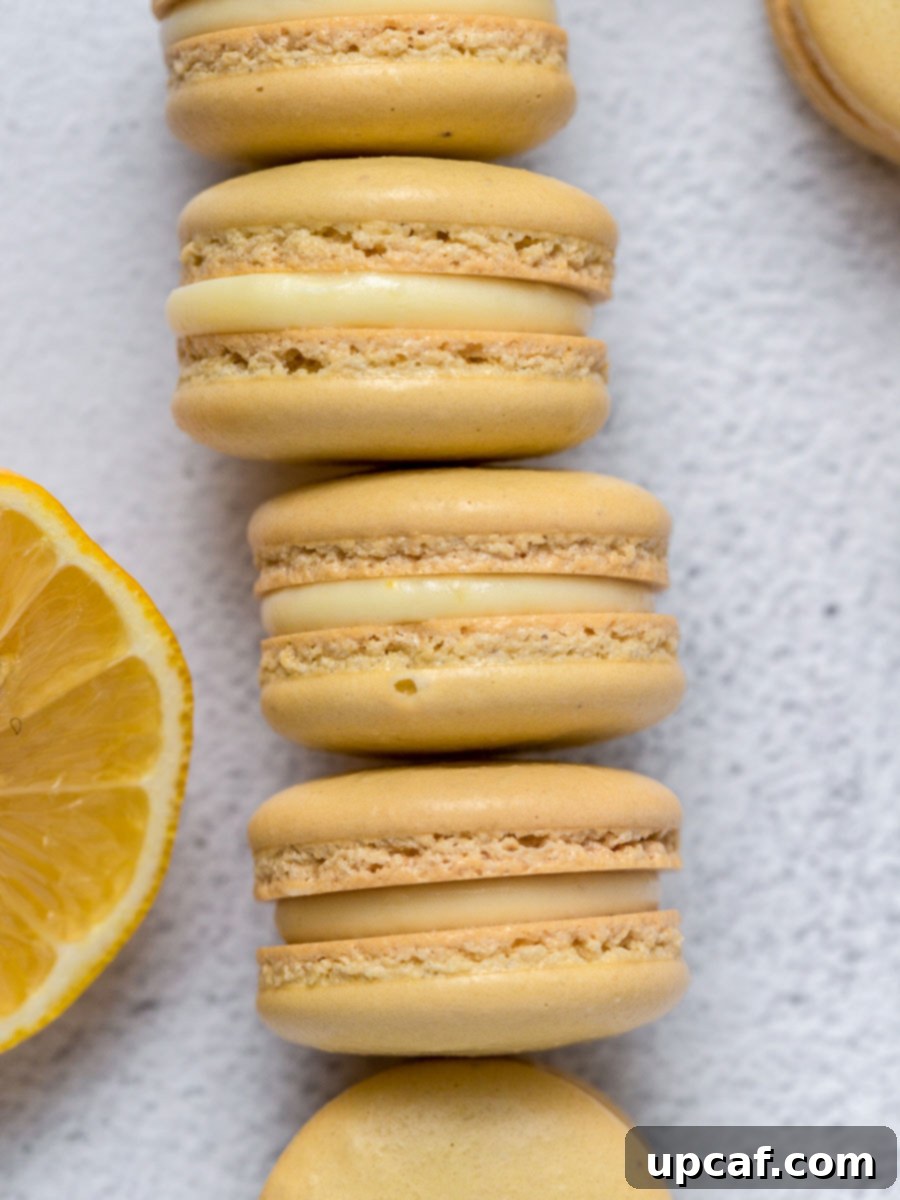
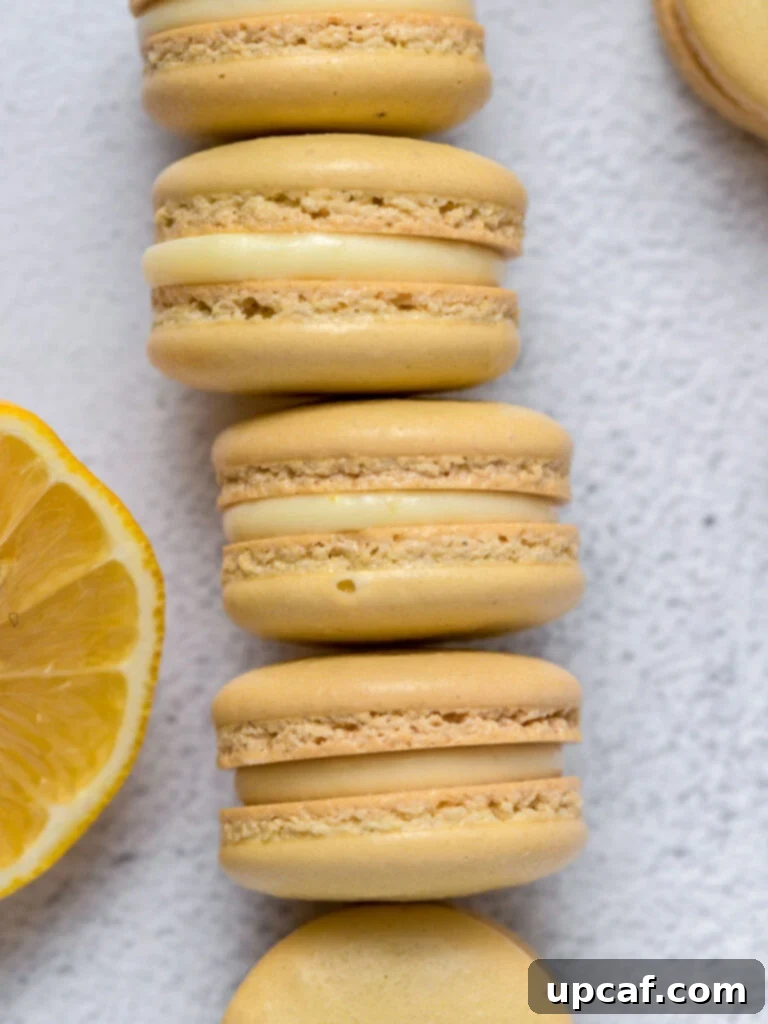
Welcome to the delightful world of French macarons! These delicate, vibrant, and utterly delicious treats are a true testament to the art of baking. Today, we’re diving into a particularly zesty and invigorating flavor: Lemon Macarons. Imagine biting into a perfectly crisp shell, giving way to a soft, chewy interior, all infused with the bright, tangy essence of fresh lemon. This recipe promises an unforgettable citrus experience, making it a standout addition to your dessert repertoire.
For many, the idea of baking homemade macarons can seem daunting. They have a reputation for being temperamental, a challenge even for seasoned bakers. However, I’m here to assure you that with careful attention to detail and these comprehensive, step-by-step instructions, you can absolutely master the art of making these exquisite lemon macarons right in your own kitchen. Whether you’re a complete novice or have attempted macarons before, this guide is designed to empower you to create these beautiful, bakery-quality confections with confidence.
If you’re as passionate about lemon-flavored desserts as I am, you’ll be thrilled to explore more of my zesty creations. Be sure to try my Lemon French Madeleines Cakes for a taste of classic French elegance or indulge in the irresistible tang of my Lemon Bars Recipe. Each offers a unique way to enjoy the incredible versatility of lemon in baking.
Why You’ll Fall in Love with These Lemon Macarons
- Exquisite Citrus Flavor: These lemon macarons are a burst of sunshine in every bite. They strike the perfect balance between sweet and tangy, with a wonderfully bright and zesty lemon flavor that is both refreshing and deeply satisfying. It’s an authentic taste that will transport your senses.
- Impressive Yet Accessible: While macarons look incredibly sophisticated, this recipe breaks down the process into manageable steps, making it surprisingly achievable for home bakers. You’ll undoubtedly impress friends and family with these gourmet treats, all while enjoying the satisfaction of having made them yourself.
- Budget-Friendly Indulgence: High-quality macarons can be quite expensive when purchased from specialty bakeries. By making them at home, you save money without compromising on taste or quality. Enjoy premium indulgence at a fraction of the cost.
- Freezer-Friendly Convenience: Planning ahead for a special occasion or simply want to have delicious treats on hand? The macaron shells can be frozen, allowing you to prepare them in advance and assemble fresh macarons whenever the craving strikes. This flexibility makes entertaining a breeze.
- Perfect Texture Harmony: The hallmark of a great macaron is its texture – a delicate, crisp outer shell that gives way to a delightfully chewy, soft interior. This recipe achieves that coveted balance, ensuring each macaron is a symphony of textures.
Essential Ingredients for Homemade Lemon Macarons
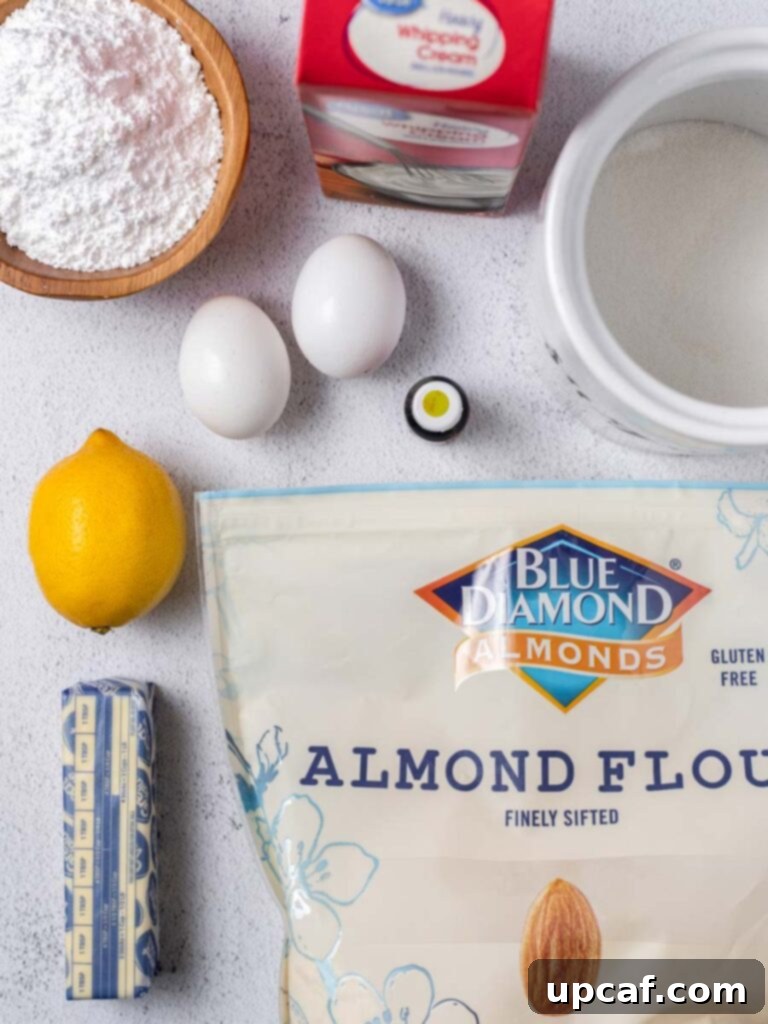
Crafting perfect macarons starts with understanding the role of each ingredient. Quality and precise measurements are key to success.
For the French Macaron Shells:
- Powdered Sugar (Confectioners’ Sugar): Crucial for the delicate texture of the macaron shells. It blends seamlessly with almond flour to create the dry mix.
- Almond Flour (Finely Ground): The star ingredient for macaron shells. Ensure it’s extra-fine, blanched almond flour for the smoothest shells and best “feet.” Do not substitute with almond meal.
- Egg Whites (Aged if Possible, Room Temperature): The foundation of the meringue. Room temperature egg whites whip up with more volume and stability. Aging them for a day or two can also help, as it reduces moisture.
- Granulated Sugar: Stabilizes the egg white meringue, creating the shiny, stiff peaks necessary for macaron structure.
- Yellow Food Coloring (Gel or Powder): A touch of food coloring enhances the visual appeal, giving your lemon macarons their signature sunny hue. Gel or powder food colorings are recommended as they don’t add extra liquid.
For the Zesty Lemon Filling:
The filling is a luscious lemon curd, brightened with whipped cream, providing the perfect counterpoint to the sweet shells.
- Granulated Sugar: Sweetens the lemon curd and provides structure.
- Fresh Lemon Juice: This is where the vibrant lemon flavor comes from. Always use freshly squeezed lemon juice for the best, most authentic taste. Bottled juice often contains preservatives and lacks the fresh, bright acidity.
- Large Egg: Acts as a thickener and emulsifier for the curd, giving it a smooth, rich consistency.
- Large Egg Yolk: Adds richness, color, and further thickening to the lemon curd.
- Unsalted Butter (Cubed, Cold): Incorporated into the warm curd to enrich it, add a silky texture, and provide a beautiful sheen. Using unsalted butter allows you to control the salt content.
- Heavy Whipping Cream (Cold): Whipped to stiff peaks and gently folded into the cooled lemon curd, creating a light, airy, and pipeable filling that perfectly complements the macaron shells.
Crafting Homemade Lemon Macarons: A Detailed Guide
Making macarons is a delightful process that combines precision with a touch of artistry. Follow these steps carefully for the best results.
Step-by-Step for Perfect Macaron Shells:
The shells are the foundation of your macaron. Patience and technique are your best friends here.
- Prepare Your Baking Sheets: Begin by lining several baking sheets with high-quality silicone baking mats (like Silpat) or parchment paper. If using parchment paper, you might want to print or draw macaron templates with 1-inch circles underneath for consistent sizing.
- Process and Sift Dry Ingredients: In a food processor, pulse the powdered sugar and almond flour together for about 30 seconds to ensure they are thoroughly combined and any lumps are broken down. This step is crucial for achieving smooth macaron shells. Then, sift this mixture into a large bowl. Discard any larger pieces of almond that don’t pass through the sieve. If you don’t have a food processor, simply sift the two ingredients together twice. Set aside this fine dry mixture.
- Create the Meringue (French Method): In a clean, medium-sized bowl (preferably a stand mixer bowl), begin beating your room temperature egg whites on low speed. As they become foamy, gradually add the granulated sugar, a tablespoon at a time, while increasing the mixer speed to medium-high. Continue beating until the meringue forms stiff, glossy peaks. When you lift the whisk, the meringue should hold its shape firmly without drooping. Gently fold in a single drop of yellow gel food coloring until evenly distributed, creating a beautiful sunny color.
- The Macaronage (Combining Wet and Dry): This is arguably the most critical step. Add the prepared meringue into the bowl with your sifted dry ingredients. Using a silicone spatula, gently fold the mixture together. The technique involves scraping down the sides of the bowl and folding the batter over itself, pressing out air as you go. You’re looking for a lava-like consistency, often described as a “ribbon stage.” When you lift the spatula, the batter should fall off in a slow, continuous ribbon and incorporate back into the main batter within 15-20 seconds. Be careful not to undermix (which causes cracked shells) or overmix (which causes flat, footless shells).
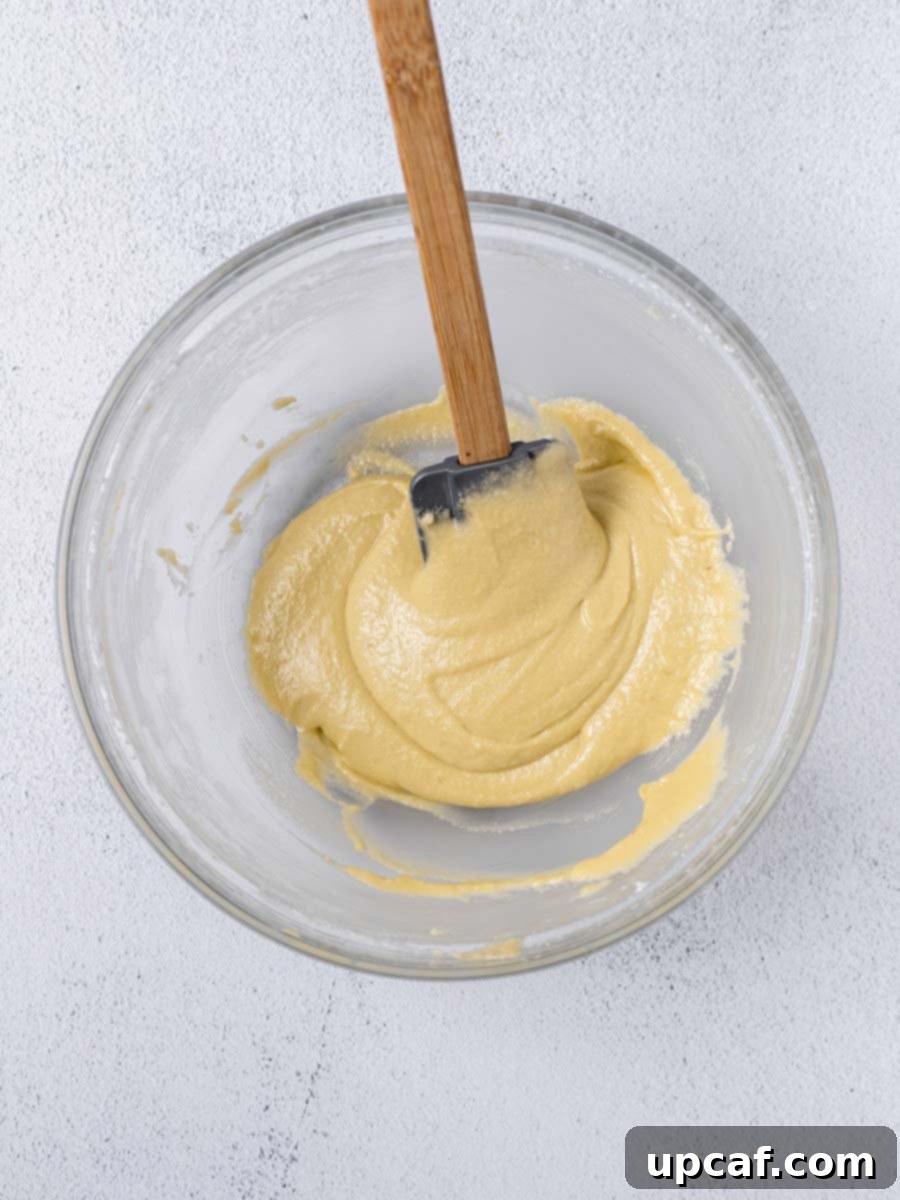
- Pipe the Macaron Shells: Transfer the macaron batter to a large piping bag fitted with a round piping tip (like an Ateco 804 or Wilton 1A). Hold the piping bag perpendicular to the baking sheet, about ½ inch above the surface. Pipe uniform 1-inch disks onto your prepared mats, using your templates as a guide if needed. Apply steady pressure, then swiftly flick your wrist to stop the flow of batter, minimizing peaks.
- Release Air Bubbles: This step is crucial for smooth shells and the development of “feet.” Firmly tap each baking sheet against your counter 5 to 6 times. This forces any trapped air bubbles to rise to the surface. Use a toothpick or a scribe tool to gently pop any remaining visible bubbles. This also helps the shells spread slightly and settle.
- Rest the Shells (Form a Skin): Allow the piped macaron shells to rest at room temperature for at least 30 minutes to 1 hour, or even longer, depending on your kitchen’s humidity. The shells are ready for baking when you can gently touch the surface without any batter sticking to your finger. This resting period allows a slight “skin” to form, which is essential for the characteristic “feet” (pieds) to develop during baking.
- Bake the Macarons: While the shells are resting, preheat your oven to 325°F (160°C). Place one baking sheet on the center rack of your preheated oven and bake for 12-15 minutes. About halfway through baking (around the 6-7 minute mark), rotate the pan 180 degrees to ensure even baking and coloring. The macarons are done when they have developed distinct “feet” and do not wobble when gently touched.
- Cool Completely: Remove the baked macarons from the oven and slide the silicone mat or parchment paper onto a wire rack. Allow them to cool completely on the mat before attempting to remove them. This is vital, as attempting to peel them off while warm will cause them to stick or break.
- Pair the Shells: Once completely cooled, gently peel each macaron shell off the mat. Match them up by size and shape with a similarly sized cookie, preparing them for filling.
Crafting the Zesty Lemon Filling for Macarons:
This lemon curd-whipped cream blend is light, tangy, and utterly irresistible.
- Prepare the Lemon Curd Base: In a medium heat-proof bowl (preferably glass or stainless steel), whisk together the granulated sugar, fresh lemon juice, whole egg, and egg yolk until thoroughly combined and smooth.
- Cook the Lemon Curd: Place the heat-proof bowl over a small saucepan containing about an inch of simmering water (creating a double boiler setup). Ensure the bottom of the bowl does not touch the water. Add the cubed unsalted butter to the mixture in the bowl. Cook over low to medium-low heat for approximately 10-15 minutes, whisking frequently, until the mixture visibly thickens. The curd is ready when it coats the back of a spoon and registers 180°F (82°C) on an instant-read thermometer. It should be a very thick, custardy consistency.
- Chill the Lemon Curd: Remove the bowl from the heat. To prevent a skin from forming, immediately place plastic wrap directly onto the surface of the hot lemon curd. This creates an airtight seal. Transfer the bowl to the refrigerator and chill for at least 2-3 hours, or until the curd is completely cold and firm.
- Whip the Heavy Cream: In a separate medium bowl, using a hand mixer or stand mixer with a whisk attachment, whip the cold heavy cream to stiff peaks. Be careful not to overwhip, as it can turn granular.
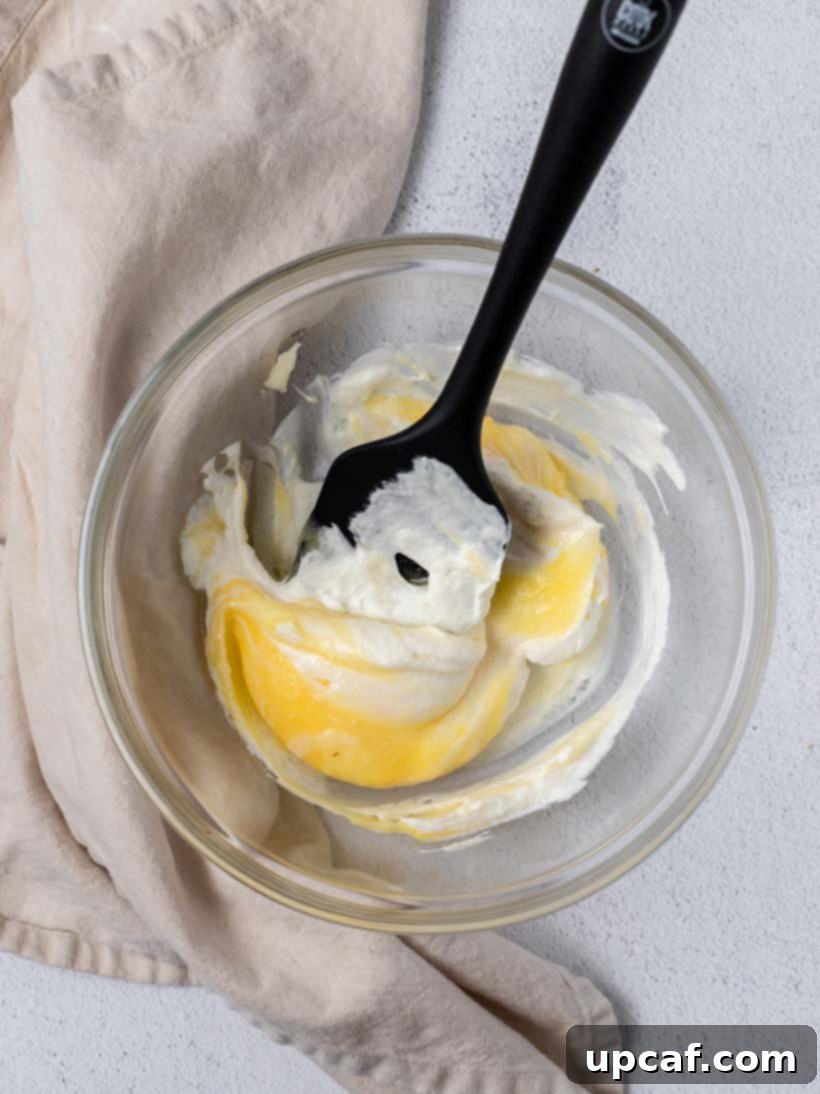
- Combine and Pipe the Filling: Once the lemon curd is fully cooled and firm, gently fold it into the whipped cream until the mixture is light, airy, and uniformly combined. Transfer this delightful whipped lemon curd filling to a piping bag fitted with your desired piping tip. Pipe a generous dollop onto the flat side of one macaron shell, then gently sandwich another similarly sized macaron shell on top. Repeat with all matched shells.
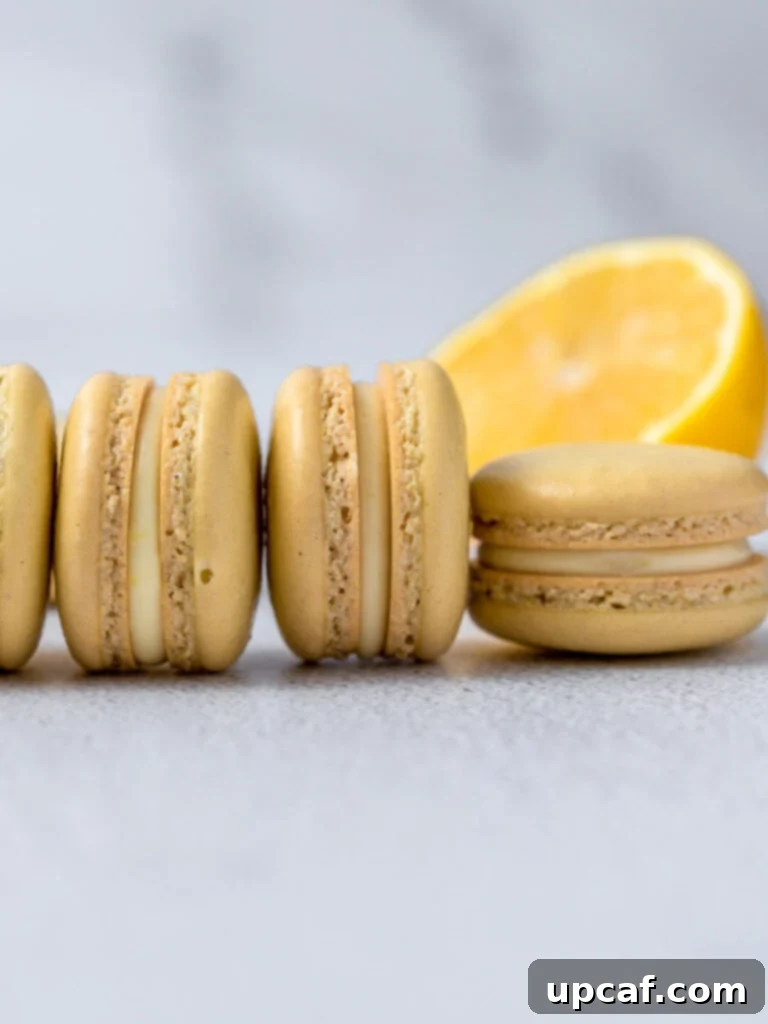
Common Macaron Troubleshooting: Understanding Your Bake
Macarons can be a bit finicky, but understanding common issues can help you achieve perfection. Here are solutions to frequently encountered problems:
Why Don’t My Macarons Have Feet?
The absence of characteristic “feet” (the ruffled edge at the base of the shell) is a common concern. While footless macarons still taste delicious, achieving those perfect feet is part of the macaron appeal.
- Over-Mixed Batter: The most frequent culprit. If your macaron batter (macaronage) is too runny from over-mixing, the shells will spread excessively and won’t have the structure to rise and form feet. The batter needs to be thick enough to hold its shape.
- Insufficient Resting Time: The resting phase, where a “skin” forms on the shells, is crucial. If the shells are baked before a proper skin develops, moisture escapes from the top, preventing the air from pushing out the bottom to create feet. The skin helps direct the air downwards. Ensure you can gently touch the surface without any batter sticking to your finger before baking.
- Oven Temperature Too Low: An oven that’s not hot enough can also contribute to footless macarons, as it won’t provide the initial burst of heat needed for the rapid expansion that creates the feet.
Why Are My Macarons Cracked?
Cracked shells usually indicate too much air trapped in the batter that bursts during baking.
- Under-Mixed Batter: If the batter is under-mixed, it retains too much air. This excess air expands rapidly in the oven, causing the shells to crack instead of rising smoothly. Ensure your macaronage reaches the proper “ribbon stage.”
- Insufficient Tapping: Not tapping the baking sheets firmly enough to release air bubbles before resting can also lead to cracking.
Why Are My Macarons Hollow?
Hollow shells mean there’s a gap between the top crust and the chewy interior. This often happens if:
- Oven Temperature Too High: The shells rise too quickly, creating a large air pocket.
- Meringue Not Stiff Enough: A weak meringue can’t provide the necessary structure.
Why Are My Macarons Lopsided?
Macarons that bake unevenly on one side can be due to:
- Uneven Oven Heat: Hot spots in your oven. Rotating the tray halfway through baking helps.
- Piping Technique: Not holding the piping bag perfectly perpendicular to the baking sheet.
Expert Tips for Macaron Success
Achieving perfect macarons is a journey, and these tips will significantly increase your chances of success:
- Precision is Paramount: Macaron baking is a science. Use a kitchen scale to measure all ingredients, especially almond flour and powdered sugar, for accuracy.
- Aged Egg Whites: For the best meringue stability, separate your egg whites a day or two in advance and store them in an airtight container in the fridge. Bring them to room temperature before whipping.
- Sift, Sift, Sift: Always sift your powdered sugar and almond flour together (preferably twice, or pulse in a food processor then sift). Lumps are the enemy of smooth macaron shells.
- Master the Macaronage: This is the most crucial step. Learn to recognize the “ribbon stage” where the batter flows slowly and continuously from the spatula. It takes practice, but it’s worth it!
- Tap, Tap, Tap: Don’t skip the tapping step. It’s essential for releasing air bubbles and promoting uniform shells and feet.
- Resting Time Varies: The time it takes for a “skin” to form on your shells depends heavily on your kitchen’s humidity. On humid days, it could take longer than an hour. Be patient and wait until the shells are dry to the touch.
- Oven Calibration: Ovens can vary wildly. Consider using an oven thermometer to ensure your oven maintains the precise temperature needed for macarons.
- Fresh Lemon Juice: For the filling, always use freshly squeezed lemon juice. Its bright, natural acidity is incomparable to bottled alternatives.
- Don’t Rush Cooling: Macarons are fragile when warm. Allow them to cool completely on the baking sheet before attempting to remove or fill them.
Flavor Variations and Serving Suggestions
While lemon macarons are divine on their own, don’t hesitate to personalize them!
- Toppings Galore: Before resting the shells, sprinkle them with nonpareil sprinkles for a festive touch, or add some finely grated lemon zest for an extra aromatic kick.
- Lemon Glaze Drizzle: After filling, a simple lemon glaze (powdered sugar mixed with a tiny bit of lemon juice) drizzled over the top adds an elegant finish.
- Chocolate Pairing: Dip half of the filled macaron in melted white chocolate or dark chocolate for a luxurious twist.
- Serving Ideas: Serve these macarons as part of a dessert platter for parties, as an afternoon tea treat, or simply enjoy one (or two!) with a cup of coffee or tea. They also make beautiful homemade gifts.
Storage and Freezing Guidelines
Proper storage ensures your lemon macarons remain delicious and retain their perfect texture.
- Storing Leftover Macarons: Once filled, store your lemon macarons in an airtight container in the refrigerator. They are best enjoyed within 3-5 days. The flavors tend to meld and deepen over 24-48 hours, a process often referred to as “maturing,” which also softens the chewiness of the shell.
- Freezing Filled Macarons: For longer storage, allow your filled macarons to “mature” in the fridge for 24-48 hours first. Then, transfer them to a freezer-safe airtight container, ideally in a single layer or with parchment paper between layers to prevent sticking. They can be frozen for up to one month. Thaw them in the refrigerator for a few hours before serving.
- Freezing Unfilled Shells: If you want to bake ahead, you can freeze just the macaron shells. Once completely cooled, place them in an airtight container or freezer bag. They can be frozen for up to a month. When ready to use, thaw them at room temperature for about 30 minutes to an hour before filling. This offers great flexibility for entertaining!
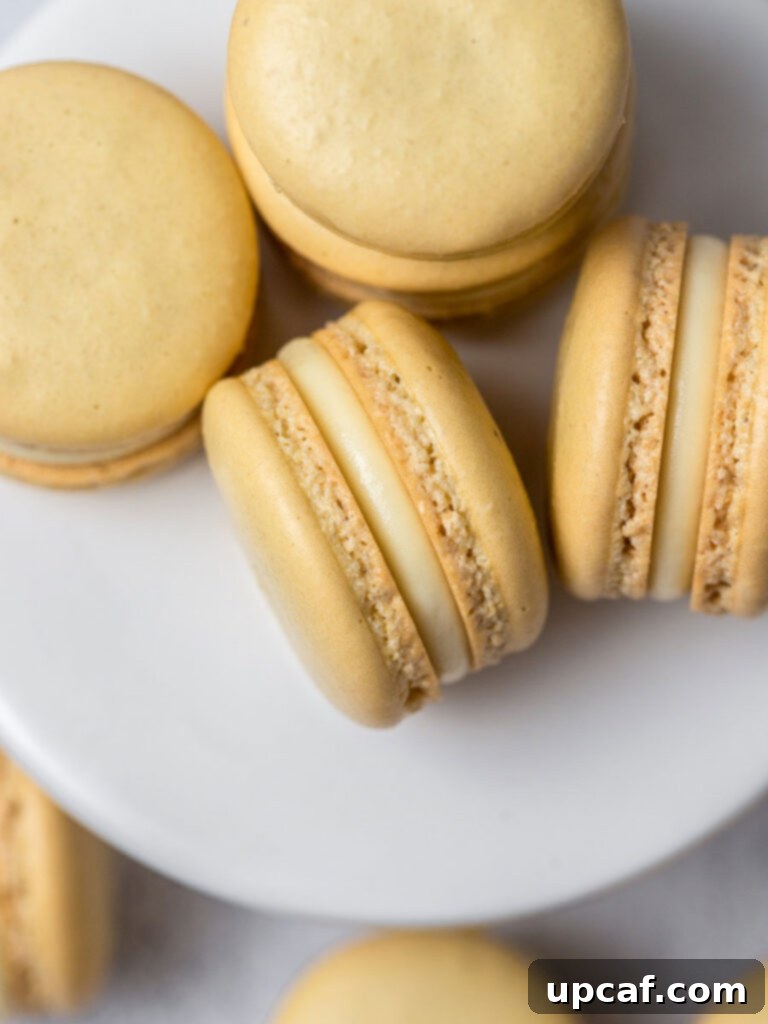
More Irresistible Desserts To Try
If you’ve enjoyed making these lemon macarons, you’ll love exploring other delightful recipes:
- Strawberry Jam Linzer Cookies
- Cheesecake Brownie Fudge Bars
- Chocolate Chip Cheesecake
- Coconut Cheesecake Bars
- Strawberry Macarons
- Red Velvet Macarons
I genuinely hope you find immense joy in baking and tasting this exquisite Lemon Macarons recipe. It’s a truly rewarding experience to create such beautiful and flavorful confections. Please do try it, savor every bite, and consider sharing your creations with your loved ones!
If you make this recipe and love it, I’d be absolutely thrilled to see your creations! Share them with me on INSTAGRAM using my hashtag for a chance to be featured in my story. For all my latest recipes and social updates, be sure to follow Cookin’ With Mima on FACEBOOK, INSTAGRAM, and PINTEREST.
Lemon Macarons Recipe
By: Mariam Ezzeddine
Sweet, tangy, and bright, these Lemon Macarons are a true delight. Featuring perfectly crisp shells and a soft, chewy interior, filled with a vibrant lemon curd whipped cream. A zesty and elegant twist on the classic French macaron, this recipe is perfect for impressing guests or simply treating yourself to a gourmet dessert.
Prep Time: 30 minutes
Cook Time: 15 minutes
Resting Time: 1 hour
Total Time: 1 hour 45 minutes
Yields: 30 macarons
Ingredients
For the Macaron Shells:
- 1 ⅔ cup powdered sugar
- 1 cup almond flour
- 3 large egg whites, at room temperature
- ¼ cup granulated sugar
- 1 drop yellow food coloring (gel or powder)
For the Lemon Filling:
- ⅓ cup granulated sugar, plus 1 tablespoon
- ¼ cup fresh squeezed lemon juice
- 1 large egg
- 1 large egg yolk
- 6 tablespoons unsalted butter, cubed and cold
- ¼ cup heavy whipping cream, cold
Instructions
For the Macaron Shells:
- Line baking sheets with silicone baking mats or parchment paper.
- In a food processor, pulse powdered sugar and almond flour until finely combined. Sift the mixture into a large bowl, discarding any larger pieces.
- In a medium bowl, beat egg whites on low speed until foamy. Gradually add granulated sugar while increasing speed to medium-high. Beat until stiff, glossy peaks form. Gently fold in yellow food coloring.
- Add the meringue to the dry ingredients. Using a silicone spatula, gently fold until the batter reaches the “ribbon stage” (lava-like consistency, falling in a thick ribbon).
- Transfer batter to a piping bag fitted with a round tip. Pipe 1-inch disks onto prepared baking sheets.
- Firmly tap baking sheets on the counter 5-6 times to release air bubbles. Pop any remaining bubbles with a toothpick.
- Let macarons rest at room temperature for at least 1 hour, or until a dry skin forms (no batter sticks to your finger when gently touched).
- Preheat oven to 325°F (160°C). Bake macarons for 12-15 minutes, rotating the pan every 5 minutes for even baking.
- Remove from oven and let cool completely on the baking sheet before peeling off the mat.
- Match similarly sized cooled shells for filling.
For the Lemon Filling:
- In a medium heat-proof bowl, whisk together sugar, lemon juice, egg, and egg yolk until smooth.
- Place the bowl over a small saucepan of simmering water (double boiler). Add cubed butter to the mixture.
- Cook over low heat for about 10-15 minutes, whisking occasionally, until the mixture thickens and coats the back of a spoon (or reaches 180°F/82°C).
- Remove curd from heat. Cover surface directly with plastic wrap and chill in the fridge until fully cooled and firm (2-3 hours).
- In a separate medium bowl, whip cold heavy cream to stiff peaks using a hand mixer. Do not overwhip.
- Once lemon curd is cooled, gently fold it into the whipped cream until fully combined and light.
- Transfer the whipped lemon curd filling to a piping bag. Pipe a desired amount onto the inside of one macaron shell and sandwich with another shell. Repeat for all macarons.
Notes
- Use a kitchen scale for precise ingredient measurements.
- Consider using aged egg whites for better meringue stability.
- Always sift dry ingredients thoroughly to avoid lumps.
- The “macaronage” process is key; aim for the “ribbon stage” consistency.
- Resting time for shells varies based on humidity; ensure a dry skin forms.
- Always use freshly squeezed lemon juice for the filling’s best flavor.
- Do not remove macarons from mats until completely cooled.
Nutrition Information (per macaron)
- Calories: 96 kcal
- Carbohydrates: 12g
- Protein: 2g
- Fat: 5g
- Saturated Fat: 2g
- Trans Fat: 1g
- Cholesterol: 21mg
- Sodium: 9mg
- Potassium: 13mg
- Fiber: 1g
- Sugar: 11g
- Vitamin A: 120IU
- Vitamin C: 1mg
- Calcium: 12mg
- Iron: 1mg
