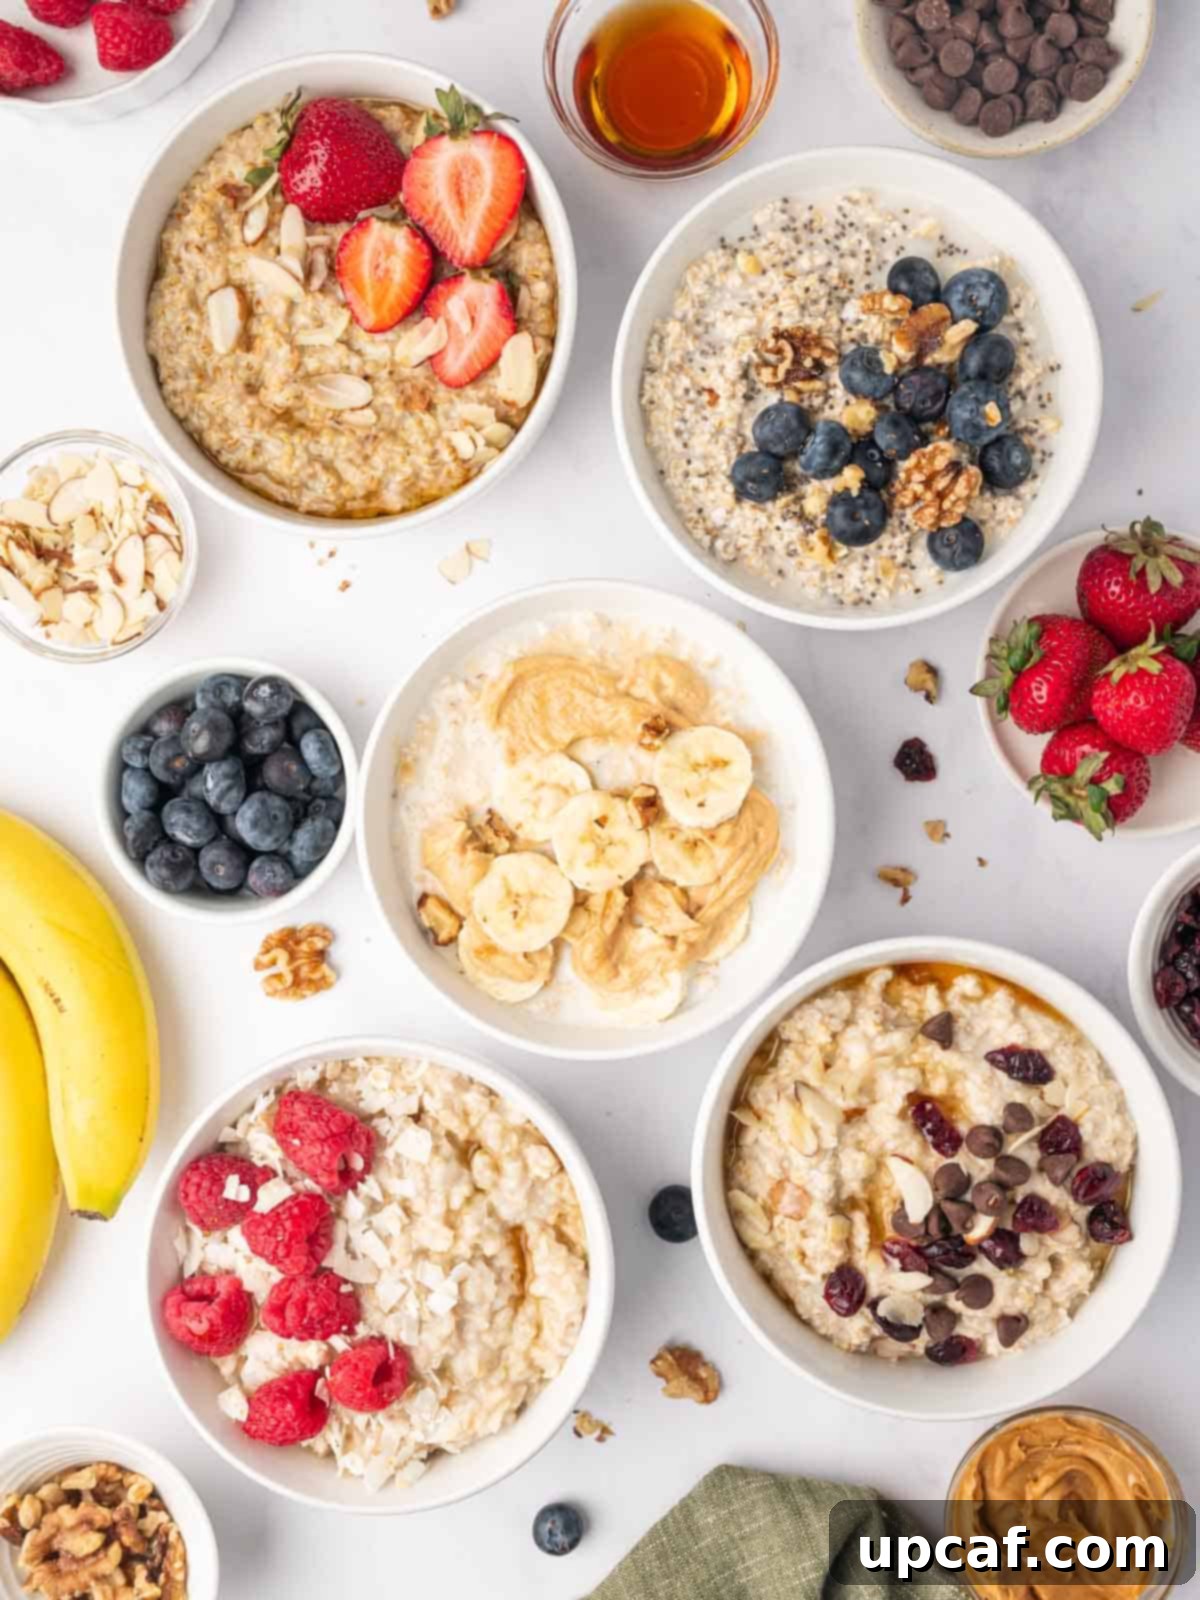
Oatmeal is more than just a breakfast; it’s a wholesome, comforting, and incredibly versatile meal that has nourished individuals and families for centuries. Whether you’re seeking a nutritious start to your day, a cozy snack on a cool evening, or a delicious and customizable dish that fits any dietary preference, mastering how to cook oatmeal to perfection is a skill that will serve you well. This comprehensive guide is designed to unlock the full potential of oats, transforming simple grains into a truly delightful experience.
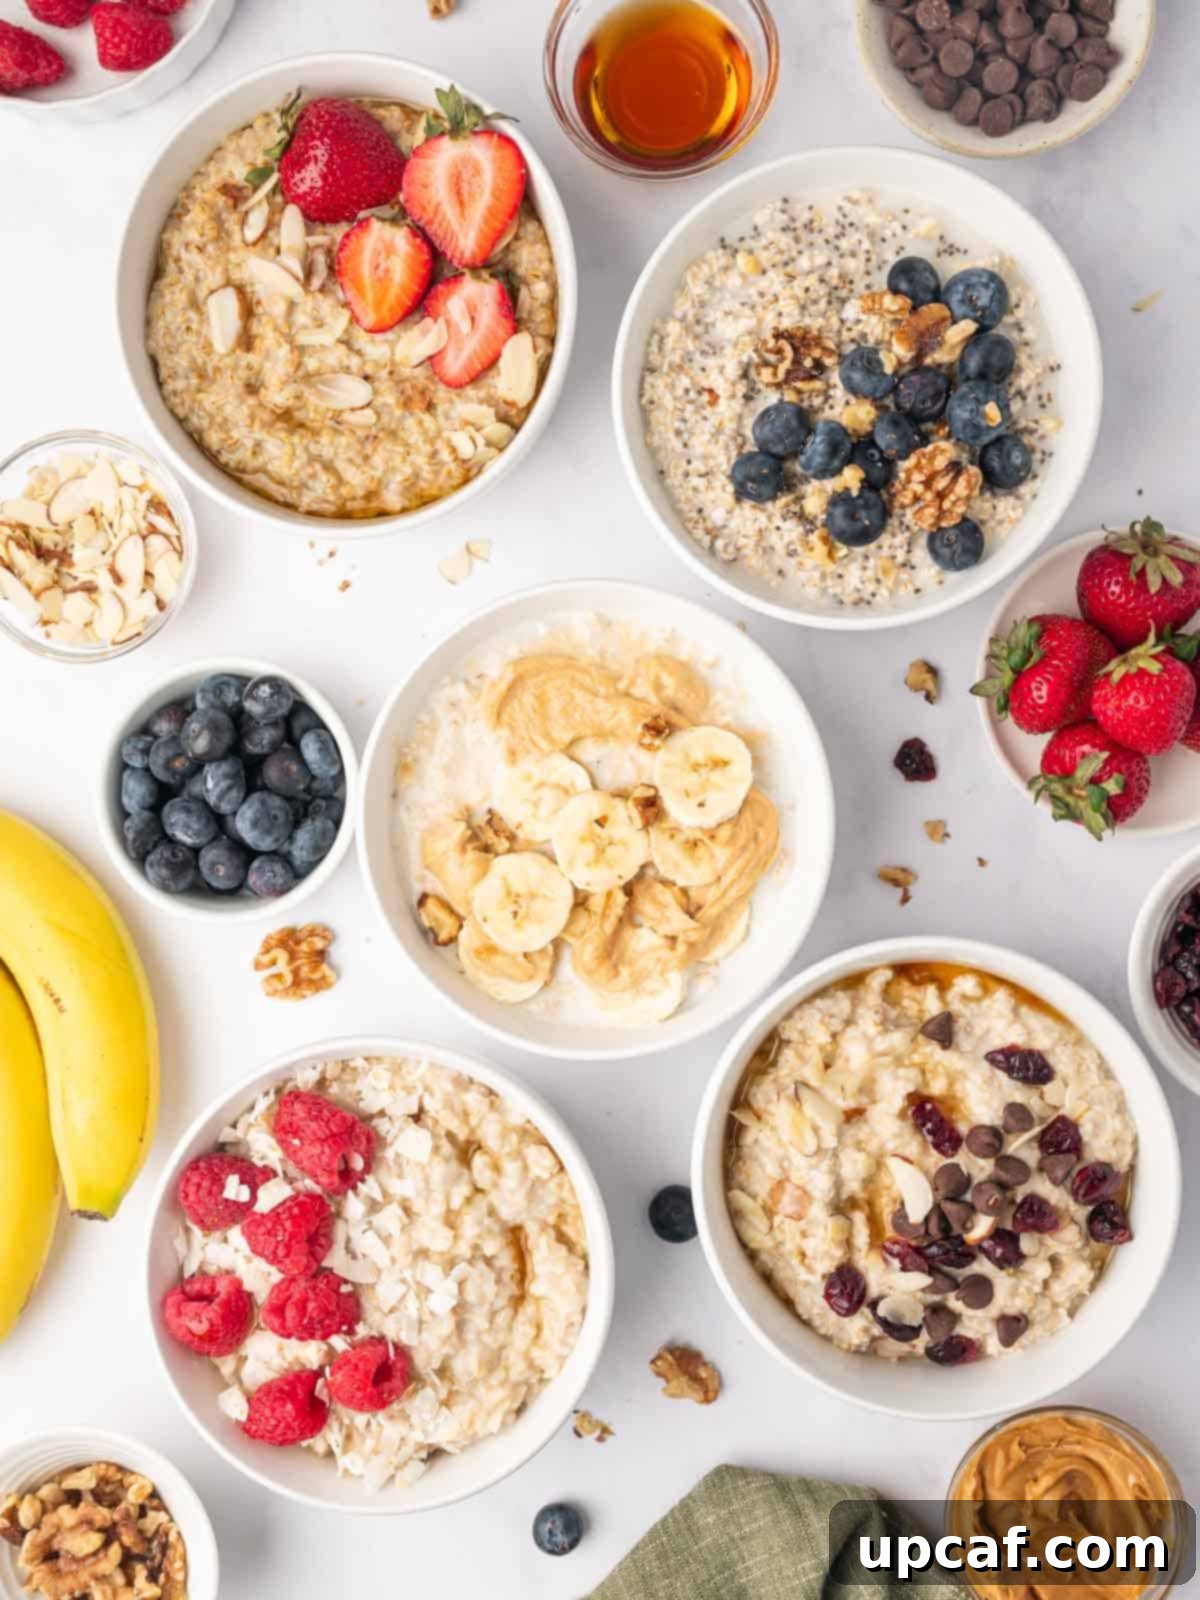
From understanding the nuances of various oat types to exploring diverse cooking methods and creative topping ideas, we’ll cover everything you need to know. We’ll delve into essential tips, common ingredient substitutions, and answer frequently asked questions to ensure your oatmeal journey is as smooth and satisfying as the perfect bowl itself. Get ready to elevate your oatmeal game and discover new ways to enjoy this classic superfood.
If you’re an oatmeal enthusiast, don’t miss out on exploring other delightful recipes like Easy Chocolate Overnight Oats and Delicious Oatmeal Jam Cookies—they are fantastic ways to enjoy the goodness of oats beyond the breakfast bowl!
Why You’ll Love Oatmeal: A Nutritional Powerhouse
Oatmeal isn’t just a beloved comfort food; it’s a nutritional powerhouse offering numerous benefits that make it an excellent choice for any meal. Here’s why oatmeal consistently wins hearts:
- Incredibly Customizable: Oats act as a blank canvas, eagerly absorbing any flavor you introduce. This makes it incredibly easy to tailor your oatmeal to your exact taste preferences. From sweet berries and rich chocolate to savory spices and eggs, the possibilities are limitless.
- Remarkably Filling: Packed with soluble fiber, oatmeal creates a feeling of fullness that lasts for hours, preventing mid-morning energy crashes and unhealthy snacking. This sustained energy release makes it an ideal breakfast for active individuals and anyone looking to maintain stable blood sugar levels.
- Highly Versatile: Oatmeal defies categorization. It can be served hot or cold, sweet or savory, thick or thin. Its adaptability means it fits seamlessly into any meal plan, whether you need a quick grab-and-go option or a slow-cooked, hearty dish.
- Quick and Effortless Preparation: For most varieties, a delicious and nutritious bowl of oatmeal can be ready in mere minutes with just a few basic ingredients. It’s the ultimate convenience food for busy schedules.
- Abundant Health Benefits: Beyond its satisfying nature, oatmeal is celebrated for its health advantages. Rich in beta-glucans, it helps lower cholesterol, supports heart health, and promotes a healthy digestive system. It’s also a good source of essential minerals like manganese, phosphorus, magnesium, and zinc.
Common Types of Oats: Understanding Your Options
Before you begin cooking, it’s crucial to understand the different types of oats available, as each offers a unique texture and cooking experience. Choosing the right oat is key to achieving your desired oatmeal consistency and flavor profile.
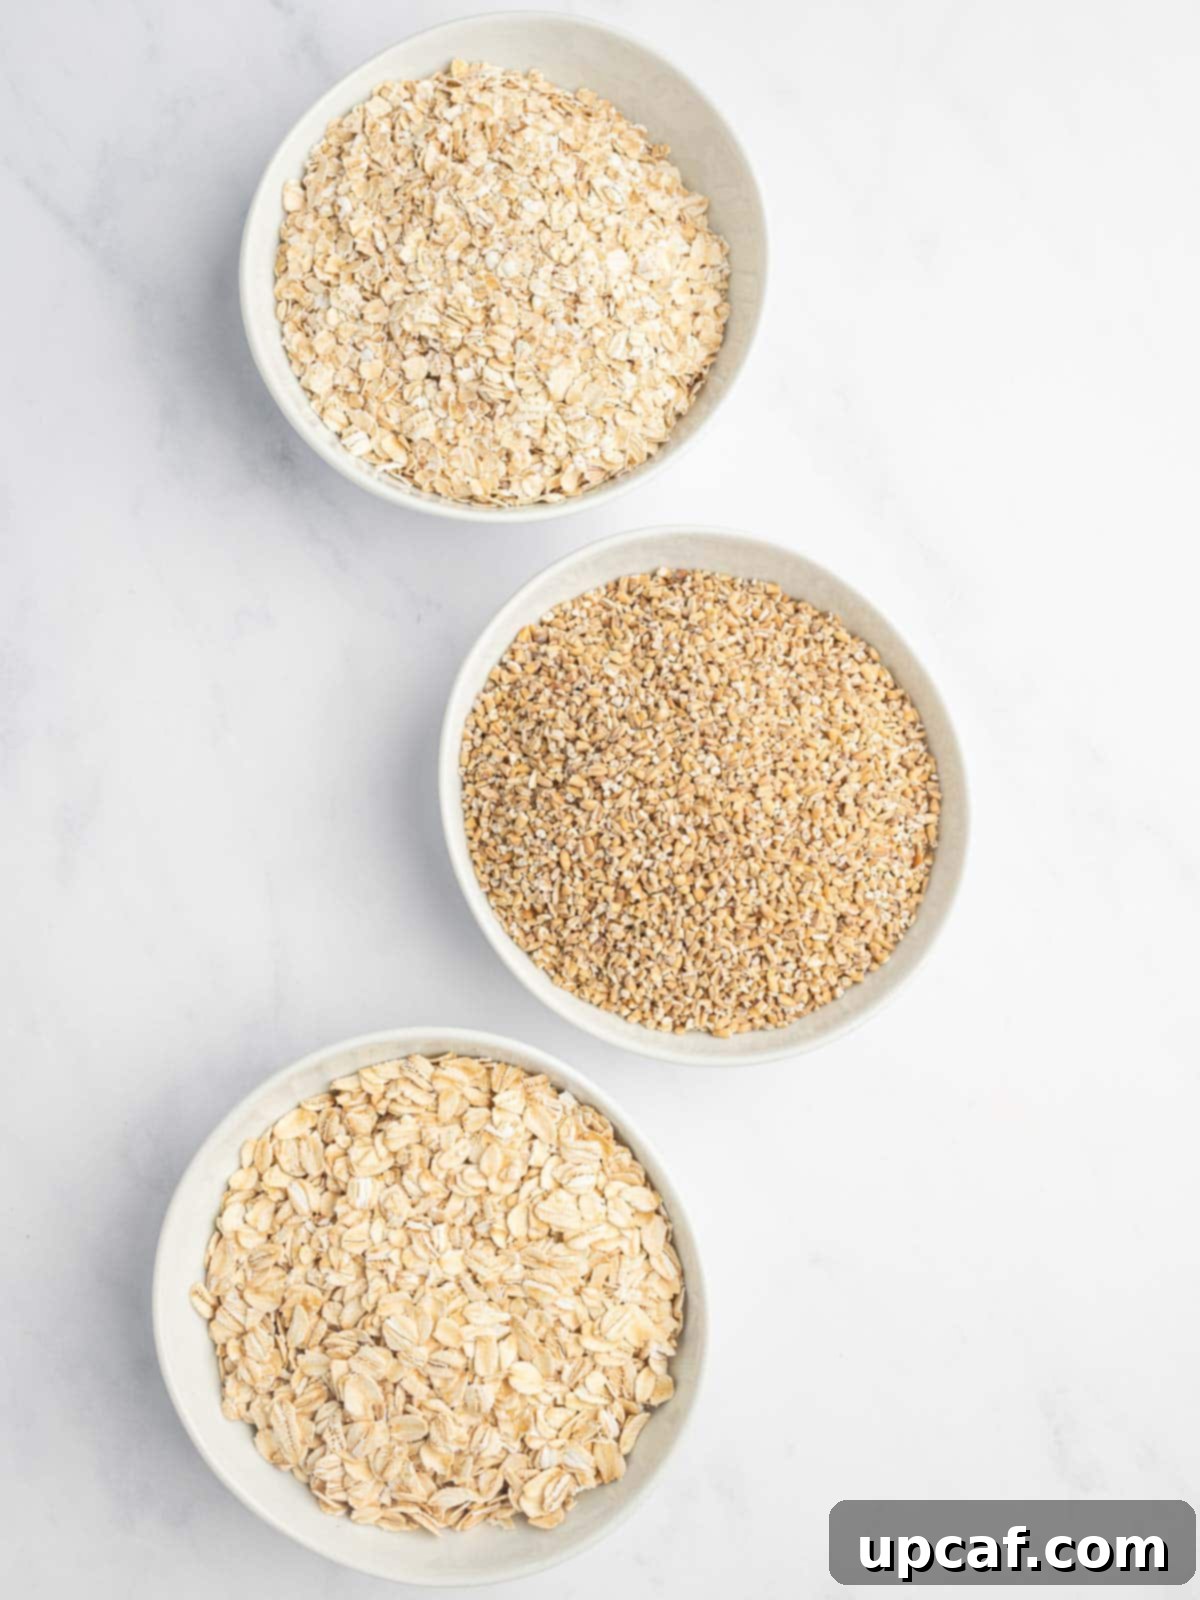
- Steel-Cut Oats (Irish Oats): These are whole oat groats (the hulled kernels of oats) that have been cut into two or three pieces with a steel blade, hence the name. Steel-cut oats have the chewiest texture and a nutty flavor. They require the longest cooking time but result in a wonderfully hearty and satisfying bowl. Their robust structure holds up well, making them ideal for slow cooking methods.
- Old-Fashioned Rolled Oats (Whole Oats): These oats are made by steaming and then rolling whole oat groats into flat flakes. This process partially cooks the oats, making them quicker to prepare than steel-cut oats, and gives them a softer, creamier texture while still retaining some chewiness. Old-fashioned oats are incredibly versatile and are commonly used in traditional oatmeal, overnight oats, and baked goods.
- Quick Oats (Quick-Cooking Rolled Oats): Quick oats are simply old-fashioned rolled oats that have been cut into smaller pieces and rolled thinner. This processing further reduces their cooking time, making them ideal for those truly in a rush. While convenient, they tend to have a softer, sometimes mushier texture compared to old-fashioned or steel-cut oats.
- Instant Oats: These are the most processed type of oats. They are pre-cooked, dried, and then rolled very thinly, often in small, irregular pieces. As their name suggests, instant oats cook almost instantly, usually by just adding hot water or a short microwave zap. While the fastest option, they generally have the least texture and a milder flavor, and often contain added sugars or flavorings.
Understanding these distinctions will help you choose the perfect oat variety for your recipe and ensure you get the texture and taste you desire.
Essential Ingredients for a Perfect Bowl of Oatmeal
Creating a delicious bowl of oatmeal requires just a few fundamental ingredients. The beauty lies in their simplicity and how they can be easily adapted to your preferences:
- Your Choice of Oats: The foundation of your meal. Old-fashioned rolled oats are a popular choice for their balanced texture and versatility, but feel free to experiment with steel-cut, quick, or instant oats based on your desired outcome and cooking time.
- Liquid Base (Milk or Water): This significantly impacts the richness and creaminess of your oatmeal. Water yields a lighter, more straightforward oat flavor, while milk (dairy or plant-based) creates a richer, more luxurious, and often creamier result. The ratio will vary by oat type and desired consistency.
- Sweetener (Optional, to Taste): A touch of sweetness can enhance the natural flavor of oats. Popular choices include honey, maple syrup, brown sugar, agave nectar, or artificial sweeteners. Start with a small amount and adjust as needed.
- Pinch of Salt (Essential, but Optional for Taste): A tiny pinch of salt (seriously, just a tiny bit!) helps to bring out the natural flavors of the oats and can prevent the oatmeal from tasting bland. Don’t skip this; it makes a surprising difference.
- Your Favorite Toppings: While technically optional, toppings are where oatmeal truly shines and becomes an exciting, personalized meal. Fruits, nuts, seeds, spices, and spreads allow for endless combinations.
Ingredient Substitutions and Variations for Creative Oatmeal
One of oatmeal’s greatest strengths is its adaptability. Don’t be afraid to get creative with substitutions to customize your bowl:
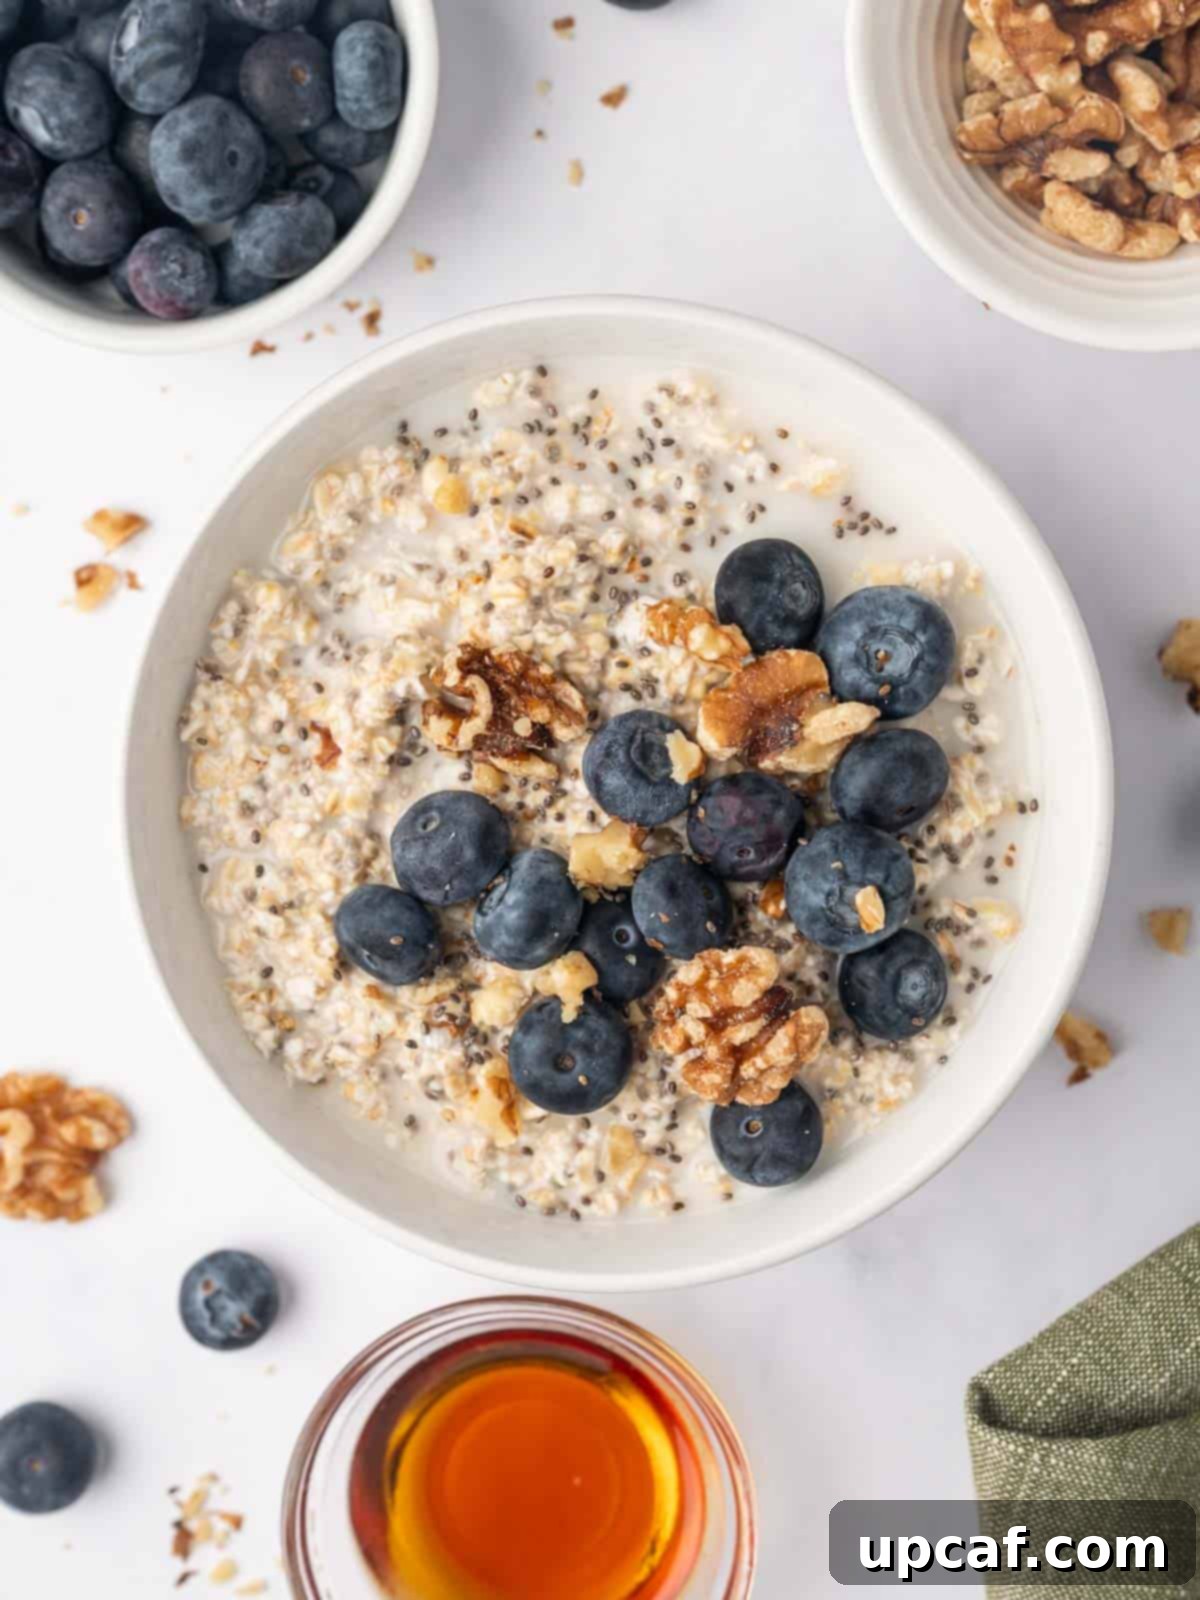
- Toppings Galore: Elevate your oatmeal with a variety of textures and tastes. Consider fresh berries (strawberries, blueberries, raspberries), sliced bananas, dried fruits (raisins, cranberries, chopped apricots), a sprinkle of nuts (almonds, walnuts, pecans), seeds (chia seeds, flaxseeds, hemp seeds for added nutrition and thickness), chocolate chips, or a dollop of peanut butter or almond butter for healthy fats and protein.
- Diverse Milk Alternatives: For a dairy-free or different flavor profile, easily swap regular cow’s milk with almond milk, soy milk, oat milk, coconut milk, or cashew milk. Each alternative will impart its unique subtle flavor to your oatmeal.
- Sweetener Spectrum: Adjust the sweetness level and flavor by using different sweeteners. Explore options like honey, pure maple syrup, agave nectar, stevia, or even a sprinkle of cinnamon sugar.
- Flavor Enhancers: A pinch of ground cinnamon, nutmeg, cardamom, or a splash of vanilla extract can dramatically deepen the flavor of your oatmeal. Cocoa powder can transform it into a chocolatey treat. For a savory twist, consider black pepper, herbs, or a dash of hot sauce.
Mastering Oatmeal: A Guide to the Best Cooking Methods
Cooking oatmeal is wonderfully simple, but the method you choose can profoundly impact the final texture and taste. Here, we explore the most common and beloved ways to prepare oats, ensuring a perfect bowl every time.
How to Cook Oatmeal in the Microwave: Quick and Easy
The microwave is a fantastic tool for preparing oatmeal, offering speed and convenience, especially for quick and old-fashioned oats. This method is perfect for busy mornings when time is of the essence.
Microwave Quick Oats
Ingredients:
- 1/2 cup quick oats
- 1 cup water or milk
- A tiny pinch of salt (optional, but recommended for flavor)
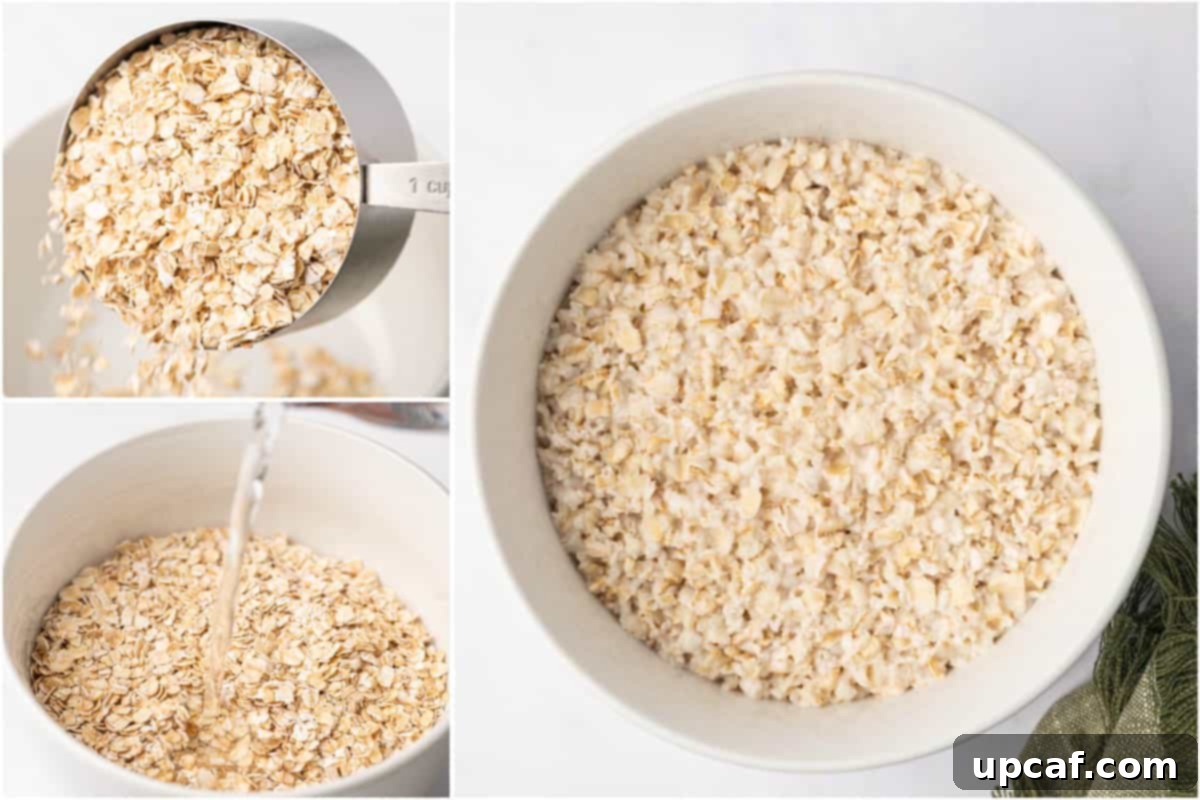
Instructions:
- Combine Ingredients: In a generously sized microwave-safe bowl (choose one larger than you think you’ll need to prevent boil-overs), combine 1/2 cup of quick oats, 1 cup of water or milk, and an optional pinch of salt.
- Microwave: Place the bowl in the microwave and cook on high for 1 to 2 minutes. Begin with 1 minute, then carefully check the consistency. If the oats appear too watery or are not fully cooked to your liking, continue to cook in short 15-30 second bursts until they are tender and the liquid is mostly absorbed.
- Stir and Rest: Once cooked, give the oats a good stir to ensure an even consistency. Let them rest for approximately 1 minute; this allows them to thicken slightly and reach their ideal texture.
- Serve: Enjoy your perfectly cooked quick oats plain, or enhance them with your favorite milk, sweeteners, and toppings such as fresh fruit, nuts, or a drizzle of honey.
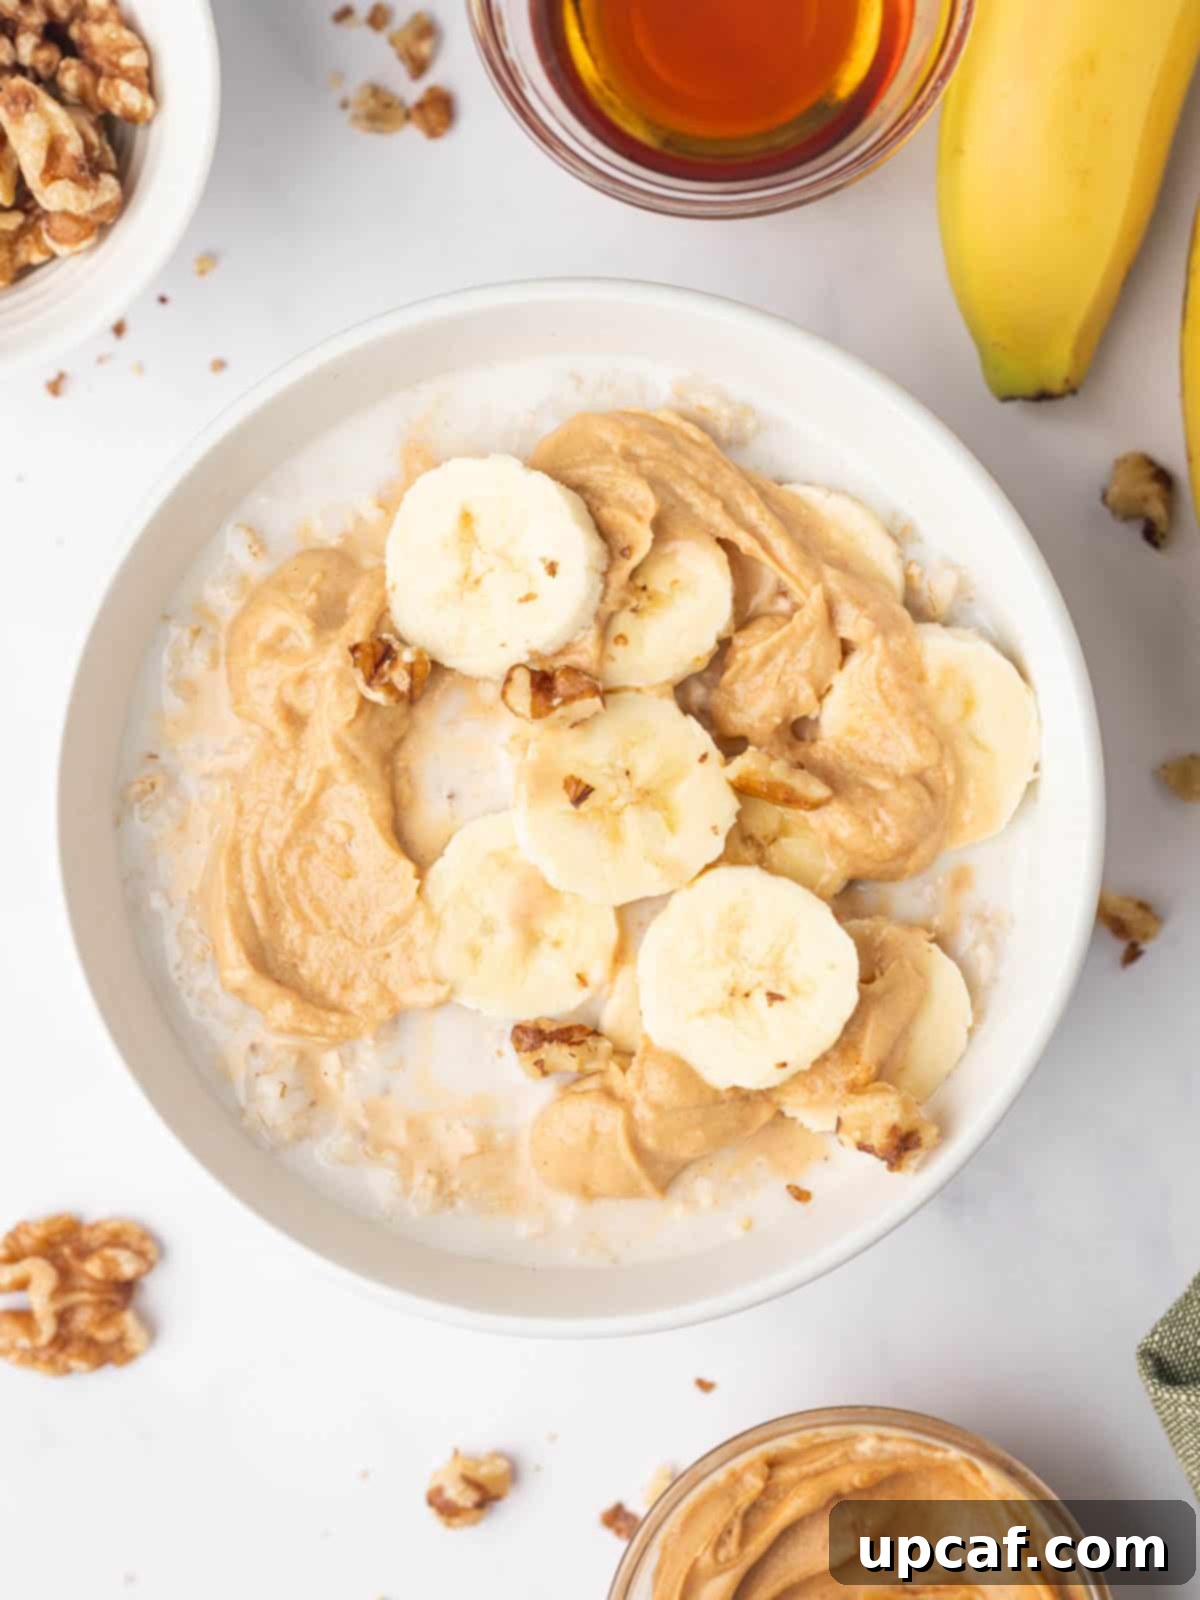
Microwave Old-Fashioned Rolled Oats
Ingredients:
- 1/2 cup old-fashioned rolled oats
- 1 cup water or milk
- A tiny pinch of salt (optional)
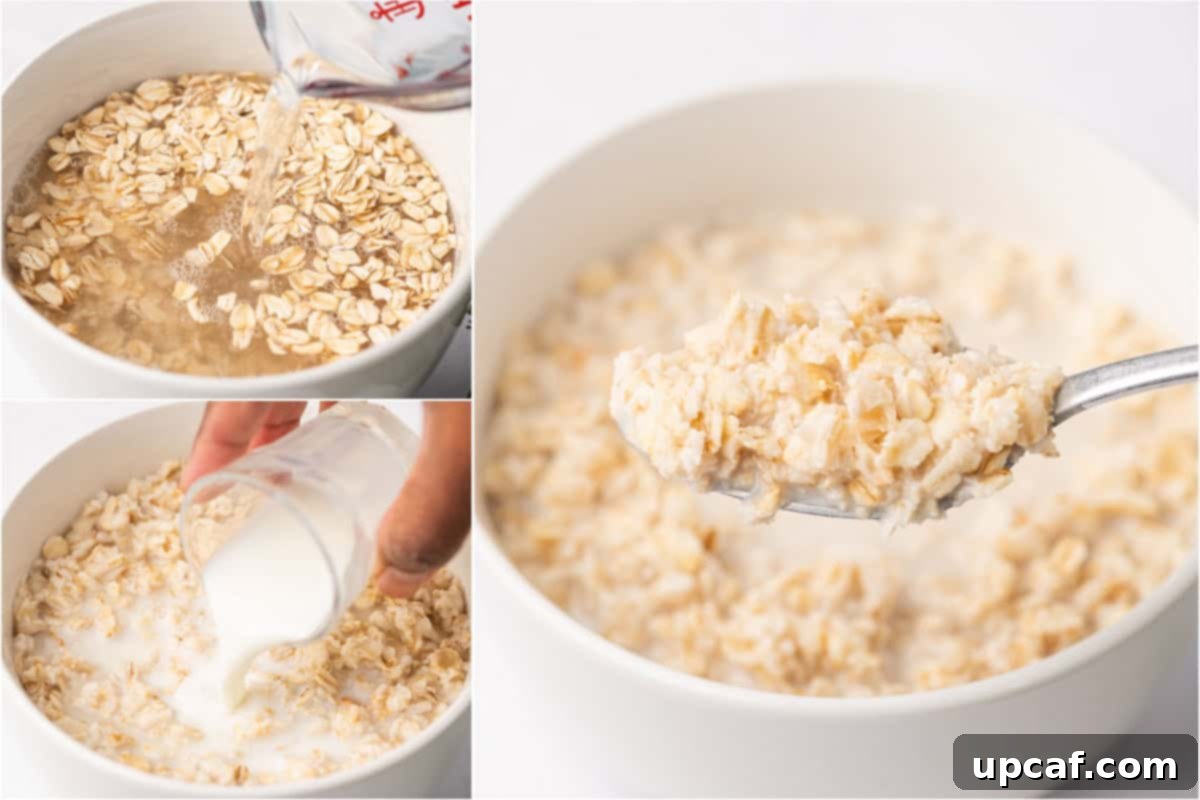
Instructions:
- Combine Ingredients: In a large microwave-safe bowl, combine 1/2 cup of old-fashioned rolled oats, 1 cup of water or milk, and an optional pinch of salt.
- Microwave: Place the bowl in the microwave and cook on high for 2.5 to 3 minutes. Start with 2.5 minutes and assess the texture. If the oats require more cooking, continue in 15-30 second intervals until they reach your preferred consistency. Be mindful of potential boil-overs.
- Stir and Rest: After cooking, stir the oats thoroughly to blend. Allow them to rest for about 1 minute, which helps any remaining liquid to absorb and the oatmeal to thicken beautifully.
- Serve: Serve your old-fashioned oatmeal hot. It’s delicious on its own, with a splash of milk, or adorned with your choice of toppings like fresh berries, honey, or a hint of cinnamon.
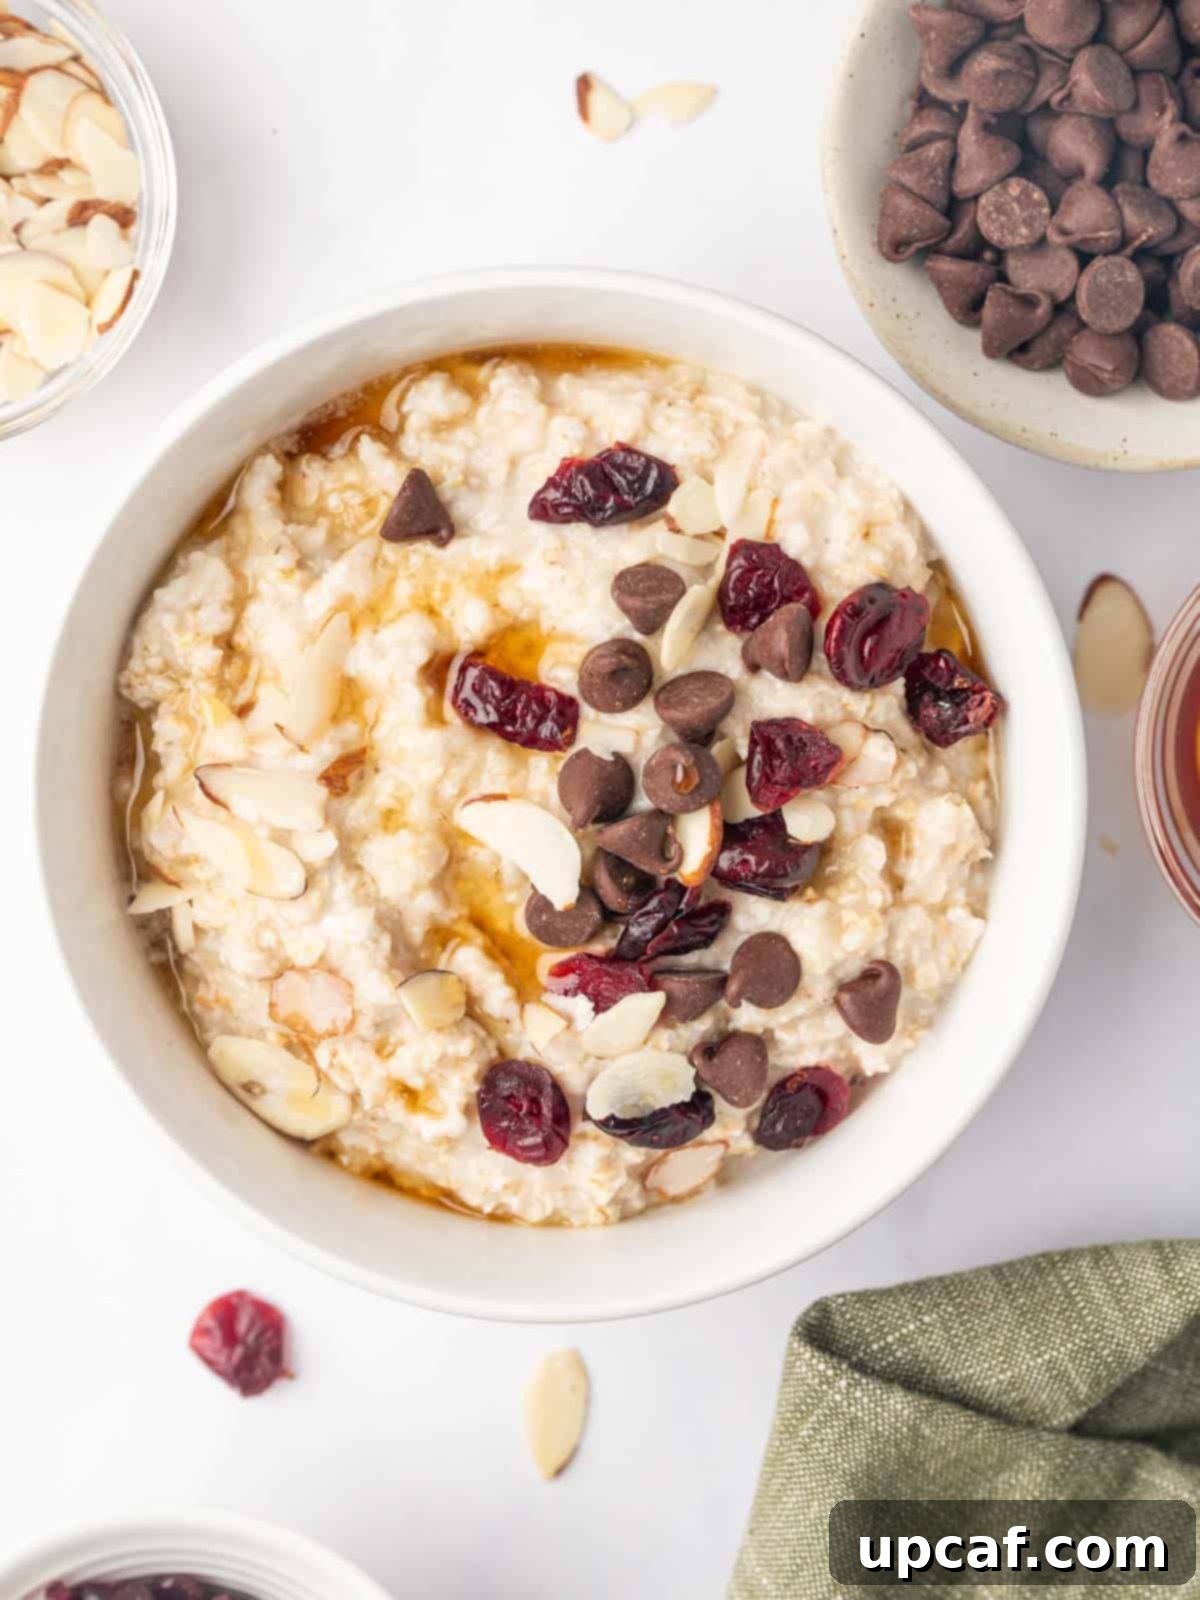
Tips for Perfect Microwave Oatmeal
- Adjust Cooking Time: Microwave wattages vary significantly. Always keep a close eye on your oats as they cook to prevent overflowing or drying out. Adjust the cooking time in small increments as needed.
- Use a Large Bowl: Oats expand and bubble up considerably when microwaved. Using a bowl that is at least twice the volume of your ingredients is crucial to avoid a messy overflow.
- Don’t Forget the Stir: Stirring both before and after cooking ensures even heat distribution and a consistent texture.
Cooking Oatmeal on the Stovetop: Classic and Creamy
The stovetop method is a classic for a reason, allowing you to achieve a perfectly creamy and tender bowl of oatmeal. It provides more control over the consistency, making it ideal for both steel-cut and old-fashioned rolled oats.
Stovetop Steel-Cut Oatmeal
Ingredients:
- 1 cup steel-cut oats
- 4 cups water (or a mix of water and milk for creaminess)
- A tiny pinch of salt (optional)
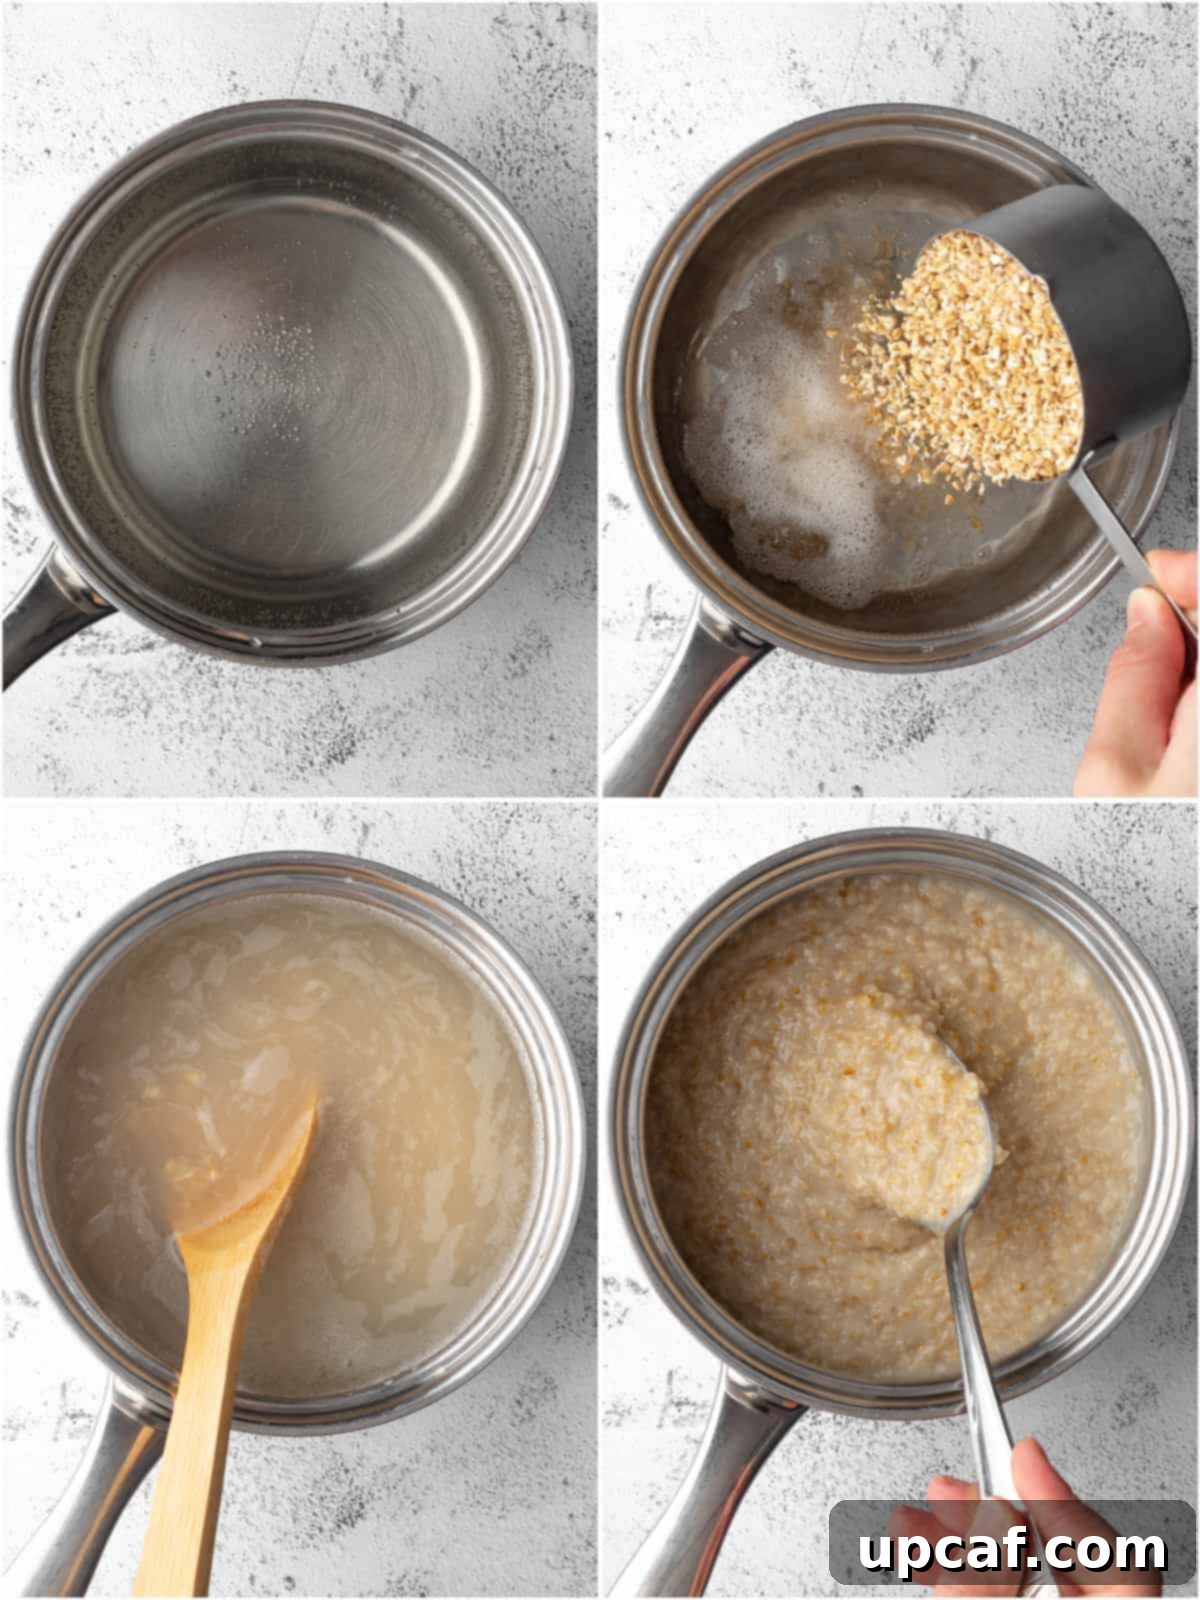
Instructions:
- Boil the Liquid: In a medium saucepan, bring 4 cups of water (or your preferred liquid) to a rolling boil over high heat. Add a tiny pinch of salt if desired; this enhances the oats’ flavor.
- Add the Oats: Once the liquid is boiling vigorously, carefully stir in 1 cup of steel-cut oats.
- Simmer Gently: Reduce the heat to low, allowing the oats to simmer uncovered. Cook for approximately 20 to 30 minutes, stirring occasionally to prevent the oats from sticking to the bottom of the pan and to ensure even cooking. For an extra creamy result, increase stirring frequency during the final 5 minutes.
- Check for Doneness: The oats are ready when they are tender and have absorbed most of the liquid. If you prefer a thicker consistency, continue cooking for an additional 5 minutes, stirring constantly. If it becomes too thick, a splash of hot water or milk can thin it out.
- Serve: Remove the saucepan from the heat and let the oats rest for a few minutes to further thicken and cool slightly. Serve hot with your choice of delightful toppings.
Stovetop Old-Fashioned Rolled Oats
Ingredients:
- 1 cup old-fashioned rolled oats
- 2 cups water (or milk for a lusciously creamier texture)
- A tiny pinch of salt (optional)
Instructions:
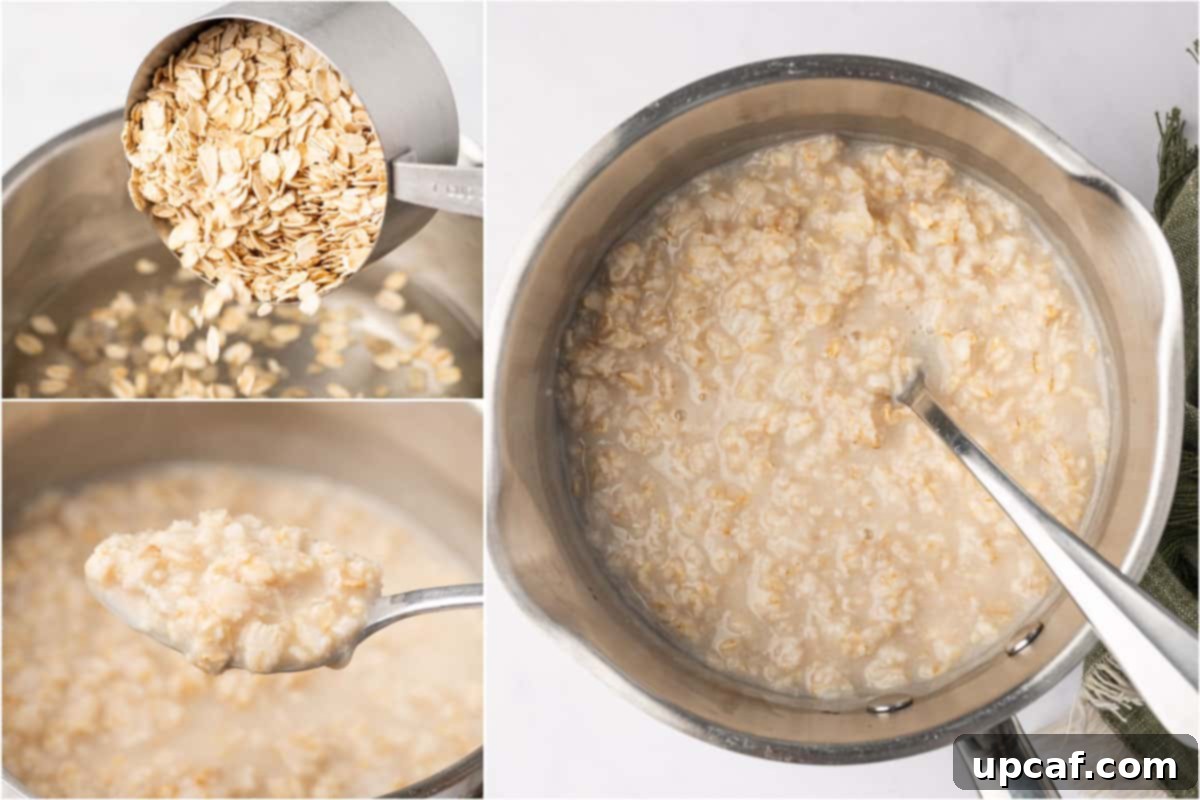
- Boil the Liquid: In a medium saucepan, bring 2 cups of water (or milk for a richer, creamier oatmeal) to a boil over medium-high heat. Add a tiny pinch of salt to round out the flavors.
- Add the Oats: Once the liquid is boiling, stir in 1 cup of old-fashioned rolled oats.
- Reduce Heat and Simmer: Immediately reduce the heat to low and allow the oats to simmer gently. Stir occasionally to prevent sticking and ensure uniform cooking.
- Cook to Consistency: Continue cooking for about 5 minutes, or until the oats reach your desired consistency. For a thicker bowl, cook for an extra 1-2 minutes. For a thinner, looser oatmeal, stir in a bit more hot water or milk.
- Remove from Heat and Rest: Once the oats are tender and have absorbed most of the liquid, remove the saucepan from the heat. Let the oatmeal sit for a minute or two; this brief rest allows it to thicken slightly and settle.
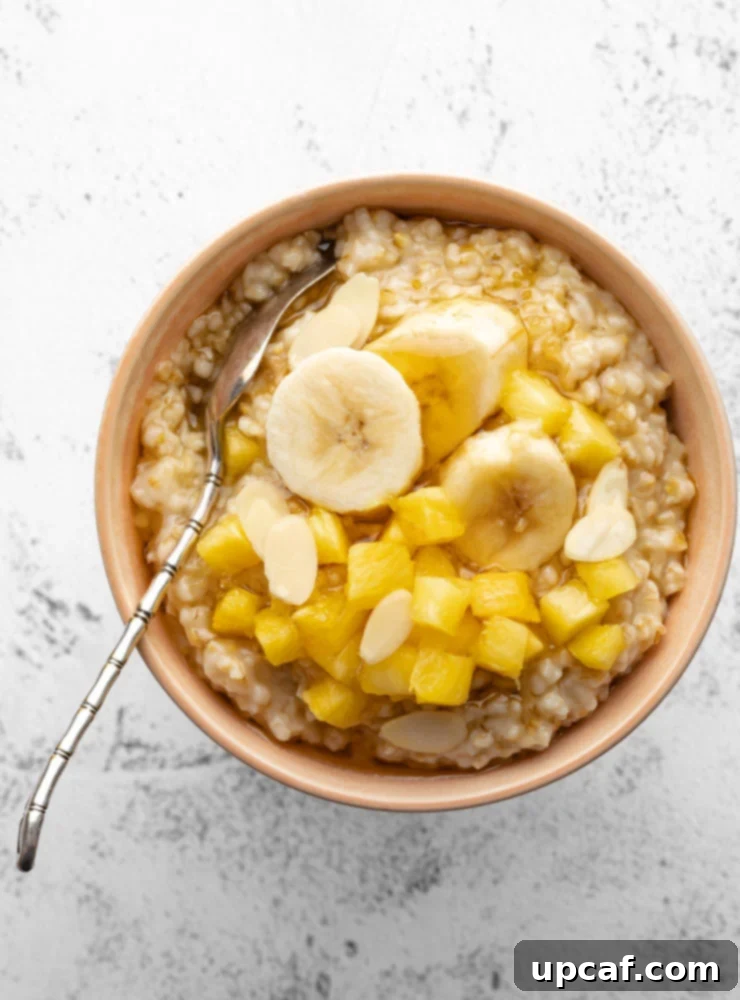
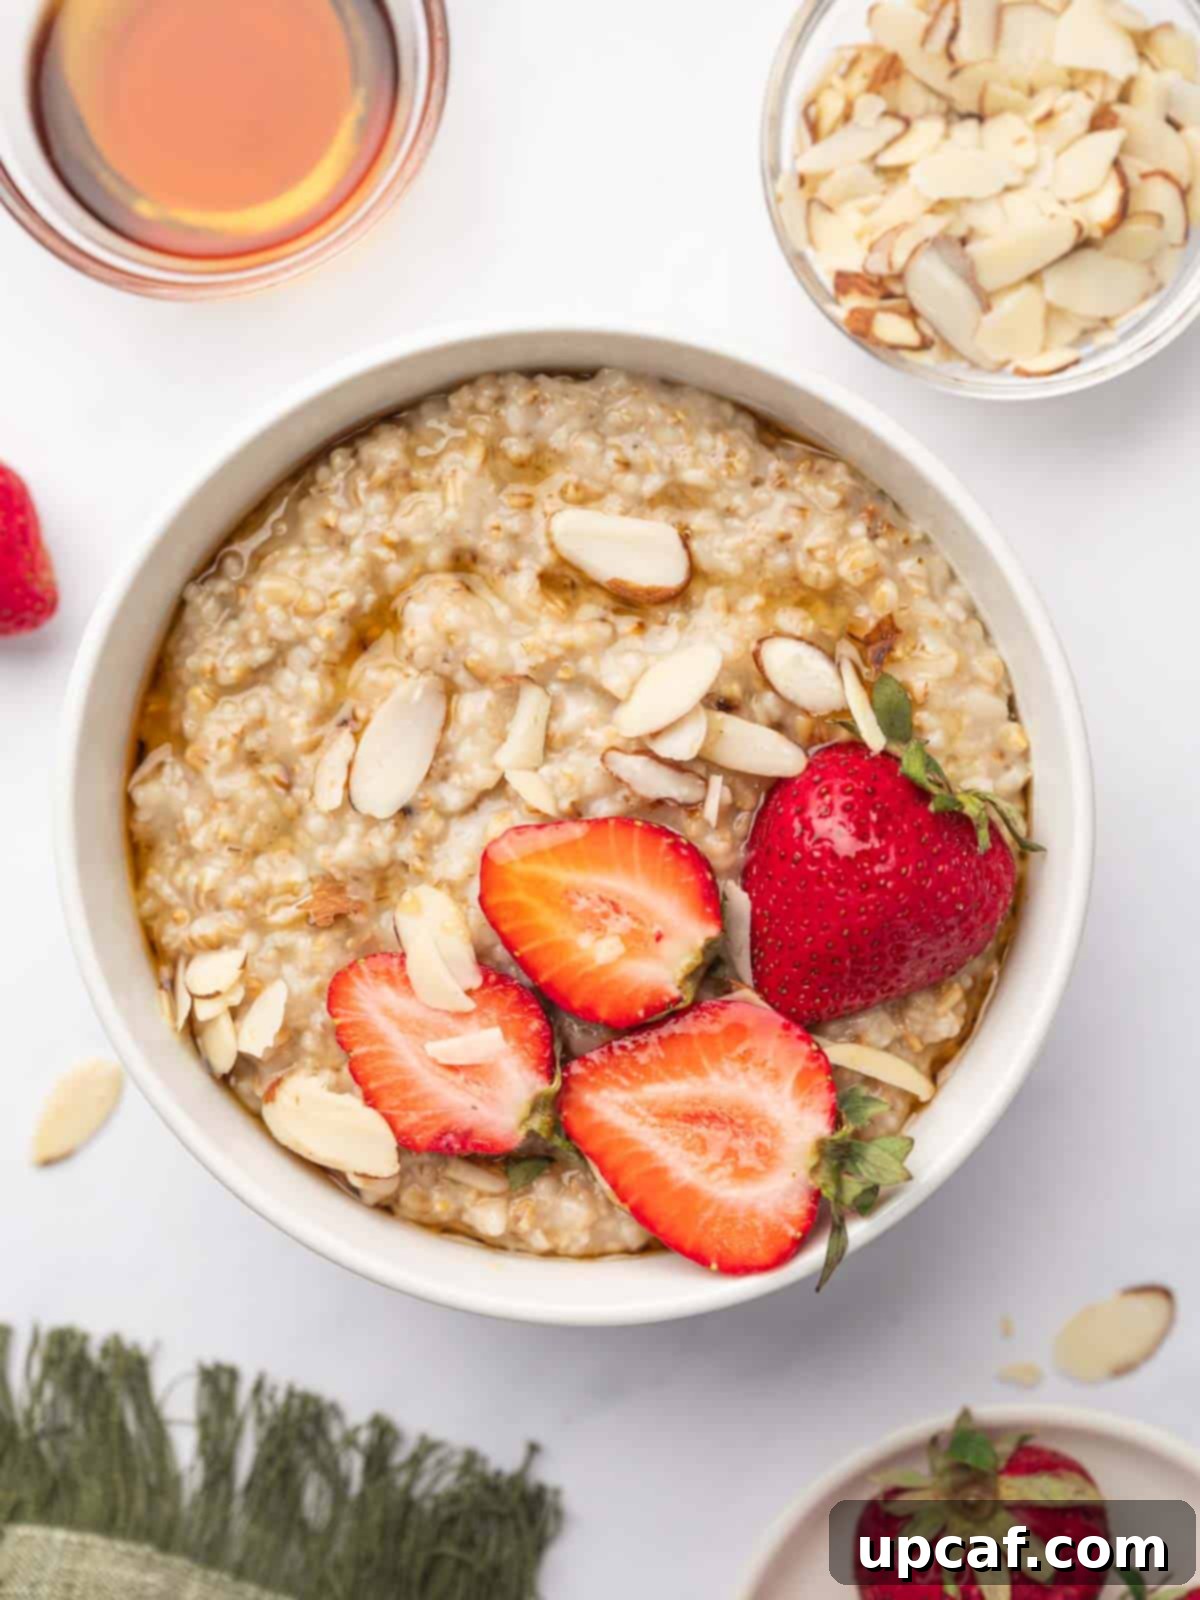
- Serve: Spoon the warm oatmeal into bowls. Garnish with your favorite toppings such as fresh fruit, crunchy nuts, a drizzle of honey, a dash of cinnamon, or a spoonful of brown sugar. Enjoy immediately.
Tips for Cooking Stovetop Oats
- Adjust Liquid to Your Liking: The liquid-to-oat ratio is flexible. For a thicker, heartier oatmeal, use slightly less water or milk. For a creamier, looser texture, increase the liquid amount or replace some water with milk.
- Stir Regularly: Especially with rolled oats, frequent stirring prevents sticking and ensures a smooth, creamy texture.
- Low and Slow for Steel-Cut: Steel-cut oats benefit from a longer, gentler simmer to achieve tenderness without becoming gummy.
Prepping Overnight Oats: The Ultimate Meal Prep Breakfast
Overnight oats are a revelation for busy mornings. This no-cook method involves soaking oats in liquid overnight, allowing them to soften and absorb flavors, resulting in a creamy, ready-to-eat breakfast when you wake up. It’s perfect for meal prepping and offers endless customization.
Basic Overnight Oats Recipe
Ingredients:
- 1/2 cup old-fashioned rolled oats (quick oats can also be used, but may result in a softer texture)
- 1/2 cup milk (dairy or non-dairy, such as almond, oat, soy, or coconut milk)
- 1 tablespoon chia seeds (optional, but highly recommended for extra thickness, nutrition, and satiety)
- 1 tablespoon sweetener (such as honey, maple syrup, or agave, optional, to taste)
- 1/2 teaspoon vanilla extract (optional, for a boost of aromatic flavor)
- A tiny pinch of salt (optional, for flavor balance)
Instructions:
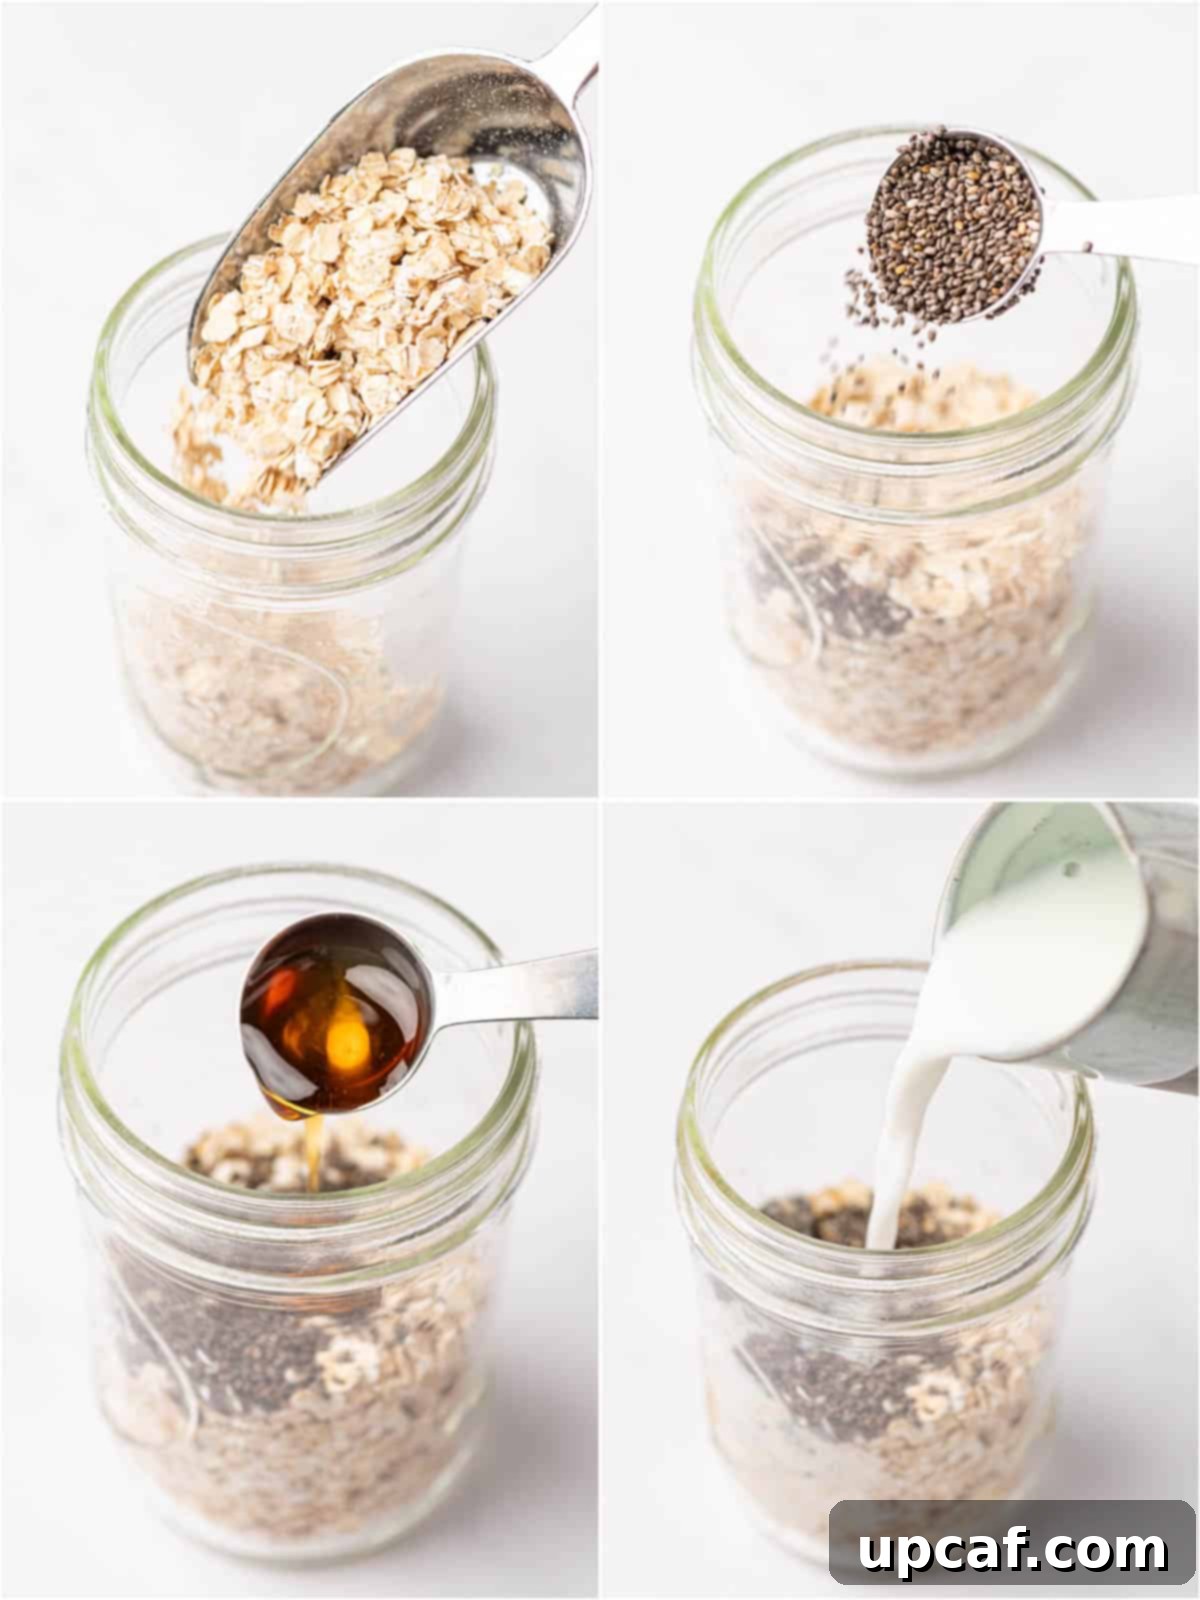
- Combine Ingredients: In a mason jar, a bowl with a lid, or any container suitable for refrigeration, combine the 1/2 cup of old-fashioned rolled oats, 1/2 cup of milk, the optional chia seeds, sweetener, vanilla extract, and a tiny pinch of salt.
- Mix Thoroughly: Stir all the ingredients together vigorously until the oats are fully coated and uniformly combined with the liquid and any add-ins. This ensures even absorption and prevents clumping.
- Cover and Refrigerate: Securely cover the jar or container with its lid or plastic wrap. Place it in the refrigerator and let the oats soak overnight, or for at least 4-6 hours. This soaking period is crucial for the oats to absorb the liquid and achieve their signature soft, creamy texture.
- Serve and Adjust: In the morning, give the oats a good stir. If the consistency is too thick for your preference, simply add a splash more milk to loosen them up.
- Top and Enjoy: Add your favorite fruits, nuts, seeds, nut butters, or any other desired toppings. Overnight oats are typically enjoyed cold, making them a refreshing breakfast. If you prefer them slightly warmer, you can let them sit at room temperature for a few minutes before eating.
How to Cook Oatmeal in an Instant Pot: Efficient and Hands-Off
The Instant Pot is a game-changer for cooking steel-cut oats, significantly cutting down on cooking time compared to the stovetop method while still delivering a perfectly chewy and hearty result. It’s ideal for a hands-off approach to this nutritious breakfast.
Instant Pot Steel-Cut Oatmeal
Ingredients:
- 1 cup steel-cut oats
- 3 cups water (or milk/plant-based milk for a creamier texture)
- A tiny pinch of salt (optional)
Instructions:
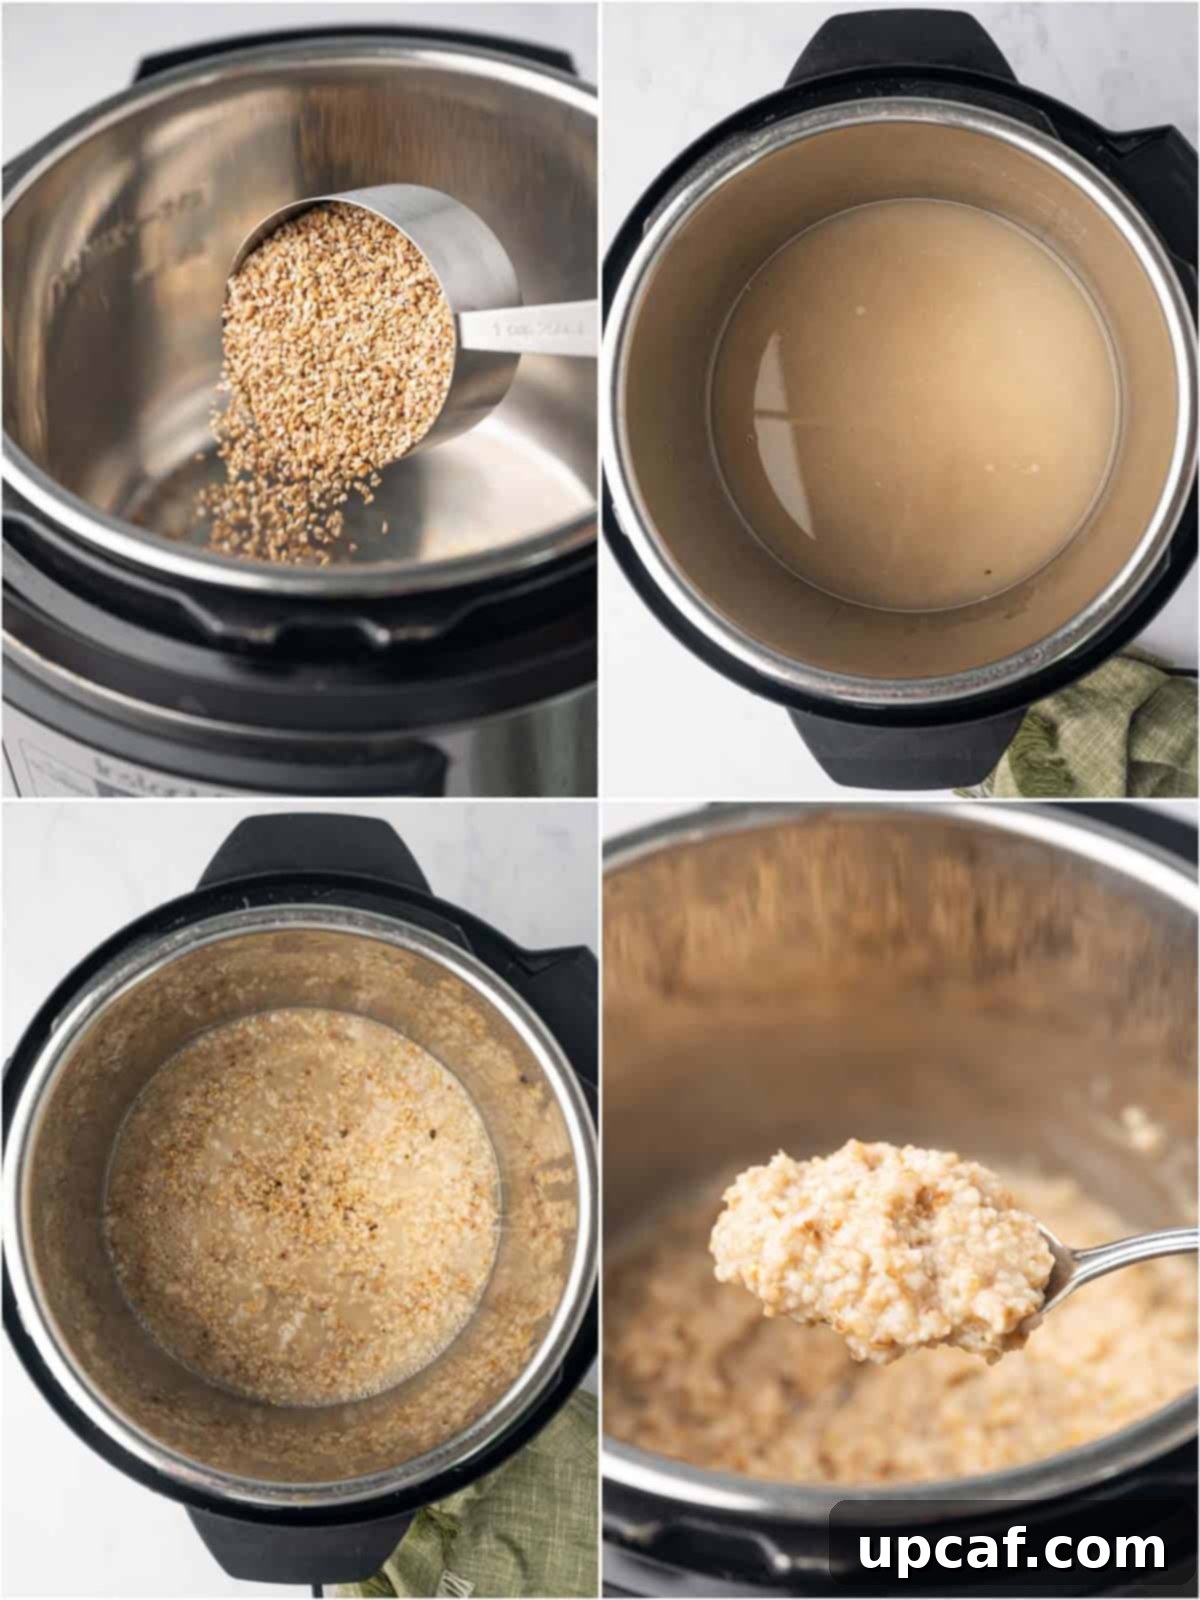
- Prepare the Instant Pot: Add 1 cup of steel-cut oats, 3 cups of water (or your chosen liquid), and a tiny pinch of salt (if using) to the inner pot of your Instant Pot. Stir gently to combine.
- Seal the Lid: Secure the lid onto the Instant Pot, ensuring it’s properly sealed. Set the steam release valve to the “Sealing” position.
- Set Cooking Time: Select the “Pressure Cook” or “Manual” button (depending on your Instant Pot model) and set the timer for 4 minutes on high pressure.
- Natural Release: Once the cooking cycle is complete, allow the pressure to release naturally for about 10 minutes. This crucial step helps the oats finish cooking properly and prevents any sputtering or mess when you manually release the remaining steam.
- Release Remaining Pressure: After 10 minutes of natural release, carefully turn the steam release valve to the “Venting” position to quick-release any residual pressure. Once the floating pin drops, it’s safe to open the lid.
- Stir and Serve: Give the oatmeal a good stir to incorporate any liquid and achieve a thick, uniform consistency. Serve hot, topped with your preferred additions like fresh berries, chopped nuts, a drizzle of maple syrup, or a dash of cinnamon.
How to Cook Oatmeal in The Oven: Baked Oatmeal Delights
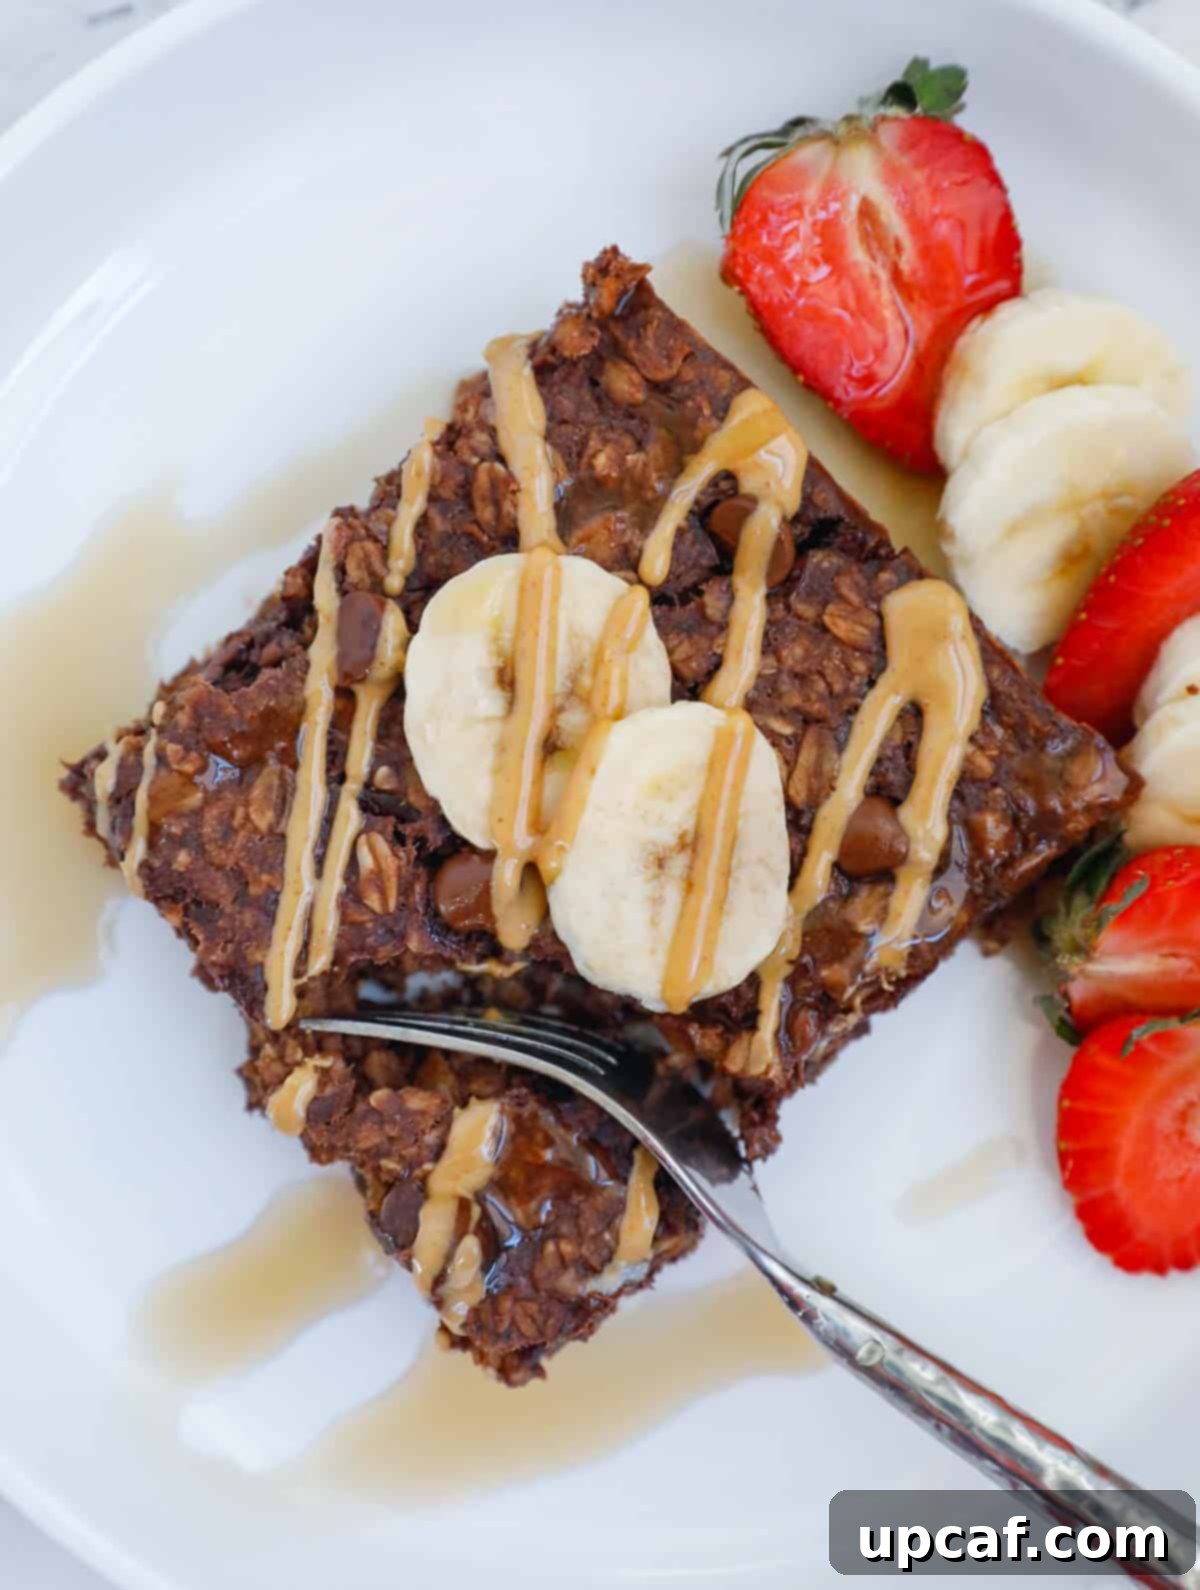
Baked oatmeal offers a delightful alternative to traditional stovetop or microwave preparations. It transforms simple oats into a comforting, cake-like casserole that’s perfect for feeding a crowd, meal prepping, or simply enjoying a warm, hearty breakfast with minimal fuss. It’s incredibly versatile and allows for endless flavor combinations, making it a favorite for families and individuals alike.
- 3 Ways to Make Baked Oats
- Chocolate Chip Baked Oatmeal
- Peanut Butter Baked Oatmeal
- Blueberry Baked Oatmeal
- Healthy Oat Banana Bread
Expert Tips for Perfectly Cooked Oatmeal
Achieving your ideal bowl of oatmeal is easier with these simple tips:
- Master the Liquid-to-Oats Ratio: While a general guideline is a 2:1 liquid-to-oats ratio for rolled oats (and 3-4:1 for steel-cut), remember this is a starting point. Adjust based on your preferred thickness. For creamier oats, add a little more liquid; for thicker oats, use less or cook slightly longer.
- Experiment with Liquid Choices: The type of liquid profoundly impacts the final taste and texture. Dairy milk or plant-based milks (almond, soy, oat, coconut) yield a richer, creamier oatmeal, while water results in a lighter, purer oat flavor. Don’t hesitate to use a combination of both for a balanced approach.
- A Pinch of Salt is Key: Don’t underestimate the power of a tiny pinch of salt. It doesn’t make your oatmeal salty but rather enhances the natural sweetness and complexity of the oats, preventing them from tasting flat.
- Stir for Creaminess and Even Cooking: For stovetop methods, frequent stirring helps to release the oats’ starches, resulting in a creamier texture, and prevents the oats from sticking to the bottom of the pan.
- Sweeten Wisely: Add sweeteners after cooking, or gradually during the last few minutes, allowing you to taste and adjust. Natural sweeteners like honey or maple syrup can be added at the end, while sugar can be stirred in earlier.
- Don’t Rush the Rest: Allowing your oatmeal to rest for a minute or two after cooking, especially for stovetop and microwave methods, gives the oats time to fully absorb any remaining liquid and thicken to their optimal consistency.
Best Oatmeal Toppings: Elevate Your Bowl
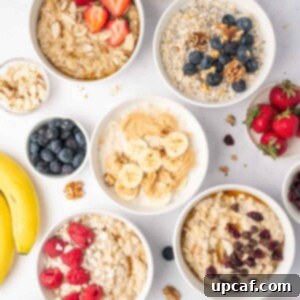
The true magic of oatmeal often lies in its toppings. This is where you can unleash your creativity and transform a simple bowl of oats into an exciting, nutrient-dense, and utterly delicious meal. Feel free to mix and match these ideas to create endless combinations that suit your mood and cravings!
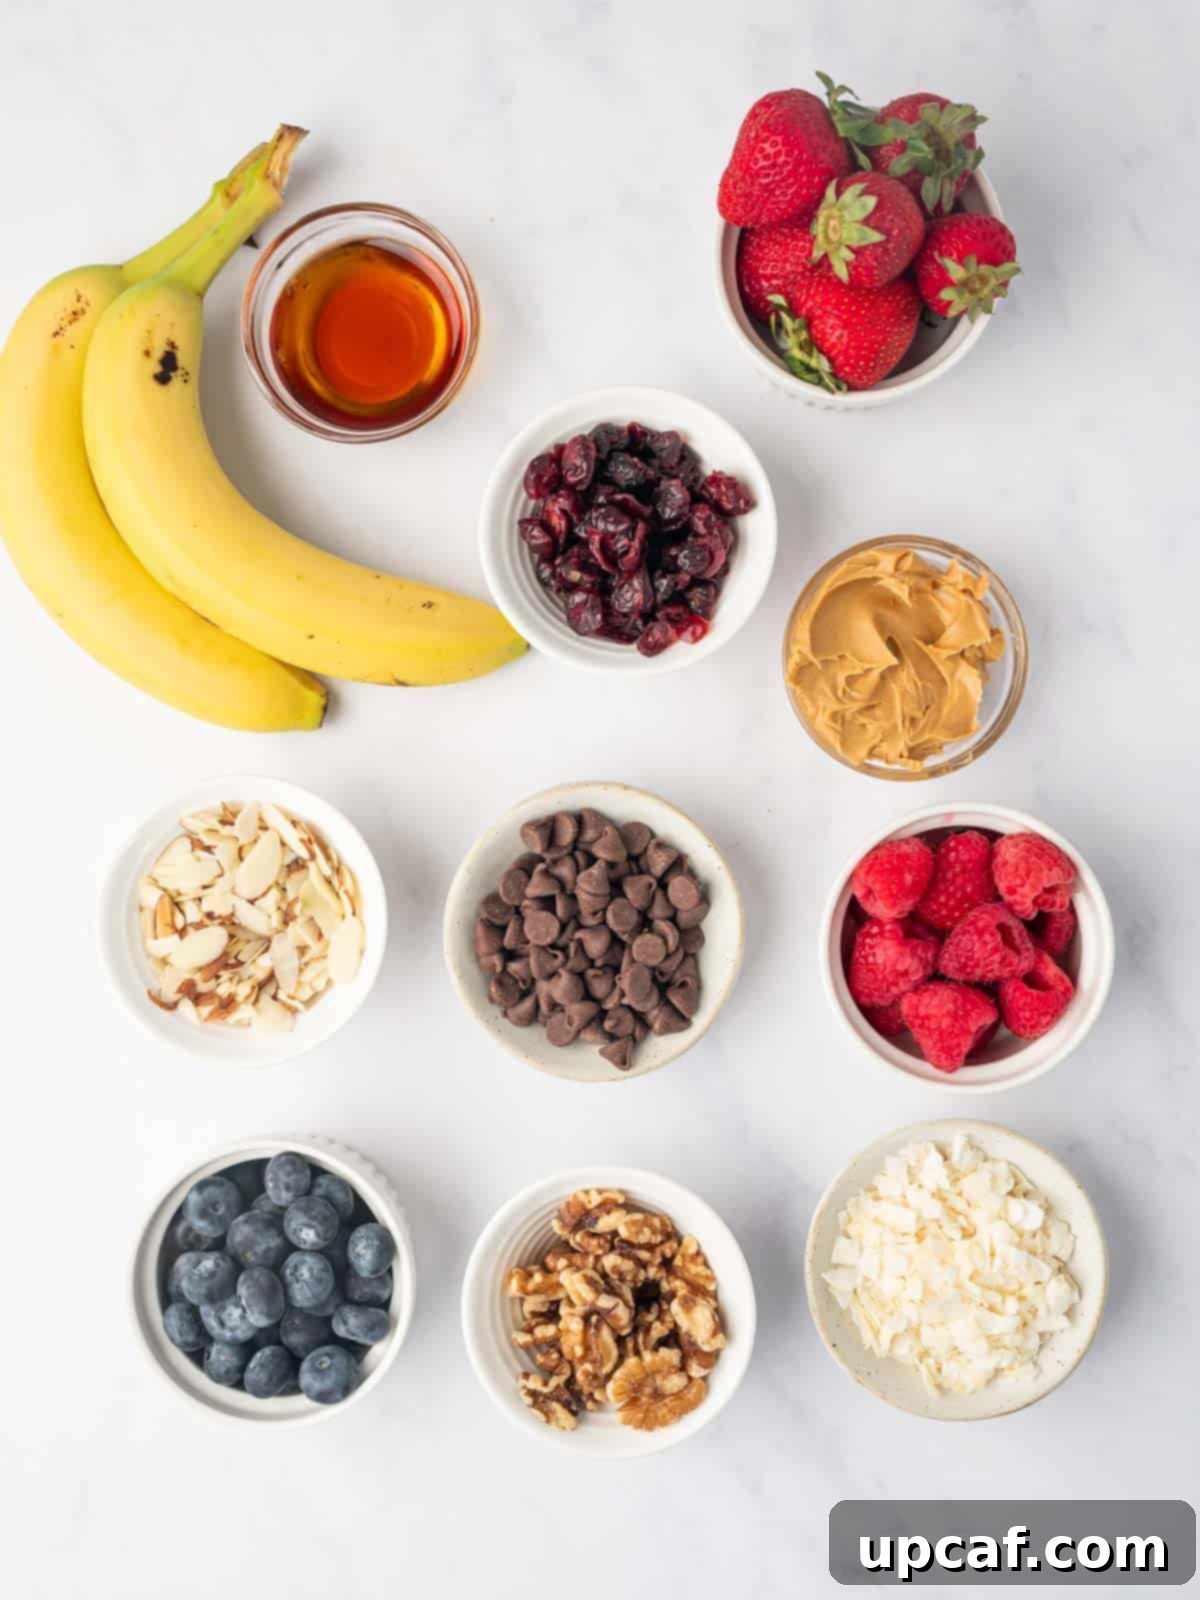
- Fresh Fruits: Add vibrant flavor, natural sweetness, and essential vitamins. Think sliced bananas, juicy blueberries, fresh strawberries, raspberries, sliced apples, or even tropical fruits like mango or pineapple.
- Dried Fruits: Provide concentrated sweetness and a chewy texture. Raisins, dried cranberries, chopped dates, dried cherries, or goji berries are excellent choices.
- Nuts and Seeds: Offer healthy fats, protein, fiber, and a delightful crunch. Consider sliced almonds, chopped walnuts, pecans, salted peanuts, flax seeds, chia seeds, hemp seeds, or pumpkin seeds.
- Spices: A dash of spice can warm up your bowl and add complex flavors. Cinnamon, nutmeg, cardamom, and even a tiny pinch of ginger or turmeric are wonderful options.
- Healthy Spreads & Butters: Boost protein and healthy fats while adding incredible flavor. Peanut butter, almond butter, cashew butter, or even a swirl of melted chocolate or Nutella spread can be indulgent.
- Sweeteners: Beyond natural fruit sweetness, you might want an extra touch. Honey, maple syrup, brown sugar, agave nectar, or a sprinkle of coconut sugar are popular choices.
- Crunchy Extras: For added texture, consider granola (crunchy oats on soft oats – a textural delight!), shredded coconut, cocoa nibs, or even a sprinkle of crumbled cookies for a treat.
- Dairy/Non-Dairy Swirls: A spoonful of Greek yogurt, a dollop of cream cheese (for a cheesecake vibe), or a swirl of whipped cream (for dessert oatmeal) can add richness.
Frequently Asked Questions About Cooking Oatmeal
Can I make oatmeal ahead of time?
Absolutely! Cooked oatmeal (especially stovetop or Instant Pot versions) can be made in a larger batch and stored. Individual portions can then be easily reheated in the microwave or on the stovetop with a splash of extra liquid. Overnight oats are specifically designed for make-ahead convenience and are ready to eat straight from the fridge.
How do I store cooked oatmeal?
Store any leftover cooked oatmeal in an airtight container in the refrigerator. It will typically stay fresh and delicious for up to 3 to 5 days. For reheating, you might need to add a small amount of water or milk to restore its creamy consistency.
How do I adjust the consistency of my oatmeal?
For Thicker Oatmeal: Use slightly less liquid than recommended, or cook the oats for an additional minute or two until more liquid has evaporated. Alternatively, stir in a tablespoon of chia seeds or ground flaxseeds, which are excellent thickening agents.
For Creamier/Thinner Oatmeal: Add a splash more hot water or milk (dairy or plant-based) to your cooked oatmeal until it reaches your desired consistency. Stir well to incorporate.
Are there any gluten-free oatmeals?
Yes, oats are naturally gluten-free. However, they are often processed in facilities that also handle gluten-containing grains like wheat, barley, and rye, leading to cross-contamination. If you have celiac disease or a severe gluten sensitivity, it is crucial to purchase oats that are specifically labeled and certified as “gluten-free.” These oats are grown and processed in dedicated facilities to ensure they are free from gluten contamination.
Can you freeze cooked oatmeal?
Yes, cooked oatmeal freezes wonderfully! Allow it to cool completely, then portion it into freezer-safe containers, muffin tins (for individual servings), or freezer bags. It can be frozen for up to 2-3 months. To reheat, simply transfer to a microwave-safe bowl or saucepan, add a splash of liquid (water or milk), and heat gently, stirring until it reaches your desired temperature and consistency.
How do I make oatmeal more filling and nutritious?
To boost the satiety and nutritional value of your oatmeal:
Add Protein: Stir in a spoonful of Greek yogurt, cottage cheese, protein powder, or a handful of nuts and seeds.
Increase Fiber: Incorporate chia seeds, flaxseeds, or psyllium husk for an extra fiber boost.
Include Healthy Fats: Swirl in nut butters (peanut, almond), avocado, or a sprinkle of healthy seeds.
Load Up on Fruits and Veggies: Fresh or frozen berries, sliced bananas, grated carrots, or zucchini can add bulk and nutrients.

Other Nutritious Breakfasts to Explore
If you’ve fallen in love with wholesome breakfasts, here are more delicious and healthy ideas to keep your mornings exciting:
- Apple Cinnamon Oatmeal Cups
- Avocado Toast With Eggs
- Homemade Fruit and Nuts Bars
- Strawberry Oatmeal Bars
Conclusion: Your Journey to Perfect Oatmeal
Oatmeal is truly a game-changer for any meal, promising a delicious, filling, and customizable experience that supports a healthy lifestyle. By now, you have a solid understanding of the different types of oats and the various methods to prepare them, empowering you to tailor your oatmeal precisely to your preferences. Whether you crave the classic comfort of a creamy stovetop bowl, the hearty chewiness of Instant Pot steel-cut oats, the convenient delight of overnight oats, or the delightful baked variations, the possibilities are vast.
Embrace the versatility of oats, experiment with flavors, and discover new favorite toppings. With these tips and techniques, you’re well-equipped to enjoy this wholesome meal in endless satisfying ways. Happy cooking, and here’s to many delicious bowls of oatmeal!
If you try this recipe or any of my other recipes, please leave a star rating in the comment section below. Also follow me at Cookin’ With Mima on Facebook |Instagram |Pinterest for all of my latest social posts and recipes.
How to Cook Old-Fashioned Oatmeal
By: Mariam Ezzeddine
Oatmeal is a game-changer for busy mornings, ensuring you start your day with a delicious and filling meal and it is highly customizable.
Prep Time: 1 minute
Cook Time: 5 minutes
Total Time: 6 minutes
Servings: 1 serving
Ingredients
- 2 cup water or milk
- 1 cup old-fashioned rolled oats
- 1 pinch salt (optional)
- Sweetener of choice (optional)
Instructions
- Boil the Water: In a medium saucepan, bring 2 cups of water (or milk for a creamier texture) to a boil over medium-high heat. Add a pinch of salt if desired.
- Add the Oats: Once the water is boiling, stir in 1 cup of old-fashioned rolled oats.
- Reduce Heat and Simmer: Reduce the heat to low and let the oats simmer gently. Stir occasionally to prevent the oats from sticking to the bottom of the pan.
- Cook the Oats: Continue to cook the oats for about 5 minutes, or until they reach your desired consistency. For thicker oatmeal, cook for an additional 1-2 minutes; for thinner oatmeal, add a bit more water or milk.
- Remove from Heat: Once the oats are tender and have absorbed most of the liquid, remove the saucepan from the heat. Let the oatmeal sit for a minute to thicken slightly.
- Serve: Spoon the oatmeal into bowls and add your favorite toppings such as fresh fruit, nuts, honey, cinnamon, or brown sugar. Enjoy warm.
Notes
- Choose the Right Oats: Opt for old-fashioned rolled oats for the perfect texture.
- Liquid Ratio: Follow the recommended liquid-to-oats ratio for the specific type of oats you’re using. Adjust based on your desired consistency.
- Experiment with Liquid Choices: Use milk (dairy or plant-based) for a creamier texture, or opt for water for a lighter version. You can also use a combination of both.
- Sweeten Wisely: Start with a modest amount of sweetener and adjust to taste.
- Toppings: Get creative with toppings like berries, nuts and chocolate chips.
