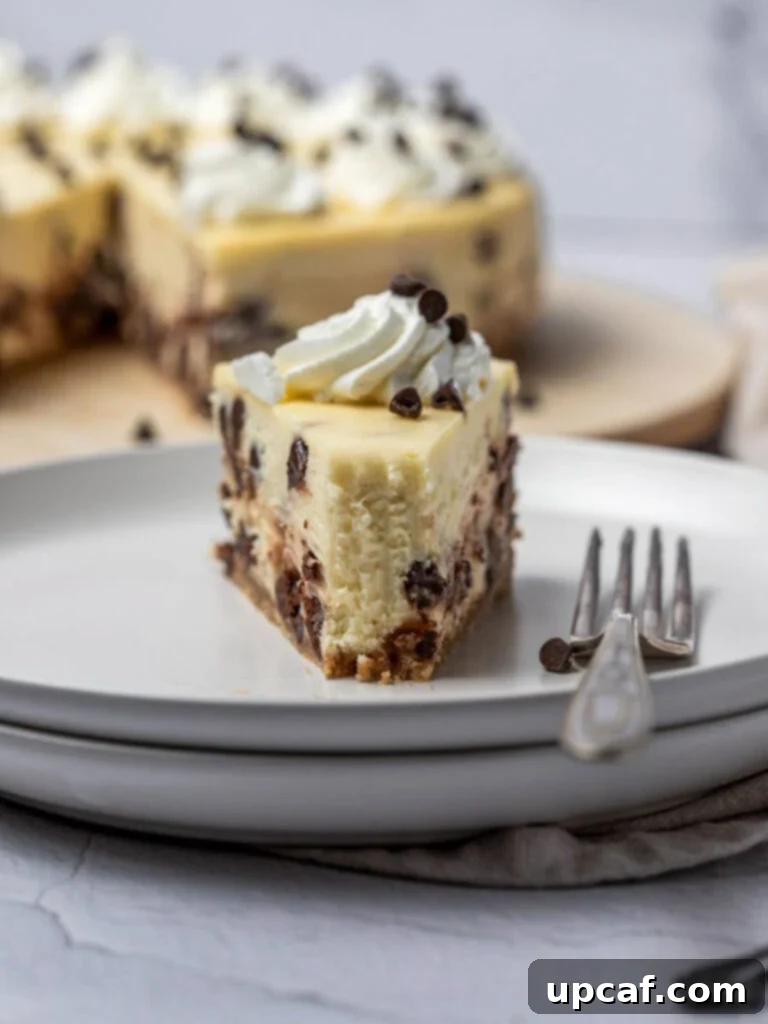
Indulge in the ultimate classic dessert with this utterly irresistible Chocolate Chip Cheesecake. Imagine a perfectly golden, buttery graham cracker crust providing the ideal foundation for an incredibly smooth, rich, and creamy cheesecake filling, generously studded with melted chocolate chips in every bite. This isn’t just any dessert; it’s a show-stopping masterpiece that looks and tastes like it took hours of complex work, yet it’s surprisingly straightforward to create in your own kitchen. Whether you’re a seasoned baker or a cheesecake novice, you’ll be amazed by how easily you can achieve bakery-quality results with this recipe.
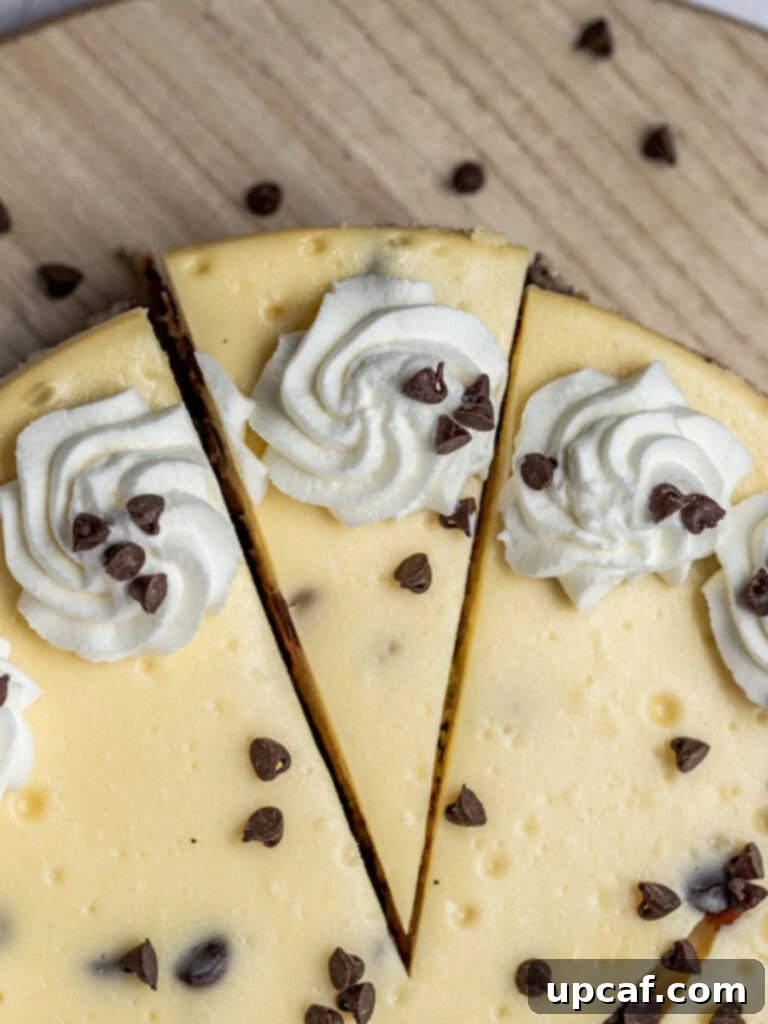
There’s a special kind of joy that comes from baking, especially when it involves creating something as universally loved as a cheesecake. In our household, we’ve been on a delightful cheesecake journey, experimenting with various flavors and textures. After much delicious testing, we truly believe we’ve perfected the recipe for the most divine baked chocolate chip cheesecake. This recipe strikes the perfect balance between classic cheesecake elegance and the beloved comfort of chocolate chips, making it a guaranteed hit for any occasion, from casual family dinners to festive celebrations.
If you’re eager to explore more of our family’s cherished dessert recipes that bring smiles and satisfaction, be sure to try these delightful treats: Eggless Chocolate Chip Cookies, a fantastic option for those avoiding eggs without compromising on flavor; our refreshing Oatmeal Cookie Ice Cream Sandwich, perfect for a warm day; and the decadent Oreo Ice Cream Sandwich, a dreamy combination for cookie and ice cream lovers.
Why This Easy Chocolate Chip Cheesecake Recipe Will Become Your Favorite
This isn’t just another cheesecake recipe; it’s a culinary experience designed for maximum enjoyment with minimal fuss. Here’s why this particular chocolate chip cheesecake is set to become a beloved staple in your dessert repertoire:
- Effortlessly Simple: With just 10 core ingredients, many of which you likely already have stocked in your pantry and fridge, this recipe simplifies the art of cheesecake making. We often find ourselves with an abundance of chocolate chips, making this the perfect excuse to create something truly special and delicious without needing a trip to the grocery store. It’s an ideal recipe for both beginners and experienced bakers seeking a straightforward yet impressive dessert.
- Remarkably Freezer-Friendly: Life is busy, and sometimes you need a dessert that can be prepared in advance or savored over time. This chocolate chip cheesecake is incredibly freezer-friendly, allowing you to easily store leftovers for a spontaneous treat later. Simply thaw and enjoy, and it will taste just as fresh and delightful as the day it was baked. This feature makes it perfect for meal prepping desserts or ensuring you always have a delicious option on hand.
- A True Crowd-Pleaser for All Ages: Loved by both adults and children alike, this cheesecake is the quintessential family-friendly dessert. Its classic flavors and appealing texture ensure it’s a hit at any gathering. Furthermore, since it’s made without any nuts, it’s an excellent choice for school bake sales, potlucks, or events where common allergens might be a concern, making it safe and enjoyable for a wider audience.
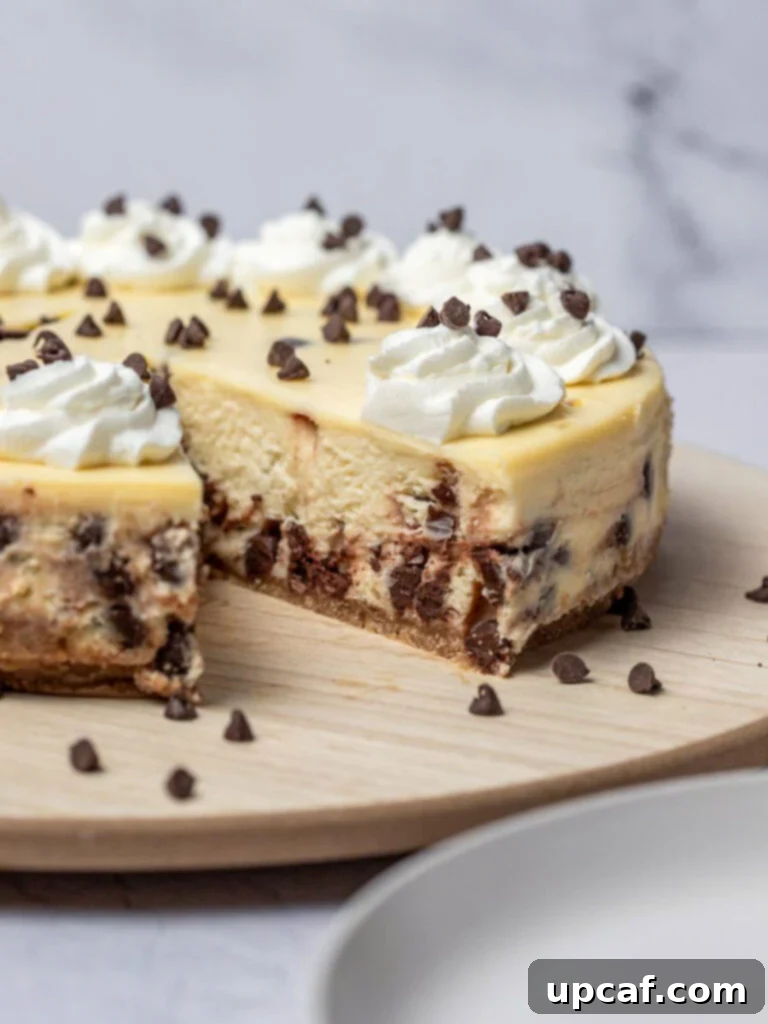
- Visually Stunning: Beyond its incredible taste, this chocolate chip cheesecake is a sight to behold. The elegant golden crust, the pristine creamy filling, and the scattered dark chocolate chips create a beautiful contrast that makes it a true centerpiece dessert, guaranteed to impress your guests.
- Perfect for Any Occasion: Whether it’s a birthday celebration, a holiday feast, or simply a weekend indulgence, this versatile dessert fits every scenario. Its timeless appeal and comforting flavors make it suitable for both casual get-togethers and more formal occasions.
Essential Ingredients for Your Homemade Chocolate Chip Cheesecake
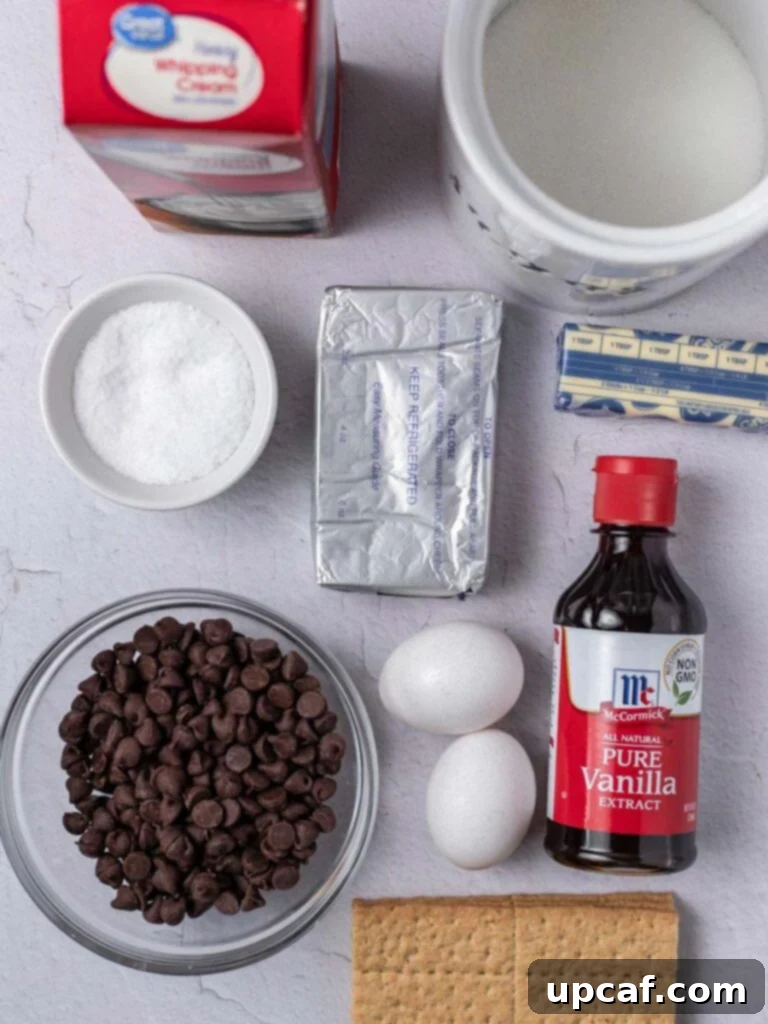
Crafting the perfect chocolate chip cheesecake starts with high-quality ingredients. Here’s a detailed look at what you’ll need to assemble this delightful dessert, along with a few tips to ensure the best results:
For the Irresistible Graham Cracker Crust
- Graham Crackers: You’ll need about 10 full sheets, thoroughly crushed. The easiest way to achieve fine crumbs is by pulsing them in a food processor, but if you prefer a bit of a workout, you can also place them in a zip-top bag and crush them with a rolling pin. Uniformly crushed crackers ensure a consistent crust texture.
- Unsalted Butter: Melted butter binds the graham cracker crumbs together, creating a sturdy and flavorful crust. Using unsalted butter gives you better control over the overall saltiness of your cheesecake.
- Granulated Sugar: A touch of sugar enhances the sweetness of the crust and helps it caramelize slightly during baking, contributing to that beautiful golden-brown color.
- Salt: Just a pinch of salt is crucial for balancing the sweetness and bringing out the rich flavors of the butter and graham crackers. Don’t skip it!
For the Velvety Smooth Cheesecake Filling
- Cream Cheese: This is the star of your cheesecake! It’s absolutely vital that your cream cheese is at room temperature. Softened cream cheese blends smoothly, preventing lumps and ensuring a silky, uniform texture in your filling. Use full-fat cream cheese for the best richness and creaminess.
- Granulated Sugar: Provides the perfect level of sweetness, complementing the tang of the cream cheese and the bitterness of the chocolate.
- Eggs: Also at room temperature. Room temperature eggs emulsify better with the cream cheese mixture, leading to a more consistent and crack-free cheesecake. They provide structure and richness to the filling.
- Heavy Cream: At room temperature. Heavy cream adds an extra layer of richness and helps achieve that ultra-creamy, melt-in-your-mouth texture. Ensure it’s not cold, as cold cream can cause the batter to seize.
- Vanilla Extract: Opt for pure vanilla extract over artificial versions. The real deal adds a profound depth of flavor that is essential to any classic cheesecake.
- Chocolate Chips: The star addition! You can use semi-sweet, milk chocolate, or even dark chocolate chips, depending on your preference. Mini chocolate chips disperse more evenly throughout the filling, but standard size chips offer delightful pockets of melted chocolate.
Mastering the Art: How To Make Chocolate Chip Cheesecake at Home
Creating this stunning chocolate chip cheesecake is simpler than you might think. Follow these detailed steps to ensure a perfect bake every time:
- Prepare Your Pan and Preheat Your Oven: Start by preheating your oven to 350°F (175°C). Take a 9-inch springform pan and lightly coat the interior with non-stick spray. Crucially, wrap the entire exterior of the pan tightly with heavy-duty aluminum foil. This foil barrier is essential to prevent any water from seeping into the crust when the cheesecake bakes in a water bath, ensuring a perfectly crisp base.
- Craft the Golden Graham Cracker Crust: In a medium-sized bowl, combine your finely crushed graham crackers with the melted unsalted butter, granulated sugar, and a pinch of salt. Mix these ingredients thoroughly until they are fully combined and the mixture resembles wet sand. This ensures every crumb is coated and will bind together beautifully.
- Press and Bake the Crust: Firmly press the graham cracker mixture evenly into the bottom of the prepared springform pan. You can use the back of a spoon, your knuckles, or the bottom of a flat glass to create a compact, even layer. This firm pressing is key to a sturdy crust that won’t crumble. Bake the crust for 9-10 minutes, or until it turns a light golden brown and releases a lovely aroma. Remove the pan from the oven and set it aside to cool completely on a wire rack while you prepare the filling. A cool crust prevents the filling from becoming greasy.
- Adjust Oven Temperature: Once the crust is out, increase your oven temperature to 450°F (230°C). This initial high heat helps set the cheesecake quickly, preventing cracks.
- Prepare the Velvety Cheesecake Filling: In the bowl of a stand mixer fitted with a paddle attachment, begin by beating the room temperature cream cheese on medium speed until it’s incredibly smooth and creamy, with no lumps remaining. Gradually add the granulated sugar, continuing to beat until the mixture is well combined and smooth.
- Incorporate Eggs Carefully: Add the eggs one at a time, beating only until each egg is just incorporated into the mixture. It’s vital to scrape down the sides and bottom of the bowl between each egg addition to ensure everything is evenly mixed. Overmixing at this stage introduces too much air, which can cause the cheesecake to puff up excessively and then crack as it cools.
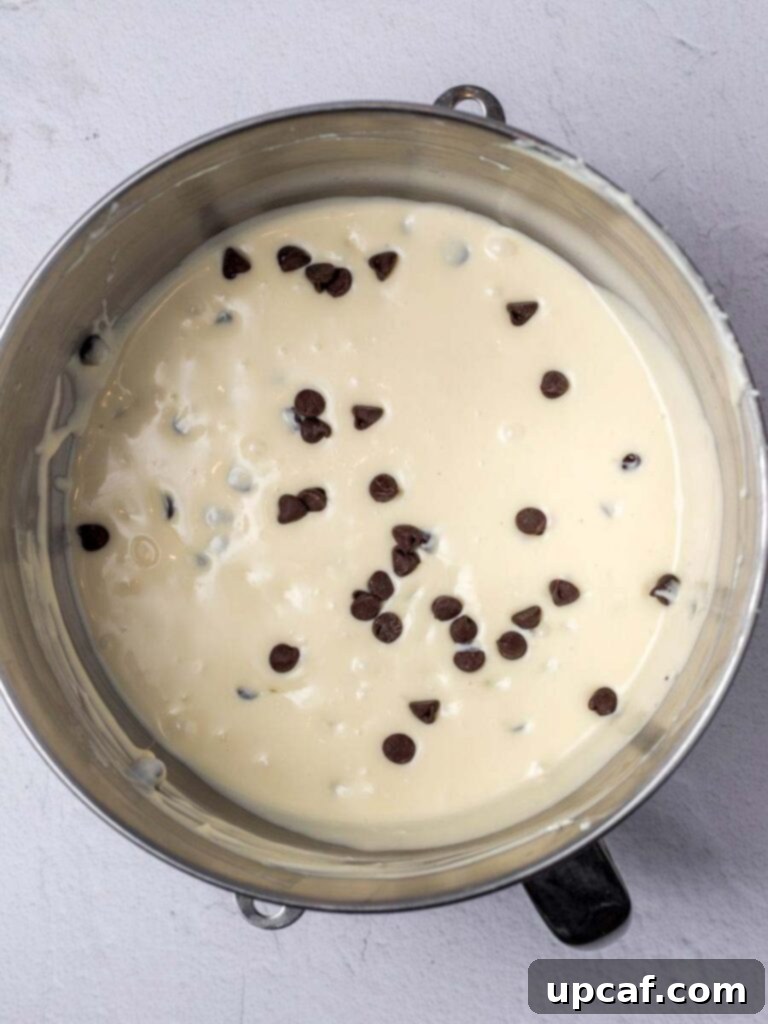
- Finish the Filling: Gently mix in the room temperature heavy cream and pure vanilla extract until just combined. Finally, with a spatula, carefully fold the chocolate chips into the batter. This ensures they are evenly distributed without overmixing the delicate batter. Pour the luscious filling over the cooled graham cracker crust in your prepared springform pan.
- Set Up the Water Bath: Carefully place your foil-wrapped springform pan containing the cheesecake into a larger, deep roasting pan. Boil enough water to fill the larger pan. Once boiling, carefully pour the hot water into the roasting pan, ensuring it reaches approximately halfway up the sides of the springform pan. This water bath is key to a perfectly smooth cheesecake.
- Bake the Cheesecake to Perfection: Gently transfer the roasting pan with the cheesecake to the center rack of your preheated oven. Bake at 450°F (230°C) for 15 minutes. After this initial bake, *without opening the oven door*, reduce the oven temperature to 225°F (107°C) and continue baking for an additional 1 hour and 20 minutes to 1 hour and 35 minutes. The cheesecake is done when the edges are set and slightly puffed, but the very center (about a 2-inch circle) still shows a slight jiggle when the pan is gently nudged.
- Gradual Cooling is Key: Once the baking time is complete, turn off the oven but leave the cheesecake inside with the oven door slightly ajar for 1 hour. This gradual cooling within the warm oven is critical for preventing cracks on the surface.
- Chill Before Serving: Remove the cheesecake from the oven and carefully lift it out of the water bath. Allow it to rest and cool completely on your kitchen counter for at least an hour, or until it reaches room temperature. Once cooled, transfer the entire springform pan (still intact) to the refrigerator and chill overnight, or for a minimum of 8 hours. This prolonged chilling period allows the cheesecake to firm up, making it easier to slice neatly and enhancing its rich, creamy texture and flavors.
The Secret to Success: Why Bake Cheesecake in a Hot Water Bath?
The water bath, or “bain-marie,” is a technique often employed in delicate baking, and it’s particularly vital for cheesecakes. Here’s why this simple step makes such a significant difference:
- Even and Gentle Baking: Cheesecake batter is essentially a custard, and like all custards, it benefits from gentle, even heat. A water bath creates a moist, consistent environment around the cheesecake, helping it bake slowly and evenly. This prevents the outer edges from cooking too quickly and becoming tough or dry, ensuring a uniform, creamy texture throughout.
- Prevents Cracks: This is perhaps the most famous benefit. Rapid temperature changes and uneven baking are primary culprits for cheesecake cracks. The water bath minimizes these fluctuations, allowing the cheesecake to rise and set smoothly without developing unsightly fissures on its beautiful surface.
- Prevents Over-Browning: The steam created by the water bath also helps to prevent the top of the cheesecake from browning too quickly or excessively, preserving its pristine appearance.
- Maintains Moisture: The moist environment helps to keep the cheesecake from drying out, resulting in a luscious, velvety texture that is the hallmark of a perfectly baked cheesecake.
Beyond the Water Bath: More Tips to Avoid Cracks on Your Cheesecake
While a water bath is a powerful tool, a few other techniques can further safeguard your cheesecake’s perfect appearance:
- Do Not Overmix the Filling: This is a golden rule for cheesecake. Overmixing, especially once the eggs are added, incorporates too much air into the batter. This trapped air will expand rapidly during baking, causing the cheesecake to puff up excessively, and then deflate and crack as it cools. Beat only until ingredients are just combined.
- Tap Out Air Bubbles: After pouring the filling into the crust, gently tap the springform pan a few times on your countertop. This helps any trapped air bubbles rise to the surface and pop, preventing them from creating craters or contributing to cracks during baking.
- Resist Opening the Oven Door: It’s tempting to peek, but opening the oven door, especially during the initial high-heat phase and then during the crucial cooling period, can cause a sudden drop in temperature. This thermal shock is a major cause of cracks, as the cheesecake rapidly contracts. Trust the process and your oven’s temperature settings.
- Gradual Cooling Post-Bake: Once baking is complete, don’t immediately pull the cheesecake out of the oven. Instead, turn off the oven and leave the cheesecake inside with the door ajar for at least an hour. This slow, controlled cooling helps the cheesecake adjust to room temperature gradually, reducing the stress on its structure and minimizing the risk of cracks.
- Ensure Room Temperature Ingredients: As noted in the ingredients section, using room temperature cream cheese, eggs, and heavy cream is vital. Cold ingredients don’t emulsify properly, leading to a lumpy batter and an increased chance of cracks.
Storing Your Delicious Leftover Cheesecake
Proper storage is essential to maintain the freshness and flavor of your chocolate chip cheesecake. Once thoroughly chilled and ready for storage, place any leftover slices or the entire cheesecake in an airtight container. This will protect it from absorbing odors from other foods in the refrigerator and prevent it from drying out. Stored correctly, your cheesecake will remain fresh and delicious in the fridge for up to one week.
Freezing Cheesecake for Future Indulgence
Cheesecake freezes beautifully, making it an excellent dessert to prepare ahead or preserve for later cravings. Follow these steps for optimal freezing:
- Freezing Individual Slices: For convenient single servings, first, allow the cheesecake to chill completely and slice it. Wrap each individual slice tightly in several layers of plastic wrap, ensuring no surface is exposed to air. Then, place the wrapped slices into an airtight freezer-safe bag or container. Properly frozen, individual cheesecake slices will maintain their quality for up to one month. Thaw individual slices in the refrigerator for a few hours before enjoying.
- Freezing a Whole Cheesecake: If you’re freezing an entire cheesecake, ensure it is completely cooled and chilled. Wrap the whole cheesecake (still on its base, if applicable) tightly in several layers of plastic wrap, followed by a layer of aluminum foil. This double layer provides maximum protection against freezer burn. Place the wrapped cheesecake in an airtight freezer-safe container or bag. A whole cheesecake can be frozen for up to 2 months. To thaw, transfer the entire wrapped cheesecake to the refrigerator overnight.
Achieving Picture-Perfect Slices: How to Cut Cheesecake Neatly
A beautifully baked cheesecake deserves to be presented with equally beautiful slices. Here are a couple of expert tips to ensure clean, professional-looking cuts every time:
- The Hot Knife Method: The most common and effective technique involves using a warm knife. Before each cut, dip a long, sharp, non-serrated knife into a tall glass of hot water for a few seconds. Wipe the knife completely dry with a clean cloth. The warm, clean blade will glide through the creamy cheesecake filling effortlessly, creating a perfectly smooth cut. Repeat this process for every single slice: warm, wipe, slice.
- The Dental Floss Trick: For an incredibly clean, almost scientific cut, dental floss (unflavored, please!) is your secret weapon. Take a piece of unflavored dental floss, long enough to stretch across the diameter of your cheesecake. Position the floss tautly over the cheesecake where you want to make your cut, then gently pull down on both ends, pressing the floss through the cheesecake until it reaches the crust. This method creates an impeccably smooth cut without any drag or residue.
Unleash Your Creativity: Exciting Recipe Variations
While this classic chocolate chip cheesecake is perfect as is, it also serves as a fantastic base for endless creative variations. Don’t be afraid to experiment and customize it to your taste or the occasion:
- Decadent Chocolate Cheesecake: Transform this recipe into a rich, deeply chocolate experience by adding ¼ to ½ cup of unsweetened cacao powder to the cream cheese filling. This will give it a beautiful dark color and intensify the chocolate flavor, complementing the chocolate chips perfectly.
- Explore Other Chip Varieties: The world of baking chips is vast and exciting! Instead of traditional chocolate chips, consider swapping them for butterscotch chips for a buttery, caramel-like flavor, or peanut butter chips for a nutty twist. White chocolate chips or mint chocolate chips can also offer delightful and unique flavor profiles. For a visually appealing cheesecake, try white and milk chocolate swirled chips.
- Fresh Berry Topping: For a lighter, fruitier touch, top your chilled cheesecake with an abundance of fresh berries such as strawberries, blueberries, raspberries, or a vibrant mix. A dollop of freshly whipped cream can complete this elegant presentation, adding a lovely contrast in texture and flavor.
- Fun with Sprinkles: To make the cheesecake more festive and colorful, especially for birthdays or parties, gently fold in about ½ cup of your favorite sprinkles into the batter just before pouring it into the crust. Make sure to use good quality sprinkles that won’t bleed color excessively.
- Rich Milk Chocolate Icing: For an extra layer of chocolate indulgence, prepare a simple milk chocolate ganache or a smooth milk chocolate icing and drizzle or spread it generously over the top of the cooled cheesecake.
- Caramel Drizzle Delight: A drizzle of gooey caramel sauce or luscious salted caramel sauce over the top of the cheesecake adds a sophisticated and irresistible layer of sweetness and complexity. A sprinkle of sea salt can further elevate a salted caramel topping.
- Nutty Crunch: If nuts are not an allergy concern, consider adding finely chopped pecans, walnuts, or almonds to the graham cracker crust for an added layer of texture and flavor, or sprinkle them over the top of the cheesecake before serving.
More Delightful Homemade Desserts You Might Enjoy
- Chocolate Chip Pumpkin Muffins: A seasonal favorite, combining warm spices with comforting chocolate.
- Nutella Ice Cream: A rich, creamy, and no-churn delight for Nutella enthusiasts.
- Quick No-Bake Chocolate Cake: When you need a chocolate fix without turning on the oven, this is your go-to!
- Gingerbread Christmas Tree Cookies: Festive and fun, perfect for holiday baking and decorating.
- Double Chocolate Chip Muffins: For those who believe more chocolate is always a good idea in a moist, fluffy muffin.
We genuinely hope you find immense joy in all the recipes we share, and that this delicious Chocolate Chip Cheesecake recipe brings a touch of magic to your kitchen. We encourage you to give it a try, savor every creamy bite, rate it based on your experience, and share this delightful creation with your cherished friends and family!
If you whip up this incredible cheesecake and love it as much as we do, please share your creations with us on INSTAGRAM using my hashtag! You might just get featured in our story! And don’t forget to follow Cookin’ With Mima on FACEBOOK, INSTAGRAM, and PINTEREST for all our latest social posts and mouth-watering recipes. Happy baking!
Chocolate Chip Cheesecake Recipe
This 10-ingredient Chocolate Chip Cheesecake is a simple yet beautiful show-stopping dessert! A golden graham cracker crust underneath a smooth cream cheese cheesecake filling, sprinkled with chocolate chips, you’re not going to believe how easy this cheesecake is to make.
- By: Mariam Ezzeddine
- Prep Time: 20 minutes
- Cook Time: 1 hour 45 minutes
- Resting Time: 8 hours
- Total Time: 10 hours 5 minutes
- Servings: 12 slices
Ingredients
For the Crust:
- 10 graham crackers, crushed
- 5 tablespoons unsalted butter, melted
- 3 tablespoons granulated sugar
- ¼ teaspoon salt
For the Filling:
- 4 (8-oz) blocks cream cheese, room temperature
- 1 ¼ cup granulated sugar
- 4 eggs, room temperature
- ½ cup heavy cream, room temperature
- 1 tablespoon vanilla extract
- 1 ½ cup chocolate chips
Instructions
For the Crust:
- Preheat your oven to 350°F (175°C). Spray a 9-inch springform pan with non-stick spray and securely wrap the outside tightly with heavy-duty aluminum foil.
- In a medium bowl, combine the crushed graham crackers, melted butter, sugar, and salt. Mix thoroughly until fully combined; the mixture should resemble wet sand.
- Firmly press the crumbs evenly into the bottom of the prepared pan.
- Bake the crust for 9-10 minutes, or until it turns golden brown. Remove the pan from the oven and allow it to cool completely on a wire rack while you prepare the filling.
For the Filling:
- Increase your oven temperature to 450°F (230°C).
- In the bowl of a stand mixer fitted with a paddle attachment, beat the softened cream cheese on medium speed until smooth. Add the granulated sugar and beat until fully combined and smooth.
- Add the eggs one at a time, beating just until each is incorporated. Scrape down the sides and bottom of the bowl between additions to ensure even mixing.
- Add the heavy cream and vanilla extract and beat until just combined. Gently fold the chocolate chips into the mixture using a spatula.
- Pour the cheesecake filling into the prepared pan over the cooled crust.
- To create a water bath, place the springform pan containing the cheesecake into a larger, deep roasting pan. Boil enough water to fill the roasting pan halfway up the sides of the cheesecake pan.
- Carefully pour the boiling water into the larger pan, stopping when it reaches halfway up the springform pan.
- Place the roasting pan with the cheesecake onto the center rack of your oven.
- Bake at 450°F (230°C) for 15 minutes. Then, *without opening the oven door*, reduce the temperature to 225°F (107°C) and continue to bake for 1 hour and 20 minutes to 1 hour and 35 minutes, or until only the very center of the cheesecake gently jiggles when nudged.
- Turn off the oven and leave the cheesecake inside with the oven door slightly ajar for 1 hour to cool gradually.
- Remove the cheesecake from the oven and water bath. Allow it to cool completely on the counter for at least an hour, or until it reaches room temperature.
- Transfer the cheesecake (still in its pan) to the refrigerator and chill overnight (at least 8 hours) before serving.
Nutrition
- Serving: 12 slices
- Calories: 242 kcal
- Carbohydrates: 33g
- Protein: 3g
- Fat: 11g
- Saturated Fat: 6g
- Cholesterol: 81mg
- Sodium: 153mg
- Potassium: 48mg
- Fiber: 1g
- Sugar: 27g
- Vitamin A: 371 IU
- Calcium: 26mg
- Iron: 1mg