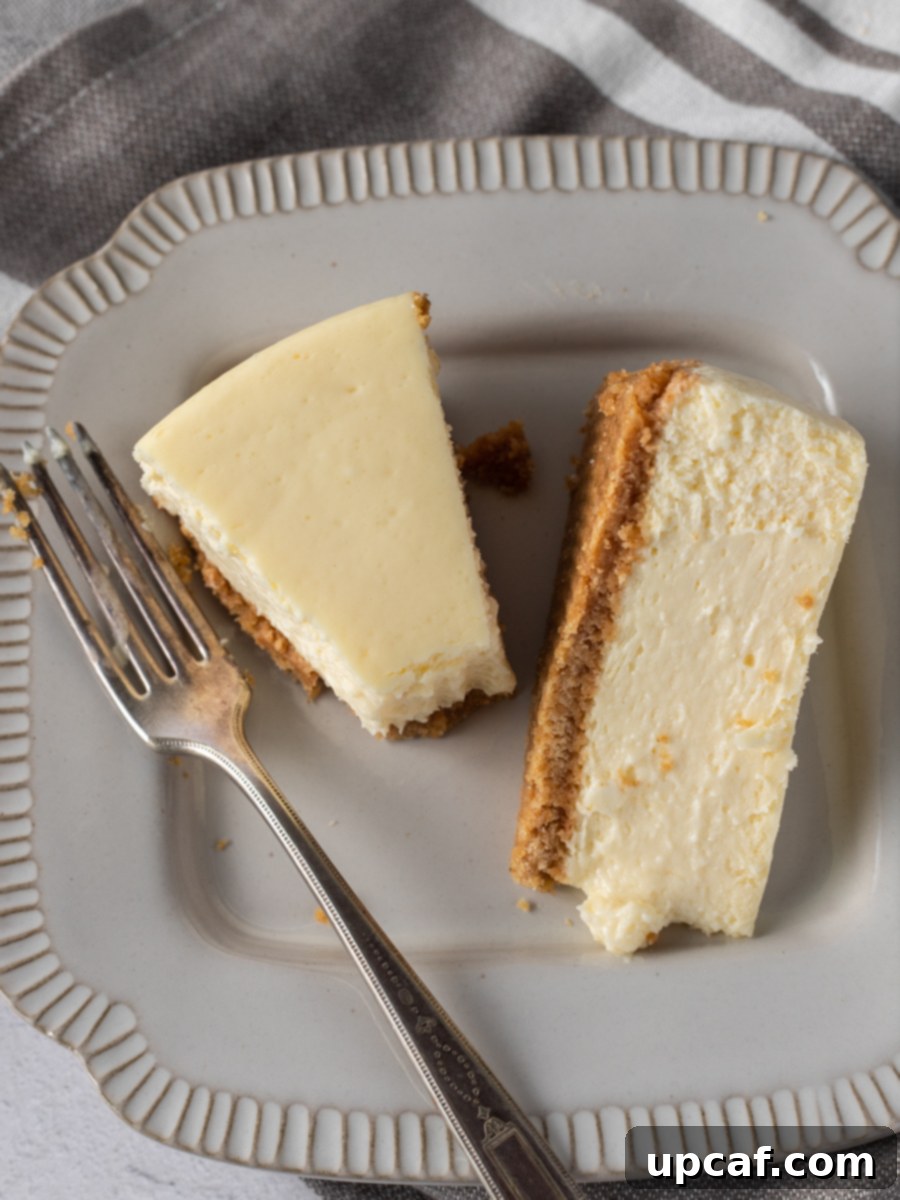
Indulge in the ultimate dessert experience with this classic, velvety smooth New York Style Cheesecake. Boasting a rich, dense cream cheese filling atop a perfectly buttery graham cracker crust, this recipe promises a truly authentic taste of New York. Forget cracks and complicated steps; our easy-to-follow guide ensures you achieve a stunning, bakery-quality cheesecake that will impress everyone. Prepare for a dessert that’s not just delicious, but also visually flawless, melting in your mouth with every decadent bite.
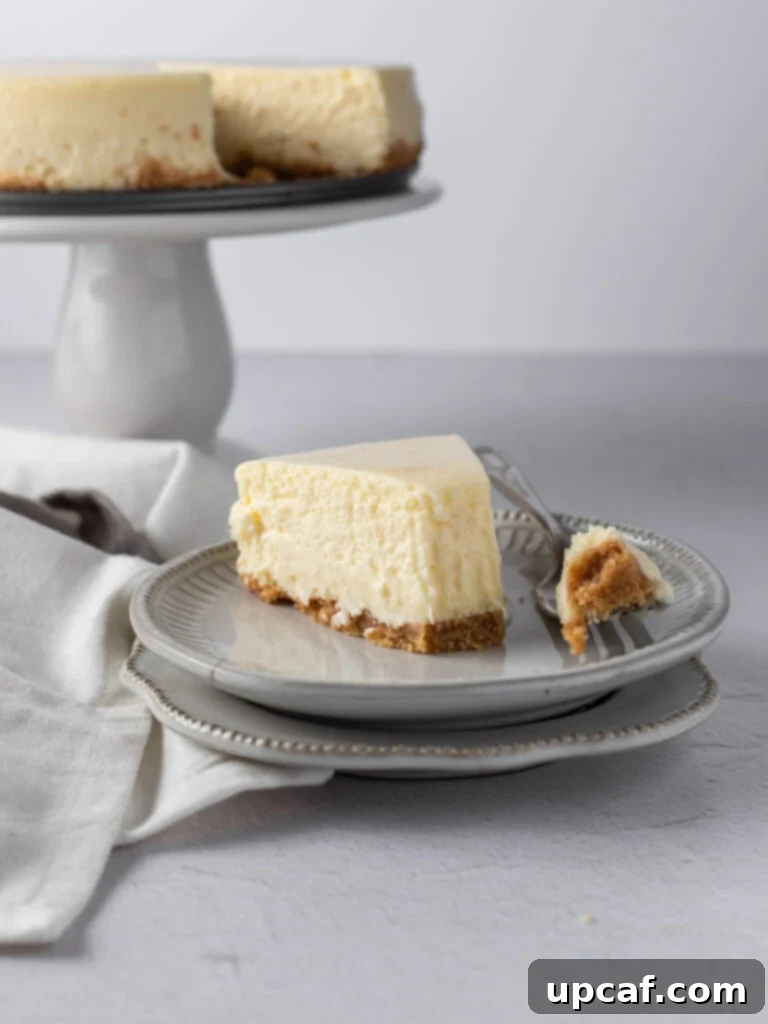
When it comes to cheesecakes, the New York style reigns supreme for a reason. But what exactly sets it apart from other cheesecakes? The secret lies in its distinctive ratio of ingredients. Unlike lighter versions that often rely on heavy cream or sour cream to thin the batter, a true New York cheesecake emphasizes a significantly higher proportion of full-fat cream cheese. This key difference is what delivers that signature dense, incredibly rich, and impossibly smooth texture that defines every slice. It’s not just a dessert; it’s an experience—a testament to creamy perfection that leaves you craving more. If you’re seeking an unapologetically opulent and classic-tasting cheesecake, then this meticulously crafted recipe is your definitive guide to achieving dessert nirvana.
Craving more delightful cheesecake creations? Don’t miss my Chocolate Chip Cheesecake for a classic with a twist, or try my innovative Cheesecake Brownie Fudge Bars for a decadent fusion dessert.
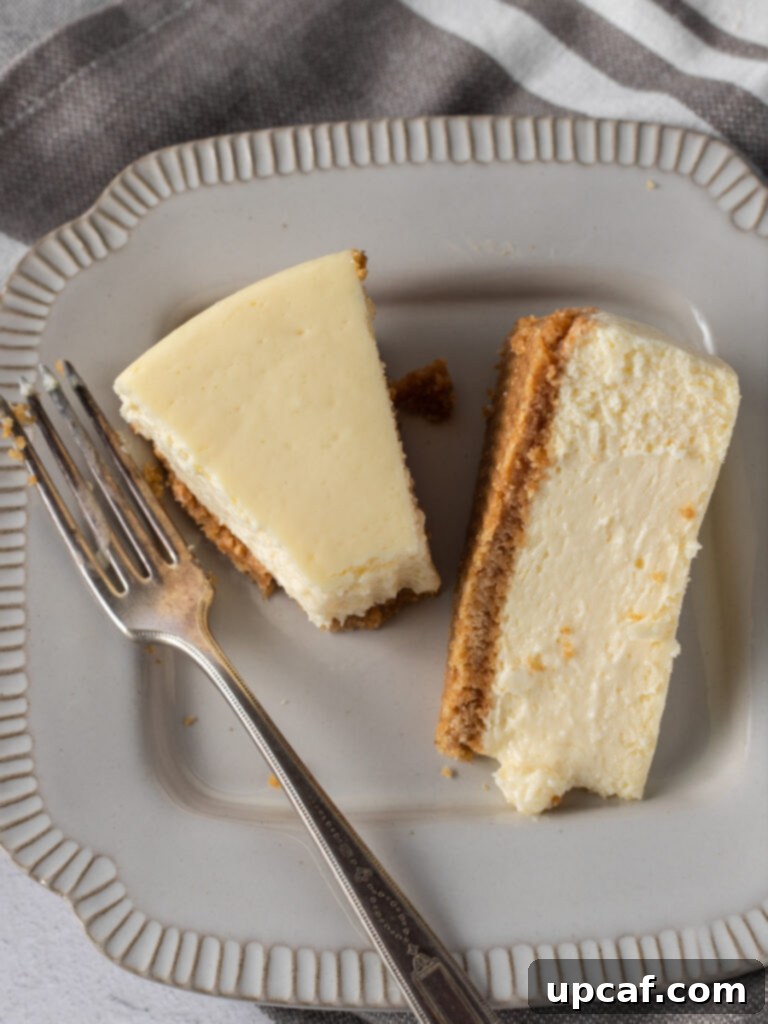
Why You’ll Adore This Authentic New York Style Cheesecake Recipe
Preparing a homemade New York style cheesecake might seem daunting at first glance, but this recipe is designed to make the process enjoyable and remarkably straightforward. Here’s why this will become your go-to cheesecake recipe:
- Effortlessly Simple: Many believe a New York cheesecake is an elaborate undertaking. While the total time in the recipe card accounts for baking and essential chilling, the active preparation steps are surprisingly minimal and quick. You’ll be amazed at how easily these few simple steps come together to create such an exquisite dessert, leaving you to wonder why you didn’t attempt it sooner. It’s perfect for both seasoned bakers and ambitious beginners.
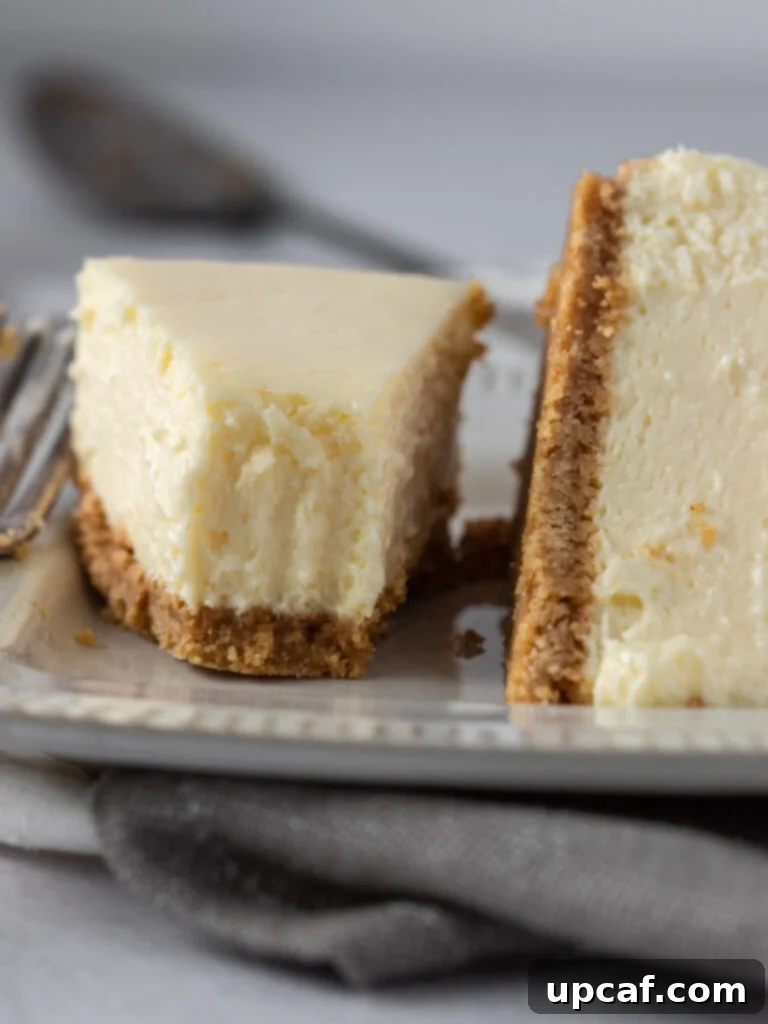
- Unforgettable Flavor and Texture: Imagine a forkful of incredibly rich, velvety cream cheese filling, perfectly balanced by a sweet, buttery graham cracker crust. This cheesecake is an indulgence, practically melting in your mouth with its luxurious density. Its profound creaminess and classic tang make it the benchmark for what a cheesecake should be. It’s so satisfying, you might find it hard to resist going back for “just one more bite.”
- Perfect for Planning Ahead: Need a show-stopping dessert for a special occasion or simply want to treat yourself throughout the week? This New York style cheesecake is incredibly make-ahead friendly. It keeps beautifully when refrigerated, allowing you to prepare it a day or two in advance. This ensures maximum flavor development and provides unmatched convenience, making it ideal for entertaining or busy schedules.
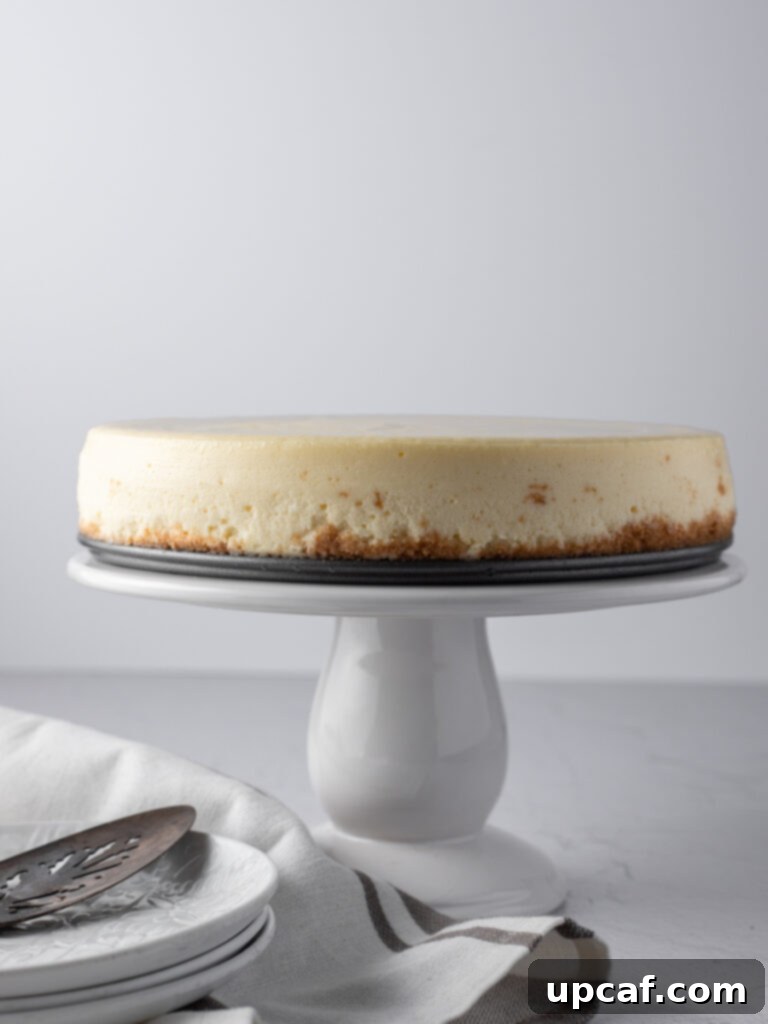
- Guaranteed Crack-Free Perfection: One of the biggest challenges in cheesecake baking is preventing unsightly cracks. This recipe incorporates specific techniques, including a crucial water bath, to ensure your cheesecake bakes evenly and gently, resulting in a flawless, smooth top every single time. Say goodbye to cracked surfaces and hello to picture-perfect presentation.
- Versatile and Customizable: While spectacular on its own, this classic New York cheesecake serves as the perfect canvas for a myriad of toppings. From fresh berries and fruit compotes to rich chocolate ganache or a drizzle of homemade caramel, it can be easily customized to suit any preference or occasion, allowing you to add your personal touch.
Essential Ingredients for Your New York Cheesecake Masterpiece
Achieving the characteristic richness and creaminess of a New York style cheesecake starts with selecting the right ingredients and preparing them properly. Here’s what you’ll need, along with a few pro tips:
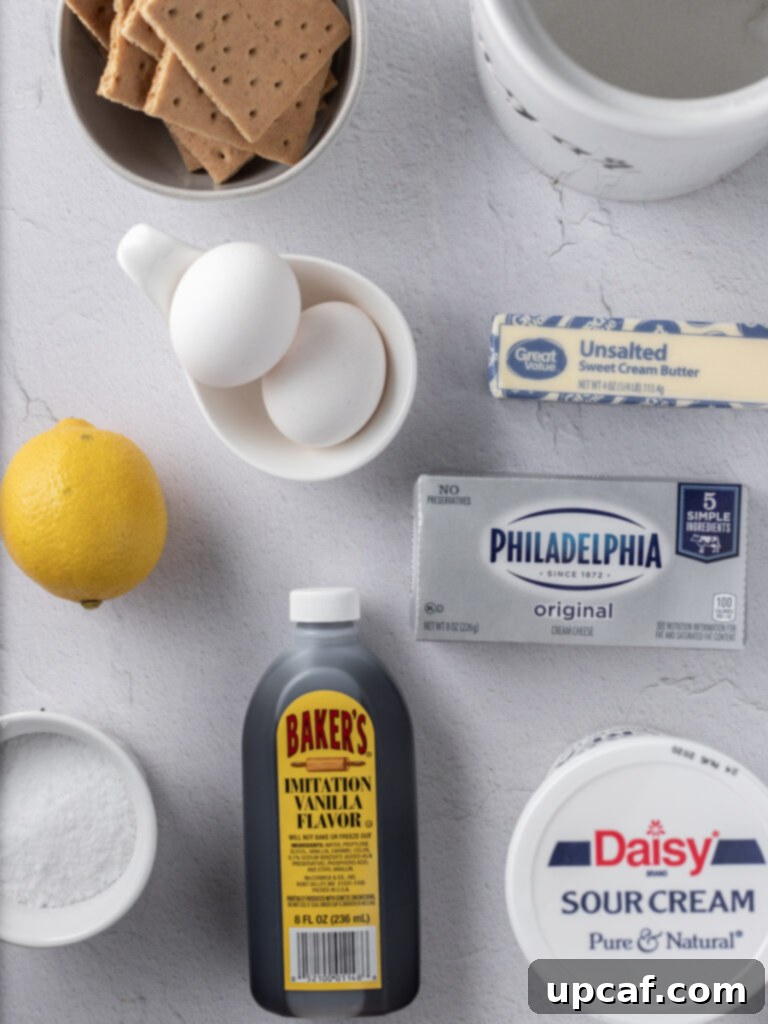
For the Irresistible Crust:
- Graham Crackers: The foundation of our cheesecake. You’ll need about 10 sheets, crushed finely to create a consistent texture. For extra convenience and to save a few minutes, you can also purchase pre-crushed graham cracker crumbs. Ensure they are ground to a fine, sandy consistency for the best crust.
- Unsalted Butter: Always opt for unsalted butter. This allows you complete control over the saltiness of your crust, ensuring it perfectly complements the sweet filling. The melted butter binds the crumbs together, creating a firm and flavorful base.
- Granulated Sugar: A small amount of sugar enhances the sweetness of the crust, making it a delicious counterpoint to the creamy filling.
- Salt: Just a pinch of salt helps to balance the sweetness and deepen the overall flavor profile of the crust, preventing it from tasting flat.
For the Luxurious Cheesecake Filling:
- Full-Fat Cream Cheese: This is the star of the show. We insist on full-fat cream cheese for that authentic dense, rich texture that New York cheesecakes are famous for. It is absolutely crucial to use room temperature cream cheese. Cold cream cheese will result in a lumpy batter and can lead to overmixing, which introduces too much air and can cause cracks. Plan ahead and take it out of the fridge at least 1-2 hours before you start baking.
- Granulated Sugar: Provides the essential sweetness for the filling, balancing the tang of the cream cheese.
- Large Eggs: Eggs provide structure and help to emulsify the filling, giving it its smooth, custardy consistency. Like the cream cheese, it’s vital to use room temperature eggs. Cold eggs can seize the cream cheese mixture, making it lumpy. Take them out of the fridge when you take out your cream cheese.
- Sour Cream: While New York cheesecakes use a high ratio of cream cheese, a touch of sour cream adds a subtle tang and helps achieve that signature creamy, smooth texture without thinning it out excessively. It also needs to be at room temperature for seamless incorporation.
- Vanilla Extract: A splash of good quality vanilla extract enhances all the flavors, adding a warm, aromatic depth to the cheesecake.
- Freshly Squeezed Lemon Juice: This secret ingredient brightens the flavor profile, cutting through the richness of the cream cheese with a subtle, zesty lift. Freshly squeezed is always best for optimal taste.
Mastering the Art: How to Bake Your New York Style Cheesecake
Creating a flawless New York style cheesecake is a rewarding process. Follow these detailed steps to ensure a perfect, crack-free result every time:
Step-by-Step for the Crust:
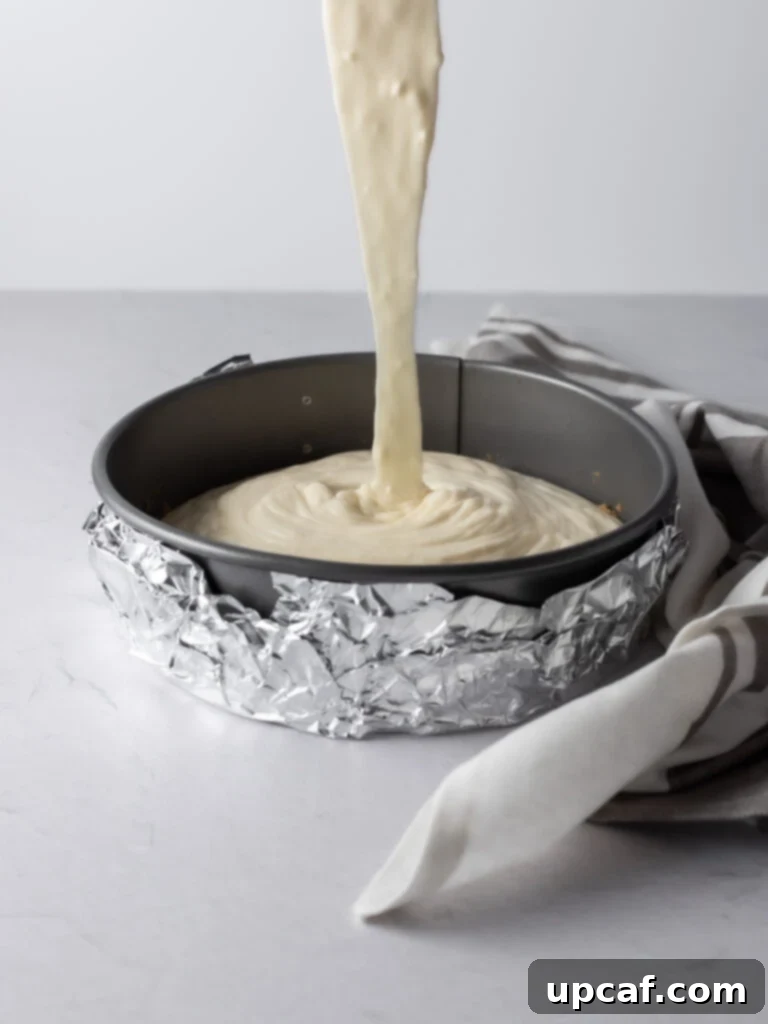
- Prepare Your Oven and Pan: Begin by preheating your oven to 350°F (175°C). Take your 9-inch springform pan and spray the inside with a non-stick cooking spray. This aids in easy release later. Crucially, wrap the entire outside of the pan tightly with heavy-duty aluminum foil. This forms a protective barrier to prevent water from the water bath seeping into the crust.
- Craft the Crumb Mixture: In a medium-sized bowl, combine your finely crushed graham crackers, melted unsalted butter, granulated sugar, and salt. Mix thoroughly until all ingredients are fully incorporated and the mixture resembles wet sand. This consistency is key for a firm crust.
- Press the Crust: Transfer the graham cracker mixture into the bottom of your prepared springform pan. Using the bottom of a flat measuring cup or your hands, firmly and evenly press the crumbs into a compact layer across the base of the pan. Ensure it’s a tight, even layer for stability.
- Pre-Bake the Crust: Place the pan in the preheated oven and bake for 9-10 minutes, or until the edges are golden brown and fragrant. This pre-baking step helps to set the crust and prevents it from becoming soggy. Once baked, remove the pan from the oven and allow it to cool completely on a wire rack while you prepare the filling. Cooling is essential to prevent the hot crust from melting the cream cheese filling.
Step-by-Step for the Creamy Filling:
- Adjust Oven Temperature: Once the crust is cooling, increase your oven temperature to 450°F (230°C). This initial high heat helps to set the cheesecake edges before the temperature is reduced for a slow bake.
- Cream the Cheese: In the bowl of a stand mixer fitted with a paddle attachment (or using a hand mixer), beat the room temperature cream cheese on medium speed until it is perfectly smooth and free of any lumps. This can take a few minutes. Then, gradually add the granulated sugar and continue beating until the mixture is fully combined, light, and wonderfully smooth. Remember, avoid overmixing at this stage to prevent incorporating too much air.
- Incorporate the Eggs: Add the room temperature eggs one at a time. After each egg addition, beat just until it is combined. Make sure to scrape down the sides and bottom of the bowl thoroughly between additions to ensure an even mixture. This careful approach is vital for a smooth texture and to avoid air bubbles.
- Add Finishing Touches: Finally, add the room temperature sour cream, vanilla extract, and freshly squeezed lemon juice to the mixture. Beat on low speed until *just* combined. Stop mixing as soon as everything is incorporated to prevent over-aeration.
- Pour the Filling: Carefully pour the prepared smooth cheesecake filling into the cooled, pre-baked graham cracker crust in the springform pan. Gently tap the pan on your countertop a few times to release any trapped air bubbles.
- Prepare the Water Bath: Place the springform pan containing the cheesecake into a larger, deep roasting pan. Bring enough water to a boil to fill the roasting pan halfway up the sides of the springform pan.
- Add Boiling Water: Carefully pour the boiling water into the larger roasting pan, making sure not to splash any water into the cheesecake itself. The water level should reach about halfway up the springform pan.
- Bake with Precision: Carefully transfer the roasting pan with the cheesecake to the center rack of your preheated oven. Bake at 450°F (230°C) for 15 minutes. This initial high heat creates a beautiful golden crust.
- Reduce Heat and Continue Baking: After 15 minutes, reduce the oven temperature to 225°F (105°C) without opening the oven door. Continue baking for an additional 1 hour and 20 minutes to 1 hour and 35 minutes. The cheesecake is done when only the very center (about a 2-inch diameter) jiggles slightly when gently shaken. The edges should appear set.
- Chill for Perfection: Once baked, turn off the oven and leave the cheesecake inside with the oven door ajar for one hour. This gradual cooling prevents sudden temperature changes that can cause cracks. After an hour, remove the cheesecake from the oven and let it rest on the counter until it reaches room temperature. Finally, transfer the cheesecake (still in its pan) to the refrigerator to chill overnight, or for a minimum of 8 hours. This prolonged chilling is essential for the cheesecake to firm up, develop its full flavor, and achieve its iconic dense texture.
The Magic of a Water Bath: Why It’s Crucial for Cheesecake Success
Baking a cheesecake in a water bath, often called a bain-marie, is a technique beloved by professional bakers and is absolutely essential for achieving that signature crack-free, creamy New York style cheesecake. So, what exactly does this method accomplish?
The water bath creates a moist, consistent, and gentle cooking environment for the delicate cheesecake batter. Here’s how it works wonders:
- Prevents Cracks: This is arguably the most significant benefit. Cheesecake batter contains a high amount of dairy and eggs, which are prone to curdling and cracking when subjected to direct, dry heat. The steam generated by the water bath adds humidity to the oven, which prevents the surface of the cheesecake from drying out and baking too quickly. This even heating allows the cheesecake to expand gradually and uniformly, reducing the likelihood of cracks forming as it cools.
- Ensures Even Baking: The water acts as a thermal buffer, regulating the temperature around the cheesecake pan. It prevents the edges from baking and setting before the center, leading to a perfectly even bake from rim to core. Without a water bath, the edges would often overcook and dry out, while the center might remain underbaked or soufflé excessively.
- Promotes Creamy Texture: The gentle, moist heat of the water bath helps the cheesecake bake slowly and consistently, resulting in an incredibly smooth, custardy, and melt-in-your-mouth texture. It prevents the eggs from overcooking, which could otherwise lead to a rubbery or grainy consistency. Instead, you get a silky, rich filling that is the hallmark of a great New York cheesecake.
- Prevents Rising and Deflating: Cheesecakes, particularly those baked without a water bath, can rise dramatically during baking and then dramatically deflate as they cool, which often leads to cracks. The stable temperature provided by the water bath minimizes this rapid rise and fall, encouraging a more controlled setting and a stable, flat surface.
Expert Tips to Guarantee a Crack-Free Cheesecake
While a water bath is a game-changer, several other crucial techniques contribute to baking a perfectly smooth, crack-free New York style cheesecake. Incorporating these tips into your baking routine will elevate your cheesecake game:
- Avoid Overmixing the Filling: This is paramount. Overmixing, especially after adding the eggs, incorporates excessive air into the batter. During baking, as this trapped air tries to escape, it can create air pockets and cause the cheesecake to rise too much, only to collapse and crack as it cools. Mix only until ingredients are just combined and smooth.
- Use Room Temperature Ingredients: As highlighted in the ingredient section, ensuring your cream cheese, eggs, and sour cream are at room temperature is non-negotiable. Cold ingredients will not emulsify properly, leading to a lumpy batter that requires more mixing, increasing the risk of over-aeration and cracks.
- Gentle Tap to Release Air Bubbles: After pouring the filling into the prepared pan, gently tap the pan on your countertop a few times. This simple action helps to bring any large air bubbles to the surface, where they can pop before baking. This technique, similar to preparing macarons, contributes to a denser, smoother interior and reduces the chance of cracks.
- Gradual Cooling is Key: Sudden temperature changes are a cheesecake’s worst enemy. After the baking time is complete, do not immediately remove the cheesecake from the oven. Instead, turn off the oven and leave the cheesecake inside with the oven door propped open slightly for at least an hour. This slow, gradual cooling period allows the cheesecake to adjust to the temperature change gently, preventing rapid contraction and cracking.
- Resist Opening the Oven Door: During the baking process, especially in the first hour, avoid the temptation to open the oven door. Each time the door is opened, a rush of cool air enters the oven, causing a significant and sudden drop in temperature. This abrupt change can disrupt the delicate baking process of the cheesecake, leading to uneven baking and, ultimately, cracks. Trust the process and your oven.
- Don’t Overbake: An overbaked cheesecake will have a rubbery texture and is highly prone to cracking. The cheesecake is done when the edges are set, but the center (about a 2-inch circle) still has a slight jiggle. It will continue to set as it cools and chills.
Frequently Asked Questions About New York Style Cheesecake
Have questions about making, storing, or serving your cheesecake? Here are answers to some common inquiries:
If you find yourself with the rare treat of leftover cheesecake, ensure it stays fresh by wrapping it tightly in plastic wrap or placing it in an airtight container. Store it in the refrigerator, where it will remain delicious for up to a week. This makes our New York style cheesecake recipe an ideal make-ahead dessert, allowing you to enjoy its rich flavor for several days.
Absolutely! Cheesecake freezes exceptionally well, making it perfect for long-term storage or preparing individual portions. You can freeze it as single slices or as a whole cake. For slices, wrap each piece individually in plastic wrap, then again in aluminum foil, and place them in a freezer-safe bag. For a whole cheesecake, wrap it thoroughly in several layers of plastic wrap followed by aluminum foil. Freeze for up to three months for optimal freshness.
To defrost a whole frozen cheesecake, transfer it from the freezer to the refrigerator and allow it to thaw overnight. This slow thawing process helps maintain its texture and prevents condensation. If you are thawing a single slice, you can let it sit at room temperature for approximately an hour, depending on its size, until it’s ready to enjoy.
Wrapping your springform pan tightly with heavy-duty aluminum foil is a critical step when using a water bath. While springform pans are designed to be relatively watertight, they can sometimes leak, especially older or well-used pans. The foil provides an extra layer of protection, acting as a barrier to prevent any water from the bath from seeping into your cheesecake crust. This ensures your graham cracker crust remains perfectly crisp and never soggy.
To achieve an evenly pressed and compact graham cracker crust before baking, utilize a sturdy object with a flat bottom. A flat-bottomed measuring cup is an excellent tool for this task. Its flat base allows you to press down firmly and evenly across the entire surface, while its round edge helps you create a neat and uniform edge along the sides of the springform pan. Consistent pressure ensures a solid crust that won’t crumble.
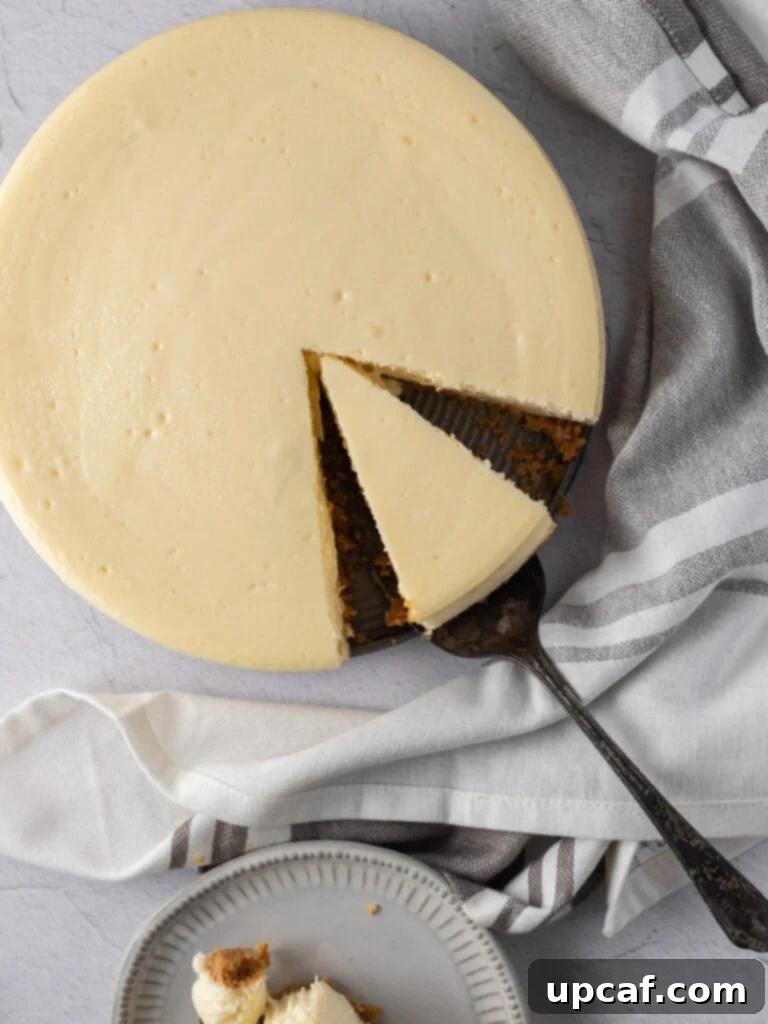
For a clean, professional-looking presentation of your New York cheesecake slices, a simple trick makes all the difference. Run your sharp knife under hot water, then wipe it clean and dry. Make a slice, and repeat the process—running the knife under hot water and wiping it clean—between each cut. This warming and cleaning action ensures a smooth, precise cut that glides through the dense cheesecake without sticking or tearing.
The beauty of this classic New York style cheesecake is its versatility with toppings! It serves as the perfect foundation for almost any addition. Get creative with freshly made whipped cream, vibrant strawberry topping, sweet blueberry topping, a decadent drizzle of Homemade Caramel Sauce, rich chocolate ganache, or even a simple dusting of cocoa powder. Fresh berries like raspberries or blackberries also add a beautiful touch and a burst of complementary flavor.
More Irresistible Dessert Recipes You’ll Love
If you enjoyed baking this New York Style Cheesecake, be sure to explore more delightful creations from my kitchen:
- Creamy Lemon Pie
- Nutella Ice Cream
- Quick No-Bake Chocolate Cake
- Gingerbread Christmas Tree Cookies
- Double Chocolate Chip Muffins
I genuinely hope you find immense joy in every recipe I share with you, especially this exquisite New York Style Cheesecake. I encourage you to try it, savor every moment, rate it honestly, and share this culinary delight with your friends and family. Happy baking!
If you whip up this incredible recipe and love it as much as I do, please share your creation using my hashtag on INSTAGRAM for a chance to be featured in my stories! Don’t forget to follow Cookin’ With Mima on FACEBOOK |INSTAGRAM |PINTEREST to stay updated with all my latest social posts and delicious recipes.
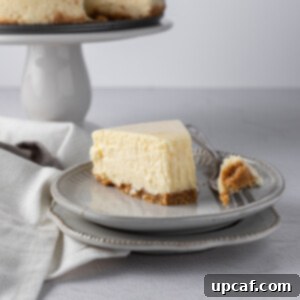
New York Style Cheesecake
Ingredients
For Crust:
- 10 sheets graham crackers, crushed
- 5 tablespoons unsalted butter, melted
- 3 tablespoons granulated sugar
- ¼ teaspoon salt
For Filling:
- 4 (8-ounce) blocks cream cheese, room temperature
- 1 ½ cup granulated sugar
- 6 whole eggs, room temperature
- ½ cup sour cream, room temperature
- 1 tablespoon vanilla extract
- 1 tablespoon freshly squeezed lemon juice
Instructions
For Crust:
- Preheat your oven to 350°F (175°C). Spray a 9-inch springform pan with non-stick spray and wrap the outside tightly with heavy-duty foil.
- In a medium bowl, combine the crushed graham crackers, melted butter, sugar, and salt. Mix until fully combined. It should have the texture of wet sand.
- Firmly press the crumbs into the bottom of the prepared pan, ensuring an even layer.
- Bake the crust for 9-10 minutes or until golden brown. Remove the pan from the oven and allow to cool completely on a wire rack while you prepare the filling.
For Filling:
- Preheat your oven to 450°F (230°C).
- In the bowl of a stand mixer fitted with a paddle attachment, beat the room temperature cream cheese on medium speed until smooth. Add the sugar and beat until fully combined and smooth.
- Add the room temperature eggs one at a time, combining fully after each addition. Scrape down the sides and bottom of the bowl between each egg.
- Add the room temperature sour cream, vanilla extract, and lemon juice. Beat on low speed until just combined. Do not overmix.
- Pour the filling into the cooled, prepared crust in the springform pan. Gently tap the pan on the counter a few times to release any air bubbles.
- Place the cheesecake-filled springform pan into a larger, deep roasting pan.
- Boil enough water to fill the roasting pan up to halfway up the springform pan. Carefully pour the boiling water into the roasting pan, making sure no water splashes into the cheesecake.
- Place the roasting pan on the center rack of your oven.
- Bake for 15 minutes at 450°F (230°C), then reduce the oven temperature to 225°F (105°C) and bake for an additional 1 hour and 20 minutes to 1 hour and 35 minutes, or until only the very center of the cheesecake (about 2 inches) jiggles slightly when gently shaken.
- Turn off the oven and leave the cheesecake inside with the oven door ajar for one hour to cool gradually. Remove the cheesecake from the oven and allow it to rest on the counter until it reaches room temperature. Transfer the cheesecake to the fridge to chill overnight (at least 8 hours) before serving.
Notes
- Avoid overmixing your cheesecake filling, as this can incorporate too much air, leading to air bubbles and potential cracks during baking as the air tries to escape.
- Gently tap your cheesecake pan on the countertop a few times after pouring the filling. This helps to pop any air bubbles that may have formed, contributing to a smoother texture.
- Do not open the oven door during the baking process, especially in the first hour. Cold air entering the oven can cause the cheesecake to bake unevenly and crack.
Nutrition
Serving: 12 slices |
Calories: 283 kcal |
Carbohydrates: 40g |
Protein: 8g |
Fat: 10g |
Saturated Fat: 5g |
Trans Fat: 1g |
Cholesterol: 103mg |
Sodium: 364mg |
Potassium: 148mg |
Fiber: 1g |
Sugar: 33g |
Vitamin A: 339IU |
Vitamin C: 1mg |
Calcium: 133mg |
Iron: 1mg
Like this recipe? Rate and comment below!
