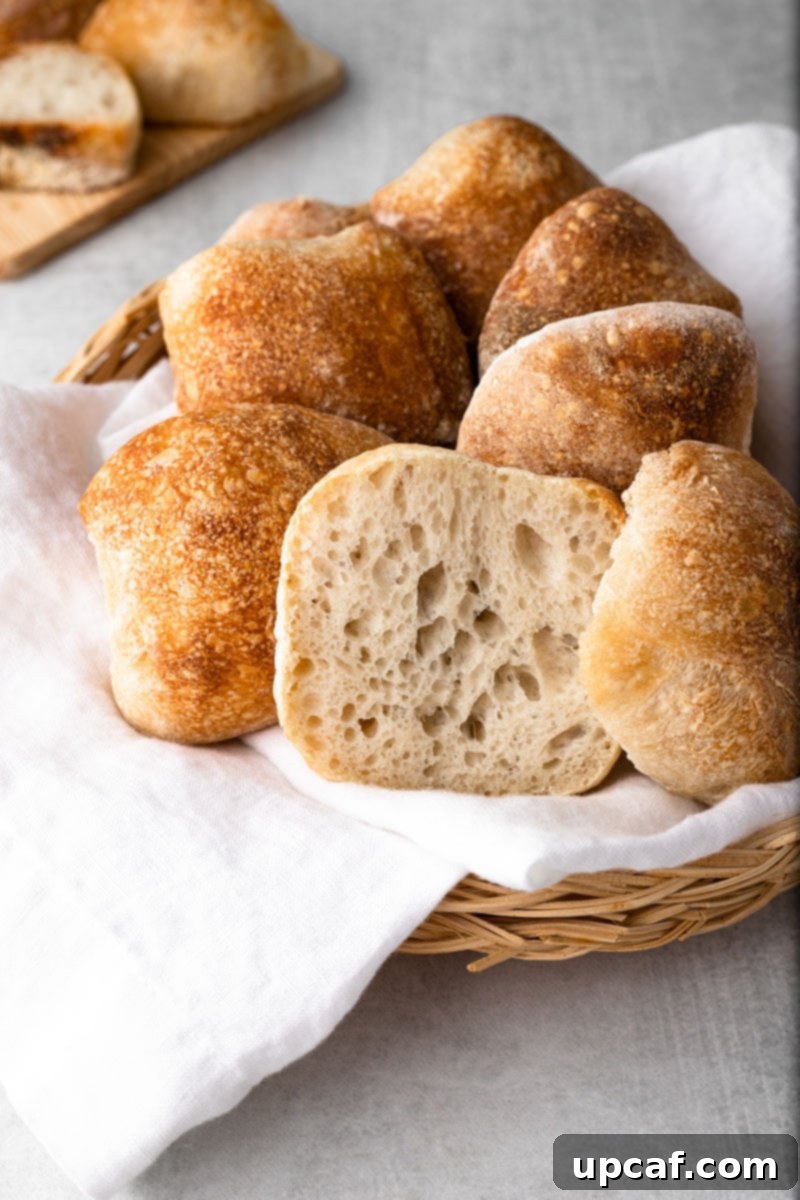
The Ultimate Guide to Baking Irresistible Homemade Ciabatta Rolls
Imagine biting into a perfectly golden, delightfully crisp crust, revealing an interior that’s incredibly soft, airy, and full of character. That’s the magic of homemade Ciabatta Rolls – and with this comprehensive guide, you’re about to unlock the secret to baking them right in your own kitchen! Forget store-bought versions; these authentic Italian-style bread rolls offer an unmatched freshness and texture that will elevate any meal. Whether you’re an experienced baker or just starting your journey into the world of yeast and flour, our easy-to-follow ciabatta roll recipe transforms simple pantry staples into extraordinary bread.
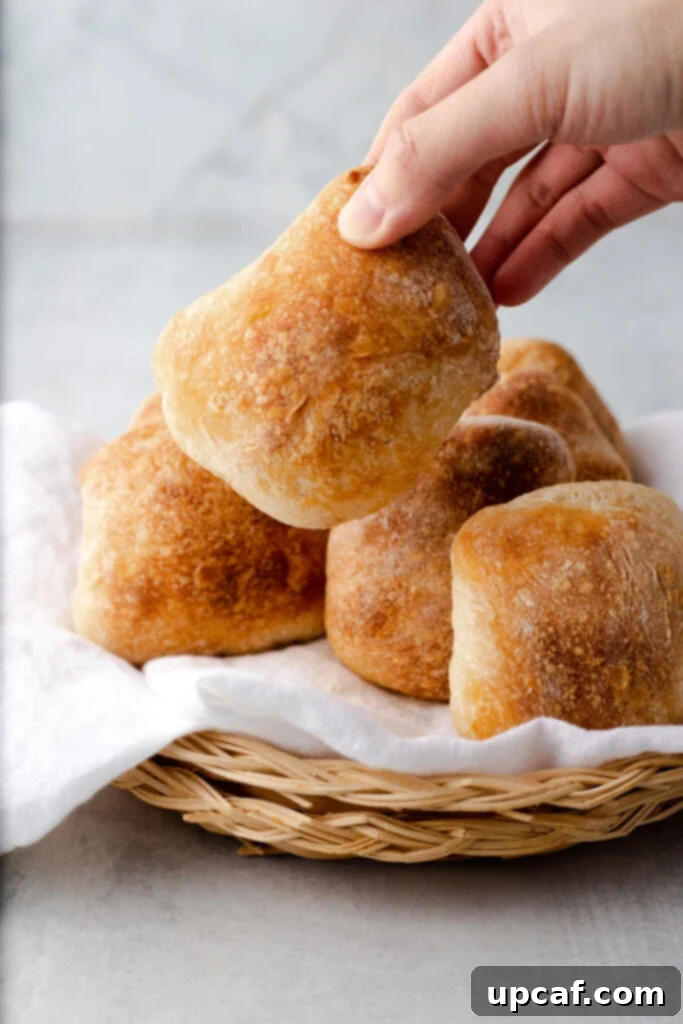
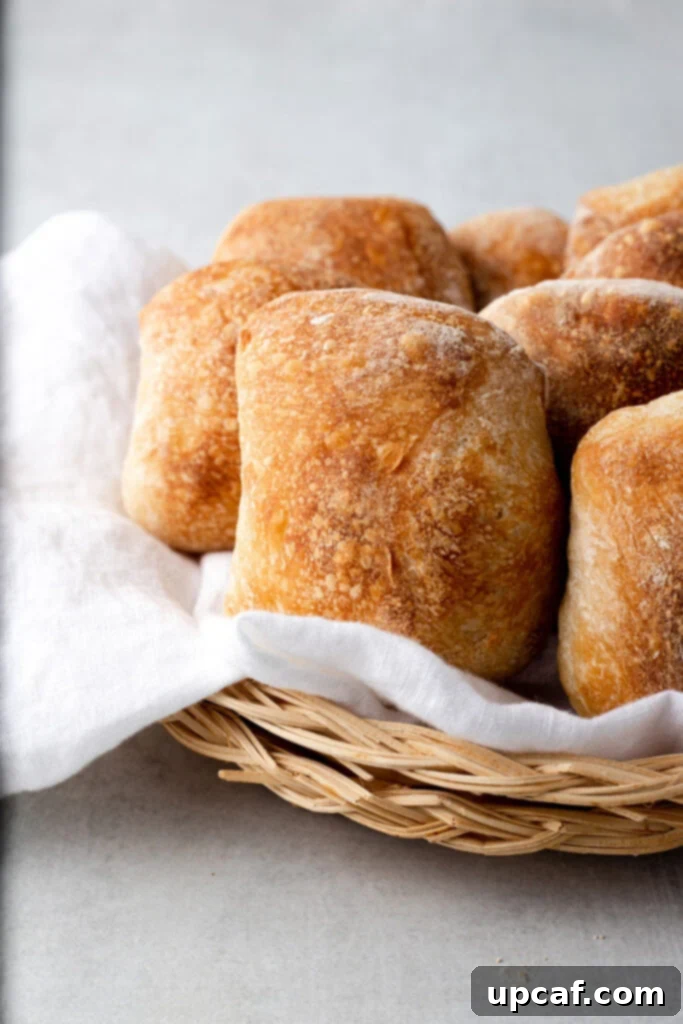
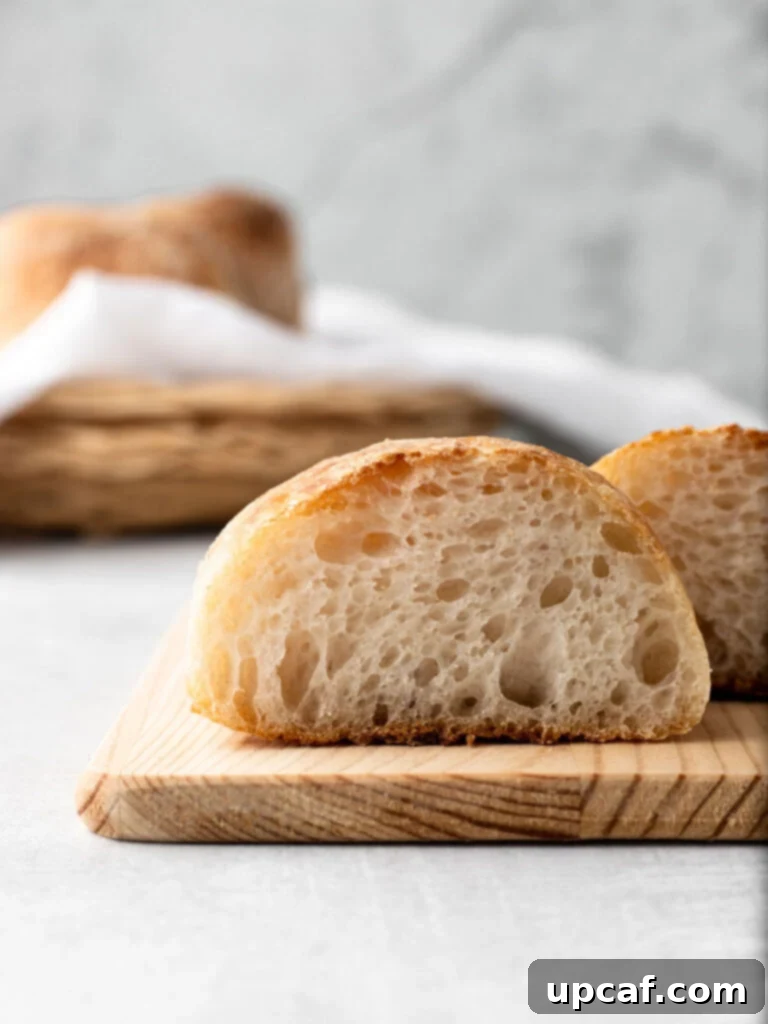
Ciabatta, which translates to “slipper” in Italian due to its distinctive flat shape, is celebrated for its open, porous crumb and wonderfully chewy texture. Our recipe ensures you achieve that signature light and airy structure with a gloriously crunchy crust every single time. Beyond their incredible taste, these homemade ciabatta buns are incredibly versatile. Serve them warm as a sophisticated side dish, slice them horizontally to create epic sandwiches bursting with flavor, or simply tear them apart and dip into your favorite olive oil or creamy tomato soup for a comforting snack. The best part? You only need a handful of basic ingredients, most of which are probably already in your pantry. Get ready to impress your family and friends with artisan-quality bread that’s surprisingly simple to make.
Ready to dive deeper into the world of baking? Explore more of our beloved bread recipes, like the effortlessly delicious No-Knead Artisan Bread for busy days, or the rich and beautiful Easy Challah Bread, perfect for special occasions. But first, let’s master these irresistible ciabatta rolls!
Why These Homemade Ciabatta Rolls Will Become Your New Favorite
There are countless reasons why baking your own ciabatta rolls at home is a truly rewarding experience. Beyond the incredible aroma that will fill your kitchen, here’s why you’ll quickly fall in love with this recipe:
- Unmatched Versatility: Ciabatta’s neutral yet flavorful profile makes it incredibly adaptable. Halve them horizontally to create gourmet sandwiches layered with your favorite fillings – from classic Italian cold cuts and fresh mozzarella to grilled vegetables and a smear of pesto. They are the perfect vessel for a hearty breakfast sandwich or a light lunch. Beyond sandwiches, rip these airy rolls into rustic pieces to dip into rich olive oil, balsamic vinegar, or a warm bowl of creamy tomato soup. Serve them as an elegant side dish with pasta, salads, or roasted meats, or even transform them into delectable cheesy garlic bread for an appetizer everyone will adore.
- Surprisingly Simple to Make: Don’t be intimidated by the artisan appearance of ciabatta. Our detailed, step-by-step instructions break down the process into manageable stages, making homemade ciabatta accessible even for novice bakers. While it involves a few resting periods, the active hands-on time is minimal, allowing you to achieve bakery-quality results with ease. The satisfaction of pulling these warm, crusty rolls from your oven is truly unparalleled.
- Pure, Wholesome Ingredients (No Added Sugars): Many commercial breads contain added sugars, preservatives, and conditioners. This ciabatta recipe keeps it wonderfully simple and pure. Made with just bread flour, water, yeast, and salt, it’s a wholesome choice for anyone looking to reduce sugar intake or simply enjoy bread in its most authentic form. You control every ingredient, ensuring a clean and delicious product free from unnecessary additives.
- The Ultimate Freshness and Flavor: There’s nothing quite like the taste and texture of freshly baked bread. The moment you pull these ciabatta rolls from the oven, you’ll be greeted by a warm, yeasty aroma that is simply divine. The difference in flavor and texture compared to store-bought bread is night and day – a truly superior experience that makes the effort worthwhile.
- Impressive Results with Minimal Effort: While ciabatta looks sophisticated, the process focuses on gentle handling and letting time do the work. The result is a stunning bread with an open crumb and rustic appearance that will undoubtedly impress guests, making you feel like a master baker without hours of intensive labor.
Essential Ingredients for Perfect Ciabatta Rolls
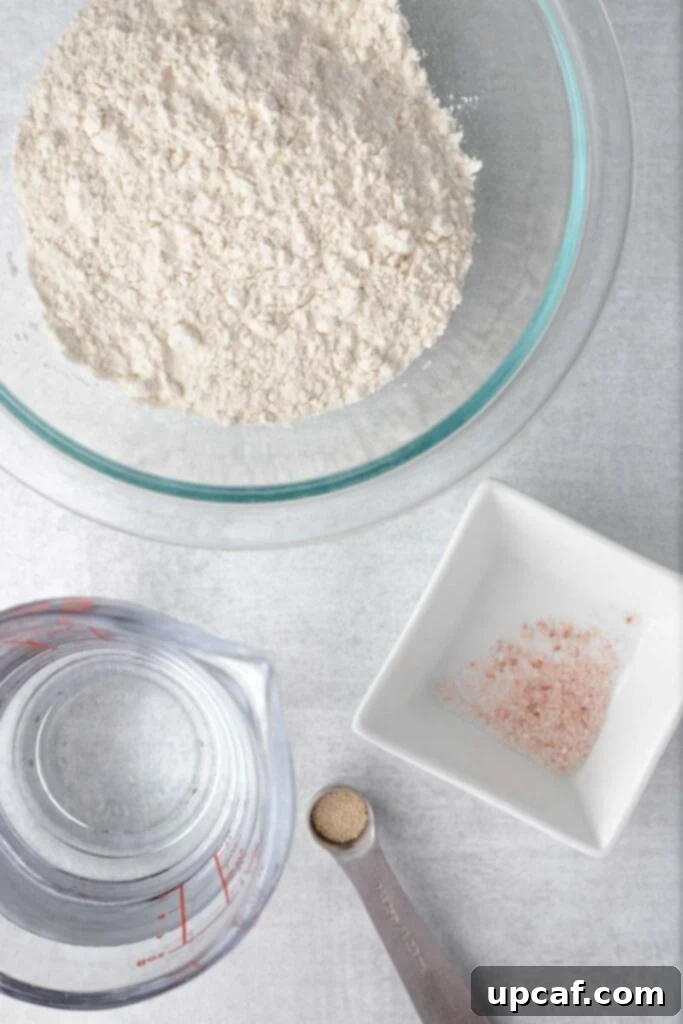
One of the beauties of ciabatta is its reliance on just a few high-quality, simple ingredients. Each component plays a vital role in developing the bread’s characteristic flavor and texture. Here’s a closer look at what you’ll need and why:
- Bread Flour: This is the star of our show. Bread flour has a higher protein content (typically 12-14%) compared to all-purpose flour. This higher protein level is crucial for developing strong gluten networks, which trap the gases produced by the yeast, resulting in ciabatta’s signature airy, open crumb and chewy texture. While you can use all-purpose flour in a pinch, your rolls might be slightly less chewy and airy.
- Instant Yeast: Our preferred choice for its convenience and reliability. Instant yeast can be mixed directly into your dry ingredients without prior proofing, saving you a step. It’s highly active and consistent, ensuring a good rise for your dough. Make sure your yeast is fresh and active for the best results; old yeast can lead to a dense, flat bread.
- Water: Often overlooked, water is more than just a liquid in bread making. It activates the yeast, hydrates the flour, and contributes to the dough’s overall consistency. For ciabatta, we use a high hydration dough, meaning a higher ratio of water to flour, which is key to achieving that open, irregular crumb structure. Lukewarm water (around 95-105°F or 35-40°C) is ideal for activating the yeast without killing it.
- Salt: A fundamental ingredient that does far more than just add flavor. Salt regulates yeast activity, preventing the dough from rising too quickly. It also strengthens the gluten structure, contributing to a better texture, and enhances the overall taste of the bread, bringing out the subtle nutty notes of the flour. Don’t skip or drastically reduce the salt!
That’s it! With these foundational ingredients, you’re well on your way to baking incredible ciabatta rolls. The simplicity of the ingredient list truly highlights the importance of technique and patience in artisan bread making.
The Secret to Authentic Ciabatta: Understanding the Biga
At the heart of our perfect ciabatta recipe lies a crucial component known as the “biga.” A biga is a type of pre-ferment, essentially a thick, Italian-style starter dough, typically made with flour, water, and a very small amount of yeast. This mixture is prepared hours or even days in advance and allowed to ferment slowly, usually in the refrigerator overnight, before being incorporated into the final dough.
Why go through the extra step of making a biga? The benefits are manifold and directly contribute to the exceptional qualities of ciabatta:
- Enhanced Flavor: The long, slow fermentation of the biga allows yeast and enzymes to break down starches and proteins in the flour, developing complex aromatic compounds. This process imbues the final bread with a deeper, more nuanced, and slightly nutty flavor profile that you simply can’t achieve with a direct dough method.
- Improved Texture and Crumb: The biga contributes to a stronger gluten structure in the final dough, which is essential for trapping gases and creating ciabatta’s signature open, irregular, and chewy crumb. It also leads to a more robust and crisp crust.
- Better Keeping Quality: Breads made with a pre-ferment tend to stay fresh longer due to the improved gluten development and slower staling process.
- Increased Dough Strength: Despite ciabatta being a high-hydration dough, the biga provides a foundational strength that makes the wet dough easier to handle and ensures it holds its shape during baking.
Our recipe begins with preparing this biga, giving it ample time to develop its magical properties. This initial step is a small investment of time that pays off immensely in the superior taste and texture of your homemade ciabatta rolls. It’s a hallmark of artisan bread making that truly makes a difference.
Step-by-Step Guide: Crafting Your Homemade Ciabatta Rolls
Baking ciabatta might seem daunting at first, but by following these detailed steps, you’ll find the process manageable and incredibly rewarding. Patience is key, as much of the work is done by time and fermentation, not intense labor.
Phase 1: Preparing the Biga (The Flavor Foundation)
- Combine Biga Ingredients: In a medium-sized mixing bowl, combine ¾ cup of bread flour, ⅕ cup of lukewarm water, and a tiny pinch of instant yeast. Mix these ingredients thoroughly with a spoon or your hands until a thick, shaggy paste forms and no dry flour remains. The mixture will be quite stiff, almost like a thick dough.
- Refrigerate Overnight: Cover the bowl tightly with plastic wrap to prevent a skin from forming. Place it in the refrigerator for at least 12-18 hours, or ideally, overnight. This slow, cold fermentation allows the biga to develop a rich, complex flavor and aroma that is characteristic of authentic ciabatta.
Phase 2: Developing the Main Dough
- Combine Main Dough: The next day, remove the biga from the refrigerator about 30 minutes before you plan to mix to allow it to come slightly closer to room temperature. In the bowl of a stand mixer fitted with the dough hook attachment, add the prepared biga, the remaining bread flour, the specified amount of water, and salt. It’s essential to use a stand mixer for this recipe due to the high hydration of the dough, which makes it very sticky and difficult to knead by hand effectively.
- Knead the Dough: Begin kneading on low speed for 2-3 minutes until the ingredients are just combined. Then increase the speed to medium-low and knead for about 10-15 minutes. The dough will be extremely wet and sticky – this is perfectly normal and desired for ciabatta! Continue kneading until the dough starts to pull away from the sides of the bowl slightly, looks somewhat smooth, and has developed some elasticity. It won’t form a tight ball like traditional bread dough.
Phase 3: The Rise and Fold (Building Structure)
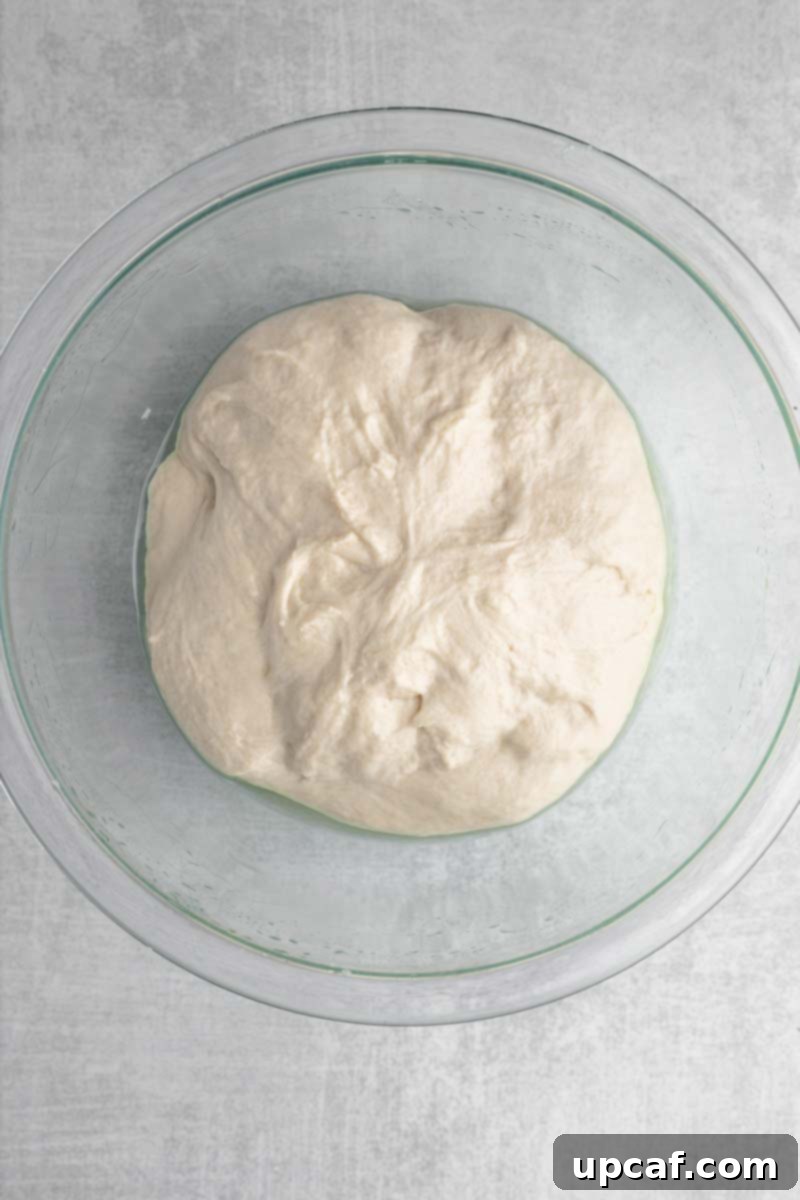
- First Rise: Lightly grease a large Pyrex bowl (or any large bowl) with olive oil. Carefully scrape the wet dough into the greased bowl. Cover the bowl loosely with plastic wrap or a damp kitchen towel and let it rise at room temperature for approximately 45 minutes. The dough should show signs of activity and begin to puff up.
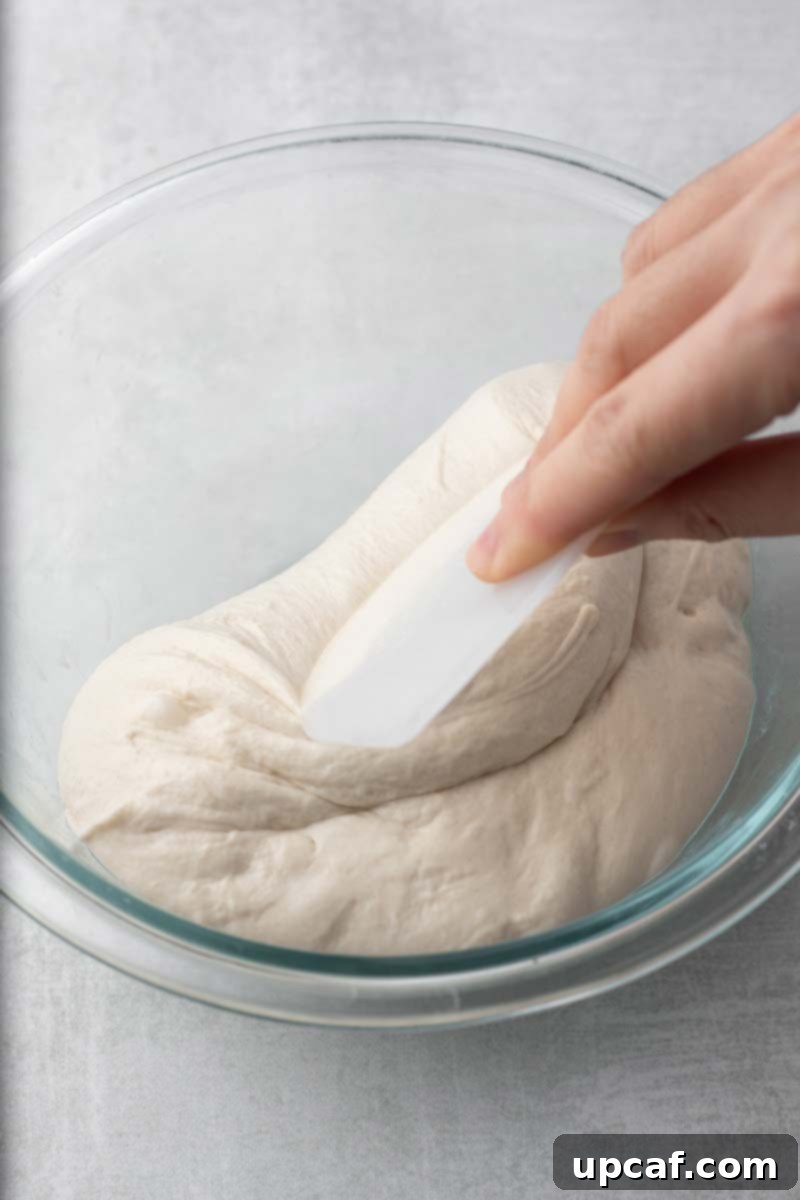
- Stretch and Fold Technique: This is a crucial step for ciabatta’s open crumb. Gently wet your hands (this prevents sticking). Reach under one side of the dough, stretch it upwards, and fold it over itself towards the center. Rotate the bowl a quarter turn and repeat this stretch-and-fold motion three more times, effectively folding the dough into a packet. This process helps to build gluten strength without traditional kneading, which is challenging with such wet dough.
- Second and Third Rises & Folds: Re-cover the bowl and let the dough rise again for another 45 minutes. Repeat the stretch-and-fold process. Perform a third rise and fold after another 45 minutes. By the end of these three cycles (totaling approximately 2 hours and 15 minutes of rising and two sets of folds), the dough should have visibly doubled in size, be full of air bubbles, and feel noticeably more elastic and cohesive.
Phase 4: Shaping and Final Proof
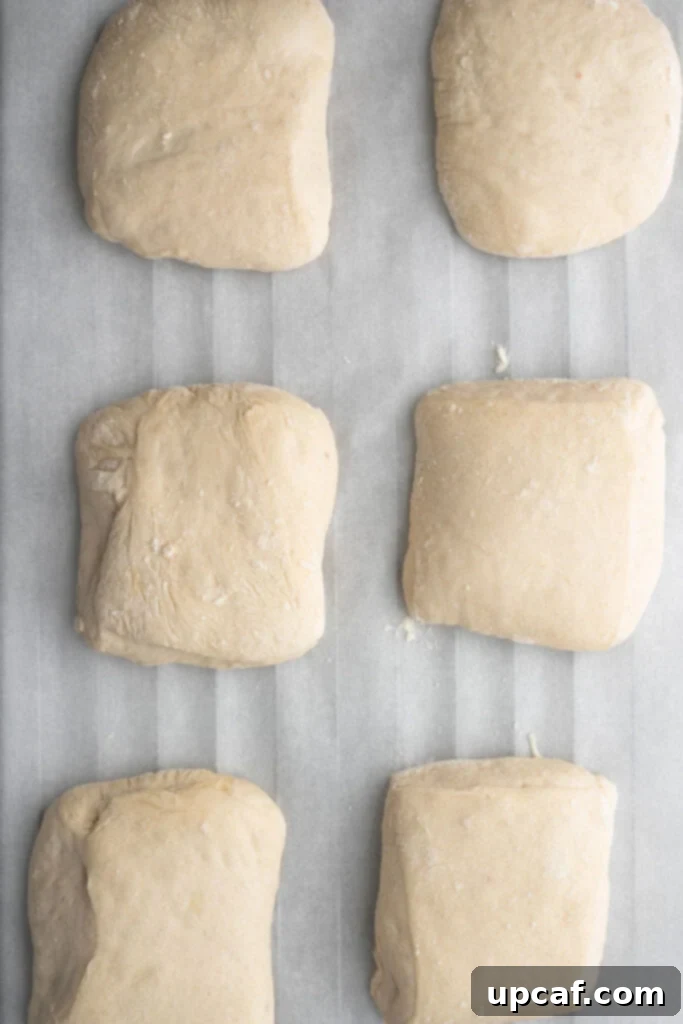
- Prepare Work Surface and Divide Dough: Generously flour your work surface – don’t be shy, as the dough is still very sticky. Gently tip the risen dough out onto the floured surface. Using a floured bench scraper (an indispensable tool for ciabatta!), gently pat the dough into a rough rectangle. Avoid degassing it too much. Flour your hands and the bench scraper, then divide the dough into 8 roughly squarish or rectangular rolls.
- Final Rest (Proofing): Carefully transfer each ciabatta roll onto a large sheet of parchment paper, leaving some space between them. Cover the rolls loosely with a clean kitchen towel or plastic wrap and let them rest for a final proof of about 20 minutes. During this time, they will slightly puff up and relax, getting ready for the oven.
Phase 5: Baking for that Perfect Crust
- Preheat Oven with Baking Surface: Place a large inverted baking pan (or a baking steel/pizza stone if you have one) into your oven. Preheat the oven to a high temperature of 450°F (230°C). Allowing the pan to preheat thoroughly is essential for creating a strong burst of steam and a crispy bottom crust.
- Bake with Steam: Once preheated, carefully slide the parchment paper with the ciabatta rolls onto the hot inverted baking pan. Immediately spray some water generously onto the dough and quickly close the oven door. This initial spray creates steam, which is vital for achieving that signature crunchy, glossy crust.
- Continue Baking and Steaming: Bake for 20 minutes. After the first 3 minutes of baking, quickly open the oven door, spray some more water on the dough and inside the oven (be careful of the hot steam!), and immediately close the door. This additional steam burst further aids crust development.
- Achieve Golden Perfection: Continue baking until the rolls have developed a beautiful golden-brown crust and sound hollow when tapped on the bottom. The internal temperature should be around 200-210°F (93-99°C).
- Cool Completely: As soon as they are done, transfer the hot ciabatta rolls to a wire cooling rack. Allow them to cool completely before slicing or serving. Cooling is crucial for the internal crumb to set properly and for the crust to remain crisp. Rushing this step can result in a gummy texture.
Expert Tips for Ciabatta Baking Success
Achieving bakery-quality ciabatta at home is within reach, especially with these helpful tips to guide you through the process:
- Verify Your Yeast Activity: Instant yeast has a shorter shelf life than active dry yeast, but both can lose potency over time. Always double-check the expiration date on your yeast package. If you’re unsure, you can proof a small amount in lukewarm water with a pinch of sugar for 5-10 minutes. If it bubbles and becomes foamy, it’s active and ready to use. Inactive yeast is the quickest way to a flat loaf.
- Embrace the Stickiness: Ciabatta dough is intentionally very wet and sticky – this is fundamental to its open, airy structure. Don’t be tempted to add extra flour during the mixing or initial handling stages, as this will lead to a dense, tough bread. Trust the process and remember that a wet dough produces a wonderfully light crumb.
- The Bench Scraper is Your Best Friend: Given the wet and sticky nature of ciabatta dough, a bench scraper (also known as a dough scraper) is an invaluable tool. It allows you to handle, lift, and divide the dough effectively without it adhering excessively to your hands or the work surface. Keep it floured!
- Mastering the Stretch and Fold: This technique is crucial for developing gluten in high-hydration doughs without traditional kneading. Be gentle but firm. The goal is to build strength and elasticity, incorporating air without deflating the dough. Wet hands are key to preventing sticking during this process.
- Creating Steam for a Superior Crust: The burst of steam in your oven during the initial baking phase is not optional; it’s essential. Steam keeps the surface of the dough moist, allowing it to expand fully before the crust sets. This leads to a thinner, crispier, and more beautifully colored crust. Spraying water directly on the dough and oven walls (carefully!) or placing a pan of hot water on the bottom rack are effective methods.
- Don’t Rush the Cooling Process: After baking, it’s tempting to cut into your warm ciabatta rolls immediately. However, allowing them to cool completely on a wire rack is vital. This enables the internal structure to set, moisture to redistribute evenly, and the crust to become truly crisp. Cutting into hot bread can result in a gummy texture.
- Use Quality Ingredients: Since there are so few ingredients, the quality of each really shines through. Use good quality bread flour and filtered water for the best flavor.
- Monitor Your Dough, Not Just the Clock: Environmental factors like room temperature and humidity can affect rising times. Instead of strictly adhering to the clock, pay attention to the dough itself. It should be visibly puffy, full of air bubbles, and have doubled (or nearly doubled) in size after its final rise.
Troubleshooting Common Ciabatta Baking Problems
Even experienced bakers encounter challenges. Here are some common issues you might face when making ciabatta rolls and how to address them:
- Dough is too sticky to handle: This is normal for ciabatta! Ensure your hands and bench scraper are generously floured when handling and dividing. Avoid adding extra flour to the main dough mix, as this will change the hydration. Work quickly and confidently.
- Ciabatta is too dense or flat:
- Inactive yeast: Always check your yeast’s freshness.
- Under-proofed dough: The dough didn’t rise enough. Give it more time in a warm spot, or ensure your room temperature isn’t too cold.
- Over-handling: Too much manipulation can knock out precious air bubbles. Be gentle, especially after the final rise.
- Not enough steam in oven: Lack of steam can cause the crust to set too quickly, preventing full expansion.
- Crust is not crispy enough:
- Insufficient steam: Ensure you’re generating enough steam at the beginning of the bake.
- Oven temperature too low: A high initial temperature helps the crust develop quickly.
- Not baked long enough: Ensure the rolls are baked until deeply golden brown.
- Cooling on a solid surface: Always cool on a wire rack to allow air circulation, preventing a soggy bottom.
- Crumb is not open and airy:
- Not enough hydration: Did you accurately measure your water? Ciabatta needs a wet dough.
- Under-developed gluten: Did you knead long enough in the mixer and perform the stretch and folds? This builds the structure needed for large air pockets.
- Over-proofing: If the dough rises too much, the gluten structure can weaken and collapse, leading to a denser crumb.
Serving Suggestions & Creative Pairing Ideas
Once your irresistible homemade ciabatta rolls are ready, the possibilities for enjoying them are endless. Here are some delicious ways to serve your freshly baked bread:
- The Quintessential Sandwich Bread: This is perhaps ciabatta’s most famous role. Its sturdy yet airy crumb is perfect for hearty sandwiches. Fill them with Italian cured meats like prosciutto or salami, fresh mozzarella, ripe tomatoes, basil, and a drizzle of balsamic glaze. Or opt for a classic chicken pesto, roast beef with provolone, or a vibrant veggie and hummus sandwich.
- Perfect for Dipping: Tear off generous chunks and serve with high-quality extra virgin olive oil for dipping. Add a sprinkle of sea salt, freshly ground black pepper, and a dash of balsamic vinegar for an elevated experience. It’s also fantastic with a warm bowl of Creamy Tomato Soup, lentil soup, or a hearty stew.
- Bruschetta Base: Slice ciabatta thinly, toast lightly, and rub with a garlic clove. Top with classic tomato bruschetta, tapenade, goat cheese and fig jam, or roasted red peppers for an exquisite appetizer.
- Garlic Bread & Cheesy Variations: Halve the rolls, spread with garlic butter, and bake until golden. For a decadent treat, sprinkle with mozzarella and parmesan cheese before baking for a cheesy garlic bread that’s perfect with pasta dishes.
- Accompaniment to Meals: Serve alongside almost any meal. It’s excellent with grilled chicken, steak, fish, or any Italian-inspired dish. The crusty exterior and soft interior provide a wonderful textural contrast to rich sauces and robust flavors.
- Breakfast & Brunch: Use ciabatta as a base for avocado toast, eggs Benedict, or even French toast for a unique twist on breakfast classics. Its robust structure holds up beautifully to wet toppings.
Storing and Reheating Your Homemade Ciabatta
To keep your delicious ciabatta rolls fresh and enjoy them for longer, proper storage is key. Following these guidelines will help maintain their texture and flavor:
- Room Temperature Storage: Once your ciabatta rolls have completely cooled (this is crucial!), store them in a plastic storage bag, a breadbox, or wrapped tightly in foil at room temperature. They are best enjoyed within 2-3 days of baking.
- Avoid Refrigeration: Do not refrigerate ciabatta bread. The cold temperature in the refrigerator causes bread to dry out and become stale much faster due to a process called retrogradation of starches. This will turn your lovely airy rolls into a dense, unappetizing texture.
- Freezing for Longer Freshness: Ciabatta freezes exceptionally well! To freeze, ensure the rolls are completely cool. Wrap each roll individually in plastic wrap, then place them together in an airtight freezer bag or container. They can be stored in the freezer for up to 3 months.
- Reheating Frozen Ciabatta: When you’re ready to enjoy, remove the desired number of rolls from the freezer. You can thaw them at room temperature for an hour or two, or for an even crispier crust, reheat them directly from frozen. Preheat your oven to 375°F (190°C). Spray the frozen rolls lightly with water (optional, but helps with crust) and bake for 10-15 minutes, or until warmed through and the crust is crisp again.
- Reheating Room Temperature Ciabatta: For rolls stored at room temperature that have lost a bit of their crispness, a quick refresh in the oven can revive them. Preheat your oven to 350°F (175°C) and bake for 5-7 minutes, or until the crust is crisp and the interior is warm.
Frequently Asked Questions About Homemade Ciabatta Rolls
The primary distinction between bread flour and all-purpose flour lies in their protein content. Bread flour contains a higher percentage of protein (typically 12-14%), which is essential for forming strong gluten networks. These strong gluten strands are what give ciabatta its characteristic chewy texture and its airy, open crumb structure. While you can substitute all-purpose flour if bread flour is unavailable, your ciabatta rolls might be slightly less chewy and have a denser crumb compared to those made with bread flour.
Absolutely! These ciabatta rolls are at their peak freshness within 3 days of baking. This makes them an excellent candidate for meal prep or for preparing ahead of a gathering. For longer storage, you can easily freeze them (see storage tips above) and reheat as needed, which is a fantastic way to enjoy fresh ciabatta anytime.
For this particular recipe, a stand mixer with a dough hook attachment is highly recommended. Ciabatta dough is intentionally very wet and sticky – a high-hydration dough – which makes it quite challenging and messy to knead by hand to the required level of gluten development. While it’s theoretically possible to achieve the right texture by hand through extensive stretch-and-fold techniques, a mixer greatly simplifies the process and ensures consistent results. If you prefer a bread recipe without needing a mixer, consider trying our No-Knead Artisan Bread.
Yes, ciabatta bread freezes beautifully! To maintain its quality, ensure the baked rolls are completely cooled. Wrap each roll tightly in plastic wrap, then place them in an airtight freezer bag or container. Properly stored, frozen ciabatta can last for up to 3 months. When you’re ready to eat, you can thaw them at room temperature or reheat them directly from frozen in a preheated oven for a fresh-baked experience.
Yes, traditionally, ciabatta bread is vegan. Our recipe uses only bread flour, water, instant yeast, and salt. It does not contain any animal products like milk, butter, or eggs, making it suitable for a vegan diet and naturally lactose-free and dairy-free.
The key to keeping ciabatta fresh is to allow it to cool completely on a wire rack after baking. Once cool, store it at room temperature in a plastic storage bag, a dedicated breadbox, or wrapped tightly in aluminum foil. Avoid refrigeration, as this rapidly dries out the bread. Stored correctly, your homemade ciabatta will stay fresh and delicious for 2 to 3 days. For longer preservation, freezing is your best option.
You can refrigerate the biga (pre-ferment) overnight as instructed in the recipe, which is crucial for flavor development. However, once you’ve mixed the main dough and it begins its primary rise, it’s generally not recommended to refrigerate the entire bulk dough for an extended period before it has fully risen. While short refrigeration might slow the rise, refrigerating a high-hydration dough like ciabatta for too long after mixing can make it even stickier and more challenging to handle and fold effectively. It’s best to follow the rising and folding schedule at room temperature for the main dough to ensure optimal gluten development and texture.
Expand Your Baking Repertoire: More Delicious Bread Recipes
If you’ve enjoyed the journey of baking these incredible ciabatta rolls, why stop there? The world of homemade bread is vast and rewarding. Here are a few more of our favorite bread recipes that we think you’ll love trying next:
- Easy Sandwich Bread: A foolproof recipe for a classic, soft, and delicious sandwich loaf that’s perfect for everyday meals and packed lunches.
- Cheesy Pesto Breadsticks: Indulge in these incredibly flavorful and addictive breadsticks, bursting with the aromatic goodness of pesto and gooey cheese – a fantastic appetizer or side.
- Easy Pumpkin Bread: A comforting and moist quick bread, infused with warm spices and the rich flavor of pumpkin, ideal for autumn mornings or a delightful snack.
Each recipe offers a unique baking experience and a delicious result, helping you build confidence and skill in the kitchen.
Baking homemade ciabatta rolls is truly one of the most satisfying culinary experiences. From the moment the aroma fills your kitchen to the first bite of that perfectly airy, crispy-crusted bread, you’ll understand why this recipe is a favorite. We encourage you to embark on this delicious journey, trust the process, and savor the incredible results. There’s nothing quite like the pride of serving bread you’ve crafted with your own hands.
We genuinely hope you enjoy this detailed guide and the mouth-watering ciabatta rolls it helps you create. We’d love to hear about your baking success! If you try this recipe and love it, please consider leaving a rating and a comment below to share your experience with other bakers. Your feedback helps our community grow and inspires more delicious creations.
Don’t forget to share your beautifully baked ciabatta rolls with us on social media! Use my hashtag #CookinWithMima on INSTAGRAM for a chance to be featured in our stories. Follow Cookin’ With Mima on FACEBOOK | INSTAGRAM | PINTEREST for daily inspiration, new recipes, and all our latest culinary adventures! Happy Baking!
Homemade Ciabatta Rolls Recipe
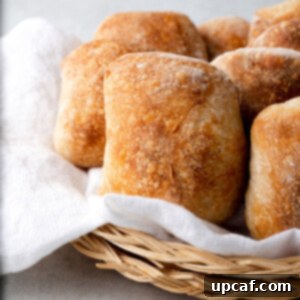
These easy homemade Ciabatta Rolls are so fluffy on the inside with a crunchy crust! You’ll love how simple it is to make a batch of ciabatta rolls with pantry staples. Use them as a side dish, as sandwich bread, or as a snack!
By: Mariam Ezzeddine
Prep Time: 1 hour 30 minutes
Cook Time: 20 minutes
Overnight Resting: 12 hours
Total Time: 13 hours 50 minutes
Servings: 8 servings
Ingredients
- 2 cups + 2 tbsp bread flour
- 1 cup water
- ⅛ tsp instant yeast
- 1 tsp salt
Instructions
Make the Biga
- In a medium bowl, mix in ¾ cups of bread flour, ⅕ cup water and yeast until well combined. Cover it with a cling wrap and refrigerate it overnight.
Make the Rolls
- Next day, in a mixing bowl with the hook dough attachment, add in the biga, remaining flour, water and salt. Knead the dough until it doesn’t stick to the sides of the bowl. Be reminded that the dough will be very wet.
- Grease a pyrex bowl with some olive oil and place the dough into the bowl. Cover it with cling wrap and let it rise for about 45 mins.
- Wet your hands slightly and stretch and fold the dough to help build the gluten. Cover it with cling wrap and let it rise again for about 45 mins. Repeat this step another time until the dough has doubled in size.
- Flour your work table generously and slowly remove the dough from the bowl. Flour your hand and bench scraper and divide the dough into 8 squarish rolls. Place the rolls on parchment paper. Cover and let them rest for about 20 mins.
- Place a large inverted baking pan into the oven and preheat the oven to 450F.
- Gradually slide the parchment paper with the dough onto the inverted baking pan. Spray some water on the dough and bake for 20 mins. At the 3rd minute of baking, spray some water again on the dough to create steam in the oven.
- When it’s done, the rolls should have a nice golden colored crust. Transfer the rolls to a cooling rack to cool completely before serving.
Notes
- Instant yeast has a shorter lifespan than active dry yeast. Make sure to check that your yeast has not expired before making these ciabatta buns.
- Due to the dough being wet and sticky, a bench scraper is very helpful to help handle and move the dough around.
- Spraying the water on the dough will help make the crust nice and crusty!
Nutrition
Calories: 227 kcal
Carbohydrates: 46 g
Protein: 8 g
Fat: 1 g
Saturated Fat: 1 g
Sodium: 294 mg
Potassium: 65 mg
Fiber: 2 g
Sugar: 1 g
Vitamin A: 1 IU
Calcium: 11 mg
Iron: 1 mg
