Indulge in the irresistible charm of these delightful Jam Thumbprint Cookies – a truly easy and rewarding baking project! Imagine tender, buttery shortbread cookies, each lovingly crowned with a vibrant dollop of crimson, fruit-filled jam. These sweet, scrumptious, and utterly addictive treats are more than just cookies; they’re miniature works of art that wouldn’t look out of place in a sophisticated patisserie display. Get ready to impress your friends and family with these colorful, classic delights that promise a burst of flavor in every bite.

These jam thumbprint cookies are not only incredibly simple to make but also deliver an unforgettable taste experience. Their soft, melt-in-your-mouth texture perfectly complements the sweet and tangy jam centers, creating a symphony of flavors that will leave everyone craving more. Whether you’re baking a batch for a cozy family treat or assembling a festive cookie box to gift during the holidays, these versatile cookies are always a hit. Their vibrant appearance and delightful taste make them a perfect addition to any seasonal celebration or a thoughtful gesture for a beloved friend.
Craving more cookie inspiration? Expand your baking repertoire with other fantastic recipes like my Cranberry Orange Shortbread Cookies, intricate Jam Linzer Cookies, traditional Danish Butter Cookies, or festive Christmas Tree Gingerbread Cookies. Each offers a unique flavor profile and a wonderful baking adventure!
Why You’ll Adore These Classic Shortbread Jam Cookies
There are countless reasons why these thumbprint cookies will quickly become a cherished recipe in your baking collection:
- Exquisite Buttery Flavor: The foundation of these cookies is a rich, light, and crisp shortbread base. Its delicate sweetness and incredible buttery notes create the perfect vessel for the luscious jam filling, ensuring a balanced and satisfying taste in every bite.
- Bursting with Fruit Jam: Each cookie is generously filled with your favorite fruit jam, adding a vibrant pop of color and an exciting layer of sweet and tangy flavor. This delightful contrast elevates the simple shortbread to something truly divine and incredibly moreish.
- Effortlessly Simple Preparation: Don’t let their elegant appearance fool you – these cookies are remarkably easy to make. Requiring only a handful of common pantry staples, you can go from mixing bowl to a tray of freshly baked cookies in approximately 30 minutes, making them ideal for last-minute treats.
- Perfect for Sharing and Gifting: Double or triple the batch with ease! These beautiful cookies are fantastic for holiday cookie exchanges, festive gatherings, or simply sharing with neighbors and loved ones. Their charming look makes them a welcome addition to any dessert platter or a thoughtful homemade gift.
- Remarkably Adaptable: The beauty of this recipe lies in its versatility. While raspberry jam is a classic choice, feel free to experiment with any jam or preserve you adore. Strawberry, apricot, cherry, or even lemon curd can transform these cookies into exciting new flavor experiences.
The Enduring Appeal of Classic Thumbprint Cookies
Thumbprint cookies, often known as Hallongrottor (Swedish for “raspberry caves”), have a rich history rooted in Scandinavian baking traditions, though variations are found in many cultures. Their enduring popularity stems from their simple yet elegant design and the delightful textural contrast between the tender cookie and the chewy jam. They represent the heartwarming essence of homemade treats – inviting, comforting, and always a pleasure to share. This recipe honors that tradition, providing a straightforward path to achieving perfectly formed, deliciously filled cookies every time. They are particularly popular during the festive season, adding a splash of color and cheer to any holiday cookie spread.
Essential Ingredients for Perfect Thumbprint Cookies
Crafting the best jam thumbprint cookies starts with understanding the role of each ingredient:
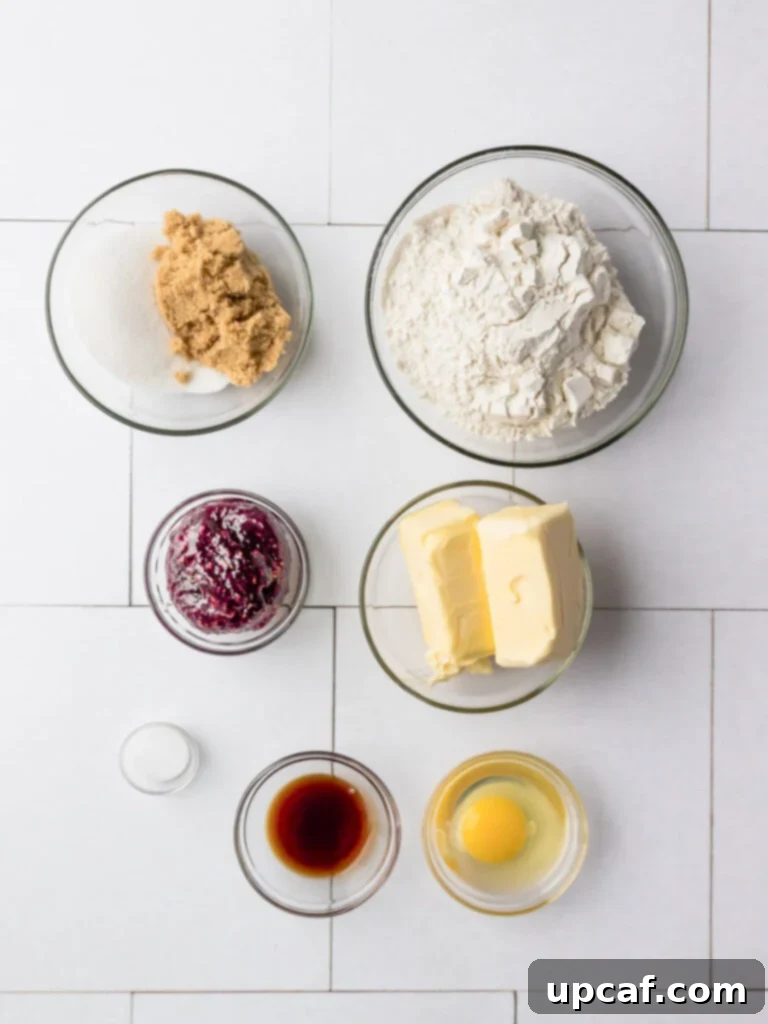
- Unsalted Butter: The star of any shortbread cookie, butter provides the rich, tender crumb. Ensure it’s at room temperature before you begin creaming to achieve a light, fluffy texture that incorporates well with the sugars. Using unsalted butter gives you control over the salt content.
- Granulated Sugar & Light Brown Sugar: This combination is key to achieving the desired texture. Granulated sugar provides crispness, while light brown sugar adds moisture, a subtle caramel note, and contributes to a wonderfully chewy interior.
- Pure Vanilla Extract: A crucial flavor enhancer. Opt for pure vanilla extract over imitation for the best, most authentic flavor that complements the butter and jam beautifully. For a subtle twist, almond extract can also be a delightful substitute.
- Large Egg: Use a room temperature egg. Eggs bind the dough, add richness, and help create that desirable chewy texture.
- All-Purpose Flour: The structural backbone of your cookie. Sifting the flour before adding it to the wet ingredients ensures a lighter, lump-free dough and a more tender cookie.
- Salt: A pinch of salt is vital for balancing the sweetness from the sugars and jam, enhancing all the other flavors in the cookie.
- Jam: The signature filling! You can use any jam flavor you prefer. Raspberry jam offers a classic, tart-sweet contrast, but strawberry, apricot, cherry, or even orange marmalade are fantastic choices. Choose a good quality jam for the best results.
Essential Kitchen Tools for Baking Success
To make the baking process as smooth as possible, ensure you have these tools on hand:
- Stand Mixer with Paddle Attachment: Ideal for creaming butter and sugar efficiently, though a hand mixer will also work.
- Large Mixing Bowl: For combining dry ingredients and later for the dough.
- Rubber Spatula: Essential for scraping down the sides of the bowl.
- Baking Sheets: Sturdy baking sheets are crucial for even baking.
- Parchment Paper: Prevents sticking and makes cleanup a breeze.
- Measuring Cups and Spoons: For accurate ingredient measurements.
- Small Scoop (Optional): A 1-inch cookie scoop ensures uniform cookie sizes.
- Pastry Bag or Ziplock Bag: Makes filling the cookie indents with jam neat and easy.
How to Craft These Delightful Raspberry Jam Thumbprint Cookies
Follow these straightforward steps to bake a batch of perfect jam thumbprint cookies:
- Prepare Your Oven and Dry Ingredients: Begin by preheating your oven to 350°F (175°C). Line a large baking sheet with parchment paper to prevent sticking and ensure easy removal. In a separate medium-sized mixing bowl, whisk together the all-purpose flour and salt. Set this aside for later.
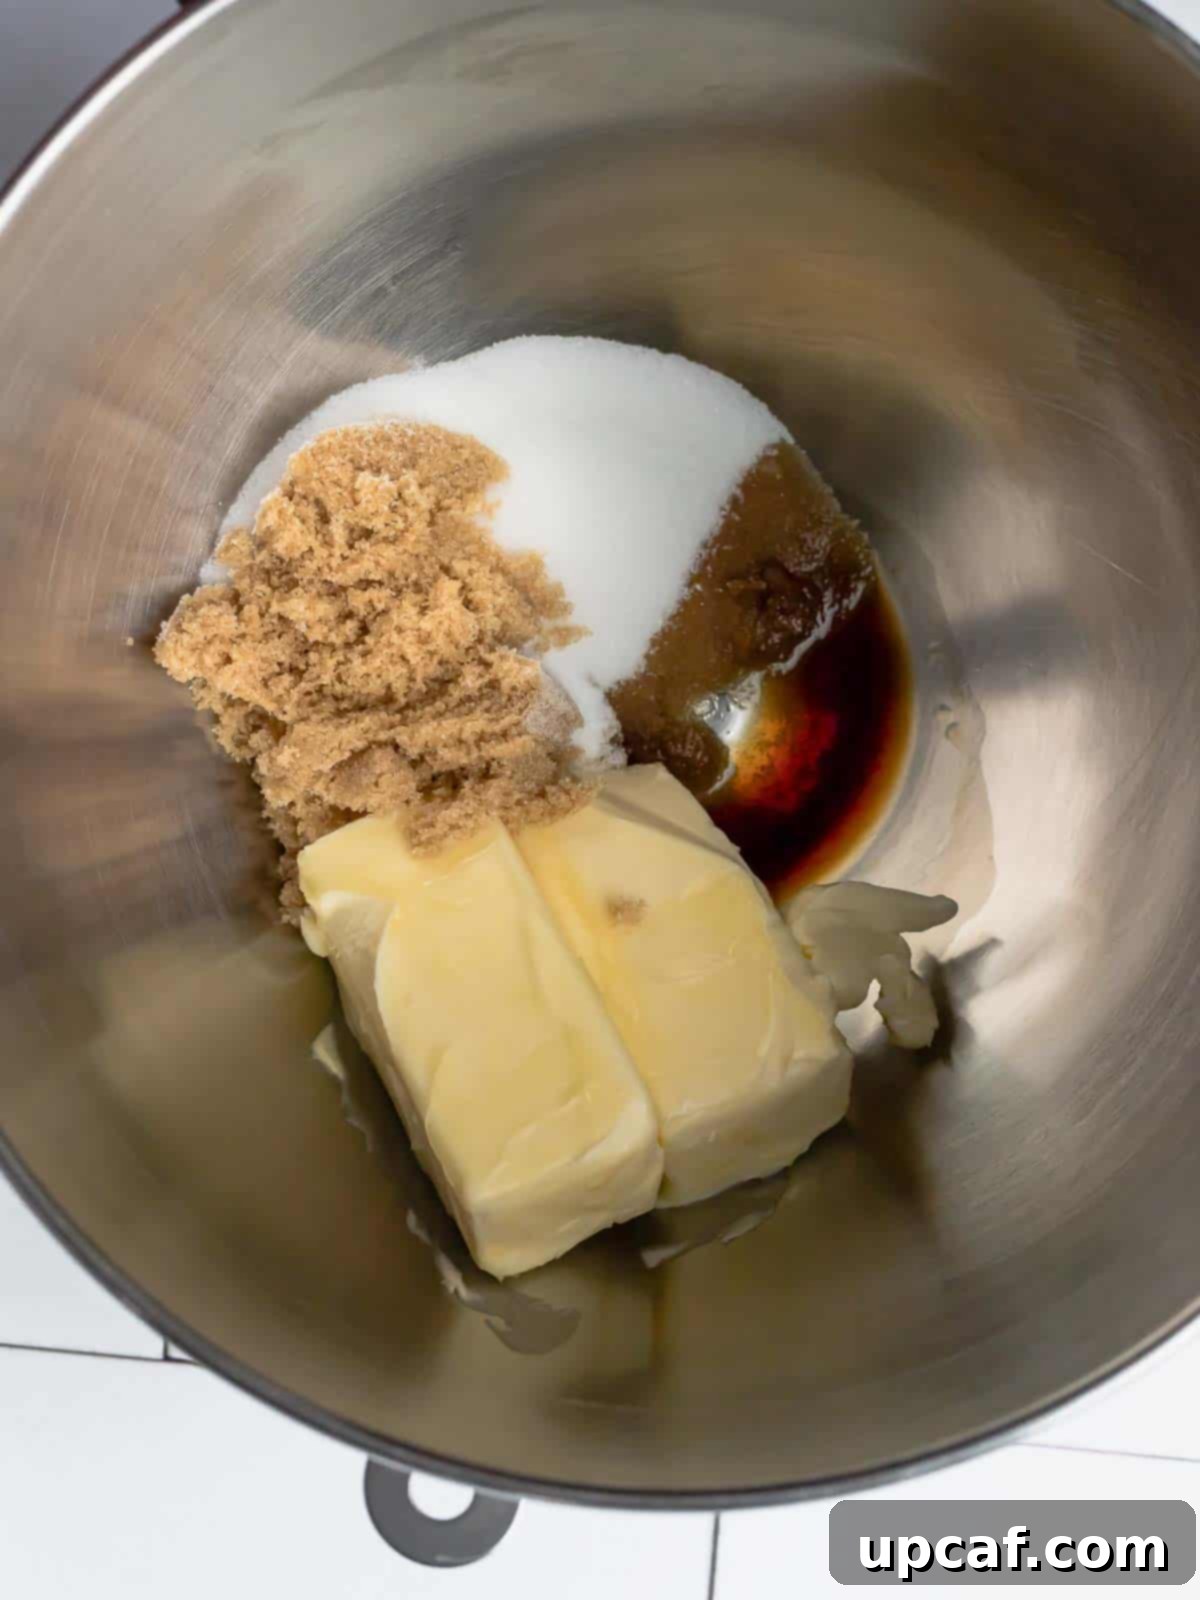
- Cream Wet Ingredients: In the bowl of a stand mixer fitted with the paddle attachment (or using a hand mixer), cream together the room temperature butter, granulated sugar, light brown sugar, and pure vanilla extract. Beat on medium speed for about 5 minutes, until the mixture is light, fluffy, and pale in color. This process incorporates air, contributing to the cookie’s tender texture.
- Incorporate the Egg: Add the room temperature large egg to the creamed mixture. Mix on low speed just until it is lightly incorporated. Don’t worry if the mixture appears slightly separated at this stage; it will come together once the dry ingredients are added.
- Combine Dry and Wet Ingredients: With the mixer on its lowest speed, gradually add half of your whisked dry ingredients (flour and salt mixture) to the wet ingredients. Mix until just combined, then stop the mixer and scrape down the sides and bottom of the bowl with a rubber spatula to ensure everything is evenly mixed. Add the remaining dry ingredients and mix only until no streaks of flour remain. Be careful not to overmix, as this can lead to tough cookies.
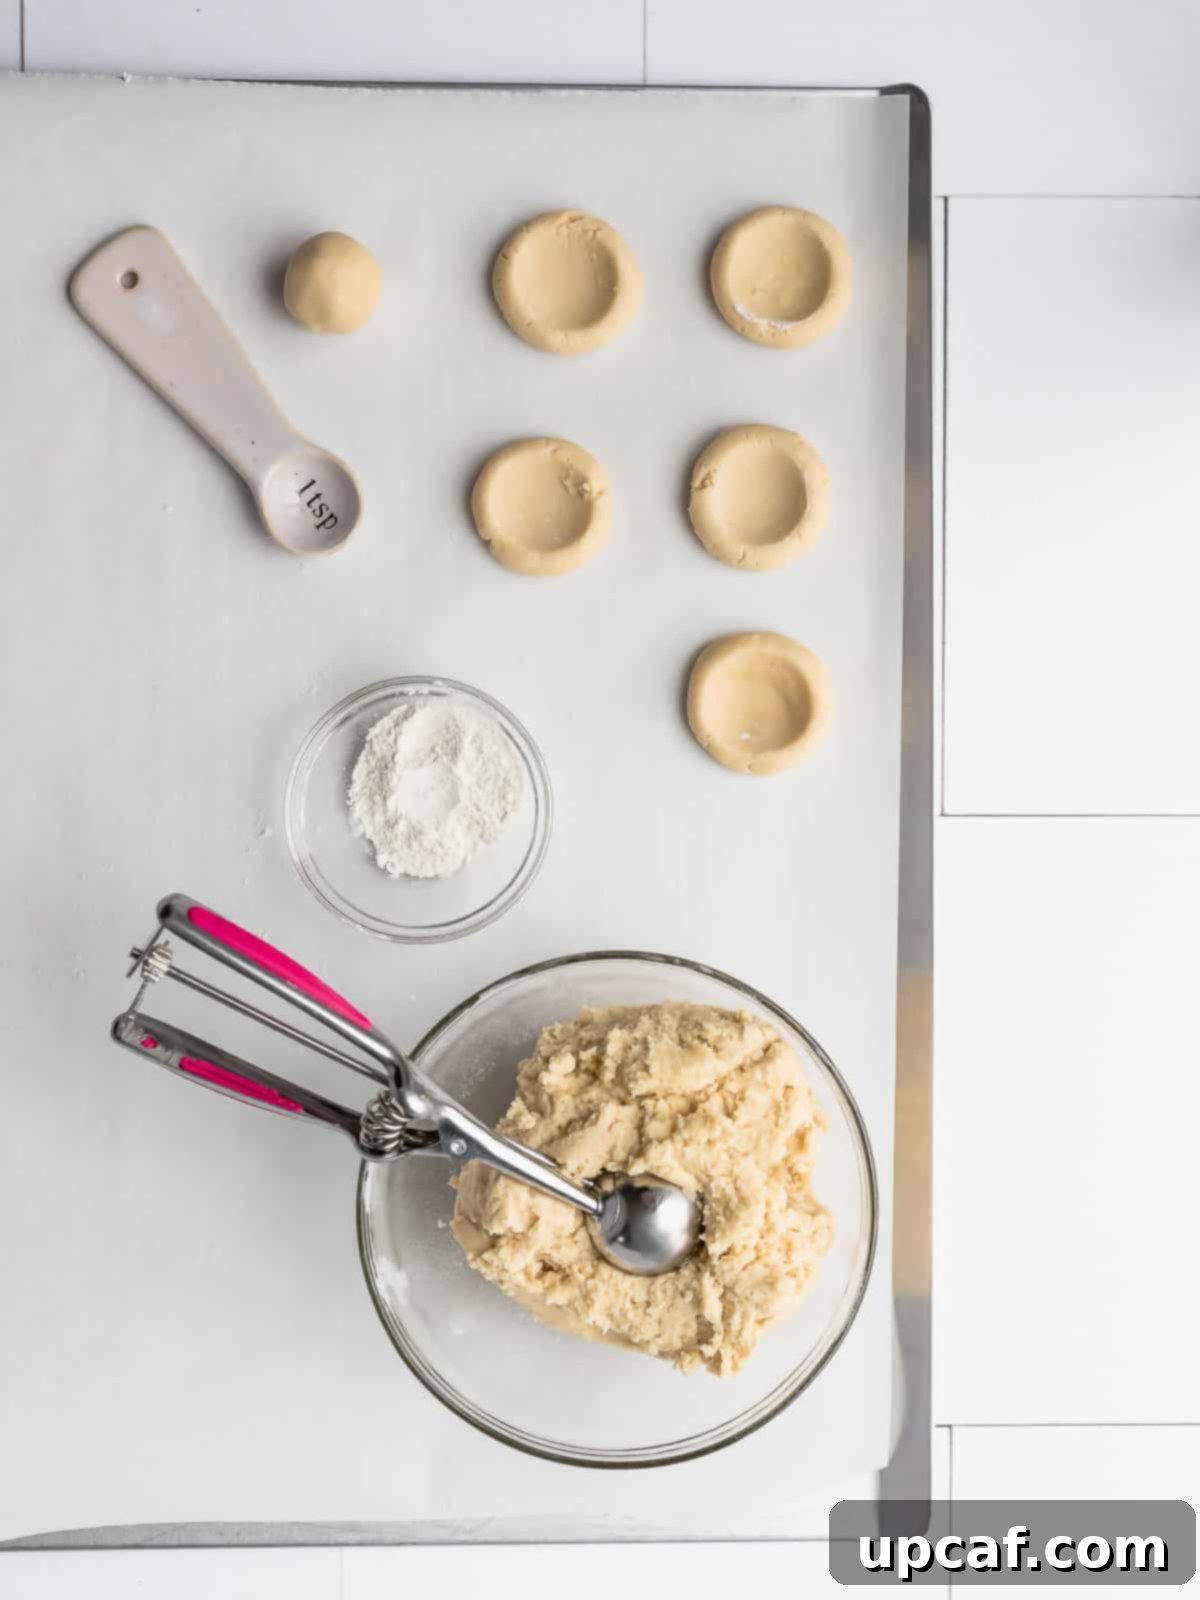
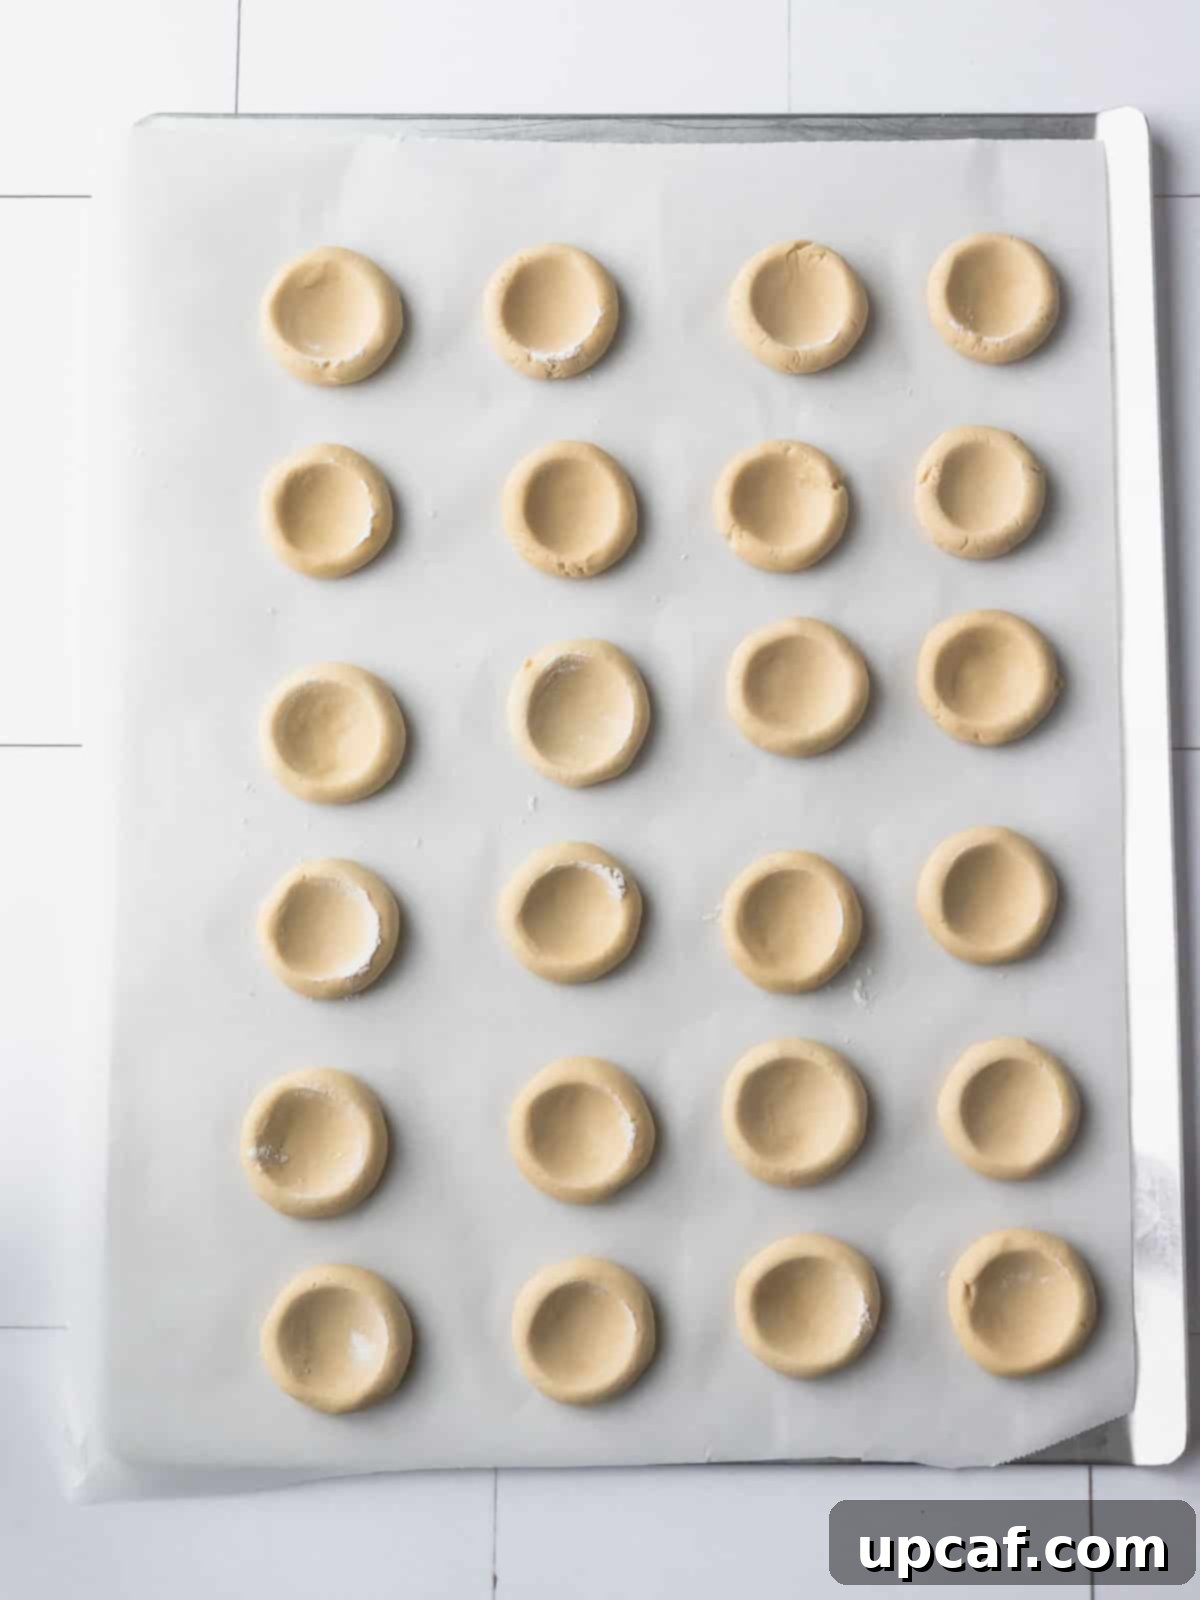
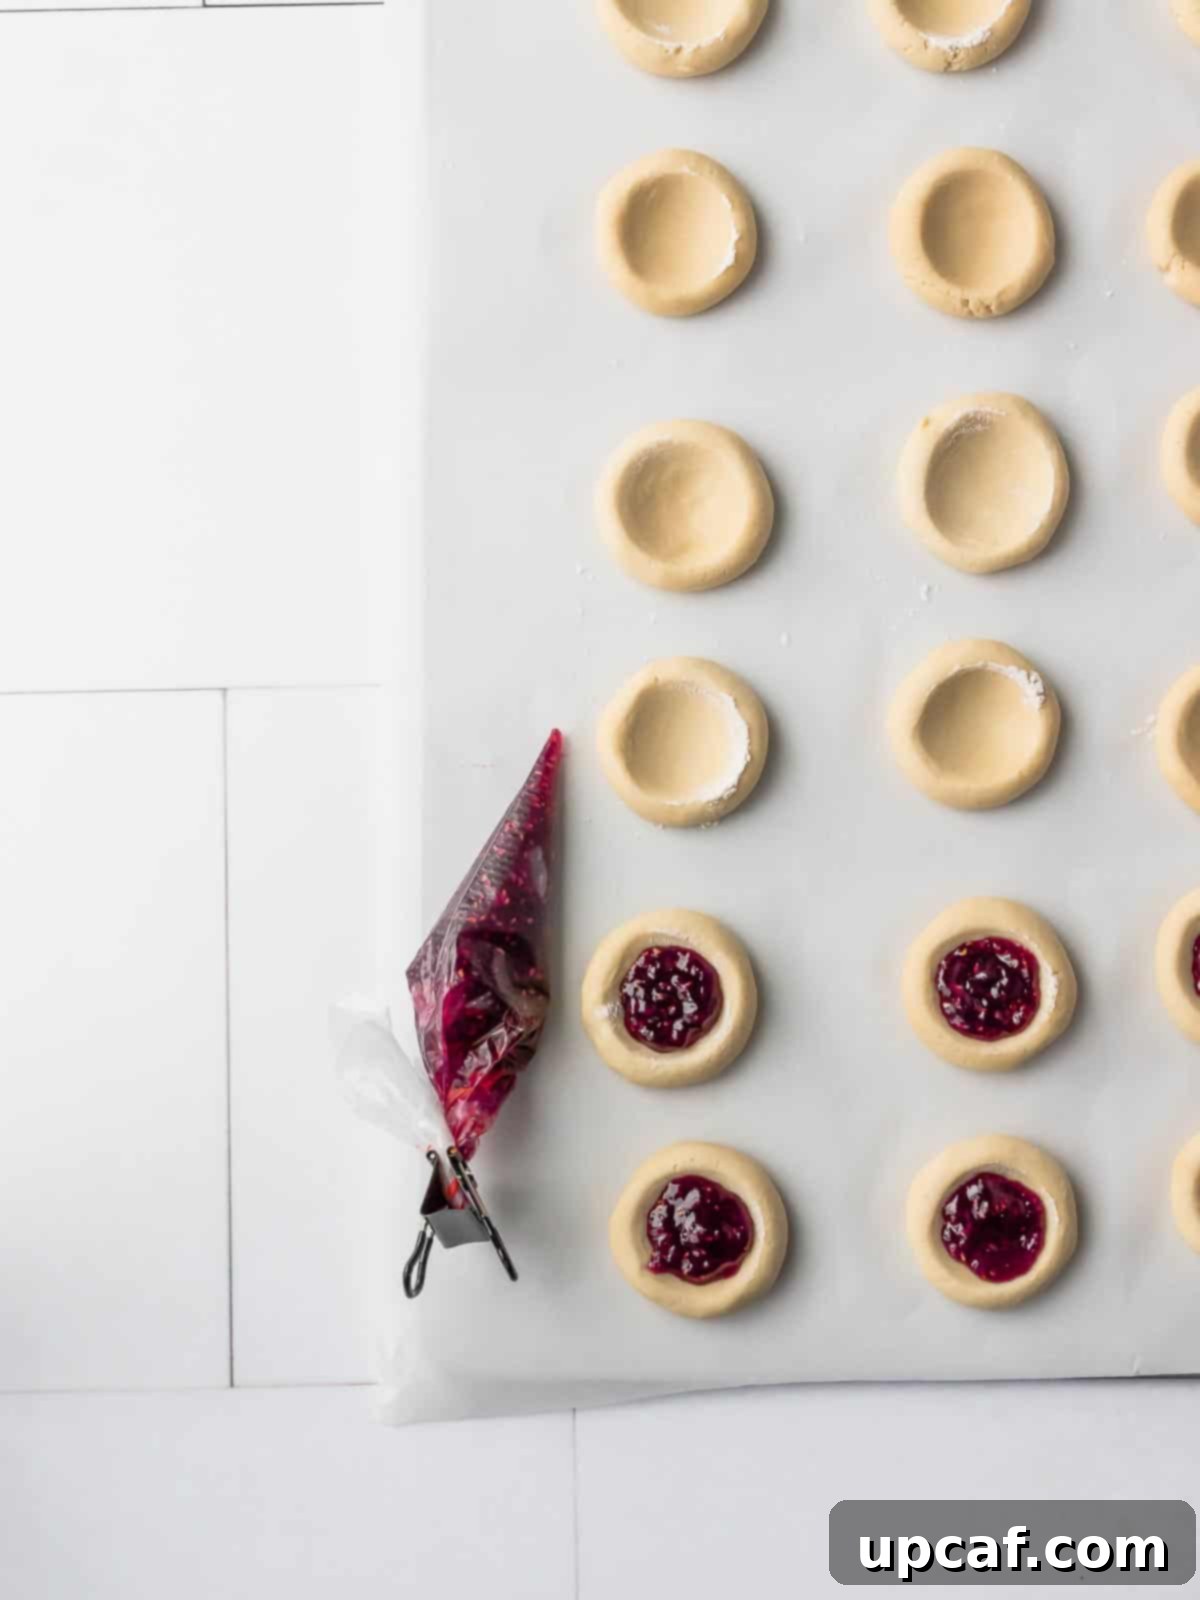
- Form and Indent the Cookies: Scoop out approximately 1 tablespoon of cookie dough for each cookie, forming it into a smooth 1-inch ball (about 20-25g). Place the dough balls on your prepared baking sheet, spacing them about 2-3 inches apart. Immediately after forming each ball, make an indent in its center. You can use your thumb or the back of a small, round spoon for this. Lightly dip your thumb or spoon into a little flour before pressing to prevent sticking. It’s crucial to press the indent right after forming each ball; waiting until all balls are formed can cause the outer crust to dry and crack when pressed.
- Fill with Jam: Spoon your chosen jam into a pastry bag or a small Ziplock bag. If using a Ziplock bag, snip a tiny corner off. Carefully pipe or spoon the jam into the indents of each cookie. Be mindful not to overfill, as the jam might bubble over during baking. If using a Ziplock, immediately discard the cut piece to prevent it from getting into your cookies.
- Bake to Golden Perfection: Place the baking sheet into the preheated oven. Bake for 15-20 minutes, or until the edges of the cookies turn a beautiful golden brown. The centers should still be soft. Keep an eye on them, as baking times can vary.
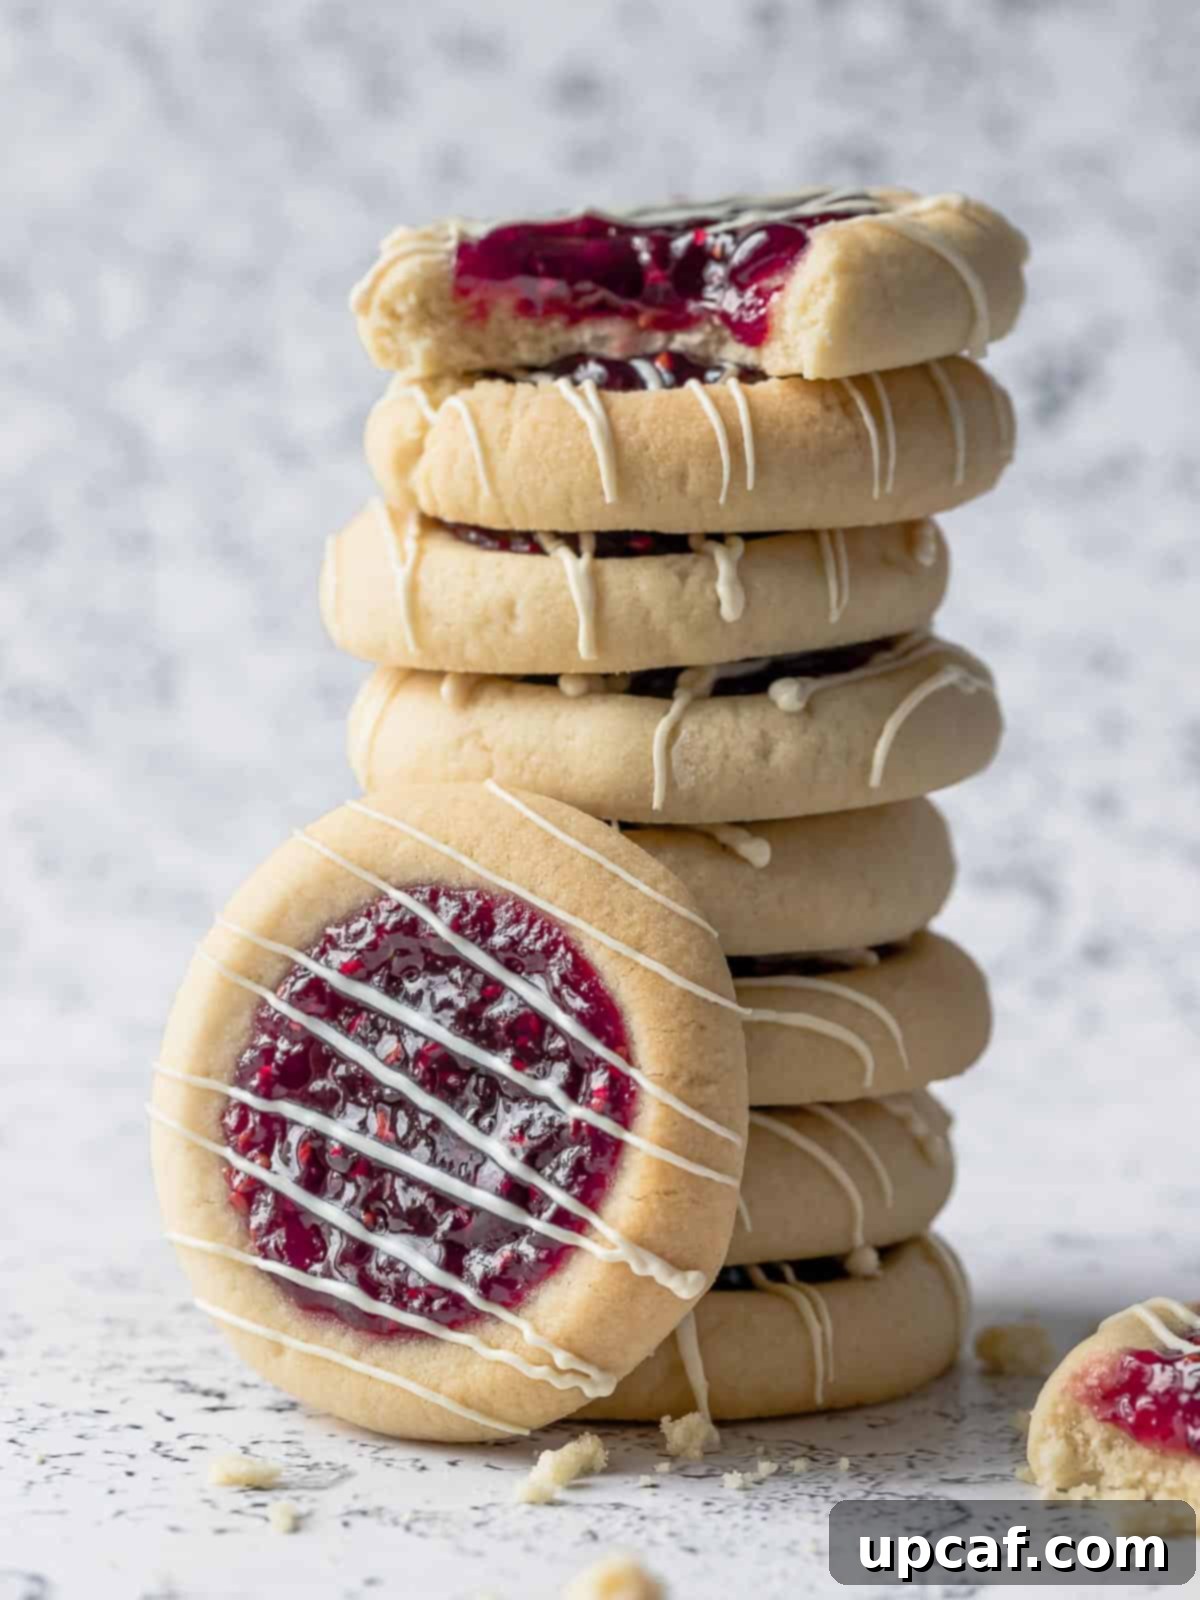
- Cool and Garnish: Once baked, transfer the cookies to a wire rack to cool completely. As they cool, the jam may settle slightly. If desired, you can add a small extra dollop of jam to the centers for an extra burst of fruitiness. For a final touch of elegance, once fully cooled, drizzle with some melted white chocolate or a simple powdered sugar glaze. Serve and savor these delectable treats!

Pro Tips for Flawless Classic Thumbprint Jam Cookies
Achieve cookie perfection with these expert tips:
- Always Preheat Your Oven: A properly preheated oven ensures even baking from the moment your cookies enter.
- Whisk Your Jam: Before filling, give your jam a good whisk to break up any lumps and achieve a smoother consistency. This makes for easier and neater application.
- Butter Quality Matters: Use real, high-quality butter for the best flavor and texture. Avoid substituting with margarine or butter alternatives, as they can alter the cookie’s structure and taste.
- Room Temperature Ingredients: While cold butter is often suggested for some shortbreads, for this recipe, ensure your butter and egg are at room temperature. This allows for proper creaming with the sugars, resulting in a tender, well-blended dough.
- Chill the Dough (If Needed): If your kitchen is warm or your dough seems too soft to handle, chilling it for 15-20 minutes before forming the balls can help prevent spreading and maintain their shape during baking.
- Parchment Paper is Your Friend: Always line your baking sheets with parchment paper. It ensures the cookies don’t stick, promotes even browning, and makes cleanup effortless.
- Master the Indent: Use your thumb or the back of a small, round spoon to create the indent. If using your thumb, dip it lightly in flour to prevent sticking. Remember to make the indent immediately after rolling each dough ball to prevent cracking.
- Jam Replenishment: The cookies can absorb some jam during baking. If you notice the centers looking a bit sparse after baking, feel free to add a little extra jam while they are still warm, allowing it to melt and settle beautifully.
- Watch for Golden Edges: The best indicator of doneness is when the edges of your thumbprint cookies turn a delicate golden brown. The centers may still look pale, but they will set as they cool.
Exciting Flavor Variations for Your Thumbprint Cookies
One of the joys of thumbprint cookies is their adaptability. Here are some ideas to inspire your next batch:
- Citrus Zest Infusion: Add a teaspoon of lemon, orange, or lime zest to the cookie dough along with the vanilla extract for a bright, aromatic twist. Pair with a complementary citrus marmalade or curd.
- Nutty Dough: Incorporate finely ground almonds, pecans, or walnuts into the flour mixture for added texture and a rich, nutty flavor.
- Chocolate Lover’s Dream: Drizzle melted dark or milk chocolate over the cooled cookies, or even dip half of each cookie in chocolate. For an extra treat, try a chocolate hazelnut spread as the “jam” filling.
- Coconut Crunch: Roll the cookie dough balls in shredded coconut before making the indent. The toasted coconut adds a delightful crunch and tropical flavor.
- Spiced Delight: Add a pinch of cinnamon, nutmeg, or cardamom to the dry ingredients, especially if pairing with apple butter or pear jam for a fall-inspired treat.
- Cream Cheese Filling: For a richer, less sweet center, try a dollop of sweetened cream cheese filling (cream cheese, powdered sugar, vanilla) instead of jam.
Storage and Freezing Instructions
Proper storage ensures your delicious thumbprint cookies remain fresh and enjoyable:
For short-term storage, keep the cooled cookies in an airtight container at room temperature for up to 3 days. If you prefer to extend their freshness, storing them in the refrigerator can keep them good for up to 1 week. Always ensure the jam has fully set before stacking to prevent sticking.
Yes, these cookies freeze beautifully! Allow the baked cookies to cool completely for several hours so the jam has ample time to set. Then, arrange them in an airtight freezer-safe container, placing parchment paper between layers to prevent them from sticking together. The cookies will maintain their quality in the freezer for up to 1 month. To thaw, simply remove them from the freezer and let them sit at room temperature overnight. They will be just as delicious as when they were freshly baked.
Frequently Asked Questions
While you can technically add jam after baking, I highly recommend filling the cookies before placing them in the oven. Baking the jam allows it to set slightly, creating a beautiful, glossy finish and ensuring it melds perfectly with the cookie base. If you forget or prefer a fresher jam taste, adding it post-bake is still an option, but the texture will be different.
Cracking often occurs when the cookie dough dries out before the indent is made. The key is to form the thumb impression as soon as possible after rolling each ball of dough. Do not roll all the dough balls first and then go back to press the indents. When the dough sits, it can form a slight crust that will crack when pressure is applied. If you do notice small cracks, gently smooth them with your finger to seal them before baking.
If your cookies spread too much during baking, it usually indicates that the dough is too soft or needs a bit more structure. There are a few solutions: ensure your butter is at room temperature but not overly soft or melted; chill the formed dough balls for 15-20 minutes before baking; or, if the dough feels particularly sticky and loose, try adding a tablespoon or two of extra flour to the dough mixture, mixing until just combined.
Absolutely! Thumbprint cookies are incredibly versatile. You can use lemon curd, caramel sauce, chocolate ganache, Nutella, peanut butter, or even a small piece of chocolate candy in the center. Just be aware that different fillings may bake slightly differently, so keep an eye on them.
Beyond the Bake: Serving Suggestions
These beautiful Jam Thumbprint Cookies are versatile and can be enjoyed in many ways. Serve them alongside a warm cup of coffee or tea for a delightful afternoon treat. They are perfect for dessert platters at holiday parties, adding a vibrant splash of color and homemade charm. Pair them with a scoop of vanilla ice cream for a simple yet elegant dessert, or crumble them over yogurt for a quick, sweet breakfast. Their rich, buttery flavor and fruity centers make them a welcome addition to any gathering, big or small.
More Delightful Holiday Dessert Recipes
Looking for more show-stopping desserts to complete your holiday menu? Explore these other fantastic recipes:
- Decadent Chocolate French Silk Pie
- Irresistible Buckeye Candy Balls
- The Best Moist Carrot Cake Ever
- Festive Pumpkin Cake Rolls
I genuinely hope you enjoy exploring all the recipes I share with you, and that this Jam Thumbprint Cookies recipe brings a special touch to your kitchen. Please try it, savor every bite, and share the joy with your friends and family!
If you fall in love with this recipe, please take a moment to leave a star rating and a comment below. Don’t forget to use my hashtag to share your delicious recreations with me on INSTAGRAM! Also, follow Cookin’ With Mima on FACEBOOK | INSTAGRAM | PINTEREST for all my latest culinary adventures and new recipes.

Raspberry Jam Thumbprint Cookie
These delicious and beautiful Jam Thumbprint Cookies are such an easy cookie recipe! Buttery cookies with a crimson dollop of jam.
Ingredients
- 1 cup butter, room temperature
- ⅓ cup granulated sugar
- ⅓ cup packed light brown sugar
- 1 tsp. pure vanilla extract
- 1 large egg
- 2 ¼ cup all-purpose flour
- ¾ tsp. salt
- ¾ cup Jam (raspberry jam recommended)
Instructions
- Preheat oven to 350 F (175 C). Prepare a baking sheet by lining it with parchment paper.
- In a medium mixing bowl, whisk together the all-purpose flour and salt. Set aside.
- With a stand mixer and paddle attachment, cream butter, both sugars, and vanilla for about 5 minutes until light and fluffy.
- Add 1 egg and mix lightly to incorporate. The mixture may look separated initially but will come together with the dry ingredients.
- With the mixer on low speed, add half of your dry ingredients and mix until just incorporated. Stop the mixer, scrape the sides and bottom of the bowl. Add the remaining dry ingredients and mix until just combined, being careful not to overmix.
- Scoop enough cookie dough to form 1-inch balls (about 20-25g). Roll each ball and place it on the prepared baking sheet.
- Immediately, with your thumb or the back of a small round spoon, form an indent in the center of each cookie. Dip your thumb/spoon into some flour to prevent sticking to the dough. Repeat for all the balls, spacing them about 2-3 inches apart.
- Place your jam into a pastry bag or a small Ziplock bag. Cut a small opening on one of the corners of the bag and fill the cavities of the cookies with jam. Discard the cut piece immediately.
- Bake at 350 F (175 C) for 15-20 minutes, or until the edges begin to turn a golden color.
- Once baked, the cookies may soak in a little jam. You can add some more if desired while they are still warm.
- To decorate, melt some white chocolate and drizzle it over your cooled cookies. Allow to set completely before storing.
- Store cookies in an airtight container at room temperature for up to 3 days, or in the refrigerator for up to 1 week.
Notes
- Ensure your oven is preheated.
- Whisk jam well before adding for easier application.
- Use real butter; do not substitute with margarine.
- While the butter is room temperature for creaming, ensure your finished dough isn’t overly warm; chilling the dough for 15-20 minutes can prevent spreading.
- All ingredients should ideally be at room temperature (except for potential dough chilling).
- Place dough balls on a baking sheet lined with parchment paper for easy removal and cleanup.
- You can use your thumb or the back of a spoon to make indents.
- The cookies can absorb some jam during baking; feel free to top them up halfway through the cook if needed.
- Keep an eye on the cookie edges; they are done when golden brown.
