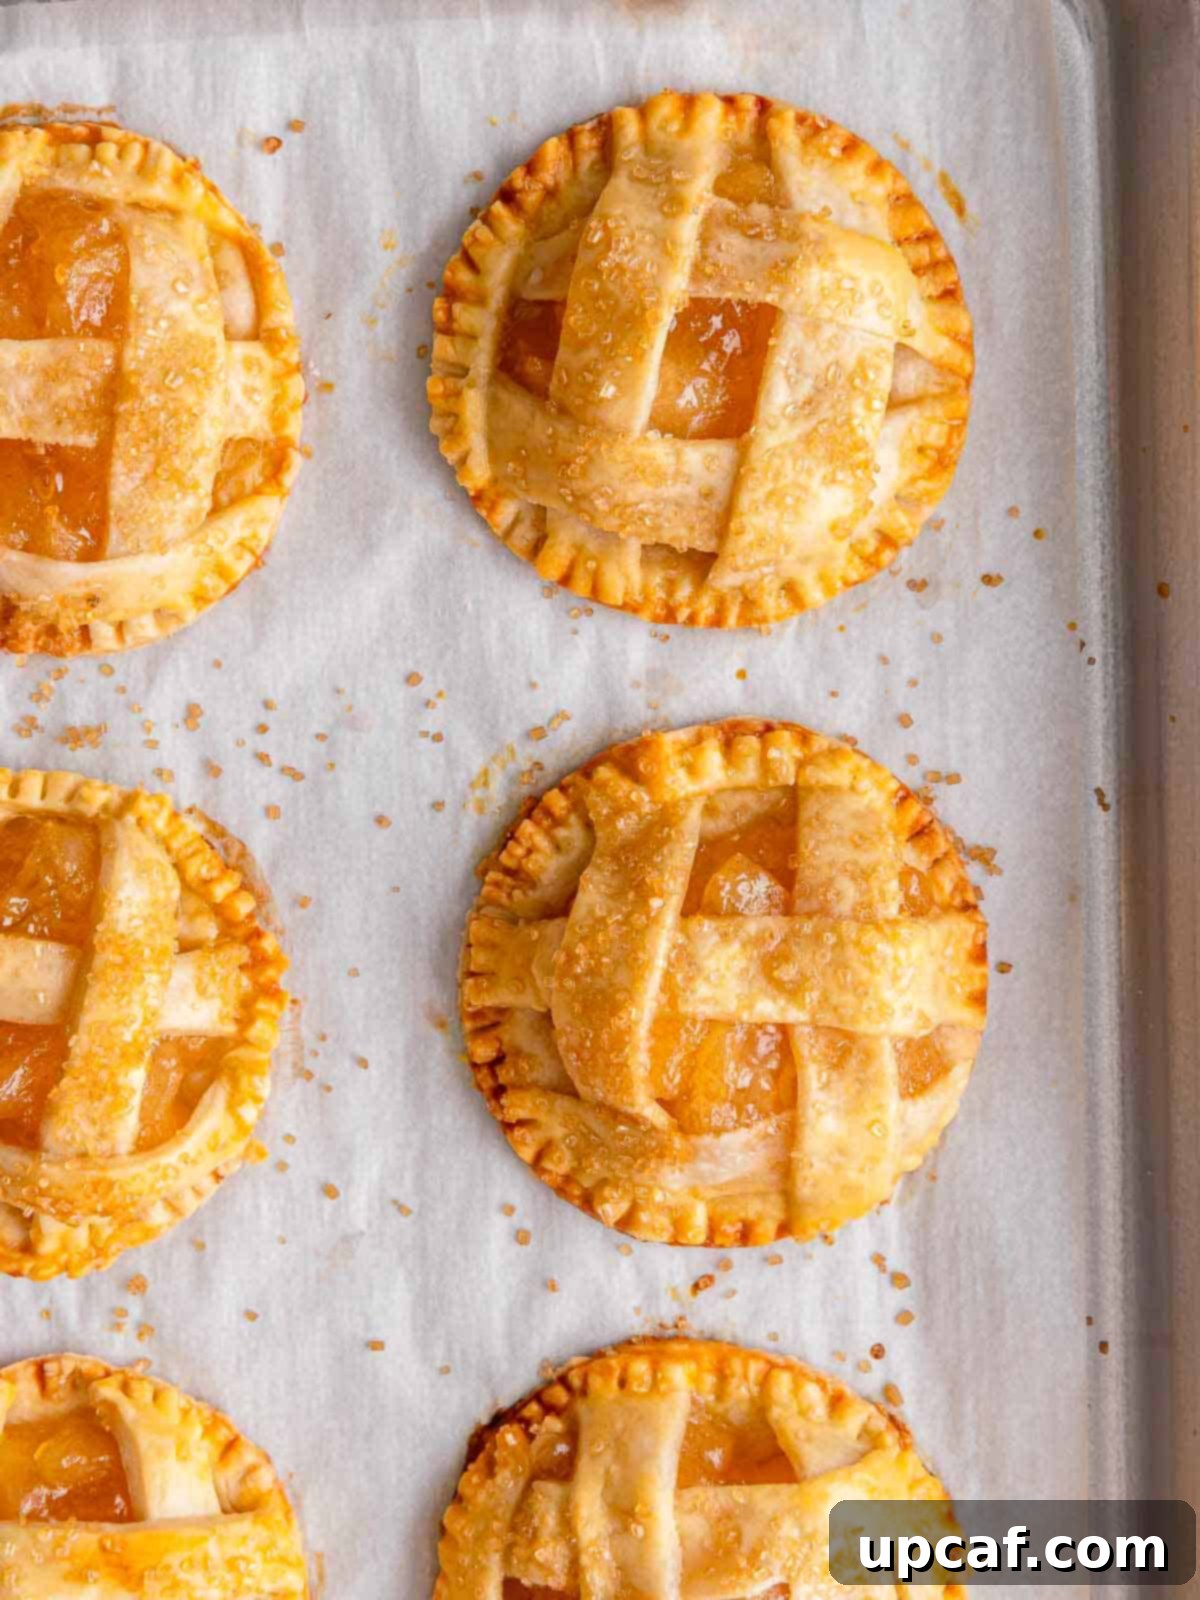
Irresistible Baked Mini Apple Pies: Your Go-To Easy Dessert Recipe
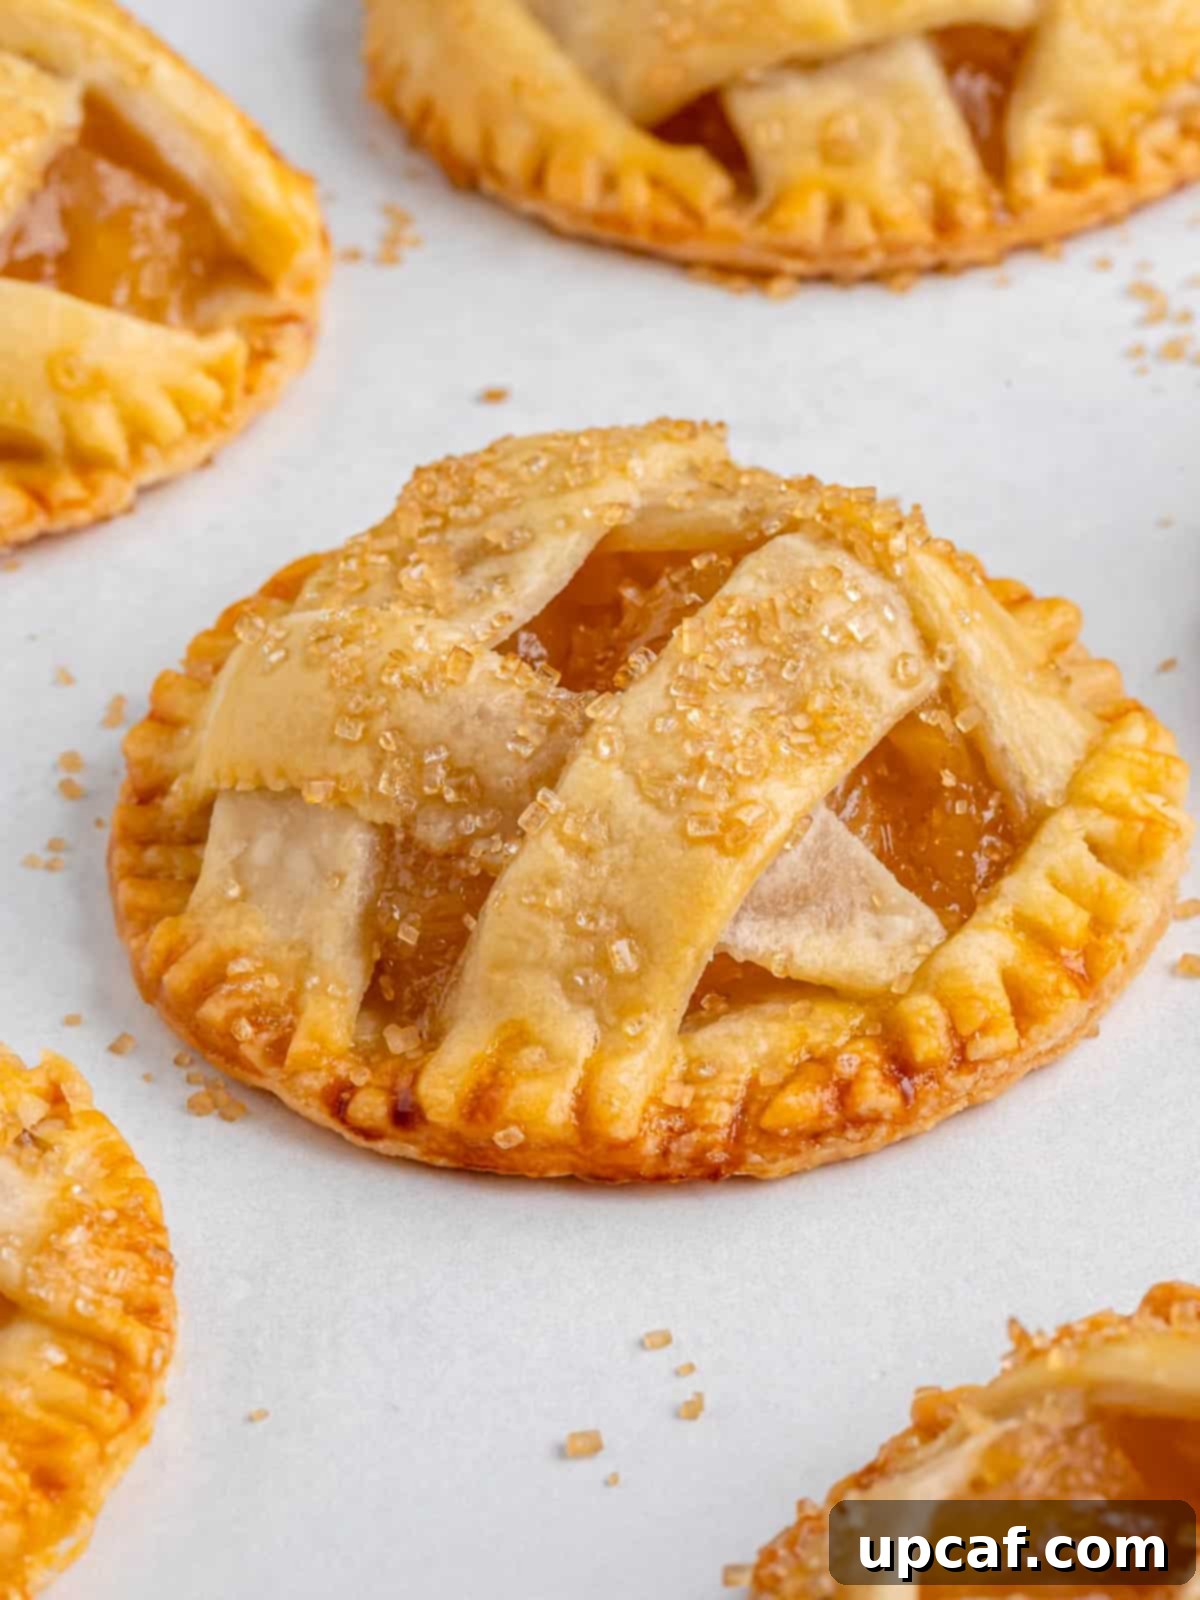
Delight in the charm and convenience of these **Baked Mini Apple Pies**, the ultimate individual dessert for any occasion. This delightful twist on a beloved classic transforms the traditional apple pie into fun, perfectly portioned treats that are as easy to make as they are delicious. Each mini pie features a warm, spiced apple filling encased in a flaky, golden pie crust, beautifully finished with a glistening sugar topping. Prepare for these bite-sized wonders to be an absolute sensation at your next gathering, picnic, or family meal.
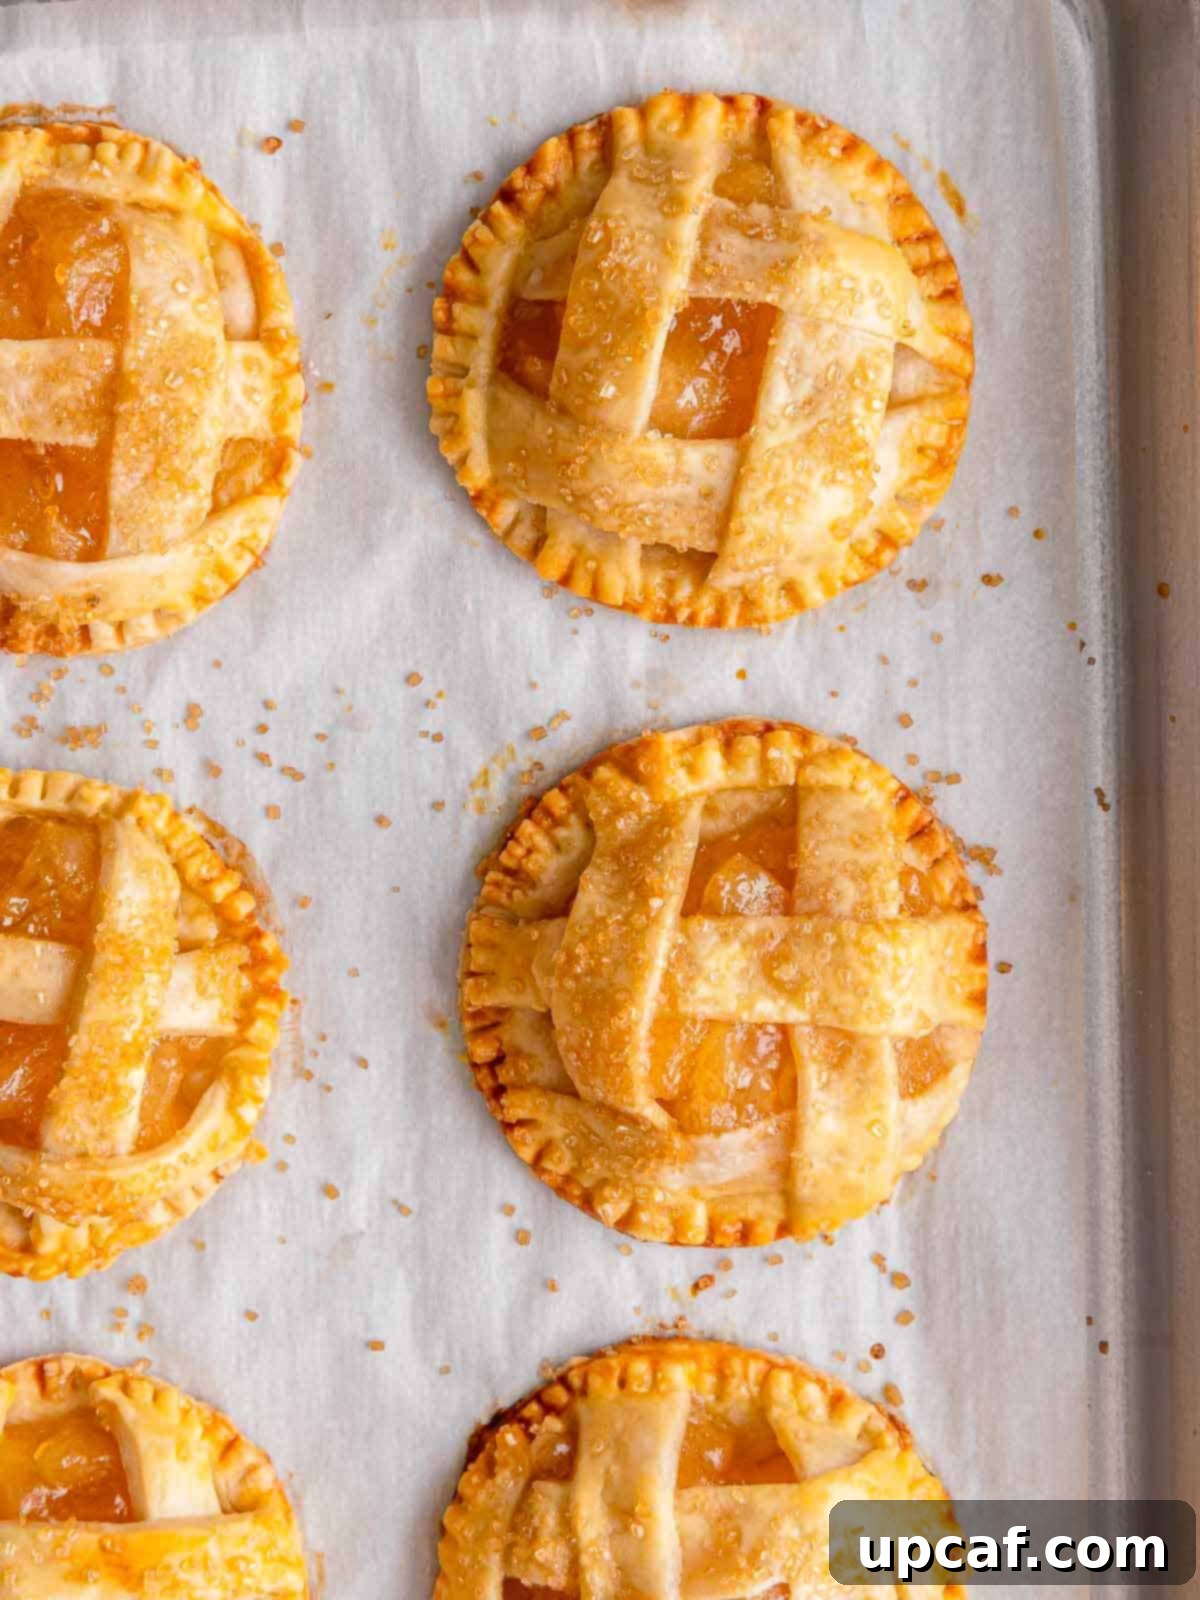
Whether you’re planning a casual backyard barbecue, a charming outdoor picnic, a festive potluck, or simply craving a comforting dessert for your loved ones, these mini apple pies are guaranteed to disappear quickly. Their individual size makes them incredibly easy to serve and enjoy, capturing all the comforting flavors of a traditional apple pie in a convenient package. With just four core ingredients and a straightforward preparation process, you’ll have a batch of these enchanting mini pies ready to impress in minimal time.
If you enjoy creative takes on classic desserts, be sure to explore other delightful recipes like our Pumpkin Pie Cheesecake Bars or refreshing Key Lime Pie Bars. These bar-style treats are also perfect for crowds, offering easy slicing and serving, much like their mini pie counterparts.
Why These Mini Apple Pies Are a Must-Try
These individual apple pies stand out for several compelling reasons, making them a favorite for both novice bakers and seasoned dessert enthusiasts:
- Effortlessly Easy Preparation: Say goodbye to complicated recipes! This recipe simplifies the apple pie-making process significantly. By utilizing pre-made apple pie filling and store-bought pie crusts, you drastically cut down on preparation time and effort. It’s all the deliciousness of homemade with a fraction of the work, making it perfect for busy schedules.
- Unforgettable Taste and Texture: These aren’t just easy; they’re incredibly tasty! The harmonious blend of warm, sweet apple filling and tender, flaky pastry crust creates a dessert that consistently earns rave reviews. Topped with a sprinkle of demerara sugar, each bite offers a delightful crunch and a burst of classic apple pie flavor that’s truly a crowd-pleaser.
- Perfectly Portioned & Portable: The individual size of these mini pies makes them ideal for any social setting. No need for plates and forks; guests can easily grab their own personal pie. Their small stature also makes them highly portable, excellent for lunchboxes, road trips, or carrying to any event where a shared dessert might be cumbersome.
- No Specialized Baking Equipment Needed: You don’t need a collection of fancy pie dishes or tart pans to create these beauties. This recipe is designed for accessibility, requiring only basic kitchen tools. A standard sheet pan, a rolling pin, and a couple of cookie cutters are all you need to assemble these charming desserts, making them suitable for almost any kitchen.
- Customizable and Versatile: While perfect as is, these mini apple pies are also a fantastic canvas for your creativity. Easily adapt them with additional spices, different fruit fillings, or various toppings to suit your taste or the occasion. They pair wonderfully with a scoop of ice cream, a dollop of whipped cream, or a drizzle of caramel sauce.
Essential Ingredients for Delightful Mini Apple Pies
Crafting these delectable mini apple pies requires only a few key ingredients, most of which you likely have on hand or can easily find at any grocery store. Focus on quality to ensure the best flavor and texture:
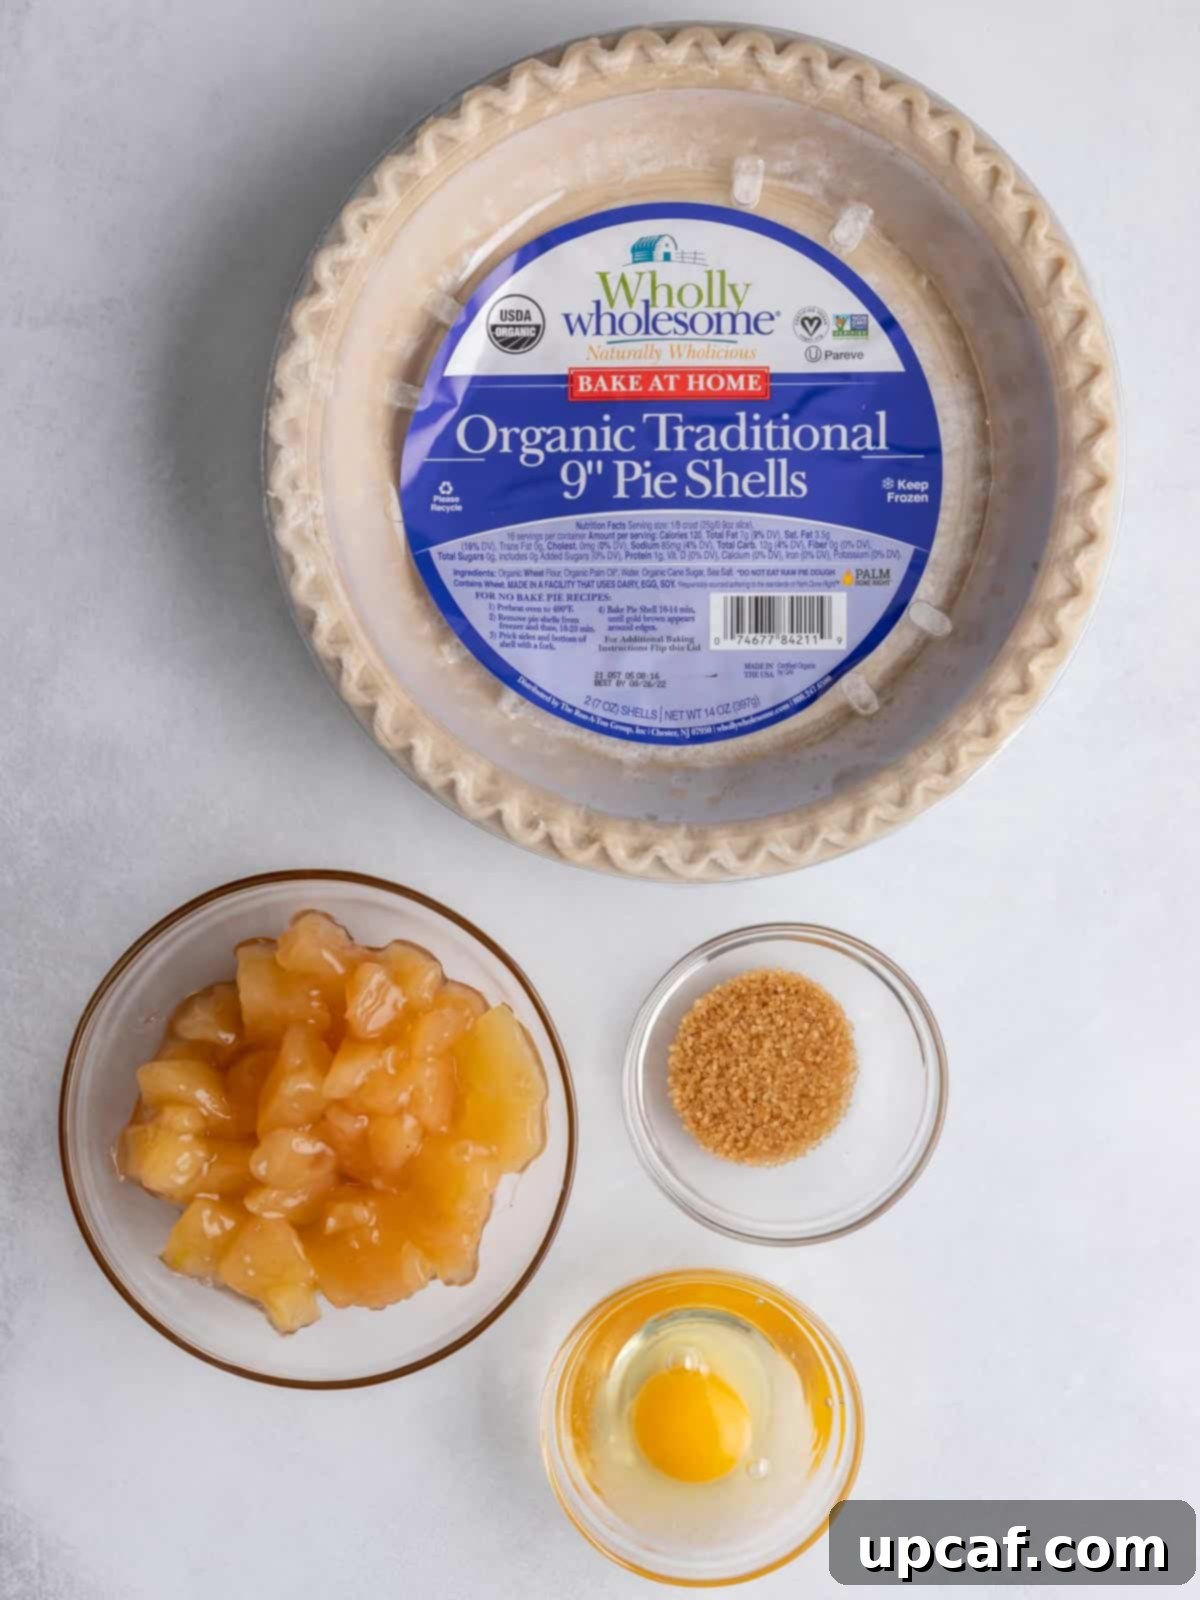
- Pre-made Pie Crust: For ultimate convenience and time-saving, we recommend using two sheets of frozen pie crust or flat pie crust sheets from your local store. These come ready to roll, eliminating the need for measuring ingredients and preparing dough from scratch. They provide a consistently flaky and delicious base for your mini pies.
- Canned Apple Pie Filling: This is the secret weapon for speed and simplicity. Opting for a quality canned apple pie filling means you can bypass the time-consuming steps of peeling, coring, slicing, cooking, and seasoning fresh apples. It delivers perfectly tender apples in a sweet, spiced sauce, ready to be baked into your pies.
- Demerara (Turbinado) Sugar: Unlike fine granulated sugar, demerara or turbinado sugar features larger, coarser crystals. Sprinkled on top of the pies before baking, these crystals don’t melt away completely, providing a beautiful sparkle and an appealing crunchy texture that contrasts wonderfully with the soft filling and flaky crust. It also helps achieve that desirable golden-brown finish.
- One Egg for Egg Wash: A single medium egg, whisked with two teaspoons of water, creates the perfect egg wash. This mixture serves multiple purposes: it gives the pie crust a rich, golden sheen as it bakes, helps the demerara sugar adhere to the top, and contributes to that desirable crisp finish on the lattice.
Step-by-Step Guide: Crafting Your Delicious Mini Apple Pies
Follow these simple instructions to create your own batch of delightful mini apple pies:
- Prepare the Pie Crust: Begin by defrosting your frozen pie crusts. The best method is to place them in the refrigerator overnight. Once thawed, allow them to come to room temperature for about an hour on your countertop before use. This makes the dough pliable and easy to work with.
- Preheat Oven & Prep Baking Sheet: Preheat your oven to 350°F (175°C). Line a large cookie sheet with parchment paper to prevent sticking and ensure even baking.
- Whisk the Egg Wash: In a small bowl, whisk one egg thoroughly with 2 teaspoons of water until well combined. Set this mixture aside.
- Prepare the Apple Pie Filling: Open your can of apple pie filling. For better portion control and to ensure the apples fit neatly into the mini pie crusts, use a knife or a spoon to gently chop the larger apple slices into smaller, bite-sized chunks. Set the prepared filling aside.
- Roll Out the Pie Crust: Carefully remove the defrosted pie dough from its packaging. Lightly flour your work surface and your rolling pin. Transfer one pie dough disc onto the floured surface. Using the floured rolling pin, gently flatten the edges of the pie crust. Continue rolling the dough just enough to smooth it out and ensure it’s an even thickness, aiming for approximately 9.5-10 inches in diameter. Avoid rolling it too thin.
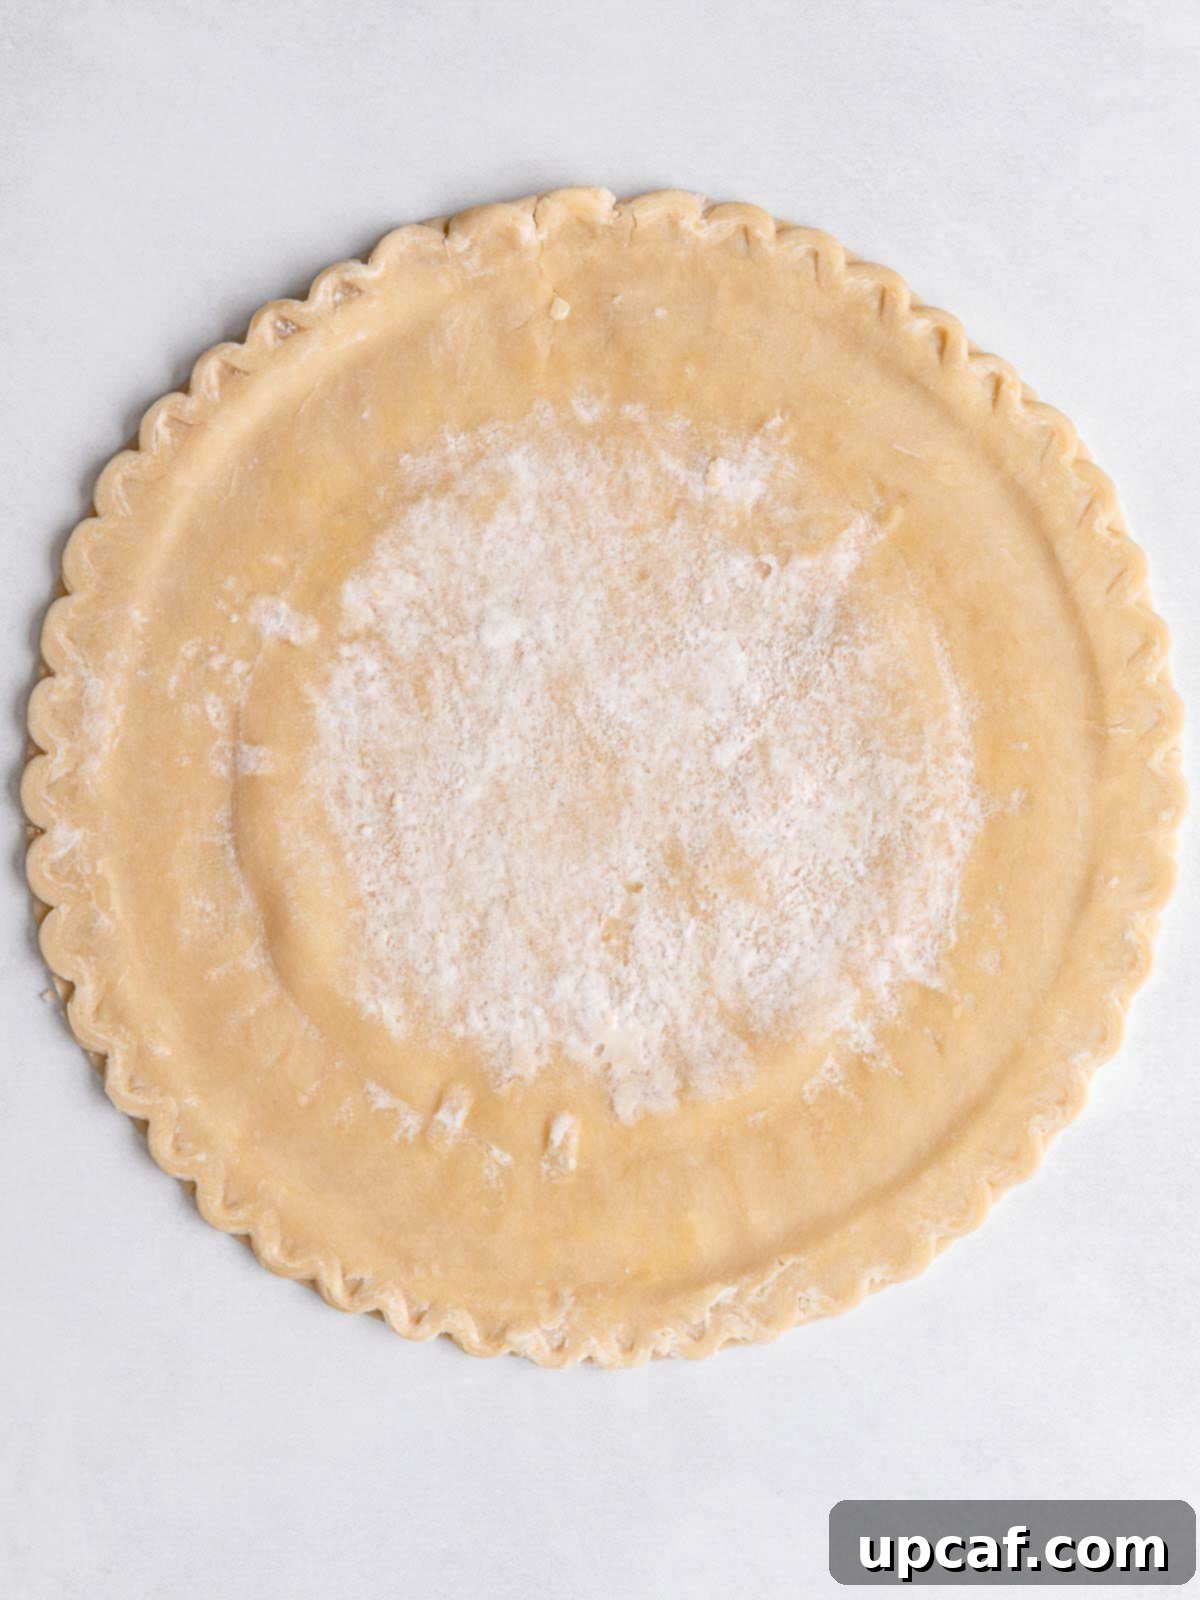
- Cut Pie Crust Circles: Using a 2.5-inch round cookie cutter, cut out as many circles as possible from the first pie crust piece. These will form the base of your mini pies. Repeat the rolling process with the second pie crust piece, and then use a slightly larger, 3-inch round cookie cutter to cut circles. These larger circles will be used for the lattice tops. Try to maximize your cuts from both dough pieces to get an even number of bases and tops.
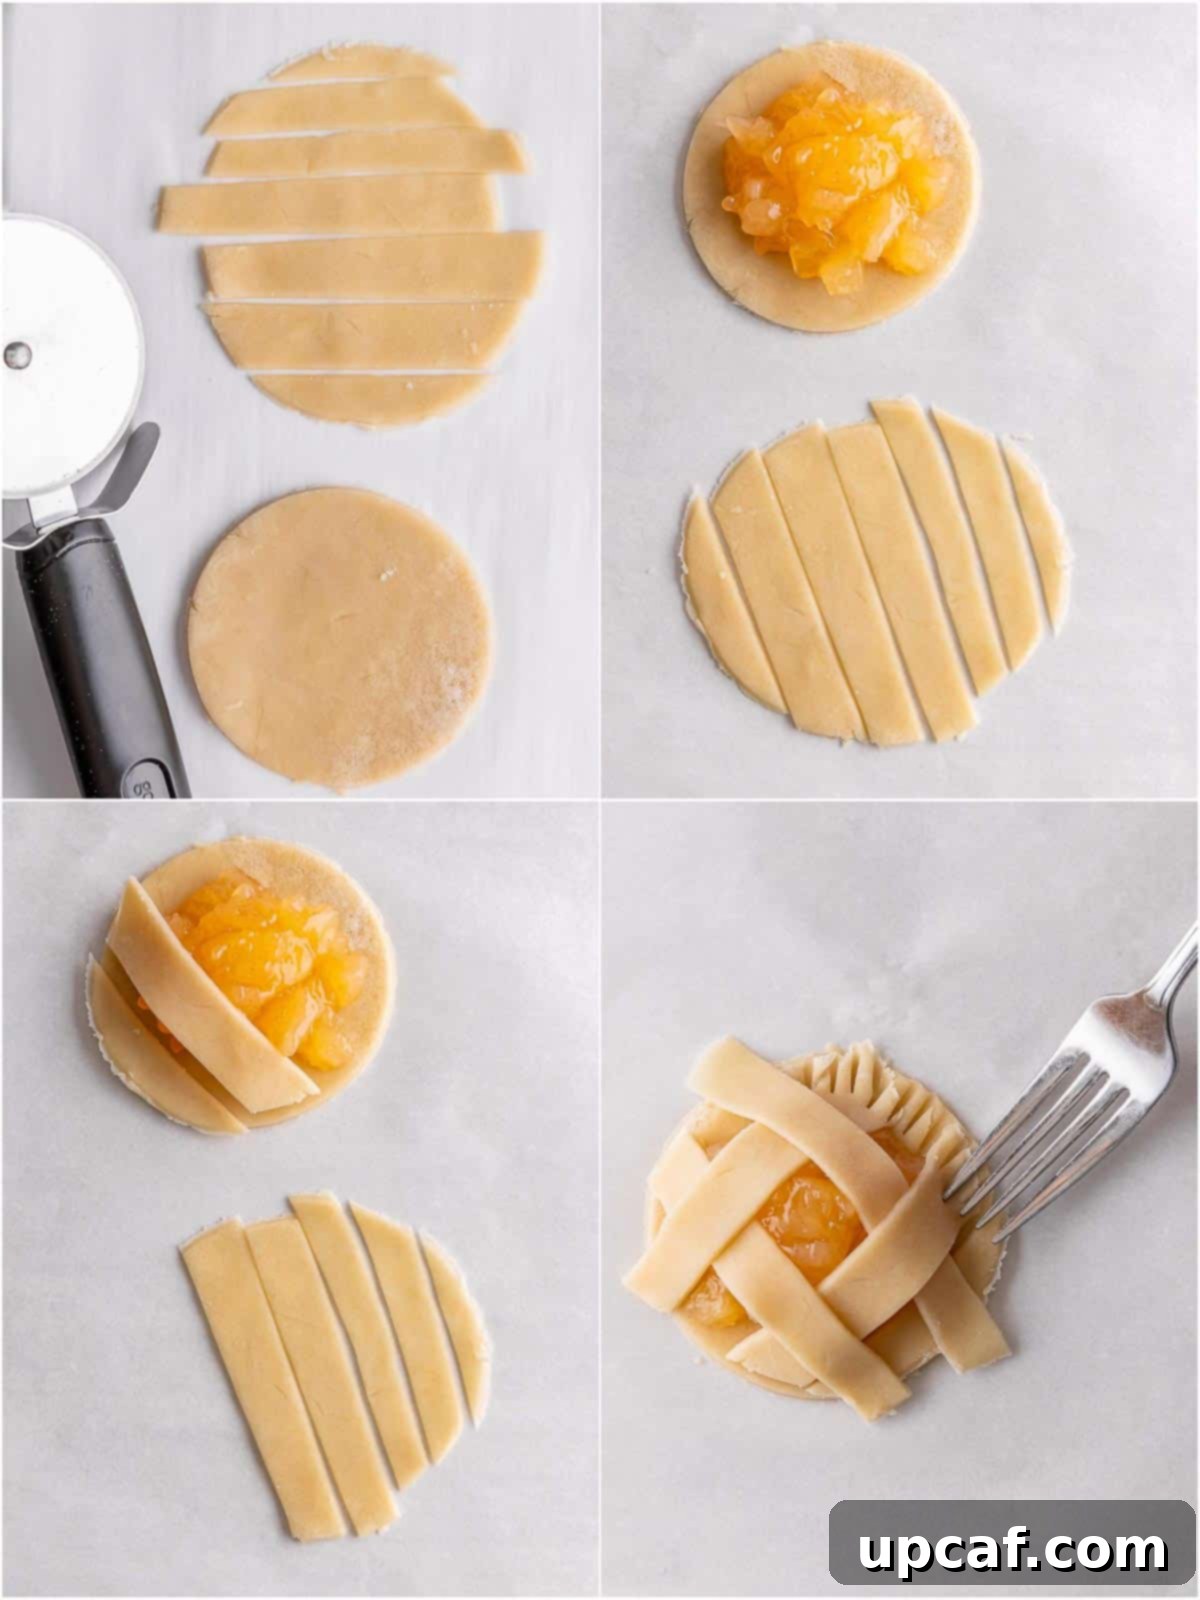
- Add the Apple Filling: Carefully spoon about a tablespoon (or slightly more, depending on the size of your base circles) of the chopped apple pie filling onto the center of each 2.5-inch pie crust round. Leave a small border around the edge for sealing.
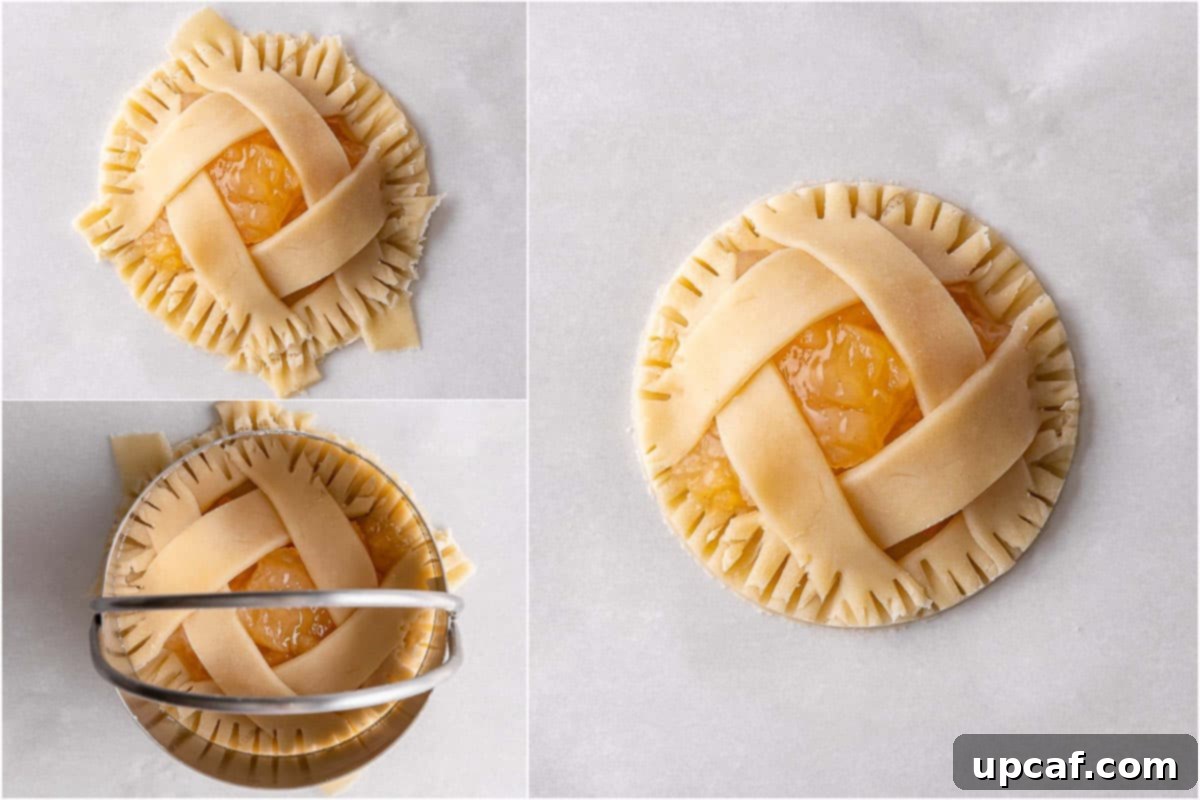
- Create the Lattice Top & Seal Edges: Take your 3-inch pie crust circles and, using a pizza cutter or a small knife, cut them into several thin strips. Carefully arrange these strips over the apple filling on the smaller pie crust rounds, overlapping them to create an attractive lattice pattern. Once the lattice is formed, gently press the edges of the top crust strips into the bottom crust. Use the tines of a fork to crimp and seal the edges all around each mini pie, ensuring the filling is securely contained. For a super neat finish, you can then press down with a 2.5-inch cookie cutter once more to trim any excess dough and create perfect, clean edges.
- Transfer & Prepare for Baking: Carefully transfer the assembled mini pies onto the parchment-lined baking sheet, spacing them a few inches apart.
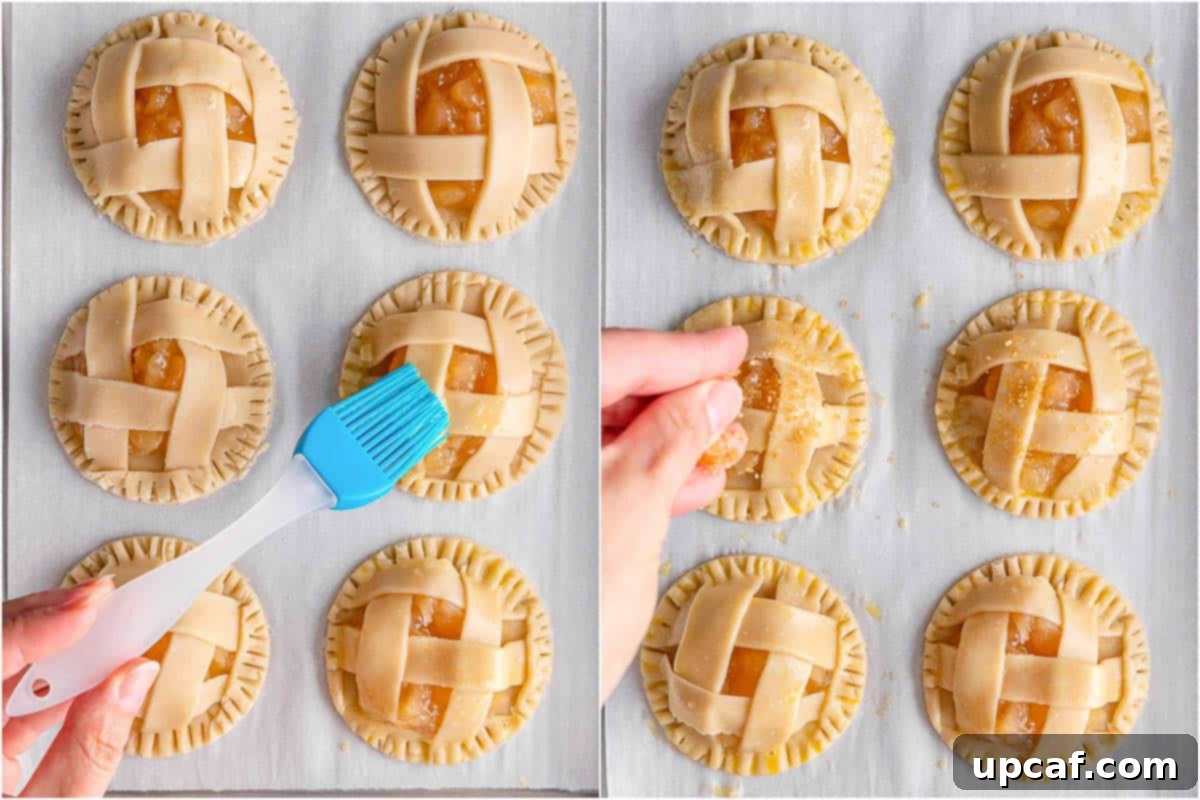
- Brush with Egg Wash & Sugar: Using a pastry brush, evenly coat the tops of all the mini apple pies with the prepared egg wash mixture. Immediately after, sprinkle a generous amount of demerara (turbinado) sugar over each pie.
- Bake to Golden Perfection: Place the baking sheet with the mini pies into the preheated oven. Bake for approximately 30 minutes, or until the crust is beautifully golden brown and the filling is bubbly. Keep an eye on them towards the end to prevent over-browning.
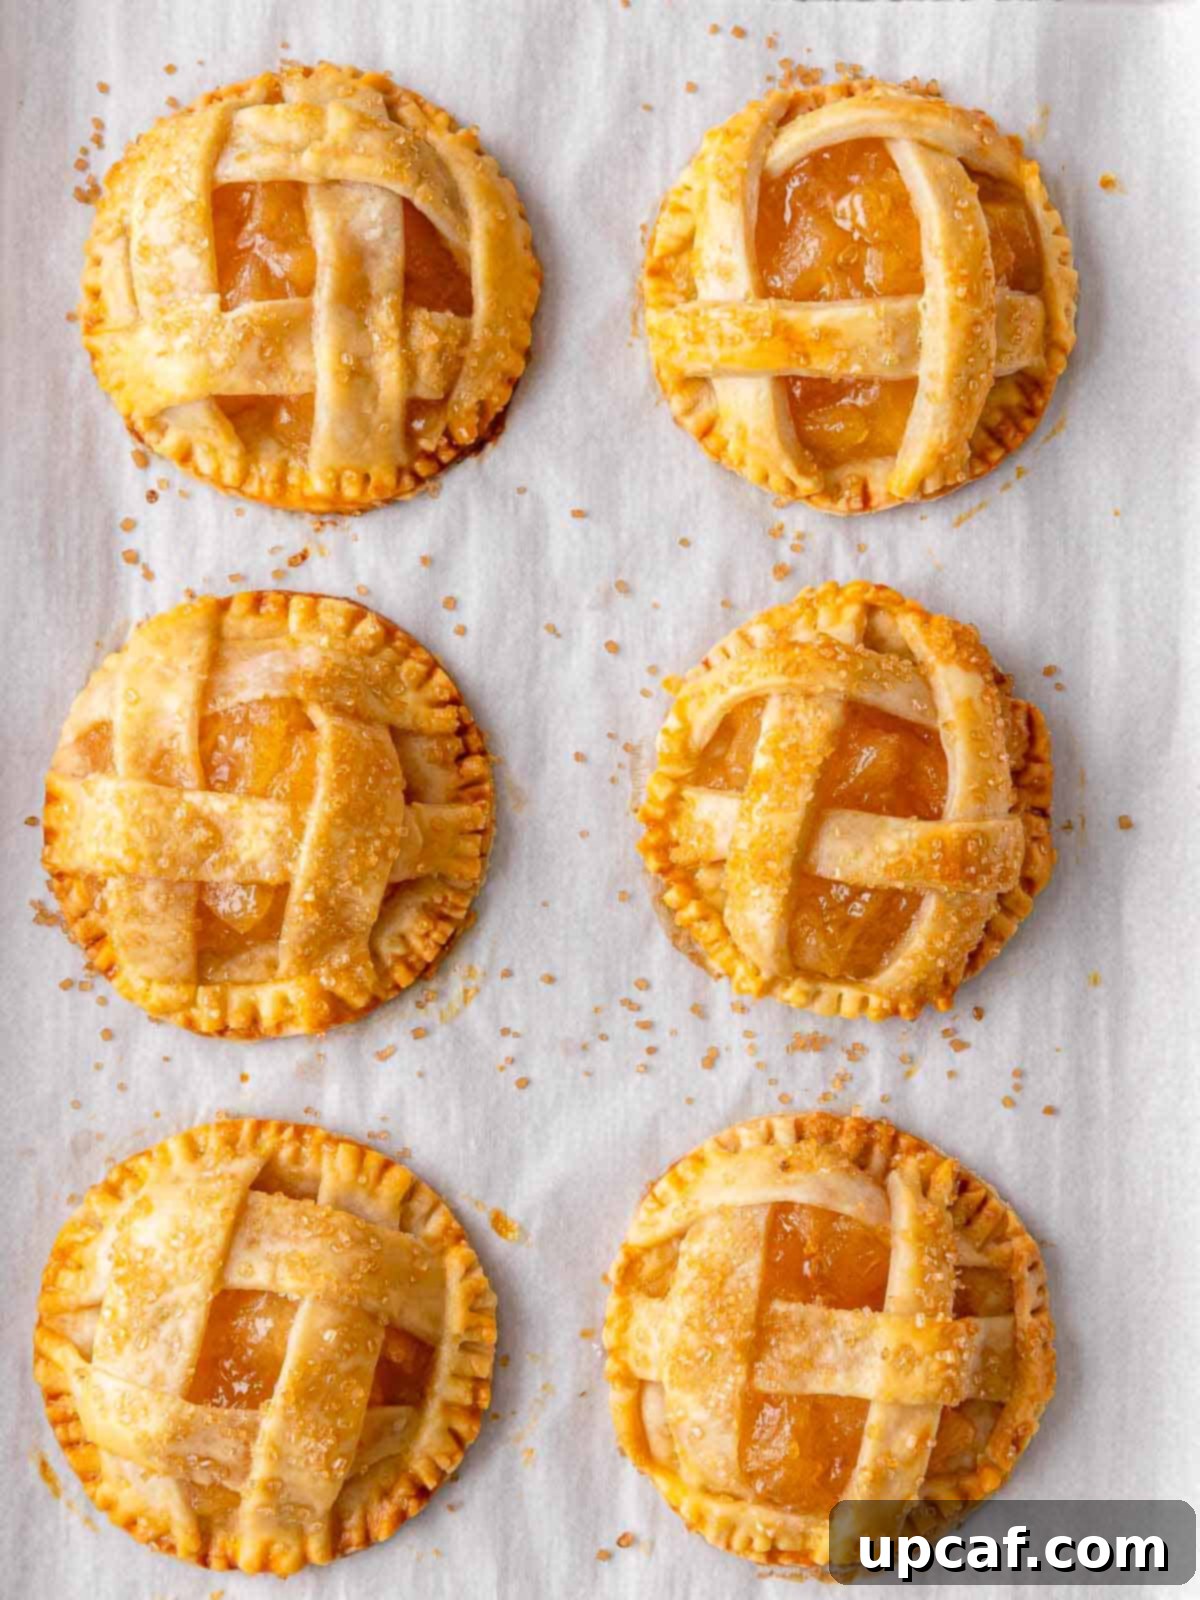
- Cool and Serve: Once baked, remove the pies from the oven and let them cool on the baking sheet for a few minutes before transferring them to a wire rack to cool completely. These mini apple pies are delicious served warm or at room temperature.
Expert Tips for Crafting the Perfect Mini Apple Pies
Elevate your mini apple pie experience with these helpful tips and tricks:
- Cookie Cutter Alternatives: Don’t have a specific cookie cutter size? No problem! Get creative with what you have. A small round bowl, a clean mason jar lid, or even the rim of a drinking glass can serve as a template. Simply press it onto the dough to make an impression and then carefully cut around it with a sharp knife.
- Combatting Sticky Dough: Pie dough can sometimes become warm and sticky, making it difficult to handle. If your dough starts to cling to your hands or rolling pin, simply pop it into the freezer for 5-10 minutes. A quick chill will firm it up and make it much easier to work with.
- Flavor Boost with Spices: Enhance the classic apple flavor by mixing a pinch of ground cinnamon, a dash of nutmeg, or even a tiny bit of allspice with your demerara sugar before sprinkling it on top. This adds an extra layer of cozy, aromatic warmth to your pies. A small amount of lemon zest could also brighten the filling.
- Serving Suggestions for Indulgence: While delicious on their own, these mini apple pies become an even more decadent dessert when served warm with a scoop of creamy vanilla ice cream. The contrast of warm pie and cold ice cream is simply divine.
- Sweet Caramel Drizzle: For an extra layer of sweetness and a touch of gourmet flair, drizzle a homemade or store-bought caramel sauce over the top of your mini pies just before serving. The rich, buttery notes of caramel complement the apple beautifully.
- Preventing Over-Browning: If your pie crusts start browning too quickly during baking but the filling isn’t quite set, loosely tent the baking sheet with aluminum foil. This will protect the crust from burning while allowing the pies to finish baking.
- Don’t Overfill: While it’s tempting to load up on the apple filling, avoid overfilling your mini pies. Too much filling can make it difficult to seal the crusts and may cause the filling to bubble out during baking, leading to a messy pie and potentially a soggy bottom.
Frequently Asked Questions About Mini Apple Pies
For this particular recipe, the beauty lies in its simplicity. Since we are using pre-made canned apple pie filling, there’s no need to cook the apples beforehand. The filling is already prepared and seasoned, saving you a significant amount of time and effort typically involved in peeling, slicing, par-cooking, and seasoning fresh apples. This convenience is what makes these mini pies so quick and easy to prepare.
To maintain their freshness and delicious taste, any leftover mini apple pies should be stored in an airtight container or tightly wrapped with plastic food wrap. Place them in the refrigerator, where they will stay fresh for 2 to 3 days. When you’re ready to enjoy them again, you can gently reheat them in the microwave for a few seconds until warm, or in a toaster oven for a crispier crust.
Absolutely! These mini apple pies freeze exceptionally well, offering a fantastic make-ahead option. You have the flexibility to freeze them either before or after baking. If freezing before baking, arrange the unbaked pies on a baking sheet and flash freeze them until solid. Once frozen, transfer them to a freezer-safe bag or container, ensuring they are well-wrapped to prevent freezer burn. This method prevents them from sticking together. When ready to bake, bring them to room temperature before unwrapping and baking as directed. If freezing after baking, allow them to cool completely before wrapping and freezing. Thaw them overnight in the refrigerator and then reheat gently.
For the best results with these mini apple pies, we highly recommend baking them completely and then storing them in the refrigerator if you wish to prepare them in advance. If you were to assemble them and leave them unbaked in the fridge, the moisture from the apple pie filling could cause the pie crust to become soggy and unpleasant, losing its desired flaky texture. Baking them first ensures the crust remains crisp and delightful.
No, there’s no need to prebake or “blind bake” the pie crust for these mini apple pies. This recipe is designed for maximum ease and comes together quickly, with all components baking simultaneously to perfection. Skipping the blind-baking step streamlines the process, allowing you to enjoy your homemade treats even faster.
For this recipe, round cookie cutters in two sizes are ideal: a 2.5-inch cutter for the base and a 3-inch cutter for the lattice top. This slight difference in size allows for easy creation of the lattice and ensures a good seal. If you don’t have these exact sizes, aim for a smaller size for the base and a slightly larger one for the top crust to allow for overlap and sealing.
The mini apple pies are ready when their crusts are a beautiful golden brown color and you can see the apple filling bubbling through the lattice top. This indicates that the crust is cooked through and the filling has heated sufficiently. If the crust starts to brown too much before the filling is hot, you can loosely cover them with aluminum foil.
More Easy Dessert Recipes to Savor
If you loved these mini apple pies, you’ll surely enjoy exploring other quick and delicious dessert ideas:
- Banana Cream Pie Chia Pudding
- Apple Cinnamon Baked Oatmeal Cups
- Apple Pie Protein Chia Seed Pudding
- Pumpkin Pie Cheesecake Bars
- Cinnamon Apple Crumb Cake
We sincerely hope you cherish every recipe shared here, especially this delightful Mini Apple Pies recipe. We encourage you to try it, savor every bite, share your experience, and let your friends and family enjoy these wonderful treats!
If this recipe becomes a new favorite, please consider leaving a star rating and a comment below. Share your delicious creations with us on Instagram using our hashtag so we can see your amazing results! Also, for all our latest social posts and exciting new recipes, follow us on FACEBOOK | INSTAGRAM | PINTEREST.
Baked Mini Apple Pies
Ingredients
- 2 pieces frozen pie crust, 9″
- 1 can apple pie filling
- 1 medium egg, plus 2 tsp water
- demerara (turbinado) sugar, for topping
Instructions
- Defrost the Pie Crust by placing it in the refrigerator overnight. After it has defrosted, bring it to room temperature. Simply place it on the countertop for an hour.
- Preheat oven to 350F.
- Whisk one egg with 2 teaspoons of water. Set aside
- Chop apple pie filling with a help of a knife or a spoon so they are in small chunks. Set aside.
- Carefully remove the pie crust from the packaging. Sprinkle the work surface and dough rolling pin with just a little bit of flour. Transfer the dough onto the countertop.
- Use a rolling pin to gently flatten the ends of each pie crust. Give the dough a few more rolls but don’t roll out too much so it is super thin. It should be about 9.5-10” in diameter, not more.
- With the help of a 2.5” cookie cutter cut circles from one pie crust piece.
- Use a 3” round cookie cutter to cut circles from the second pie crust piece. Try to have an even number of circles from each dough crust piece.
- Spoon a tablespoon or so of apple pie filling onto all 2.5” rounds.
- With the help of the pizza cutter cut the 3” circle into few thin strips. Place strips on top of the apple pie filling overlapping them to make a lattice pattern.
- Press down edges with the fork and then press with 2.5” cookie cutter to clean up the edges.
- Line a cookie sheet with parchment paper. Transfer to the baking sheet. Repeat this with all the pie crust circles.
- Brush the egg wash mixture on top of all the apple pies and sprinkle with sugar.
- Bake for about 30 minutes until nice golden in color.
- Enjoy warm or cooled.
Notes
- If you don’t have a cookie-cutter, you can use a small round bowl as a template and use a knife to trace the round shape out. You can also a mason jar lid.
- If the pie dough starts becoming too sticky to work with, place it in the freezer for a few minutes to chill it.
- Mix some cinnamon with the sugar for an extra cozy flavor.
- Serve with a scoop of vanilla ice cream for a delicious dessert.
- Try a drizzle of caramel on top before serving for an even sweeter apple pie!
Nutrition Information
Approximate values per serving (based on 8 servings):
- Calories: 288 kcal
- Carbohydrates: 43g
- Protein: 3g
- Fat: 12g
- Saturated Fat: 4g
- Polyunsaturated Fat: 1g
- Monounsaturated Fat: 5g
- Trans Fat: 1g
- Cholesterol: 20mg
- Sodium: 217mg
- Potassium: 83mg
- Fiber: 2g
- Sugar: 13g
- Vitamin A: 48IU
- Vitamin C: 1mg
- Calcium: 14mg
- Iron: 1mg
(Please note: Nutritional information is an estimate and may vary depending on specific ingredients used and preparation methods.)
