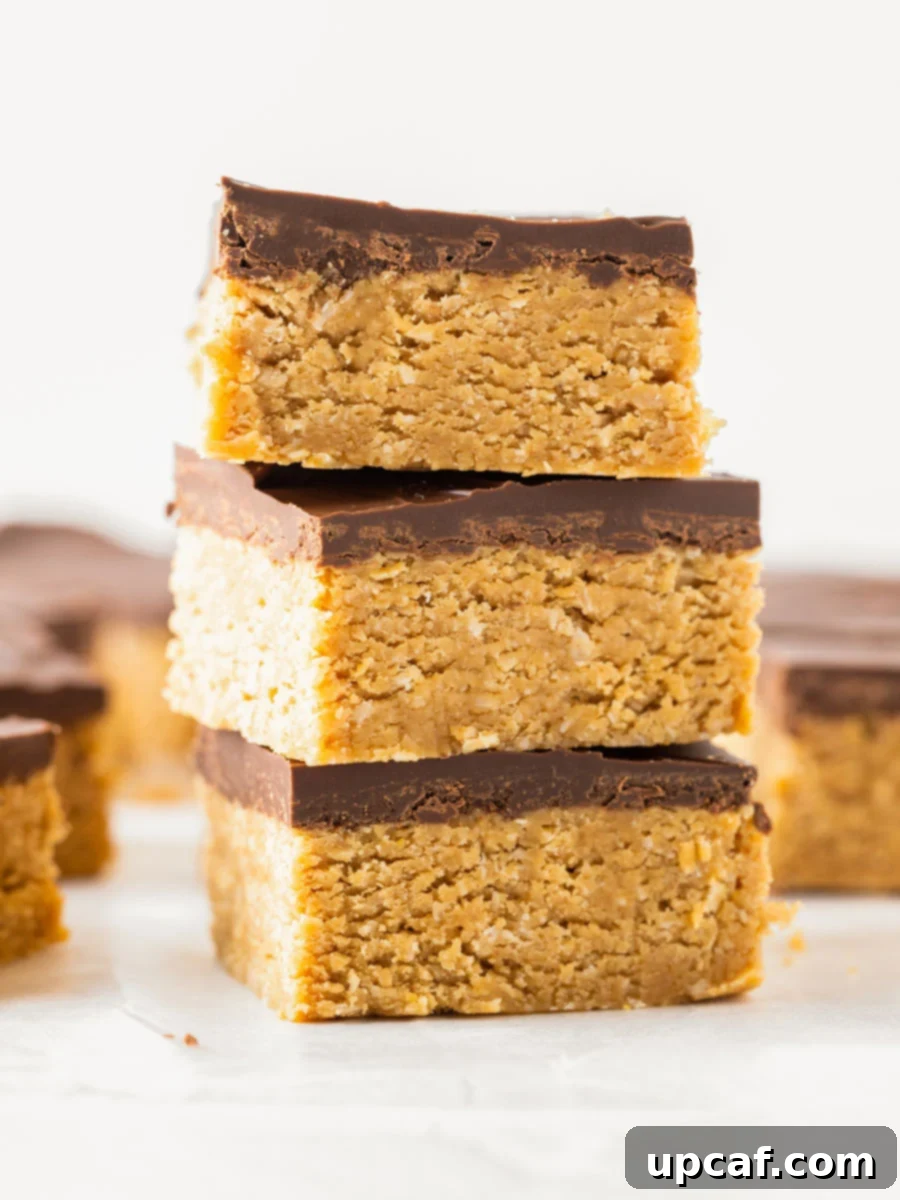
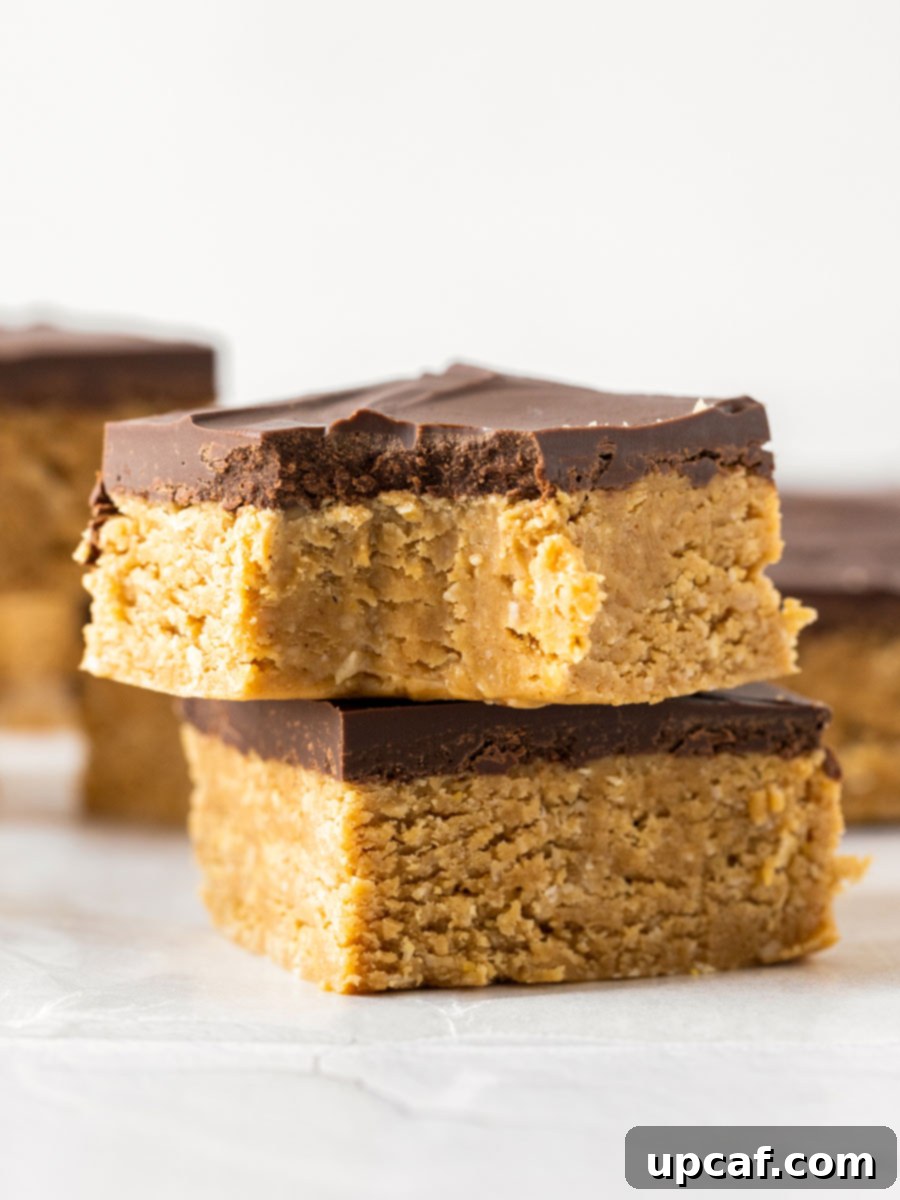
If you’re searching for an effortless, utterly delicious dessert that requires absolutely no baking, your quest ends here with these spectacular no-bake Chocolate Peanut Butter Oatmeal Bars. A timeless classic reinvented for modern convenience, these bars deliver a perfect harmony of rich chocolate and creamy peanut butter, all held together by wholesome oats. They’re the ultimate treat to satisfy your sweet cravings without ever needing to turn on the oven, making them ideal for any time of year, especially those warm days when you want to keep your kitchen cool.
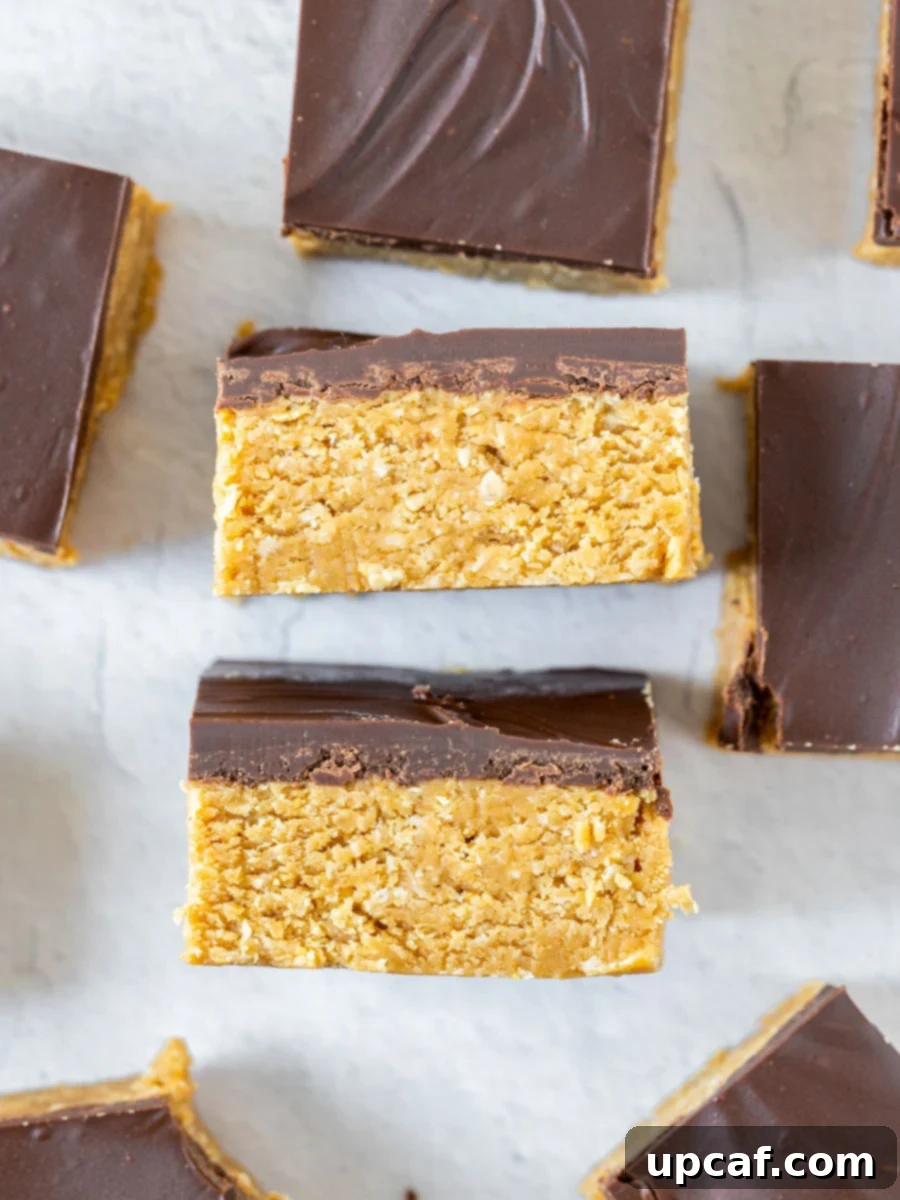
Crafted with just a handful of simple ingredients, these Chocolate Peanut Butter Oatmeal Bars are destined to become your go-to dessert for any occasion. They offer that beloved flavor profile reminiscent of your favorite peanut butter cups, but in a wonderfully chewy bar form. With minimal prep time, you can whip up a batch quickly, pop them into the fridge, and have a decadent dessert ready to enjoy in just about an hour. They are incredibly easy to make, delightful to eat, and a fantastic way to impress guests or simply treat yourself and your family.
For those who love incorporating oatmeal into their recipes, be sure to explore more of our delightful creations, such as our Chocolate Chip Baked Oatmeal and a comforting Blueberry Oatmeal Bake.
Why You’ll Fall in Love with These No-Bake Chocolate Peanut Butter Oatmeal Bars
These no-bake bars are more than just a dessert; they’re a convenient and delicious solution for your sweet tooth. Here are compelling reasons why this recipe will quickly become a household favorite:
- No Baking Required: Say goodbye to hot ovens and lengthy baking times. This recipe is perfect for scorching summer days, busy weeknights, or anytime you prefer to keep your kitchen cool and clean. Just mix, press, chill, and enjoy!
- Quick and Easy Preparation: From start to finish, you’ll spend only about 15 minutes of active prep time. The simplicity of this recipe makes it ideal for novice bakers, kids who love to help in the kitchen, or anyone looking for a quick and rewarding treat.
- Minimal Pantry Staples: You likely already have most of the ingredients in your pantry. This recipe relies on common, affordable items, making it an economical choice for a delicious homemade dessert.
- Irresistible Flavor Combination: The classic pairing of rich chocolate and creamy peanut butter is universally loved. These bars perfectly capture that crave-worthy balance, delivering a taste that rivals your favorite candy bars.
- Versatile and Customizable: Whether you prefer a saltier kick, an extra crunch, or a different type of nut butter, these bars are incredibly adaptable to your personal preferences and dietary needs.
Key Ingredients for Your Chocolate Peanut Butter Oatmeal Bars
The magic of these no-bake treats lies in their wholesome yet simple ingredients. Each component plays a crucial role in creating the perfect texture and flavor. Here’s a closer look at what you’ll need:
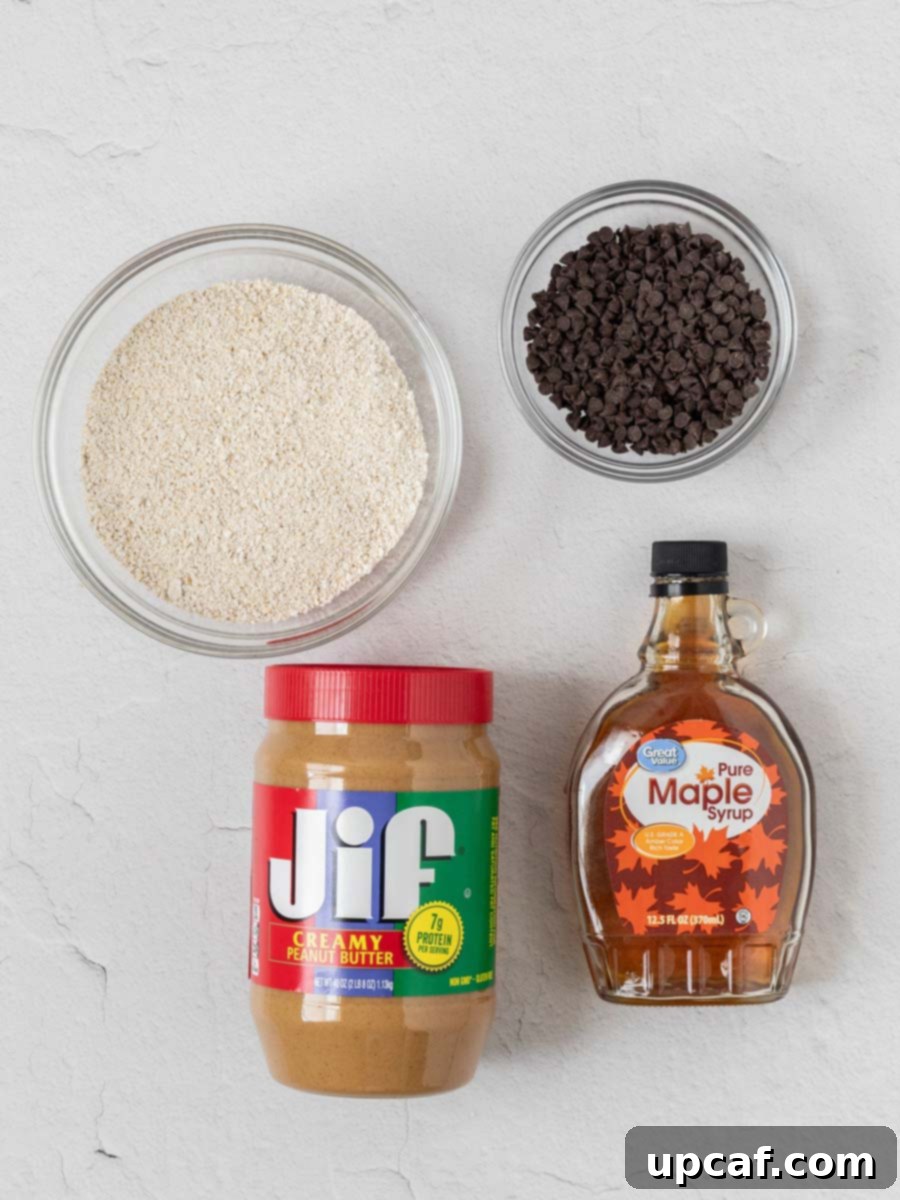
- Quick Oats: These finely cut oats are essential for achieving the perfect chewy texture in the base layer. Unlike rolled oats, quick oats absorb moisture faster and bind together seamlessly, forming a firm and satisfying foundation for your bars. They also contribute a healthy dose of fiber!
- Creamy Peanut Butter: The undisputed star of the show, creamy peanut butter provides an incredibly rich, smooth, and unmistakable flavor. It acts as the primary binder for the base and contributes to the luscious topping, making these bars wonderfully decadent.
- Maple Syrup: This natural sweetener not only adds a delightful depth of flavor but also plays a vital role in binding the base ingredients without making them grainy. Its liquid consistency ensures a perfectly smooth and uniform texture throughout the oat layer.
- Dark Chocolate Chips: Used for the irresistible top layer, dark chocolate chips melt down into a glossy, smooth coating that perfectly complements the peanut butter base. The slight bitterness of dark chocolate provides a beautiful contrast to the sweetness of the other ingredients, creating a sophisticated flavor profile.
- Vanilla Extract: While optional, a touch of vanilla extract significantly amplifies the overall flavor profile, adding warmth and depth to both the peanut butter base and the chocolate topping. It’s a simple addition that makes a big difference.
- Butter: A small amount of butter is added to the chocolate topping to ensure a smooth, glossy finish and a perfectly spreadable consistency. It helps create that melt-in-your-mouth experience when combined with the chocolate and peanut butter.
Creative Substitutions and Delicious Variations
One of the best things about these no-bake bars is how easily they can be customized to suit your taste or what you have on hand. Don’t hesitate to get creative!
- Topping Enhancements: Elevate your bars with an extra sprinkle! A dash of sea salt flakes on top enhances the chocolate and peanut butter flavors beautifully. You can also add a layer of crushed peanuts, chopped pretzels, or even colorful sprinkles for added texture and visual appeal. A drizzle of white chocolate or milk chocolate could also be a delightful addition.
- Base Layer Swaps: For a different flavor and texture, consider substituting a portion or all of the oats. Crushed graham cracker crumbs offer a classic, slightly sweet base, while crushed pretzels introduce a fantastic salty-sweet dynamic that’s incredibly addictive. You could also experiment with crushed vanilla wafers or shortbread cookies.
- Nut Butter Alternatives: If peanut allergies are a concern or you simply prefer a different flavor, almond butter or cashew butter can be used as a direct substitute. For a completely nut-free version, sunflower seed butter (like SunButter) works wonderfully, maintaining that creamy texture and rich flavor.
- Chocolate Choices: While dark chocolate chips provide a sophisticated touch, feel free to use milk chocolate chips for a sweeter, creamier topping, or semi-sweet chocolate chips for a balanced flavor. You can even mix different types of chocolate for a more complex profile.
- Add-ins for Extra Fun: Mix mini chocolate chips, shredded coconut, or chopped nuts (like walnuts or pecans) into the oat base for an added layer of flavor and texture.
Step-by-Step Guide: How to Craft Your Perfect No-Bake Chocolate Peanut Butter Oatmeal Bars
Making these decadent bars is incredibly straightforward, involving just a few simple steps. Follow this guide to achieve perfectly delicious results every time.
Step 1: Prepare Your Baking Pan
Start by preparing an 8×8 inch square baking pan. Lightly spray the pan with a non-stick cooking spray, then line it with parchment paper or aluminum foil, leaving an overhang on the sides. This overhang will act as “handles,” making it incredibly easy to lift the set bars out of the pan later for clean slicing. Set your prepared pan aside.
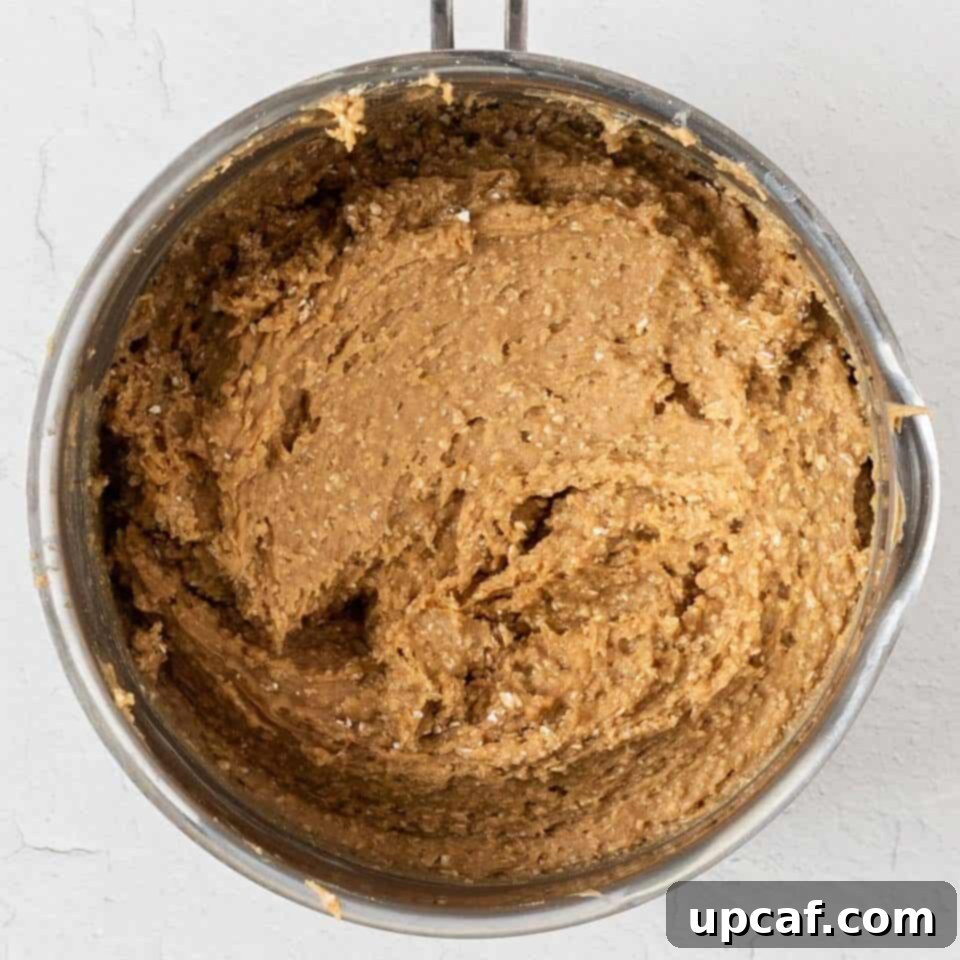
In a medium-sized saucepan, combine 2 cups of creamy peanut butter and ½ cup of maple syrup. Heat this mixture over medium heat, stirring continuously with a spatula or wooden spoon. Continue stirring until the ingredients are fully combined and the mixture becomes smooth and warm. Remove from heat, then add 3 cups of quick oats and 1 teaspoon of vanilla extract (if using) to the saucepan. Stir vigorously until the oats are thoroughly incorporated and the mixture is thick and evenly coated.
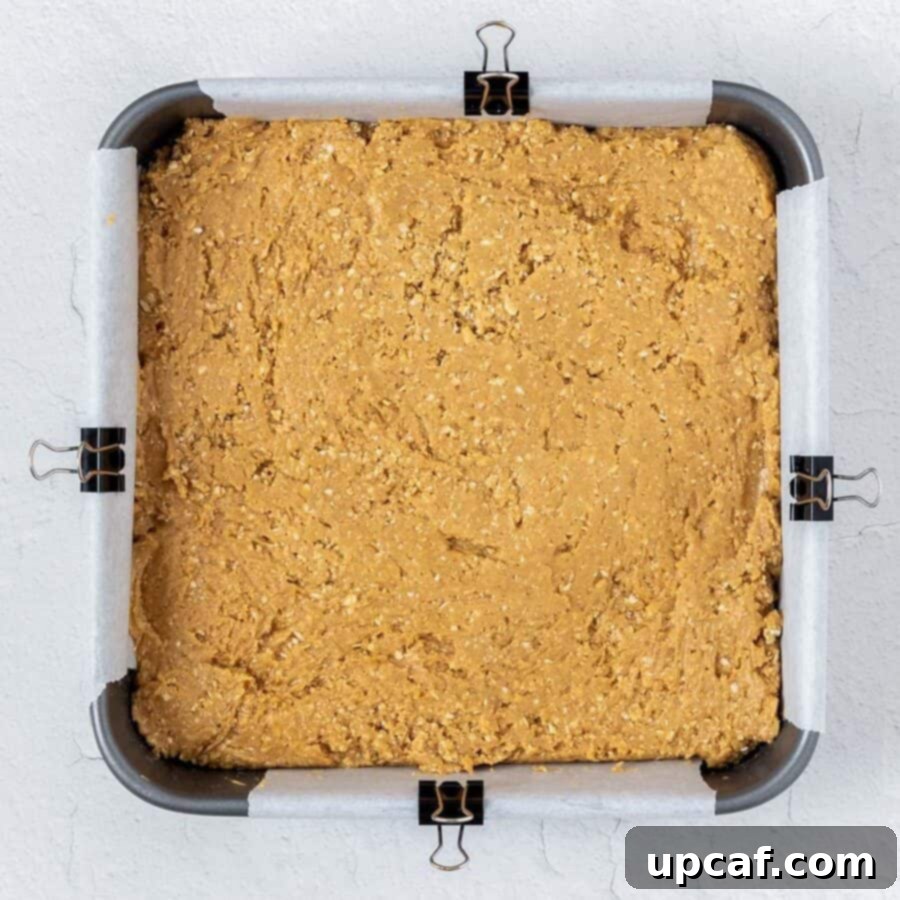
Transfer the warm peanut butter oat mixture into your prepared 8×8 inch pan. Using the back of a spoon, a spatula, or your clean hands (lightly greased if it’s too sticky), press the mixture down firmly and evenly across the bottom of the pan. It’s crucial to press it down well to ensure the bars hold their shape when cut. Set the pan aside.
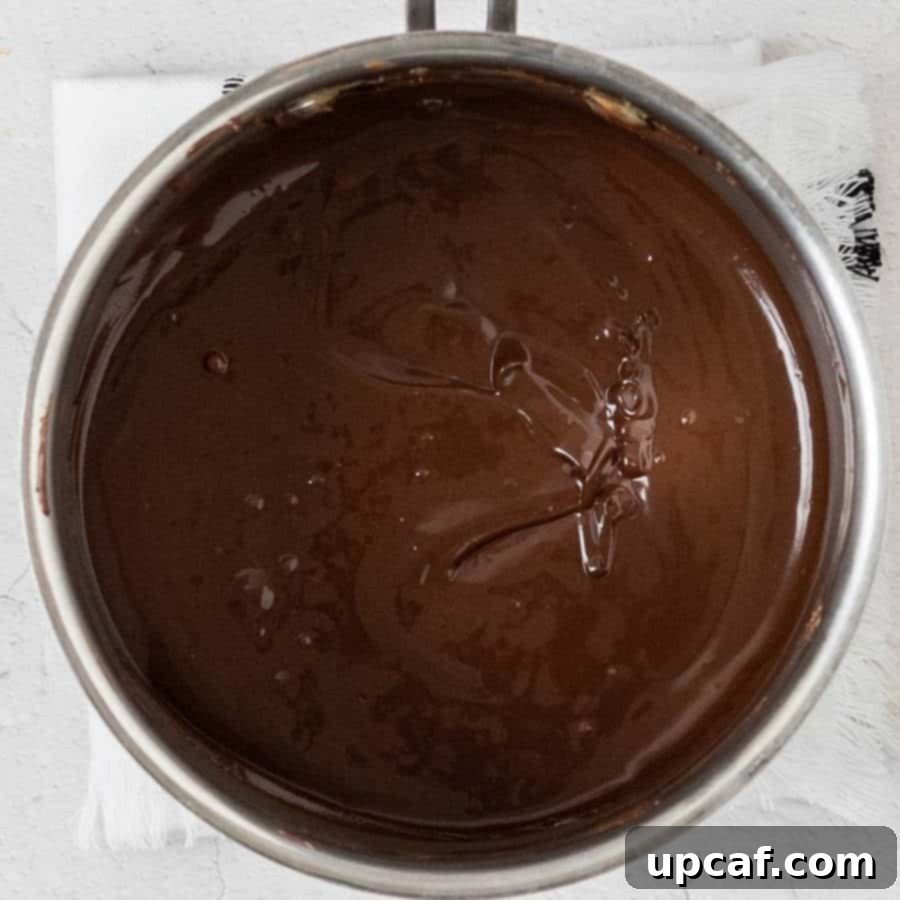
In a separate small saucepan, combine 1¼ cups of dark chocolate chips, ¼ cup of creamy peanut butter, and 1 tablespoon of butter. Heat this mixture over very low heat, stirring constantly. Continue to stir until all the ingredients are fully melted and smoothly combined. Be careful not to overheat the chocolate, as it can seize. You’ll achieve a rich, glossy, and perfectly pourable chocolate mixture.
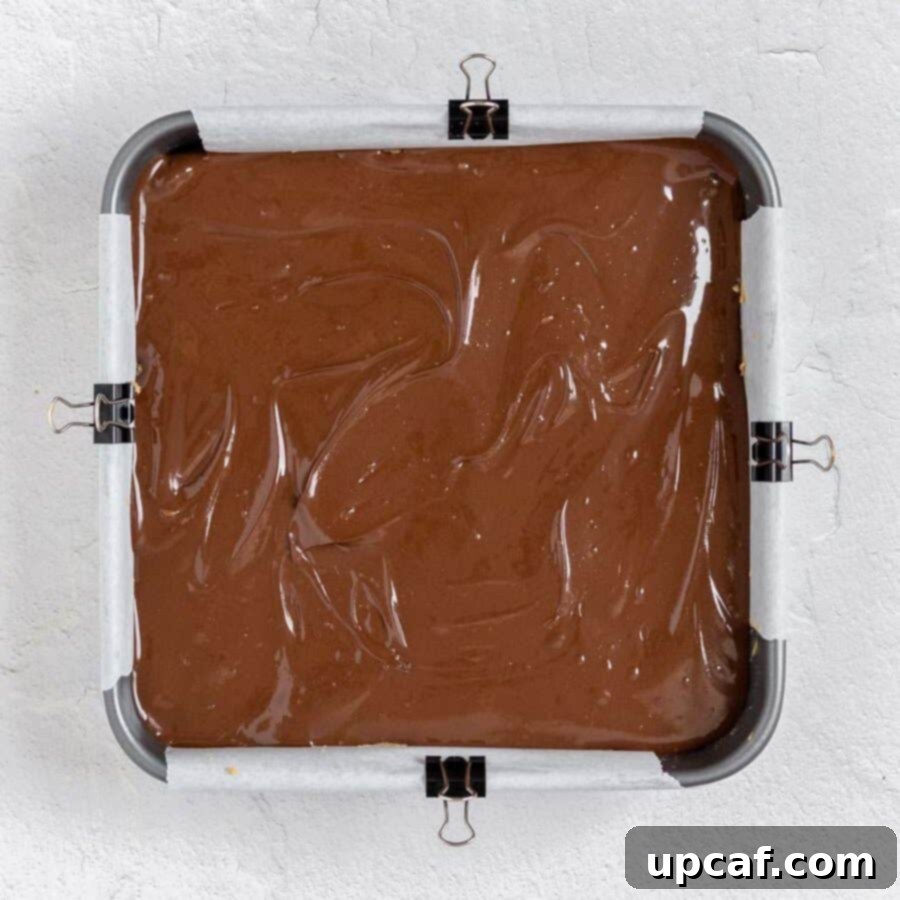
Carefully pour the freshly melted chocolate mixture over the pressed oat base in the pan. Using a spatula or the back of a spoon, gently spread the chocolate evenly across the entire surface of the bars, ensuring a smooth and consistent layer from edge to edge. If desired, sprinkle with sea salt or other toppings at this stage before the chocolate sets.
Step 6: Chill Until Firm, Then Serve
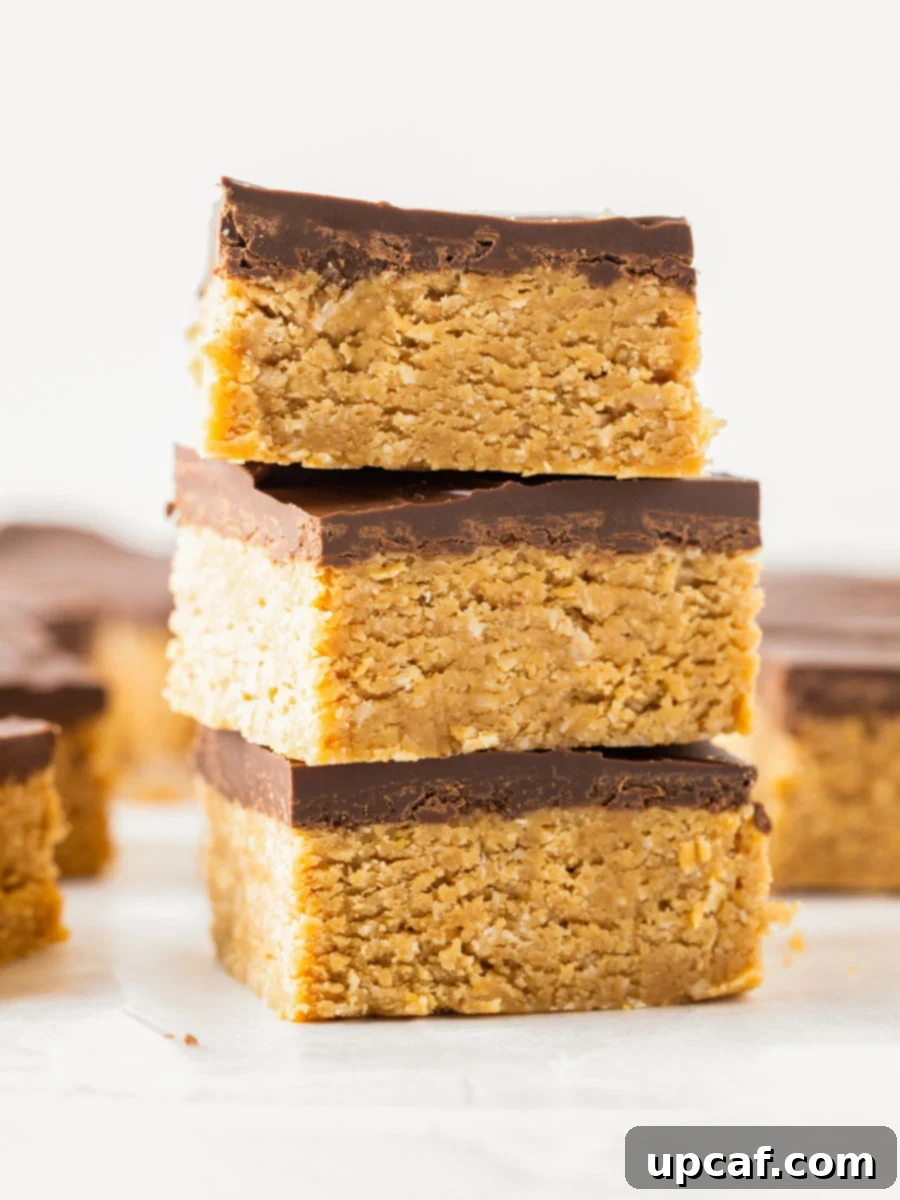
Once the chocolate topping is spread, transfer the pan to the refrigerator. Allow the bars to chill for at least 1 hour, or until the chocolate layer is completely firm and set. Chilling is essential for the bars to hold their shape and make for clean cuts. Once thoroughly chilled, lift the entire block of bars out of the pan using the parchment paper overhang. Place them on a cutting board, slice them into 16 equal-sized bars, and serve chilled. Enjoy your homemade, perfectly sweet, and utterly satisfying no-bake treats!
Expert Tips for Crafting the Perfect No-Bake Bars
Achieving bakery-quality no-bake bars is easy with these insider tips:
- Press Down Firmly for a Stable Base: This is a critical step! When pressing the oat mixture into the pan, apply firm and even pressure across the entire surface. A well-compacted base ensures that your bars hold together beautifully when sliced and don’t crumble apart.
- Chill Completely for Best Results: Patience is key here. Allow the bars to chill in the refrigerator for the full recommended time, at least 1 hour, or until the chocolate topping is completely firm to the touch. Rushing this step will result in soft, messy bars that are difficult to cut cleanly.
- Master the Art of Clean Slices: For those picture-perfect, neat cuts, use a sharp, thin-bladed knife. Before each cut, run the knife under hot water for a few seconds, then quickly wipe it dry. The warm blade will glide through the chocolate and peanut butter layers without dragging or cracking, resulting in beautifully clean edges.
- Use Quality Ingredients: While simple, the quality of your peanut butter and chocolate can significantly impact the final flavor. Opt for creamy, good-quality peanut butter and chocolate chips for the best taste and texture.
- Don’t Overheat the Chocolate: When melting the chocolate topping, always use low heat and stir continuously. High heat can cause the chocolate to seize or burn, resulting in a grainy, unappetizing topping.
Frequently Asked Questions About No-Bake Chocolate Peanut Butter Oatmeal Bars
Here are answers to some common questions about making and enjoying these delightful no-bake bars:
For those beautiful, neat slices, your best friend is a sharp knife and hot water. Simply run your knife under hot water for a few seconds before each cut, then wipe it clean and dry. The warmth from the blade will help it glide smoothly through the chocolate without causing it to crack or smudge, giving you crisp edges every time. If the chocolate is very cold, let the bars sit at room temperature for 5-10 minutes first.
While you can melt ingredients in the microwave, I generally prefer the stovetop method, especially for the base. This allows for more even heat distribution and constant stirring, which helps prevent scorching or uneven melting. If you opt for the microwave, use a microwave-safe bowl and heat in short bursts (15-30 seconds), stirring thoroughly after each interval until smooth. Keep a close eye on it to avoid overheating.
These delicious bars store very well! Place them in an airtight container and keep them refrigerated for up to one week. If you’re looking for a longer storage solution, these bars also freeze beautifully. Wrap individual bars tightly in plastic wrap, then store them in a freezer-safe bag or container for up to 2 months. Thaw them in the refrigerator or at room temperature for a few minutes before enjoying.
Chocolate cracking is usually a sign that it’s too cold and brittle. To prevent this, allow your chilled bars to sit at room temperature for about 5 to 10 minutes before attempting to cut them. This slight warming period will soften the chocolate just enough to make it pliable and less prone to cracking. Using the hot knife trick mentioned above will also significantly help.
Yes, you absolutely can use natural peanut butter, but there’s a small trick to it. Natural peanut butter tends to separate, with oil rising to the top. Make sure to stir it very thoroughly until it’s completely smooth and homogeneous before measuring and using it. If the oil isn’t well incorporated, it can affect the texture and consistency of your bars, making them potentially greasier or less firm.
These bars can easily be made gluten-free! The main ingredient to consider is the oats. While oats are naturally gluten-free, they are often processed in facilities that also handle wheat, barley, and rye, leading to cross-contamination. To ensure your bars are truly gluten-free, simply use certified gluten-free quick oats.
Explore More Irresistible Dessert Bar Recipes
If you loved these no-bake bars, you’re in for a treat! Discover more delightful bar recipes that are perfect for any occasion:
- Homemade Fruit and Nut Bars Recipe
- Almond Joy Cheesecake Bars
- Easy Coconut Cheesecake Bars
- Easy Crème Brûlée Cheesecake Bars
- Key Lime Pie Bars
Chocolate Peanut Butter Oatmeal Bars Recipe Card
Here’s the full recipe for these easy and delicious No-Bake Chocolate Peanut Butter Oatmeal Bars, ready for you to make!
Chocolate Peanut Butter Oatmeal Bars
By: Mariam Ezzeddine
Decadent and velvety, these No-Bake Chocolate Peanut Butter Oatmeal Bars are a breeze to prepare! They are the ideal indulgence for times when your oven is occupied or when you wish to avoid warming up the kitchen.
- Prep Time:
- 10 minutes
- Cook Time:
- 5 minutes
- Rest Time:
- 1 hour
- Total Time:
- 1 hour 15 minutes
- Servings:
- 12 bars
Ingredients
For peanut butter base:
- 2 cups creamy peanut butter
- ½ cup maple syrup
- 3 cups quick oats
- 1 tsp vanilla extract (optional)
For chocolate topping:
- 1¼ cup dark chocolate chips
- ¼ cup creamy peanut butter
- 1 tbsp butter
Instructions
- Spray an 8×8 inch pan with non-stick spray and line with parchment paper or foil, leaving an overhang. Set aside.
- In a medium saucepan, heat 2 cups peanut butter and maple syrup over medium heat, stirring constantly until fully combined and smooth. Add the quick oats and vanilla extract (if using) and stir until fully combined. The mixture will be thick.
- Press the oat mixture evenly and firmly into the prepared pan. Set aside.
- In a small saucepan, heat the dark chocolate chips, ¼ cup peanut butter, and butter over low heat until fully melted and combined, stirring constantly to prevent scorching.
- Pour the melted chocolate mixture over the oat base and spread evenly with a spatula.
- Refrigerate the bars for at least 1 hour or until the chocolate is firm and completely set.
- Once chilled, use the parchment paper overhang to lift the bars from the pan. Cut into 12-16 equal-sized bars using a hot, clean knife. Serve chilled. Enjoy!
Notes
- Press Down Firmly: Ensure you press the base layer firmly into the pan to help the bars hold together well and prevent crumbling.
- Chill Completely: Let the bars chill for at least 1 hour to ensure they set properly and maintain their shape when cut.
- Cutting the Bars: For perfectly clean slices, use a sharp knife. Run the knife under hot water before each cut and wipe it clean between slices to prevent chocolate drag and cracking.
Nutrition Information (per bar, for 12 servings)
(Approximate values based on ingredients)
- Calories: 511 kcal
- Carbohydrates: 44 g
- Protein: 15 g
- Fat: 33 g
- Saturated Fat: 11 g
- Polyunsaturated Fat: 7 g
- Monounsaturated Fat: 13 g
- Trans Fat: 0.04 g
- Cholesterol: 3 mg
- Sodium: 230 mg
- Potassium: 495 mg
- Fiber: 5 g
- Sugar: 20 g
- Vitamin A: 31 IU
- Vitamin C: 0.1 mg
- Calcium: 105 mg
- Iron: 2 mg
These No-Bake Chocolate Peanut Butter Oatmeal Bars are a truly fantastic treat that’s incredibly easy to make and bursting with a flavor that’s hard to resist. With just a few simple ingredients and absolutely no need to turn on the oven, these bars are the perfect solution for a quick dessert, a satisfying snack, or a delightful contribution to any gathering. They’re wholesome, decadent, and universally loved. Enjoy them chilled and watch them disappear quickly!
If you try this recipe or any of my other delicious creations, please consider leaving a star rating and a comment in the section below to share your experience. Also, connect with us at Cookin’ With Mima on Facebook | Instagram | Pinterest for all our latest social posts, culinary inspiration, and new recipes.
