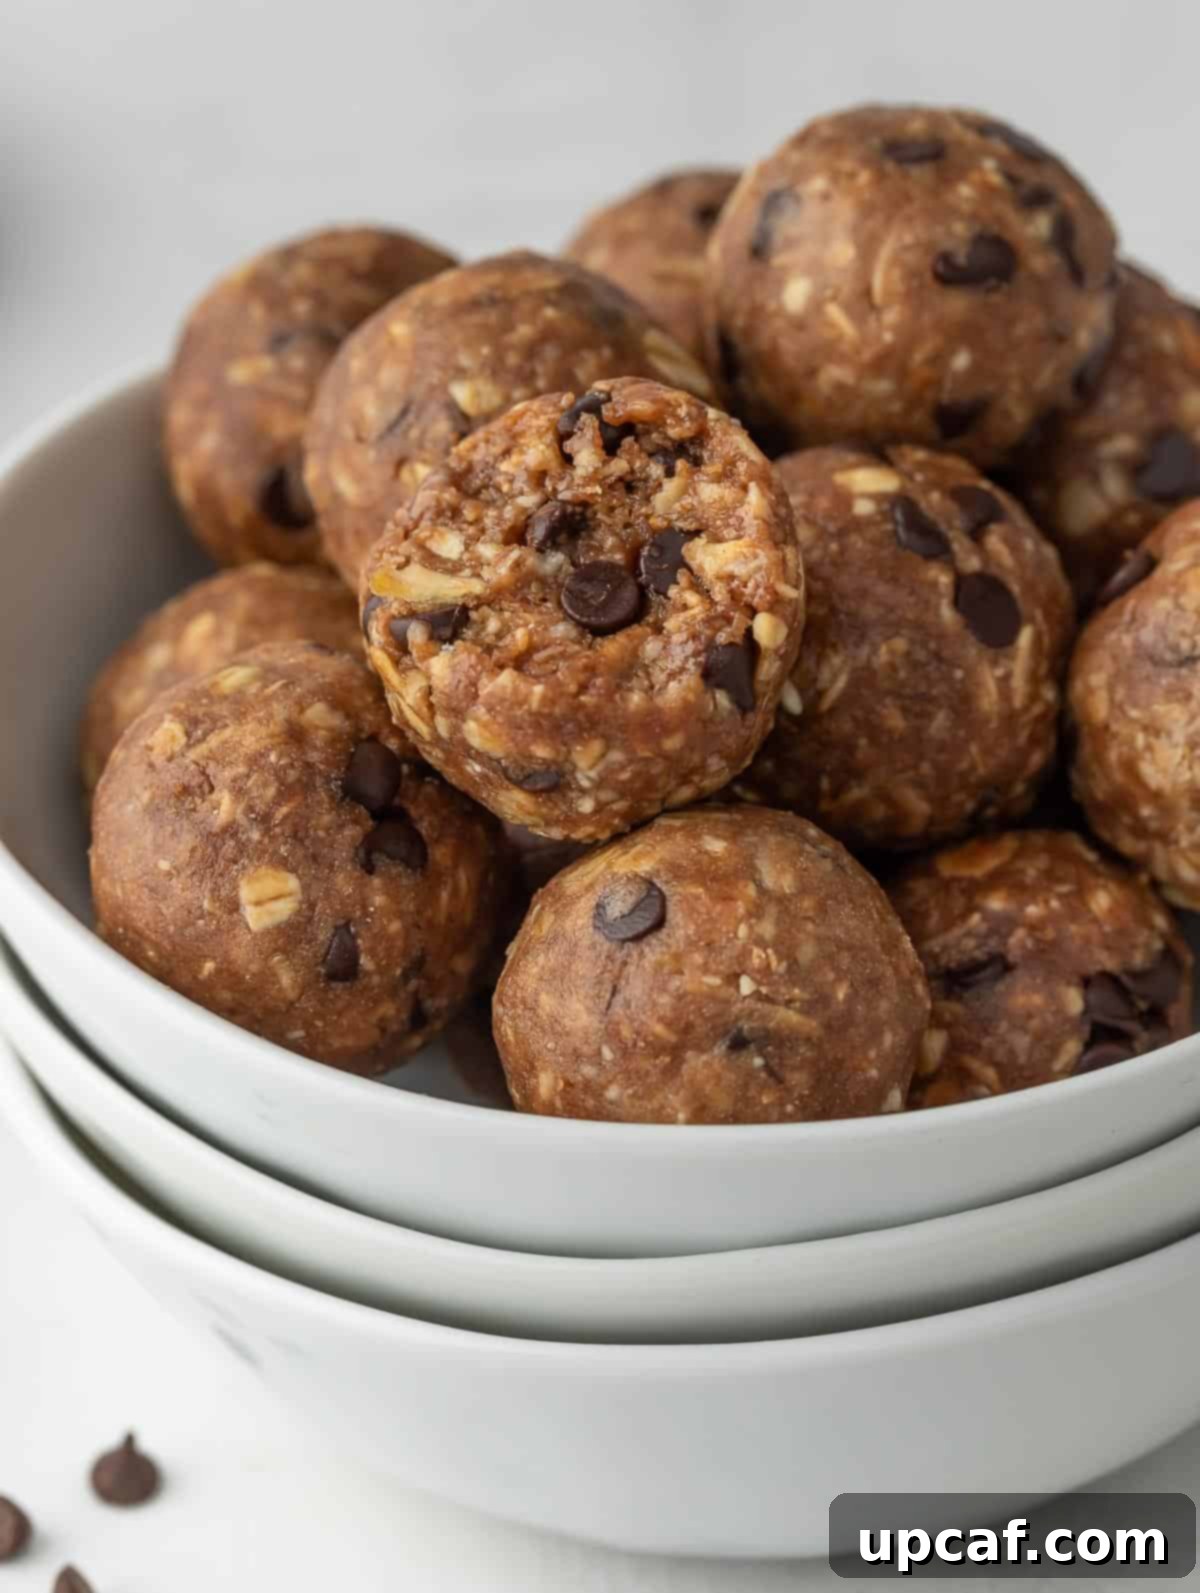
Welcome to a healthier, more delicious way to energize your day! These incredible Chocolate Peanut Butter Protein Balls are designed to revolutionize your breakfast and snack routine. Imagine enjoying a rich, chocolatey, peanut buttery treat that’s not only incredibly satisfying but also packed with wholesome ingredients to fuel your body. Forget complicated recipes or endless kitchen cleanup – these protein bites come together in minutes, require absolutely no cooking, and are the perfect grab-and-go solution for busy mornings or whenever you need a quick energy boost.
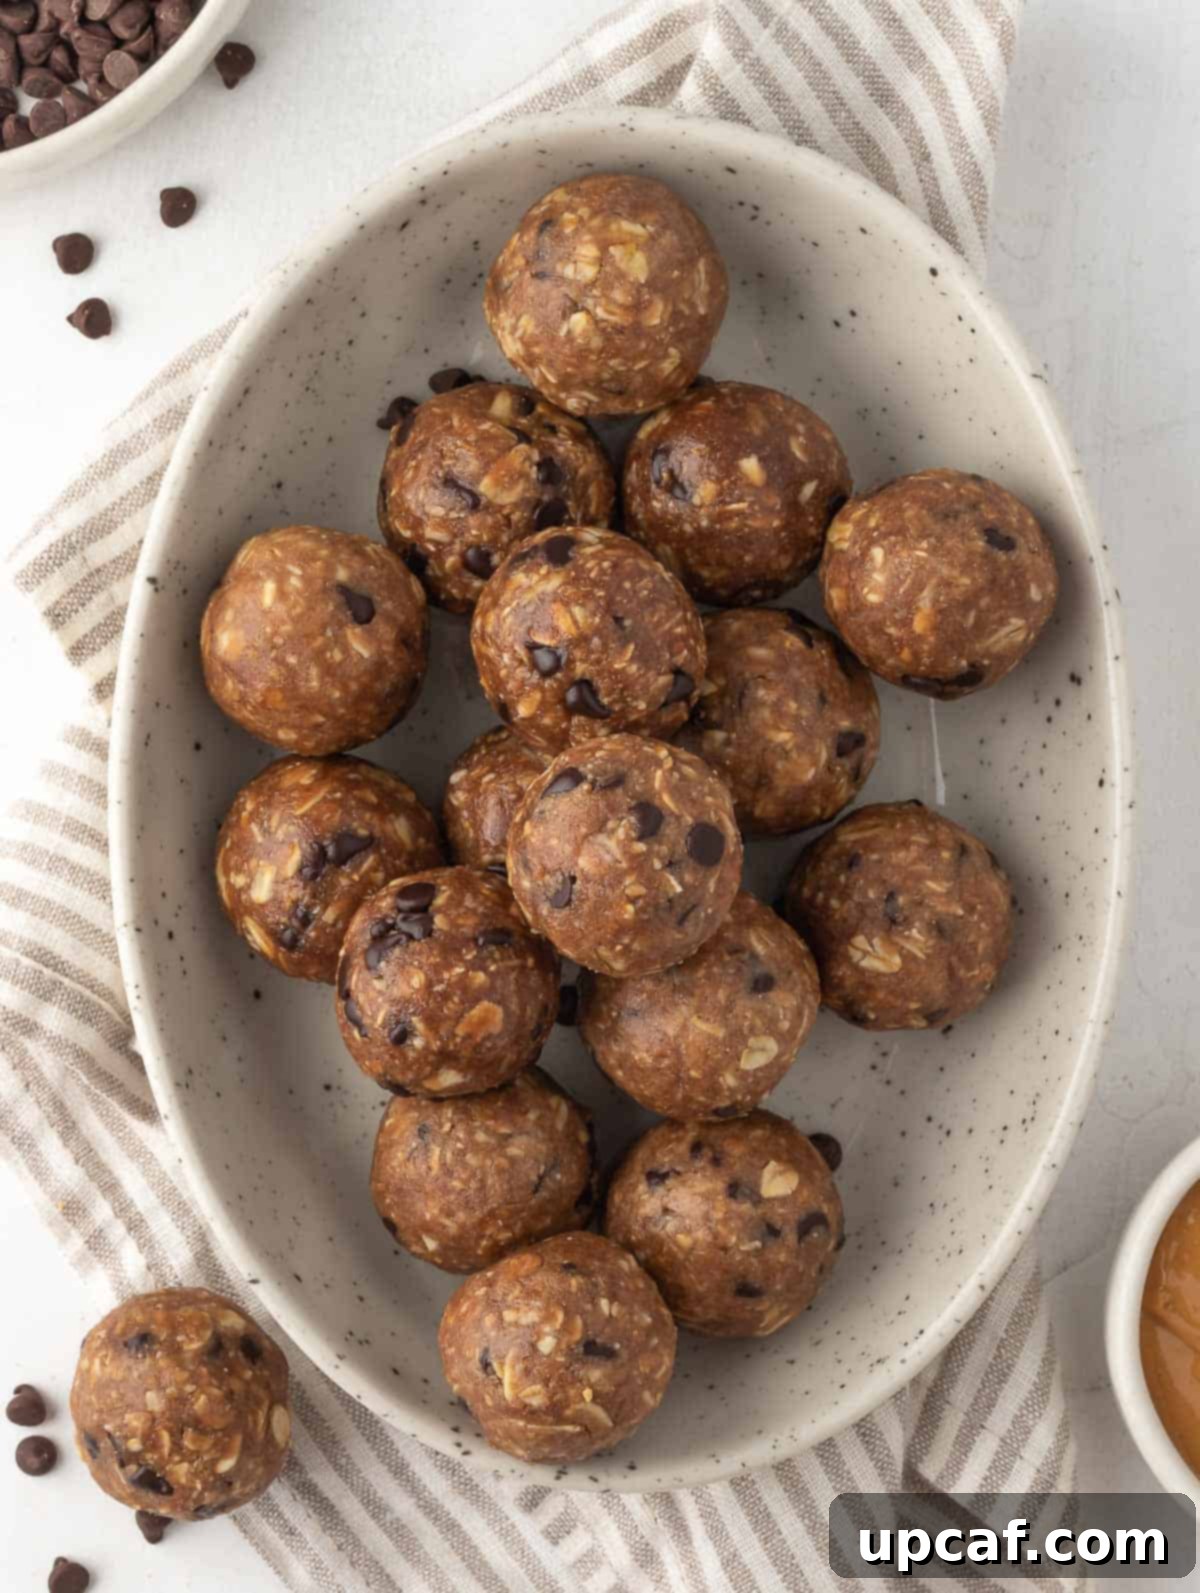
Crafted from simple pantry staples, these no-bake chocolate peanut butter energy balls are more than just a healthy snack; they’re a smart lifestyle choice. If you’re someone who loves to munch throughout the day and is looking to save money without compromising on taste or nutrition, then this recipe is your new best friend. They offer that irresistible combination of sweet and salty, reminiscent of your favorite peanut butter cups, but with the added benefits of protein and fiber. Say goodbye to expensive store-bought protein bars and hello to homemade goodness that’s both cheaper and significantly healthier!
Should you find yourself craving more of that delightful peanut butter flavor, don’t miss out on my Chocolate Peanut Butter Cheesecake Bars or No Bake Chocolate Peanut Butter Bars. These recipes are just as easy to prepare and are guaranteed crowd-pleasers that will have your family asking for more!
Why You’ll Adore These Chocolate Peanut Butter Protein Balls
These protein-packed treats aren’t just delicious; they offer a myriad of benefits that make them an essential addition to your healthy eating repertoire. Here’s why they’re destined to become your new favorite:
- Nutrient-Rich Powerhouse: Every bite of these chocolate peanut butter delights is brimming with wholesome ingredients. We’re talking about a balanced mix of healthy fats, essential protein, and vital fiber, all carefully packed into one convenient, delicious ball. They provide sustained energy, help keep you full, and contribute to your overall well-being, making them a smart choice for any time of day.
- Effortless No-Bake Convenience: Forget about preheating ovens or dealing with hot pans. This recipe requires absolutely no cooking, making it incredibly easy and mess-free. It’s especially perfect for warmer days when you want to avoid heating up your kitchen. Plus, the no-bake nature makes it a fantastic project to get kids involved in the kitchen – they’ll love rolling these fun treats without any safety concerns about hot surfaces.
- Ultimate Grab-and-Go Solution: Life can get hectic, but healthy eating doesn’t have to suffer. These protein balls are the epitome of convenience, designed for those on the move. Simply store them in your fridge or freezer, and they’re ready to be snatched up whenever hunger strikes. Ideal for busy professionals, active individuals, or parents packing school lunches, they offer a quick, nutritious snack that fits seamlessly into any fast-paced lifestyle.
- Budget-Friendly & Economical: Why spend a fortune on store-bought protein bars when you can make a batch of these delectable treats for a fraction of the cost? Using common pantry staples, these chocolate peanut butter protein balls help you save money while providing superior taste and quality. It’s a smart way to enjoy healthy snacking without breaking the bank.
- Highly Customizable for Every Palate: One of the best aspects of this recipe is its flexibility. Whether you want to amp up the chocolate, add more crunch, or tweak the sweetness, these protein balls are incredibly adaptable. Easily adjust ingredients to suit your dietary preferences or create new flavor combinations every time you make them.
- Kid-Approved and Wholesome: Getting kids to eat healthy snacks can often be a challenge. However, these protein balls taste so much like a dessert that children will happily devour them, unaware they’re fueling their bodies with beneficial nutrients. They’re a fantastic way to introduce healthy fats, protein, and fiber into their diet in a fun, appealing format.
Essential Ingredients for Your Protein Bites
Creating these delightful chocolate peanut butter energy balls starts with a selection of simple, wholesome ingredients you likely already have on hand. Each component plays a crucial role in both the flavor and nutritional profile of these irresistible treats.
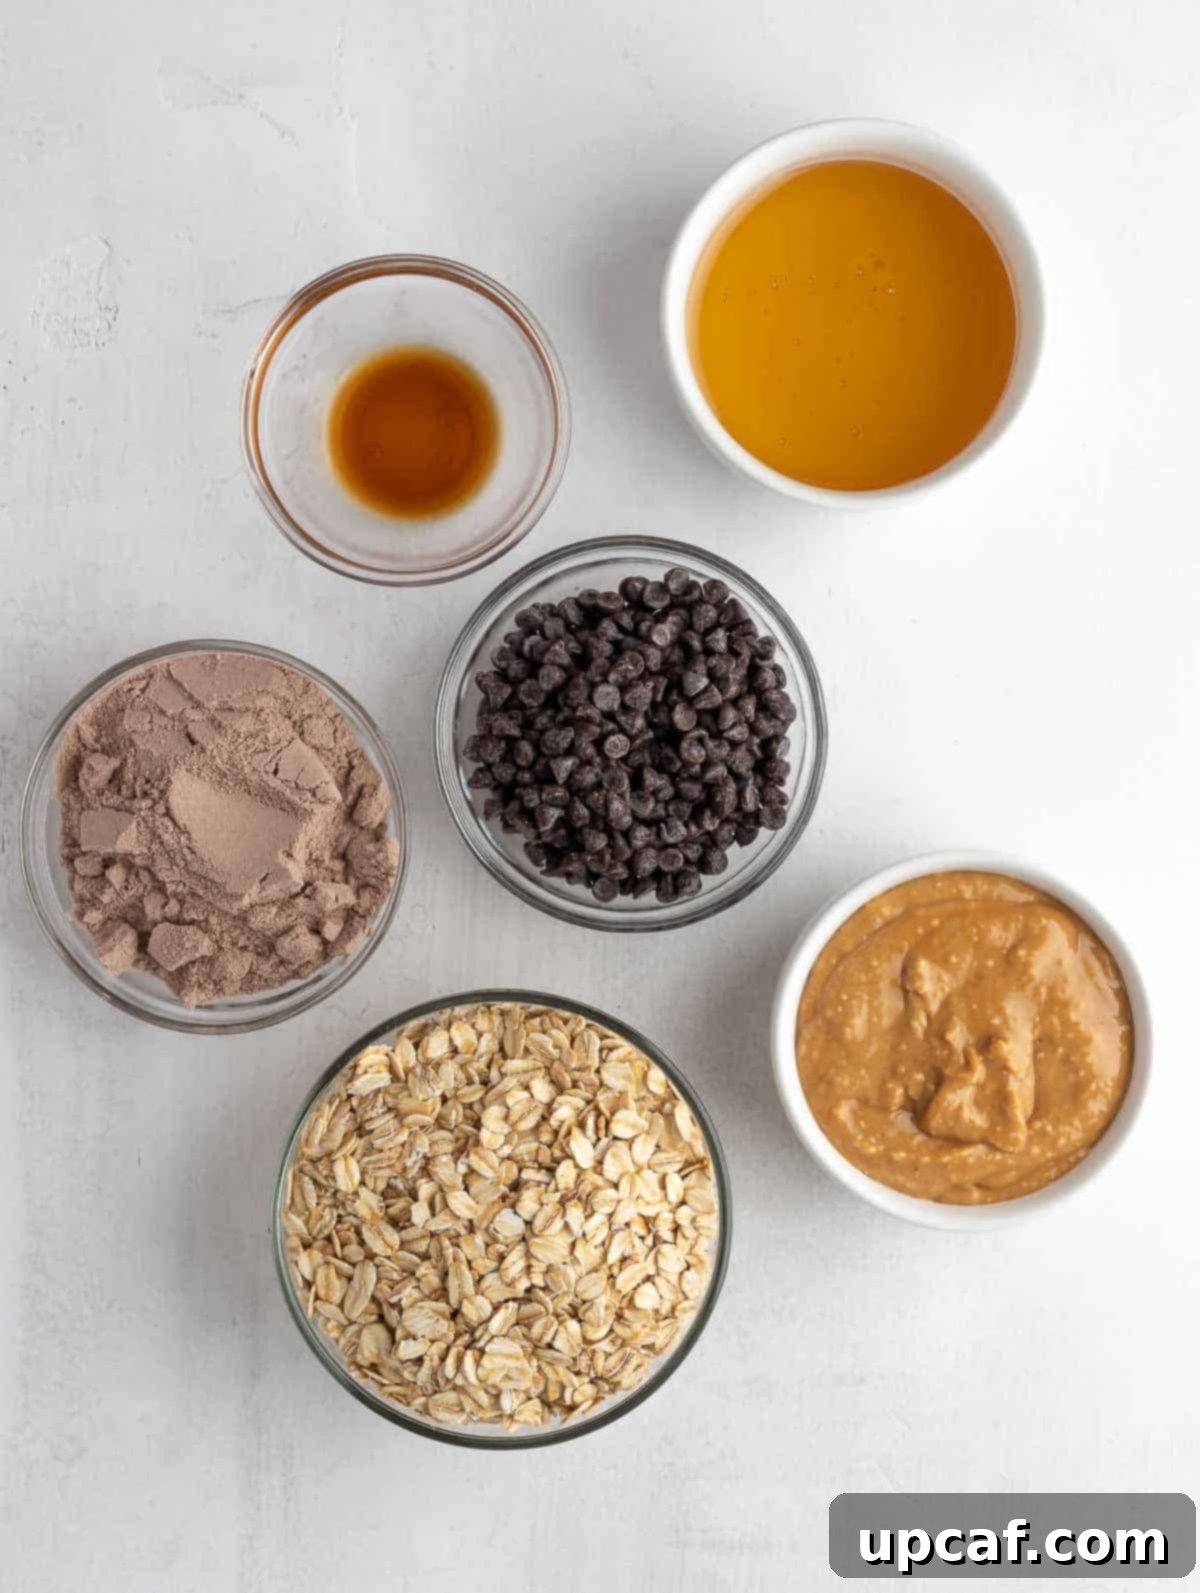
- Mini Chocolate Chips: These tiny morsels are key for even distribution throughout the mixture, ensuring a burst of chocolate in every bite without making the balls too crumbly. While regular-sized chips can be used, mini chips integrate more smoothly. For an even more intense peanut butter experience, consider swapping some or all of the chocolate chips for mini peanut butter chips! Dark chocolate chips can also add a richer flavor and extra antioxidants.
- Old Fashioned Rolled Oats: The backbone of these energy balls, rolled oats provide essential fiber and a satisfying texture. They act as a natural binder and absorbent, helping the mixture hold its shape. It’s crucial to use old-fashioned rolled oats, not steel-cut (which are too coarse) or instant oats (which can become mushy). Rolled oats offer the perfect balance for consistency and nutritional benefits.
- Chocolate Protein Powder: This ingredient boosts the protein content, making these balls truly beneficial for muscle recovery and satiety. I often use a premiere whey protein for its smooth texture and rich flavor, but feel free to use your preferred brand and type. Plant-based protein powders like pea or soy protein work wonderfully for a vegan option, while casein protein can offer a thicker consistency. Choose a powder with a flavor you enjoy, as it will significantly impact the overall taste.
- Creamy Peanut Butter: The star of the show! Creamy peanut butter is essential for binding all the ingredients together and providing that signature nutty flavor. Ensure you use creamy, not chunky, peanut butter for the best consistency and ease of mixing. Natural peanut butter (just peanuts and salt) is ideal, but any creamy variety will work. If using natural peanut butter, stir it well before measuring to incorporate any separated oil.
- Honey: A touch of natural sweetness and an additional binder. Honey helps to sweeten the balls without relying on refined sugars. Its sticky nature is also crucial for holding the ingredients together. If you’re looking for a vegan alternative, maple syrup or agave nectar can be substituted in equal amounts.
- Vanilla Extract: Just a small amount of pure vanilla extract elevates all the flavors, adding warmth and depth to the chocolate and peanut butter combination. Always opt for pure vanilla extract over artificial for the best taste.
- Water: This is an essential liquid to adjust the consistency of your mixture. Start with a smaller amount and add gradually, as the absorption rate of oats and protein powder can vary.
- Dash of Salt (Optional but Recommended): A pinch of salt might seem counterintuitive in a sweet treat, but it’s a secret weapon! Salt perfectly balances the sweetness and enhances the rich flavors of chocolate and peanut butter, making them truly pop.
Crafting Your Chocolate Peanut Butter Protein Balls: A Simple Guide
Making these protein balls is incredibly straightforward and quick, making them perfect for even the busiest of days. Follow these simple steps to create your batch of delicious, energy-boosting treats:
- Prepare Your Dry Ingredients: Begin by combining all your dry ingredients in a large mixing bowl. This includes the old-fashioned rolled oats and chocolate protein powder. Whisk them together gently to ensure an even distribution, which will prevent lumps and ensure consistent flavor throughout your protein balls.
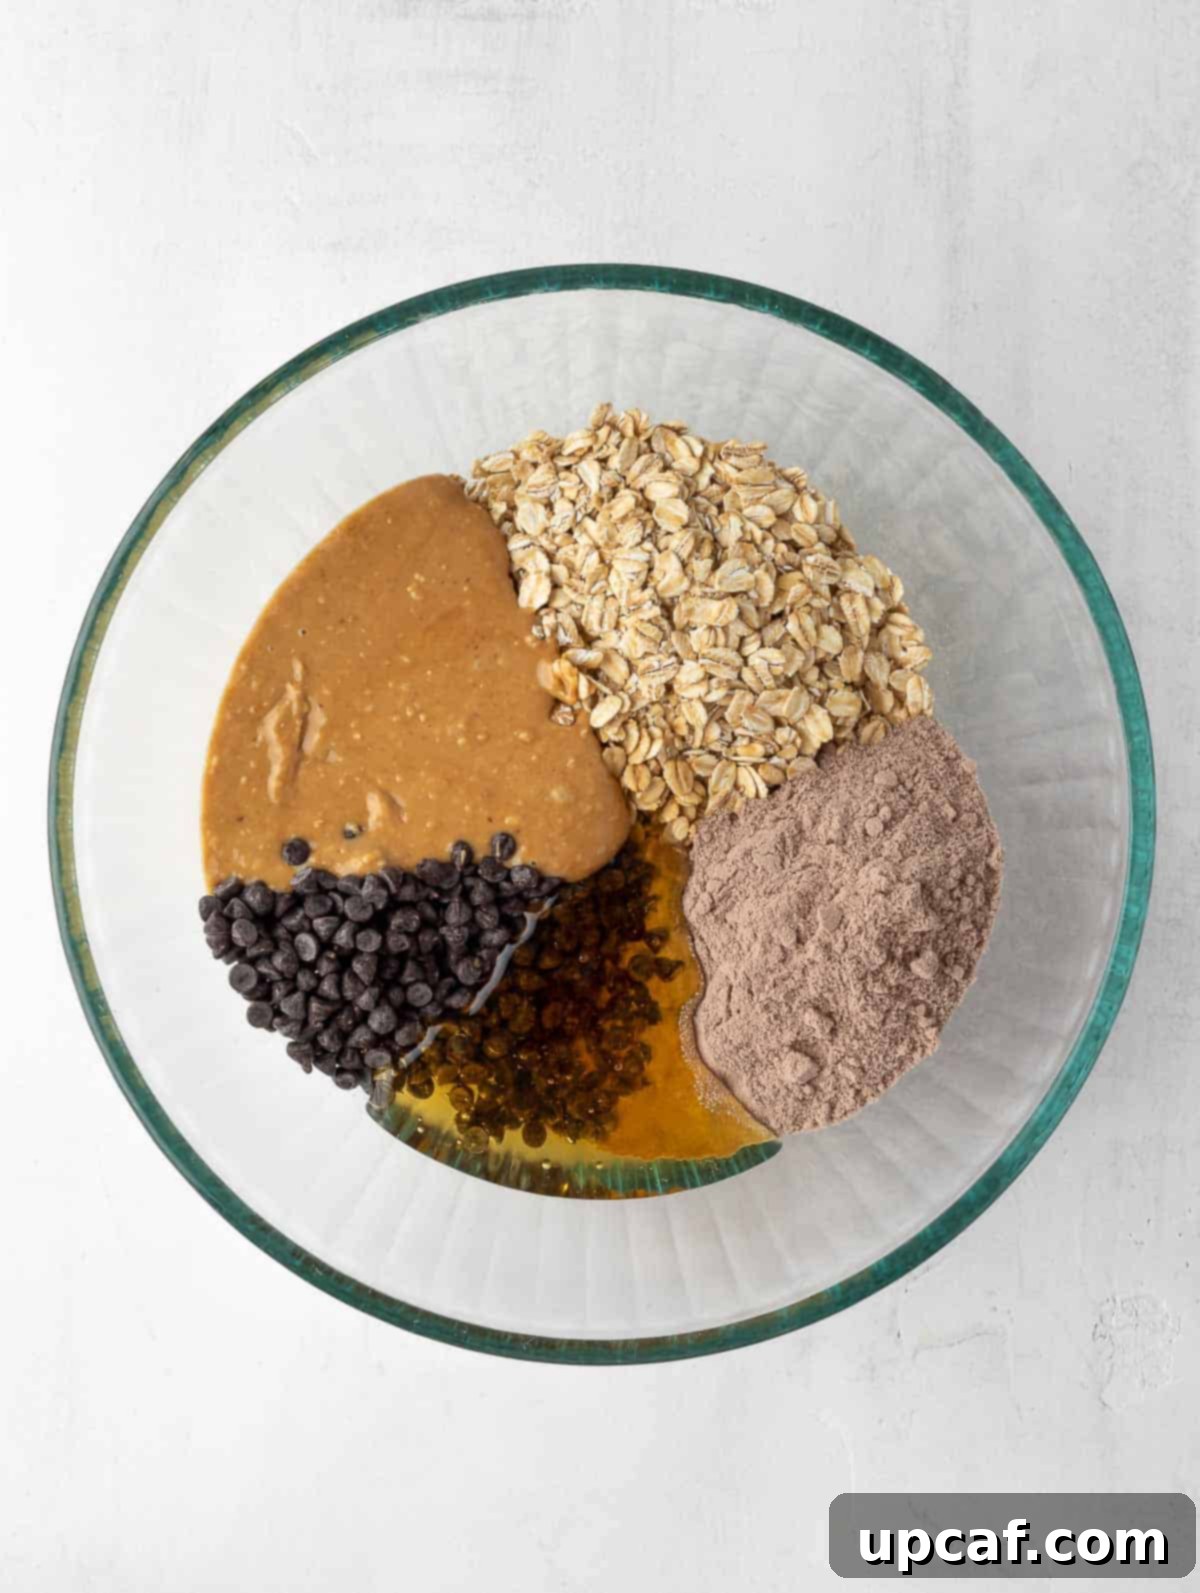
- Combine All Ingredients Thoroughly: Now, add the creamy peanut butter, honey, vanilla extract, mini chocolate chips, and the optional dash of salt to the bowl with your dry ingredients. Using a sturdy spatula or, even better, your hands (which can be more effective for achieving the right consistency), mix everything until it’s thoroughly combined. The goal is to reach a pliable but firm, dough-like consistency that holds together when pressed. If the mixture seems too dry or crumbly, refer to the troubleshooting tips below for how to adjust it.
- Shape the Energy Balls: Once your mixture is perfectly combined, it’s time to roll your protein balls. Take approximately a tablespoon-sized piece of the dough. Using the palms of your hands, roll it tightly into an even, compact sphere. Applying firm pressure helps the balls hold their shape better. For perfectly uniform portions, an ice cream scoop or a cookie scoop can be incredibly helpful.
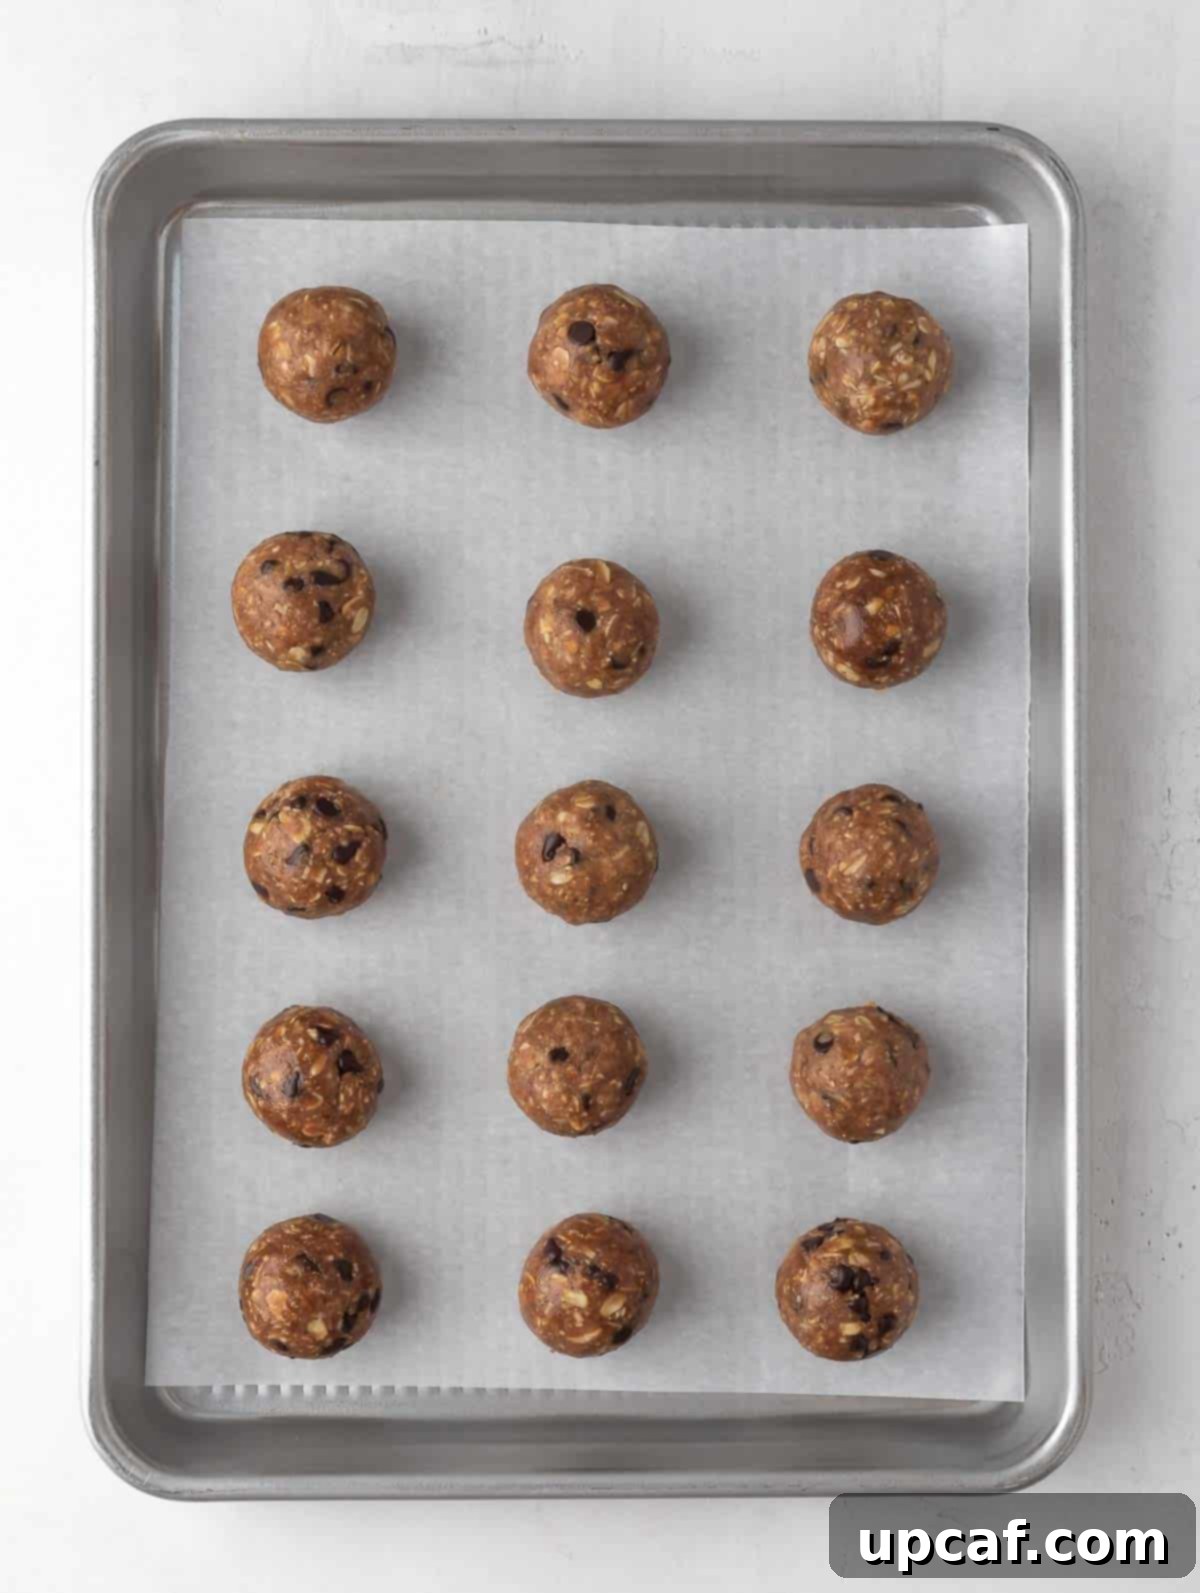
- Chill for Optimal Firmness: Arrange the freshly rolled balls onto a baking sheet lined with parchment paper. This prevents sticking and makes cleanup a breeze. Place the tray in the refrigerator and chill for at least 10 minutes. This crucial step allows the ingredients to set, firming up the balls and ensuring they maintain their shape when stored. Once chilled and firm, transfer the protein balls to an airtight container and store them in the fridge for easy access.
Expert Tips for Perfect Protein Energy Balls Every Time
Achieving the perfect texture and flavor for your protein balls is simple with a few helpful pointers. These tips will guide you through common adjustments and creative variations:
- Adjusting Consistency: The texture of your mixture is key to perfectly rolled balls.
- If the mixture is too tough or dry: If your dough is too crumbly and won’t form a ball, gradually add more water or honey, one tablespoon at a time. Mix thoroughly after each addition until the mixture becomes pliable and easy to roll. Different protein powders and types of peanut butter can affect moisture levels, so trust your judgment here.
- If the mixture is too soft or sticky: If your mixture is too wet and struggles to hold its shape, incorporate more old-fashioned rolled oats, one tablespoon at a time. The oats will absorb excess moisture, helping the mixture firm up. You can also add a tiny bit more protein powder if preferred.
- Beyond Balls: Make No-Bake Energy Bars: If rolling individual balls isn’t your preference, this recipe is incredibly versatile. Simply press the entire mixture evenly into a square or rectangular pan lined with parchment paper. You can sprinkle shredded coconut, extra chocolate chips, or chopped nuts on top for an added layer of flavor and texture. Once thoroughly chilled and firm, cut the pressed mixture into squares or bars to create delicious no-bake chocolate peanut butter energy bars.
- Boost Nutritional Value with Add-ins: Enhance the health benefits of your protein balls by incorporating additional superfoods. Consider adding:
- Hemp Hearts: A great source of omega-3s, protein, and minerals.
- Chia Seeds: Packed with fiber, omega-3s, and can help with binding.
- Flax Seeds (Ground): Offers fiber and omega-3s, also acts as a binder.
- Collagen Peptides: An excellent source of protein for skin, hair, and joint health.
- Dried Fruit: Finely chopped cranberries, raisins, or apricots can add natural sweetness and chewiness.
- Nut Butter Alternatives: While creamy peanut butter is classic, you can easily substitute it with other nut butters for different flavor profiles and to accommodate allergies. Any creamy nut butter, such as almond butter, cashew butter, or sunflower seed butter (for a nut-free option), will work. Be aware that changing the nut butter will alter the flavor considerably, so choose one you love! Ensure your chosen butter has a similar creamy consistency.
- Achieving Uniform Portions: For consistently sized protein balls, which can be helpful for tracking macros or simply for aesthetic appeal, use a small ice cream scoop, a cookie scoop, or even a meatball scoop. This ensures each ball is roughly the same size, making the rolling process quicker and more efficient.
- Flavor Variations: Don’t be afraid to experiment with flavors! A pinch of cinnamon can add warmth, or a tiny dash of cayenne pepper can give a subtle “Mexican hot chocolate” kick. Different extracts like almond or peppermint could also be interesting.
- Vegan & Gluten-Free Adaptations: For a vegan version, ensure your protein powder is plant-based (e.g., pea protein, brown rice protein) and swap honey for maple syrup or agave nectar. To make them gluten-free, simply use certified gluten-free rolled oats.
Frequently Asked Questions
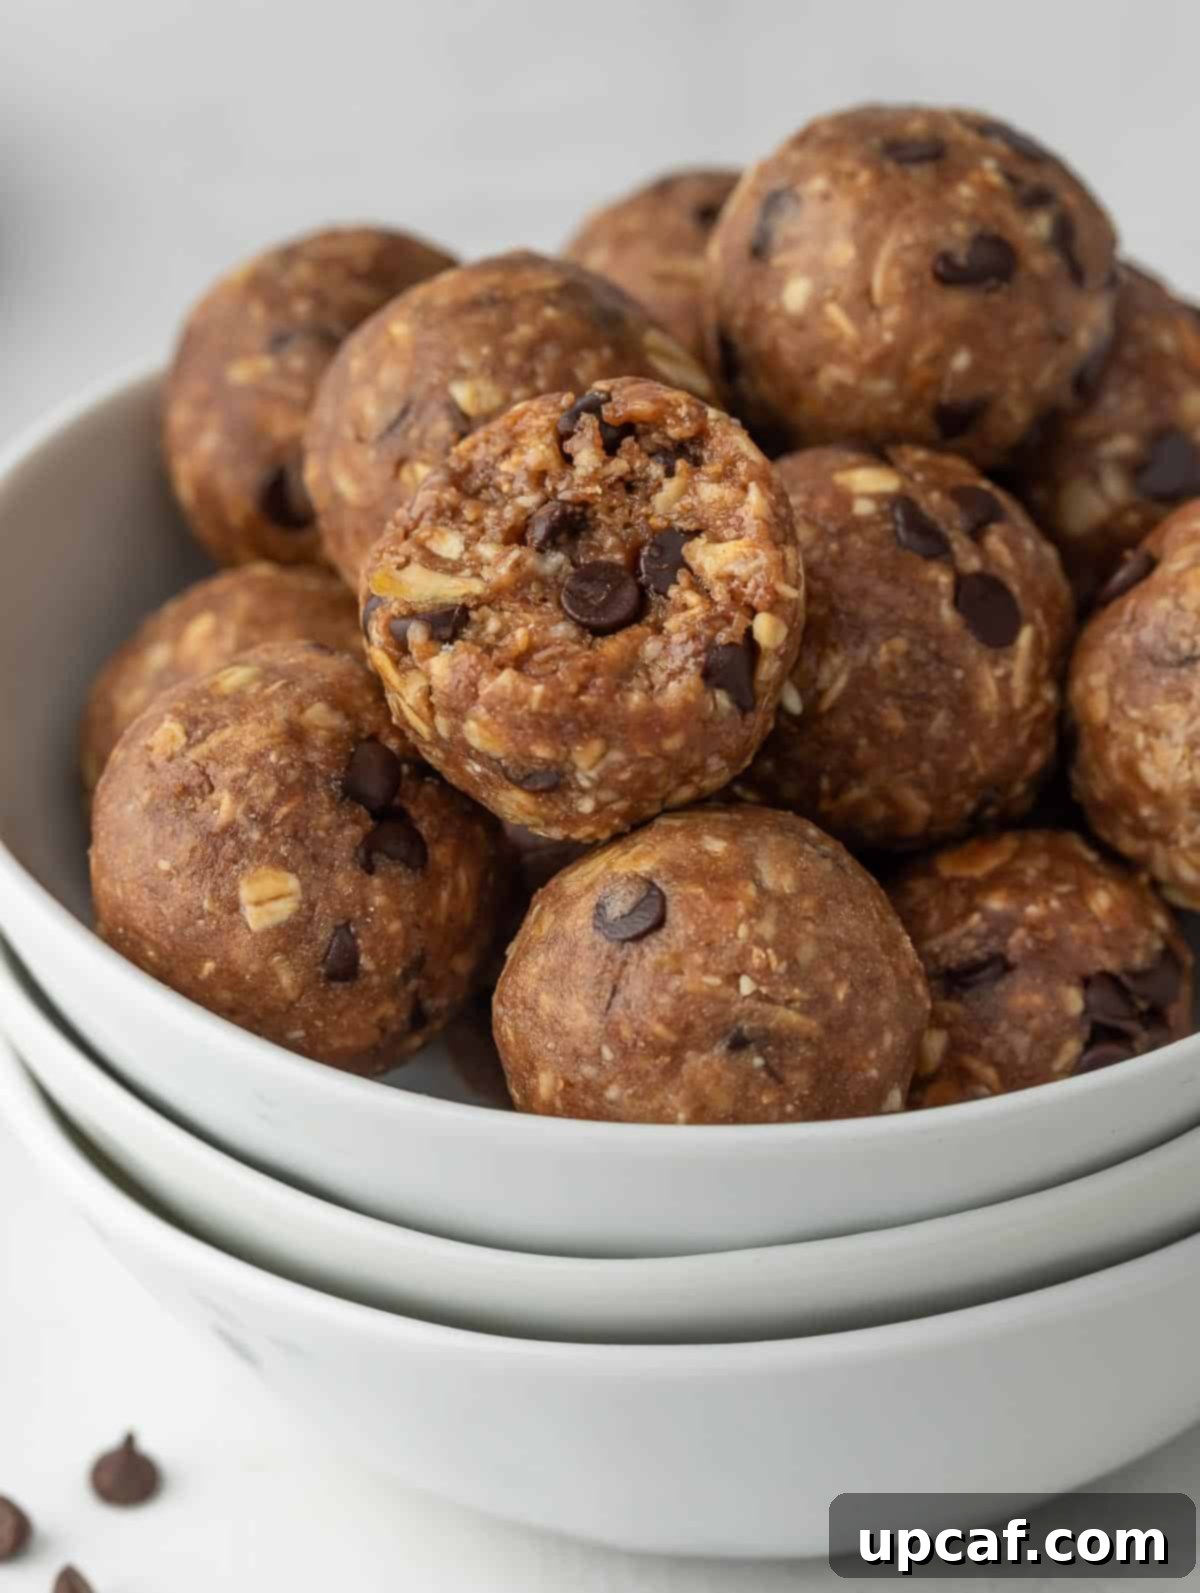
Once you’ve finished making your delicious peanut butter energy balls and they’ve been chilled, transfer them to an airtight container. Store them in the refrigerator, where they will stay fresh and firm for up to 5-7 days. Proper storage ensures they maintain their texture and flavor.
These healthy peanut butter balls are excellent for freezing, making them perfect for long-term meal prep! To freeze them effectively, first place the rolled balls in a single layer on a parchment-lined sheet pan. Freeze them for about an hour, or until solid. This prevents them from sticking together. Once frozen, transfer them to a freezer-safe container or a heavy-duty freezer bag. They can be stored in the freezer for up to one month. To enjoy, simply thaw the desired number of balls in the refrigerator overnight or on the counter for a shorter period.
While these energy balls can tolerate being at room temperature for a short period (e.g., packed in a lunchbox for a few hours), it’s highly recommended to store them in the fridge. The colder temperature helps them retain their firm shape and prevents them from becoming too soft or melting, especially in warmer environments. For optimal freshness and consistency, always refrigerate them.
Absolutely! These protein balls are crafted with nutrient-dense ingredients like oats, natural peanut butter, and protein powder, making them a very healthy choice. They provide a good source of protein, healthy fats, and fiber. However, like any nutrient-dense food, I recommend enjoying them in moderation as a balanced snack, a quick pre- or post-workout fuel, or as a complement to your breakfast, rather than consuming the entire batch in one sitting.
Yes, these peanut butter protein balls can easily be made vegan with a couple of simple adjustments. First, substitute the honey with a plant-based liquid sweetener like maple syrup or agave nectar. Second, ensure that the chocolate protein powder you choose is a vegan-friendly version, as traditional whey protein is dairy-derived. Many excellent plant-based protein powders are available, such as those made from pea, rice, or soy protein. Always check the ingredient label to confirm its vegan status.
Yes, absolutely! Oats are naturally gluten-free, but they can sometimes be processed in facilities that also handle gluten-containing grains, leading to cross-contamination. To ensure your protein balls are genuinely gluten-free, simply use certified gluten-free rolled oats, which are readily available in most grocery stores.
Don’t worry, this is a common issue and easily fixed! If your mixture is too sticky, it likely has too much liquid; add a tablespoon of oats or a small amount of protein powder at a time until it’s workable. If it’s too crumbly, it needs more liquid; add a teaspoon of water or honey at a time until it comes together. The key is to add small amounts and mix thoroughly between additions until you reach a pliable, dough-like consistency that holds its shape when rolled.
Discover More Healthy Recipes To Try
If you loved these protein balls, you’re in for a treat! Explore more nourishing and delicious recipes to support your healthy lifestyle:
- How to Cook Oatmeal
- Cookie Dough Protein Balls
- Baked Oats {3 Ways}
- Vanilla Protein Energy Balls
- Vegan Double Chocolate Cookies
- Chocolate Peanut Butter Oatmeal
I genuinely hope you enjoy exploring all the recipes I’m passionate about sharing with you, especially this delightful Chocolate Peanut Butter Protein Balls recipe. Give it a try, savor every bite, and if you love it as much as I do, please consider rating it and sharing the joy with your friends and family!
Should you make this recipe and find yourself delighted, I’d be thrilled if you could leave a star rating and a comment below. Your feedback means the world! Also, remember to follow Cookin’ With Mima on FACEBOOK | INSTAGRAM | PINTEREST for all my latest social posts, culinary adventures, and newest recipes.
Print Recipe
Chocolate Peanut Butter Protein Balls
Ingredients
- ⅓ cup mini chocolate chips
- 1 cup old fashioned rolled oats
- ⅓ cup chocolate protein powder
- ½ cup creamy peanut butter
- ¼ cup honey
- 1-2 tsp vanilla extract
- 2-3 tsp of water
- dash of salt, optional
Instructions
- Place all the ingredients into a large bowl.
- Using a spatula, or with your hands, mix everything until well combined. You need to have pliable but firm, dough-like consistency. If the mixture seems to be on the tough side and does not want to roll into a ball add more water or honey. Do it so 1 tablespoon at a time. Stir well and try rolling again.
- If the mixture seems to be too soft that doesn’t want to hold a ball shape, add more oats. Do so 1 tablespoon at a time. Stir well and try rolling again.
- Take a tablespoon-sized piece of dough and with the help of your palms tightly roll even balls.
- Place rolled balls onto a sheet lined with parchment paper and chill for 10 minutes.
- Once chilled place the balls into an airtight container and store them in a fridge.
Notes
- If the mixture seems to be on the tough side and does not want to roll into a ball add more water or honey. Do it so 1 tablespoon at a time. Stir well and try rolling again.
- If the mixture seems to be too soft that doesn’t want to hold a ball shape, add more oats. Do so 1 tablespoon at a time. Stir well and try rolling again.
- Don’t want to roll them? You can press the mixture into a square pan and sprinkle the coconut on top. Then, once they’ve chilled, cut them into squares to make them into no-bake chocolate peanut butter energy bars.
- You can add some hemp hearts, collagen, or chia seeds for some extra added nutrition.
- Any creamy nut butter (such as cashew butter or almond butter) will work in place of peanut butter if needed, but the flavor will change to taste like the nut butter.
- You can use an ice cream scoop or meatball scoop to help you scoop out even portions of the cake batter.
