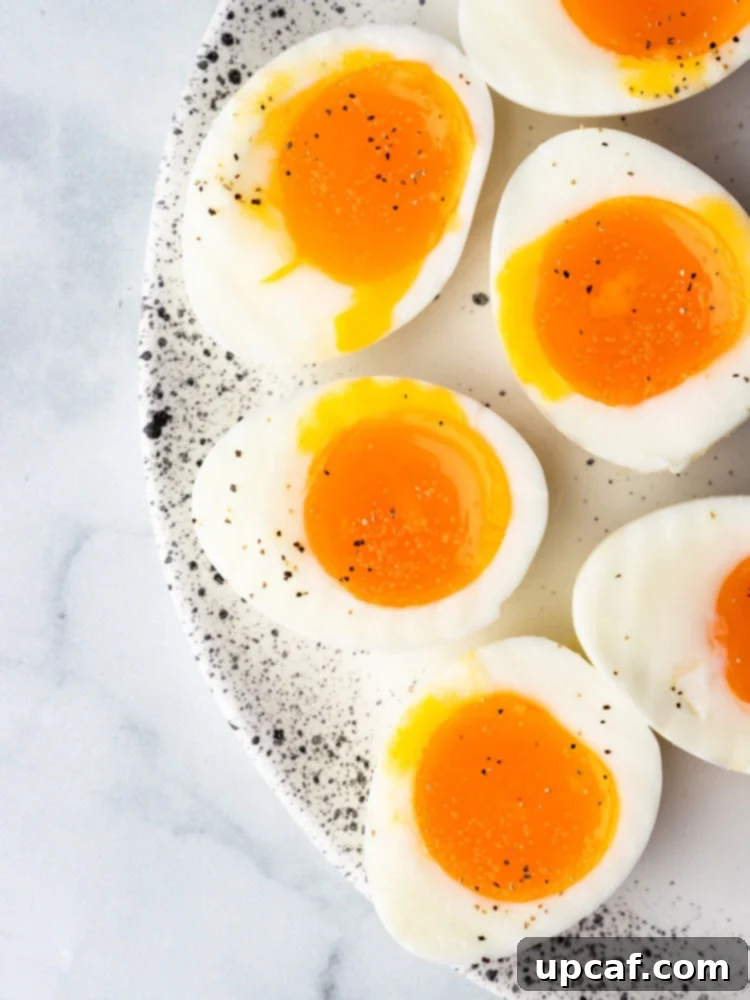
Imagine a breakfast or brunch where every bite is a symphony of textures: firm, tender egg whites cradling a lusciously warm, creamy, and gloriously runny yolk. That’s the magic of a perfectly soft-boiled egg. Far from being a mere side dish, a well-prepared soft-boiled egg elevates any meal, transforming simple dishes into gourmet experiences. This guide will walk you through a foolproof method to achieve that ideal consistency every single time, making it an indispensable skill for any home cook. If you’ve already mastered the art of hard-boiling an egg, preparing its softer counterpart will be an absolute breeze, opening up a world of culinary possibilities.
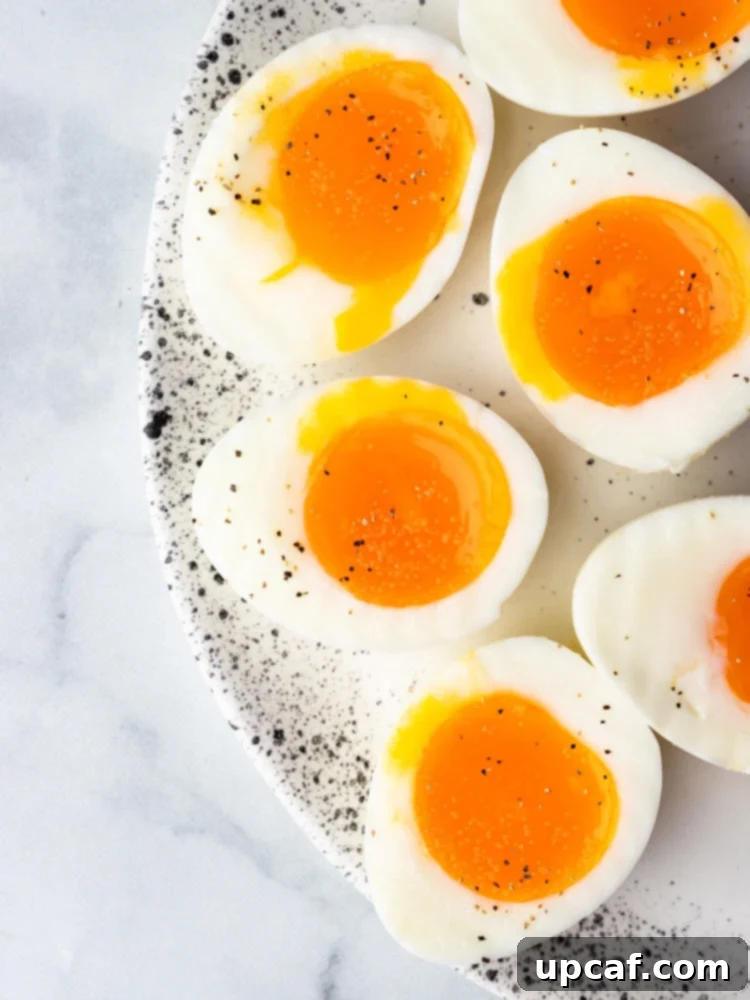
Looking for delightful bread recipes to pair with your exquisite soft-boiled eggs? Complement their rich texture with my No Knead Artisan Bread for a rustic touch, or my Easy Sandwich Bread for a softer, classic pairing. Both are excellent choices for soaking up those glorious runny yolks, making for a truly satisfying meal.
Understanding the Perfect Soft-Boiled Egg: Definition and Characteristics
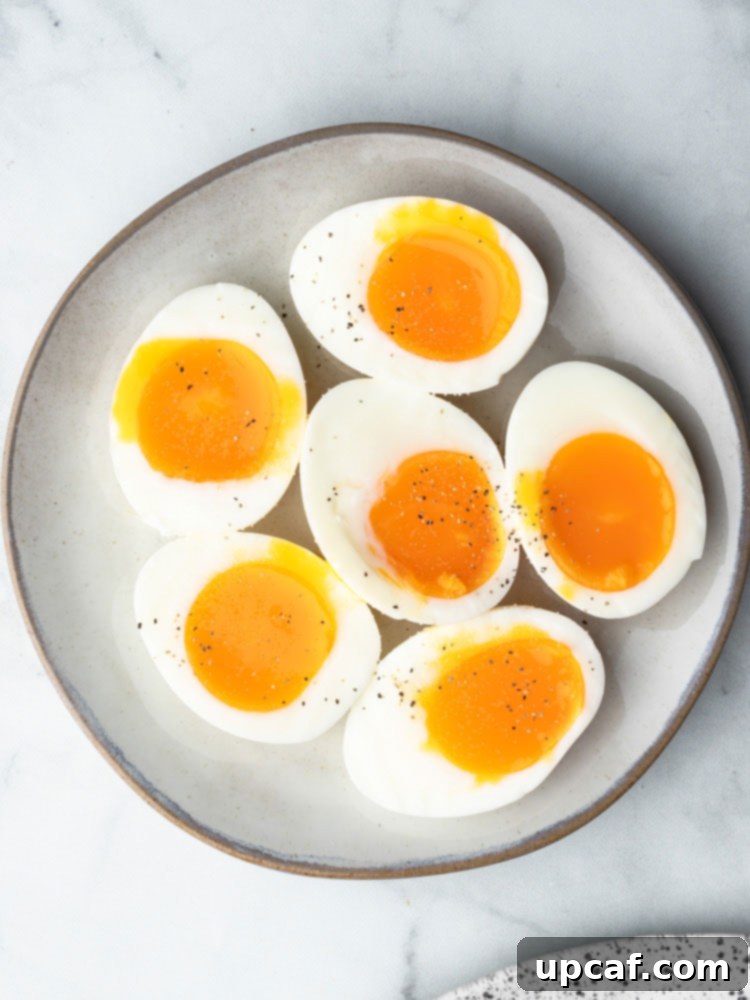
A soft-boiled egg is a culinary marvel that strikes a delicate balance between a fully cooked egg and raw. The defining characteristic is its firm, opaque egg white, which provides a satisfying outer layer, while the yolk remains warm, beautifully creamy, and wonderfully runny. Unlike hard-boiled eggs where the yolk is solid and crumbly, a soft-boiled yolk cascades gently when pierced, offering a rich, velvety texture and an intense flavor that’s simply unmatched. This precise cooking method ensures the whites are set enough to hold their shape, but the interior maintains a luxurious, molten consistency, making it a favorite for many breakfast and brunch enthusiasts. It’s this delightful contrast in textures that makes the soft-boiled egg so incredibly versatile and appealing, offering a gourmet touch with minimal effort.
There are subtle variations within the “soft-boiled” spectrum. A shorter cooking time (e.g., 5 minutes) results in a truly liquid, golden yolk—perfect for dipping. A slightly longer cook (6-7 minutes) yields a yolk that is creamy and jammy at the edges but still beautifully flowing in the center, ideal for topping salads or grain bowls without being excessively messy. Understanding these nuances allows you to tailor your soft-boiled egg to your exact preference and intended use.
Elevate Your Meals: Versatile Uses for Soft-Boiled Eggs
The humble soft-boiled egg is a powerhouse of flavor and texture, capable of transforming a variety of dishes. Its rich, runny yolk acts as a natural sauce, adding depth and creaminess to anything it touches. Beyond its simple charm, the soft-boiled egg is packed with protein and essential nutrients, making it a healthy and satisfying addition to many meals. Here are just a few ideas to incorporate this culinary gem into your daily meals, turning ordinary into extraordinary:
- Gourmet Salad Bowls: Elevate any green salad, Niçoise salad, or even a simple spinach salad by adding a sliced or halved soft-boiled egg. The vibrant, runny yolk acts as an emulsifier for your dressing, creating a richer, more cohesive flavor profile and adding substantial protein to keep you feeling full and energized.
- Ramen and Noodle Dishes: A truly iconic pairing! Place a beautifully halved soft-boiled egg directly on top of your steaming bowl of ramen or any Asian-inspired noodle dish. The creamy yolk enriches the broth with its velvety texture and contributes a vital source of protein, enhancing both the flavor complexity and visual appeal of your meal.
- Avocado Toast Reinvented: Take your popular avocado toast to an entirely new level of deliciousness by topping it with a perfectly soft-boiled egg. The luscious, warm yolk mingling with creamy avocado and crunchy toast creates an irresistible combination of flavors and textures, making it an ideal choice for a hearty breakfast, a satisfying brunch, or a light yet fulfilling lunch.
- Classic Toast Soldiers: This is arguably the most quintessential way to enjoy a soft-boiled egg. Carefully crack open the top of the egg, grab some crispy strips of toast (your “soldiers”), and dip them directly into the warm, flowing yolk. It’s a comforting, nostalgic, and utterly delicious breakfast experience that never goes out of style.
- Wholesome Porridge or Grain Bowls: For a nutritious and satisfying start to your day or a light dinner, serve a soft-boiled egg atop a bowl of savory oatmeal, quinoa, farro, or other breakfast grain bowls. It provides an excellent protein boost and a luxurious, creamy element that complements grains, roasted vegetables, and savory toppings beautifully.
- Hearty Breakfast Plates: Alongside classic breakfast staples like crispy bacon, savory sausage, roasted potatoes, or sautéed greens, a soft-boiled egg brings a soft, creamy element that ties the entire plate together, ensuring a balanced, flavorful, and delightful meal.
- Soups and Stews: Much like its role in ramen, a soft-boiled egg can be a fantastic and enriching addition to various creamy or brothy soups and stews, providing a rich counterpoint and an extra layer of flavor and sustenance.
- Mediterranean Platters: Serve soft-boiled eggs alongside a colorful array of olives, creamy feta cheese, fresh tomatoes, crisp cucumbers, and warm pita bread for a light, healthy, and flavorful Mediterranean-inspired meal.
Essential Tools and Ingredients for Perfect Soft-Boiled Eggs
Achieving soft-boiled perfection requires just a few basic items, most of which you likely already have in your kitchen. Quality ingredients and appropriate kitchen tools will set you up for success, ensuring a smooth process from start to finish with minimal fuss.
The Star Ingredient: Eggs and Simple Additions
- Eggs: You can use medium or large-sized eggs, whether white or brown – the color of the shell doesn’t impact the taste or cooking time. For best results and easier peeling, it’s generally recommended to use eggs that are a few days old rather than extremely fresh ones. Bringing them closer to room temperature before cooking can also prevent cracking when introduced to hot water and promote more even cooking throughout the egg.
- Water: Plain tap water is perfectly sufficient. Some cooks believe that adding a pinch of salt to the water can help seal cracks if they occur, while others advocate for a tiny amount of baking soda (about ½ teaspoon) to increase the alkalinity, which is said to make the eggs easier to peel. While not strictly necessary, these are optional additions you might consider experimenting with.
Indispensable Equipment for Soft-Boiling Success
Having the right tools on hand makes the soft-boiling process effortless and helps ensure consistent results:
Saucepan with Lid: Choose a saucepan that is appropriately sized for the number of eggs you plan to cook. It should be wide enough to allow all the eggs to sit in a single layer at the bottom without overcrowding, preventing uneven cooking or bumping. A well-fitting lid is crucial for bringing the water to a boil efficiently and maintaining a consistent, gentle simmer once the eggs are added.
Large Slotted Spoon or Tongs: These are absolutely essential for gently lowering the delicate eggs into the hot water and carefully removing them once cooked. Their design minimizes the risk of cracking the fragile eggshells and prevents dangerous splashing, ensuring both the integrity of your eggs and your safety. Tongs offer excellent control, while a slotted spoon allows water to drain quickly.
Bowl of Ice Water: This is a critical and non-negotiable step for perfect soft-boiled eggs! Prepare this bowl by filling it with cold water and plenty of ice cubes before you even start boiling your water. Immediately plunging the cooked eggs into this ice bath serves two vital purposes: it rapidly halts the cooking process, preventing the delicate yolk from firming up further, and it helps loosen the shell from the egg white, making peeling significantly easier and cleaner.
Optional: Kitchen Timer: While you can certainly use a standard clock, a dedicated kitchen timer (digital or mechanical) can be incredibly helpful for precise cooking. Timing is paramount for soft-boiled eggs, as even a minute can change the yolk consistency from runny to jammy or even firm. Your phone’s timer will also work perfectly.
Optional: Egg Cup: For those who cherish the traditional experience of serving soft-boiled eggs upright with toast soldiers, an egg cup is a charming and practical addition to your servingware, holding the egg securely for easy access to its delectable yolk.
The Foolproof Method: Step-by-Step Guide to Perfect Soft-Boiled Eggs
Achieving that coveted creamy, runny yolk is simpler than you might think, and with a little precision, you can enjoy consistently perfect results every time. Follow these detailed steps for reliably delicious soft-boiled eggs:
- Step 1: Prepare the Water and Heat. Begin by filling your chosen saucepan ¾ full with cold water. Place it on your stovetop and bring it to a vigorous, rolling boil over high heat. Watch it carefully. Once the water is enthusiastically boiling with large, active bubbles, immediately reduce the heat to a gentle rolling simmer. This means the water should still be bubbling consistently, but not so aggressively that it would jostle or crack the eggs. Maintaining a steady, gentle simmer is key to even cooking and preventing shell breakage.
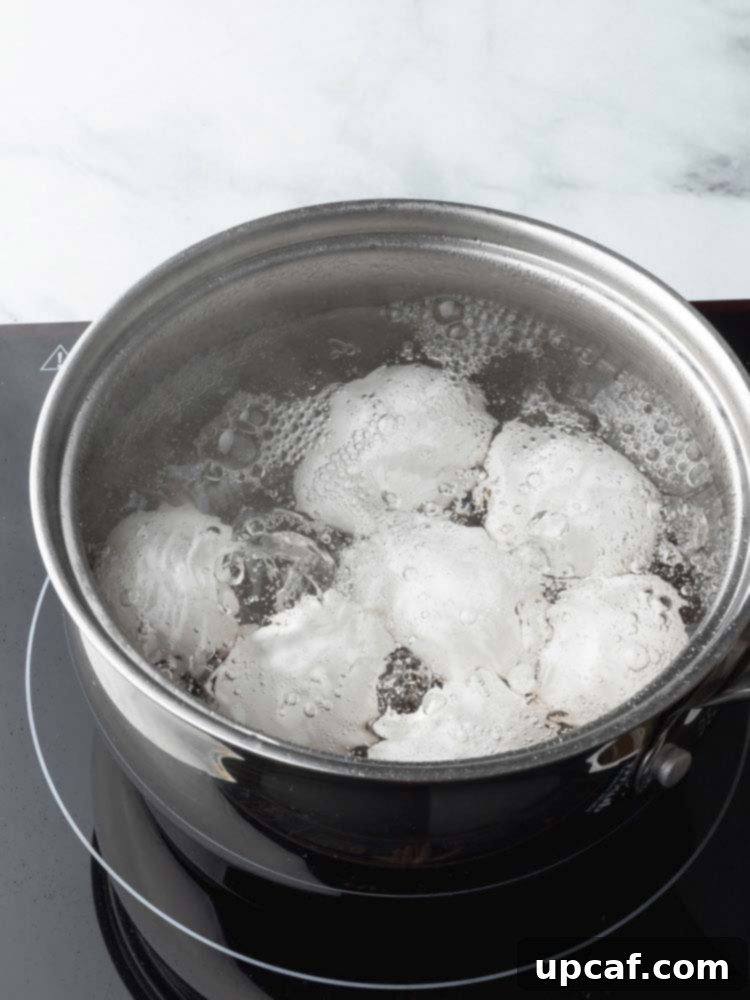
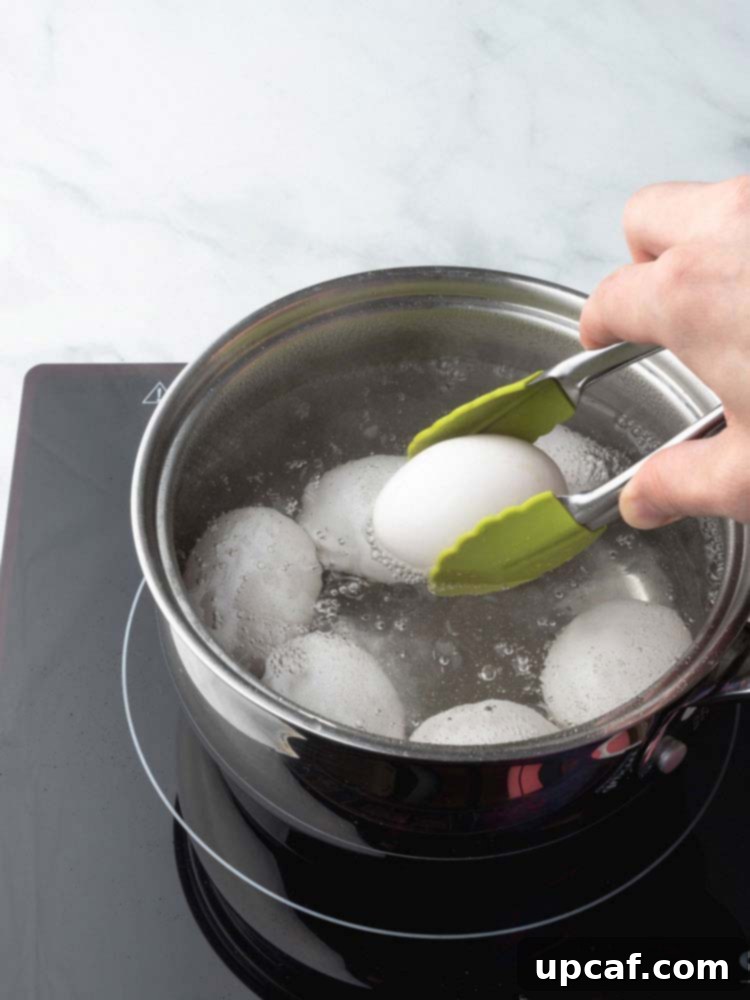
- Step 2: Gently Add the Eggs. Once your water is at a gentle simmer, use your large slotted spoon or tongs to carefully and gently lower each egg into the simmering water, one by one. Avoid dropping them, as this can cause them to crack against the bottom of the pot. It’s highly recommended to add eggs that are at room temperature, as cold eggs from the fridge are significantly more prone to cracking due to the sudden temperature change.
- Step 3: Cook to Your Desired Perfection. Now for the critical timing! Simmer the eggs for 6 to 7 minutes. This duration is ideal for achieving a firm, tender white and a wonderfully creamy, beautifully runny yolk that’s perfect for most applications. If you prefer a very runny yolk (often affectionately called a “dippy egg”), aim for 5 minutes. For a slightly firmer, jammy yolk that still has a molten center but holds its shape better (great for salads or sandwiches), cook for 7-8 minutes. Remember to adjust cooking time slightly based on the size of your eggs (larger eggs may need an extra 30 seconds) and your personal preference for yolk consistency.
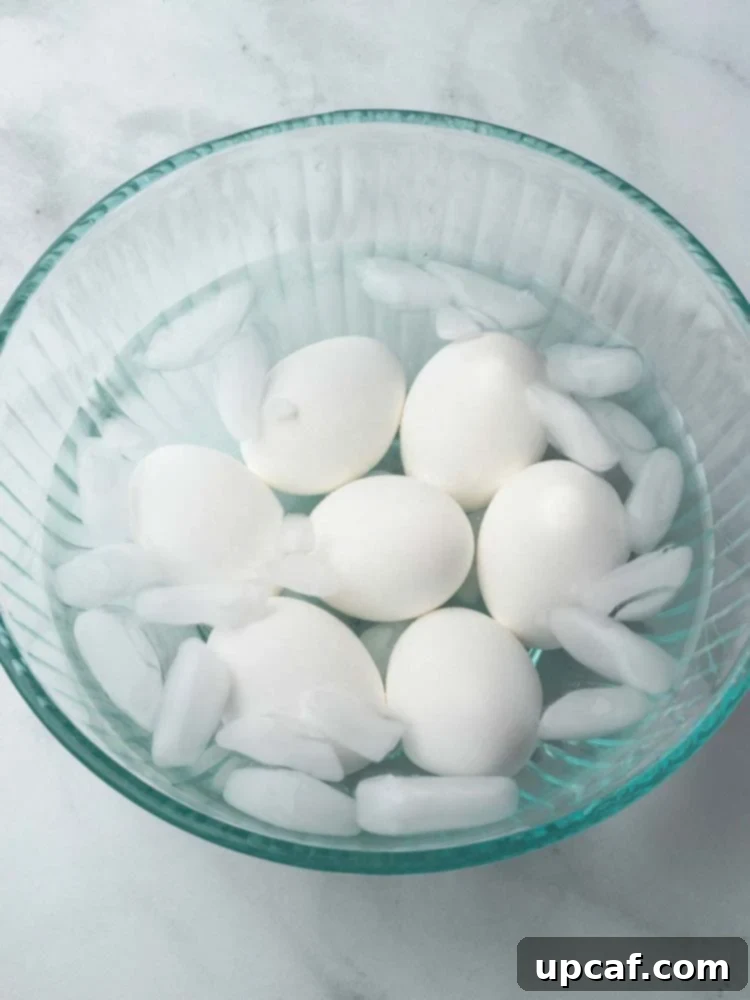
- Step 4: The Essential Ice Bath. As soon as your timer signals the end of the cooking time, quickly and efficiently remove the eggs from the hot water using your slotted spoon. Immediately plunge them into the prepared bowl of ice water. This rapid cooling process is absolutely crucial for two reasons: it completely stops the cooking process, ensuring your delicate yolks don’t continue to cook and firm up, and the sudden temperature change helps the egg whites contract, which begins to loosen the shell from the egg, setting the stage for easier peeling.
- Step 5: Cool and Prepare for Peeling. Allow the eggs to cool in the ice bath for at least 2 minutes. This brief but vital cooling period ensures the cooking has ceased and provides enough time for the egg to slightly shrink away from its shell. While some prefer to peel immediately after a quick dip, waiting a couple of minutes often yields better results.
Mastering the Peel: Techniques for Effortless Soft-Boiled Eggs
Peeling soft-boiled eggs can sometimes be tricky due to their delicate whites and wonderfully runny yolks. The goal is to remove the shell cleanly without tearing the tender white or rupturing the liquid gold within. However, with the right technique and a bit of gentleness, you can minimize breakage and enjoy your perfectly cooked eggs every time. Patience and a light touch are key.
Method 1 – Peeling the Whole Egg for Various Dishes (Salads, Toppings)
- Once the egg has cooled sufficiently in the ice bath (at least 2 minutes, or longer if you prefer them cooler), gently tap the broader, bottom end of the egg against a hard surface, like your countertop. This end usually contains a small air pocket, which makes it an ideal starting point for breaking the shell. Carefully and lightly work your way around the egg, creating small cracks all over the shell. Begin to remove the shell, making sure to also get under the thin, inner membrane. If you encounter difficulty or notice the egg white sticking to the shell, try peeling it under a gentle stream of cool running water. The water helps to get under the membrane and lubricate the process, effectively separating the shell from the delicate white and washing away any small shell fragments.
Method 2 – Preparing Eggs for Toast Soldiers (Dipping in an Egg Cup)
- For the classic “egg and soldiers” experience, where the egg is served in an egg cup and dipped into, peeling the entire egg isn’t necessary, nor is it the traditional method. Instead, after cooling the egg, place it upright in an egg cup. Using a sharp, thin-bladed knife or even the back of a spoon, gently but firmly tap around the very top portion of the egg. The aim is to create a clean, circular crack that allows you to lift and remove just the cap of the shell, revealing the glorious, inviting runny yolk within. If you happen to own a specialized egg cutter or topper, this tool can make this step even cleaner, easier, and more elegant.
Expert Tips for Super Easy Egg Peeling
Even with the right method, peeling soft-boiled eggs can sometimes present a challenge, especially if you’re aiming for a pristine, unblemished egg white. Incorporating these simple, expert-approved tips can dramatically improve your peeling success rate, ensuring smooth and frustration-free results:
- Use Room Temperature Eggs: Always aim to use eggs that have been brought closer to room temperature before boiling. Eggs straight from the fridge are more prone to cracking when exposed to sudden, drastic heat changes (thermal shock), and their whites are inherently more likely to adhere stubbornly to the shell membrane. Letting them sit out on the counter for 20-30 minutes beforehand can make a remarkable difference in both preventing cracks and facilitating an easier peel.
- Older Eggs Peel Easier Than Fresh: This might seem counter-intuitive, but it’s a golden rule for egg peeling! Older eggs (those that are a few days or even a week old, yet still well within their expiry date) tend to peel much more easily than very fresh eggs. As eggs age, their pH level naturally changes, which causes the inner membrane to separate more readily from the egg white, resulting in a significantly cleaner and smoother peel. If you plan to make soft-boiled eggs, consider buying them a few days in advance.
- Add a Pinch of Baking Soda to the Water: A common chef’s trick is to add about half a teaspoon (½ tsp) of baking soda to the boiling water. Baking soda is an alkaline substance, and adding it to the water can subtly raise the pH level of the cooking environment. This increase in alkalinity helps the egg white separate more easily from the shell membrane, often leading to a much smoother and less frustrating peeling experience for both soft-boiled and hard-boiled eggs.
- The Immediate Ice Bath is Crucial: As emphasized in the cooking instructions, rapidly chilling the eggs in an ice bath immediately after they finish cooking is not just for stopping the cooking process—it’s also fundamentally important for easier peeling. The sudden and drastic temperature change causes the egg white to contract rapidly, pulling it away from the inner shell membrane. This separation creates a small gap, making it much simpler to get under the shell and peel it cleanly.
- Peel Under Running Water (If Needed): If you find yourself still struggling with particularly stubborn eggs, try peeling them under a gentle stream of cool running water. The water helps to get under the membrane, lubricating the process, and washes away small shell fragments, preventing them from clinging to the egg white and making the peeling smoother.
Frequently Asked Questions About Soft-Boiled Eggs
For optimal safety, taste, and texture, soft-boiled eggs are best consumed immediately after preparation. However, if stored properly in their shells in the refrigerator, they can last for up to 3 days. It’s crucial not to peel them until just before eating, as removing the shell exposes the egg to air and potential contaminants, significantly reducing their shelf life. Peeled and cut soft-boiled eggs should be refrigerated immediately and discarded after 24 hours to ensure food safety.
The precise cooking time for a soft-boiled egg varies slightly depending on your desired yolk consistency and the size of the egg. Generally, for a very runny, custardy yolk, typically 4-5 minutes after the water reaches a gentle simmer is ideal. If you prefer a slightly firmer but still wonderfully creamy, jammy yolk (often preferred for salads or topping bowls), aim for about 6-7 minutes. Always start timing from the exact moment the eggs are gently placed into the simmering water, not when the water starts boiling again.
Yes, soft-boiled eggs are generally considered safe to eat, provided they are cooked properly to an internal temperature that eliminates harmful bacteria while retaining the desired runny yolk. The whites should be fully set and opaque. Cooking for at least 4-5 minutes ensures the egg white is cooked through and the yolk is adequately warmed. For individuals with compromised immune systems, the very young, the elderly, or during pregnancy, it’s always recommended to use pasteurized eggs or cook eggs to a firmer consistency (like a jammy yolk or hard-boiled) to minimize any potential risk of foodborne illness.
The primary reason soft-boiled eggs can be notoriously difficult to peel is related to the freshness of the egg. Very fresh eggs have a lower pH level in their whites, which causes the albumen (egg white protein) to adhere more tightly to the inner shell membrane. This strong bond weakens as the egg ages and its pH naturally increases. There are two widely recommended solutions: 1) use eggs that are at least a few days old (not straight from the store shelf), or 2) add a small amount of baking soda (about ½ teaspoon) to the cooking water to increase its alkalinity, thereby helping the egg white separate more easily from the shell.
While technically possible, it’s generally not recommended for optimal results. Cold eggs plunged directly into hot, simmering water are more susceptible to cracking due to thermal shock, as the sudden temperature change causes rapid expansion of the egg inside the shell. If you absolutely must use cold eggs, add them very gently to the simmering water, perhaps one at a time, and consider adding an extra 30 seconds to a minute to the cooking time to account for the lower starting temperature. Ideally, let your eggs sit out at room temperature for 20-30 minutes before cooking to minimize cracking and ensure more even cooking.
A “jammy” yolk refers to an egg yolk that is no longer fully liquid and runny, but also not completely firm and crumbly like a hard-boiled egg. Instead, it has a thick, custardy, almost gelatinous consistency, similar to fruit jam. This highly desirable texture is achieved by cooking the egg for a slightly longer duration than a very runny soft-boiled egg, typically around 7-8 minutes. Jammy eggs are incredibly versatile and fantastic for salads, sandwiches, and grain bowls as they offer a rich, creamy texture without being overly messy.
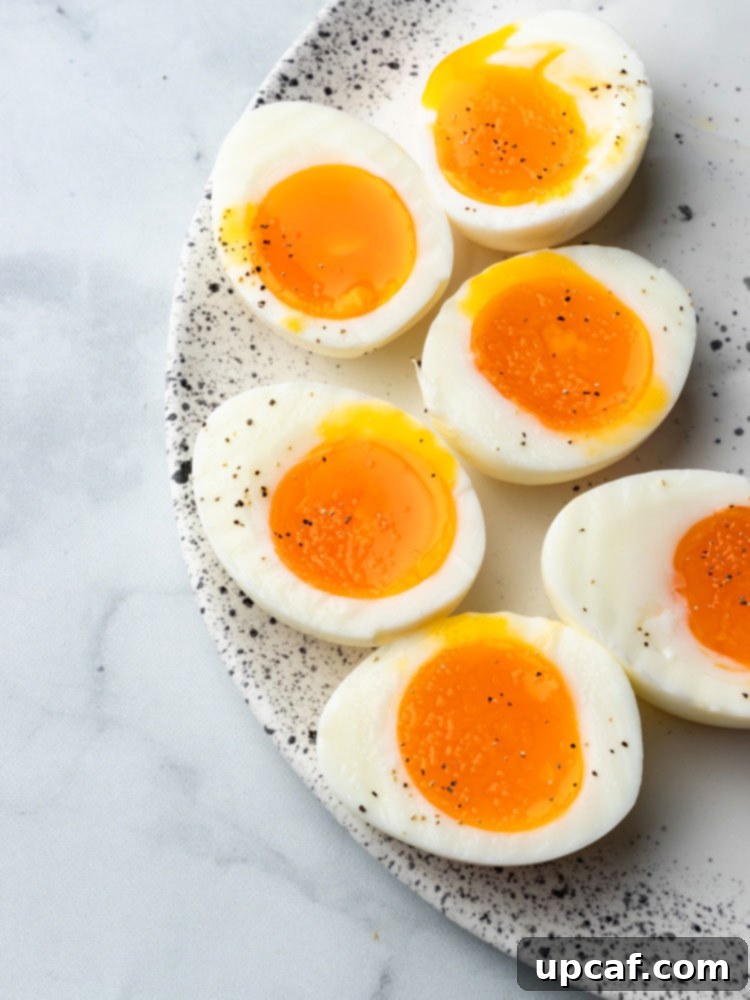
Once you’ve mastered the art of the perfect soft-boiled egg, why not expand your culinary repertoire and explore other essential egg preparation techniques? Continue your journey to egg-cellence with my detailed How to Make Perfect Hard Boiled Eggs tutorial, or learn the delicate skill of creating healthy, elegant eggs with my How to Poach An Egg instructions.
I genuinely hope you find immense pleasure and culinary success in all the recipes and helpful cooking tutorials I share. Mastering the perfect soft-boiled egg is a truly rewarding skill that will enhance countless breakfasts, lunches, and dinners. I encourage you to try this foolproof method, savor the delightful results, and please consider rating it and sharing your success with friends and family! Your feedback and shared experiences are what truly inspire me.
If you try this recipe and love it, don’t forget to use my hashtag to share it with me on INSTAGRAM for a chance to be featured in my story! Also, be sure to follow Cookin’ With Mima on FACEBOOK | INSTAGRAM | PINTEREST for all of my latest social posts, delicious new recipes, and invaluable cooking tips.
How to Make The Perfect Soft Boiled Egg
By: Mariam Ezzeddine
Unlock the secret to flawlessly soft-boiled eggs with silky, creamy yolks every time. This easy recipe guide guarantees success for a delightful culinary addition to any meal!
Prep Time: 5 minutes
Cook Time: 6-7 minutes
Resting Time: 2 minutes
Total Time: 13-14 minutes
Servings: 6 servings
Ingredients
- 6 whole eggs (medium or large, preferably at room temperature)
- Cold water (to fill saucepan ¾ full)
- Optional: ½ teaspoon baking soda
Instructions
- Fill a saucepan ¾ full with cold water. Bring it to a vigorous boil over high heat. Once boiling, reduce the heat to a gentle rolling simmer.
- Using a large slotted spoon or tongs, gently add your eggs (preferably at room temperature) into the simmering saucepan one by one.
- Simmer the eggs for 6 to 7 minutes for a creamy, runny yolk. For a very runny yolk (dippy egg), cook for 5 minutes. For a slightly firmer, jammy yolk, cook for 7-8 minutes. Adjust timing slightly for egg size.
- Once the cooking time is complete, quickly remove the eggs from the hot water and immediately transfer them into a prepared bowl of ice water.
- Let the eggs cool in the ice bath for at least 2 minutes before peeling.
Notes
- For significantly easier peeling, ensure your eggs are at room temperature before boiling.
- Older eggs (a few days to a week old) consistently peel more easily than very fresh eggs.
- Adding ½ teaspoon of baking soda to the boiling water can also aid in easier peeling by increasing water alkalinity.
- For serving with toast soldiers, gently tap and remove only the top portion of the shell while the egg is in an egg cup.
Nutrition (per serving, estimated)
Serving: 1 egg | Calories: 70kcal | Carbohydrates: 1g | Protein: 6g | Fat: 5g | Saturated Fat: 2g | Cholesterol: 185mg | Sodium: 62mg | Potassium: 63mg | Sugar: 0g | Vitamin A: 260IU | Calcium: 25mg | Iron: 0.7mg
