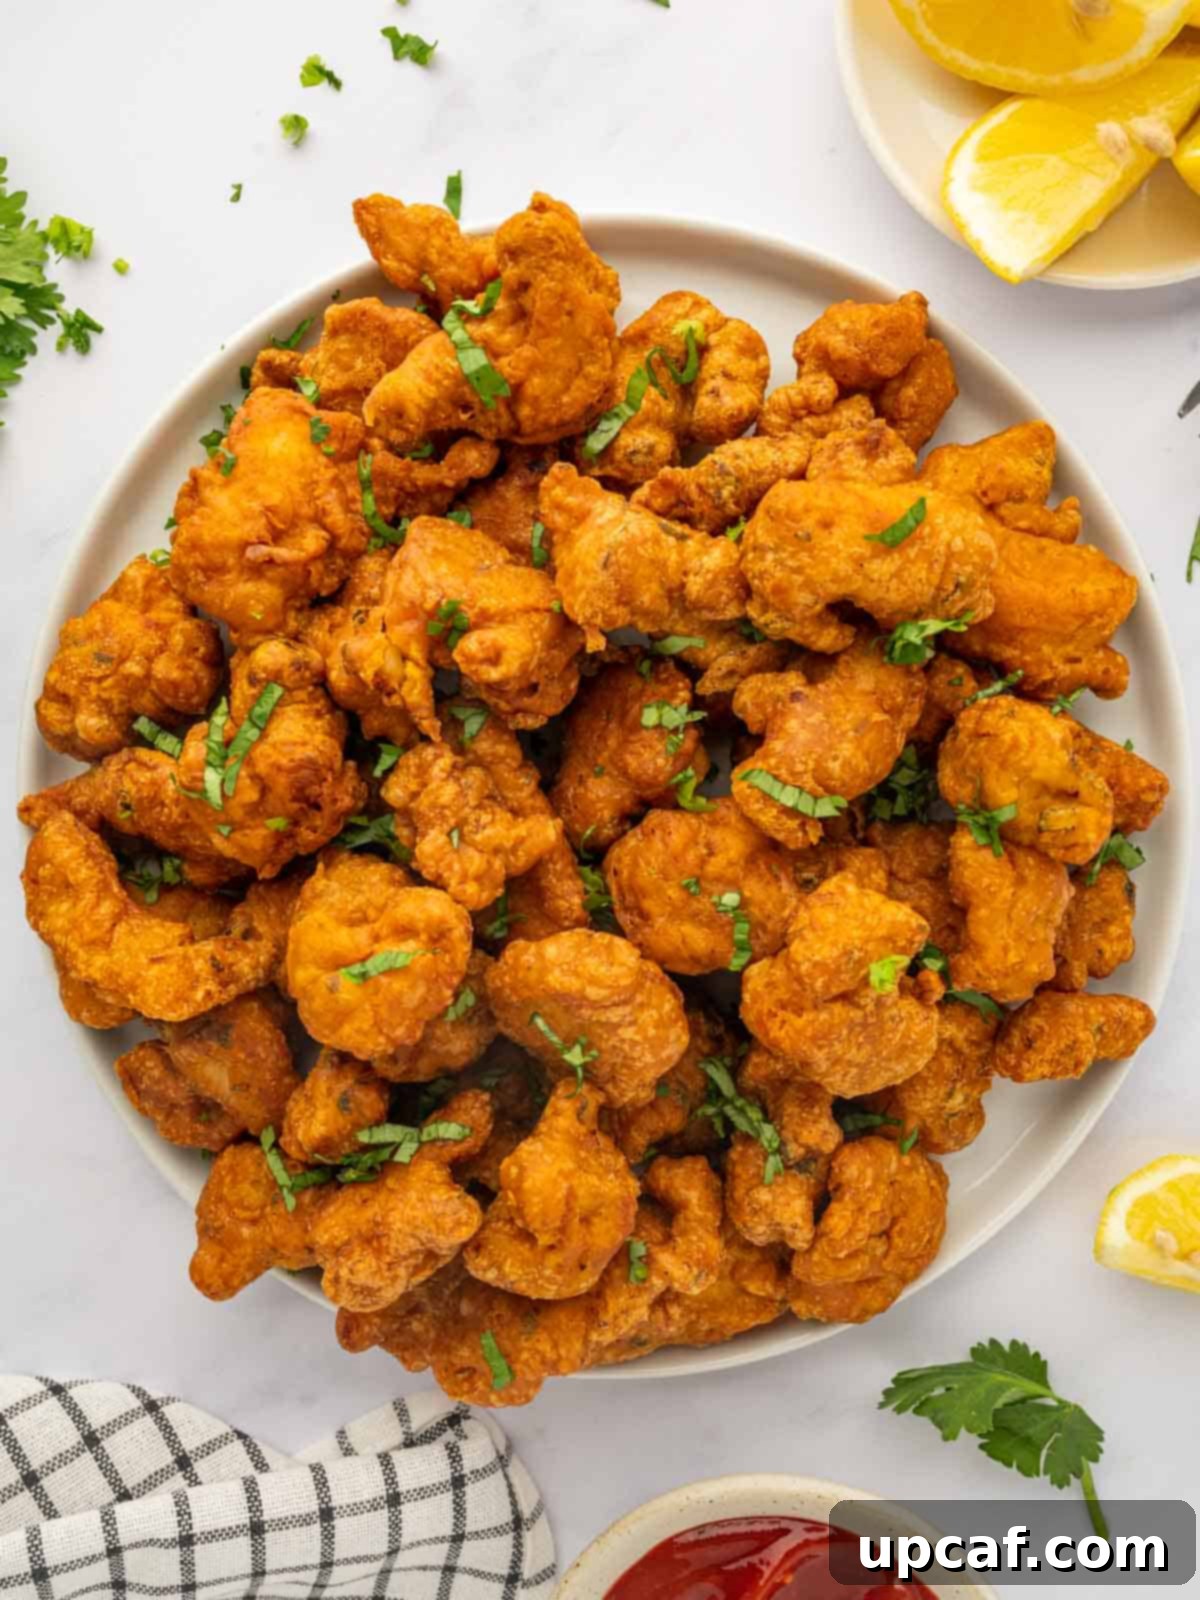
Welcome to the ultimate guide for crafting the most delectable Chicken Pakora! This beloved Indian street food is a symphony of flavors and textures, featuring succulent pieces of chicken marinated in a vibrant blend of spices, then coated in a crisp, golden-brown batter and deep-fried to perfection. Whether you’re a seasoned chef or a culinary beginner, this recipe promises an authentic taste experience that’s surprisingly easy to achieve. Imagine tender, juicy chicken encased in a wonderfully crunchy shell, bursting with aromatic Indian spices – a true treat for your taste buds.
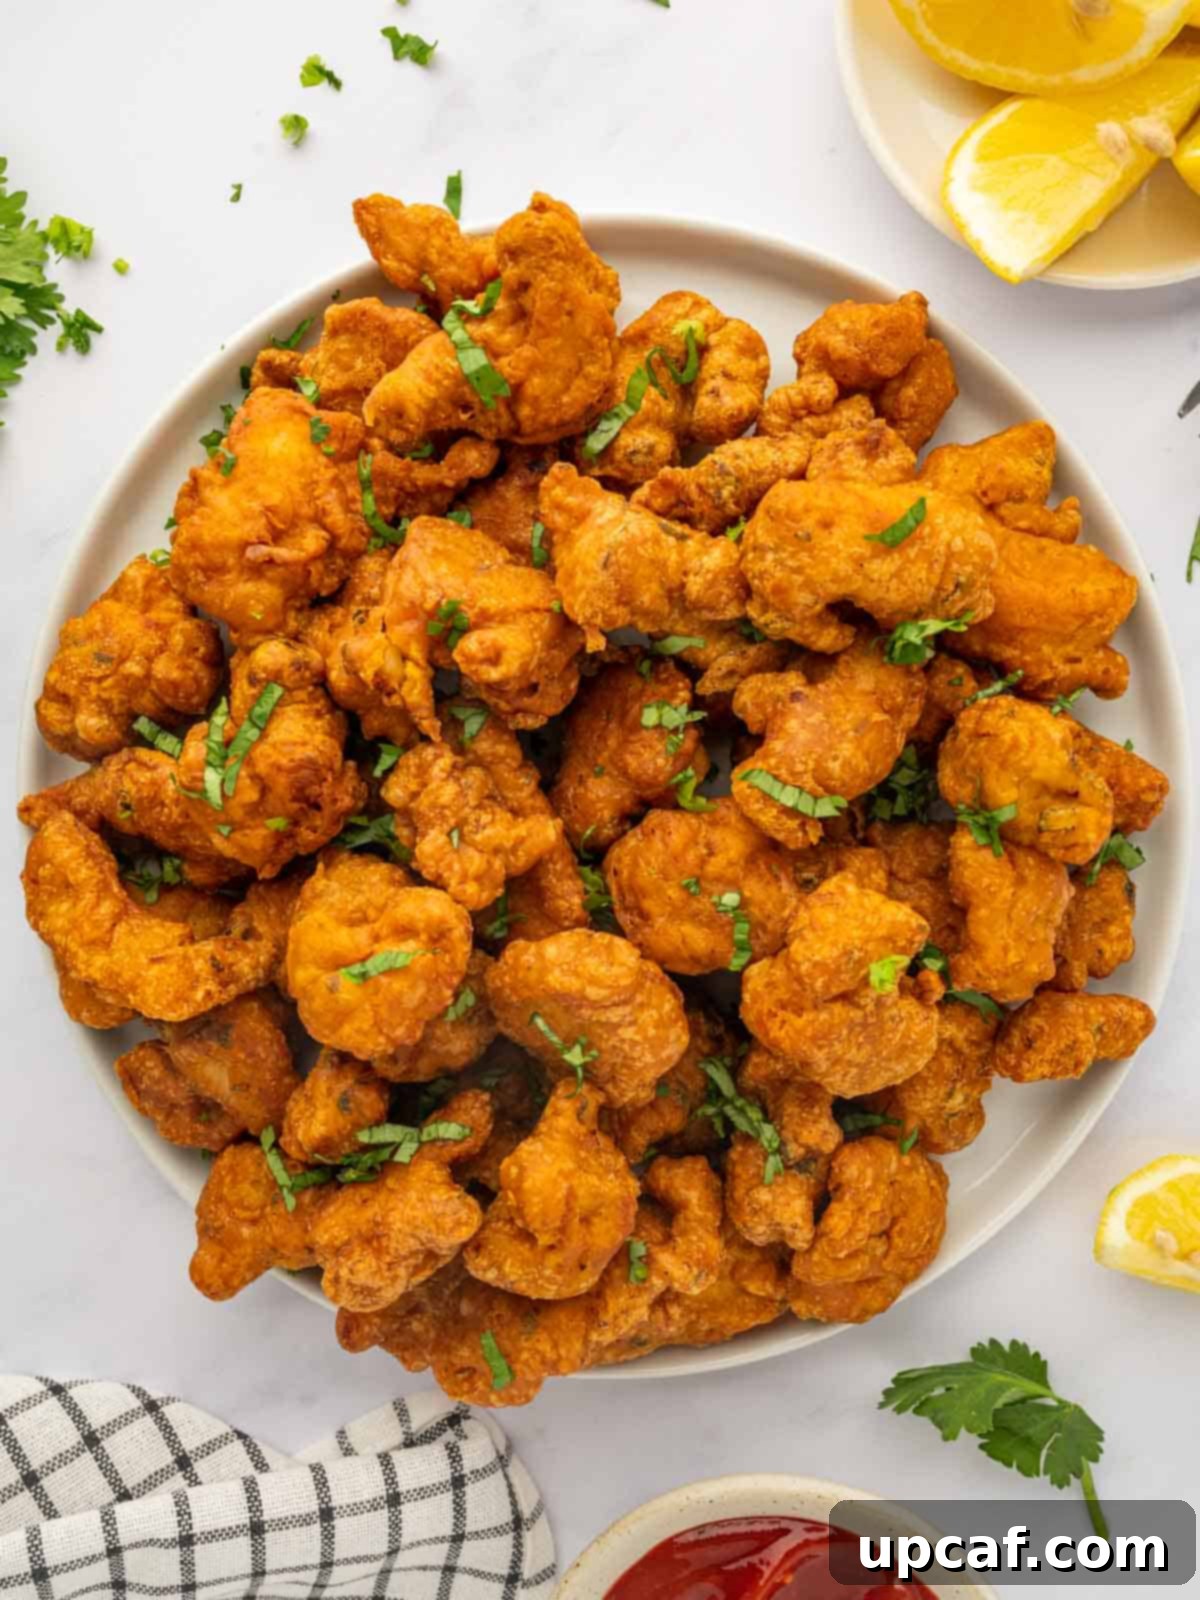
Chicken Pakora is more than just a snack; it’s an experience. Its spicy, savory bite-sized pieces make it an ideal appetizer or a delightful addition to any gathering. Planning a party, a game day tailgate, or just looking for a fun meal for the family? This recipe is your secret weapon. It’s incredibly versatile, easily scalable for a crowd – simply double or triple the recipe, and you’ll have enough to feed an army of hungry guests. Yet, its simplicity means it’s equally perfect for a quick weeknight snack or a satisfying main course any day of the week. Get ready to impress with this irresistible Indian classic!
Craving more amazing chicken dishes? Explore other favorites like my Million Dollar Chicken Bake or a zesty Lemon Chicken Piccata.
Why You’ll Fall in Love with This Chicken Pakora Recipe
This isn’t just another chicken recipe; it’s a culinary journey that promises to become a staple in your kitchen. Here’s why this Chicken Pakora stands out:
- Explosion of Authentic Indian Flavors: Every bite of this pakora is a vibrant celebration of India’s rich culinary heritage. The carefully selected blend of traditional spices creates a profound depth of flavor that is truly unique and utterly addictive. From the warm notes of cumin and garam masala to the subtle tang of lemon and the fiery kick of chili, this dish delivers an unparalleled taste experience that will transport your senses straight to the bustling streets of India.
- Remarkably Flexible Spice Level: One of the best aspects of this recipe is its adaptability. Whether you prefer a mild, family-friendly warmth or a bold, tongue-tingling heat, you have complete control. Easily adjust the quantity of green and red chili powders to suit your palate. For those who love an extra kick, serve with a spicy chili sauce; for a milder experience, cool it down with a refreshing yogurt dip or mint chutney. It’s truly a dish for everyone!
- The Ultimate Party Appetizer: These bite-sized chicken pieces are inherently fun and incredibly easy to eat, making them the perfect finger food for any occasion. Whether it’s a casual potluck, a sophisticated cocktail party, or a lively game day gathering, Chicken Pakora is guaranteed to be a crowd-pleaser. Their irresistible crunch and flavorful interior make them disappear quickly, so be sure to make a generous batch!
- Speedy Preparation for Busy Lives: Despite its gourmet taste, this Chicken Pakora recipe is incredibly efficient. From start to finish, you can have a batch of these golden, crispy delights on your table in approximately 30 minutes. This makes it an ideal choice for busy weeknights when you crave something extraordinary without spending hours in the kitchen.
- Crispy Perfection, Every Time: The secret to truly great pakora lies in its texture. Our carefully balanced batter, combined with expert frying tips, ensures each piece achieves an irresistibly crispy exterior while keeping the chicken inside wonderfully tender and juicy. This delightful contrast is what makes Chicken Pakora so satisfying.
Essential Ingredients for Your Perfect Pakora
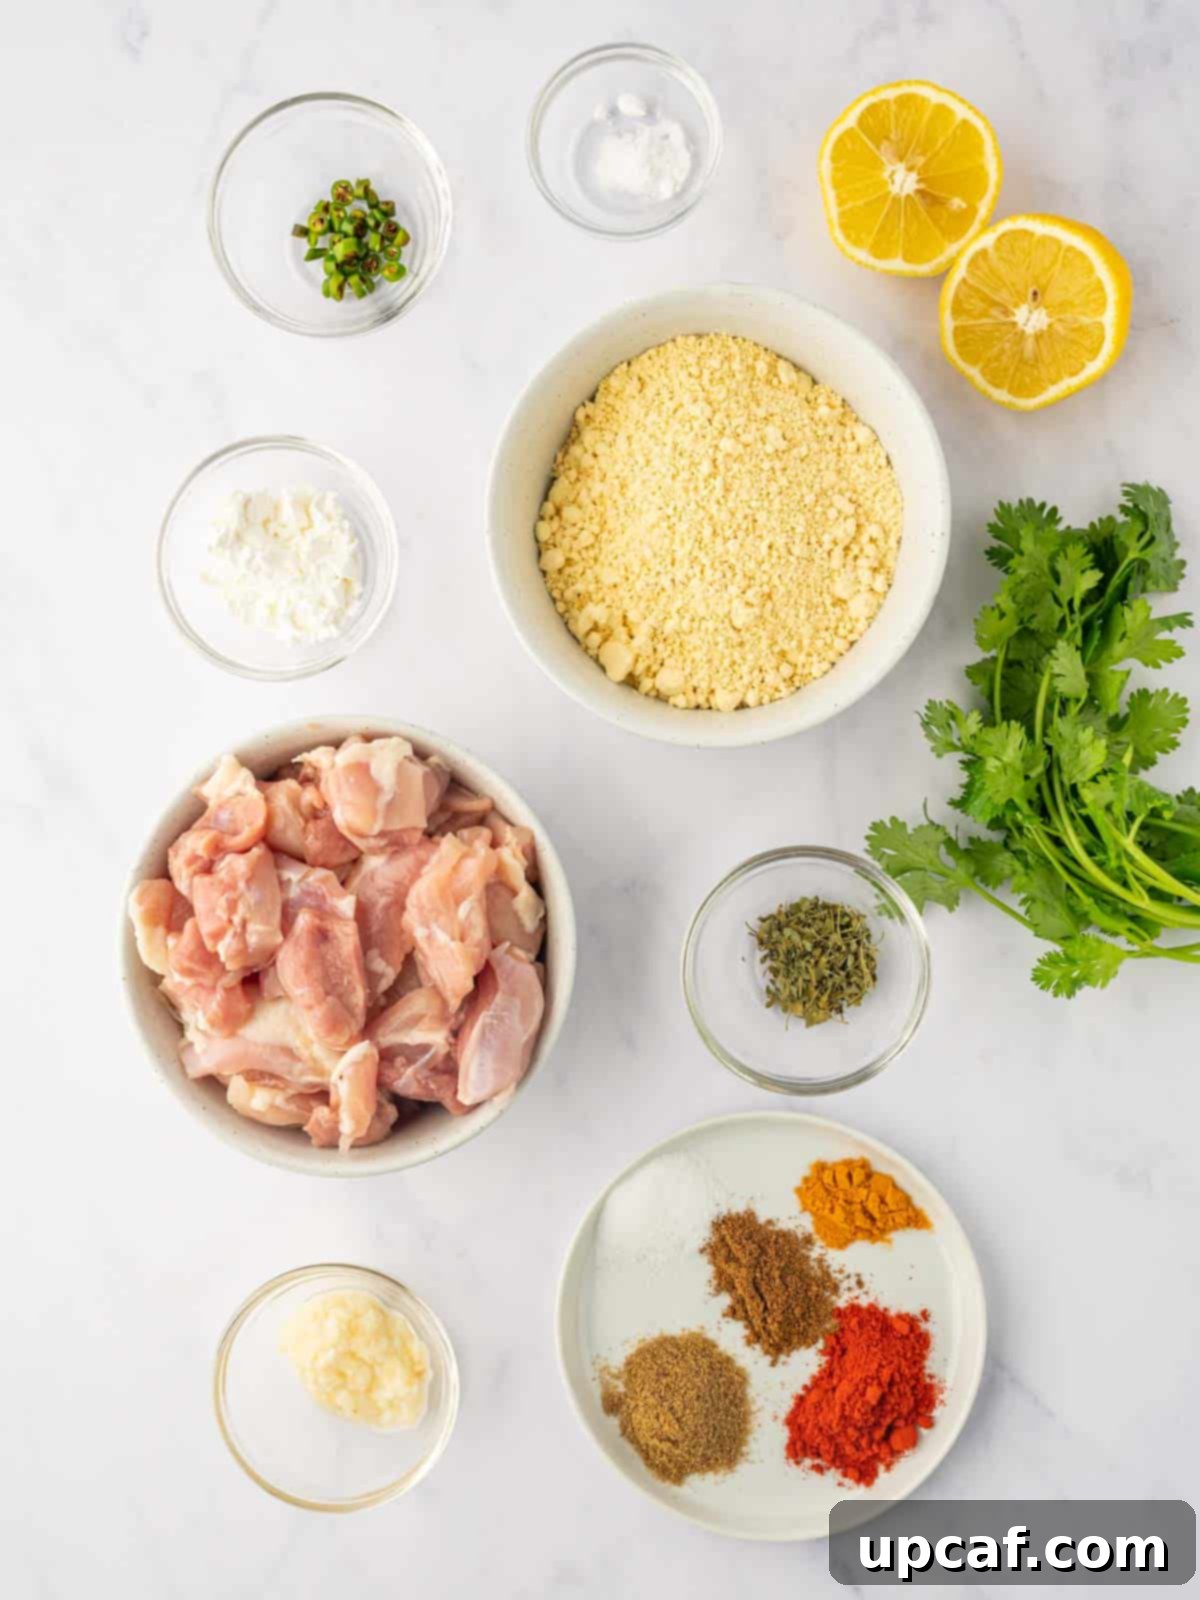
Creating sensational Chicken Pakora starts with fresh, quality ingredients. Here’s a detailed look at what you’ll need and why each component is crucial:
- Chicken Thighs: We opt for boneless, skinless chicken thighs, cut into uniform bite-sized pieces. Dark meat, like chicken thighs, is inherently more flavorful and contains a higher fat content compared to chicken breast. This extra fat ensures the chicken remains incredibly tender and juicy during the deep-frying process, preventing it from drying out and contributing to a richer overall taste.
- The Flavor-Packed Marinade: This is where the magic happens, infusing the chicken with an explosion of South Asian spices.
- Lemon Juice: Acts as a tenderizer and brightens the flavors, adding a tangy counterpoint to the rich spices.
- Ginger and Garlic Paste: A foundational aromatic in Indian cuisine, providing a pungent, warm, and deeply savory base.
- Green Chili: Finely chopped, it adds a fresh, sharp heat. Adjust the amount to control the spice level.
- Red Chili Powder: Contributes a robust, fiery heat and a beautiful reddish hue to the finished pakora.
- Ground Cumin: Offers earthy, warm notes that are characteristic of Indian dishes.
- Dried Fenugreek Leaves (Kasuri Methi): These dried leaves provide a slightly bitter, sweet, and highly aromatic flavor that is distinctive and essential for authentic taste.
- Salt: Essential for seasoning, bringing out all the other flavors.
- Garam Masala: A fragrant blend of ground spices, it adds a complex, warm, and slightly sweet finish to the marinade.
- Turmeric Powder: Not only provides a beautiful golden color but also contributes earthy undertones and anti-inflammatory properties.
- The Crispy Batter: This simple yet effective blend coats the marinated chicken, ensuring that signature crispy exterior.
- Gram Flour (Besan): Made from ground chickpeas, this flour is gluten-free and forms the base of the pakora batter, giving it a unique texture and flavor.
- Cornstarch: Added for extra crispiness and to help the batter adhere well to the chicken.
- Baking Soda: A small amount creates a light, airy, and fluffy texture in the batter when it reacts with the acidic lemon juice, preventing it from being too dense.
- Water: Gradually added to create the perfect thick, coating consistency for the batter.
- Oil for Frying: Choose a neutral-flavored oil with a high smoke point, such as vegetable oil, canola oil, or peanut oil. Ensure you use enough oil to fully submerge the chicken pieces for proper deep frying, guaranteeing an even cook and consistent crispness.
- Fresh Garnishes:
- Lemon Wedges: A squeeze of fresh lemon juice over the hot pakoras adds a refreshing zest that cuts through the richness and brightens all the flavors.
- Fresh Cilantro: Finely chopped cilantro sprinkled over the top provides a burst of fresh, herbaceous flavor and a vibrant pop of color, completing the dish beautifully.
Step-by-Step Guide: Crafting Your Perfect Chicken Pakora
Follow these simple steps to create perfectly crispy and flavorful Chicken Pakora:
Step 1: Prepare Your Workspace and Ingredients. Before you begin, gather all your equipment, including a wide mixing bowl, a heavy-bottomed pot or wok for frying, a slotted spoon or spider, and a wire rack lined with paper towels. Dice your chicken thighs into uniform bite-sized pieces, roughly 1-inch cubes, for even cooking. Prepare all your marinade ingredients by mincing the ginger and garlic (or using paste) and finely chopping the green chili. Having everything ready will make the cooking process smooth and enjoyable.
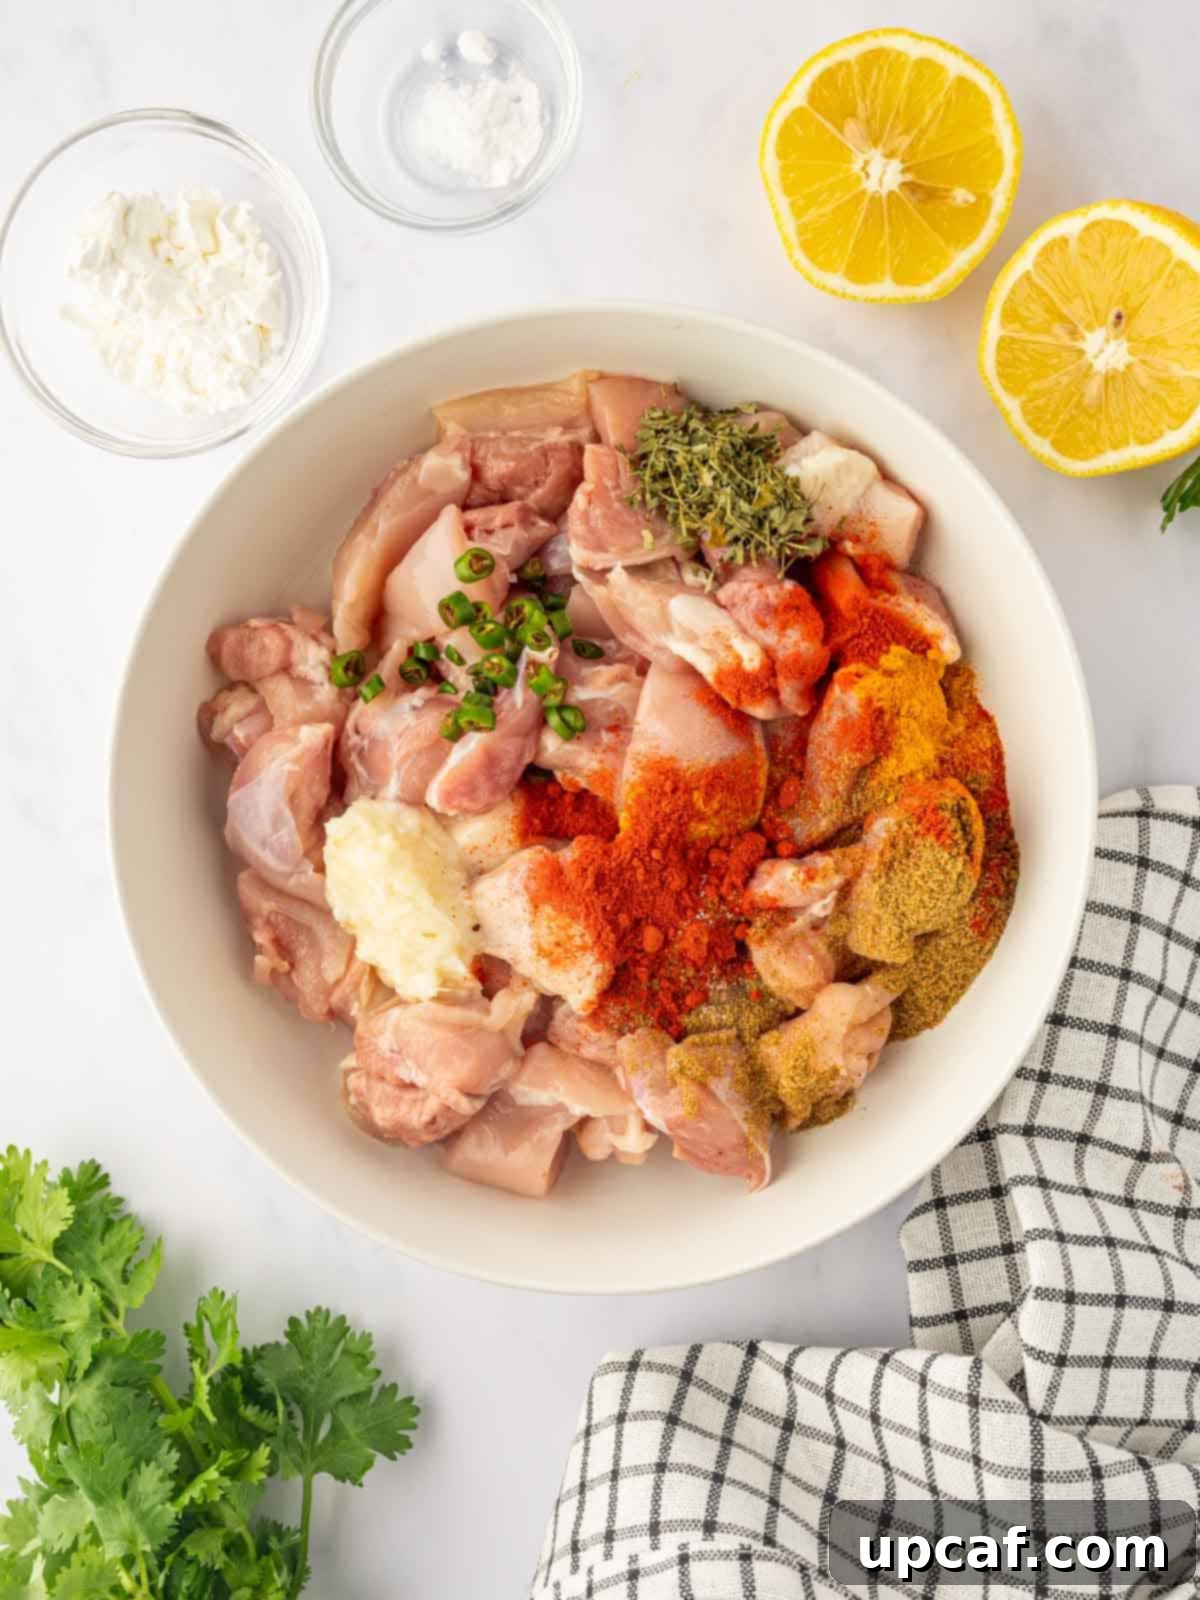
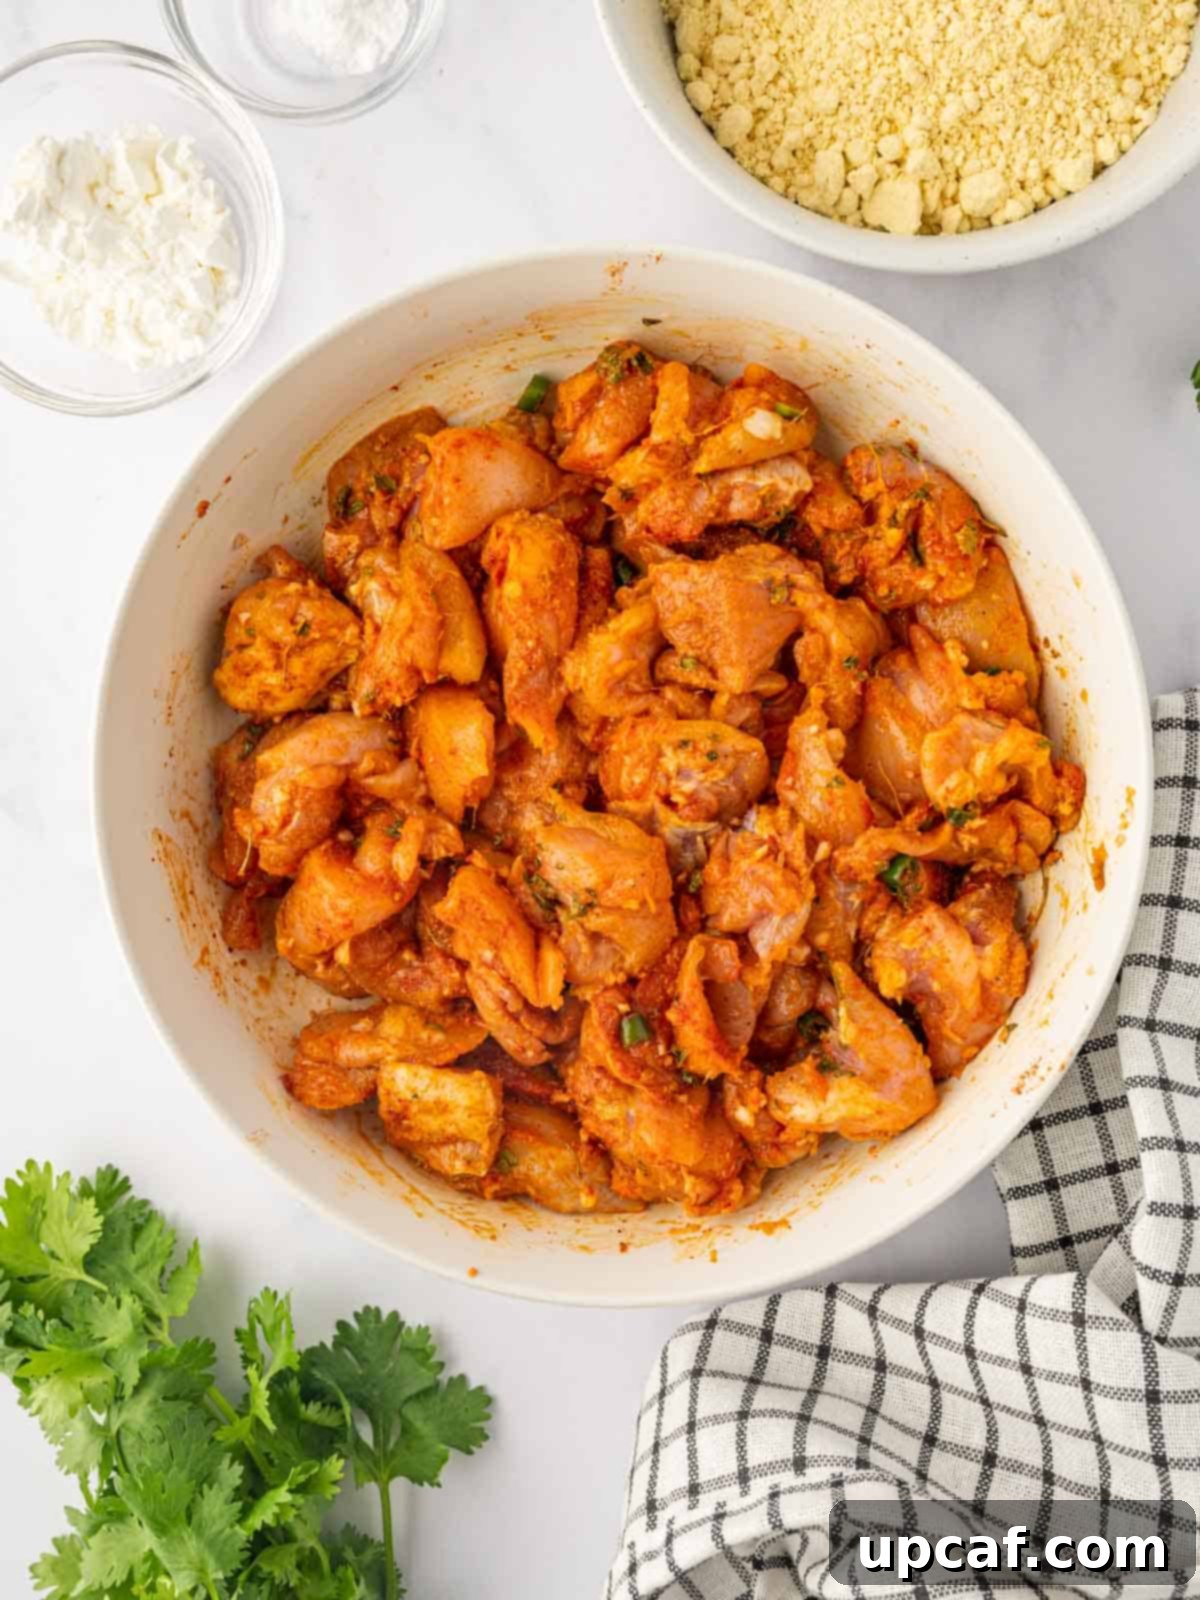
Step 2: Marinate the Chicken for Maximum Flavor. In your wide mixing bowl, combine the bite-sized chicken pieces with the lemon juice, ginger-garlic paste, finely chopped green chili, red chili powder, ground cumin, dried fenugreek leaves, salt, garam masala, and turmeric powder. Using your hands or a sturdy spoon, toss the chicken thoroughly, ensuring every piece is evenly coated with the aromatic spice blend. Allow the chicken to marinate for a minimum of 15 minutes at room temperature. For a deeper, more infused flavor, cover the bowl and refrigerate for up to 30 minutes, or even a few hours.
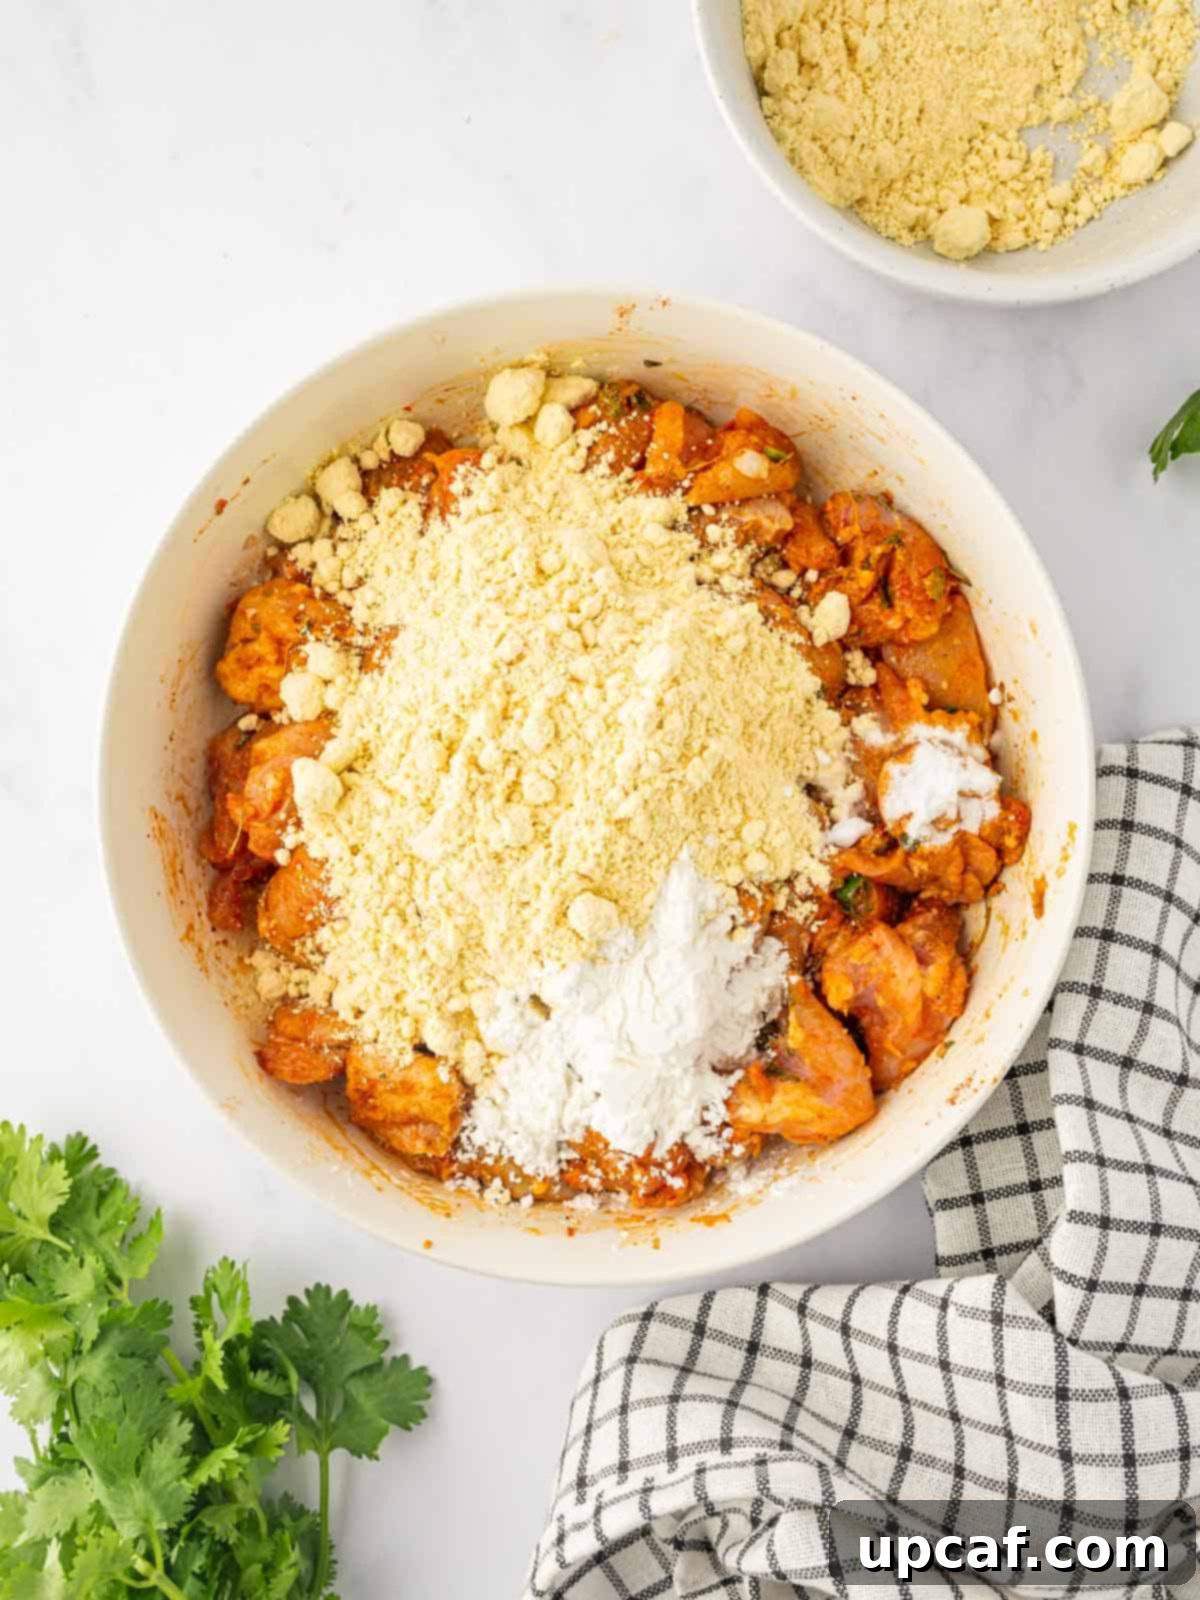
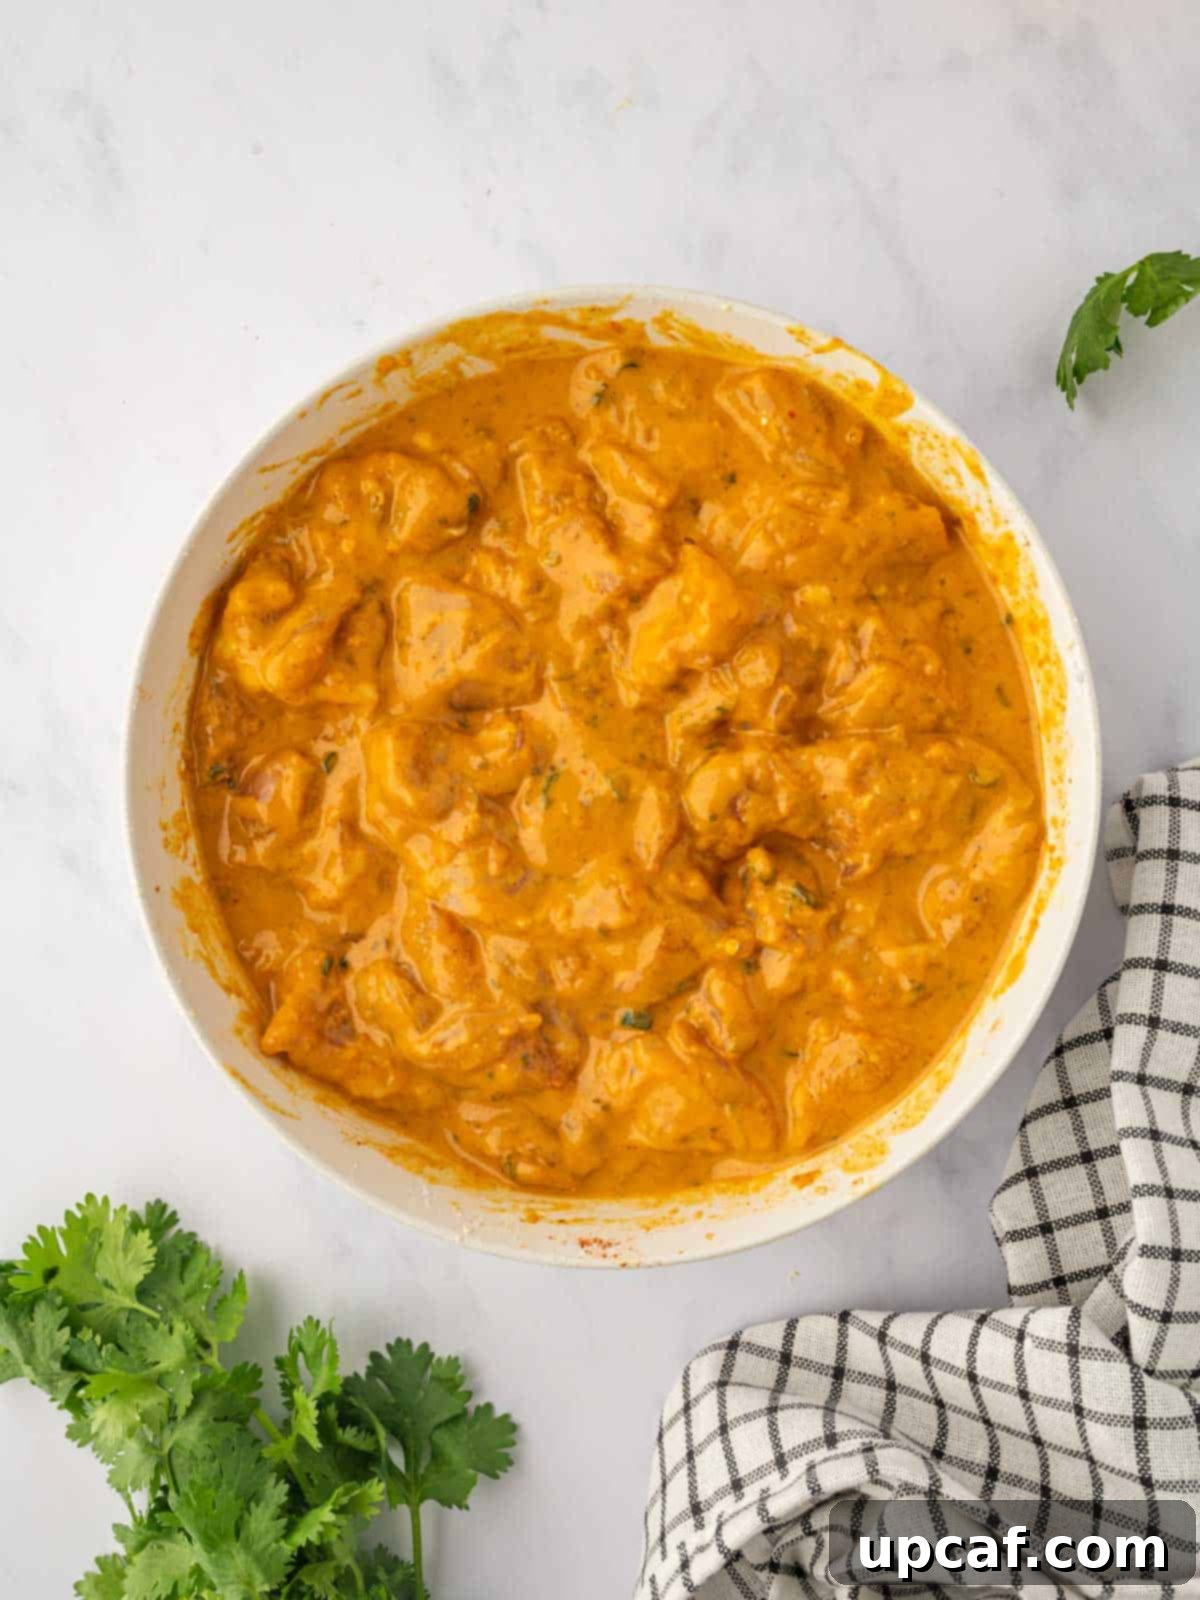
Step 3: Create the Crispy Batter Coating. To the marinated chicken, add the gram flour (besan), cornstarch, and baking soda. Toss the chicken again until the dry ingredients are mostly distributed. Now, begin sprinkling water over the chicken a little bit at a time – start with a tablespoon or two – mixing continuously. The goal is to form a thick, cohesive batter that lightly coats each piece of chicken. It should be just thick enough to cling to the chicken without being runny. Add more water sparingly if needed until you achieve the desired consistency.
Step 4: Deep-Fry the Chicken to Golden Perfection. While the chicken is marinating and being coated, heat your chosen oil for deep frying in a wok or heavy-bottomed pot. Aim for a consistent oil temperature between 350-375°F (175-190°C) – a cooking thermometer is highly recommended for accuracy. Once the oil is hot and shimmering, carefully add the chicken pieces in small batches. Avoid overcrowding the pan, as this will lower the oil temperature and result in greasy, less crispy pakoras. Fry each batch for 4-5 minutes, turning occasionally, until the chicken is cooked through, golden brown, and delightfully crispy. Use a slotted spoon or spider to remove the cooked pakoras.
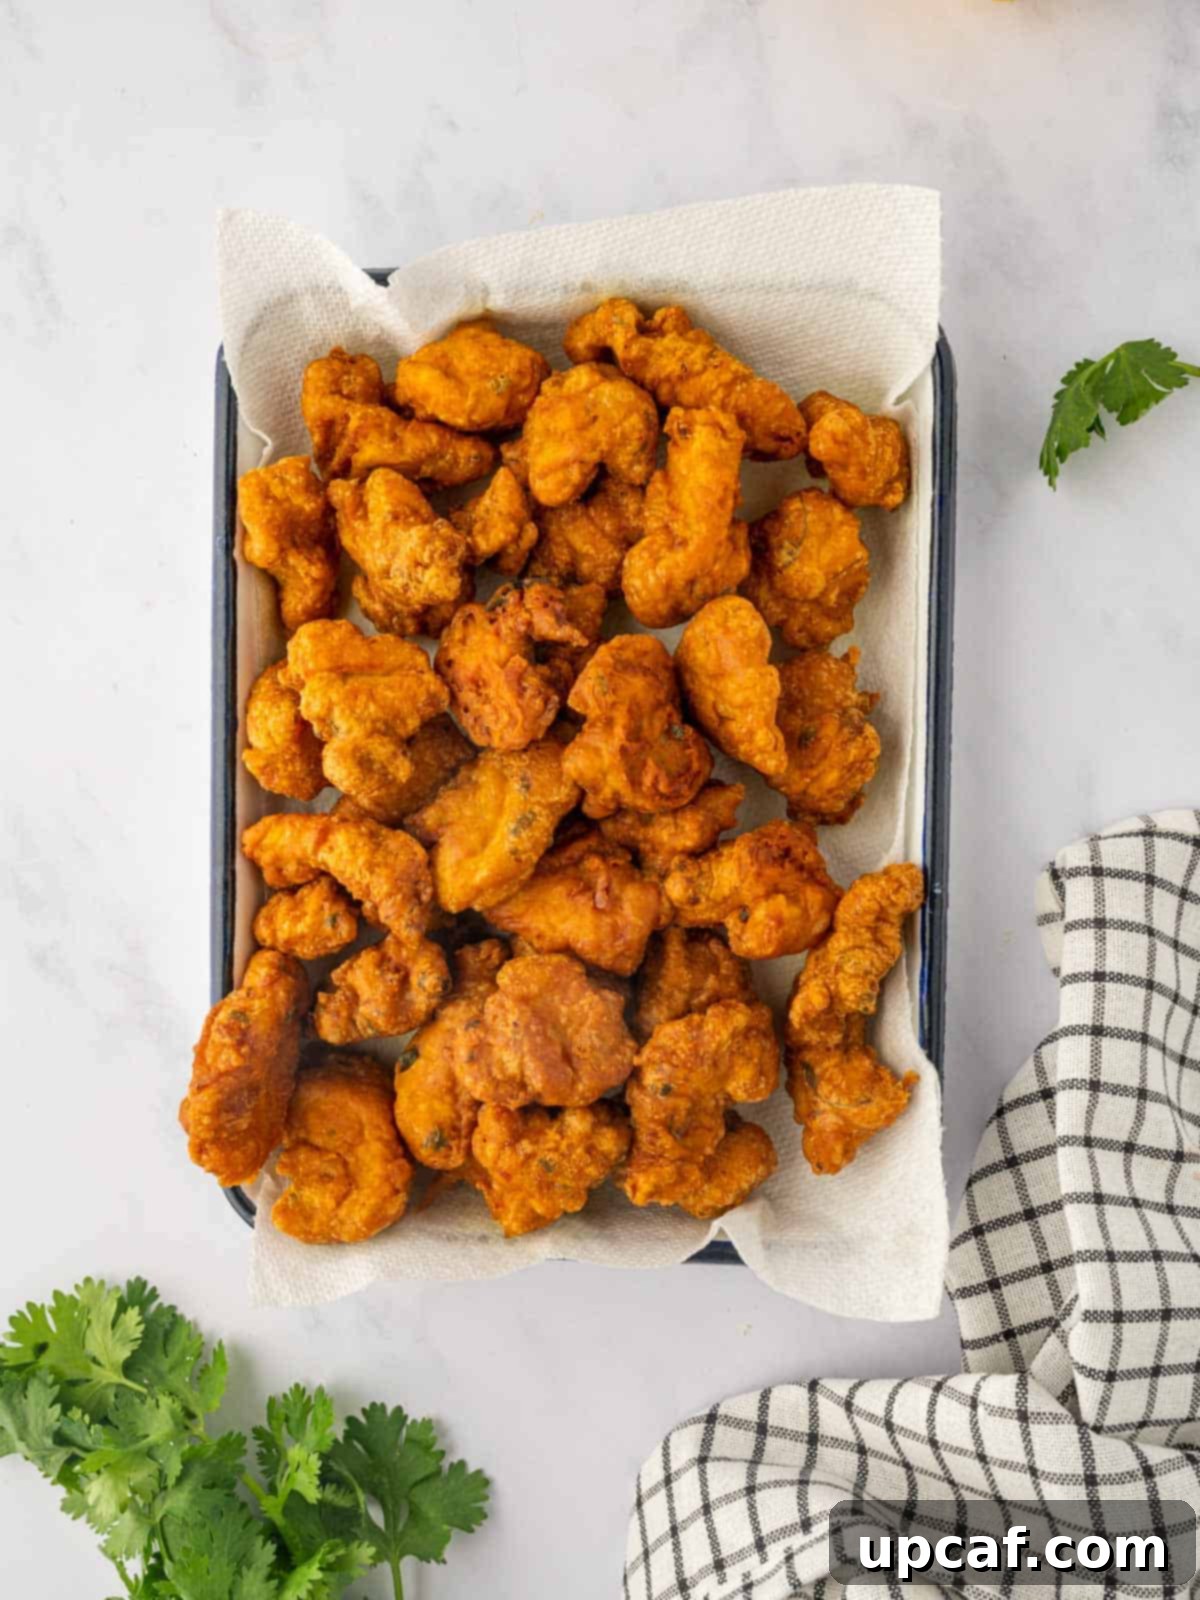
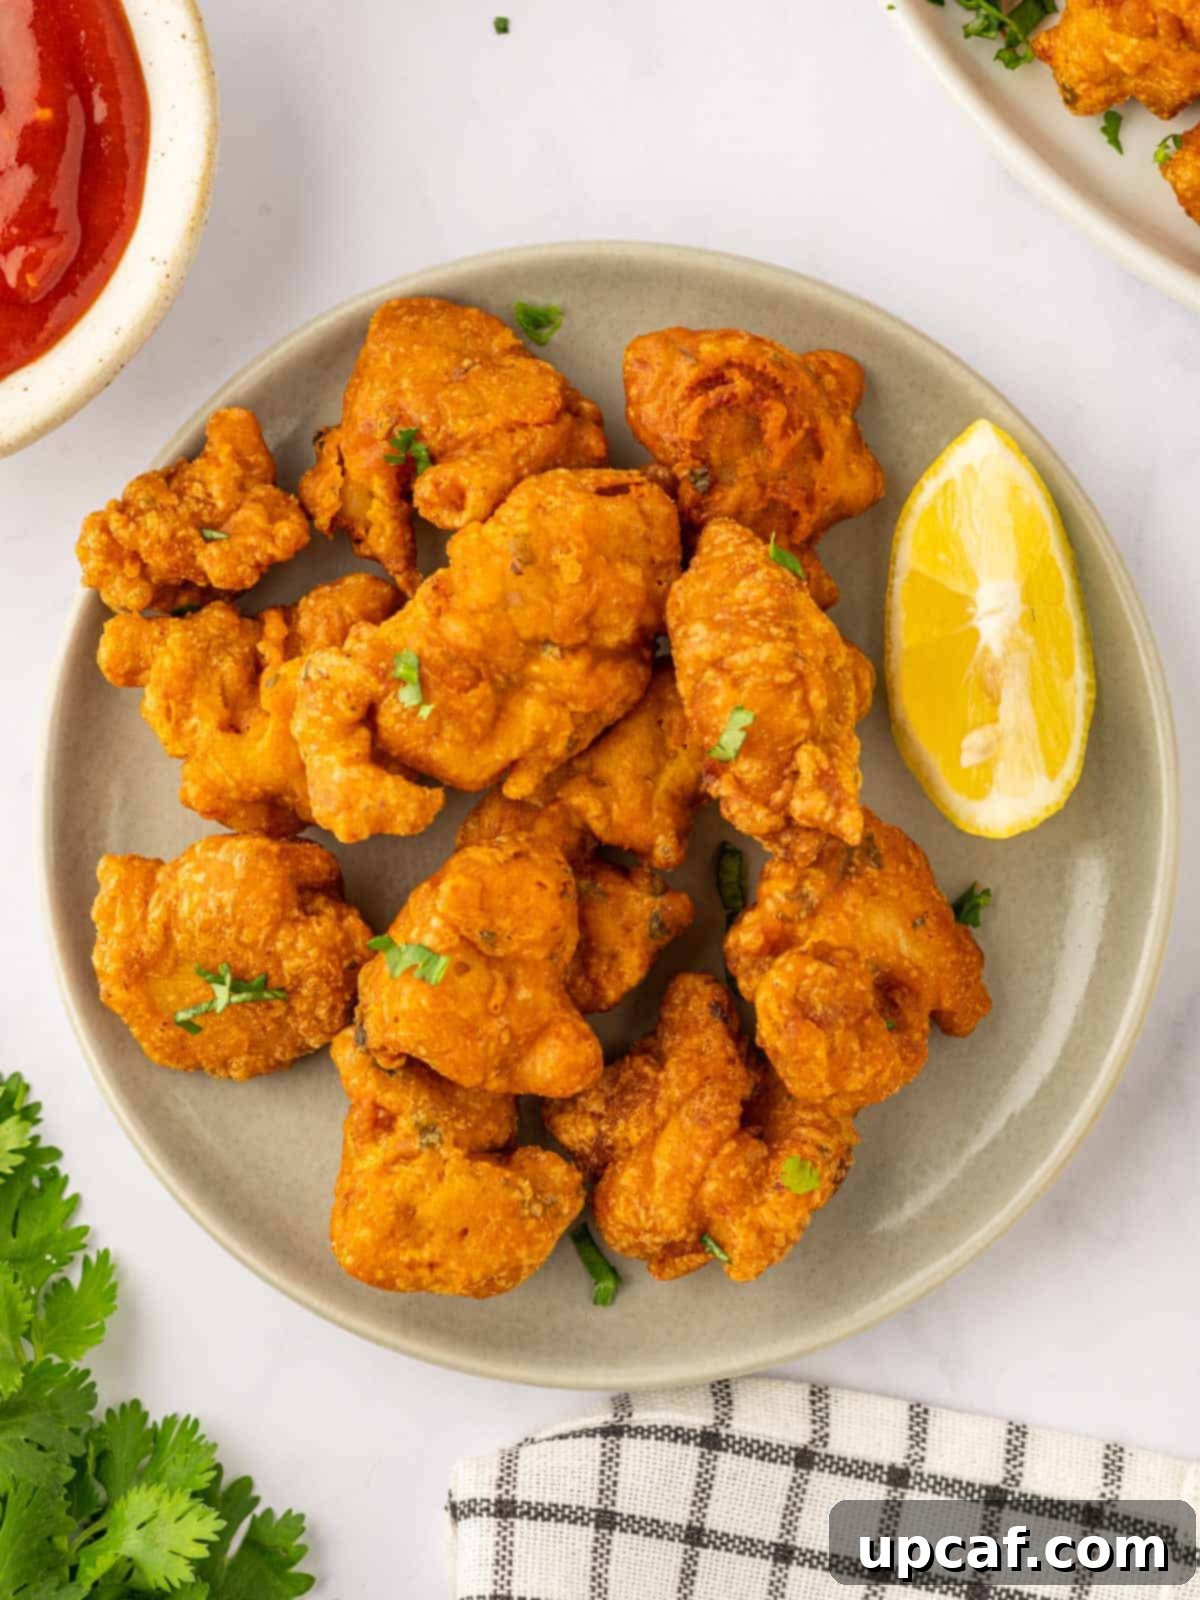
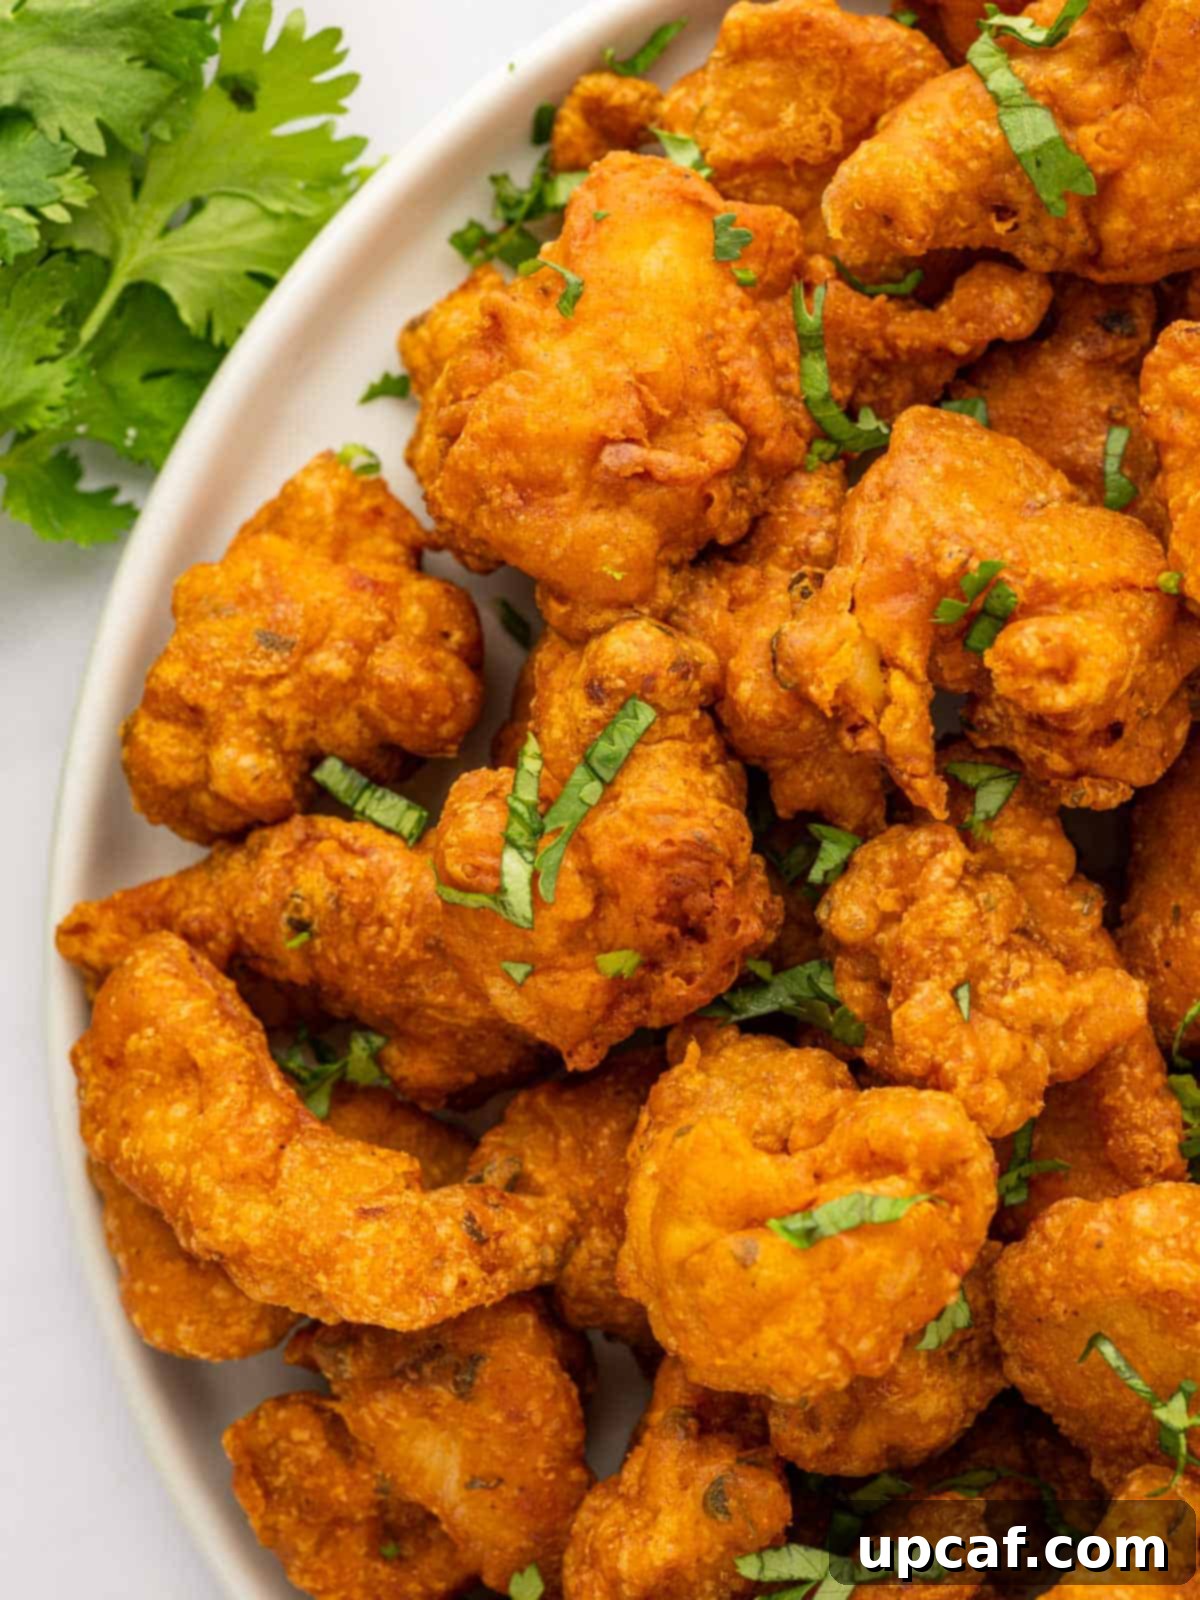
Step 5: Garnish and Serve Immediately. As each batch of crispy chicken pakoras comes out of the oil, transfer them to a wire rack lined with paper towels to drain any excess oil. This crucial step helps maintain their crispiness. Once all batches are fried, arrange the golden pakoras on a beautiful serving platter. Generously garnish with freshly chopped cilantro and serve immediately with lemon wedges on the side, along with your favorite dipping sauces such as mint chutney, tamarind chutney, or a cooling yogurt dip.
Expert Tips for Unforgettable Chicken Pakora
Achieving restaurant-quality Chicken Pakora at home is easier than you think with these expert tips:
- Maximize Marination Time: While 15 minutes is the minimum, allowing the chicken to marinate for a full 30 minutes, or even up to 2-3 hours in the refrigerator, will significantly deepen the flavor. The spices will have more time to penetrate the meat, resulting in a more intensely flavorful pakora.
- Baking Soda vs. Baking Powder – Know the Difference: It’s important to use baking SODA as specified. Baking soda requires an acid (like the lemon juice in our marinade) to activate and produce carbon dioxide bubbles. These bubbles are what give the batter its characteristic light and fluffy texture, contributing to the overall crispiness. Baking powder is a combination of baking soda and an acid, and using it might yield different results.
- Master Oil Temperature: This is perhaps the most critical factor for crispy, non-greasy pakora. Maintain a consistent oil temperature between 350-375°F (175-190°C). If the oil is too cool, the pakoras will absorb too much oil and become soggy. If it’s too hot, the exterior will burn before the chicken inside cooks through. Invest in a reliable deep-fry thermometer for best results.
- Don’t Overcrowd the Pan: Fry the chicken in small batches. Crowding the pot will drastically drop the oil temperature, leading to uneven cooking and less crispy results. Give each piece enough space to fry properly and uniformly.
- Drain Excess Oil: Always transfer freshly fried pakoras to a wire rack lined with paper towels. This allows excess oil to drip away, preventing the pakoras from sitting in oil and becoming soggy, thus preserving their delightful crunch.
- Taste and Adjust Seasoning: Before coating all the chicken, you can fry a tiny piece of marinated chicken or a small dollop of batter to taste the seasoning. Adjust salt or chili powder as needed to match your preference.
- Uniform Chicken Pieces: Cutting the chicken thighs into roughly equal bite-sized pieces ensures that they cook evenly at the same rate, preventing some pieces from being undercooked or overcooked.
- Use Fresh Ingredients: Fresh ginger, garlic, and green chilies make a noticeable difference in flavor compared to pre-packaged pastes or dried alternatives.
Delightful Pairings: What to Serve with Chicken Pakora
Chicken Pakora is delicious on its own, but pairing it with complementary dishes elevates the entire meal experience. Here are some fantastic serving suggestions:
- Classic Indian Accompaniments:
- Mint Chutney: A refreshing, vibrant chutney made with fresh mint, cilantro, green chilies, and yogurt, offering a cool contrast to the spicy pakora.
- Tamarind Chutney: Sweet, tangy, and slightly spicy, this chutney adds a burst of complex flavors that perfectly complements the fried chicken.
- Raita (Yogurt Sauce): A cooling mixture of plain yogurt with cucumber, mint, and spices, ideal for balancing the heat.
- White Rice: Simple steamed basmati rice provides a neutral base that soaks up the flavors and richness of the pakora.
- Bread for Scooping:
- Warm, fluffy Naan Bread or roti is excellent for scooping up pakora and any accompanying sauces, adding a comforting element to the meal.
- Light Sides to Balance the Richness:
- A crisp, cool green salad with a light vinaigrette can provide a refreshing counterpoint to the fried dish.
- Sliced red onions, cucumbers, and tomatoes tossed with a squeeze of lemon and a pinch of chaat masala offer a tangy, fresh crunch.
- Beverage Pairings:
- Traditional Masala Chai or a cold, refreshing mango lassi beautifully complement the spicy flavors.
- A light lager or a crisp white wine can also pair well, cutting through the richness.
Storing and Reheating Your Pakora for Lasting Freshness
While Chicken Pakora is best enjoyed fresh and hot, you can certainly store leftovers and reheat them effectively to recapture some of their original crispiness:
Storing: First, ensure your cooked Chicken Pakora has cooled completely to room temperature. This is crucial to prevent condensation and sogginess. Once cool, transfer the pakoras to an airtight container. You can layer them with paper towels to absorb any lingering moisture. Store in the refrigerator for up to 1-2 days. Beyond this, the texture may start to degrade significantly.
To Reheat (for optimal crispness): The key to reheating pakora is to restore its crispy exterior, and the microwave is generally not recommended for this purpose as it tends to make them soggy.
- Oven Method: Preheat your oven to 350°F (175°C). Spread the pakoras in a single layer on a baking sheet. Reheat for 10-15 minutes, or until heated through and crispy. Flipping them halfway through can ensure even crisping.
- Skillet Method: For a stovetop option, heat a little bit of oil (just a teaspoon or two) in a non-stick skillet over medium heat. Add the pakoras in a single layer and pan-fry them for a few minutes per side, flipping occasionally, until they are hot and crispy all around.
- Air Fryer Method: This is arguably the best method for reheating. Place the cooled pakoras in a single layer in your air fryer basket. Air fry at 350°F (175°C) for 5-8 minutes, shaking the basket halfway, until they are perfectly hot and crisp.
Freezing for Future Enjoyment: You can also freeze cooked Chicken Pakora for longer storage.
- Individual Freezing: After frying and allowing the pakoras to cool completely, arrange them in a single layer on a baking sheet. Freeze for 1-2 hours until they are solid. This prevents them from sticking together.
- Long-Term Storage: Once individually frozen, transfer the pakoras to freezer bags or an airtight freezer-safe container. They can be stored for 1-2 months. When ready to enjoy, reheat directly from frozen using the oven or air fryer method, adding a few extra minutes to the cooking time.
Exploring Healthier & Creative Cooking Methods
While traditional deep-frying yields the most authentic crispy pakora, there are several alternative cooking methods that can offer a healthier twist or a unique texture:
Air Fryer Chicken Pakora: For those seeking a similar crisp texture with significantly less oil, the air fryer is an excellent choice.
- Preparation: After coating the chicken with the batter, lightly spray the pakoras with cooking oil. Ensure an even, light coating on all sides.
- Cooking: Arrange the pakoras in a single layer in your air fryer basket, making sure not to overcrowd it. Air fry at 375°F (190°C) for 10-15 minutes, flipping them halfway through, until they are golden brown and crispy. The cooking time may vary slightly depending on your air fryer model.
- Result: Produces a wonderfully crispy exterior with a moist interior, much like deep-fried, but with fewer calories and less fat.
Baked Chicken Pakora: A healthier, hands-off approach that still delivers delicious flavor.
- Preparation: Preheat your oven to 375°F (190°C). Lightly grease a baking sheet or line it with parchment paper. Place the battered chicken pieces in a single layer on the prepared baking sheet, ensuring they are not touching. You may lightly spray them with oil for added crispness.
- Cooking: Bake for 15-20 minutes, flipping the pakoras halfway through the baking time, until they are cooked through and have a golden crust.
- Result: While not as intensely crispy as deep-fried or air-fried versions, baked pakoras are soft yet flavorful, making them a good lighter option.
Grilled Chicken Pakora Skewers: For a smoky twist, consider grilling your chicken pakora. This method works best with slightly thicker pieces of chicken and a batter that adheres well.
- Preparation: Marinate and batter your chicken pieces as usual. Thread the battered chicken onto skewers (if using wooden skewers, soak them in water for at least 30 minutes to prevent burning).
- Cooking: Preheat your grill to medium-high heat. Lightly brush the grill grates with oil. Place the skewers on the grill and cook for 8-12 minutes, turning frequently, until the chicken is cooked through and the batter is nicely charred and crispy in spots. Baste with any leftover marinade or a little oil during grilling for extra moisture and flavor.
- Result: A unique smoky flavor and a slightly different texture, perfect for outdoor cooking.
Frequently Asked Questions About Chicken Pakora
Here are answers to some common questions about making delicious Chicken Pakora:
Gram flour, also widely known as besan or chickpea flour, is a versatile flour made from finely ground dried chickpeas (garbanzo beans). It’s a cornerstone ingredient in many South Asian and Mediterranean cuisines, particularly prized for its ability to create light, crispy batters. Its unique nutty flavor and binding properties make it ideal for pakoras, giving them their characteristic texture and taste, which differs from wheat-based flours. It’s also naturally gluten-free.
The ultimate secret lies in a combination of factors. Firstly, maintaining a consistent oil temperature (350-375°F or 175-190°C) is paramount to prevent sogginess and ensure even cooking. Secondly, using a well-balanced batter with the right liquid-to-flour ratio and a touch of baking soda contributes to a light and airy crispness. Lastly, frying in small batches, allowing enough space between each piece, prevents the oil temperature from dropping too low and ensures uniform crisping. Don’t forget to drain excess oil on a wire rack after frying!
The key is to add water gradually when preparing the batter. Start with a smaller amount of water than you think you might need and mix it thoroughly into the gram flour and spices. Continue to add water, a tablespoon at a time, mixing well after each addition, until you achieve a thick, smooth consistency that clings to the chicken pieces without dripping excessively. It should be thick enough to coat, but not so thick that it forms a heavy, pasty layer. A good visual cue is that it should be slightly thicker than pancake batter.
Yes, you absolutely can use boneless, skinless chicken breasts as an alternative to chicken thighs. However, keep in mind that chicken breast is leaner and tends to dry out more quickly than dark meat. If using chicken breast, cut it into smaller, uniform pieces to ensure faster and more even cooking. It’s crucial to monitor the frying process closely and remove the chicken as soon as it reaches an internal temperature of 165°F (74°C) to prevent overcooking and maintain tenderness.
This Chicken Pakora recipe is naturally gluten-free as it uses gram flour (chickpea flour) which is a gluten-free alternative to wheat flour. Just ensure all your spices and any pre-made pastes (like ginger-garlic paste) are also certified gluten-free, as some brands may contain hidden gluten ingredients or cross-contamination.
While this recipe focuses on chicken, pakoras are incredibly versatile! For a delicious vegetarian option, you can use the same spice-rich batter with various vegetables. Popular choices include thinly sliced onions (onion bhaji), potatoes, spinach, paneer (Indian cheese), mixed vegetables, or cauliflower florets. Simply coat your chosen vegetables in the spiced gram flour batter and deep-fry them until golden and crispy.
Discover More Irresistible Chicken Recipes
If you loved this Chicken Pakora recipe, you’ll surely enjoy exploring other delicious chicken dishes from my collection:
- Tandoori Chicken Skewers
- Easy Chicken Biryani
- Chicken Manchurian
- Thai Chicken Meatballs
- Healthy Chicken Tikka Masala
- Paneer Pasanda (not chicken, but a popular Indian dish!)
This Chicken Pakora recipe truly offers a delightful blend of simplicity, bold flavors, and satisfying crunch that makes it an instant favorite. It’s a delectable Indian appetizer, featuring succulent bite-sized chicken pieces perfectly coated in a spiced gram flour batter and deep-fried to an irresistible golden perfection. The combination of its crispy exterior and tender, flavorful interior makes it a universally popular and utterly irresistible dish, perfect for any occasion or simply as a comforting treat.
I hope you thoroughly enjoy making and savoring this fantastic recipe! If you give this Chicken Pakora a try, or any of my other culinary creations, please consider leaving a star rating in the comment section below. Your feedback and ratings are incredibly valuable and help others discover these delicious dishes. Don’t forget to connect with Cookin’ With Mima on Facebook, Instagram, and Pinterest for all my latest recipes, cooking tips, and culinary adventures!
Print Recipe
Chicken Pakora Recipe
Ingredients
- 1 ½ lb chicken thighs, cut into bite size pieces
- 1 tablespoon lemon juice
- 1 tablespoon ginger and garlic paste
- 1 teaspoon green chili, finely chopped
- ½ tablespoon red chili powder
- 1 teaspoon ground cumin
- ¾ teaspoon dried fenugreek leaves
- ¾ teaspoon salt
- ½ teaspoon garam masala
- ¼ teaspoon turmeric powder
- 1 cup gram flour
- 2 tablespoons cornstarch
- ¼ teaspoon baking soda
- ½ cup water
- Oil, to deep fry
- Chopped cilantro, to garnish
- Lemon wedges, to serve
Instructions
- In a wide bowl, place the chicken pieces. Add the lemon juice, ginger and garlic paste, green chili, red chili powder, cumin, fenugreek leaves, salt, garam masala, and turmeric powder. Toss the chicken pieces well with the spices and allow them to marinate for at least 15 minutes.
- Add the gram flour, cornstarch, and baking soda to the chicken and toss it. Sprinkle water little by little until it forms a thick batter.
- Meanwhile, heat oil for deep frying in a wok. Once the oil is heated, add the chicken pieces and fry them for 4-5 minutes until they are golden and crispy.
- Repeat the same with the remaining chicken pieces and fry them in batches.
- Transfer the crispy chicken pakoras to a serving plate and garnish them with freshly chopped cilantro.
- Serve the chicken pakoras with lemon wedges on the side along with any dips.
Notes
- If you have time, let the chicken marinate for a total of 30 minutes. The flavor will soak deep into the meat.
- Don’t confuse baking SODA with baking POWDER. Baking soda is used to give the batter a little fluffiness. It reacts with the acidic lemon juice and produces bubbles to lift the batter.
- Maintain a consistent oil temperature around 350-375 degrees Fahrenheit (175-190° degrees Celsius). Use a thermometer to ensure proper frying and avoid a greasy result.
- Storing: Allow it to cool completely before storing in an airtight container in the refrigerator. Use within 1-2 days for the best texture.
Nutrition
Calories: 514kcal | Carbohydrates: 23g | Protein: 35g | Fat: 31g | Saturated Fat: 8g | Polyunsaturated Fat: 7g | Monounsaturated Fat: 12g | Trans Fat: 0.1g | Cholesterol: 167mg | Sodium: 684mg | Potassium: 638mg | Fiber: 4g | Sugar: 4g | Vitamin A: 448IU | Vitamin C: 2mg | Calcium: 37mg | Iron: 3mg
