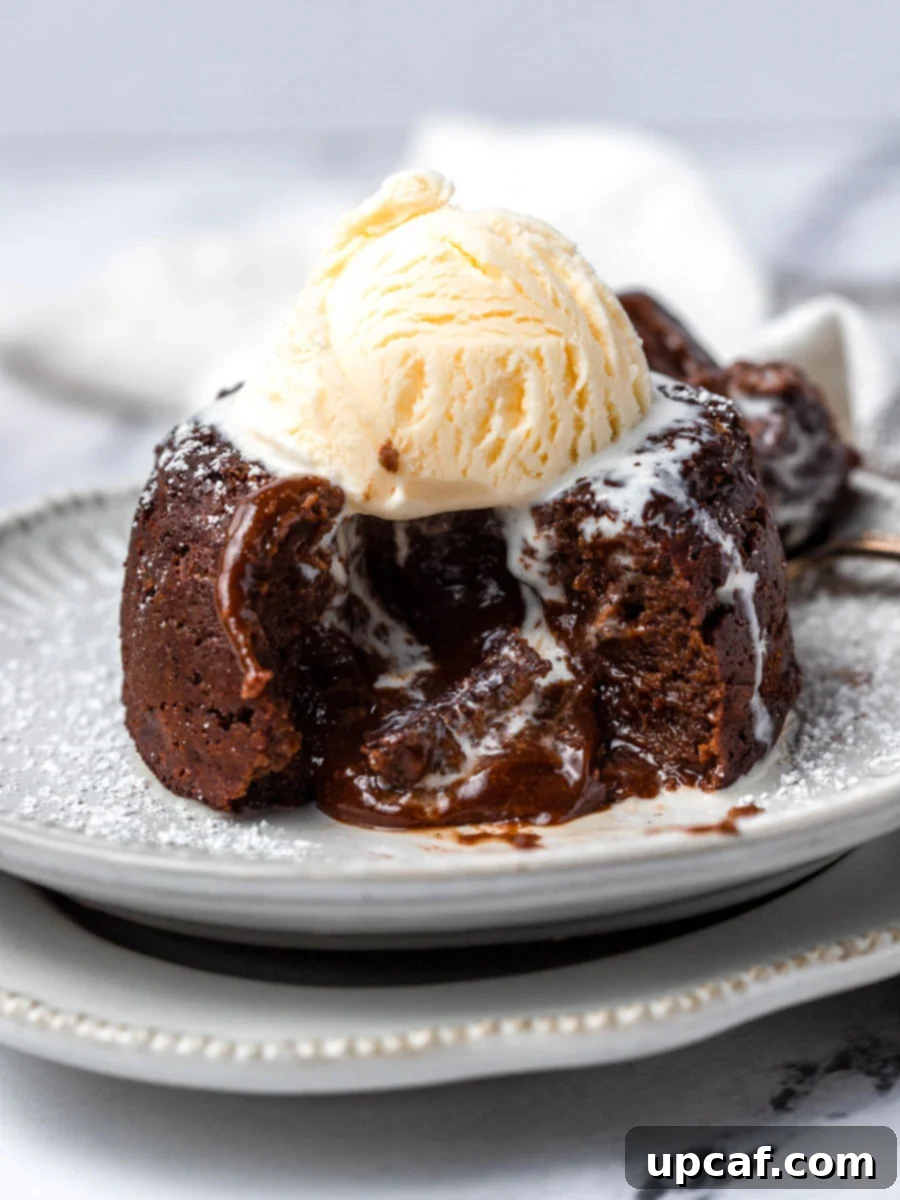
Prepare to impress with this incredibly rich and irresistibly decadent homemade Molten Chocolate Lava Cake. Far from the intimidating dessert it might seem, these individual chocolate masterpieces are surprisingly simple to create in your own kitchen. Imagine slicing into a warm, delicate cake and watching as a river of molten, gooey chocolate gracefully cascades onto your plate, ready to melt in your mouth with every spoonful. This recipe promises an unforgettable dessert experience that’s both elegant and utterly comforting.
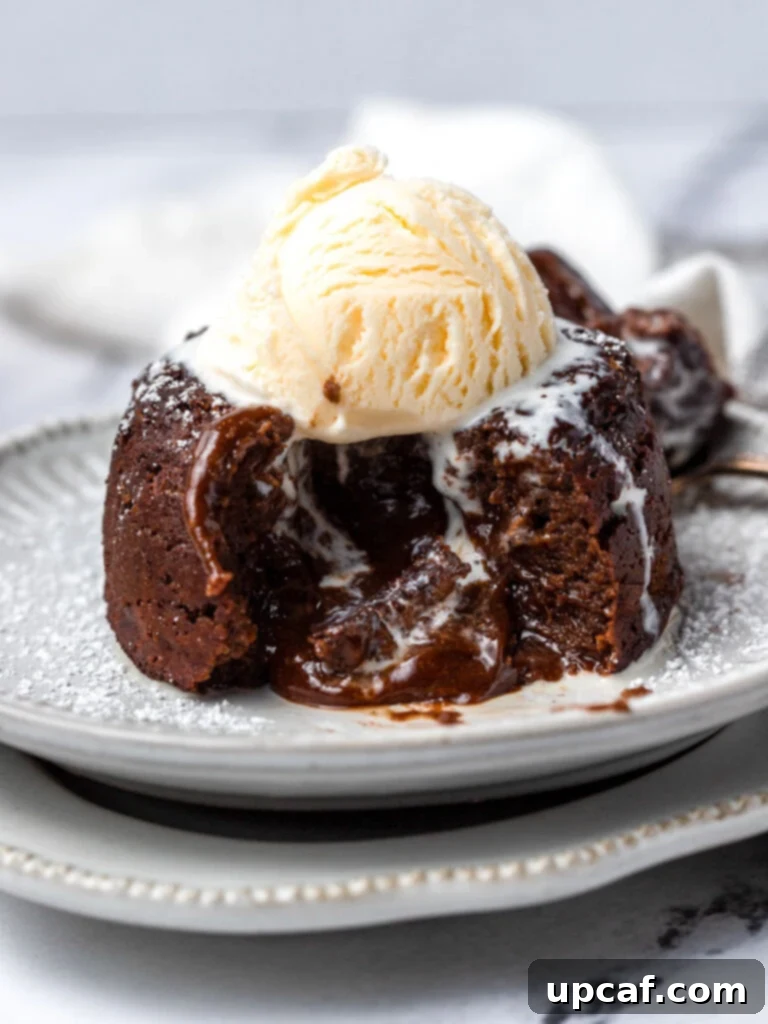
The perfect molten chocolate lava cake is a symphony of textures and flavors: warm, deeply fudgy, luxuriously gooey, and intensely delicious. While often found on the menus of high-end restaurants, many people don’t realize how easy it is to recreate this show-stopping dessert at home. This guide will walk you through the process, proving that with just a handful of common ingredients and a few straightforward steps, you can achieve professional-quality lava cakes that will have everyone asking for more. Say goodbye to complex baking techniques; your journey to chocolate bliss starts here.
Craving more exquisite dessert recipes? Elevate your baking repertoire with my Cheesecake Brownie Fudge Bars, indulge in the luscious Best Moist Carrot Cake, or wake up your taste buds with my delightful Double Chocolate Chip Muffins. Each recipe is designed to bring joy and deliciousness to your table.
Why You’ll Fall in Love with This Easy Chocolate Lava Cake Recipe
This recipe isn’t just about making a dessert; it’s about creating an experience with minimal fuss. Here’s why these homemade molten chocolate lava cakes will become your go-to indulgence:
- Effortless Preparation: No Fancy Equipment Required. Forget about pulling out heavy stand mixers or specialized gadgets. This recipe is wonderfully simple, requiring just a few basic kitchen tools like bowls and a whisk. It’s a testament to the fact that you don’t need a professional kitchen to bake something extraordinary. A little bit of “elbow grease” is all it takes to mix the batter by hand, making it accessible for even novice bakers.
- Perfectly Portioned Indulgence: No More Dessert Disputes! Serving individual portions baked in ramekins means everyone gets their own perfectly sized cake. This eliminates any friendly (or not-so-friendly) debates over who gets the biggest slice or the piece with the most chocolate. Each guest receives an identical, beautifully presented dessert, ensuring a harmonious and enjoyable dining experience for all.
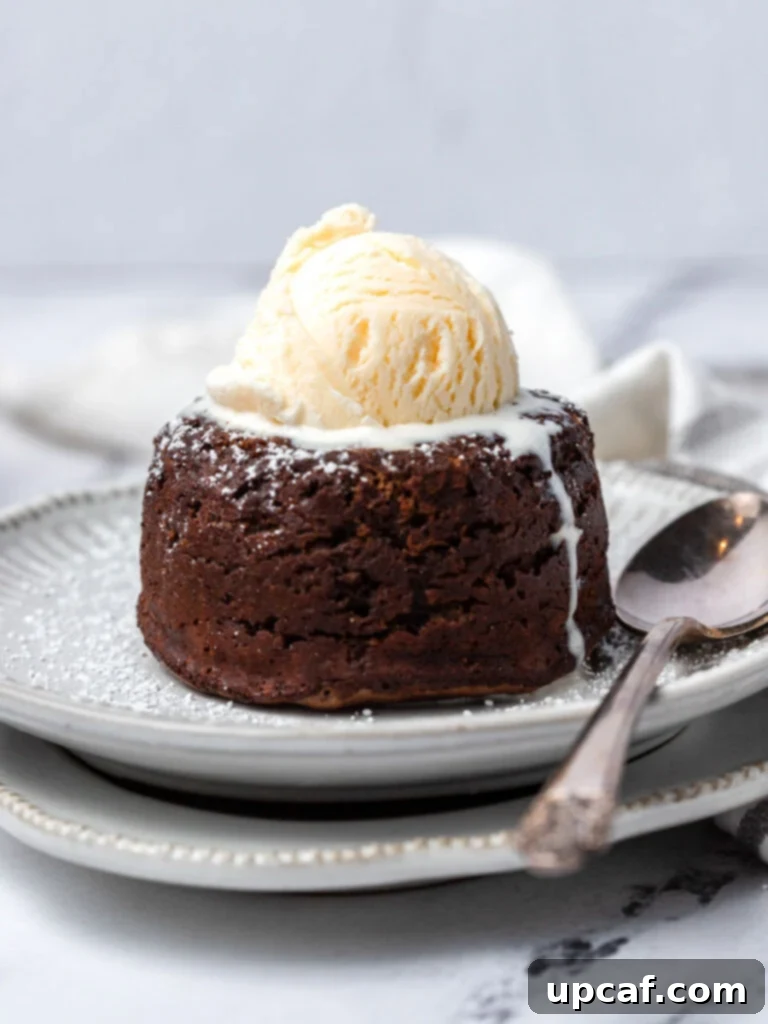
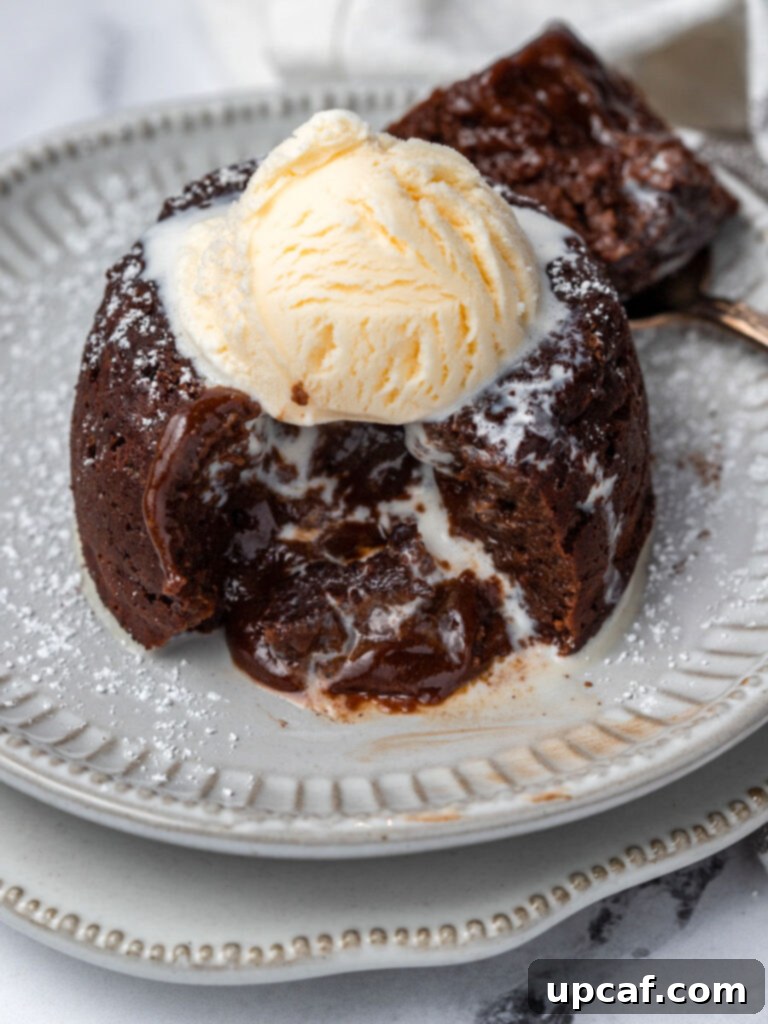
- The Unforgettable Molten Center is Pure Bliss. This is the hallmark of a lava cake and arguably its most celebrated feature. The anticipation of cutting into the cake and witnessing the warm, barely-set, rich chocolate ooze out is truly a moment to savor. This spectacular molten core is what elevates a simple chocolate cake into a show-stopping dessert, providing a luxurious contrast to the firm outer crust. It’s a textural and sensory delight that keeps people coming back for more.
- Quick to Prepare and Bake: Instant Gratification. Despite its sophisticated appearance, these lava cakes come together remarkably fast. With minimal prep time and a short baking duration, you can whip up this elegant dessert when unexpected guests arrive or when a sudden craving for chocolate strikes, without spending hours in the kitchen.
- Impressive Factor: Dazzle Your Guests. Serving a molten chocolate lava cake instantly elevates any meal. It’s a dessert that looks incredibly fancy and complex, yet you’ll know the secret of its simple creation. Your friends and family will be thoroughly impressed by your baking prowess!
The Allure of Molten Chocolate Lava Cakes: A Culinary Journey
The molten chocolate lava cake, also known as chocolate moelleux or chocolate fondant, is a beloved dessert worldwide, famous for its rich, liquid chocolate center. Its exact origin is a subject of playful debate, with both French chef Jean-Georges Vongerichten and American chef Jacques Torres claiming its invention in the 1980s. Regardless of its true birthplace, this dessert quickly captured the hearts of chocolate lovers everywhere, becoming a staple in fine dining establishments and eventually, a favorite for home bakers.
The magic lies in its simplicity and the precise balance of baking. The cake is intentionally underbaked in the center, allowing the core to remain a warm, flowing river of chocolate, contrasting beautifully with the slightly firm, cake-like exterior. This delicate balance is what makes each bite an adventure, a perfect blend of gooey richness and tender crumb. Understanding this concept is key to mastering your homemade lava cakes.
Essential Ingredients for Your Molten Chocolate Lava Cake
Crafting these divine molten chocolate lava cakes requires a minimal yet carefully selected list of ingredients. Quality matters here, as each component contributes significantly to the final taste and texture. Gather these items, and you’re halfway to dessert heaven:
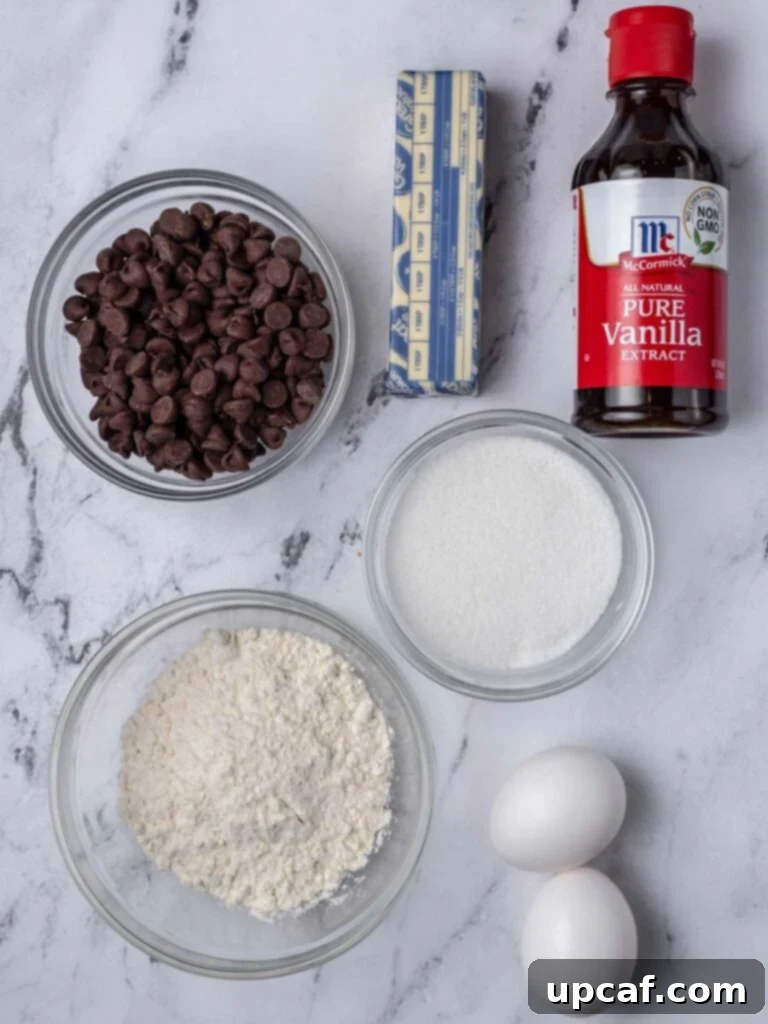
- High-Quality Chocolate Chips: The star of the show! Opt for good quality semi-sweet or dark chocolate chips. A higher cocoa percentage (around 60-70%) will yield a richer, more profound chocolate flavor, which is crucial for a truly decadent lava cake. You can also use chopped baking chocolate bars for a smoother melt.
- Unsalted Butter: Make sure to use unsalted butter to maintain full control over the saltiness of your dessert. Butter provides richness and moisture, contributing to the cake’s tender crumb and fudgy texture. It also helps create that luxurious molten core when combined with the chocolate.
- Large Eggs: Eggs are essential for structure, richness, and binding the ingredients together. They create the cake’s fluffy texture and also help to emulsify the batter, leading to a smooth, uniform consistency. Using large eggs ensures the correct liquid-to-dry ingredient ratio.
- Granulated Sugar: A touch of granulated sugar sweetens the chocolate and balances its bitterness. It also aids in achieving a tender crumb and a slightly crispy edge on the baked cake. Don’t overdo it, as the chocolate should be the predominant flavor.
- Pure Vanilla Extract: Vanilla is a flavor enhancer, adding depth and complexity to the chocolate. A good quality pure vanilla extract can truly elevate the overall taste profile, making the chocolate taste even more pronounced and rounded.
- All-Purpose Flour: Just a small amount of all-purpose flour provides the necessary structure to hold the cake together while still allowing for that gooey, molten center. If you have the time, sifting the flour beforehand can prevent lumps and make for an even smoother batter, ensuring easy mixing and a uniform cake texture.
Gather Your Tools: Essential Kitchen Equipment
One of the beauties of this recipe is its simplicity, extending to the tools you’ll need. You likely already have everything required in your kitchen:
- Ramekins: These small, individual ceramic dishes are perfect for baking lava cakes. Standard 4-ounce or 6-ounce ramekins work best. If you don’t have ramekins, oven-safe muffin tins can be used, but adjust baking time as they might cook faster.
- Mixing Bowls: You’ll need at least two bowls – one small, heatproof bowl for melting chocolate and butter, and one medium bowl for whisking wet ingredients.
- Whisk: A good whisk is all you need for combining the ingredients by hand. No electric mixer necessary!
- Small Saucepan: For creating a double boiler to gently melt the chocolate and butter.
- Sheet Pan: To place your ramekins on for easy transport into and out of the oven, and to catch any potential drips.
- Nonstick Cooking Spray or Butter & Cocoa Powder: Essential for preparing the ramekins to ensure your cakes slide out perfectly.
- Spatula or Spoon: For folding ingredients and dividing batter.
Step-by-Step Guide: Crafting Your Own Homemade Lava Cakes
Creating these molten delights is easier than you think. Follow these clear instructions for perfect results every time:
- Step 1: Prepare Your Oven and Ramekins. Begin by preheating your oven to a precise 375°F (190°C). This ensures the oven is at the optimal temperature for baking as soon as your batter is ready. Next, prepare four individual ramekins. Generously spray the inside of each ramekin with a good quality nonstick cooking spray, making sure to coat all surfaces thoroughly. For an extra layer of nonstick insurance and a beautiful finish, you can also dust the sprayed ramekins with cocoa powder, tapping out any excess. This creates a chocolatey barrier that helps the cakes release effortlessly.
- Step 2: Gently Melt the Chocolate and Butter. In a small, heatproof bowl, combine your chocolate chips (or chopped chocolate) and the unsalted butter. Set this bowl over a small saucepan filled with about an inch or two of simmering water, creating a double boiler. Ensure the bottom of the bowl does not touch the water. Stir the mixture occasionally with a rubber spatula until the chocolate and butter are fully melted and smoothly combined, forming a glossy, uniform liquid. This gentle melting method prevents the chocolate from seizing or burning. Once melted, carefully remove the bowl from the heat and allow the chocolate mixture to cool slightly for a few minutes. This prevents the hot chocolate from cooking the eggs prematurely in the next step.
- Step 3: Combine the Remaining Ingredients. In a separate medium-sized mixing bowl, whisk together the large eggs, granulated sugar, and pure vanilla extract. Whisk vigorously until the mixture is fully combined, slightly thickened, and pale in color. The whisking incorporates air, which contributes to the cake’s structure. Gradually add the all-purpose flour to this egg mixture, mixing until just combined. Be careful not to overmix the flour, as this can lead to a tough cake. Finally, gently fold the cooled chocolate mixture into the egg and flour batter until everything is thoroughly incorporated and uniform in color. Use a spatula to scrape down the sides of the bowl, ensuring no streaks of unmixed batter remain.
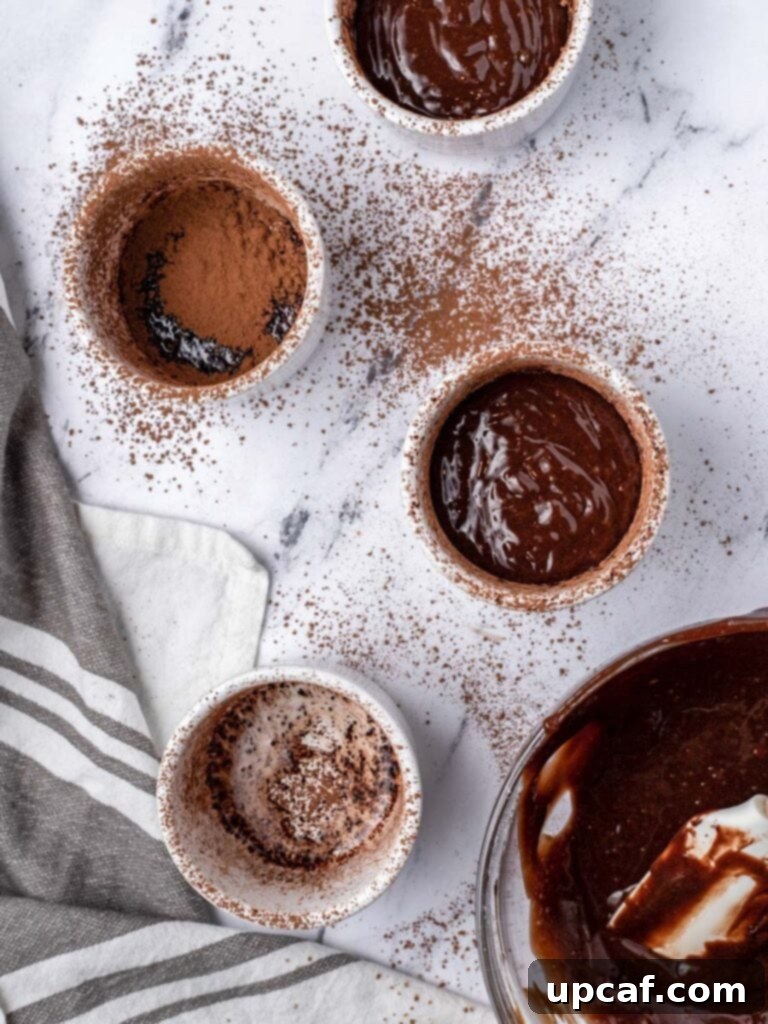
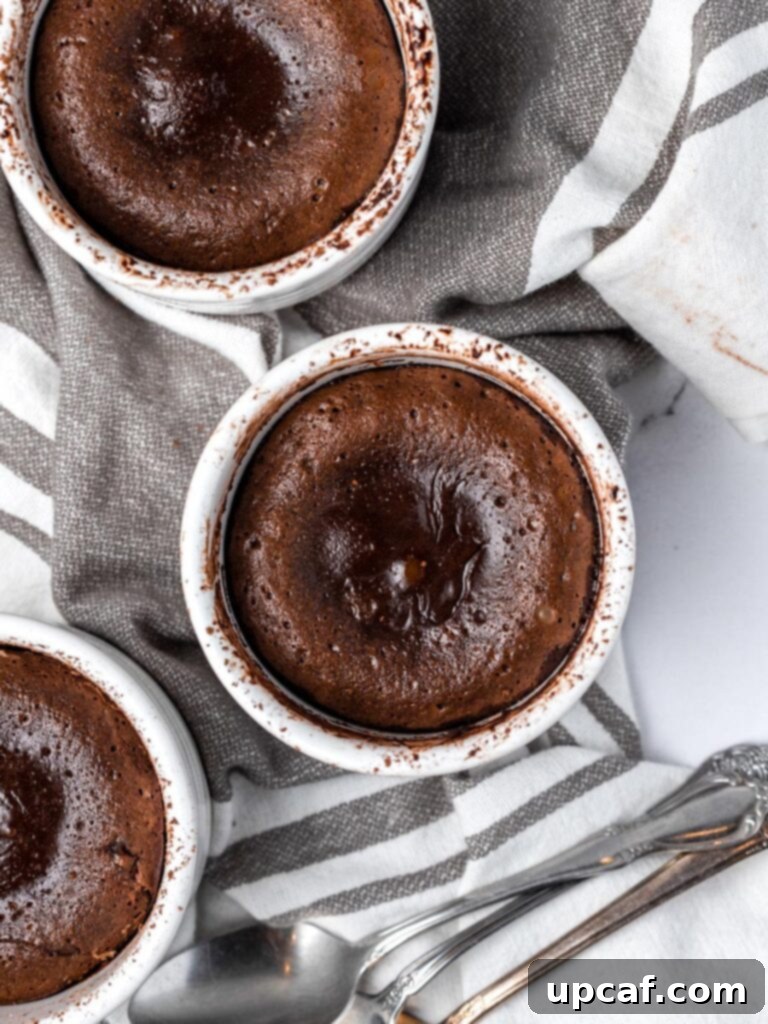
- Step 4: Bake Your Molten Chocolate Lava Cakes. Carefully divide the prepared batter evenly among the four buttered and floured (or sprayed and cocoa-dusted) ramekins. It’s important not to overfill them, leaving a little room for the cakes to rise. Place the filled ramekins onto a sturdy baking sheet. This makes it easier to transfer them safely into and out of the hot oven. Bake for approximately 10-12 minutes. The key to the molten center is knowing when to stop baking: the edges of the cakes should be set and slightly firm, while the very center should still be visibly jiggly when gently shaken. This jiggly center indicates that the chocolate inside is perfectly molten. Remove the cakes from the oven and allow them to cool in their ramekins for a couple of minutes. This short resting period helps them set just enough for easy removal.
- Step 5: Serve Immediately for the Best Experience. Once slightly cooled, it’s time for the grand reveal! Place a serving plate upside down directly on top of each ramekin. Holding both the plate and the ramekin firmly together, carefully but swiftly flip them over. Gently lift the ramekin, and the molten chocolate lava cake should slide out seamlessly onto the plate. Serve these warm, gooey masterpieces immediately to enjoy the spectacular molten center at its peak.
Achieving Lava Cake Perfection: Expert Tips & Tricks
While this recipe is straightforward, a few expert tips can ensure your molten chocolate lava cakes are flawless every time:
- Know Your Oven and Ramekins: Test Bake for Perfection. Every oven and every set of ramekins can behave slightly differently. Baking times can vary based on your oven’s calibration and the thickness/material of your ramekins. I highly recommend conducting a test bake with a single lava cake first. This will help you determine the precise timing needed for that perfect jiggly, molten center before you commit to baking a larger batch. Note the ideal baking duration for future reference.
- Elevate the Chocolate Flavor with Espresso. For an even more profound and intense chocolate experience, consider adding a small amount of instant espresso powder (about ½ to 1 teaspoon) to your batter. Espresso doesn’t make the cake taste like coffee; instead, it remarkably deepens and enhances the chocolate notes, making the overall flavor richer and more complex.
- Mastering the Nonstick Coating is Crucial. The success of flipping your lava cakes relies heavily on proper ramekin preparation. You must thoroughly coat the inside of your ramekins with nonstick spray or butter and a dusting of cocoa powder. Any missed spots can cause the cake to stick, tear, and lose its beautiful shape and molten center during the inversion process. Be meticulous!
- Gentle Release: Loosening the Edges. If you’re nervous about flipping your freshly baked lava cakes, a simple trick can help. After letting them cool for a couple of minutes, gently run a thin, sharp knife around the inner edge of each cake within the ramekin. This subtle action helps to loosen any sticky spots, ensuring the cake slides out smoothly and gracefully onto your serving plate.
- Don’t Overbake: The Key to the Lava. This is the most critical tip! The difference between a molten lava cake and a regular chocolate cupcake is just a few minutes of baking. Look for set edges and a distinctly jiggly center. When in doubt, underbake slightly rather than overbake, as you can always pop it back in for another minute.
- Use Room Temperature Eggs: Eggs at room temperature emulsify better with other ingredients, creating a smoother batter and a more uniform cake texture. If you forget to take them out, place them in a bowl of warm water for a few minutes.
Frequently Asked Questions About Molten Chocolate Lava Cakes
Here are answers to some common questions about making these delectable desserts:
Absolutely! This is one of the conveniences of this recipe. You can prepare the batter, portion it out into your prepared ramekins, and then cover each ramekin tightly with plastic wrap. Store them in the refrigerator for up to two days. When you’re ready to bake, remove them from the fridge and allow the batter to come back to room temperature (about 20-30 minutes) before baking as directed. This makes them perfect for entertaining!
Yes, this recipe is quite flexible! You can easily scale it up or down to suit your needs. The original recipe yields 4 molten chocolate lava cakes, so if you have more ramekins and a bigger crowd, feel free to double, triple, or even halve the ingredients. Just remember that if you’re baking in multiple batches, you’ll want to serve the cakes immediately after baking each batch to ensure that molten center remains perfectly gooey and warm.
You can certainly use a muffin tin as an alternative to ramekins, but there are a couple of considerations. Muffin cups are typically smaller and made of a different material (often metal), which means they will bake faster. Be sure to adjust your baking time accordingly – they might be done in as little as 7-9 minutes. Keep a close eye on them and perform the “jiggly center” test frequently to achieve the perfect molten interior.
The tell-tale sign of a perfectly baked lava cake is firm edges and a distinctly wobbly, jiggly center. The top surface might look set, but a gentle shake of the ramekin will reveal the liquid chocolate inside. If the entire cake feels firm, it’s overbaked, and your molten center will be more like a soft brownie. A test bake is highly recommended for precision!
What Can I Serve My Lava Cakes With?
While phenomenal on their own, molten chocolate lava cakes truly shine when paired with complementary toppings. The contrast of warm chocolate with a cool accompaniment is simply divine. Here are some of my favorite serving suggestions:
- Ice Cream: A classic pairing! A scoop of vanilla bean ice cream is a perfect counterpoint to the rich, warm chocolate. The melting ice cream mixes with the molten chocolate, creating an exquisite sauce. Other great options include mint chip, coffee, or even a luscious caramel swirl ice cream. Try my homemade recipes:
- Strawberry Cheesecake Ice Cream
- Nutella Ice Cream
- Almond Joy Ice Cream
- Oreo Ice Cream
- Fresh Berries: A sprinkle of fresh raspberries, strawberries, or blueberries adds a beautiful burst of color, a tangy counterpoint, and a refreshing lightness to the rich chocolate.
- Whipped Cream: A dollop of freshly whipped cream, perhaps infused with a hint of vanilla or a liqueur, offers a light and airy texture that complements the dense cake.
- Powdered Sugar: A simple dusting of powdered sugar creates an elegant finish and a subtle extra touch of sweetness.
- Caramel or Raspberry Sauce: Drizzle your lava cake with a decadent homemade caramel sauce or a vibrant raspberry coulis for an extra layer of flavor and visual appeal.
- Chocolate Shavings or Cocoa Powder: For the ultimate chocolate lover, a few chocolate shavings or an extra dusting of cocoa powder intensify the chocolate experience.
More Decadent Desserts You’ll Love
If you’ve enjoyed crafting these molten chocolate lava cakes, you’ll surely love exploring other delightful recipes from my collection. Expand your dessert repertoire with these irresistible treats:
- Chocolate Chip Cheesecake
- Coconut Cheesecake Bars
- Easy Shortbread Peppermint Cookies
- Gingerbread Christmas Tree Cookies
- Best Lemon Bars Recipe
- Berry Pavlova Cake
I genuinely hope you find immense joy in all the recipes I share with you, especially this exquisitely delicious Molten Chocolate Lava Cake recipe. I encourage you to try it, savor every moment of making and eating it, rate it, and share this wonderful experience with your dearest friends and family. Happy baking!
If you try this recipe and love it, please share your creation with me on INSTAGRAM using my hashtag for a chance to be featured in my story! Also, be sure to follow Cookin’ With Mima on FACEBOOK | INSTAGRAM | PINTEREST for all my latest culinary posts and new recipes.
Molten Chocolate Lava Cake
By: Mariam Ezzeddine
Rich and indulgent, this homemade Molten Chocolate Lava Cake is deceptively simple to prepare. Slice into one to let the warm, gooey center cascade out and delight your taste buds.
Prep Time: 10 minutes
Cook Time: 12 minutes
Total Time: 22 minutes
Servings: 4 cakes
Print Recipe
Ingredients
- ⅔ cup chocolate chips (good quality semi-sweet or dark)
- 1 stick (½ cup) unsalted butter
- 3 large eggs
- ⅓ cup granulated sugar
- 1 teaspoon vanilla extract
- ¼ cup all-purpose flour (sifted for best results)
Instructions
- Preheat oven to 375°F (190°C). Prepare 4 ramekins by thoroughly spraying them with nonstick spray. For an extra touch, you can dust them with cocoa powder and tap out any excess.
- In a small, heatproof bowl, combine the chocolate chips and unsalted butter. Place this bowl over a small saucepan of simmering water (double boiler method), ensuring the bottom of the bowl does not touch the water. Stir occasionally until fully melted and smoothly combined. Remove from heat and allow to cool slightly for a few minutes.
- In a medium bowl, whisk together the eggs, granulated sugar, and vanilla extract until fully combined, slightly thickened, and pale.
- Add the all-purpose flour to the egg mixture and mix until just combined, being careful not to overmix. Then, gently fold in the slightly cooled chocolate mixture until no streaks remain and the batter is uniform.
- Divide the batter evenly among each of the prepared ramekins.
- Place the ramekins on a sheet pan and bake for 10-12 minutes. The cakes are done when the edges are set and firm, but the center is still visibly jiggly when gently shaken.
- Remove from the oven and allow to cool in the ramekins for a couple of minutes.
- Place a serving plate on top of each ramekin and carefully flip it over. Gently lift the ramekin to release the cake. Serve immediately to enjoy the molten center.
Notes
- Baking times can vary, so consider doing a test bake with one cake to find the perfect timing for your oven and ramekins.
- For an intensified chocolate flavor, add ½ to 1 teaspoon of instant espresso powder to the batter.
- Ensure ramekins are thoroughly coated with nonstick spray/butter and cocoa powder for easy release.
- If worried about flipping, gently run a knife around the edges of the cake in the ramekin before inverting to help loosen it.
Nutrition Information (per serving)
- Serving: 4 servings
- Calories: 352 kcal
- Carbohydrates: 23g
- Protein: 6g
- Fat: 27g
- Saturated Fat: 16g
- Cholesterol: 200mg
- Sodium: 57mg
- Potassium: 52mg
- Fiber: 1g
- Sugar: 17g
- Vitamin A: 908 IU
- Calcium: 28mg
- Iron: 1mg
