Indulge your deepest chocolate cravings with this utterly irresistible Double Chocolate Cheesecake. This recipe delivers a sublime harmony of light, airy cream cheese filling infused with deep cocoa flavor, all nestled atop a crunchy, rich Oreo crust. Crowned with a cloud of homemade chocolate whipped cream, every slice promises a melt-in-your-mouth experience that is nothing short of pure bliss. If you’re searching for the ultimate chocolate dessert that combines elegance with ease, look no further – this double chocolate cheesecake recipe is designed to impress with minimal fuss.
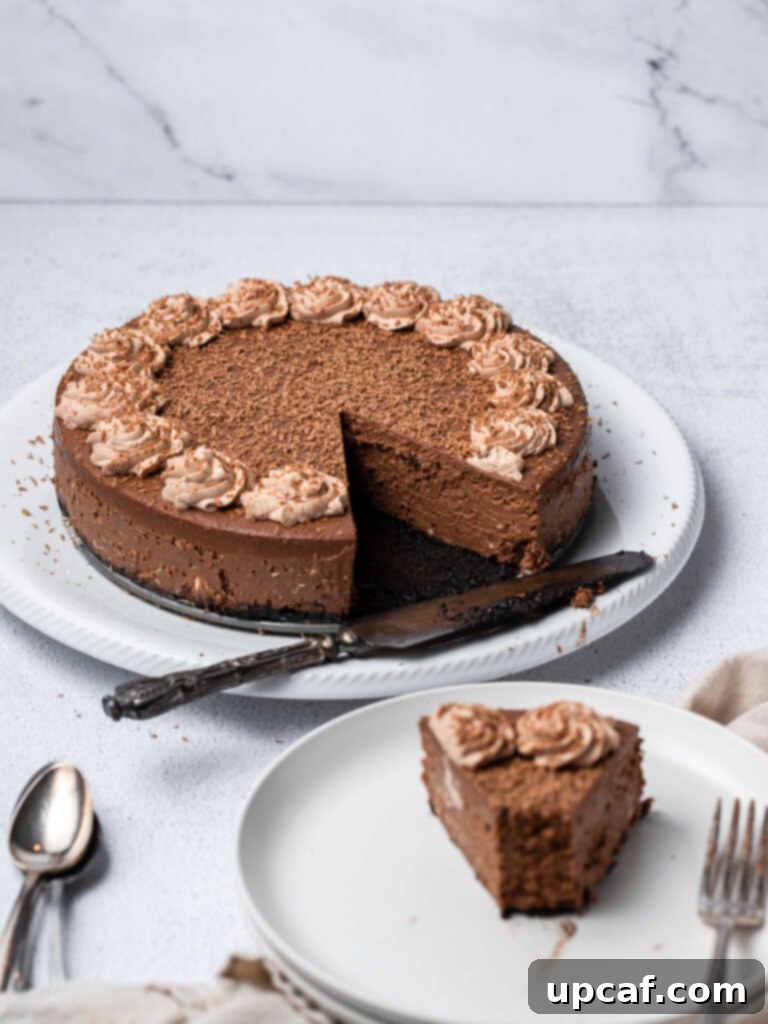
For the true chocolate enthusiast, this creamy and decadent chocolate cheesecake is an absolute dream come true. We’ve meticulously crafted this dessert to feature not one, but three distinct layers of rich chocolate goodness. From the robust foundation of an Oreo cookie crust to the lusciously smooth chocolate cream cheese filling, culminating in a delicate swirl of homemade chocolate whipped cream, every element is designed to amplify the chocolate experience. It’s a symphony of textures and flavors that will satisfy even the most discerning palate, ticking all the boxes for a truly spectacular, chocolate-packed dessert.
If your sweet tooth yearns for more simple yet decadent treats, be sure to explore my Chocolate Peanut Butter Cheesecake Bars for a delightful flavor combination, or my elegant Strawberry French Tart for a burst of fresh fruit flavor.
Why You’ll Adore This Double Chocolate Cheesecake
This Double Chocolate Cheesecake isn’t just another dessert; it’s a testament to simple elegance and profound flavor. Here’s why it’s destined to become a staple in your recipe collection:
- Surprisingly Simple to Master: Don’t let the luxurious appearance of this cheesecake intimidate you. While the recipe might seem to have several steps, each one is remarkably straightforward and requires minimal active cooking time. Much of the process involves baking and chilling, leaving you with plenty of downtime. You can achieve bakery-quality results in your own kitchen with confidence, making this an ideal project for both novice and experienced bakers alike.
- Wonderfully Freezer-Friendly: Planning ahead for a special occasion or simply want to savor leftovers for weeks? This chocolate cheesecake is perfectly suited for freezing. Prepare it in advance for holiday gatherings, or store individual slices to enjoy a gourmet treat whenever a craving strikes. Its freezer-friendly nature makes it incredibly convenient, allowing you to have a decadent dessert on hand without last-minute stress.
- Irresistible Oreo Cookie Crust: Move over, traditional graham cracker! This cheesecake boasts a fun and flavorful crust made from crushed Oreo cookies. The dark chocolatey crunch of the Oreos perfectly complements the creamy filling, adding an extra layer of texture and a beloved cookie flavor that elevates the entire dessert. It’s a delightful twist that sets this cheesecake apart and makes it even more appealing.
- Rich & Complex Chocolate Flavor: We’ve layered three different chocolate elements – the Oreo crust, the chocolate-infused cream cheese filling, and the luscious chocolate whipped cream – to create a multi-dimensional chocolate experience. Each component contributes to a deep, satisfying cocoa flavor without being overwhelmingly sweet, striking the perfect balance for true chocolate lovers.
- A Showstopper for Any Occasion: Whether it’s a birthday, an anniversary, a dinner party, or just a weekend treat, this Double Chocolate Cheesecake is guaranteed to be the star of the dessert table. Its elegant appearance and intensely satisfying flavor make it a perfect centerpiece that guests will rave about.
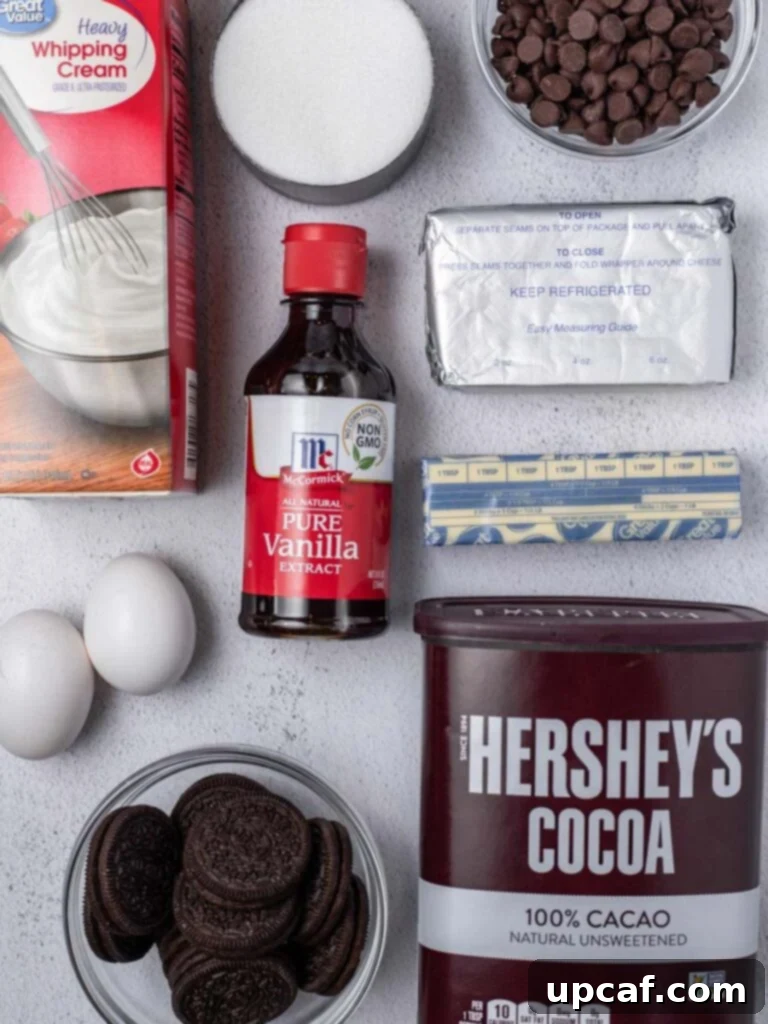
Key Ingredients for Your Decadent Chocolate Cheesecake
Crafting the perfect Double Chocolate Cheesecake begins with selecting the right ingredients. Pay attention to the details, especially regarding temperatures, as they play a crucial role in achieving that coveted smooth, creamy texture.
For the Irresistible Oreo Crust
- Oreos: You’ll need about 20 full-sized sandwich cookies, finely crushed. You can use a food processor for the best results, ensuring a uniform “wet sand” texture. Don’t scrape out the cream filling; it adds to the flavor and helps bind the crust.
- Unsalted Butter: Four tablespoons, thoroughly melted. Unsalted butter allows you to control the overall sodium content of your dessert. It’s essential for binding the cookie crumbs and creating a firm crust that holds together beautifully.
For the Velvety Chocolate Cream Cheese Filling
- Heavy Cream: Half a cup, brought to room temperature. This will be combined with chocolate chips to create a rich ganache that’s folded into the cream cheese, intensifying the chocolate flavor and contributing to the filling’s luxurious consistency.
- Chocolate Chips: One cup of your favorite chocolate chips. Semi-sweet or dark chocolate chips work best, providing a deep cocoa flavor that balances the sweetness of the cheesecake. High-quality chocolate will make a noticeable difference in the final taste.
- Full-Fat Cream Cheese: Four 8-ounce blocks, softened to room temperature. This is perhaps the most crucial ingredient. Room temperature cream cheese mixes smoothly and evenly, preventing lumps and ensuring a silky, cohesive filling. Avoid low-fat varieties, as they can affect the texture and richness.
- Granulated Sugar: One and a half cups. Sweetens the filling, balancing the tang of the cream cheese and the bitterness of the cocoa.
- Cocoa Powder: One-third cup, sifted. Sifting is non-negotiable here! It prevents clumps of cocoa in your filling, guaranteeing a smooth and uniform chocolate distribution. Use unsweetened natural cocoa powder for the best flavor.
- Large Eggs: Four eggs, brought to room temperature. Like the cream cheese, room temperature eggs incorporate more readily into the batter, helping to create a stable emulsion and a smooth, crack-free cheesecake.
- Pure Vanilla Extract: One tablespoon. Always opt for real vanilla extract over artificial for the most authentic and aromatic flavor. It enhances the chocolate notes beautifully.
For the Fluffy Chocolate Whipped Cream Topping
- Heavy Cream: Half a cup, chilled. Cold cream whips up faster and achieves stiffer peaks.
- Granulated Sugar: One tablespoon. Adds a touch of sweetness to the whipped cream, complementing the rich cheesecake below.
- Cocoa Powder: One tablespoon. This gives the whipped cream its delightful chocolate flavor and color. Sifting it before adding can help prevent lumps.
How to Bake the Perfect Double Chocolate Cheesecake
Creating this stunning Double Chocolate Cheesecake is a rewarding process. Follow these detailed steps to ensure a flawless, delicious dessert every time.
Step 1: Prepare Your Oven and Pan
Preheat your oven to 350°F (175°C). Take a 9-inch springform pan and generously spray the inside with a non-stick cooking spray. Crucially, wrap the outside of the pan tightly with heavy-duty aluminum foil. This creates a barrier against water, essential for the water bath method and preventing your crust from getting soggy.
Step 2: Craft the Oreo Crust
In a medium mixing bowl, combine the finely crushed Oreos with the melted unsalted butter. Mix thoroughly until the crumbs are evenly coated and the mixture resembles wet sand. This ensures a cohesive crust. Press the mixture firmly and evenly into the bottom of the prepared springform pan. Use the bottom of a flat glass or measuring cup to compact it tightly.
Step 3: Bake the Crust to Perfection
Transfer the pan with the crust to the preheated oven and bake for 10 minutes. This pre-baking step helps to set the crust, making it sturdy and preventing it from becoming crumbly. Once baked, remove the pan from the oven and set it aside to cool completely while you prepare the rich filling.
Step 4: Create the Silky Chocolate Cheesecake Filling
Increase your oven temperature to 450°F (230°C). In a medium, heat-safe bowl, combine the heavy cream and chocolate chips. Create a double boiler by placing this bowl over a small saucepan filled with simmering water, ensuring the bottom of the bowl does not touch the water. Stir occasionally until the chocolate chips are fully melted and smoothly incorporated with the cream, forming a ganache. Remove from heat and allow this chocolate mixture to cool slightly.
In the bowl of a stand mixer fitted with the paddle attachment, beat the room temperature cream cheese on medium speed until it is completely smooth and free of lumps. This is critical for a smooth cheesecake. Gradually add the granulated sugar and the sifted cocoa powder, continuing to beat until the mixture is fully combined and perfectly smooth, scraping down the sides of the bowl as needed.
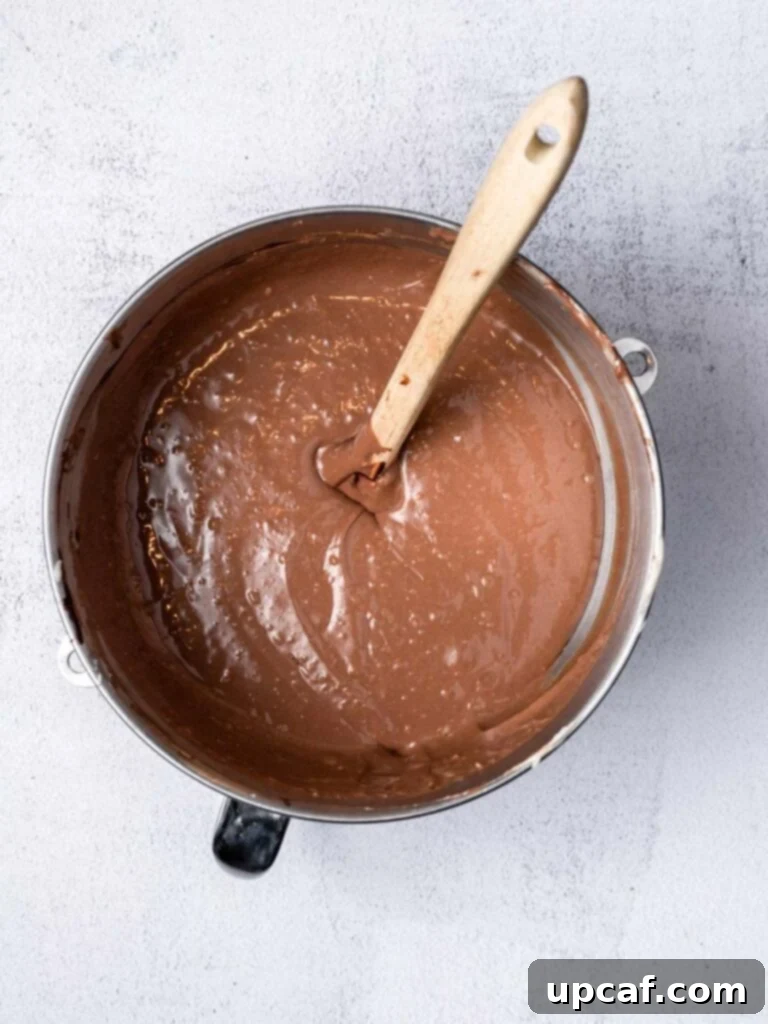
Pour the slightly cooled chocolate ganache into the cream cheese mixture. Beat on low speed until just incorporated. Be careful not to overmix at this stage.
Add the room temperature eggs one at a time, beating on low speed until each egg is just combined before adding the next. Overmixing eggs can incorporate too much air, leading to cracks in the cheesecake. Scrape down the sides and bottom of the bowl between each addition to ensure everything is evenly mixed. Finally, add the vanilla extract and beat until just combined. Gently pour the luxurious chocolate cheesecake filling into your cooled, prepared Oreo crust.
Step 5: Prepare the Essential Water Bath
To prevent cracks and ensure even baking, a water bath is crucial. Place your foil-wrapped springform pan containing the cheesecake into a larger, deep roasting pan. Boil enough water to fill the outer pan halfway up the sides of the springform pan. Carefully pour the boiling water into the larger pan, taking care not to splash water into the cheesecake itself. Place the entire assembly (roasting pan with water bath and cheesecake) onto the center rack of your preheated oven.
Step 6: Bake the Cheesecake to Perfection
Bake the cheesecake at 450°F (230°C) for 15 minutes. This initial high heat helps to set the edges quickly. After 15 minutes, without opening the oven door if possible, reduce the oven temperature to 225°F (107°C) and continue baking for another 1 hour and 20 minutes to 1 hour and 35 minutes. The cheesecake is done when the edges are set, but the center still jiggles slightly when gently nudged. It will continue to set as it cools.
Step 7: Cool and Chill for Ultimate Texture
Once baked, carefully remove the roasting pan from the oven. Let the cheesecake cool in the water bath for about 30 minutes, then remove the springform pan from the water bath and place it on a wire rack on the counter to cool completely to room temperature (this usually takes about an hour or two). Once at room temperature, transfer the cheesecake to the refrigerator to chill overnight. This prolonged chilling period is vital for the cheesecake to fully set, develop its rich flavor, and achieve that perfect creamy texture.
Step 8: Prepare and Decorate with Chocolate Whipped Cream
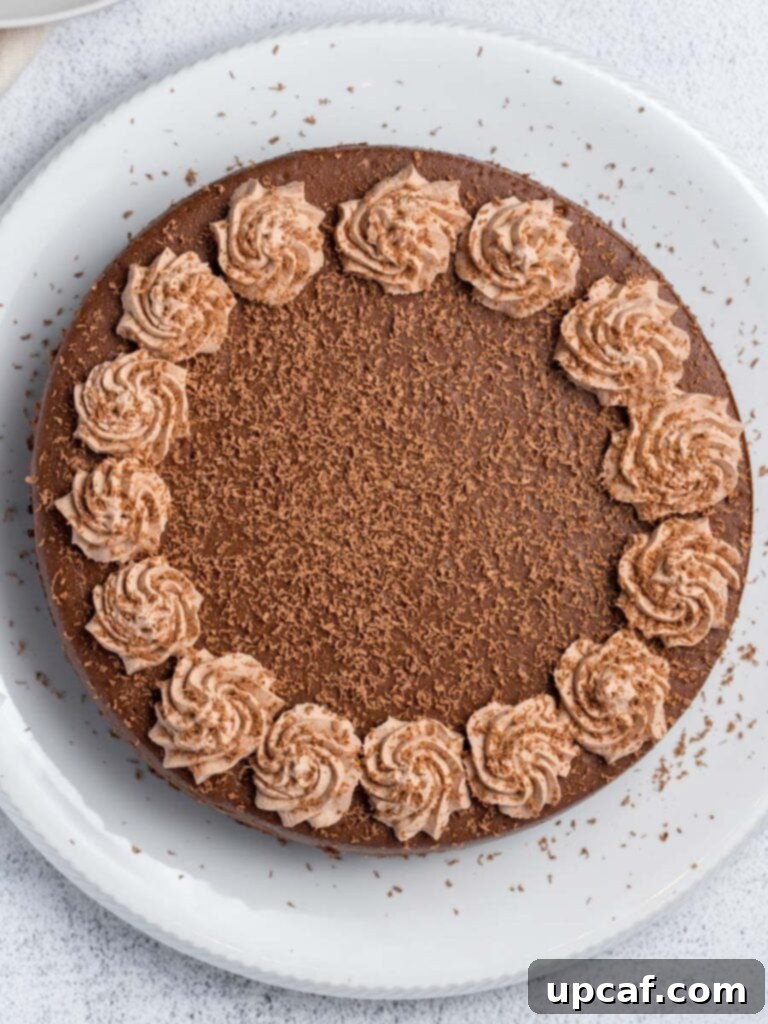
The next day, or when you’re ready to serve, prepare the homemade chocolate whipped cream. In a medium bowl, combine the cold heavy cream, granulated sugar, and cocoa powder. Using a hand mixer (or a stand mixer with a whisk attachment), beat the ingredients on medium-high speed until stiff peaks form. Be careful not to overbeat, as it can turn grainy quickly. Once whipped, pipe the chocolate whipped cream onto the chilled cheesecake in your desired design or simply spread it generously over the top for a more rustic look. Slice and serve!
Frequently Asked Questions About Double Chocolate Cheesecake
Why is baking cheesecake in a hot water bath recommended?
Baking cheesecake in a water bath, also known as a bain-marie, is a classic technique that provides gentle, even heat to the cheesecake. This prevents the cheesecake from cooking too quickly around the edges, which often leads to cracking. The steam created by the hot water also adds moisture to the oven, which results in a wonderfully creamy, smooth texture and ensures the top remains perfectly intact without unsightly cracks. It also helps in preventing the cheesecake from rising too much and then deflating dramatically after cooling.
Do I really need to sift the dry ingredients like cocoa powder?
Yes, sifting ingredients like cocoa powder and sometimes even sugar into your cheesecake filling is a crucial step for achieving the silkiest, creamiest texture possible. Cocoa powder, in particular, tends to clump, and sifting ensures that these small pockets of dry powder are broken up before they’re incorporated into the batter. This prevents any gritty texture or unpleasant bites of concentrated cocoa powder in your finished double chocolate cheesecake. It might seem like an extra step, but it’s truly worth the effort for a superior result.
Do I have to use Oreos for the crust? Can I use other cookies?
While Oreos offer a distinct and delicious chocolatey crunch that perfectly complements this recipe, you certainly have options! You can absolutely use other brands of chocolate sandwich cookies, provided their texture is similar to Oreos once crushed. If you’re feeling adventurous, you could even try a different type of chocolate cookie, or for a contrasting flavor, a traditional graham cracker crust, though it won’t be “double chocolate” in the same way. Just ensure you maintain the proper ratio of crushed cookies to butter for the crust to set correctly.
Is a mixer essential for making this cheesecake?
While a stand mixer fitted with a paddle attachment makes the process significantly easier and ensures the creamiest, lump-free batter, it is not strictly mandatory. You can absolutely mix the ingredients by hand using a sturdy whisk and a good amount of arm effort. However, expect it to take longer and require more strenuous mixing to achieve the desired smooth consistency for the cream cheese filling. Ensure all ingredients are truly at room temperature if mixing by hand, as this will make incorporation much simpler.
How can I tell if my cheesecake is perfectly baked?
The key to a perfectly baked cheesecake is a slight jiggle. The edges should appear set, firm, and perhaps slightly puffed, but the very center (about a 2-3 inch diameter) should still have a gentle wobble, like very firm jelly, when you gently nudge the pan. It should not look wet or liquid. The residual heat will continue to cook the center as it cools. An internal thermometer inserted into the center should read around 150°F (65°C) for an accurate reading, but the visual jiggle test is often sufficient.
Expert Tips to Prevent Cracks in Your Cheesecake
Cracks can be a common frustration for cheesecake bakers, but with a few simple techniques, you can achieve a beautifully smooth top every time:
- Tap Out Air Bubbles: After pouring the filling into the crust, gently tap the cheesecake pan on your countertop a few times. This helps to bring any trapped air bubbles to the surface, which can otherwise expand during baking and cause cracks. This simple step can make a big difference in the final appearance.
- Avoid Overmixing the Filling: When combining your cream cheese mixture, especially after adding the eggs, mix only until just combined. Overmixing incorporates too much air into the batter, leading to a light, airy texture that is more prone to cracking as it cools and contracts. A dense, smooth batter is your goal.
- Resist Opening the Oven Door: As tempting as it is to peek, do not open the oven door while the cheesecake is baking, especially during the crucial first hour and the cooling phase. Sudden fluctuations in temperature can shock the cheesecake, causing it to crack. Allow the cheesecake to bake undisturbed and follow the cooling instructions carefully.
- Ensure Gradual Cooling: After baking, let the cheesecake cool gradually. This includes leaving it in the water bath for a while, then on the counter, and finally in the fridge. Rapid temperature changes are a primary culprit for cracks.
- Don’t Overbake: An overbaked cheesecake is a dry cheesecake, and dry cheesecakes are prone to cracking. Always err on the side of slightly underbaked (with the center still jiggly) as it will continue to set as it cools.
Storage and Freezing Tips for Your Cheesecake
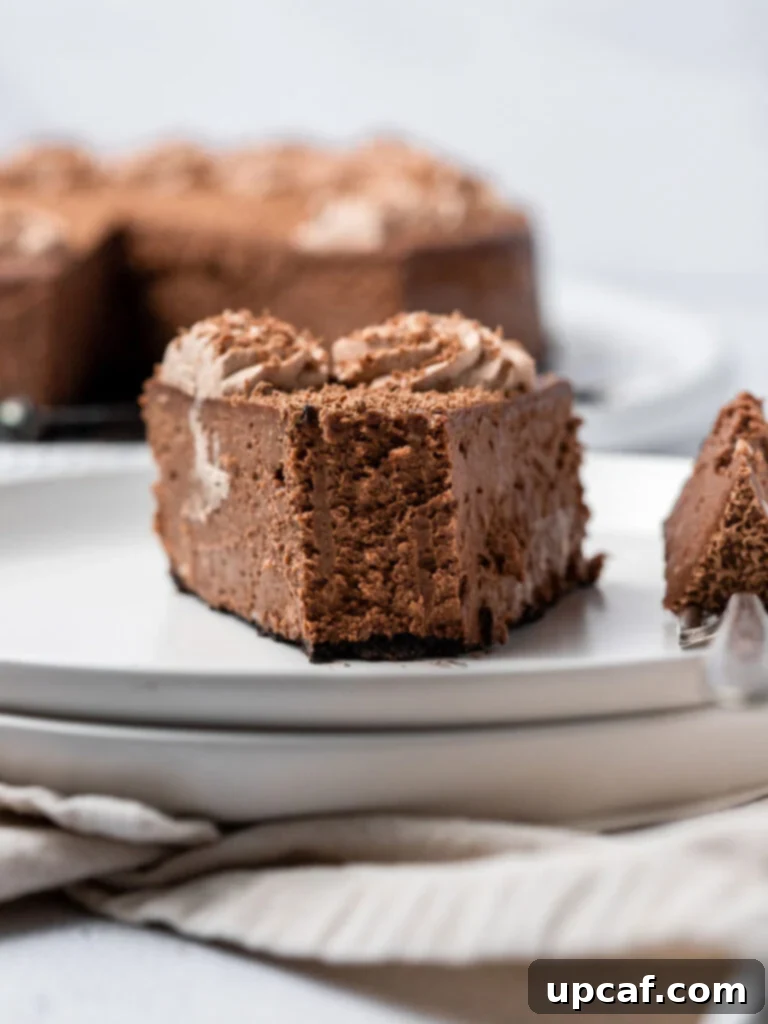
This Double Chocolate Cheesecake is just as delightful the next day, and it freezes beautifully, making it perfect for meal prep or enjoying a slice whenever you desire.
Storing Leftovers: To maintain its freshness and flavor, place any leftover chocolate cheesecake slices in an airtight container. Store this container in the refrigerator, where the cheesecake will remain delicious for up to 5-7 days. Always keep it covered to prevent it from absorbing other food odors.
Freezing Individual Slices: For convenient portion control and longer storage, wrap individual double chocolate cheesecake slices tightly in plastic wrap, then again in aluminum foil. Store these double-wrapped slices in an airtight freezer-safe container or freezer bag. They will keep well in the freezer for up to one month. Thaw individual slices in the refrigerator for several hours or overnight before serving.
Freezing a Whole Cheesecake: If you plan to freeze the entire cheesecake for an extended period, ensure it is completely chilled first. Remove it from the springform pan, then wrap the entire cheesecake tightly first in plastic wrap and then in a layer of heavy-duty aluminum foil. Place it in an airtight freezer-safe container or bag. A whole cheesecake can be frozen for up to three months. Important: If you intend to freeze the cheesecake, hold off on piping or spreading the chocolate whipped cream until you are ready to thaw and serve it. Whipped cream does not freeze and thaw well, often becoming watery or grainy.
Looking for More Dessert Inspiration?
If you’ve enjoyed this indulgent cheesecake, you’ll love exploring other delightful recipes:
- Moist & Flavorful Banana Walnut Cake
- Homemade Oatmeal Cookie Ice Cream Sandwich
- Irresistible Blueberry Crisp Recipe
- The Best Crepe Recipe for Any Time of Day
- Easy Oreo Ice Cream Sandwich
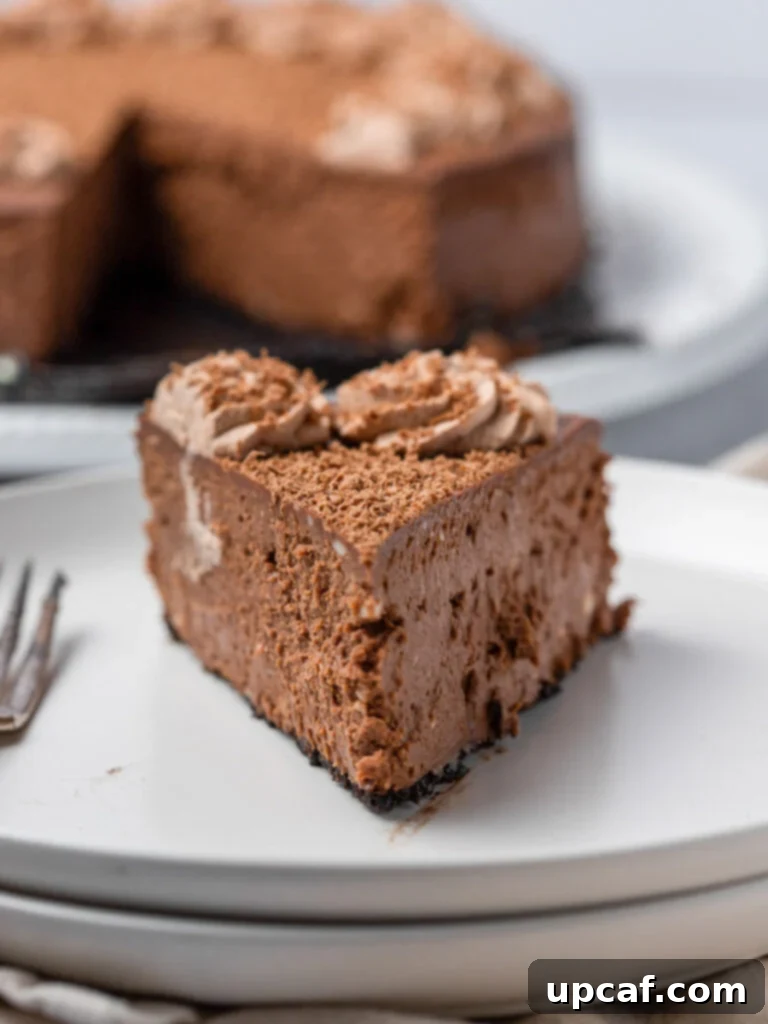
I genuinely hope you find immense joy in all the recipes I share with you, and that this exquisite Double Chocolate Cheesecake recipe brings a smile to your face. Please do try it, savor every bite, and consider rating it to help others discover its magic. Sharing your culinary creations with friends and family is one of life’s greatest pleasures!
If you whip up this spectacular Double Chocolate Cheesecake and love it as much as I do, please share your masterpiece with me on INSTAGRAM using my hashtag! You might just be featured in my story! For all my latest social posts, kitchen tips, and new recipes, be sure to follow Cookin’ With Mima on FACEBOOK, INSTAGRAM, and PINTEREST. Happy baking!
Print Recipe
Double Chocolate Cheesecake
Mariam Ezzeddine
Super easy to make, this Double Chocolate Cheesecake is the perfect combination of light and fluffy cream cheese filling with a rich chocolate taste. This melt-in-your-mouth double chocolate cheesecake is everything you want in a chocolate dessert.
30 minutes
1 hour 45 minutes
8 hours
10 hours 15 minutes
12 slices
Ingredients
For the Crust:
- 20 pieces Oreos, crushed finely
- 4 tablespoons unsalted butter, melted
For the Filling:
- ½ cup heavy cream, room temperature
- 1 cup chocolate chips (semi-sweet or dark recommended)
- 4 (8-ounce) blocks full-fat cream cheese, room temperature
- 1 ½ cup granulated sugar
- ⅓ cup cocoa powder, sifted
- 4 large eggs, room temperature
- 1 tablespoon pure vanilla extract
For the Chocolate Whipped Cream:
- ½ cup heavy cream, chilled
- 1 tablespoon granulated sugar
- 1 tablespoon cocoa powder, sifted
Instructions
For the Crust:
- Preheat your oven to 350°F (175°C). Lightly spray a 9-inch springform pan with non-stick spray and securely wrap the outside with aluminum foil to protect it from the water bath.
- In a medium bowl, combine the finely crushed Oreos and the melted butter. Mix until the crumbs are thoroughly moistened and resemble wet sand.
- Firmly press the crumb mixture into the bottom of the prepared springform pan, creating an even layer.
- Bake the crust for 10 minutes. Remove the pan from the oven and set it aside to cool completely while you prepare the filling.
For the Filling:
- Increase your oven temperature to 450°F (230°C).
- In a medium, heat-safe bowl, combine the heavy cream and chocolate chips. Place the bowl over a small saucepan of simmering water (double boiler method). Stir occasionally until the chocolate chips are fully melted and smooth.
- Remove the chocolate mixture from the heat and allow it to cool slightly, ensuring it’s not hot when added to the cream cheese.
- In the bowl of a stand mixer fitted with a paddle attachment, beat the room temperature cream cheese on medium speed until it is smooth and creamy. Add the granulated sugar and sifted cocoa powder, beating until fully combined and smooth, scraping down the bowl as needed.
- Pour the slightly cooled chocolate mixture into the cream cheese batter. Beat on low speed until just incorporated, being careful not to overmix.
- Add the eggs one at a time, beating on low speed only until each egg is just combined before adding the next. This prevents too much air from being incorporated, which can lead to cracks. Scrape down the sides and bottom of the bowl after each addition.
- Stir in the vanilla extract until just combined.
- Pour the prepared filling into the cooled Oreo crust in the springform pan.
- Prepare the water bath: Place the springform pan (still wrapped in foil) into a larger, deep roasting pan. Boil enough water to fill the roasting pan about halfway up the sides of the cheesecake pan.
- Carefully pour the boiling water into the roasting pan, ensuring no water splashes into the cheesecake itself.
- Place the roasting pan with the water bath and cheesecake onto the center rack of your preheated oven.
- Bake for 15 minutes at 450°F (230°C). After 15 minutes, reduce the temperature to 225°F (107°C) and continue to bake for 1 hour and 20 minutes to 1 hour and 35 minutes, or until the edges are set and the center of the cheesecake still has a slight, gentle jiggle.
- Remove the pan from the oven and allow it to rest in the water bath for about 30 minutes, then remove the springform pan from the water bath. Let it cool on the counter for another hour or until it reaches room temperature.
- Transfer the cheesecake to the refrigerator to chill thoroughly, preferably overnight (at least 8 hours). This chilling step is essential for the cheesecake to fully set and develop its texture and flavor.
For the Chocolate Whipped Cream:
- Once the cheesecake is chilled and you’re ready to serve, place all of the chilled ingredients (heavy cream, granulated sugar, cocoa powder) in a medium bowl.
- Using a hand mixer or a stand mixer with a whisk attachment, beat on medium-high speed until stiff peaks form. Be careful not to overbeat, as it can quickly turn into butter.
- Pipe the whipped cream onto the cheesecake in your desired decorative pattern or simply spread it evenly over the top of the chilled cheesecake. Slice and enjoy!
Notes
Storing Leftovers: Place leftover chocolate cheesecake slices in an airtight container and store them in the fridge. Enjoy within 5-7 days.
Freezing Leftovers: Wrap individual double chocolate cheesecake slices tightly in plastic wrap, then foil, and store them in an airtight container before freezing for up to one month. Thaw in the refrigerator.
Freezing a Whole Cheesecake: Wrap the entire chilled cheesecake tightly in plastic wrap, then foil, and store it in an airtight container before freezing for up to three months. If freezing, avoid adding the whipped cream until you are ready to serve, as it doesn’t freeze well.
Nutrition
Carbohydrates: 32g
Protein: 7g
Fat: 14g
Saturated Fat: 8g
Trans Fat: 1g
Cholesterol: 95mg
Sodium: 235mg
Potassium: 161mg
Fiber: 1g
Sugar: 28g
Vitamin A: 502IU
Vitamin C: 1mg
Calcium: 126mg
Iron: 1mg