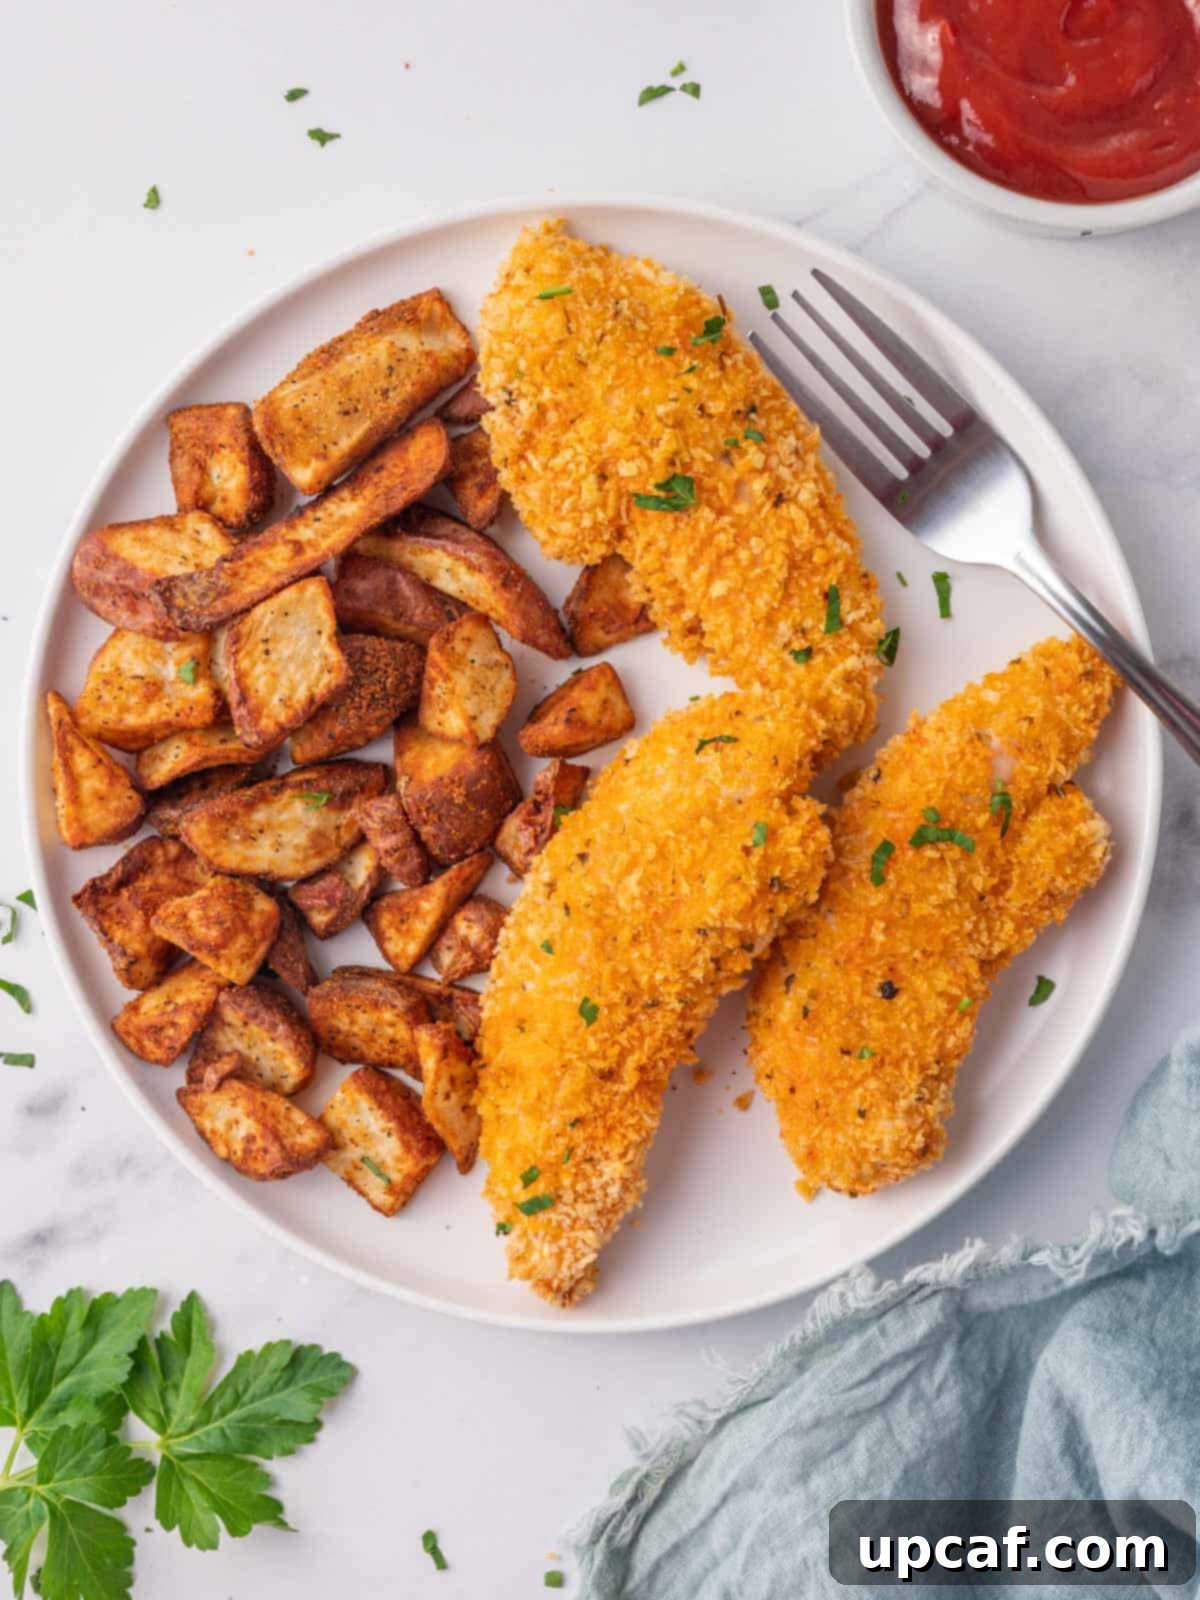
Craving that perfect balance of crispy exterior and juicy, tender interior in your chicken? Look no further than these incredible Baked Panko Chicken Tenders. This isn’t just another chicken tender recipe; it’s a culinary experience that elevates a family favorite to a new level. Forget the deep-fryer mess and unhealthy oils! Our method utilizes the magic of panko breadcrumbs and oven baking to deliver a satisfying crunch that rivals any fried version, all while keeping the chicken moist and flavorful. Infused with a thoughtful blend of aromatic herbs and savory spices, each bite bursts with deliciousness. Whether you’re planning a quick weeknight dinner, a fun party appetizer, or a kid-friendly meal, these panko-crusted chicken tenders are guaranteed to become a staple in your household, especially when paired with your go-to dipping sauce.
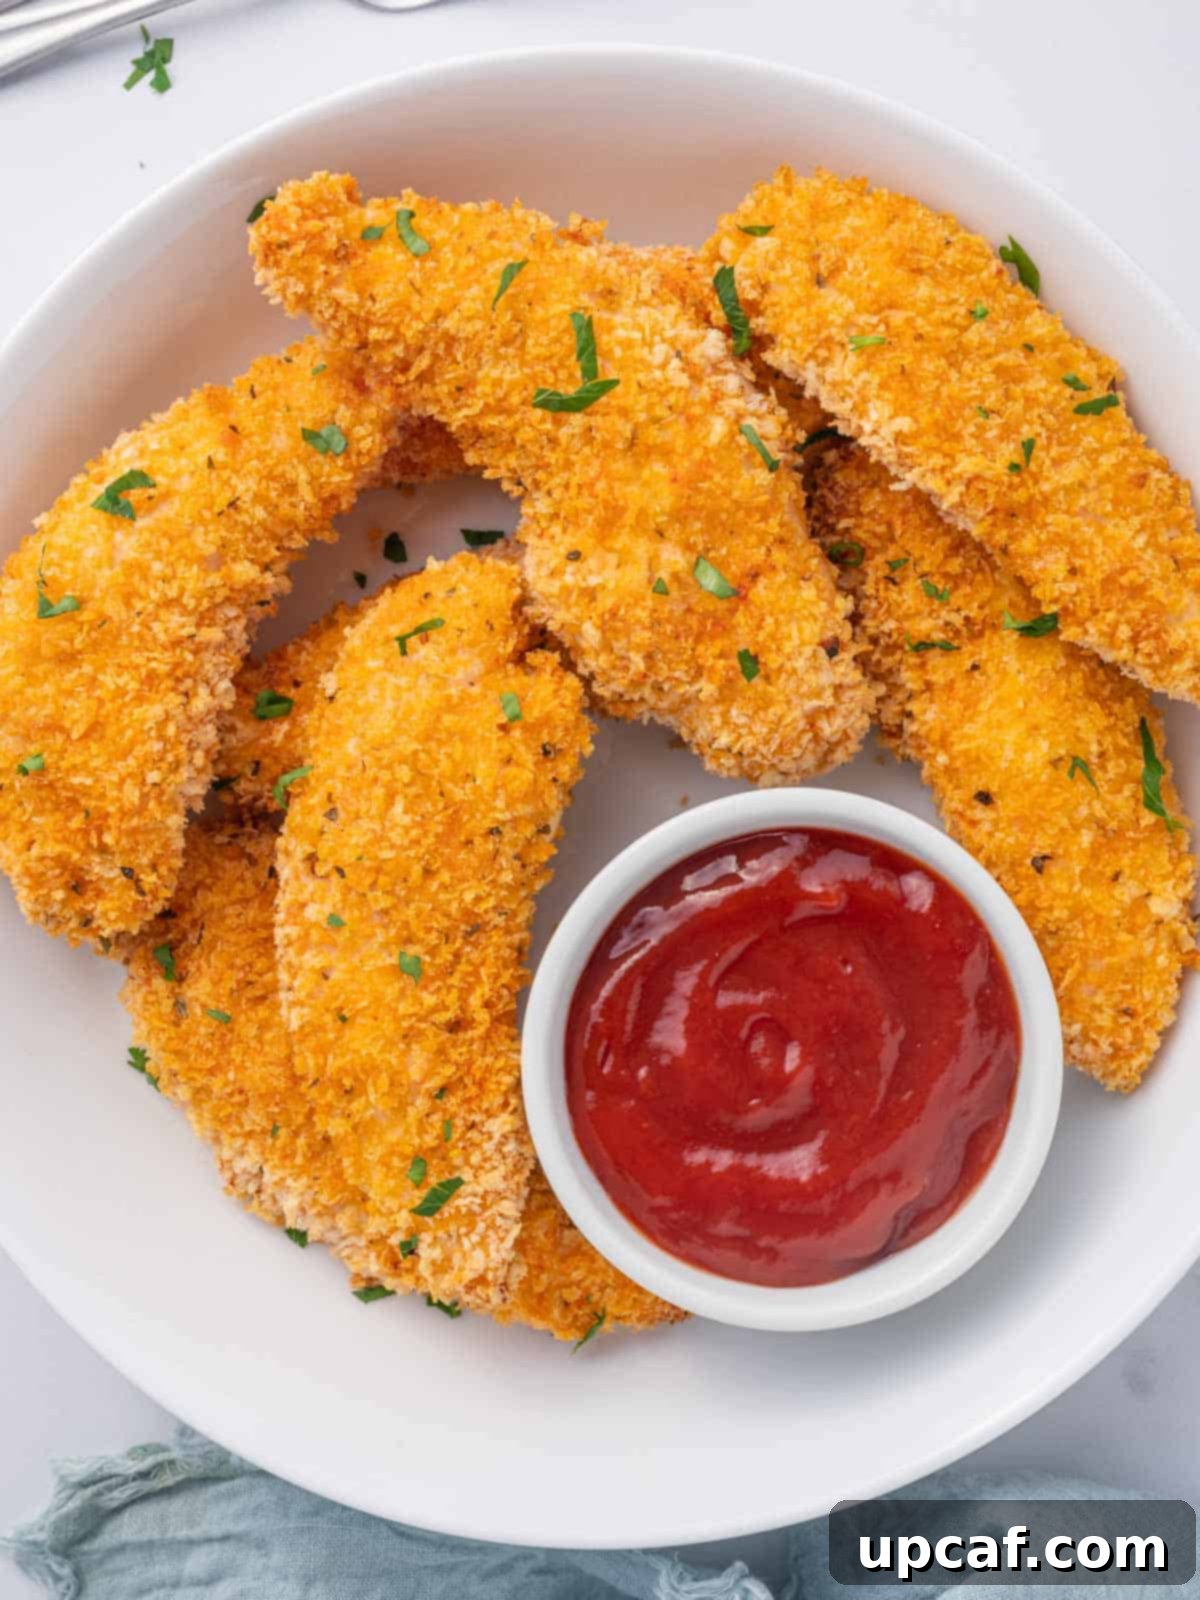
The secret to achieving the ultimate crispy texture and rich flavor in these chicken tenders lies in the meticulously crafted breading process. Each chicken strip is first lightly coated in a seasoned flour mixture, then dipped in beaten eggs, and finally generously dredged in light, airy panko breadcrumbs seasoned with a medley of herbs and spices. This layering technique ensures maximum crispness and locks in moisture, preventing the chicken from drying out during baking. This simple yet effective approach makes these baked chicken tenders not only incredibly easy to prepare but also a guaranteed hit with both children and adults. Say goodbye to bland, soggy tenders and embrace the superior taste and texture of our baked panko rendition.
If you’re a devoted fan of chicken tenders and enjoy exploring new flavor profiles, be sure to explore some of our other fantastic recipes. Dive into the zesty kick of our Baked Buffalo Chicken Tenders, discover the simple perfection of Baked Crispy Chicken Tenders, or experience a spicy adventure with our Nashville Hot Chicken Tenders. Each recipe offers a unique take on this beloved dish, promising delightful variations for every palate.
Why You’ll Love These Panko Crusted Chicken Tenders
- Unrivaled Crispness: Panko breadcrumbs are truly the star here. Unlike traditional breadcrumbs, panko has a larger, flakier structure, which creates more surface area for air to circulate during baking. This results in an incredibly light, airy, and super crunchy coating that stays crisp long after they come out of the oven. Prepare for an addictive crunch with every bite!
- Effortless and Healthier Cooking: One of the biggest advantages of this recipe is that it requires absolutely no deep frying. Baking these chicken fingers allows them to achieve a wonderfully crispy texture without the need for excessive oil, making them a much healthier alternative. This also means significantly less mess in the kitchen and an easier cleanup, allowing you to enjoy your meal without the usual post-frying hassle.
- A Universal Crowd-Pleaser: From picky eaters to gourmet enthusiasts, these baked panko chicken tenders are a guaranteed hit. Their appealing golden-brown crust, succulent interior, and customizable flavor make them perfect for family dinners, game day snacks, or even a sophisticated appetizer. Kids adore them, and adults appreciate their delicious taste and ease of preparation. They’re a dish that truly brings smiles to everyone’s faces.
- Packed with Flavor: Our carefully chosen blend of herbs and spices is designed to infuse the chicken with rich, savory notes, ensuring every tender is bursting with taste. This isn’t just about crispness; it’s about a complete flavor experience.
- Quick and Convenient: With minimal prep time and a relatively short baking duration, these chicken tenders are an ideal solution for busy weeknights. You can have a delicious, home-cooked meal on the table in under 30 minutes, freeing up more time for family and relaxation.
Essential Ingredients for Panko Chicken Strips
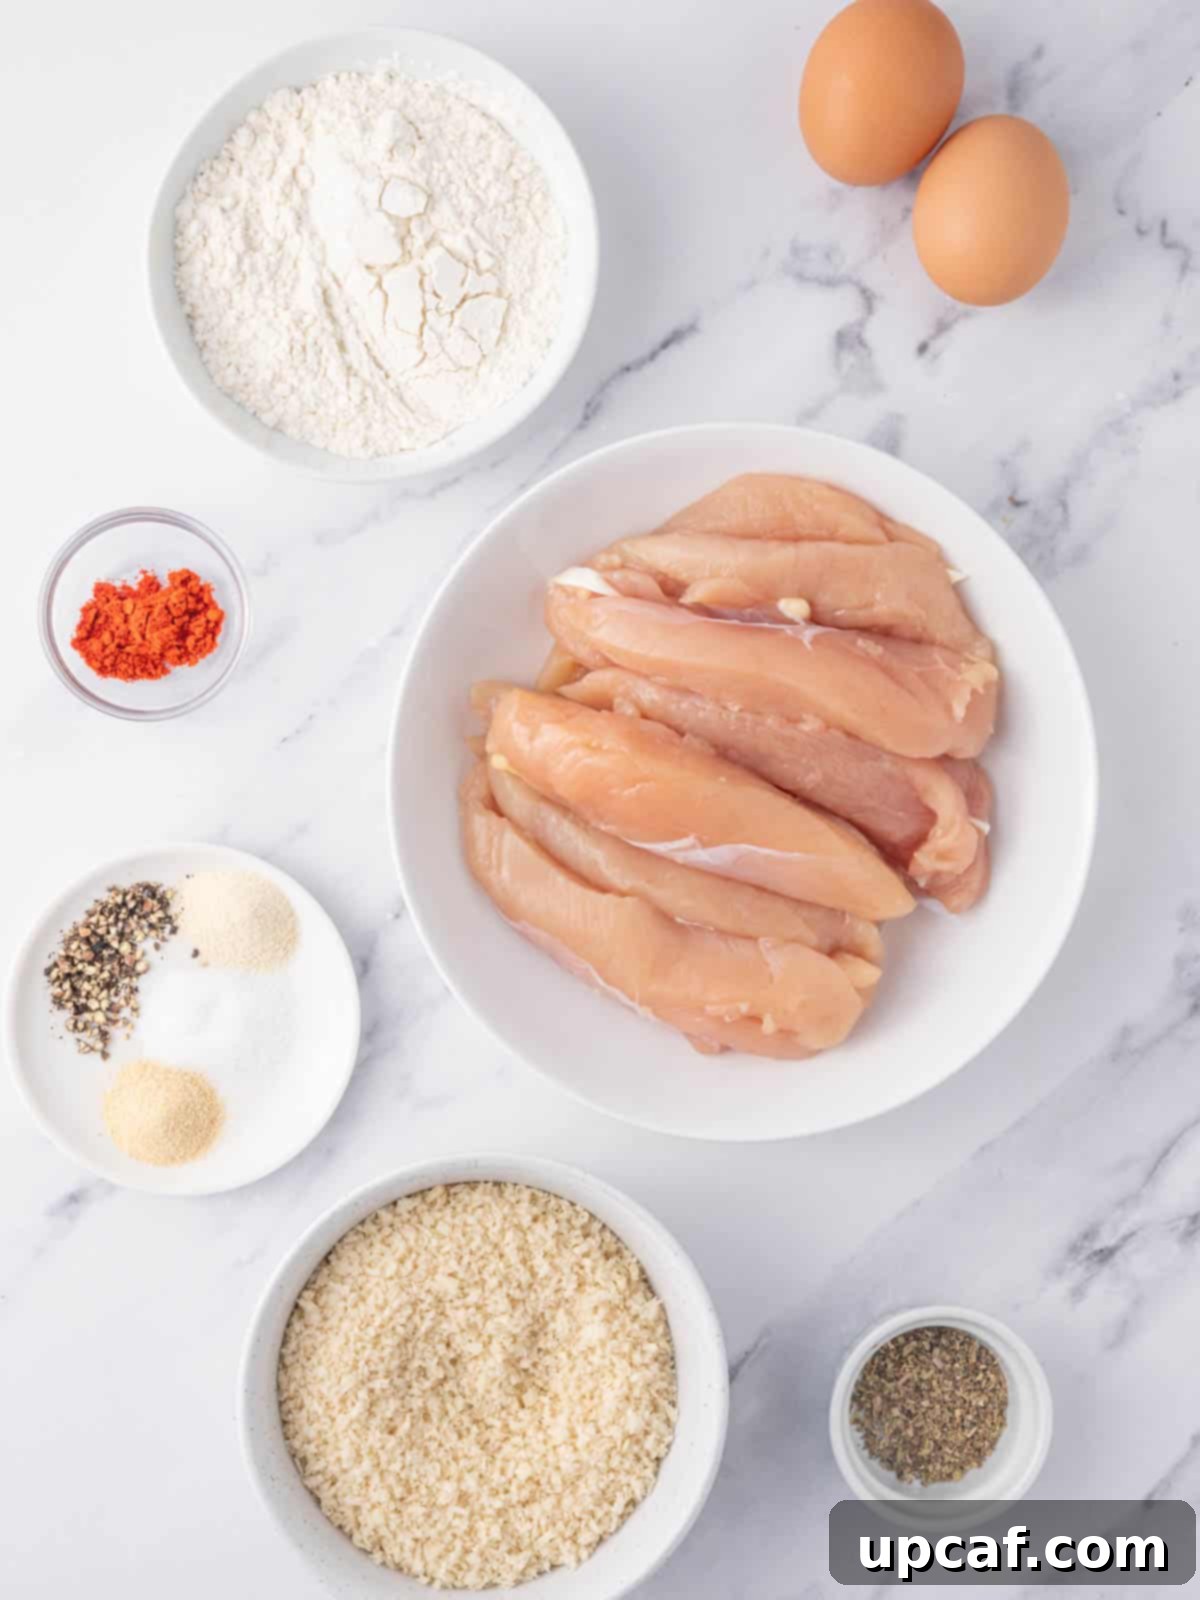
Crafting the perfect batch of crispy panko chicken tenders begins with selecting high-quality ingredients and understanding the role each plays in achieving that irresistible flavor and texture. Here’s what you’ll need:
- Chicken: The foundation of our dish! For optimal results, we recommend using pre-cut chicken tenderloins. These cuts are naturally tender and cook quickly and evenly. Alternatively, you can use boneless, skinless chicken breasts. Simply slice them lengthwise into approximately 1-inch wide strips to mimic tenderloins. Ensure the chicken is fresh and patted thoroughly dry before beginning the breading process, as this helps the coatings adhere better.
- All-Purpose Flour: This forms the crucial first layer of our breading. The flour mixture not only helps create a dry surface for the egg wash to cling to but also adds to the overall textural crispness. It acts as a base for seasoning, contributing to the savory depth of the tenders.
- Seasoning Blend: This carefully balanced blend is what gives our chicken tenders their exceptional flavor.
- Garlic Powder & Onion Powder: These provide a fundamental savory depth, offering a milder, more consistent flavor than fresh garlic or onion, which can sometimes burn during baking. They are essential for a classic, universally appealing taste.
- Salt & Ground Black Pepper: Basic but vital. These seasonings enhance all the other flavors and are divided between the flour and panko mixtures for balanced seasoning throughout each layer. Adjust to your personal preference.
- Paprika: Adds a lovely reddish hue and a mild, sweet peppery flavor to the panko coating. For an extra dimension of smoky goodness, consider substituting with smoked paprika. This subtle change can elevate the flavor profile significantly.
- Dried Oregano: Offers an earthy, slightly peppery aroma and taste to the panko, complementing the other spices beautifully and adding an authentic touch of Mediterranean warmth.
- Eggs: The binding agent! Well-beaten, room-temperature eggs create a sticky layer that allows the panko breadcrumbs to adhere firmly to the seasoned flour. Using room-temperature eggs helps them whisk more easily and creates a smoother coating.
- Panko Breadcrumbs: The undisputed champion of crispness! Japanese-style panko breadcrumbs are distinctly different from traditional breadcrumbs. They are made from crustless white bread and have a light, airy, and flaky texture, resulting in a significantly crispier finish when baked or fried. Do not substitute with regular breadcrumbs if you want that signature crunch.
- Fresh Parsley (Garnish): A sprinkle of freshly chopped parsley not only adds a vibrant pop of color but also introduces a fresh, herbaceous note that brightens the rich flavors of the chicken tenders. It’s the perfect finishing touch for presentation and taste.
Step-by-Step: How To Make Perfect Baked Panko Chicken Tenders
Making these incredibly delicious and crispy chicken tenders at home is simpler than you might think. Follow these detailed steps for the best results:
- Step 1: Preheat and Prepare Your Baking Surface. Begin by preheating your oven to a precise 400 degrees Fahrenheit (200 degrees Celsius). While the oven heats, prepare a large baking sheet. Line it with parchment paper; this prevents sticking and makes for an effortless cleanup. If you have one, placing an oven-safe wire rack on top of the parchment-lined baking sheet is an excellent way to promote even air circulation around the tenders, enhancing their crispness from all sides.
- Step 2: Prepare the Chicken. Take your chicken tenderloins (or breast strips) and thoroughly pat them dry with paper towels. Removing excess moisture is a critical step, as it ensures that your breading adheres properly and becomes wonderfully crispy, rather than soggy. Set the dried chicken aside.
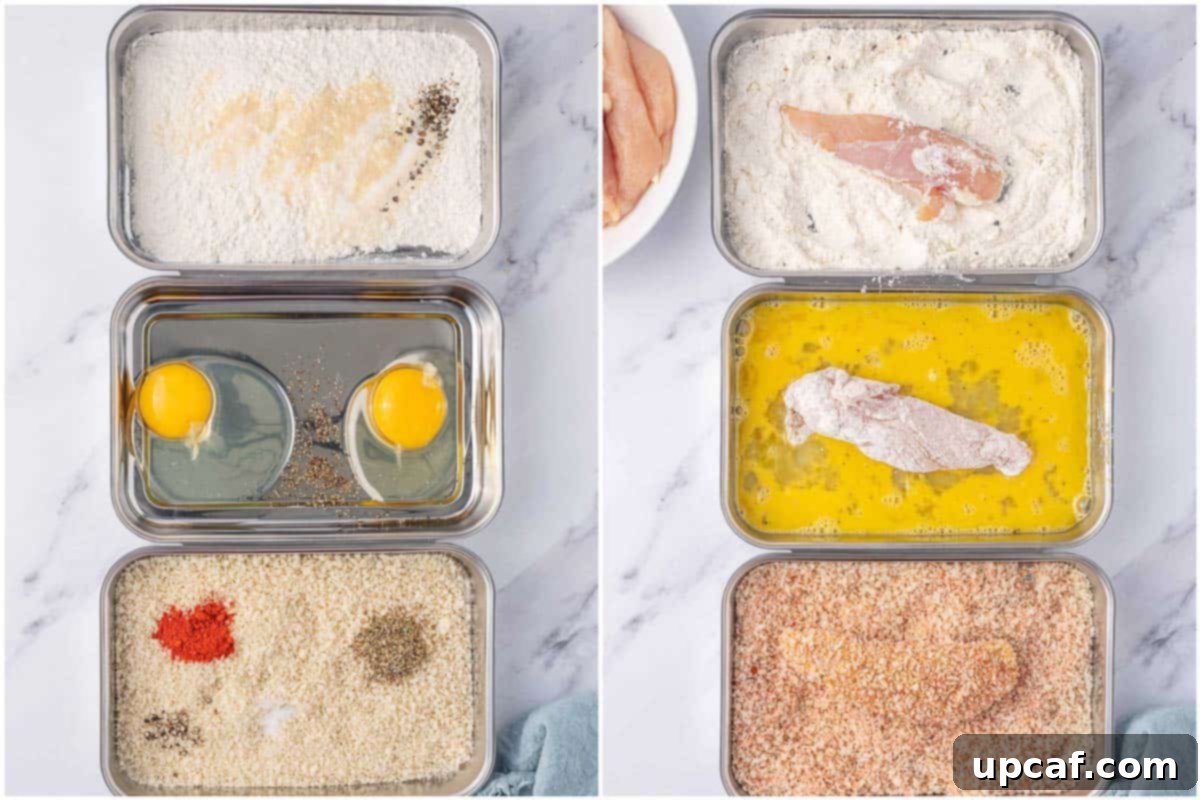
- Step 3: Set Up Your Breading Stations. This organized approach is key to an efficient and clean breading process. You will need three shallow bowls:
- In the first bowl, combine ¾ cup all-purpose flour, 1 teaspoon garlic powder, 1 teaspoon onion powder, ½ teaspoon salt, and ½ teaspoon ground black pepper. Whisk these dry ingredients together thoroughly to ensure the seasonings are evenly distributed.
- In the second bowl, crack and vigorously whisk 2 large eggs. Season them lightly with a pinch of salt and pepper. Whisk until the yolks and whites are fully combined and slightly frothy.
- In the third bowl, combine 1 ½ cups panko breadcrumbs, 1 teaspoon paprika, 1 teaspoon dried oregano, the remaining ½ teaspoon salt, and ½ teaspoon ground black pepper. Mix these ingredients well.
Arrange these three bowls in a production line fashion: flour, then egg, then panko.
- Step 4: Coat the Chicken Tenders. Now it’s time to bread your chicken. Using one hand for dry ingredients and the other for wet will help keep your hands cleaner.
- First, take a chicken tender and dredge it completely in the seasoned flour mixture, ensuring it’s fully coated. Gently shake off any excess flour.
- Next, transfer the floured chicken to the egg wash. Turn it to coat thoroughly, letting any excess egg drip off.
- Finally, place the egg-coated chicken into the seasoned panko breadcrumbs. Press the panko firmly onto both sides of the chicken to ensure a thick and even coating. This generous coating is what delivers that amazing crunch.
Repeat this process for all chicken tenders, placing each fully coated tender directly onto your prepared baking sheet (or wire rack). Make sure to leave a little space between each tender to allow for proper air circulation and even crisping. Do not overcrowd the baking sheet.
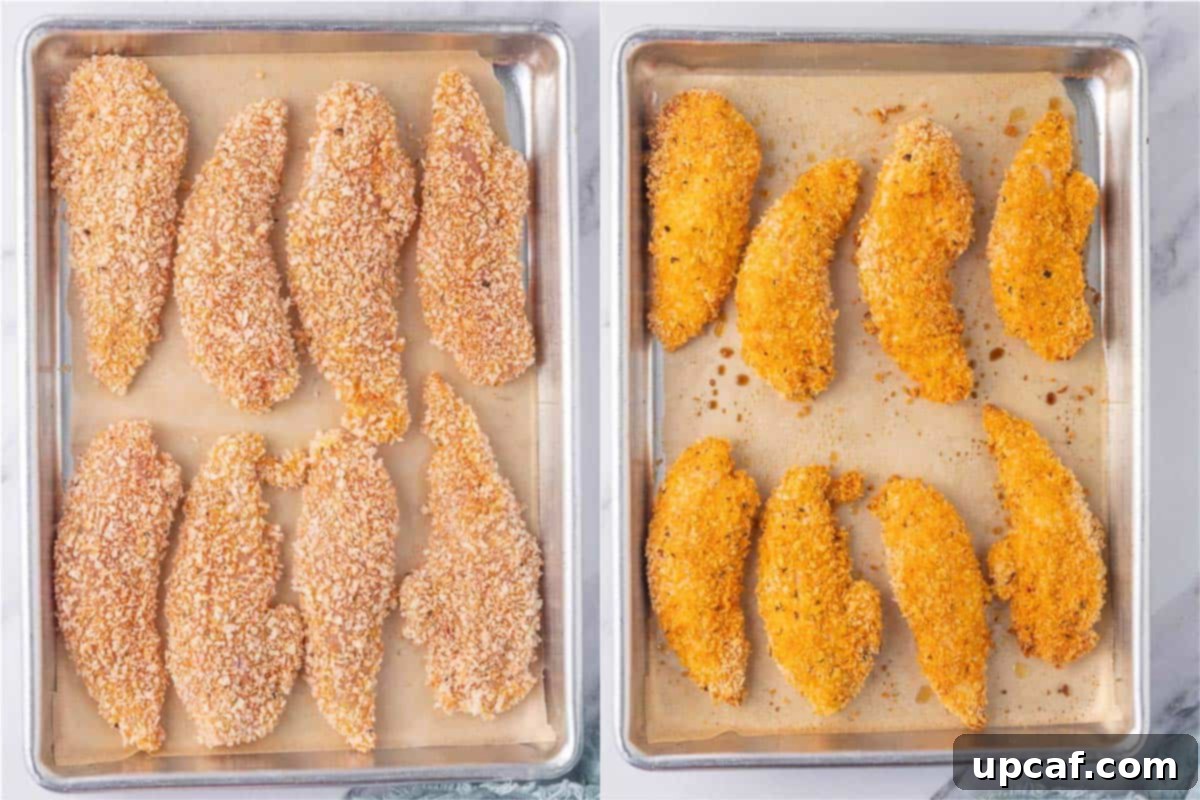
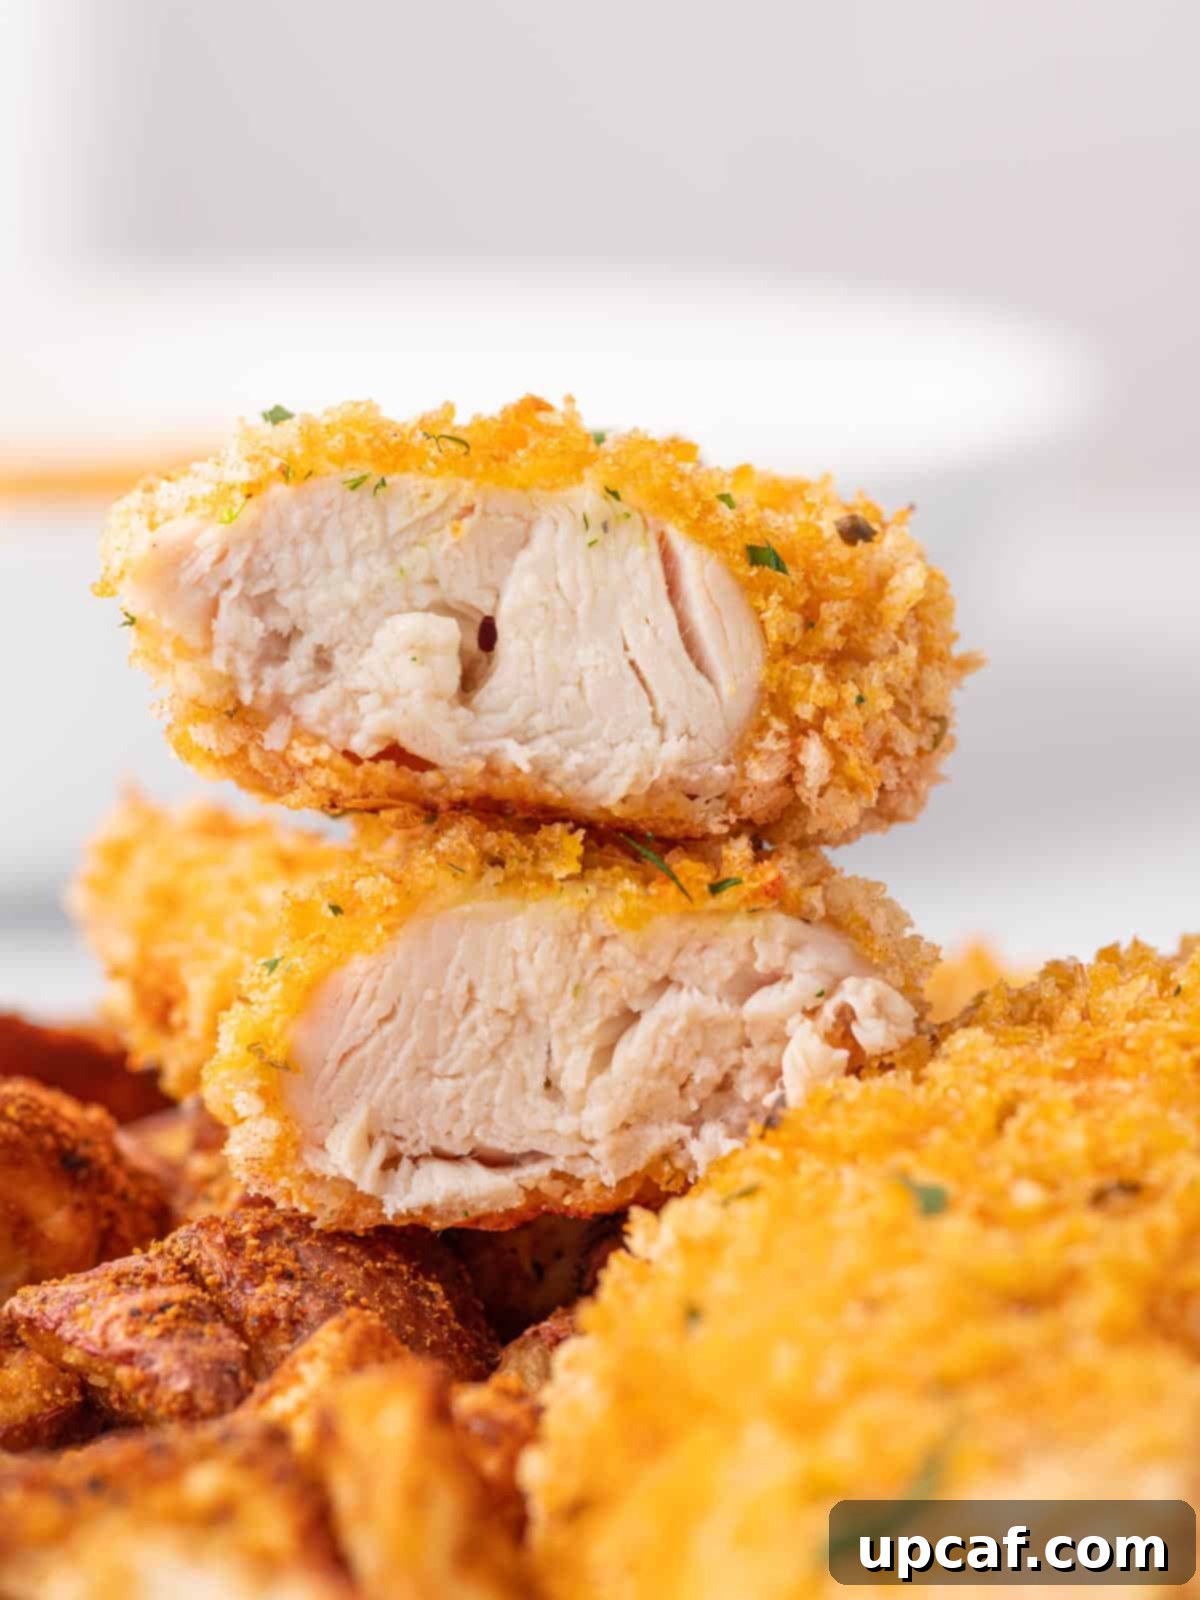
- Step 5: Bake to Golden Perfection. Place the baking sheet with the breaded chicken tenders into the preheated oven. Bake for 18-20 minutes. The exact baking time may vary slightly depending on the thickness of your chicken strips and your oven’s calibration. Flip the tenders halfway through the baking time (around 9-10 minutes) to ensure even browning and crispness on all sides. The chicken is cooked through when it reaches an internal temperature of 165 degrees Fahrenheit (74 degrees Celsius) and the coating is beautifully golden brown and crispy.
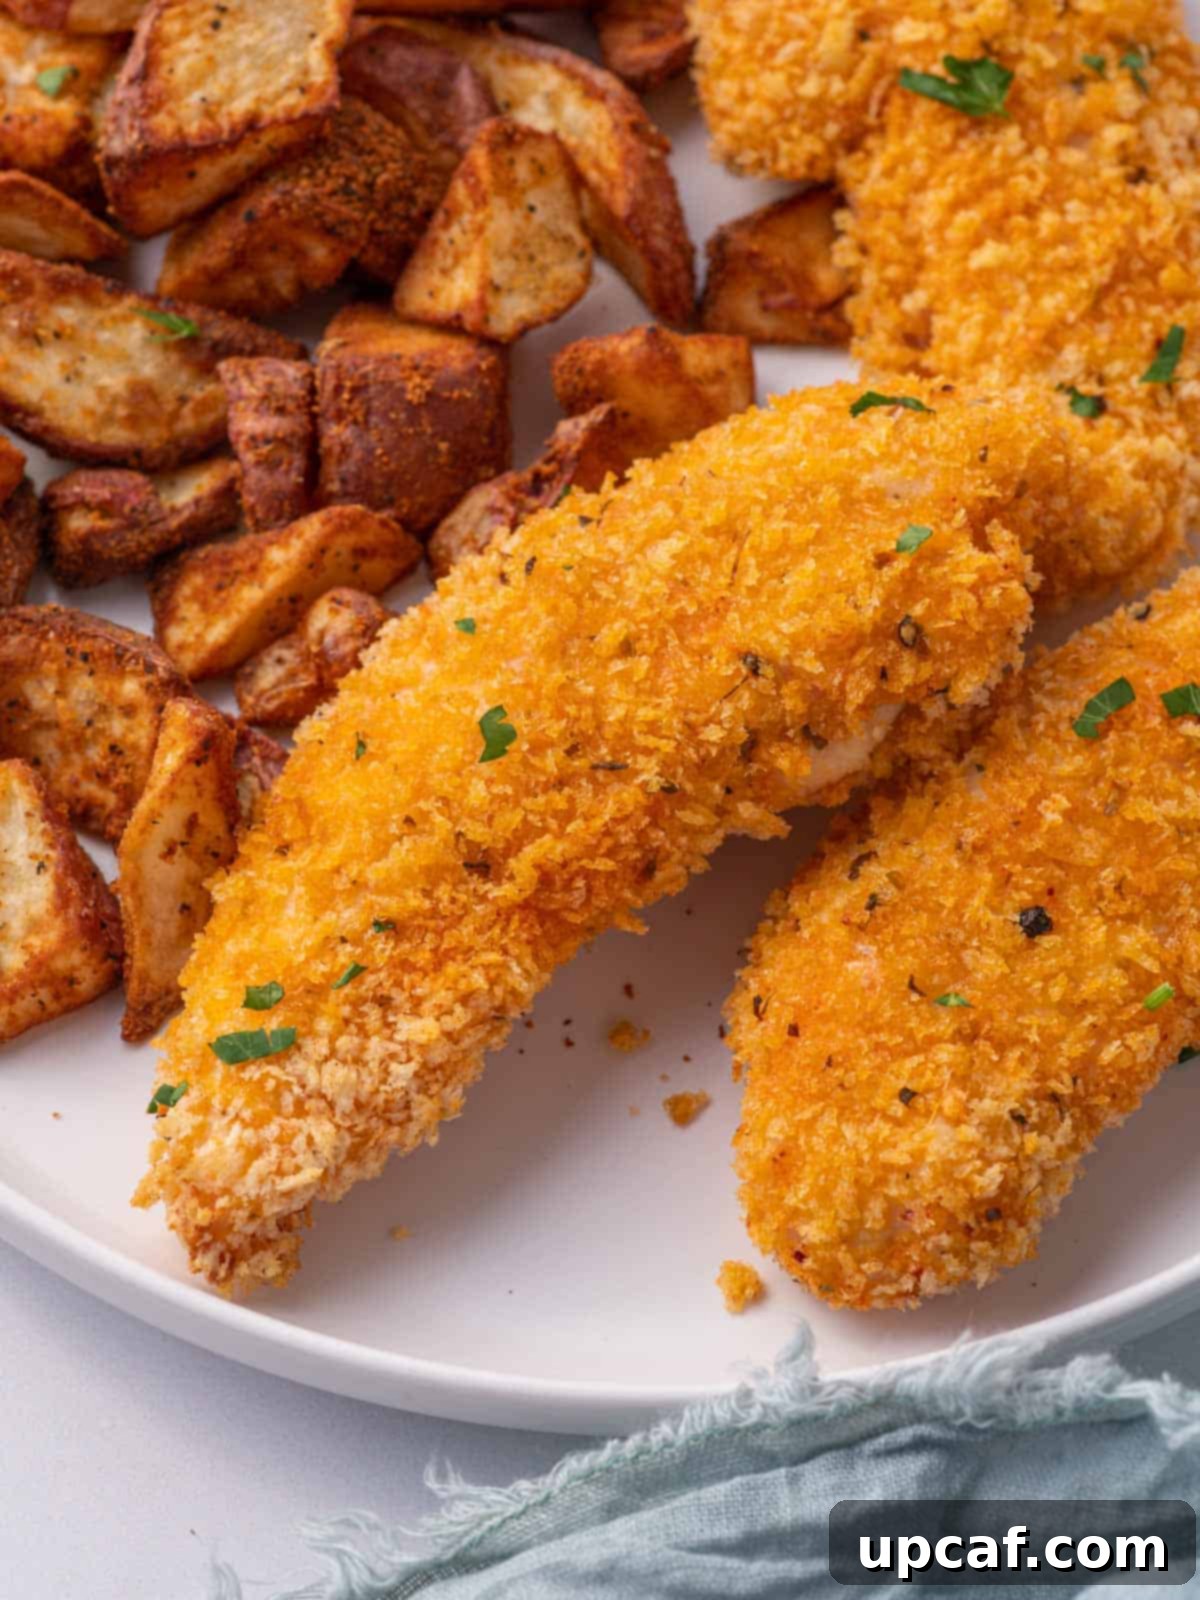
- Step 6: Garnish and Serve. Once baked, remove the chicken tenders from the oven. For an extra touch of freshness and vibrant color, sprinkle them generously with freshly chopped parsley. Serve immediately with your favorite dipping sauces, such as ketchup, honey mustard, ranch, or a spicy sriracha mayo. Enjoy!
Expert Tips for the Best Homemade Chicken Tenders
Achieving truly restaurant-quality chicken tenders at home is all about paying attention to a few key details. Here are some invaluable tips to ensure your baked panko chicken tenders are absolutely perfect every time:
- Tendon Removal for Optimal Texture: If you’re using pre-cut chicken tenderloins, you’ll often find a white tendon running through them. While edible, this tendon can become chewy when cooked. To remove it, hold the tendon firmly with a paper towel (for grip) and slide a fork underneath it, pressing down on the chicken. Pull the tendon through the fork, and it should slide right out, leaving you with perfectly tender chicken.
- Uniform Strips for Even Cooking: If opting for chicken breasts, cut them into strips of roughly equal size and thickness. This ensures that all your tenders cook at the same rate, preventing some from being overcooked and dry while others are still undercooked. Aim for approximately 1-inch thick strips.
- Panko is Non-Negotiable for Crispness: For that superior, airy crunch, stick exclusively with panko breadcrumbs. Regular breadcrumbs tend to absorb more moisture and create a denser, less crispy coating. Panko’s unique flaky structure is the secret weapon for truly crispy baked chicken.
- Customize Your Seasoning: The provided spice blend is a fantastic starting point, but don’t hesitate to adjust it to your family’s preferences. Love a bit more garlic? Add an extra half teaspoon. Prefer a more herbaceous flavor? Try a pinch of dried thyme or rosemary in the panko.
- Add a Kick with Cayenne: If you appreciate a little heat, sprinkle a quarter to half teaspoon of cayenne pepper into the flour mixture or the panko for a delightful spicy kick. Start with a small amount and adjust according to your spice tolerance.
- Master the Two-Handed Dredging Technique: To keep your breading stations clean and prevent your hands from becoming a gloppy mess, use one hand exclusively for the wet ingredients (the egg wash) and the other hand for the dry ingredients (flour and panko). This technique makes the breading process much smoother and more enjoyable.
- Elevate with a Wire Rack: For the ultimate crispy chicken tenders, arrange them on an ovenproof wire rack placed over your parchment-lined baking sheet. This allows hot air to circulate all around the chicken, ensuring the bottom gets just as crispy as the top, eliminating any potential for a soggy underside.
- Ensure Proper Internal Temperature: Always cook chicken to an internal temperature of 165 degrees Fahrenheit (74 degrees Celsius) to ensure it is safe to eat. Use a meat thermometer inserted into the thickest part of the largest tender. Remove the chicken promptly once it reaches this temperature to prevent overcooking and maintain juiciness.
- Monitor Smaller Strips: Keep in mind that smaller or thinner chicken strips will cook faster. Begin checking for doneness a few minutes earlier for these pieces to avoid drying them out.
- Don’t Overcrowd the Pan: Give each chicken tender its space on the baking sheet. Overcrowding can lead to steaming instead of baking, which will prevent the tenders from getting properly crispy. If necessary, use two baking sheets.
- Broil for Extra Golden Finish: For an even more golden-brown and extra-crispy exterior, you can briefly place the tenders under the broiler for 1-2 minutes during the last stage of baking. Watch them very carefully, as they can burn quickly.
Frequently Asked Questions About Panko Chicken Tenders
Can I air fry panko chicken tenders?
Absolutely! Air frying is an excellent alternative for these panko chicken tenders, offering an even quicker path to crisp perfection. To air fry, preheat your air fryer to 400 degrees Fahrenheit (200 degrees Celsius). Lightly spritz the breaded tenders with cooking spray (this helps achieve a golden crust). Arrange them in a single layer in the air fryer basket, ensuring not to overcrowd it. Cook for 5 minutes, then flip them over and cook for another 5 minutes, or until the chicken reaches an internal temperature of 165 degrees Fahrenheit (74 degrees Celsius) with a digital thermometer and the coating is golden and crispy.
Can I make these with regular breadcrumbs?
While you can use regular breadcrumbs, gluten-free breadcrumbs, or other types of breading for this recipe, we strongly recommend sticking with panko (or gluten-free panko). Panko’s unique, flaky structure is specifically designed to create that unparalleled extra crunch that sets these chicken tenders apart. Regular breadcrumbs tend to absorb more moisture and result in a softer, less crispy coating. For the best possible crispy chicken fingers, panko is your go-to!
How do I store and reheat panko chicken strips?
Leftover panko chicken strips can be stored in an airtight container in the refrigerator for up to 3-4 days. To reheat and restore their crispness, avoid the microwave, which can make them soggy. Instead, place them on a baking sheet in a preheated oven at 350 degrees Fahrenheit (175 degrees Celsius) or in a toaster oven for about 10-15 minutes, or until they are warmed through and the coating is crispy again. An air fryer can also reheat them beautifully in just a few minutes at 375°F (190°C).
Can I freeze panko crusted chicken tenders?
Yes, these chicken tenders are perfect for freezing, making them a fantastic option for convenient meal prep! You have two main options for freezing:
- Uncooked: Coat the chicken tenders as directed in the recipe. Then, arrange them in a single layer on a parchment-lined baking sheet and flash freeze for 1-2 hours until solid. Once frozen, transfer them to a freezer-safe bag or container, removing as much air as possible, and freeze for up to 3 months. When ready to bake, place the frozen, breaded chicken strips directly onto a baking sheet and bake in a preheated 375 degrees Fahrenheit (190 degrees Celsius) oven for approximately 25-30 minutes, or until they reach an internal temperature of 165 degrees Fahrenheit.
- Cooked: After baking, allow the chicken tenders to cool completely. Then, flash freeze them on a baking sheet before transferring them to a freezer-safe bag. Reheat from frozen in the oven or air fryer until warmed through and crispy.
What to serve with Baked Panko Chicken Tenders?
Panko crusted chicken is incredibly versatile and pairs wonderfully with a wide array of side dishes and, of course, your favorite dipping sauces! Beyond classic ketchup, consider honey mustard, ranch, BBQ sauce, a spicy sriracha mayo, or a creamy garlic aioli. For balanced meals, serve them alongside steamed or roasted vegetables such as our delicious Parmesan Roasted Glazed Carrots or Roasted Brussels Sprouts. They also make a fantastic pairing with comforting starches like Crispy Air Fryer French Fries, Crispy Air Fryer Roasted Potatoes, mashed potatoes, or even a fresh garden salad.
More Delicious Panko Crusted Recipes
If you’ve fallen in love with the incredible crispness of panko, you’ll be thrilled to discover how versatile this breadcrumb truly is! Explore these other fantastic recipes that leverage the power of panko for maximum crunch and flavor:
- Air Fryer Fish and Chips
- Crispy Air Fryer Eggplants
- Crispy Air Fryer Cod
- Baked Buffalo Chicken Tenders
- Air Fryer Salmon Patties
Baked Panko Chicken Tenders Recipe
By: Mariam Ezzeddine
Baked Panko Chicken Tenders are simple, incredibly tasty, and often hailed as the best chicken tenders recipe you can make at home. These panko chicken strips achieve unparalleled crispness thanks to their generous coating of Japanese-style breadcrumbs, all without the need for deep frying.
- Prep Time: 10 minutes
- Cook Time: 20 minutes
- Total Time: 30 minutes
- Servings: 4 Servings
Ingredients
- 1 ½ lb chicken tenderloins
- ¾ cup all-purpose flour
- 1 teaspoon garlic powder
- 1 teaspoon onion powder
- 1 teaspoon salt, divided
- 1 teaspoon ground black pepper, divided
- 2 eggs
- 1 ½ cup panko breadcrumbs
- 1 teaspoon paprika
- 1 teaspoon dried oregano
- Chopped parsley, to garnish
Instructions
- Preheat the oven to 400 degrees F (200 degrees C). Line a baking sheet with parchment paper, or place an oven-safe wire rack on top of the parchment-lined sheet. Set aside.
- Pat the chicken tenders thoroughly dry with paper towels. This crucial step ensures the breading will adhere properly and become crispy.
- Prepare the breading stations:
- In the first shallow bowl, combine flour, garlic powder, onion powder, ½ teaspoon salt, and ½ teaspoon pepper. Whisk until well mixed.
- In the second shallow bowl, whisk the eggs until well beaten, and season with a pinch of salt and pepper.
- In the third shallow bowl, combine panko breadcrumbs, paprika, dried oregano, the remaining ½ teaspoon salt, and ½ teaspoon pepper. Mix well.
Arrange the bowls in the order: flour, egg, panko.
- Coat the chicken: Dredge each chicken tender first in the seasoned flour, shaking off any excess. Then, dip it into the egg mixture, allowing excess to drip off. Finally, press it firmly into the panko breadcrumbs mixture until fully and evenly coated on all sides.
- Arrange the coated chicken tenders on the prepared baking sheet, ensuring there is space between each piece for even cooking.
- Bake for 18-20 minutes, flipping halfway through (around 9-10 minutes), until the chicken is cooked through (internal temperature reaches 165°F / 74°C) and the coating is golden brown and crispy.
- Garnish the cooked chicken tenders with fresh chopped parsley and serve immediately with your preferred dipping sauce, such as ketchup.
Notes
- If using chicken tenderloins, consider removing the small white tendon to ensure a more pleasant, non-chewy texture.
- For consistency in cooking, cut chicken breasts into equal-sized strips if using them instead of tenderloins.
- Always opt for panko breadcrumbs for the ultimate crispiness; regular breadcrumbs will not yield the same crunchy result.
- Feel free to adjust the seasoning amounts to better suit your personal taste preferences.
- For those who enjoy a little heat, a dash of cayenne pepper can be added to the flour or panko mixture.
- Employ the “wet hand, dry hand” technique when dredging to keep the process cleaner and more efficient.
- For maximum crispness, bake the chicken tenders on an ovenproof wire rack placed over the baking sheet, allowing air to circulate around all sides.
- Always use a meat thermometer to ensure the chicken reaches a safe internal temperature of 165 degrees F (74 degrees C), and remove it promptly to prevent overcooking.
- Be aware that thinner or smaller chicken strips may cook faster, so adjust baking times accordingly.
Nutrition
The nutritional information for these Baked Panko Chicken Tenders per serving (approximately 4 servings per recipe) is as follows:
- Calories: 408 kcal
- Carbohydrates: 36g
- Protein: 45g
- Fat: 8g
- Saturated Fat: 2g
- Polyunsaturated Fat: 2g
- Monounsaturated Fat: 2g
- Trans Fat: 0.03g
- Cholesterol: 191mg
- Sodium: 976mg
- Potassium: 767mg
- Fiber: 2g
- Sugar: 2g
- Vitamin A: 427IU
- Vitamin C: 2mg
- Calcium: 80mg
- Iron: 4mg
I genuinely hope you enjoy exploring all the recipes I share, including this fantastic Baked Panko Chicken Tenders recipe. It’s truly a delight to prepare and even more so to savor. I encourage you to try it out, experience its deliciousness, and consider rating it and sharing your culinary creations with your friends and family! Your feedback and shares mean the world.
If you make this recipe and love it, please take a moment to leave a star rating and a comment below. Don’t forget to use my hashtag when sharing your delicious recreations on Instagram – I’d love to see what you’ve cooked up! Also, for all my latest social posts, kitchen tips, and new recipes, be sure to follow Cookin’ With Mima on FACEBOOK |INSTAGRAM |PINTEREST. Happy cooking!
