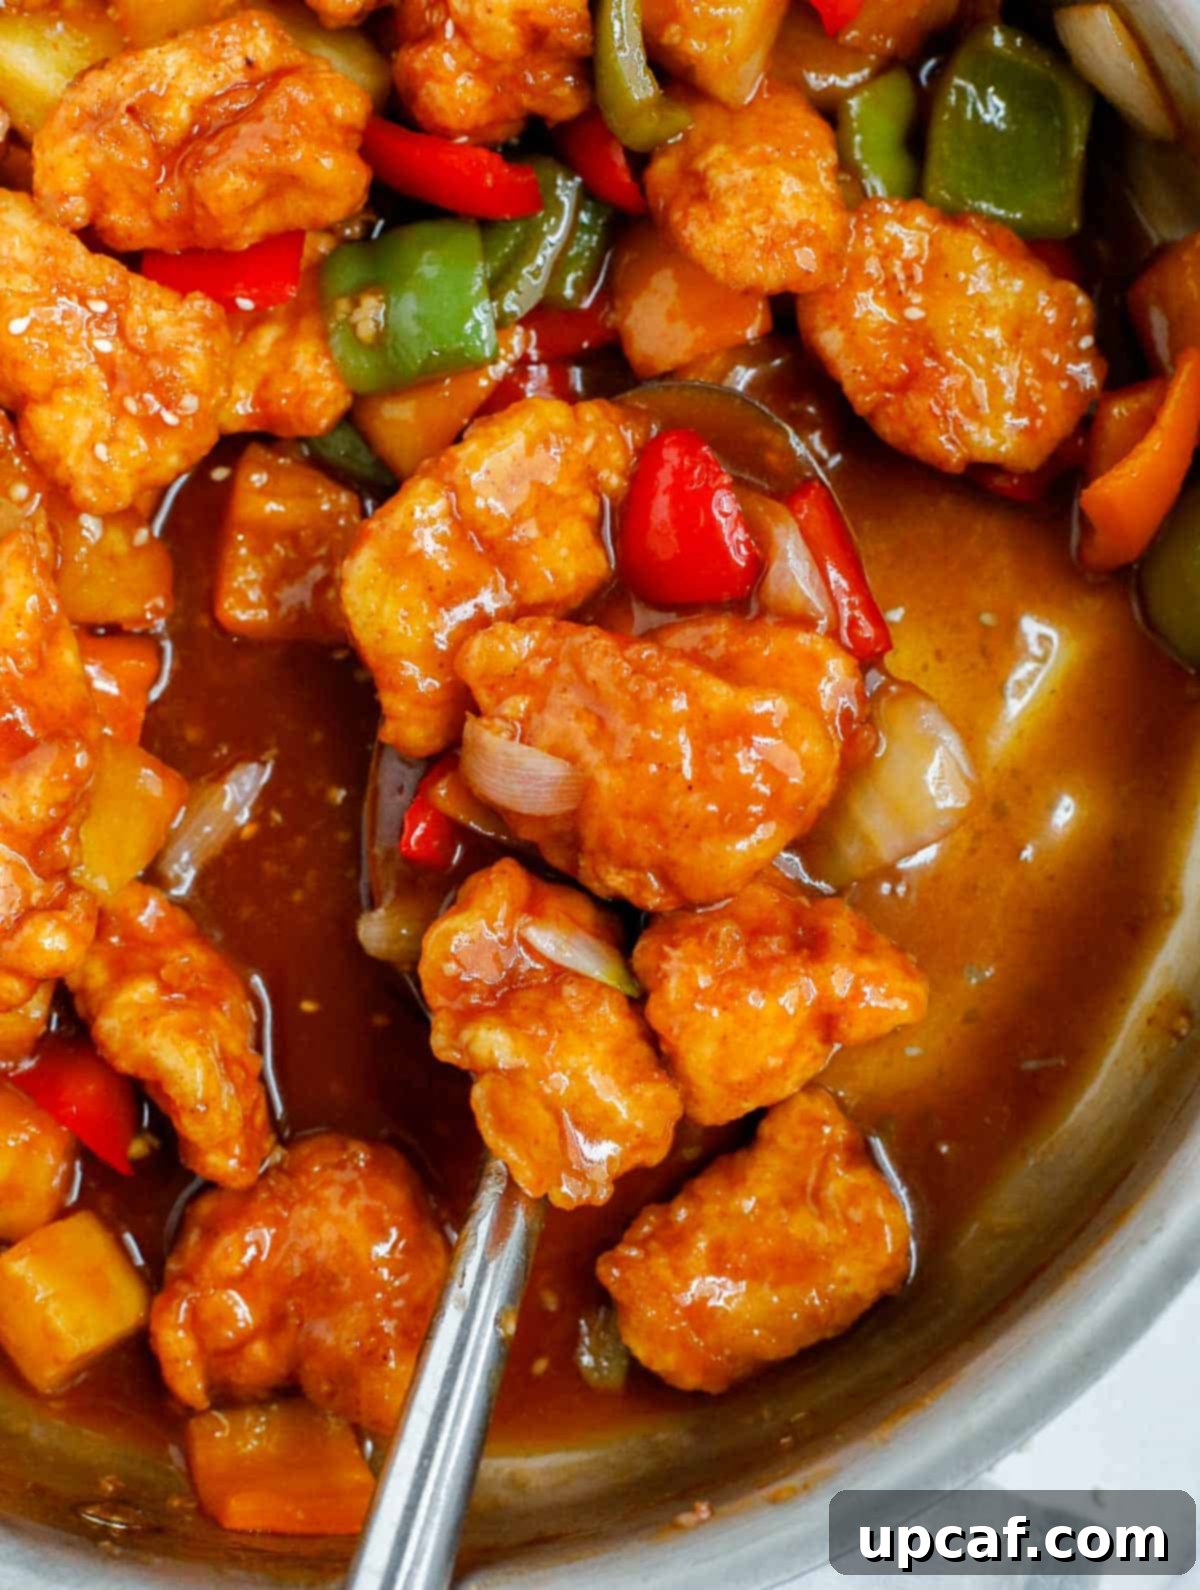
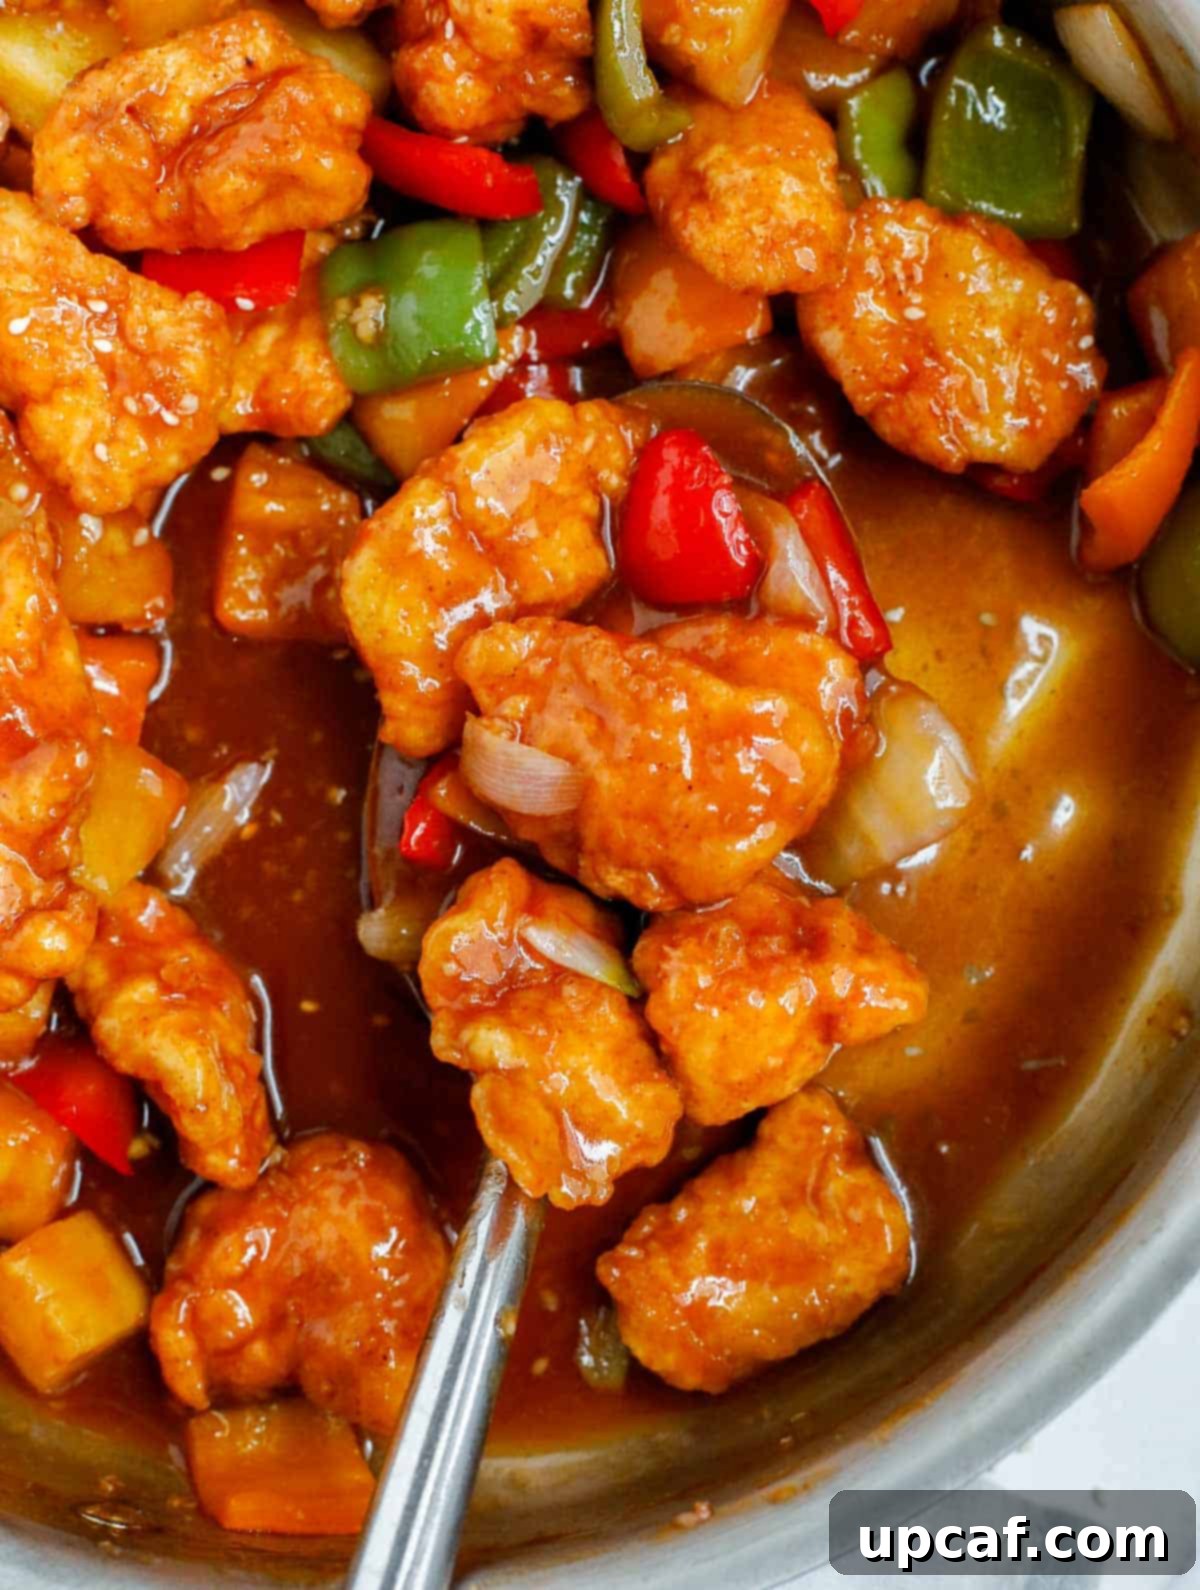
Welcome to the ultimate guide for creating the most delectable Homemade Sweet and Sour Chicken right in your own kitchen! Forget about expensive, greasy takeout and embark on a culinary journey to craft this classic Chinese-American dish with confidence. Our recipe strips away the intimidation, offering a straightforward approach to achieving perfectly crispy chicken, vibrant vegetables, and a truly authentic sweet and sour sauce that will have your taste buds singing. Loaded with colorful bell peppers, sweet pineapple, tender onions, and succulent chicken – crispy on the outside and juicy within – this dish promises to be a new family favorite and a regular on your meal rotation.
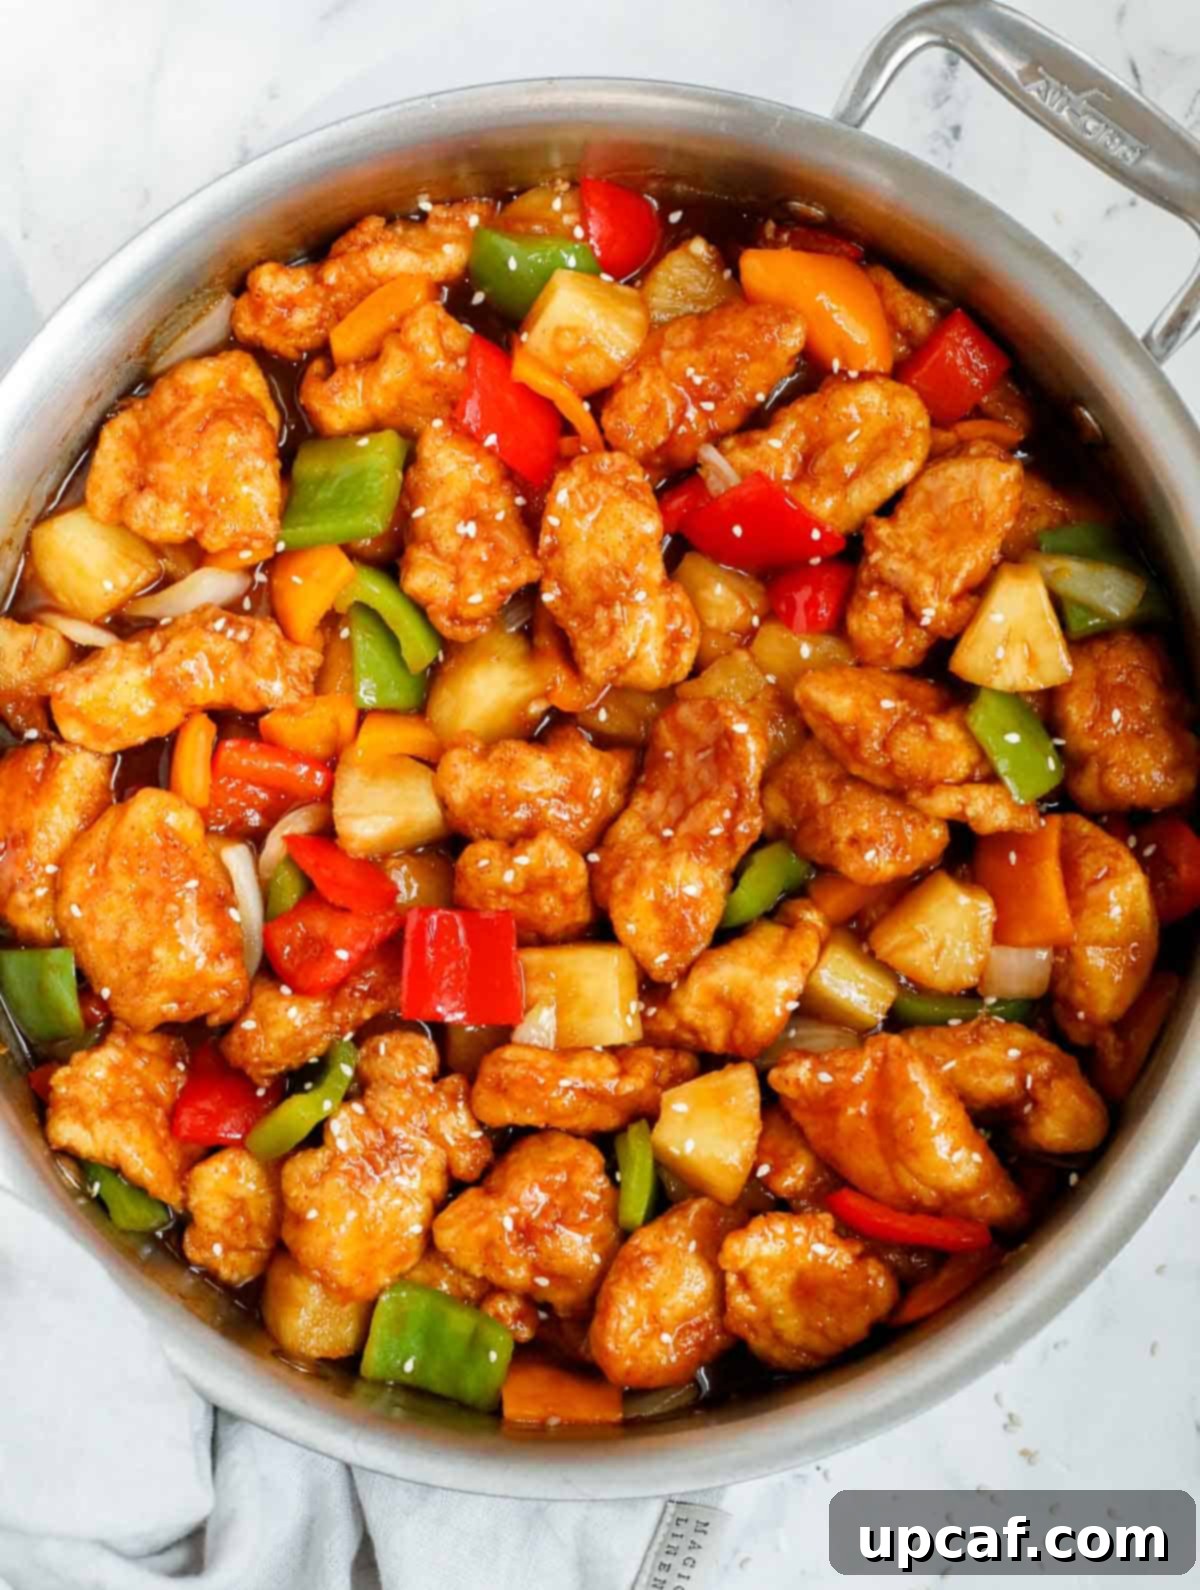
The secret to an exceptional sweet and sour chicken lies in its texture: a delightful contrast between the crunchy exterior of the chicken and its tender, flavorful interior. When paired with our perfectly balanced sauce and the satisfying bite of fresh vegetables, this homemade rendition easily surpasses any restaurant-style dish. This recipe is not only incredibly easy to follow but also empowers you to control the quality of ingredients, making it a healthier and more satisfying choice. Prepare to impress your family and friends with a dish that’s both comforting and exciting.
If you’re a connoisseur of crispy chicken, you’ll also adore these other recipes: Baked Crispy Chicken Tenders, Korean Crispy Fried Chicken, and Crispy Chicken Bites.
Why You’ll Love This Homemade Sweet and Sour Chicken Recipe
There are countless reasons why this sweet and sour chicken recipe is poised to become a staple in your culinary repertoire. Beyond its mouthwatering flavor, it offers practical advantages that elevate it above typical takeout options.
- Authentic Flavor, Healthier Twist: Our easy sweet and sour sauce masterfully replicates the beloved taste of your favorite restaurant dish, but without the artificial red food dye often found in commercial versions. You get all the authentic sweet, tangy, and savory notes using wholesome ingredients.
- Surprisingly Simple to Make: Don’t let the detailed ingredient list daunt you! This recipe is designed for home cooks of all skill levels. Each step is straightforward, and the dish comes together more quickly than you might anticipate, proving that gourmet Chinese cuisine is well within your reach.
- Budget-Friendly & Highly Customizable: Cooking sweet and sour chicken at home is significantly more economical than ordering takeout. Furthermore, it offers incredible flexibility. You can easily swap vegetables based on what’s in season, what you have on hand, or simply what your family prefers, minimizing waste and maximizing flavor.
- Control Over Ingredients: Making your own means you control the amount of sugar, salt, and oil, allowing you to tailor the dish to your dietary needs and preferences without sacrificing taste.
- A Fun Family Activity: Involving family members in the preparation can turn mealtime into a delightful bonding experience. From chopping veggies to coating chicken, there’s a task for everyone.
A Brief History of Sweet and Sour Chicken
Sweet and sour chicken is a cornerstone of Chinese-American cuisine, a dish that beautifully encapsulates the fusion of culinary traditions. Its roots can be traced back to Cantonese cuisine, particularly in the dish “gulaorou” (古老肉), which translates to “ancient sweet and sour pork.” This dish traditionally featured pork, not chicken, and was created to appeal to Western palates, often employing a sauce that balanced vinegar for sourness and sugar for sweetness. As Chinese immigrants settled in America, they adapted their traditional recipes using readily available ingredients and techniques, leading to the rise of what we now recognize as sweet and sour chicken. The use of fried, breaded meat with vibrant bell peppers and pineapple became iconic, symbolizing the adaptability and innovation of Chinese chefs in the diaspora. Today, it remains one of the most popular items on Chinese restaurant menus worldwide, celebrated for its irresistible combination of flavors and textures.
Key Components of the Perfect Sweet and Sour Chicken
Achieving sweet and sour chicken perfection involves mastering three core elements:
The Crispy Chicken
The star of the show, perfectly fried chicken pieces, forms the foundation of this dish. We aim for a golden-brown, crackling crust that locks in moisture, ensuring every bite is tender and juicy. The secret lies in a meticulous breading process and proper frying technique, preventing the chicken from becoming soggy when coated in the sauce. Using tenderloins or breast meat cut into uniform cubes guarantees even cooking and a delightful texture throughout.
The Vibrant Vegetables
Beyond adding appealing color, the vegetables contribute essential freshness and crunch. Bell peppers (red, orange, green) offer a spectrum of sweetness and a pleasant crispness, while onions provide a savory aromatic base. Pineapple chunks are crucial, lending a burst of tropical sweetness and a tangy counterpoint that complements the sauce beautifully. These vegetables are stir-fried just enough to be tender-crisp, preserving their texture and nutrients.
The Irresistible Sweet and Sour Sauce
This iconic sauce is the heart and soul of the dish. It’s a delicate balance of sweet, tangy, and savory notes, with a velvety consistency that clings to every piece of chicken and vegetable. Our homemade version uses common pantry staples to create a rich, flavorful sauce that’s free from artificial colors, ensuring a natural and delectable taste that outshines commercial alternatives.
Essential Sweet and Sour Chicken Ingredients
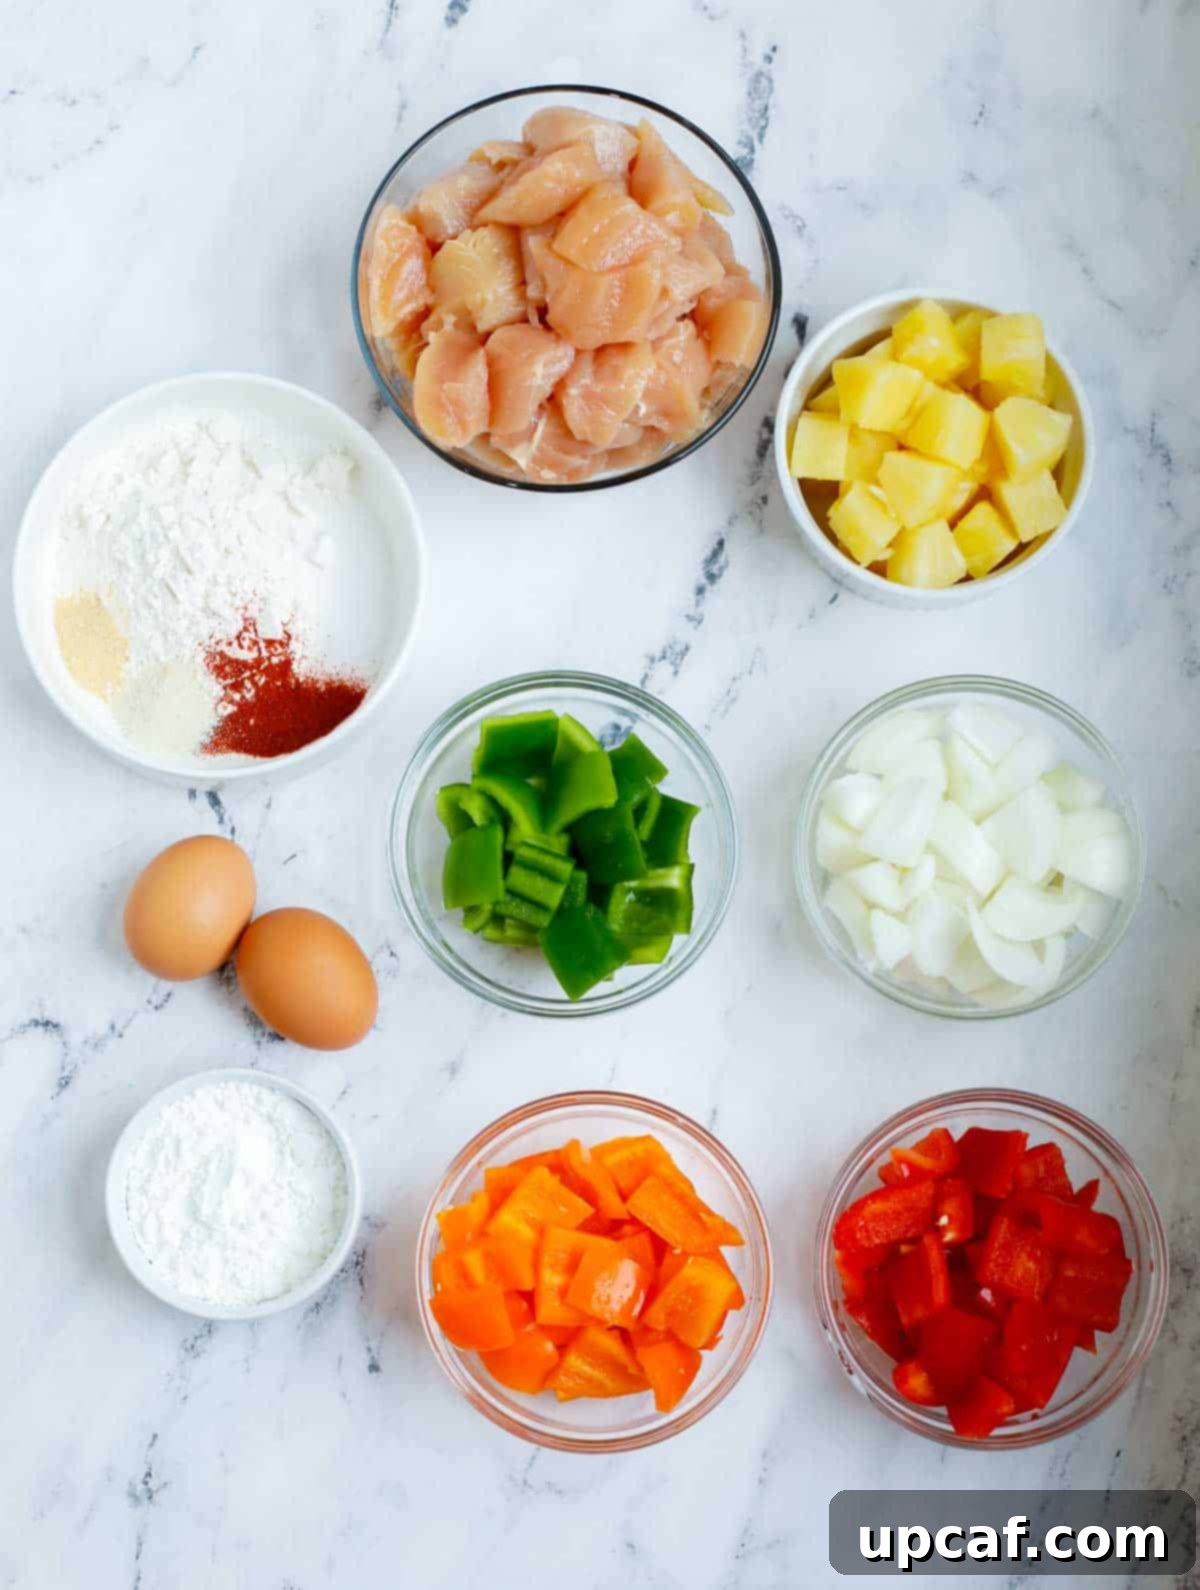
Gathering the right ingredients is the first step to culinary success. Here’s a detailed look at what you’ll need for this savory dish, along with helpful notes and substitution ideas:
- Chicken: Use 2 lbs of chicken tenderloin or boneless, skinless chicken breast, cut into uniform 1-inch cubes. Chicken thighs are also an excellent alternative for a juicier, more flavorful result.
- Corn Starch (for chicken): Approximately ⅓ cup. This is crucial for creating that signature crispy coating on the chicken. It helps absorb moisture and forms a light, delicate crust.
- Eggs: 2 whole eggs, beaten at room temperature. The egg wash acts as a binder, helping the flour coating adhere to the chicken pieces.
- Bell Pepper: A combination of 1 large red, 1 large orange, and 1 large green bell pepper, cubed. These add vibrant color, natural sweetness, and a satisfying crunch. Feel free to adjust the quantities or colors based on preference.
- Pineapple: 1 cup of canned pineapple chunks. Be sure to reserve ¼ cup of the juice from the can for the sauce, as it adds a fantastic tropical tang and sweetness. While fresh pineapple can be used, canned is often preferred for its consistent sweetness and convenience.
- Onion: 1 medium sweet onion, cut into chunks. It provides a foundational aromatic flavor that softens and sweetens when stir-fried.
- Olive Oil (light tasting): 2 tablespoons. Used for stir-frying the vegetables. A light-tasting oil ensures the natural flavors of the vegetables shine through. Any neutral oil like canola or vegetable oil works well.
- Neutral Oil (for deep frying): Enough to fill your deep pan or fryer to the appropriate depth for frying the chicken. Vegetable, canola, or peanut oil are good choices due to their high smoke points.
- Sesame Seeds: For garnishing. A sprinkle of toasted sesame seeds adds a lovely nutty flavor and an elegant finish.
For the Chicken Flour Coating:
This seasoned flour mixture is key to the chicken’s crispy exterior.
- All-purpose flour: ½ cup. You can substitute a gluten-free all-purpose flour blend if you prefer a gluten-free option.
- Onion powder: 1 teaspoon. Adds a subtle savory depth to the coating.
- Garlic powder: 1 teaspoon. Essential for a well-rounded savory flavor.
- Paprika: 1 teaspoon. Contributes a mild, sweet pepper flavor and a beautiful golden hue to the fried chicken.
- Salt: ½ teaspoon. Enhances all the other flavors in the coating.
Crafting the Perfect Homemade Sweet and Sour Sauce
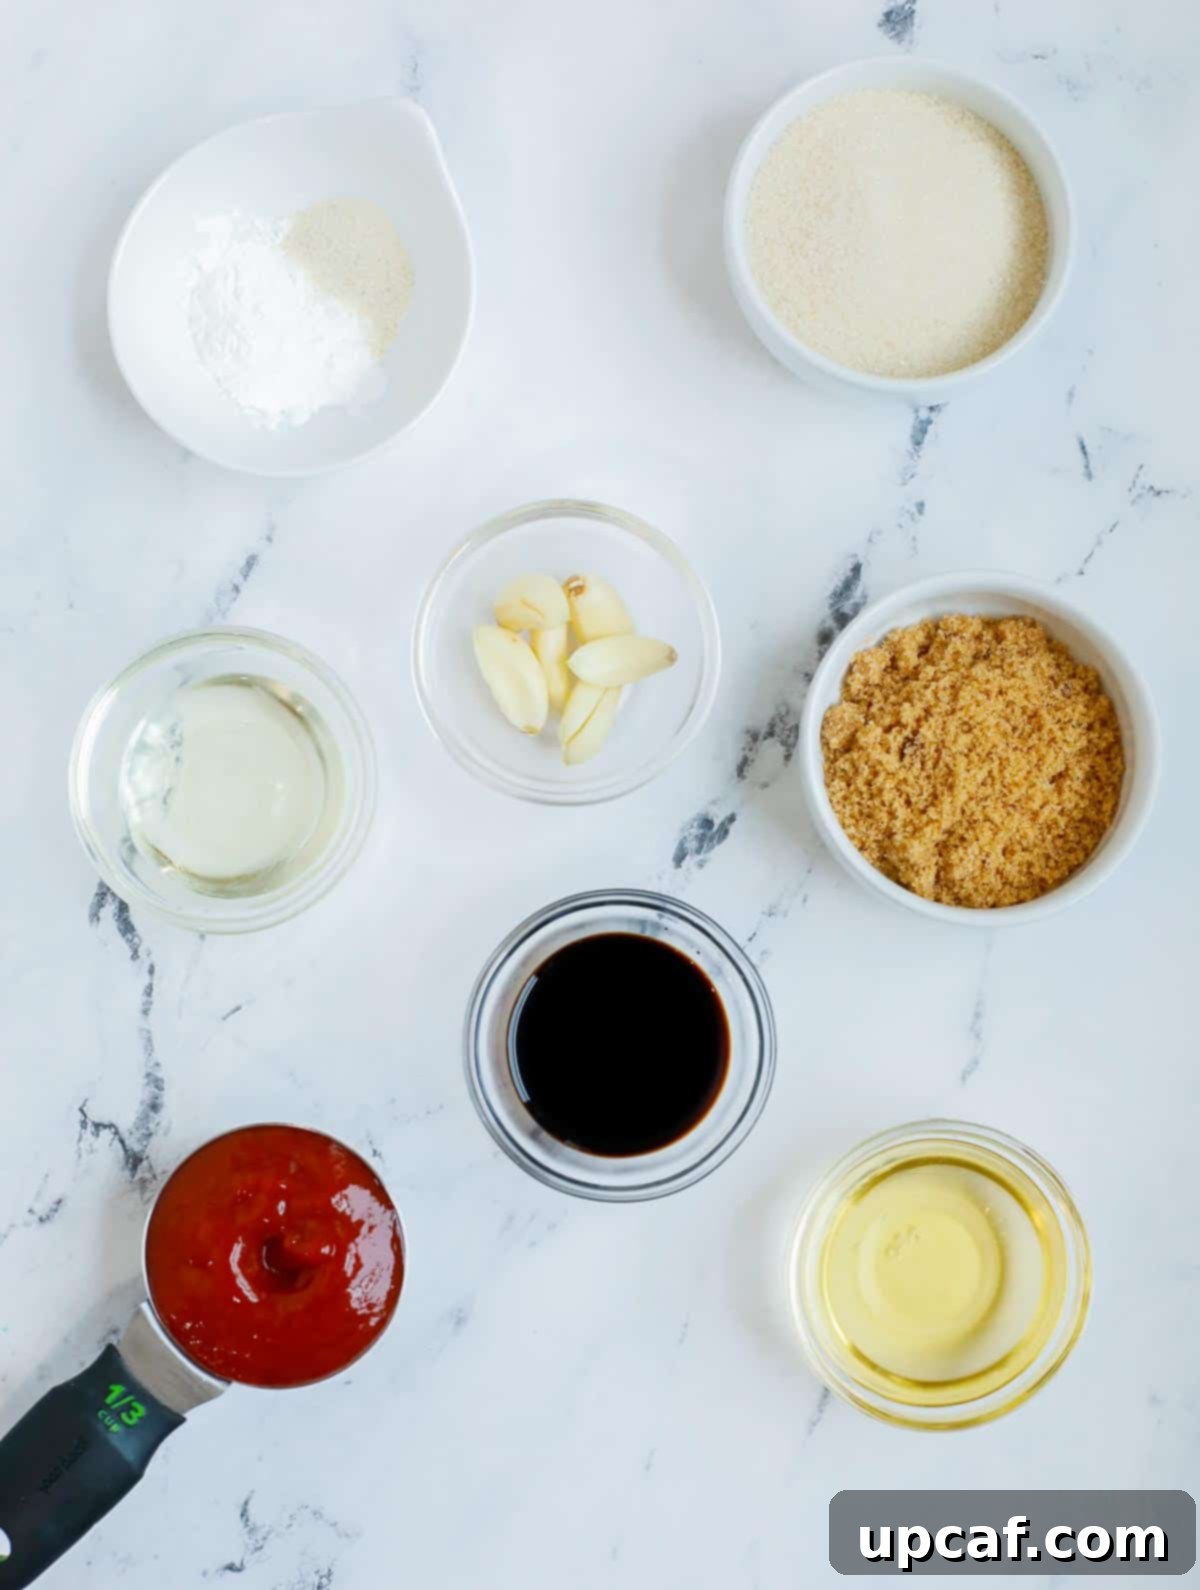
The sauce is where the magic truly happens, bringing together all the elements into a harmonious, irresistible dish. Our homemade version is vibrant, balanced, and free from artificial additives.
- Ketchup: ⅓ cup. Forms the sweet and savory base of the sauce, providing a rich tomato flavor. Use a low-sugar ketchup if you prefer to reduce added sugars.
- Seasonings: 1 teaspoon onion powder and 3 large cloves of fresh garlic, minced. These add essential aromatic depth and a rich, earthy flavor to the sauce that truly distinguishes it.
- Lite Soy Sauce: 2 tablespoons. Provides a savory, umami foundation. Using lite or low sodium soy sauce allows for better control over the overall saltiness. For gluten-free alternatives, tamari or coconut aminos are excellent substitutes.
- Rice Vinegar: 3 tablespoons. Delivers the signature tangy “sour” component of the sauce. Rice vinegar has a mild, slightly sweet profile. If unavailable, white wine vinegar or apple cider vinegar can be used, though they may impart a slightly different flavor.
- Corn Starch (for sauce): 1½ tablespoons. This is the thickening agent that gives the sauce its glossy, clingy texture. It helps achieve that perfect restaurant-style consistency.
- Sugar: A combination of 2 tablespoons light brown sugar and ¼ cup granulated sugar. This blend provides a complex sweetness, with brown sugar adding a hint of molasses depth. Adjust to your sweetness preference.
- Pineapple Juice: ¼ cup, reserved from the canned pineapple chunks. It naturally sweetens the sauce and enhances the fruitiness, creating a cohesive flavor profile.
- Neutral Oil: 1 tablespoon. Used to briefly sauté the aromatics before mixing the sauce ingredients.
How To Make Homemade Sweet and Sour Chicken: A Step-by-Step Guide
Follow these detailed instructions to create a restaurant-quality sweet and sour chicken dish from scratch.
- Prepare the Equipment and Oil: In a large, deep pan or a dedicated deep fryer, add enough neutral oil for deep frying. Preheat the oil to medium heat (around 350-375°F or 175-190°C). Using a thermometer is highly recommended for best results.
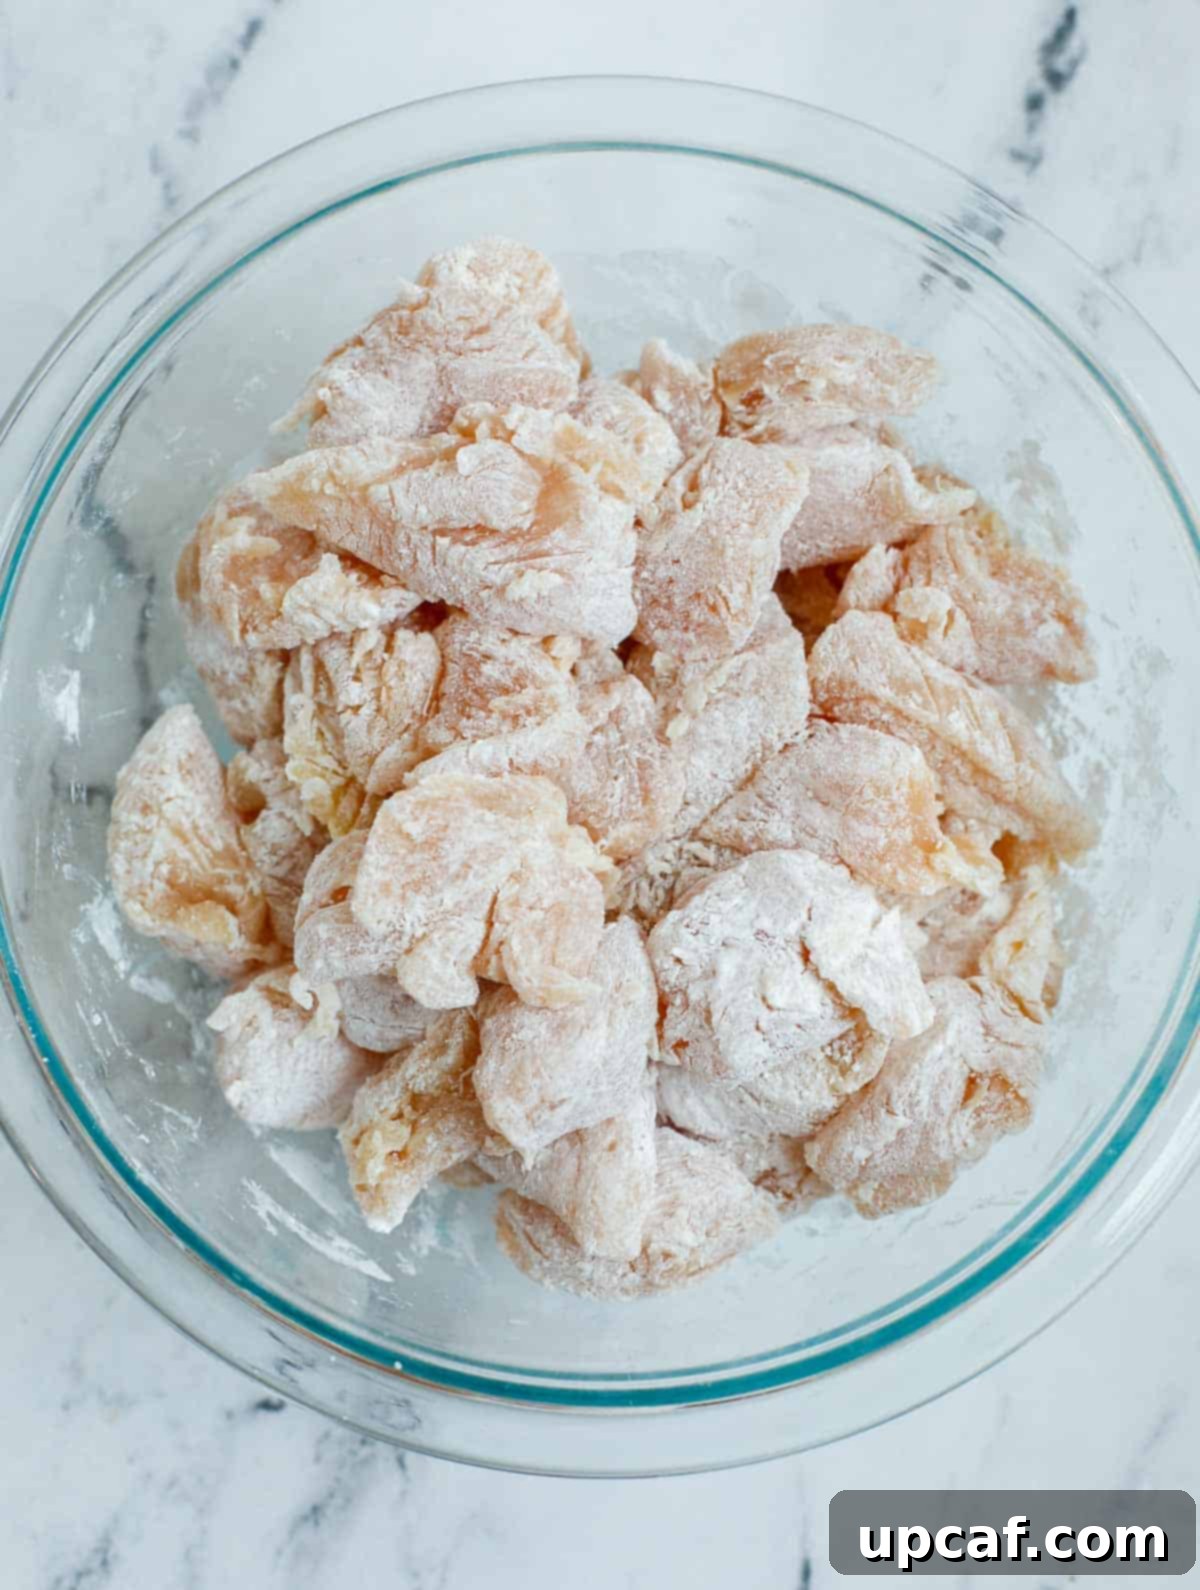
- Prepare the Chicken: Thoroughly pat dry the chicken tenderloins or breast cubes using paper towels. This step is crucial for achieving a crispy coating. Transfer the dried chicken pieces to a bowl. Add the ⅓ cup of cornstarch and toss thoroughly until each piece is evenly coated. Set aside while you prepare the dredging station.
- Set Up Dredging Stations: Prepare two separate small bowls. In the first bowl, beat the 2 room temperature eggs until well combined. In the second bowl, whisk together all the ingredients for the flour coating mix (½ cup all-purpose flour, 1 tsp onion powder, 1 tsp garlic powder, 1 tsp paprika, ½ tsp salt) until thoroughly blended.
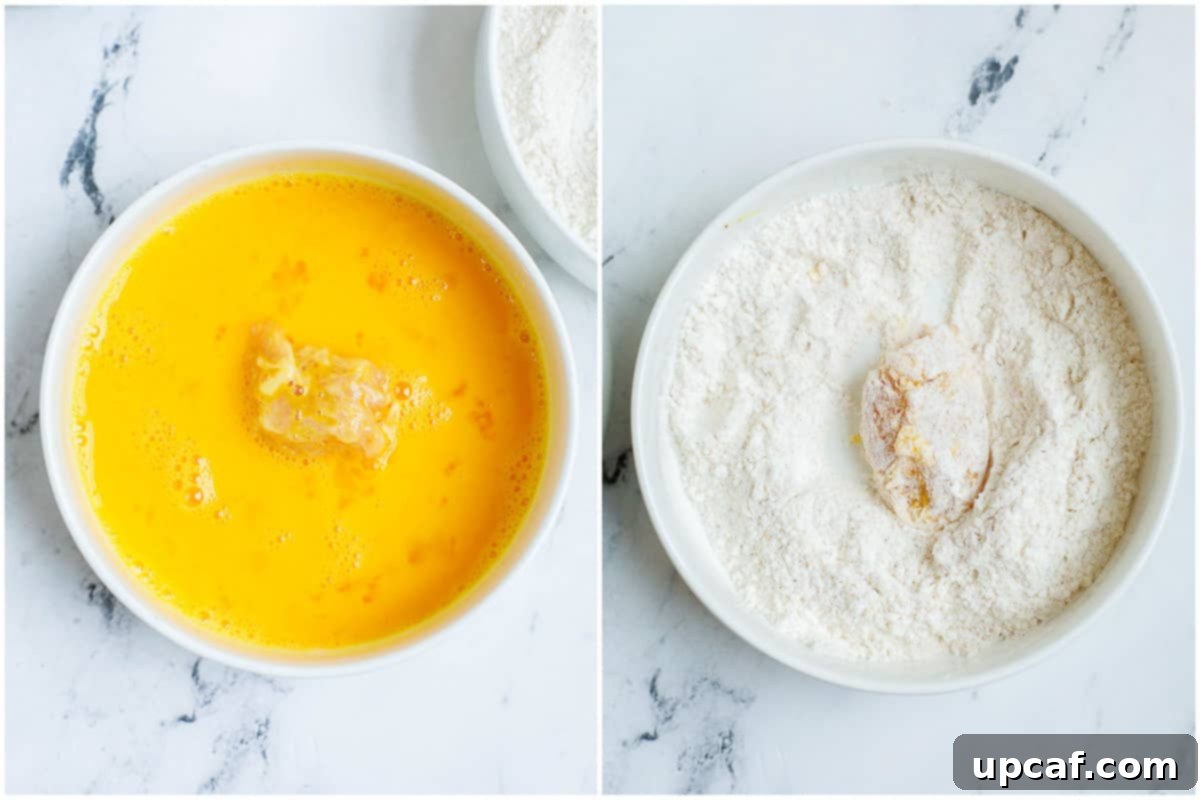
- Coat the Chicken: Take one piece of the cornstarch-coated chicken, dip it completely into the beaten egg bath, ensuring it’s fully covered. Then, transfer it to the bowl with the dry flour coating mix, pressing gently to ensure the flour adheres well to all sides. Place the coated chicken piece onto a clean cookie rack or plate. Repeat this process for all remaining chicken pieces, allowing excess coating to gently fall off.
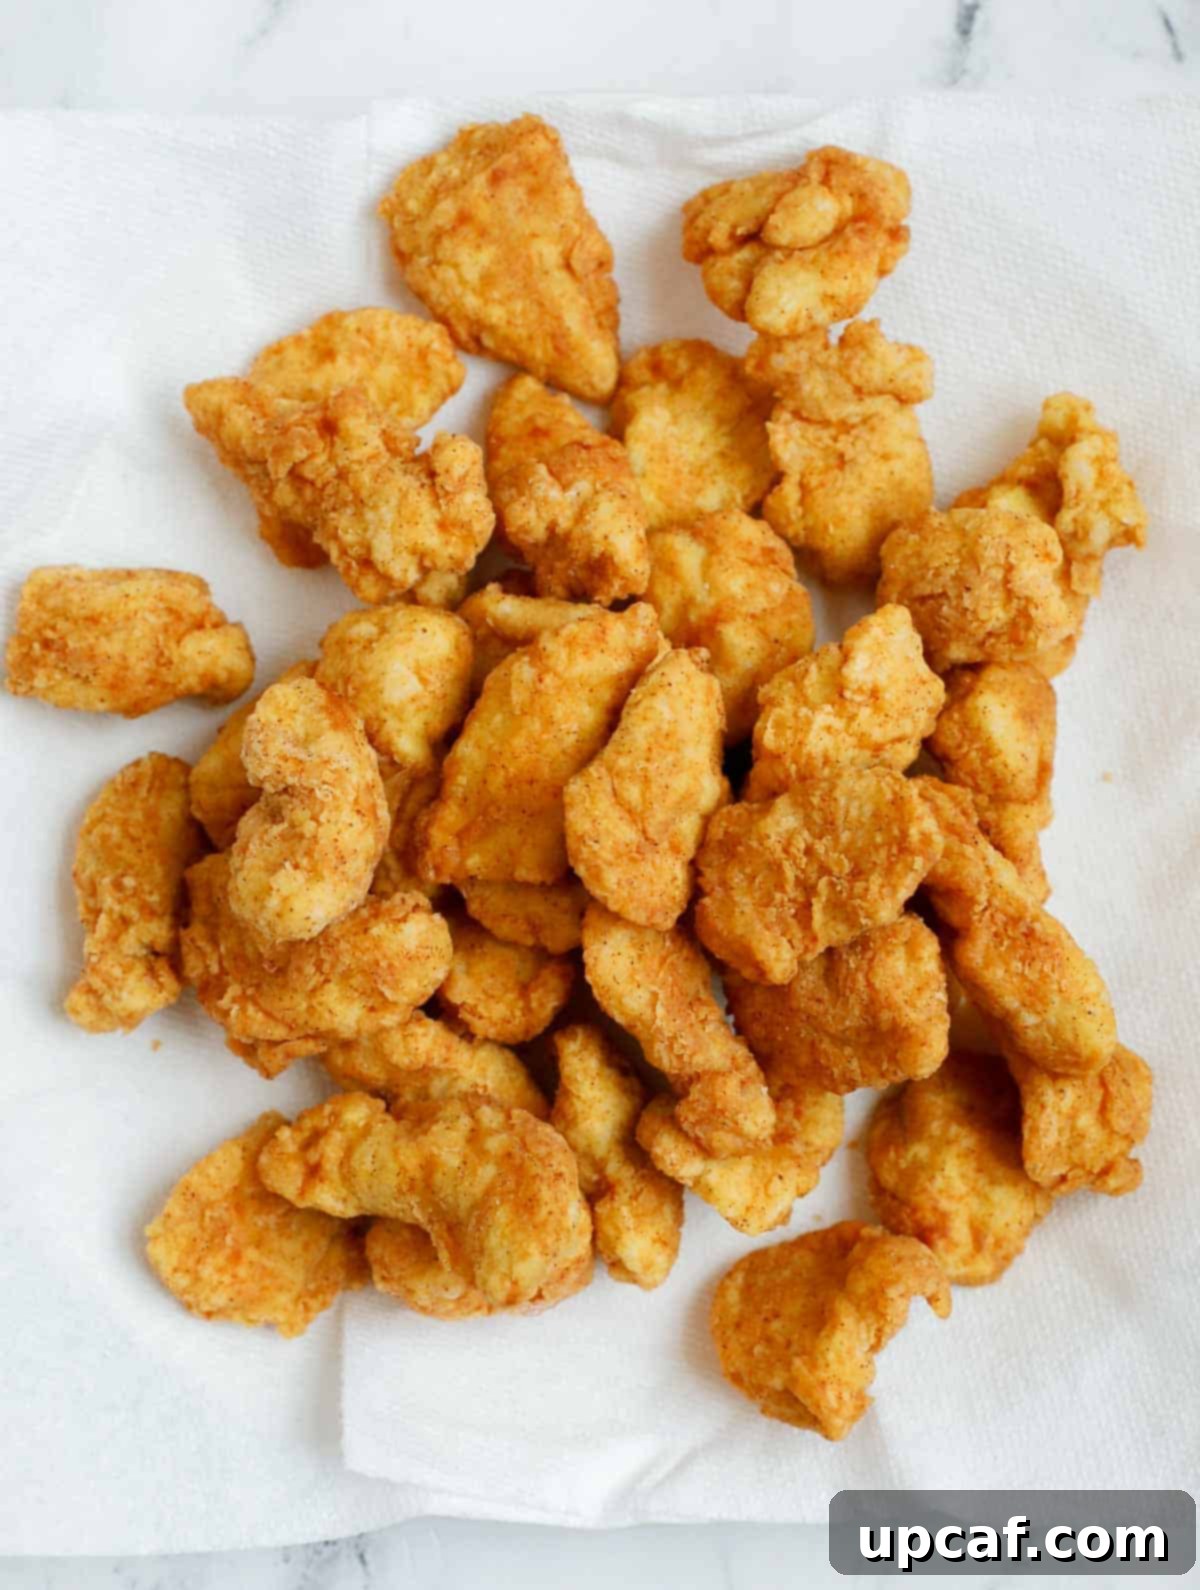
- Fry the Chicken: Carefully place the coated chicken pieces into the preheated oil. Do not overcrowd the pan, as this will lower the oil temperature and result in soggy chicken. Fry the chicken in batches for approximately 5-7 minutes per batch, or until they turn a beautiful golden brown and are exceptionally crispy. Once cooked, remove the chicken using a slotted spoon or spider and transfer them to a plate lined with paper towels to drain excess oil. Set aside.
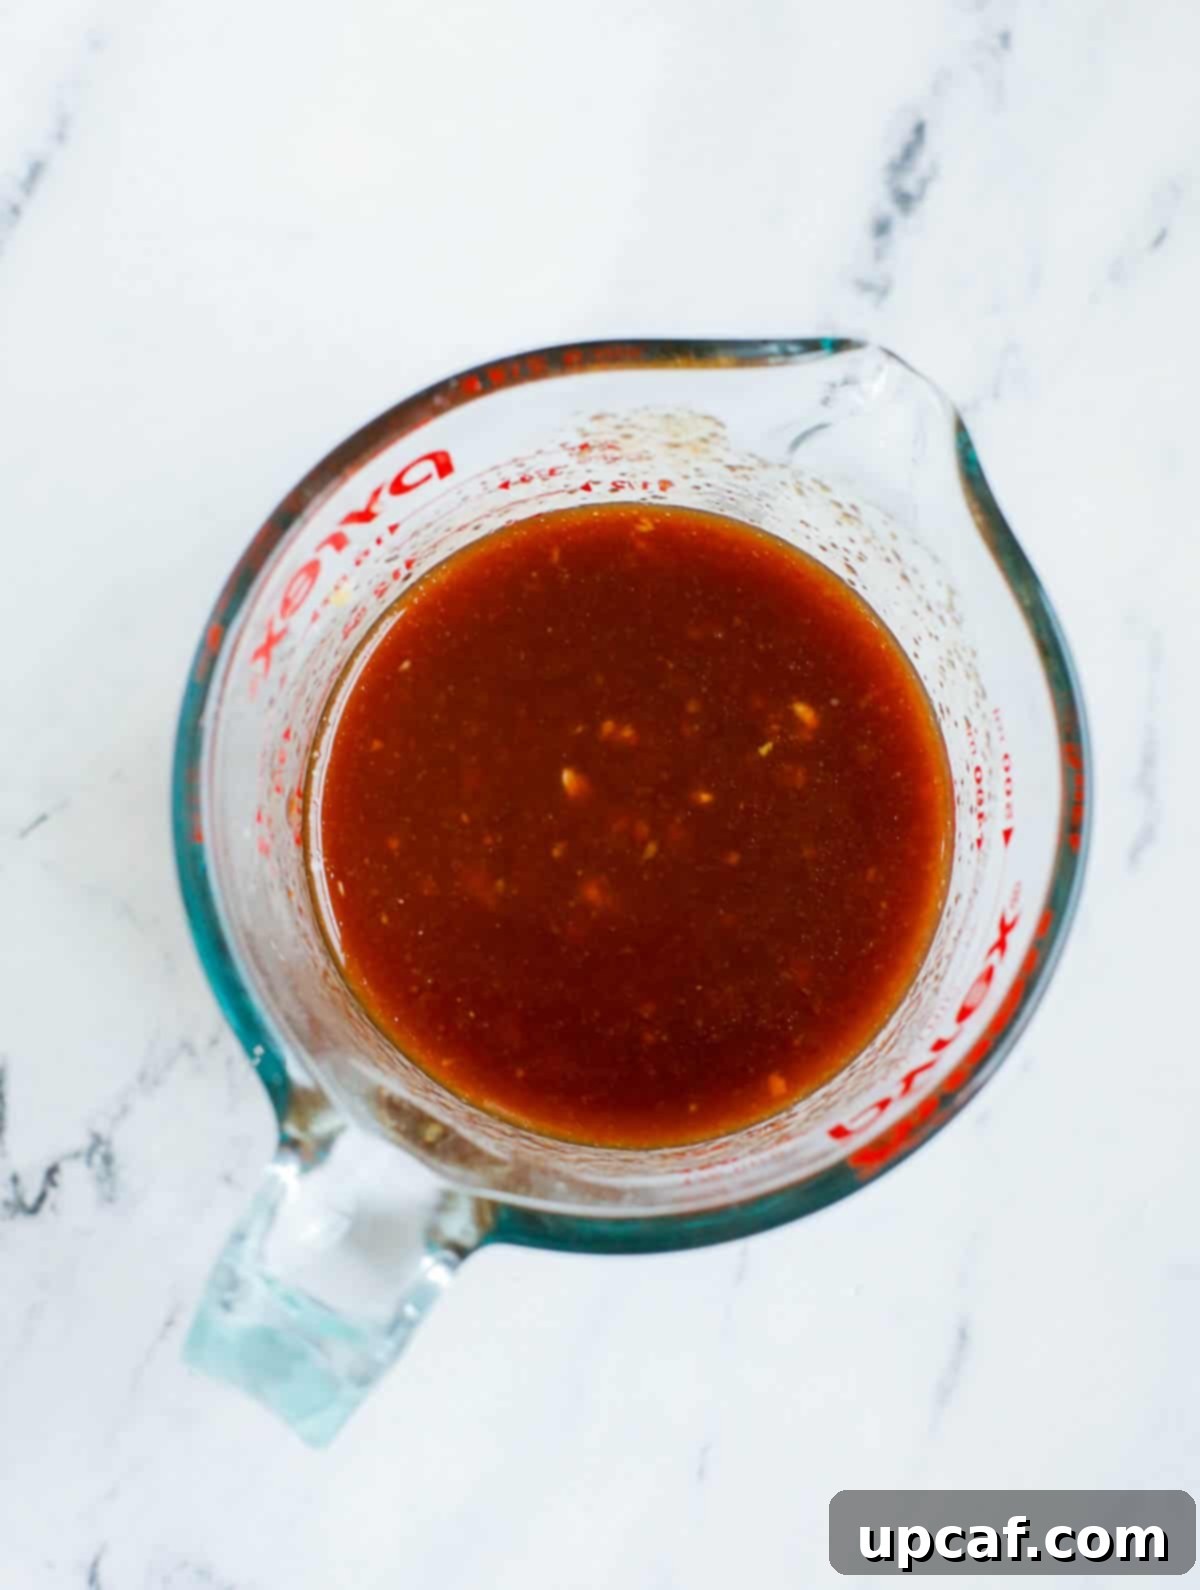
- Prepare the Sweet and Sour Sauce: In a medium bowl or large measuring cup, combine all the sweet and sour sauce ingredients: ⅓ cup ketchup, 1 tsp onion powder, 2 tbsps lite soy sauce, 3 tbsps rice vinegar, 3 minced garlic cloves, 1½ tbsp corn starch, 2 tbsps light brown sugar, ¼ cup granulated sugar, and ¼ cup reserved pineapple juice. Whisk everything together thoroughly until the cornstarch is fully dissolved and the mixture is smooth.
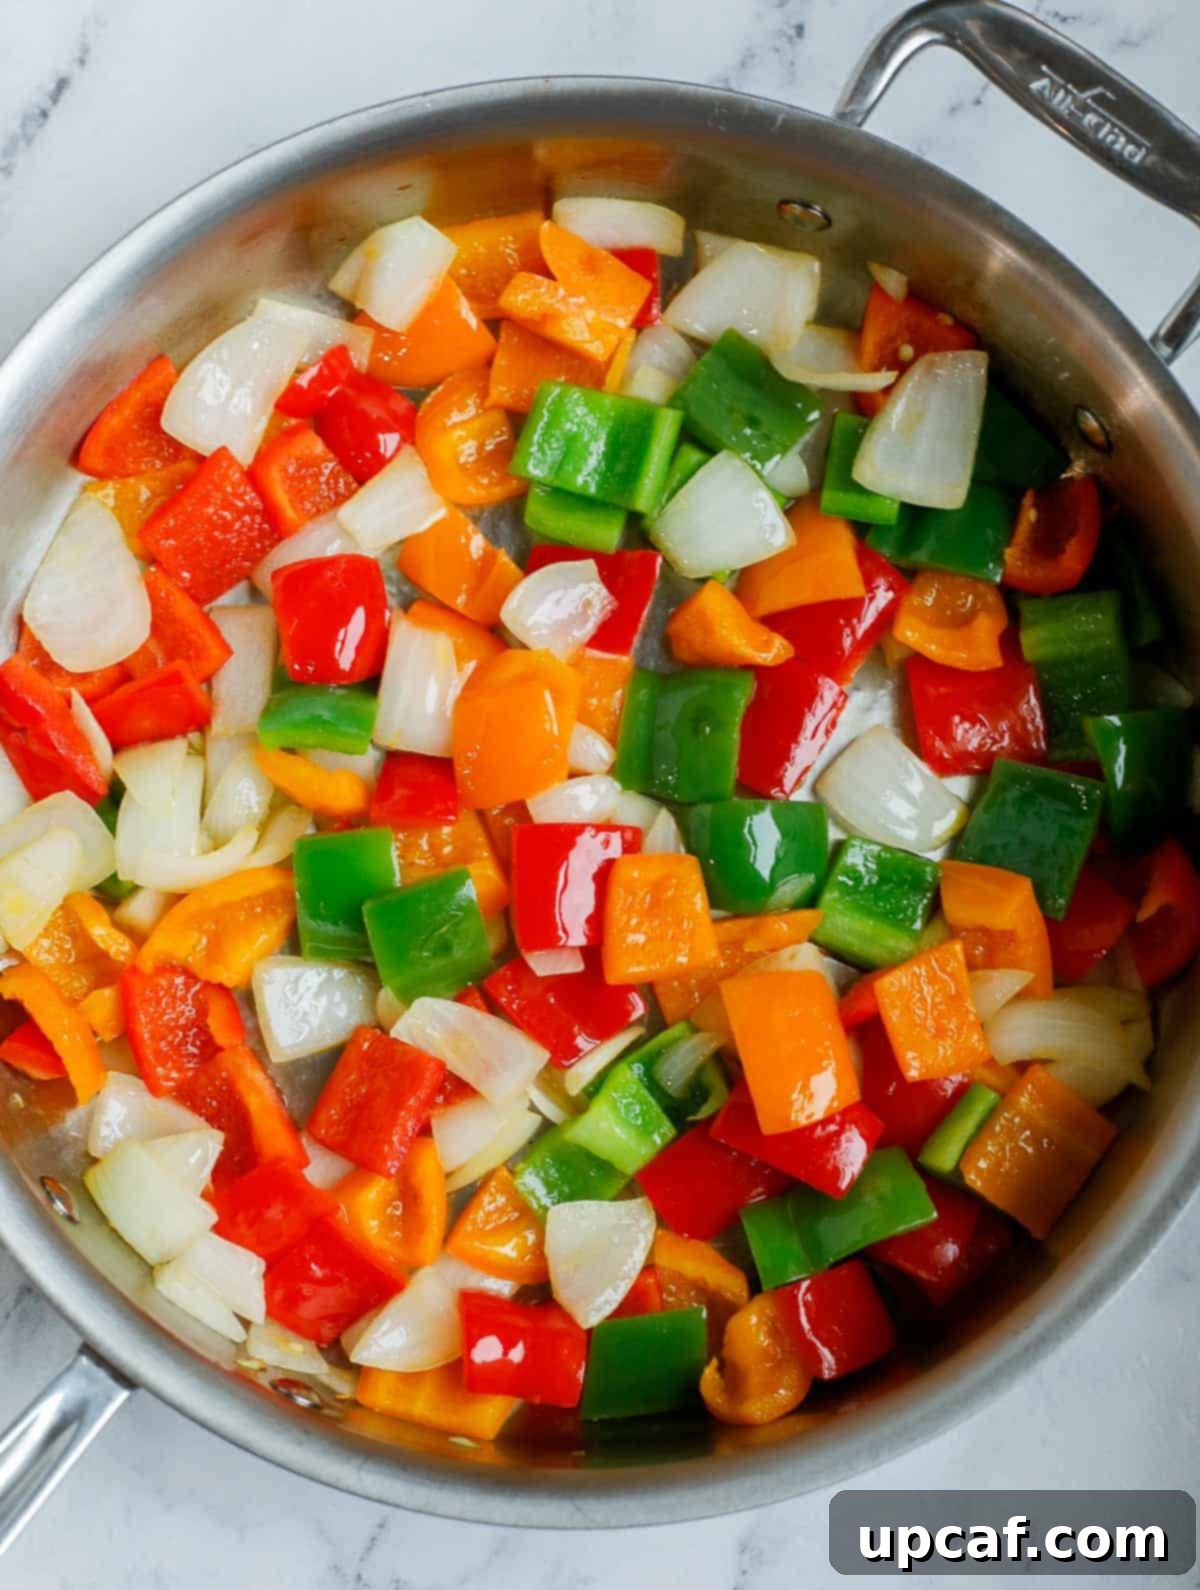
- Stir-Fry the Veggies: In a separate large skillet or wok, heat 2 tablespoons of light-tasting olive oil over medium heat. Add the cubed bell peppers and onion (do not add the pineapple yet). Stir-fry for about 3-4 minutes, or until the vegetables are tender-crisp but still retain a slight bite. Remove the stir-fried vegetables from the pan and set them aside.
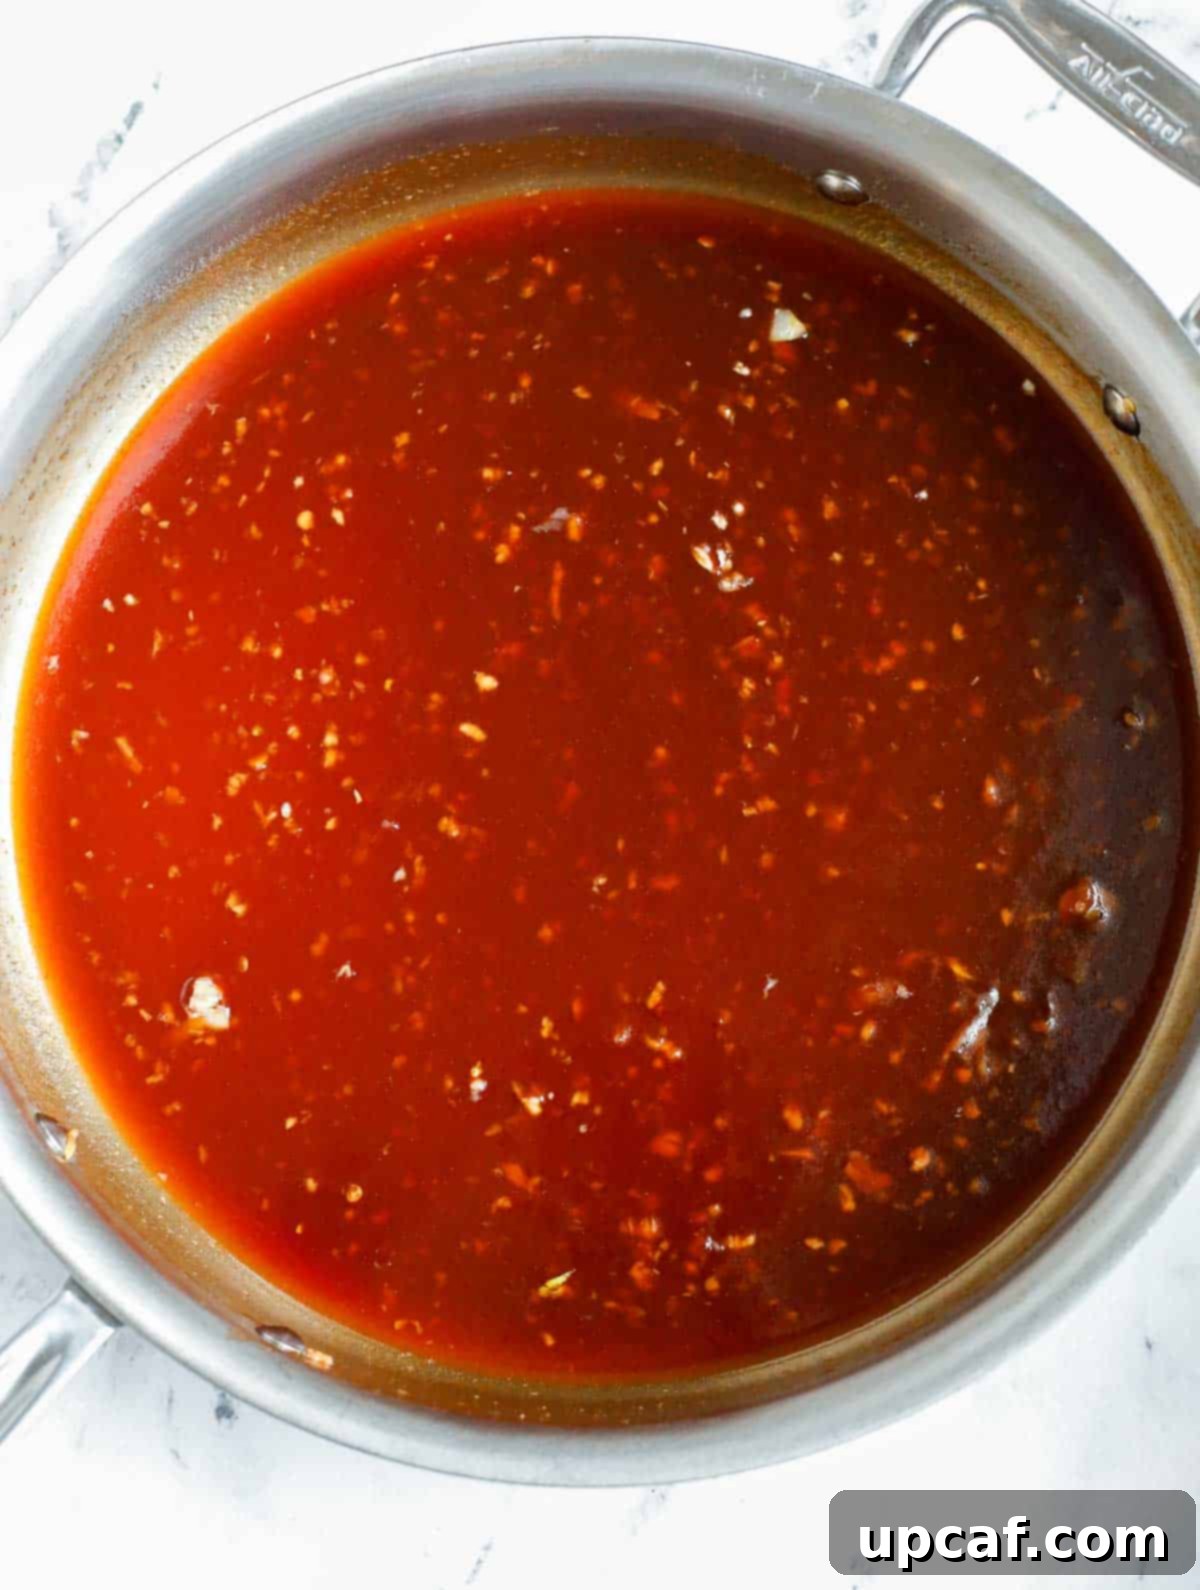
- Thicken the Sauce: Using the same pan where you stir-fried the vegetables (no need to clean it), add the prepared sweet and sour sauce mix. Bring it to a simmer over medium-low heat, stirring constantly with a whisk. The sauce will begin to thicken rapidly as it cooks, typically within 2-3 minutes. Continue stirring until it reaches a desired glossy, slightly thickened consistency.
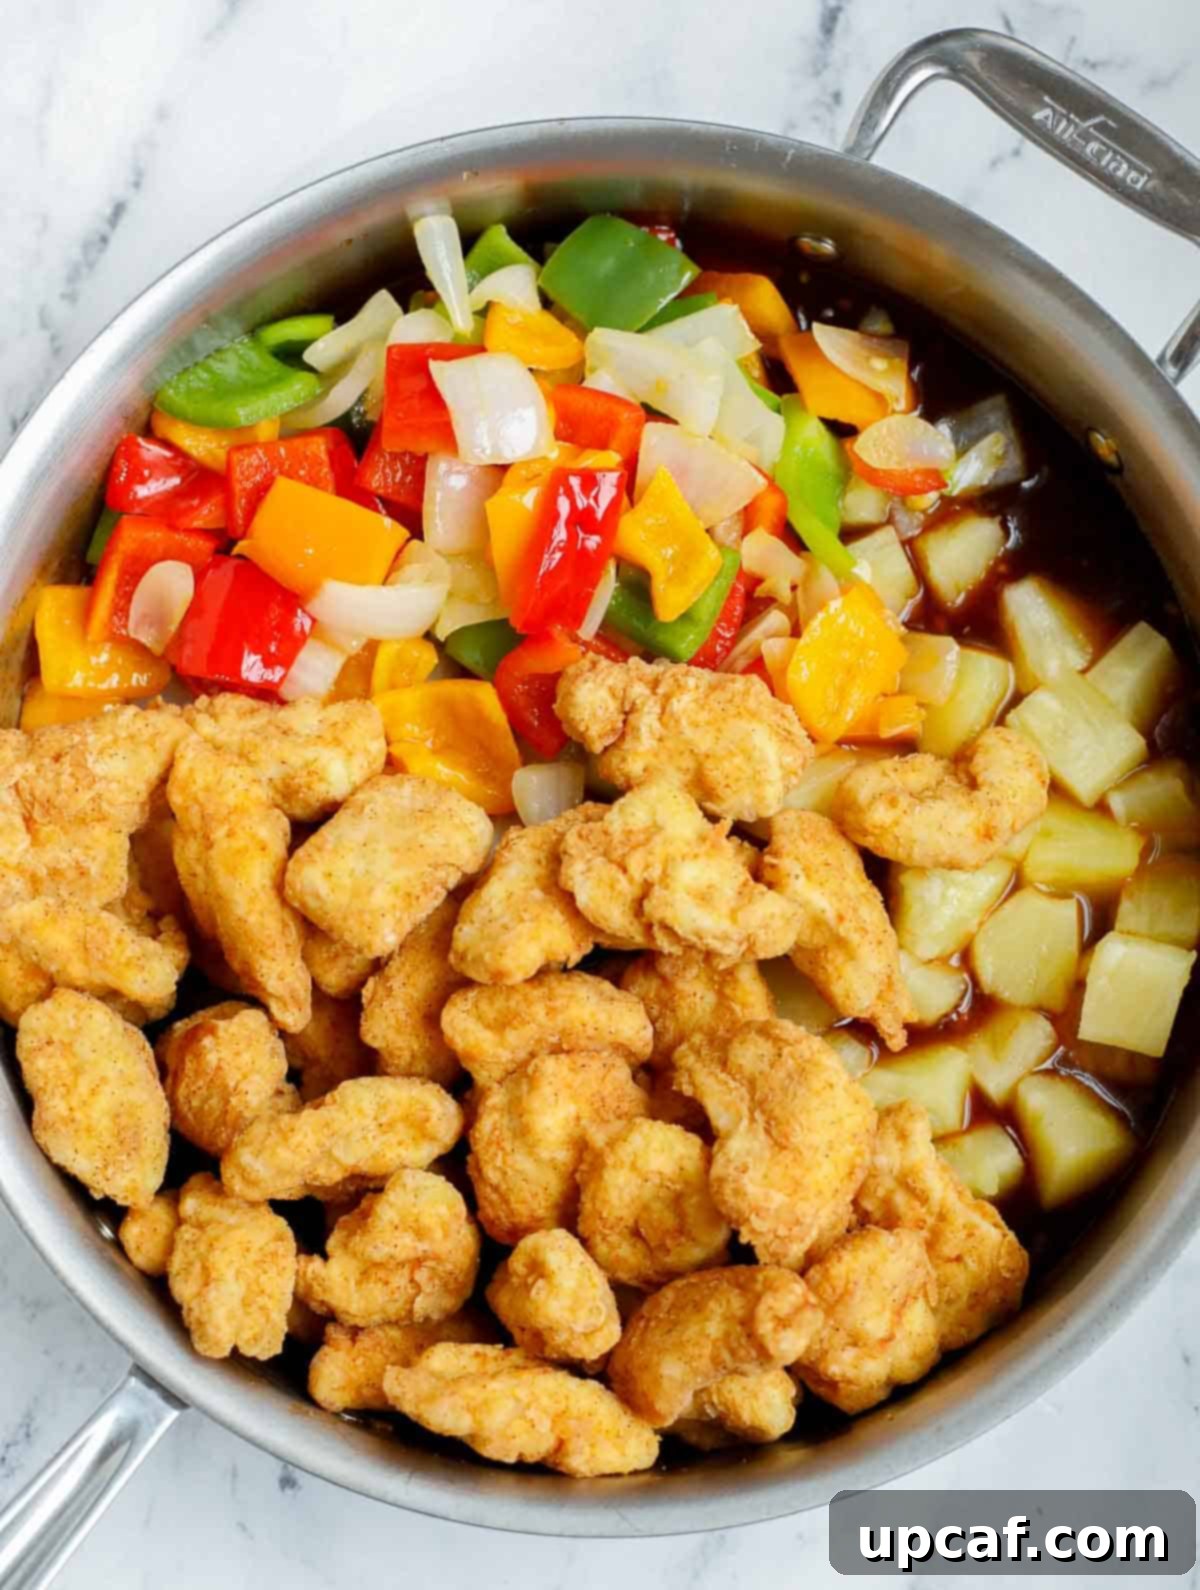
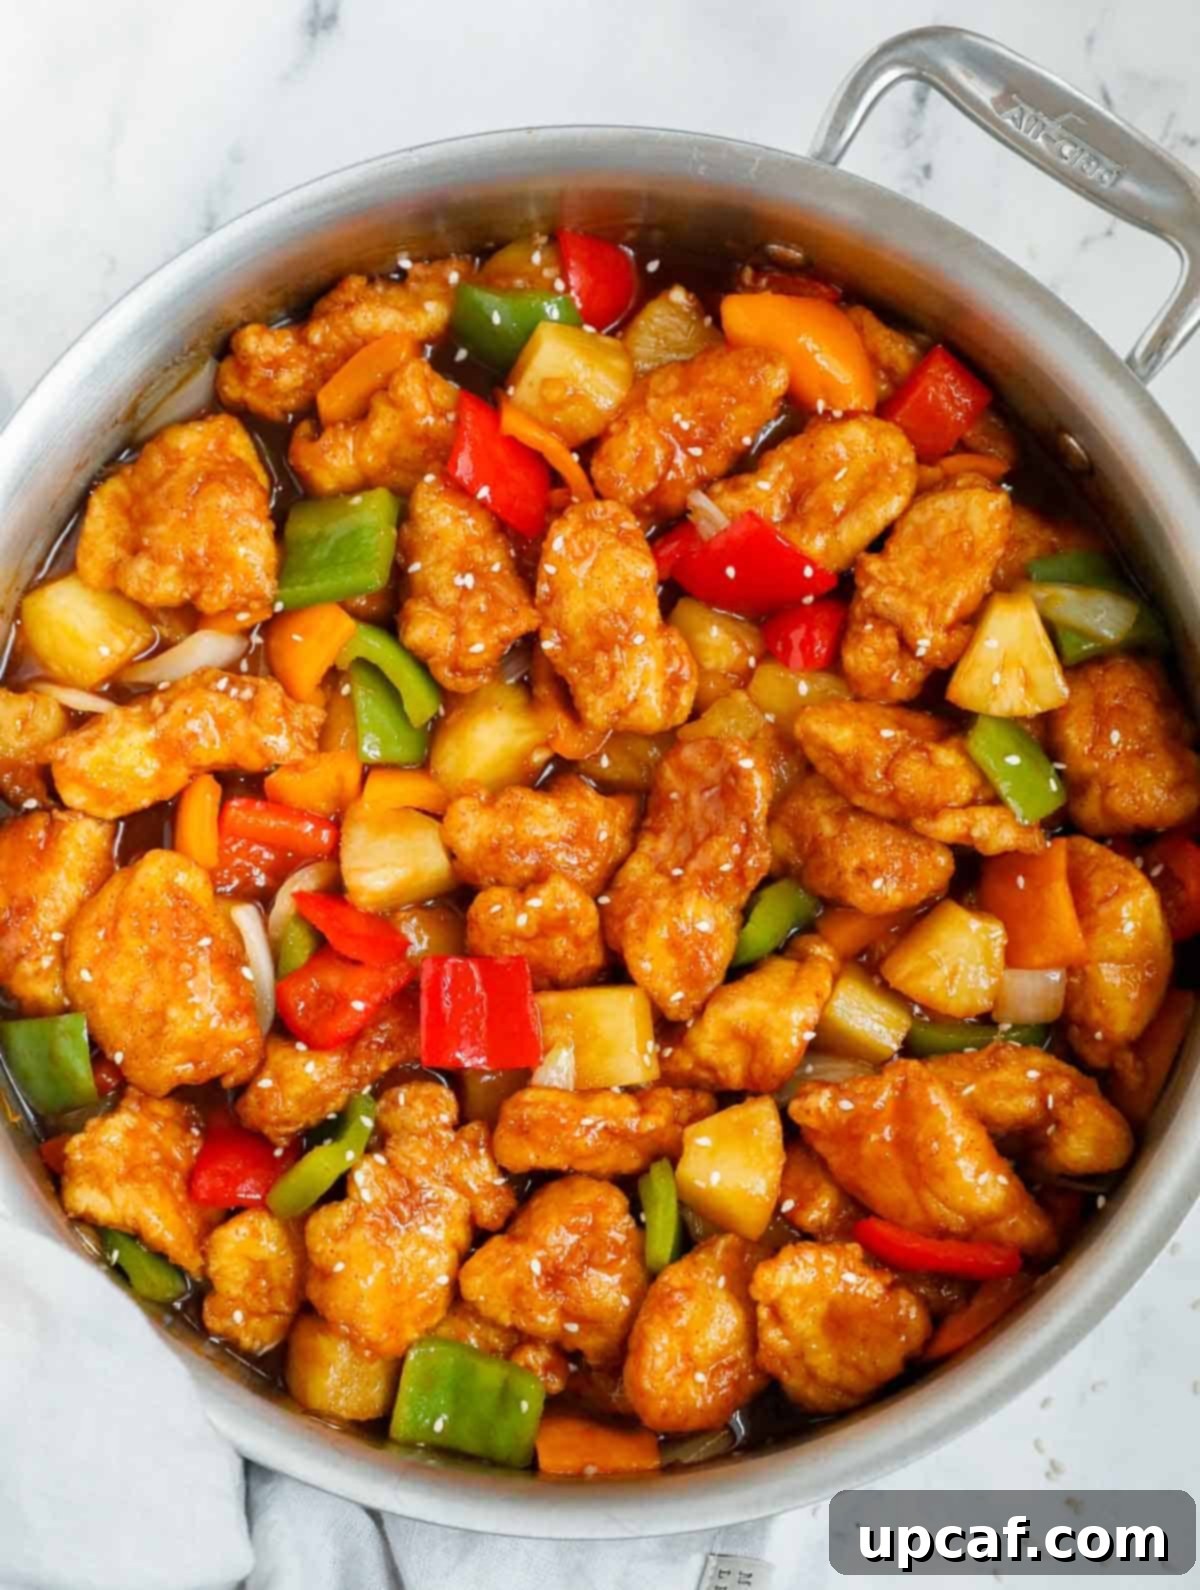
- Combine and Serve: Once the sauce has thickened to your liking, add the fried chicken, stir-fried vegetables, and pineapple chunks back into the pan with the sauce. Toss everything together gently to ensure all components are thoroughly coated in the luscious sauce. Cook for another 2-3 minutes, just long enough to heat everything through and allow the flavors to meld. Remove from heat immediately. Garnish with a sprinkle of sesame seeds if desired, and serve piping hot.
Expert Tips for the Best Homemade Sweet and Sour Chicken
Elevate your homemade sweet and sour chicken from great to extraordinary with these expert tips:
- Choose the Right Chicken: While chicken breast is lean, boneless, skinless chicken thighs can offer a juicier, more forgiving result, especially when fried. Cut your chosen chicken into even 1-inch pieces to ensure uniform cooking.
- Perfect Frying Temperature: Always ensure your oil is heated to the correct temperature (350-375°F / 175-190°C) before frying. Too cool, and the chicken will absorb too much oil and become greasy; too hot, and it will burn before cooking through. A kitchen thermometer is a valuable tool here.
- Don’t Overcrowd the Pan: Fry the chicken in small batches to maintain the oil temperature and prevent the pieces from sticking together. This is crucial for achieving maximum crispiness.
- Crispy Coating Secret: After coating the chicken, let it rest on a wire rack for 5-10 minutes. This allows the coating to adhere better, reducing the chance of it falling off during frying.
- Flavor Boost for Chicken: Before the cornstarch coating, consider lightly seasoning the chicken pieces with a pinch of salt and black pepper for an extra layer of flavor.
- Spice it Up: For those who enjoy a little heat, add a pinch of red pepper flakes to your sweet and sour sauce. It provides a subtle kick without overpowering the classic flavors.
- Vary Your Veggies: Sweet and sour chicken is incredibly versatile. Feel free to incorporate other vegetables like sliced carrots, broccoli florets, snap peas, mushrooms, or zucchini. Add them to the stir-fry according to their cooking times – denser vegetables first.
- Maintain Veggie Crunch: Avoid overcooking the vegetables. They should still have some “bite” (al dente) to them for a pleasant texture contrast against the tender chicken and smooth sauce.
- Sauce Consistency: Remember that the cornstarch-thickened sauce will continue to thicken slightly as it cools. If it becomes too thick, you can thin it out with a tablespoon or two of water or chicken broth. If it’s too thin, whisk a little more cornstarch with cold water, then stir into the simmering sauce.
- Serve Immediately: For the best texture and flavor, sweet and sour chicken is best enjoyed right after it’s prepared when the chicken is at its crispiest and the vegetables are perfectly tender-crisp.
- Serving Suggestions: This dish is traditionally served with a side of fluffy white rice, brown rice, or Cauliflower Rice for a lighter option. Noodles are another fantastic pairing.
- Gluten-Free Option: To make this recipe gluten-free, substitute all-purpose flour with a gluten-free flour blend and use gluten-free tamari or coconut aminos instead of regular soy sauce.
Frequently Asked Questions About Homemade Sweet and Sour Chicken
Traditional sweet and sour sauce does contain a fair amount of sugar, so it wouldn’t typically be classified as a “healthy food” in large quantities. However, when you make it at home, you have complete control over the ingredients, allowing you to reduce sugar and sodium content, making it a much healthier option than many restaurant versions. Enjoyed in moderation as part of a balanced diet, it can certainly fit into a healthy lifestyle.
Absolutely! While canned pineapple is convenient and provides the juice needed for the sauce, fresh pineapple can be used for a brighter, more vibrant flavor. If using fresh, you’ll need to substitute the pineapple juice in the sauce with orange juice or a mix of water and a touch more sugar/vinegar to achieve a similar balance.
Leftovers of this recipe will keep well in an airtight container in the refrigerator for up to 3-5 days. For reheating, while microwaving is an option, it may result in less crispy chicken. For best results, reheat the chicken and vegetables in a skillet over medium heat with a tiny bit of oil until warmed through and the chicken regains some crispness. You can also briefly crisp the chicken in an air fryer before tossing with reheated sauce and veggies.
Yes, you can! After frying the chicken, let it cool completely, then flash freeze the pieces on a cookie sheet for an hour or two until solid. Transfer them to an airtight freezer bag or container. You can also freeze raw stir-fry veggies and the prepared sauce in separate freezer bags. When ready to cook, thaw components overnight in the fridge, then combine and cook as directed in the recipe.
This takeout-style dish pairs perfectly with a variety of sides. Classic choices include steamed white rice, brown rice, fried rice, or lo mein noodles. For a lighter meal, consider Cauliflower Rice. Make it a full feast by adding an appetizer such as Shrimp Sushi Stack, Shrimp Lettuce Salad, Easy Sushi Bake, or Spicy Salmon and Rice Egg Rolls.
Yes, for a lighter version, you can bake or air fry the chicken. After coating, arrange the chicken in a single layer on a baking sheet (for baking) or in the air fryer basket. For baking, spray lightly with oil and bake at 400°F (200°C) for 15-20 minutes, flipping halfway, until golden and cooked through. For air frying, spray lightly with oil and air fry at 375°F (190°C) for 10-15 minutes, shaking the basket occasionally, until crispy. The texture will be slightly different from deep-fried but still delicious.
Absolutely! You can easily adapt this recipe to be vegetarian. Substitute the chicken with firm tofu (pressed and cubed, then breaded and fried), tempeh, or even thick-cut mushrooms (like oyster or king oyster mushrooms) for a similar textural experience. The sauce and vegetable components remain the same.
More Asian-Inspired Recipes You’ll Love
- Chinese Honey Garlic Chicken
- Chicken Pakora
- Easy Grilled Chicken Satay
- Chinese Szechuan Chili Chicken
- Chinese Lemon Chicken
Homemade Sweet and Sour Chicken
By: Mariam Ezzeddine
Homemade Sweet and Sour Chicken brings your favorite Chinese takeout dish right to your kitchen without being intimidating. The easy sweet and sour sauce has an authentic taste and the dish is loaded with peppers, onions, pineapple and delicious chicken that is crispy on the outside and juicy on the inside.
Prep Time: 15 minutes
Cook Time: 20 minutes
Total Time: 35 minutes
Servings: 4 servings
Equipment
- Deep Pan or Deep Fryer
- Large Skillet or Wok
- Mixing Bowls
- Whisk
- Slotted Spoon or Spider
- Paper Towels
Ingredients
Main Ingredients
- 2 lbs chicken tenderloin, cubed into 1 inch pieces
- ⅓ cup corn starch
- 2 whole eggs, beaten
- 1 large red bell pepper, cubed
- 1 large orange bell pepper, cubed
- 1 large green bell pepper, cubed
- 1 cup pineapple chunks (canned)
- 1 medium sweet onion, cubed
- 2 tbsps light tasting olive oil
- Neutral oil, for deep frying
- Sesame seeds, for garnishing
Chicken Flour Coating
- ½ cup all-purpose flour
- 1 tsp onion powder
- 1 tsp garlic powder
- 1 tsp paprika
- ½ tsp salt
Homemade Sweet and Sour Sauce
- ⅓ cup ketchup
- 1 tsp onion powder
- 2 tbsps lite soy sauce
- 3 tbsps rice vinegar
- 3 large cloves garlic, minced
- 1½ tbsp corn starch
- 2 tbsps light brown sugar
- ¼ cup granulated sugar
- ¼ cup pineapple juice, from chunk can
- 1 tbsp neutral oil
Instructions
- In a large deep pan, preheat the oil to medium heat (350-375°F / 175-190°C).
- Pat dry the chicken tenderloins, cut into one-inch cubes and transfer to a bowl.
- Add ⅓ cup corn starch to the chicken and toss around to coat well. Set aside.
- In two other small bowls, beat the 2 eggs in one and mix together the flour coating mix ingredients (flour, onion powder, garlic powder, paprika, salt) in another.
- Dip one piece of chicken into the egg bath and then into the dry flour coating mix. Transfer the piece on a cookie rack and repeat steps for the remainder of the chicken pieces.
- Fry the chicken pieces in the heated oil for about 5-7 minutes per batch, or until golden brown and crispy. Do not overcrowd the pan.
- Remove the chicken from the frying pan and set on a plate lined with paper towel to drain. Set aside.
- In a bowl or cup, mix together all the sweet and sour sauce ingredients (ketchup, onion powder, soy sauce, rice vinegar, garlic, corn starch, brown sugar, granulated sugar, pineapple juice, neutral oil).
- Heat another pan or wok over medium heat, add in the 2 tbsps of light tasting olive oil. Pan sear the cubed veggies (red, orange, green bell peppers, onion – not the pineapple) until tender-crisp, about 3-4 minutes. Remove and set aside.
- In the same pan, add in the sweet and sour sauce mix. Simmer on medium low heat, mixing constantly until the sauce thickens up, about 2-3 minutes.
- Once the sauce has thickened up, add in the fried chicken, stir-fried veggies, and pineapple chunks. Mix together to coat well and cook for another 2-3 minutes to heat through.
- Remove from heat and garnish with some sesame seeds if desired. Serve immediately.
Notes
- Use boneless, skinless chicken thighs instead of breast for a juicier result.
- Cut your chicken into even sized pieces for even cooking.
- Heat the oil well before frying the chicken (350-375°F / 175-190°C).
- Add a bit of red pepper flakes to the sauce for a touch of heat.
- Add more vegetables like carrots, broccoli, mushrooms or zucchini.
- Don’t overcook the veggies. They should still have some bite to them.
- The sauce will thicken while cooking but will continue to thicken as it cools.
- This dish is best served right away.
- Serve with a side of rice or noodles.
Nutrition Information (Approximate Per Serving)
Calories: 675kcal | Carbohydrates: 82g | Protein: 54g | Fat: 15g | Saturated Fat: 3g | Polyunsaturated Fat: 2g | Monounsaturated Fat: 7g | Trans Fat: 0.03g | Cholesterol: 147mg | Sodium: 730mg | Potassium: 1453mg | Fiber: 6g | Sugar: 43g | Vitamin A: 3171IU | Vitamin C: 153mg | Calcium: 89mg | Iron: 3mg
I genuinely hope you enjoy all the recipes I share with you, and especially this delicious Homemade Sweet and Sour Chicken recipe. I encourage you to try it, savor every bite, leave a star rating, and share your culinary triumphs with your friends and family!
If you try this recipe and love it, please take a moment to leave a star rating and comment below. Don’t forget to use my hashtag to share your delicious recreations with me on Instagram so I can see them! Also, follow me at Cookin’ With Mima on FACEBOOK |INSTAGRAM |PINTEREST for all of my latest social posts and exciting new recipes. Happy cooking!
