Indulge in the exquisite charm of a classic Berry Pavlova Cake, a dessert that masterfully blends rustic elegance with sophisticated flavors. This stunning meringue-based creation is renowned for its irresistibly crisp exterior, giving way to a wonderfully soft, marshmallow-like interior that simply melts in your mouth. Perfect for holiday gatherings, special celebrations, or simply when you crave an impressive yet surprisingly straightforward treat, our Berry Pavlova is guaranteed to captivate your guests and leave a lasting impression. What makes this recipe even more appealing is its reliance on a short list of accessible ingredients, with much of the preparation being hands-off, allowing you more time to enjoy the festivities.
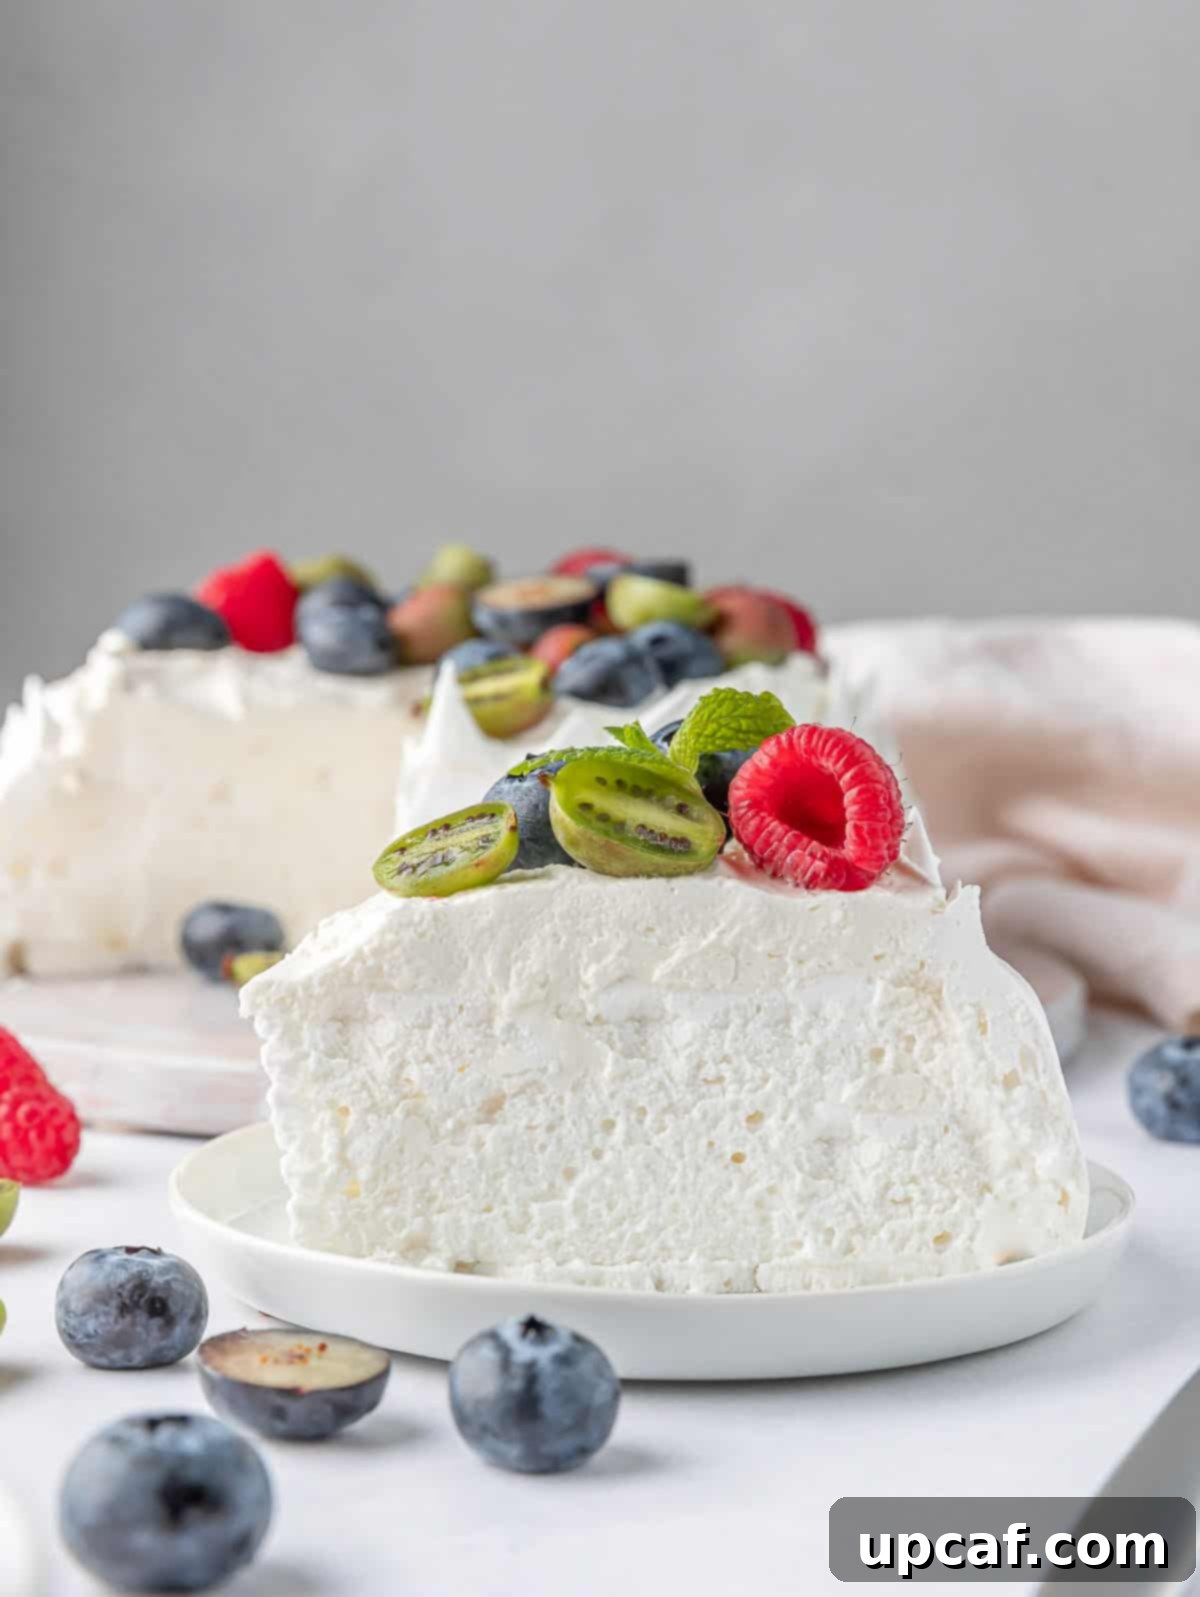
The Pavlova, a delicate meringue dessert, carries a captivating history, named in honor of the legendary Russian prima ballerina, Anna Pavlova. Her performances were celebrated for their extraordinary lightness and airiness, qualities beautifully mirrored in this iconic dessert. While its ethereal crust and delicate structure might suggest a challenging culinary endeavor, fear not! With our comprehensive tips and expert tricks, you’ll discover that perfecting a beautiful, cloud-like Pavlova is not only achievable but also incredibly rewarding. Prepare to master this delightful creation in no time!
For those seeking other festive and equally delightful dessert options, especially during the autumn and winter holidays, I highly recommend exploring my Pumpkin Cake Roll or the irresistible Pumpkin Pie Cheesecake Bars. These seasonal favorites are particularly splendid during Thanksgiving and Christmas, bringing the comforting flavors of pumpkin to your celebratory table.
What is Pavlova? A Delectable Dessert with a Rich History
At its heart, Pavlova is a glorious meringue-based dessert, a culinary homage to the grace and lightness of the famous Russian ballerina, Anna Pavlova. This exquisite creation stands out with its distinct textural contrast: a remarkably crisp, almost shell-like crust that encases a soft, airy, and marshmallowy interior. Traditionally, it’s crowned with a generous dollop of freshly whipped cream and an abundance of vibrant, fresh fruits, making it a feast for both the eyes and the palate.
Interestingly, despite its Russian namesake, the true origin of the Pavlova recipe has been a subject of friendly debate for decades. While many assume its roots are in Russia, culinary historians widely agree that this delightful dessert is a proud and integral part of the national cuisine in both Australia and New Zealand. Both nations lay claim to its invention, and it remains a beloved staple, frequently gracing tables during celebrations, holidays, and family gatherings due to its relatively simple preparation and universally appealing taste.
The magic of Pavlova lies in its delicate balance of textures and flavors. The meringue base provides a sweet, ethereal foundation, while the creamy topping and fresh fruit add a burst of tanginess and moisture, creating a symphony of sensations with every spoonful. It’s a dessert that feels inherently celebratory, promising a light and refreshing end to any meal.
Why You’ll Adore This Easy Berry Pavlova Recipe
Our Berry Pavlova recipe isn’t just another dessert; it’s an experience waiting to happen. Here’s why this particular recipe will become your new favorite:
- A True Showstopper: Forget complicated tiered cakes or elaborate decorations. The Pavlova, with its naturally beautiful, cloud-like form and vibrant fruit topping, is an inherently elegant dessert that commands attention. When you present this at your next dinner party, it’s guaranteed to elicit gasps of delight and admiring glances. It looks far more complex than it actually is, making you look like a culinary genius!
- Crafted from Pantry Staples: You might be surprised to learn that this sophisticated dessert relies on humble ingredients you likely already have on hand. The star ingredient, egg whites, are often readily available. If you’re an avid baker or simply have a carton of eggs in the fridge, you can easily separate the whites (saving the yolks for a rich omelet or crème brûlée!) and get started. This accessibility makes it a convenient choice for spontaneous baking or when you need a dessert without a special grocery run.
- The Ultimate Holiday Treat: There’s a distinct festive charm about Pavlova. Its crisp white meringue, adorned with colorful berries, evokes a sense of celebration and joy. If you’ve ever yearned to create a truly special holiday dessert that feels both traditional and refreshingly unique, this Berry Pavlova is your answer. It’s light enough to follow a hearty holiday meal and its seasonal appeal makes it perfect for Christmas, New Year’s, or any celebratory occasion.
- Naturally Gluten-Free: For those with dietary restrictions, Pavlova is a wonderful naturally gluten-free option, ensuring that everyone at your table can enjoy a slice of this heavenly dessert without compromise.
- Versatile and Customizable: While we highlight berries, the beauty of Pavlova lies in its adaptability. You can easily swap out fruits based on seasonality or personal preference, making it a dessert that can be enjoyed year-round.
Essential Ingredients for the Perfect Pavlova Meringue
Crafting the perfect Pavlova meringue requires just a few key ingredients, each playing a crucial role in achieving that signature crisp exterior and soft interior. Quality ingredients make a noticeable difference in the final product.
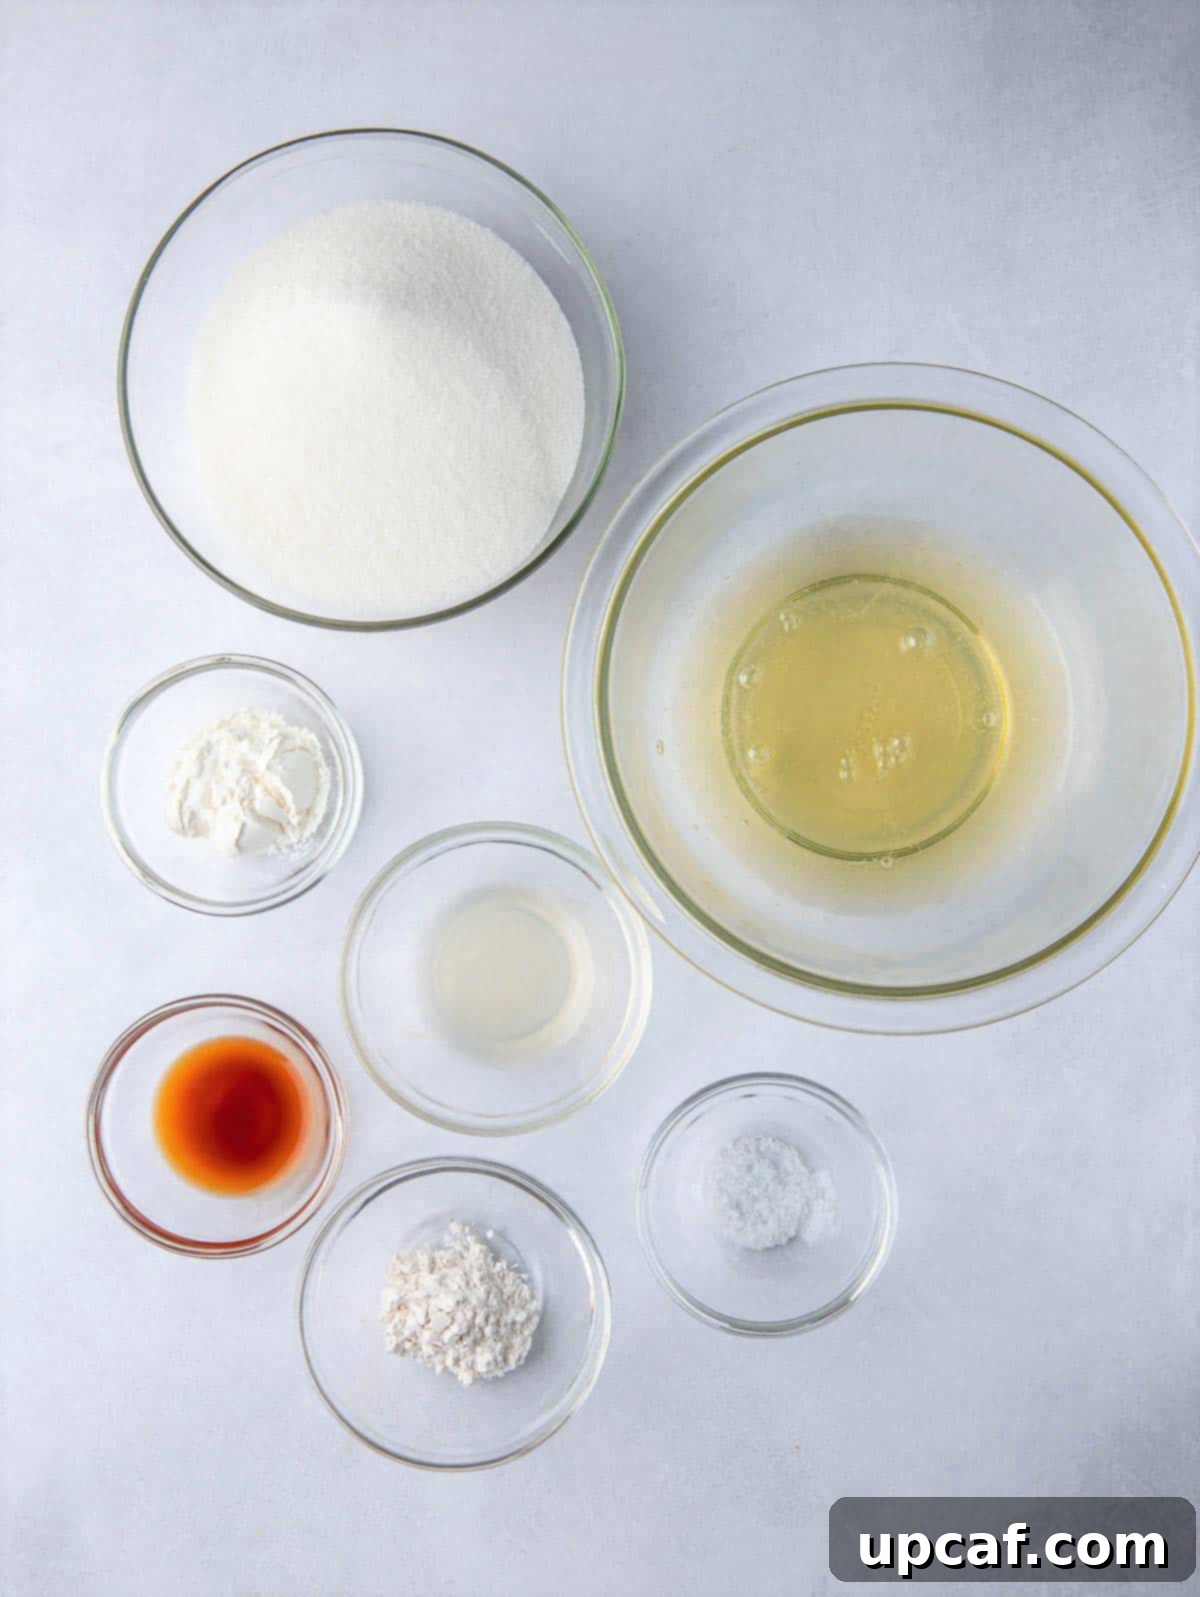
- Egg Whites: These are the foundation of your meringue. For optimal volume and stability, ensure your egg whites are at room temperature. This allows them to whip up faster and achieve greater volume, resulting in a lighter, airier meringue. It’s also critical that they are entirely free of any egg yolk, as even a tiny speck of fat can prevent them from whipping properly.
- Caster Sugar (Superfine Sugar): This type of sugar is preferred because its finer granules dissolve more quickly into the egg whites, creating a smooth, stable, and glossy meringue. If you can’t find caster sugar, powdered sugar (confectioners’ sugar) can be a suitable substitute, as it also dissolves readily and contributes to a silky texture.
- Cream of Tartar: This acidic ingredient is a meringue’s best friend. It acts as a stabilizer, helping the egg whites achieve maximum volume and maintain their structure as they’re whipped. It also helps prevent the meringue from collapsing during baking.
- Vanilla Extract: For a delightful aromatic touch. Be mindful of the quantity, as too much vanilla extract, especially darker varieties, can subtly tint your pristine white meringue, affecting its classic appearance.
- Fresh Lemon Juice: Similar to cream of tartar, lemon juice provides acidity that aids in stabilizing the egg whites, contributing to a stronger meringue structure. Always opt for freshly squeezed lemon juice over bottled for the best flavor and acidity profile.
- Corn Starch: This is the secret ingredient for the Pavlova’s unique marshmallowy center. Corn starch helps to create that soft, chewy interior while maintaining the crispness of the outer shell. It also acts as an additional stabilizer, further preventing collapse.
- A Pinch of Salt: A small amount of salt helps to enhance the flavor of the meringue and can also contribute to the stability of the egg whites as they whip.
Exquisite Topping Ingredients for Your Berry Pavlova
While the meringue base is the star, the toppings elevate the Berry Pavlova Cake from simply delicious to absolutely divine. The contrast between the crisp, sweet meringue and the fresh, creamy elements is what makes this dessert truly special.
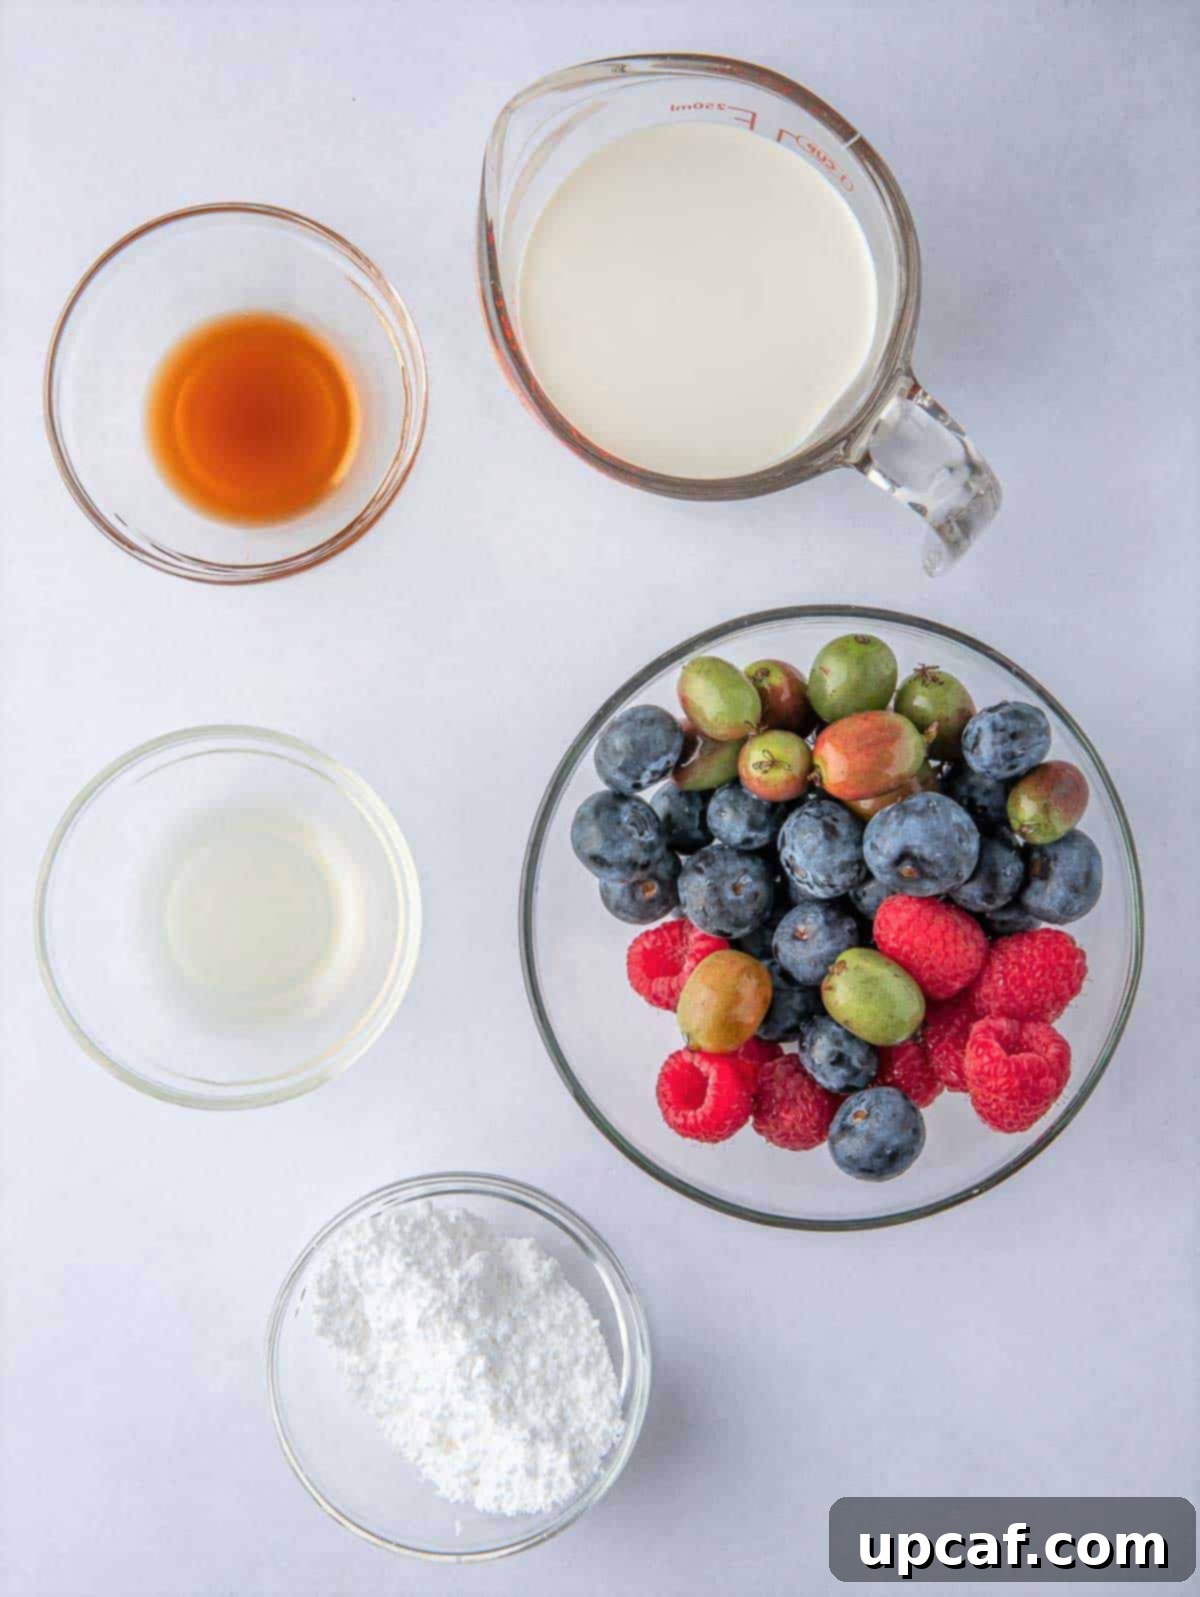
- Homemade Whipped Cream: Nothing beats the rich, smooth, and fresh taste of homemade whipped cream. For this, you will need:
- Heavy Whipping Cream: Ensure it is very cold; cold cream whips up faster and holds its peaks better.
- Powdered Sugar: Adds a touch of sweetness without graininess.
- Lemon Juice: A small amount brightens the flavor and adds a subtle tang, cutting through the richness.
- Vanilla Extract: Infuses the cream with a lovely, classic aroma.
- Fresh Berries and Fruits: These are not just for garnish; they provide essential tartness and freshness that balance the sweet meringue. A colorful medley of berries like strawberries, blueberries, raspberries, and blackberries works beautifully. You can also incorporate other seasonal fruits such as kiwi slices, mango chunks, or sliced peaches for added variety and visual appeal. Always ensure fruits are thoroughly washed and gently dried before use.
- Optional Garnishes: For an extra touch of sophistication, consider a sprinkle of fresh mint leaves for a pop of green and a refreshing aroma, or a light dusting of powdered sugar. A drizzle of fruit coulis can also add a vibrant touch.
Mastering the Art of Making a Berry Pavlova Cake
Creating a perfect Pavlova involves a few critical steps, but each one is straightforward and essential for that signature crisp-on-the-outside, soft-on-the-inside texture. Follow these instructions carefully to achieve a truly magnificent dessert.
- Prepare Your Equipment and Oven: Begin by preheating your oven to 250°F (120°C). This low and slow temperature is crucial for drying out the meringue without browning it. On a piece of parchment paper, use a pencil to trace a 7-inch (18 cm) circle. This will serve as your guide for shaping the meringue. Flip the parchment paper over so the traced side is face down (this prevents pencil marks from transferring to your meringue) and place it on a baking sheet. Next, ensure your mixing bowl and whisk attachment are impeccably clean and completely dry. To do this, dip a paper towel in a little bit of vinegar and wipe down the inside of the bowl and the whisk. Then, wipe them thoroughly clean with a separate, dry paper towel. This step is vital to remove any traces of grease, which can prevent egg whites from whipping properly.
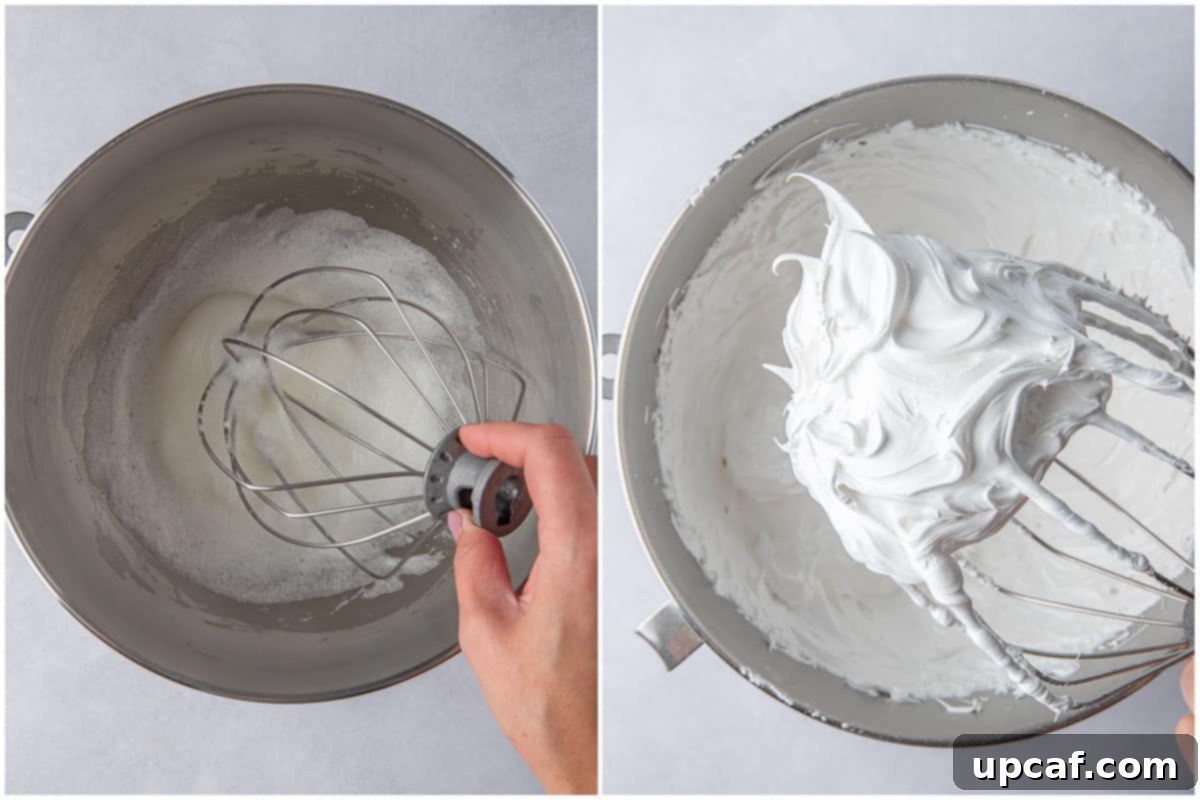
- Whip the Egg Whites to Perfection: In your thoroughly cleaned bowl, transfer the room-temperature egg whites and a pinch of salt. Begin whisking on medium speed. Observe as the egg whites gradually become frothy and turn white in color. Continue whisking until they are soft and billowy, starting to leave faint whisk marks, but not yet holding stiff peaks. It’s important to scrape down the sides and check the bottom of the bowl to ensure all the liquid egg white has been incorporated and become frothy. At this stage, add the cream of tartar and continue whisking to fully incorporate it, which will help stabilize the developing meringue.
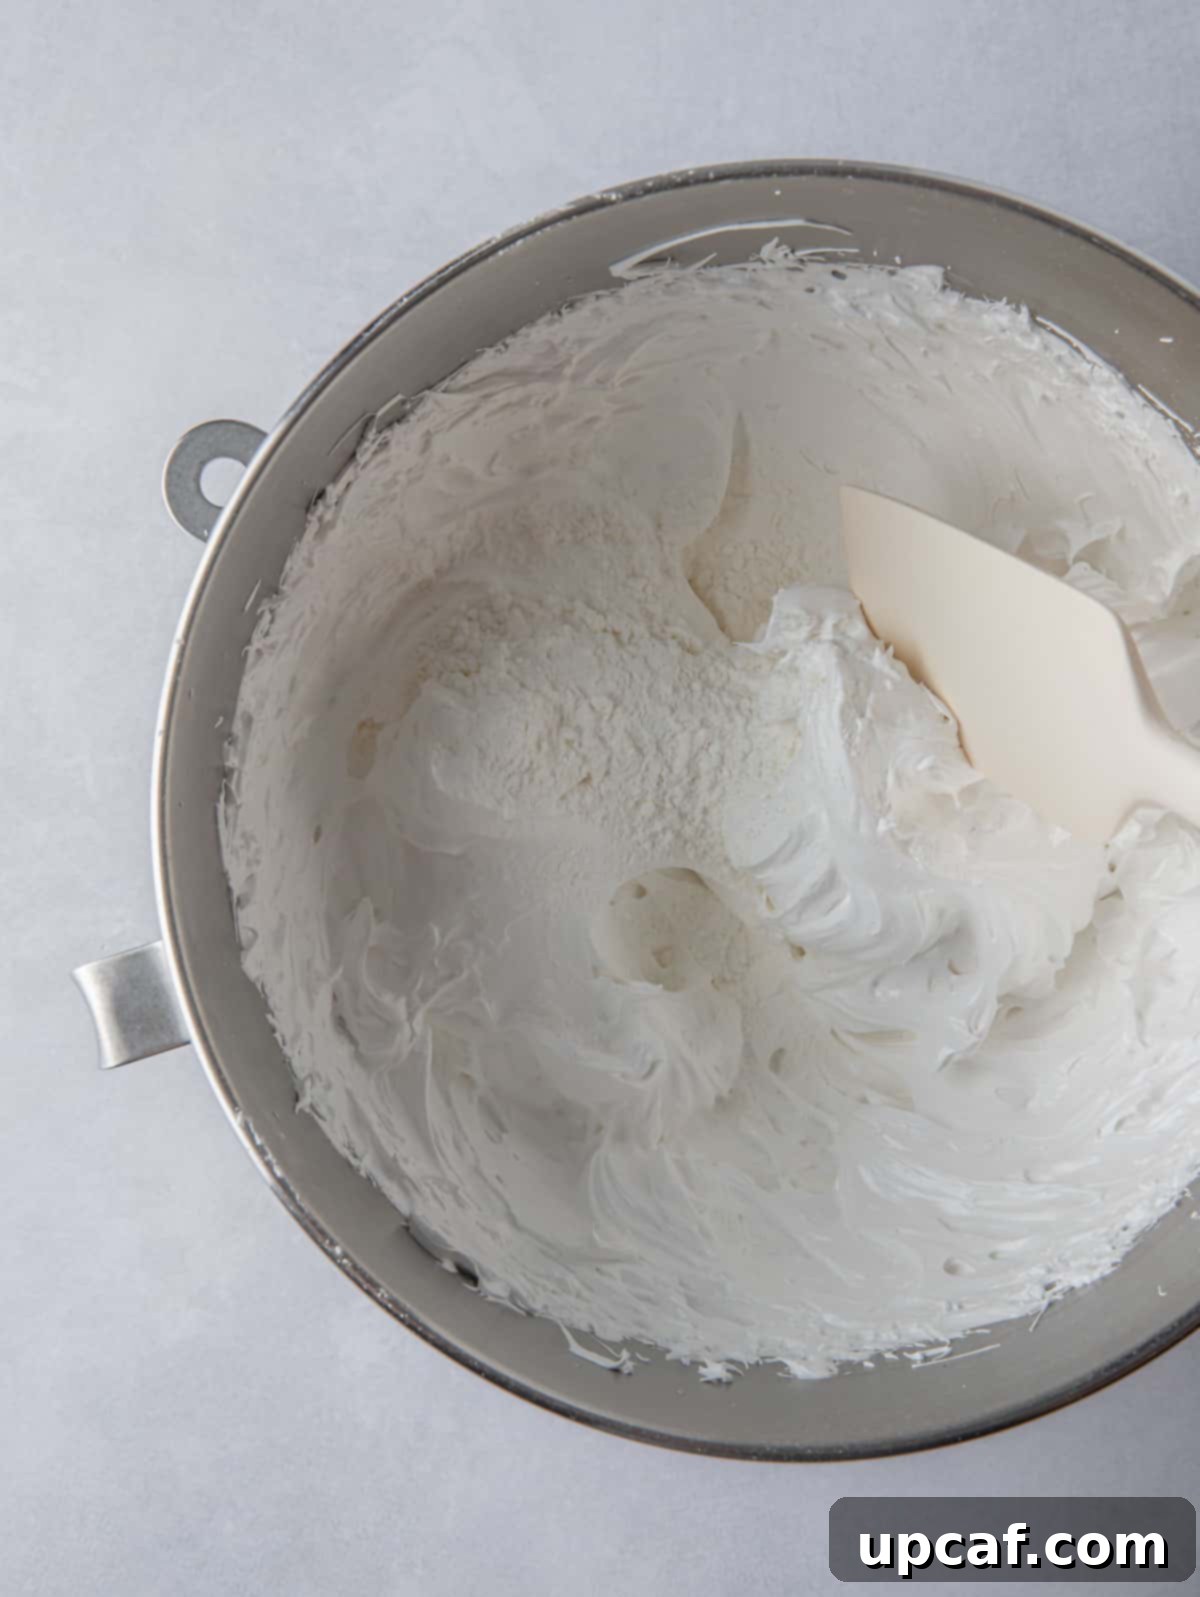
- Create the Glossy Meringue: Increase the mixer speed to medium-high. Now, begin adding the caster sugar, one teaspoon at a time, allowing 5-10 second increments between each addition. This slow and gradual addition is paramount: it ensures the sugar has ample time to fully dissolve into the egg whites, which prevents a grainy meringue and crucially, avoids deflating the delicate foam. Continue whisking after all the sugar has been added until it is completely dissolved – you can test this by rubbing a small amount of meringue between your fingers; if it feels smooth with no gritty sugar granules, it’s ready. The mixture should be stiff, glossy, and hold firm peaks. Finally, gently fold in the lemon juice, vanilla extract, and cornstarch with a spatula until just incorporated. Be careful not to overmix at this stage.
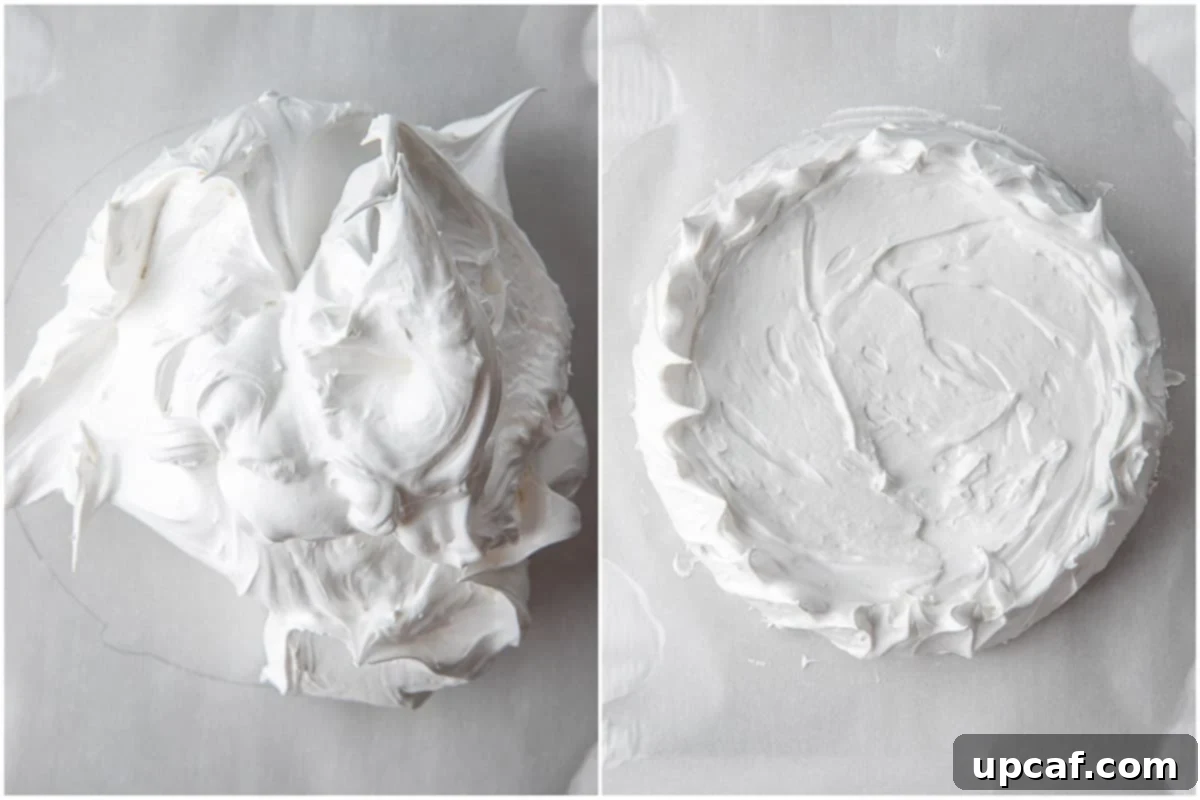
- Bake the Pavlova Base: Gently spoon the meringue onto your prepared baking tray, using the traced 7-inch circle as a guide. Carefully spread and shape the meringue with a palette knife or the back of a spoon to form an even, circular layer. To add an aesthetically pleasing touch, you can use the back of a spoon or spatula to create gentle peaks or swirls around the edges, dragging it from the bottom upwards. Place the pavlova into the preheated oven for 10 minutes. Ensure it is placed on the middle rack, or in the position where your oven provides the most even heat distribution. After ten minutes, without opening the oven door, reduce the oven temperature to 200°F (95°C) and continue baking for another 2 hours. This extended, low-temperature bake is essential for drying out the meringue properly.
- Cool the Meringue Slowly: Once the 2-hour baking time is complete, and again, without opening the oven door, turn off the oven completely. It is crucial to let the meringue cool down gradually inside the oven. This slow cooling process prevents thermal shock, which can cause the Pavlova to crack or collapse. Allow it to cool for at least 3 hours, or ideally, leave it in the oven overnight until the oven is completely cold. This patient cooling phase ensures a stable, perfectly crisp Pavlova base.
- Prepare the Fresh Whipped Cream: Once your Pavlova base has fully cooled, it’s time to prepare the luscious topping. In the bowl of a stand mixer fitted with a whisk attachment (or using a hand mixer), pour in the very cold heavy whipping cream. Whip on medium-high speed until soft peaks begin to form. Gradually add the powdered sugar and continue whipping until the cream is thick and holds firm peaks. Be careful not to overwhip, as it can turn grainy. Finally, whisk in the lemon juice and vanilla extract until just incorporated, adding a delightful depth of flavor.
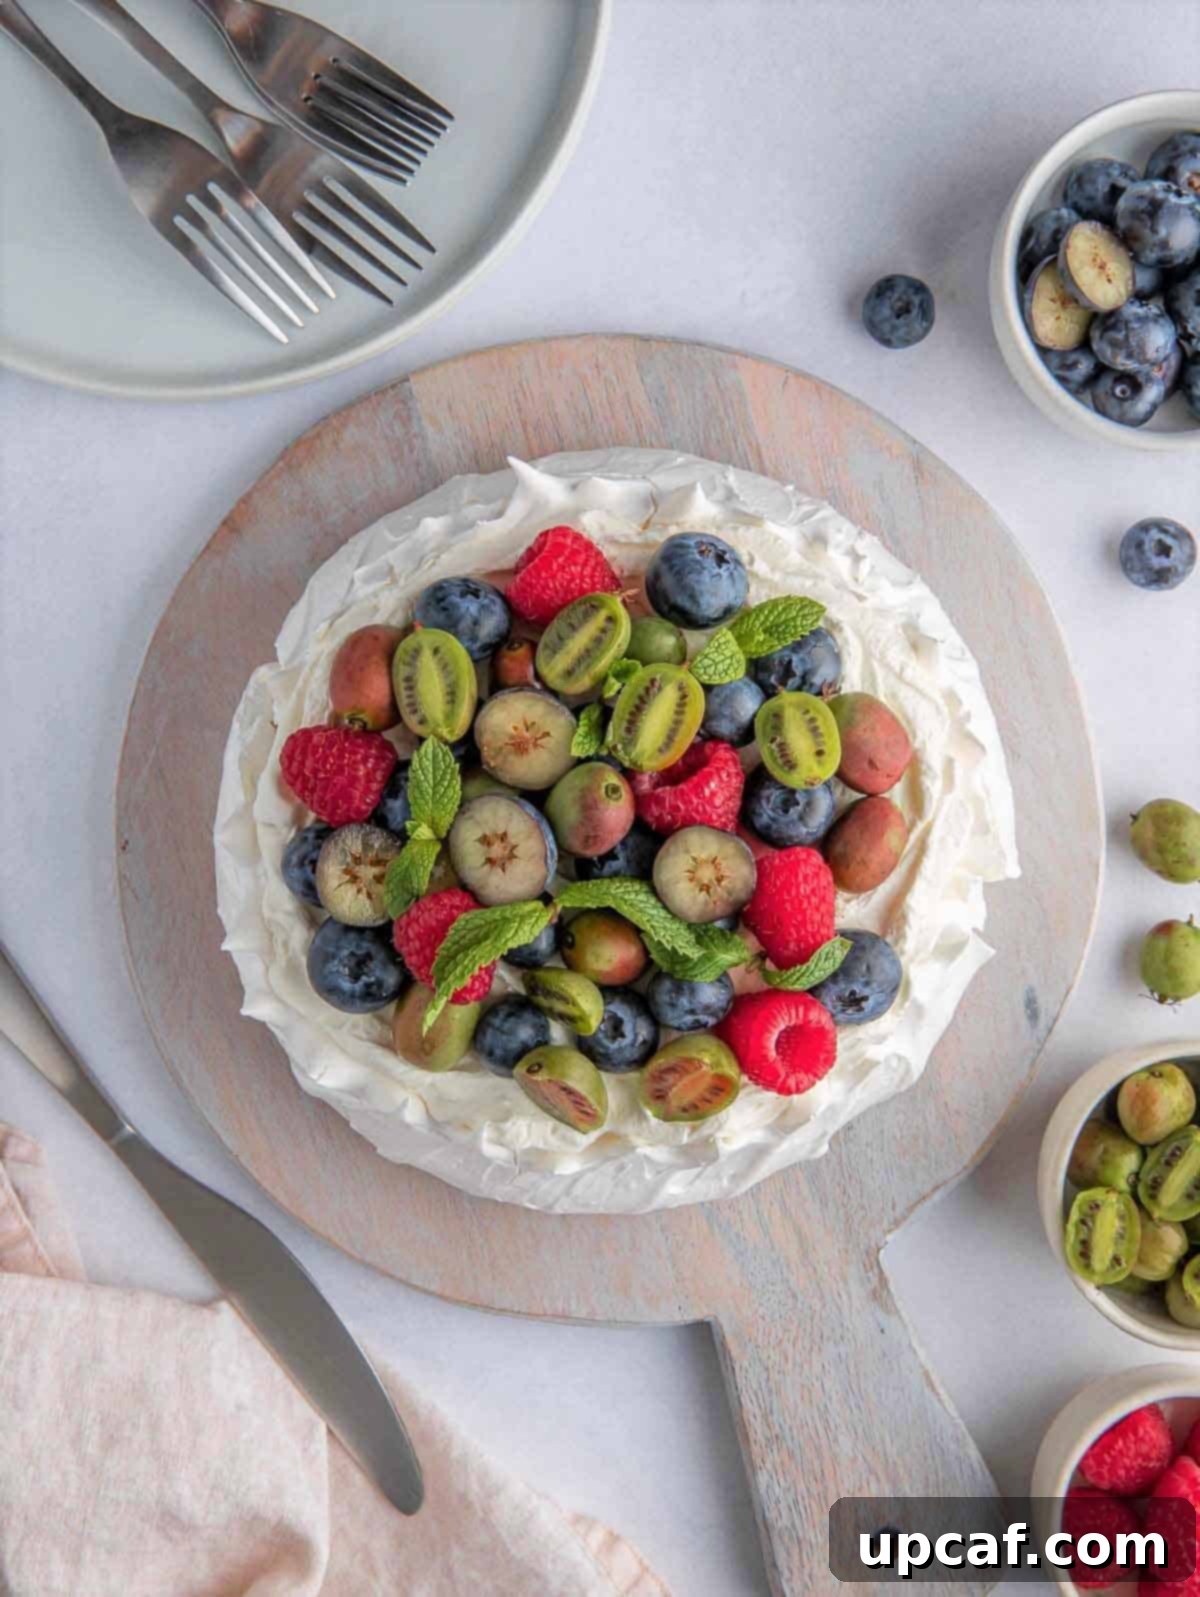
- Assemble and Serve: Carefully transfer the freshly whipped cream onto the cooled Pavlova meringue base, spreading it evenly or creating beautiful swirls. Generously top the cream with your selection of fresh berries and fruits, arranging them artfully for a vibrant display. Serve your magnificent Berry Pavlova Cake immediately. Remember, for the best texture and flavor, Pavlova is ideally consumed on the same day it is made. While leftovers can be refrigerated, the meringue will inevitably soften and become soggy over time.
Expert Tips for Crafting the Ultimate Pavlova Cake
Achieving Pavlova perfection is within reach with these crucial tips:
- Patient Cooling is Key: After baking, resist the urge to immediately remove your Pavlova from the oven. Allow it to rest in the warm, turned-off oven for at least 30 minutes, or ideally, for several hours or even overnight. This gradual cooling process is vital for the meringue to dry out completely and helps prevent cracks and collapse, ensuring a stable, crisp exterior.
- Don’t Skip the Preheat: Always ensure your oven is fully preheated to the correct initial temperature before placing the Pavlova inside. If the meringue sits out for too long before baking, its delicate structure can begin to melt or soften, leading to a less impressive finished product.
- Freshness is Paramount: Pavlova is a dessert best enjoyed on the day it’s made. The crisp meringue, once topped with whipped cream and fruit, will naturally absorb moisture over time, leading to a softer, less desirable texture. While leftovers can be refrigerated, be aware that the meringue will likely become soft and soggy.
- Room Temperature Egg Whites for Volume: Egg whites achieve greater volume and whip more effectively when they are at room temperature. However, separating eggs is often easier when they are cold. Plan ahead: separate your eggs while they are cold, then let the egg whites sit at room temperature for 30 minutes to an hour before you begin whipping.
- Zero Tolerance for Yolk: Even a minuscule amount of egg yolk in your egg whites can be detrimental. The fat from the yolk will inhibit the egg whites from whipping into a stable, foam-like structure. Be meticulous when separating eggs.
- Measure Egg Whites by Weight: For consistent results, especially when dealing with meringue, a kitchen scale is your best friend. Eggs can vary significantly in size, so measuring egg whites by weight (grams) ensures accuracy and reliability in your recipe, leading to a more consistent meringue structure every time.
- Spotless Equipment is Non-Negotiable: Your mixing bowl and whisk must be impeccably clean and bone-dry. Any residual grease, even from previous washes, can completely prevent the egg whites from whipping properly. Stainless steel or glass bowls are often preferred over plastic, as plastic can sometimes retain a subtle film of grease from past uses. Wiping with vinegar, as mentioned in the instructions, is an excellent preventative measure.
- Humidity is the Enemy: High humidity can negatively impact meringue, causing it to become sticky, chewy, or even “weep” as the sugar absorbs moisture from the air. If possible, choose a dry, low-humidity day for making Pavlova.
- Perfect Sugar Dissolution: Ensure the sugar is fully dissolved in the meringue. Gritty sugar can lead to a chewy or “weeping” Pavlova. The slow addition of sugar and the finger test (rubbing a small amount between your fingers) are crucial steps.
- Avoid Over-Whipping: While you want stiff peaks, over-whipping egg whites can cause them to become dry, granular, and prone to weeping or collapsing. Stop just when the peaks are firm and glossy.
Frequently Asked Questions About Pavlova
Meringues can indeed be tricky, and undissolved sugar is a common frustration. If you added the sugar too quickly, it might take a very long time to dissolve, or even worse, it might not dissolve fully. If your meringue still achieves stiff and glossy peaks despite some undissolved sugar, you can proceed with baking. However, be aware that the finished Pavlova might have a slightly grainy texture rather than being perfectly smooth. To prevent this, consider substituting caster sugar with an equal amount of powdered sugar (confectioners’ sugar). When using powdered sugar, add it in 2-3 additions while whipping, and then continue whisking on medium-high for about 7-10 minutes until you achieve stiff, smooth peaks. Afterward, proceed with adding lemon juice, vanilla, and cornstarch as directed.
If you notice liquid (often a sugary syrup) seeping out of your Pavlova, it’s commonly referred to as “weeping.” This usually indicates that the sugar did not fully dissolve into the meringue during the whipping process. Another cause can be over-whipping the egg whites; if they are whipped beyond their structural capacity, they lose the ability to hold air and sugar effectively, causing the sugar to leach out. Lastly, high humidity in your environment can also contribute to weeping, as the sugar in the meringue will absorb moisture from the air.
A collapsed or cracked Pavlova typically signifies that the meringue’s center has shrunk away from its outer shell. This can occur if the egg whites were over-whipped, leading to a fragile structure. Alternatively, the most common culprits are baking the Pavlova in an oven that is too hot, or cooling it too rapidly after baking. Rapid temperature changes cause the meringue to contract too quickly. To mitigate this, always allow your Pavlova to cool down very slowly inside the oven once the heat is turned off, ideally for several hours or even overnight.
If your Pavlova has an off-white or slightly browned hue instead of being pristine white, there are a couple of common reasons. The primary cause is often an oven temperature that is too hot. When the oven is too warm, the sugar in the meringue can caramelize, resulting in a yellowish or light brown tint. Additionally, using too much vanilla extract, especially darker varieties, can impart a subtle color to the meringue.
A soft and sticky Pavlova usually results when the meringue weeps and then reabsorbs the liquid, or when it hasn’t been dried out sufficiently during the baking and cooling process. To prevent this, ensure the sugar is fully dissolved in your meringue, avoid over-whipping your egg whites, and follow the baking and slow cooling instructions meticulously. Additionally, baking on a low-humidity day can significantly help maintain its crispness.
The untopped Pavlova base can be stored in an airtight container at room temperature for up to two days, or in the refrigerator for the same duration. For optimal freshness and crispness, it’s best to assemble and top the Pavlova just before serving. Once topped with whipped cream and fruit, it should be consumed on the same day, as the meringue will begin to soften.
The beauty of Pavlova lies in its simple yet striking decoration, primarily using fresh fruits. An assortment of vibrant berries (strawberries, raspberries, blueberries) is a classic choice, but don’t limit yourself. Sliced kiwi, mangoes, peaches, nectarines, and apricots also make stunning and delicious toppings. For an added touch of freshness and color contrast, consider scattering a few delicate mint leaves over the fruit. You can also drizzle with a fruit coulis or a dusting of powdered sugar for extra elegance.
After your Pavlova base has completely dried out and cooled, it’s crucial to store it immediately in an airtight container. This protects it from humidity and helps it retain its crisp texture. Keep the container in a cool, dry place until you are ready to garnish and serve it. Do not top the Pavlova until just before eating.
Yes, you can absolutely prepare the Pavlova base a day in advance! The key is to ensure it is thoroughly dry after baking and then store it properly in an airtight container to protect it from moisture. The whipped cream and fruit toppings should only be added immediately before serving to maintain the meringue’s delightful crispness.
More Delightful Holiday-Friendly Desserts to Explore
- Decadent Chocolate Chip Cheesecake
- Rich Double Chocolate Cheesecake
- The Best New York Style Cheesecake
- Tangy Raspberry Cheesecake Bars
- Moist Banana Walnut Cake
I genuinely hope you find joy and success in preparing all the recipes I share with you, and especially this truly delicious Berry Pavlova Cake. I encourage you to try this recipe, savor every bite, and share your delightful creations with friends and family!
If you make this recipe and love it as much as I do, please take a moment to leave a star rating and a comment below. Your feedback means the world to me! Don’t forget to use my hashtag to share your delicious recreations with me on Instagram – I can’t wait to see them! Also, be sure to follow Cookin’ With Mima on FACEBOOK |INSTAGRAM |PINTEREST for all my latest culinary posts and new recipes.
Berry Pavlova Cake
Ingredients
For the Pavlova Meringue
- 4 large egg whites, (about 140 g) room temperature
- 250 grams caster sugar, can be substituted with 250 grams of powdered sugar
- 1 tsp cream of tartar
- ½ tsp vanilla extract
- 1 tsp lemon juice
- 2 Tbsp corn starch
- pinch of salt
For the Whipped Cream
- ¾ cup heavy whipping cream, cold
- 2 Tbsp powdered sugar, scooped, and then sifted
- 1 tsp lemon juice
- 1 tsp vanilla extract
- 1 cup fresh berries/fruits , washed and cut
Instructions
- Preheat oven to 250F (120°C).
- With a pencil, trace a 7” circle on a piece of parchment paper. Flip the traced side down and place the parchment paper on a baking sheet.
- Dip a paper towel in a little bit of vinegar and thoroughly wipe the inside of your mixing bowl and whisk. Wipe clean with another piece of dry paper towel to ensure no grease remains.
- In the cleaned bowl, combine room temperature egg whites and a pinch of salt. Whisk on medium speed until the mixture becomes frothy and opaque white, leaving soft whisk marks. Ensure there’s no liquid egg white at the bottom of the bowl.
- Add the cream of tartar and continue whisking to incorporate.
- Increase mixer speed to medium-high. Gradually add the caster sugar, one teaspoon at a time, allowing 5-10 second intervals between additions. This gradual process is essential for the sugar to dissolve properly and prevent meringue deflation.
- Once all the sugar is added, continue whisking until it is completely dissolved. To test, stop the mixer and rub a small amount of meringue between your fingers; no sugar granules should be felt. The mixture should be stiff and glossy. (For an easier powdered sugar version, see notes.)
- Gently fold in the lemon juice, vanilla extract, and cornstarch with a spatula until just incorporated.
- Spoon the meringue onto the prepared baking tray, spreading it evenly within the traced circle using a palette knife or the back of a spoon.
- For an aesthetic touch, use a spatula to gently drag from the bottom up around the edges, creating decorative peaks.
- Place the Pavlova into the oven for 10 minutes. Ensure it’s on the middle rack or where heat is most even.
- After ten minutes, without opening the oven door, reduce the temperature to 200°F (95°C).
- Bake for an additional 2 hours.
- Without opening the oven, turn off the heat. Let the meringue cool down completely inside the oven for at least 3 hours, or ideally, overnight. This slow cooling prevents cracking and ensures crispness.
- Once the Pavlova base has cooled, prepare the whipped cream topping.
- In a stand mixer bowl, whip cold heavy cream until soft peaks form. Add powdered sugar and continue whipping until thick and firm peaks are achieved. Be careful not to overwhip. Whisk in lemon juice and vanilla until just incorporated.
- Transfer the whipped cream on top of your cooled Pavlova meringue base.
- Generously top with fresh berries and other desired fruits.
- Serve your Berry Pavlova Cake immediately for the best experience. Leftovers should be refrigerated, but note that the meringue will soften and become soggy over time.
Notes
- Allow pavlovas to rest in the warm, turned-off oven for at least 30 minutes (or longer) before removing them to ensure the exterior dries well and prevents cracks.
- Always preheat your oven to the specified temperature. Placing meringue in a cold oven or letting it sit out too long before baking can cause it to lose its form.
- For optimal crispness and texture, Pavlova Cake is best enjoyed on the same day it is made. Leftovers will become soft and soggy even when refrigerated.
- Egg whites whip better and achieve greater volume when at room temperature. However, they separate more easily when cold. Plan ahead by separating eggs while cold, then let the whites warm up to room temperature.
- Ensure absolutely no egg yolk is present in your egg whites. The fat from the yolk will prevent the egg whites from whipping into a stable foam.
- Using a kitchen scale to measure egg whites by weight (approximately 140g for 4 large eggs) provides the most accurate and consistent results, as egg sizes vary.
- The mixing bowl and whisk must be impeccably clean and dry. Any grease can inhibit the egg whites from whipping. Stainless steel or glass bowls are recommended as plastic can retain grease film.
- Similarly, ensure all utensils used in the whipping process are completely dry.
- For an alternative to caster sugar, you can use 250 grams of sifted powdered sugar. Add it gradually, then whip for 7-10 minutes until stiff peaks form.
Nutrition
Carbohydrates: 39g |
Protein: 2g |
Fat: 8g |
Saturated Fat: 5g |
Polyunsaturated Fat: 1g |
Monounsaturated Fat: 2g |
Cholesterol: 31mg |
Sodium: 37mg |
Potassium: 119mg |
Fiber: 1g |
Sugar: 35g |
Vitamin A: 337IU |
Vitamin C: 1mg |
Calcium: 18mg |
Iron: 1mg
Love this recipe? Rate and comment below!
