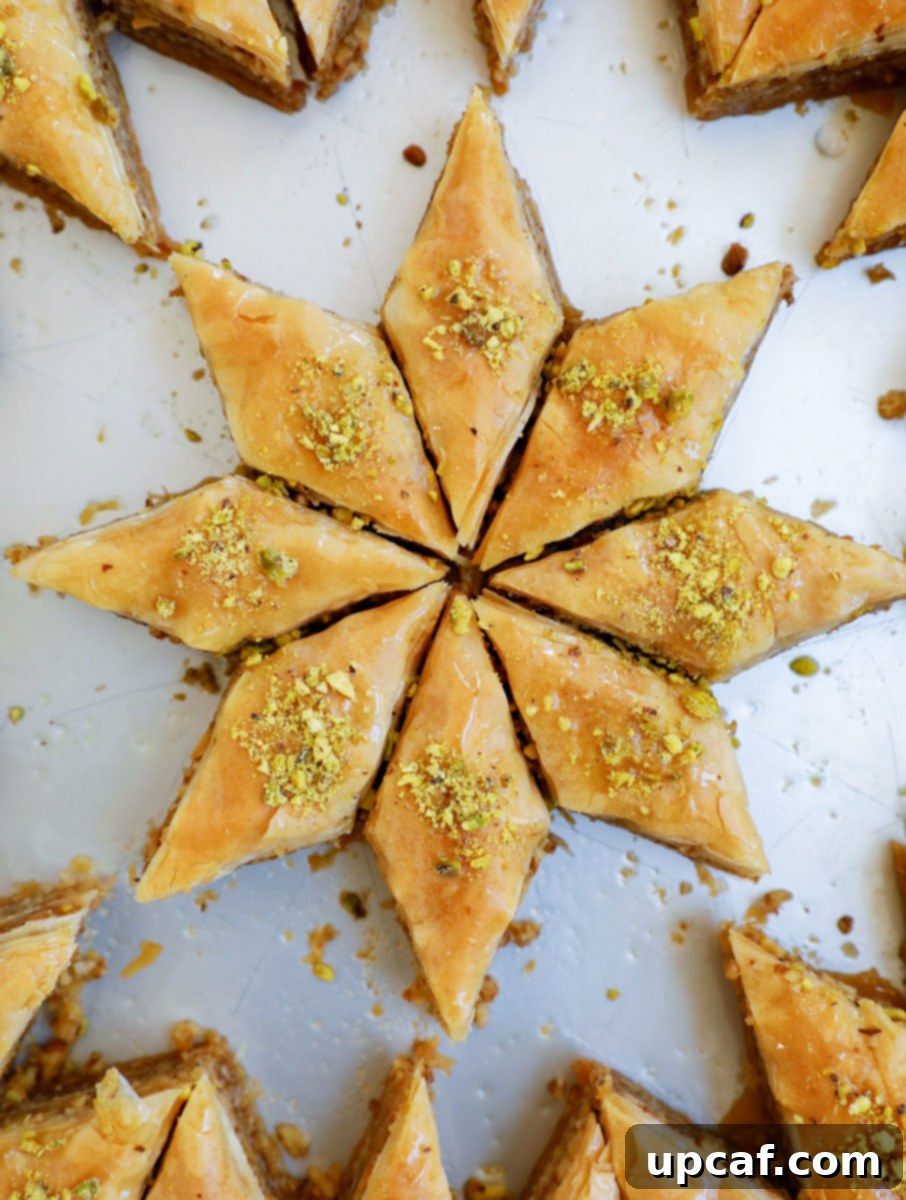
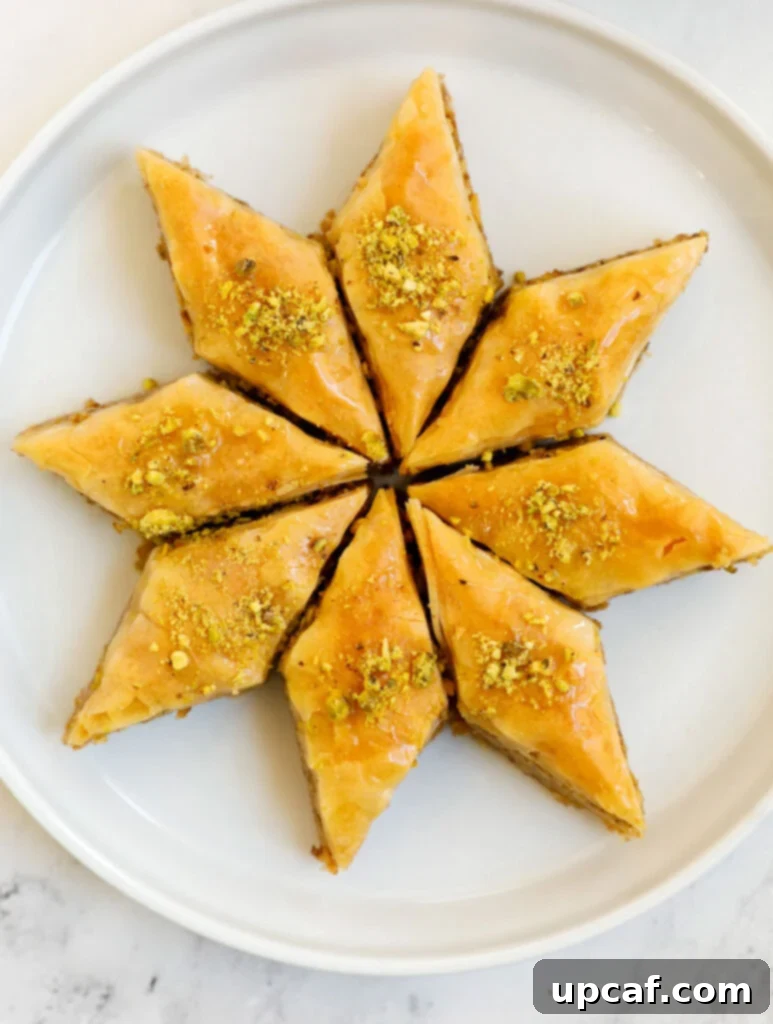
Indulge in the golden perfection of homemade Walnut Baklava, a truly captivating dessert that promises layers of delicate, flaky phyllo dough, generously filled with a rich blend of ground walnuts, and lovingly bathed in a fragrant, aromatic simple syrup. Each bite offers a symphony of textures and flavors – the crisp crackle of butter-brushed pastry giving way to the sweet, nutty core, all culminating in a delightful syrup-infused finish. This isn’t just a dessert; it’s an experience, a labor of love that yields extraordinary results.
There’s an undeniable magic in creating something truly exceptional from scratch, especially when it comes to desserts. For those who appreciate the art of baking and refuse to compromise on flavor, this homemade baklava recipe stands as a testament to culinary excellence. Forget the often-dry, mass-produced versions; the difference with this recipe is profound. Time and again, those who taste this baklava exclaim it’s “seriously better than store-bought!” It’s a recipe designed for success, guiding you to a baklava that is consistently moist, perfectly sweet, and utterly irresistible. Prepare to receive compliments and witness empty trays – this is your foolproof guide to the ultimate walnut baklava.
Crafting the perfect simple syrup is key to authentic baklava, and you might find yourself with a little extra. Should you wish to explore more delightful Middle Eastern and Lebanese dessert recipes that utilize this fragrant syrup, here are some cherished family favorites that bring a taste of tradition to your table:
- Lebanese Shaabiyat Dessert
- Lebanese Nights Dessert
- Pistachio Baklava Recipe
- Fried Lebanese Atayef
What is Baklava?
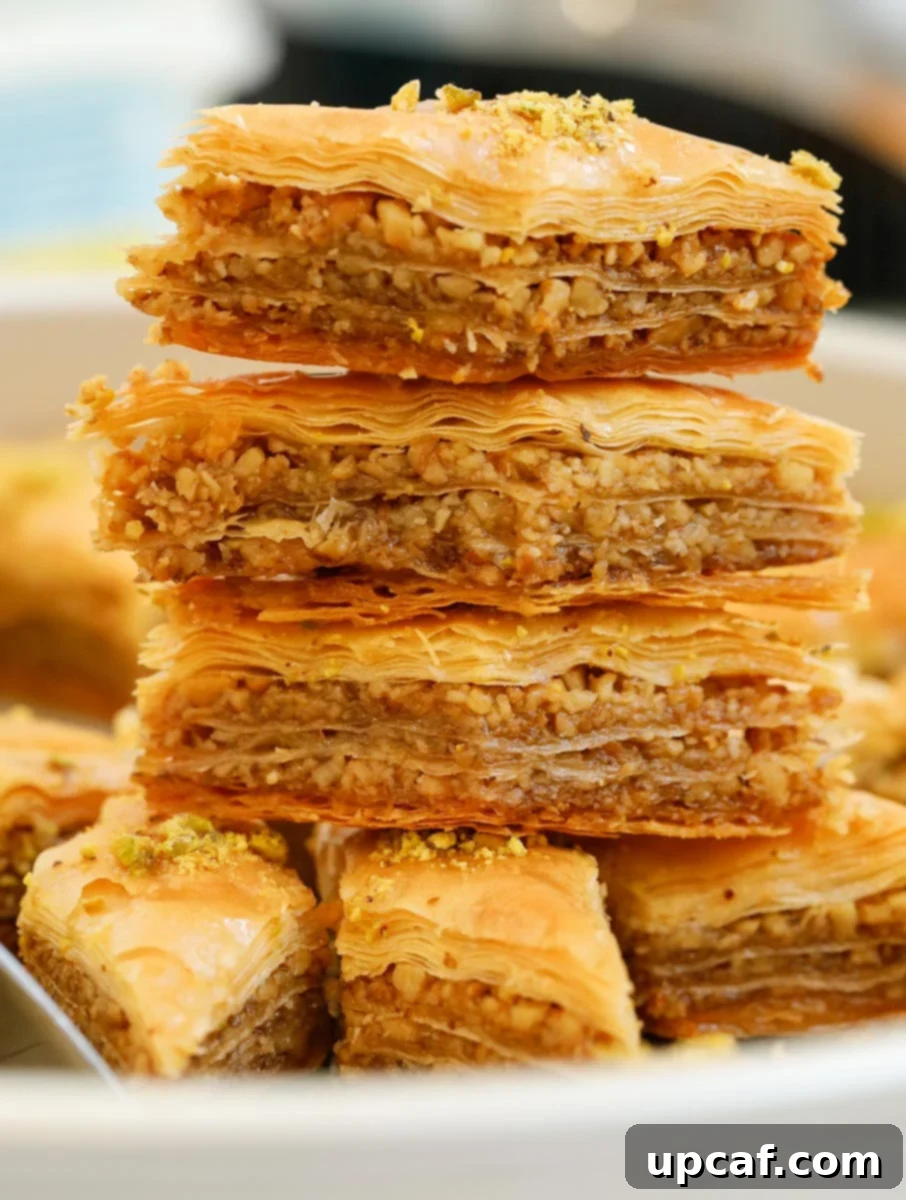
Baklava is an iconic, sweet, layered pastry dessert renowned across the Middle East, the Balkans, and South Asia. At its core, it’s a meticulously crafted confection composed of numerous thin sheets of phyllo pastry, each brushed with butter or ghee, and generously filled with chopped nuts – typically walnuts or pistachios. These layers are baked until golden and crisp, then drenched in a fragrant syrup, often infused with citrus or floral essences, allowing the pastry to soak up the sweetness and moisture.
The resulting texture is a marvel: a delicate crunch that gives way to a soft, nutty filling and a sticky, sweet finish. While the fundamental concept remains consistent, the specific ingredients, nut choices, syrup infusions, and even the shapes in which it’s cut vary significantly from one region to another, making each version a unique cultural expression of this beloved treat.
The Ancient Roots and Diverse Origins of Baklava
Tracing the exact origin of baklava is like unraveling a delicious historical mystery. Its roots pre-date comprehensive documentation, stretching back long before the Ottoman era, making it difficult to pinpoint a single country of origin. Historical culinary researchers suggest that baklava, or similar layered pastries, may have existed as far back as the 2nd century BC, with some theories linking it to an ancient Roman “placenta cake” – a honey-drizzled layered pastry. However, the form we recognize today is largely associated with the Byzantine Empire and later, the Ottoman Empire.
Over centuries, as empires expanded and trade routes flourished, baklava evolved and spread across diverse cultures. Countries like Turkey, Greece, Iran, Lebanon, and Armenia all lay claim to their own distinct versions, each adapting the recipe to local tastes and available ingredients. This rich historical tapestry means there’s no single “inventor” of baklava, but rather a collective culinary heritage that has nurtured its development.
In this particular rendition, we celebrate the vibrant flavors of Lebanese baklava. The distinctive twist here lies in the use of Lebanese Simple Syrup, known as “Ater”. Unlike plain sugar syrup, Ater is delicately infused with rose water and orange blossom water, imparting a captivating floral aroma and a subtle, enchanting flavor that elevates the walnuts and phyllo to an extraordinary level. This aromatic syrup transforms the baklava, offering a truly authentic taste of Lebanese hospitality and culinary artistry.
Why You’ll Adore This Homemade Walnut Baklava Recipe
Prepare to fall in love with making and devouring this incredible Walnut Baklava. Here’s why this recipe will become your go-to for special occasions and everyday indulgence:
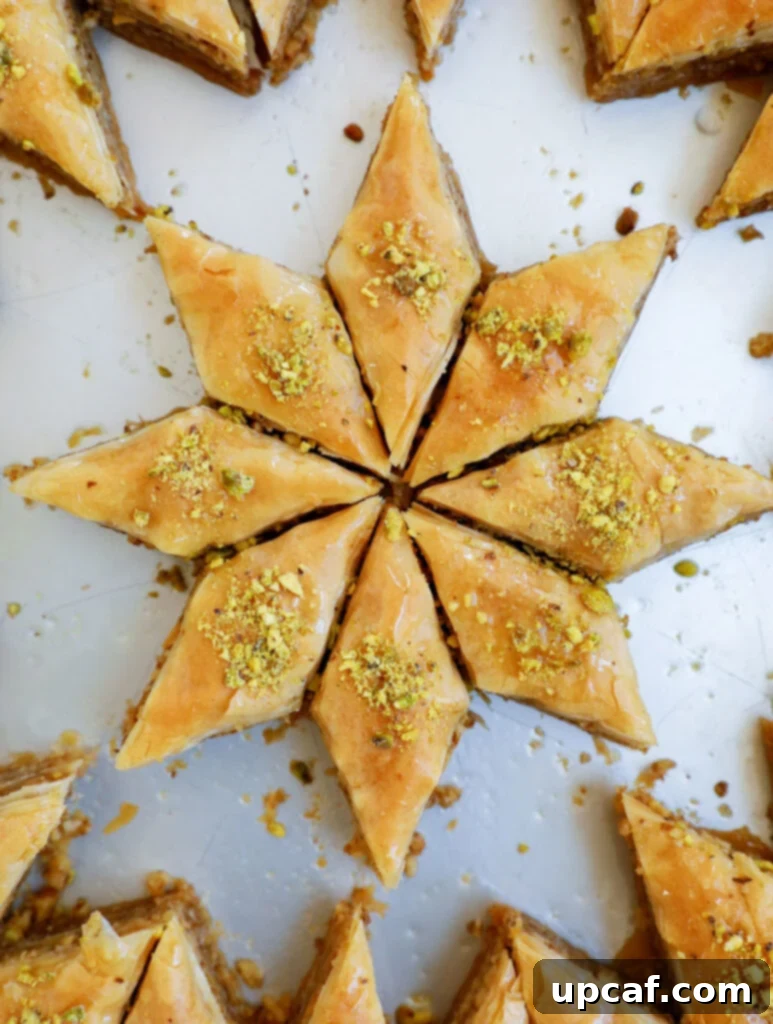
- It’s a Showstopper: With its intricate layers and golden-brown finish, this walnut baklava is undeniably beautiful. It presents an elegant, impressive dessert that will instantly captivate your guests and earn you endless praise. Pulling this out of the oven is an absolute triumph!
- Surprisingly Approachable: While baklava has a reputation for being complex, this recipe breaks down the process into manageable, easy-to-follow steps. The bulk of the work involves simple layering, which becomes rhythmic and satisfying. Don’t let its sophisticated appearance intimidate you; with a little patience, you’ll master this delightful pastry.
- Unforgettably Delicious: This homemade version is a revelation, far superior to anything you’ll find in stores. The fresh, rich walnuts, the crisp, buttery phyllo, and the fragrant simple syrup combine to create a flavor profile that is truly addictive. It’s a dessert that rarely sees leftovers, testament to its incredible taste.
- The Aroma is Divine: The moment this baklava bakes, your kitchen will be filled with the most enticing scent of toasted nuts, butter, and exotic floral notes from the syrup. It’s an olfactory experience that builds anticipation and enhances the enjoyment of the first bite.
Essential Ingredients for Perfect Walnut Baklava
Creating magnificent baklava begins with selecting high-quality ingredients. Here’s what you’ll need to assemble this Lebanese masterpiece:
- Phyllo Dough Sheets: These whisper-thin pastry sheets are the foundation of baklava’s signature flakiness. You’ll typically find them in the frozen pastry section of your local grocery store. Ensure they are fully thawed before use for best results.
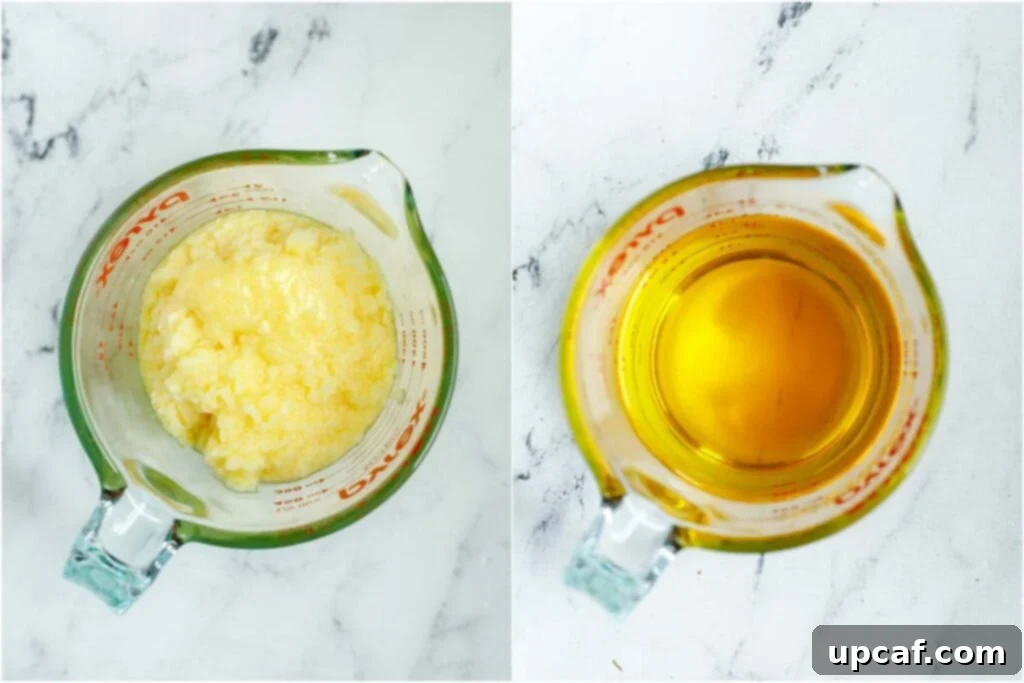
- Ghee (Clarified Butter): Ghee is essential for achieving the baklava’s rich flavor and crisp, golden layers. Its pure butterfat content browns beautifully and imparts a nutty depth that regular butter cannot. While store-bought grass-fed ghee is excellent, you can also easily make your own homemade ghee for an even richer taste.
- Fragrant Simple Syrup (Ater): This sweet liquid gold transforms the baked pastry. Learn how to make authentic Middle Eastern Simple Syrup at home, infused with rose and orange blossom water, to give your baklava its characteristic floral aroma.
- Ground Pistachios: A touch of finely ground pistachios is used as a traditional garnish, adding a beautiful pop of color and an additional layer of nutty flavor and texture to the finished dessert.
- Whole Walnuts: The star of our filling! Use good quality, fresh whole walnuts. Their earthy flavor and satisfying crunch are paramount to the baklava’s deliciousness.
- Powdered Sugar: Mixed with the ground walnuts, powdered sugar not only adds sweetness but also helps bind the nut filling slightly, preventing it from crumbling excessively during slicing.
Crafting Homemade Walnut Baklava: A Step-by-Step Guide
Making baklava is a rewarding process that combines a few key preparation steps with careful layering. Follow these instructions to create your delicious homemade baklava:
- Prepare in Advance: Begin by preparing your simple syrup, allowing it ample time to cool completely. Warm baklava absorbs cool syrup best, ensuring a perfectly moist and crispy result. Also, make sure your ghee is fully melted and ready for brushing.
- Preheat Oven: Preheat your oven to 350°F (175°C), ensuring it’s at the ideal temperature when your baklava is ready for baking.
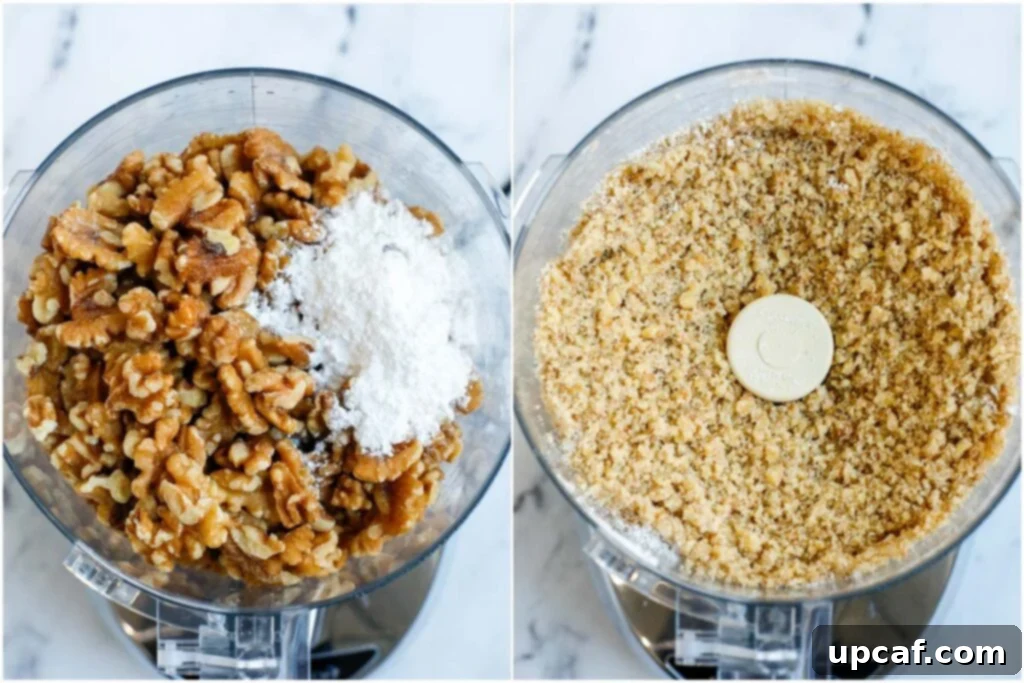
- Create the Walnut Filling: In a food processor, pulse the whole walnuts with the powdered sugar until finely ground but not pasty. The texture should resemble coarse crumbs. Transfer this aromatic filling to a bowl and set aside.
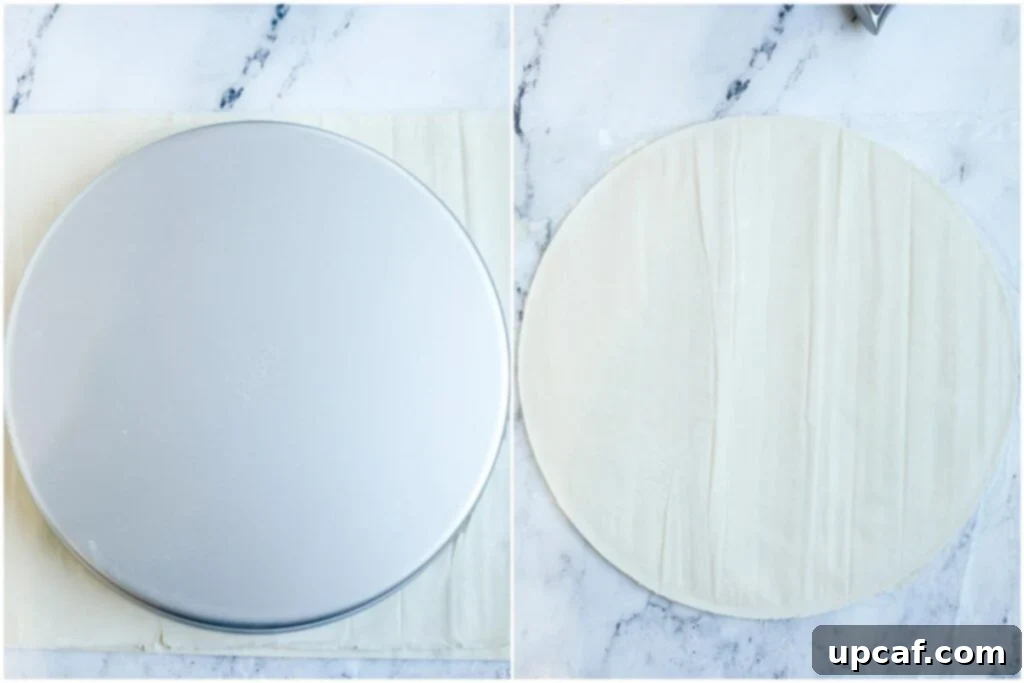
- Prepare the Phyllo Sheets: Carefully unfold the delicate phyllo sheets onto a large, clean cutting board. Gently smooth them out and align them neatly. If your phyllo sheets are larger than your baking pan, place the pan on top of the stack as a guide and trim the phyllo to fit perfectly. This ensures even layers and a professional finish. Repeat this process for the second pack of phyllo sheets.
Mastering the Art of Layering Baklava
The secret to perfect baklava lies in meticulous layering. While the full, detailed instructions are provided in the recipe card, here’s a summary to guide you through building this magnificent dessert:
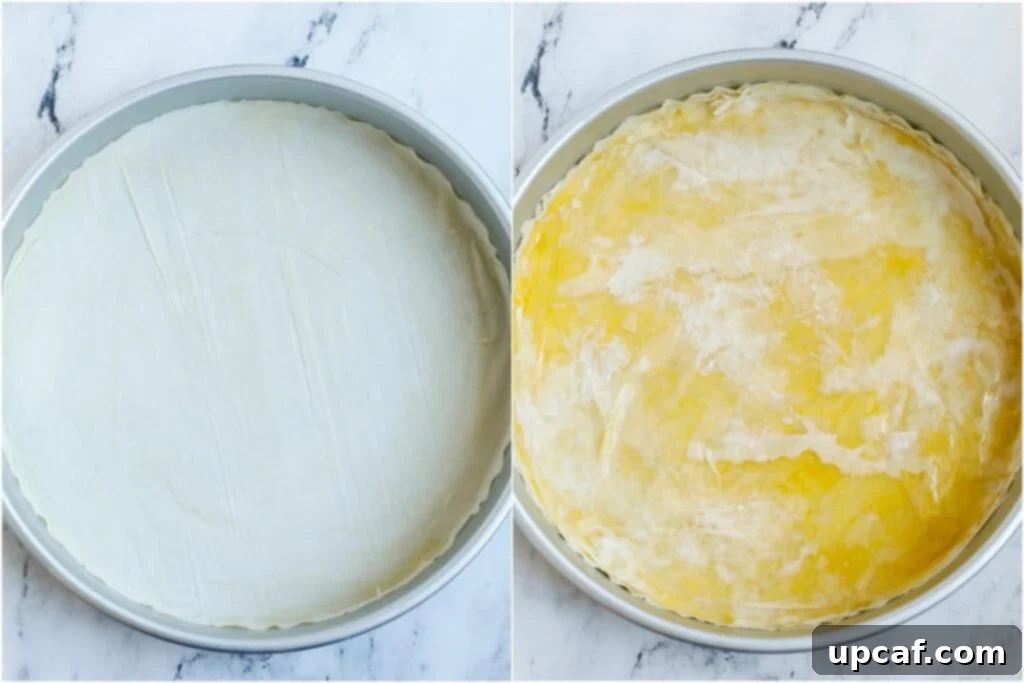
- Start by generously brushing the bottom of your baking pan with melted ghee, ensuring every inch is coated.
- Carefully place your first phyllo sheet into the pan, then gently brush its entire surface with ghee. Repeat this process nine more times, creating a solid base of ten ghee-brushed phyllo layers.
- Press down firmly on the phyllo layers to eliminate any air bubbles and create an even, compact base.
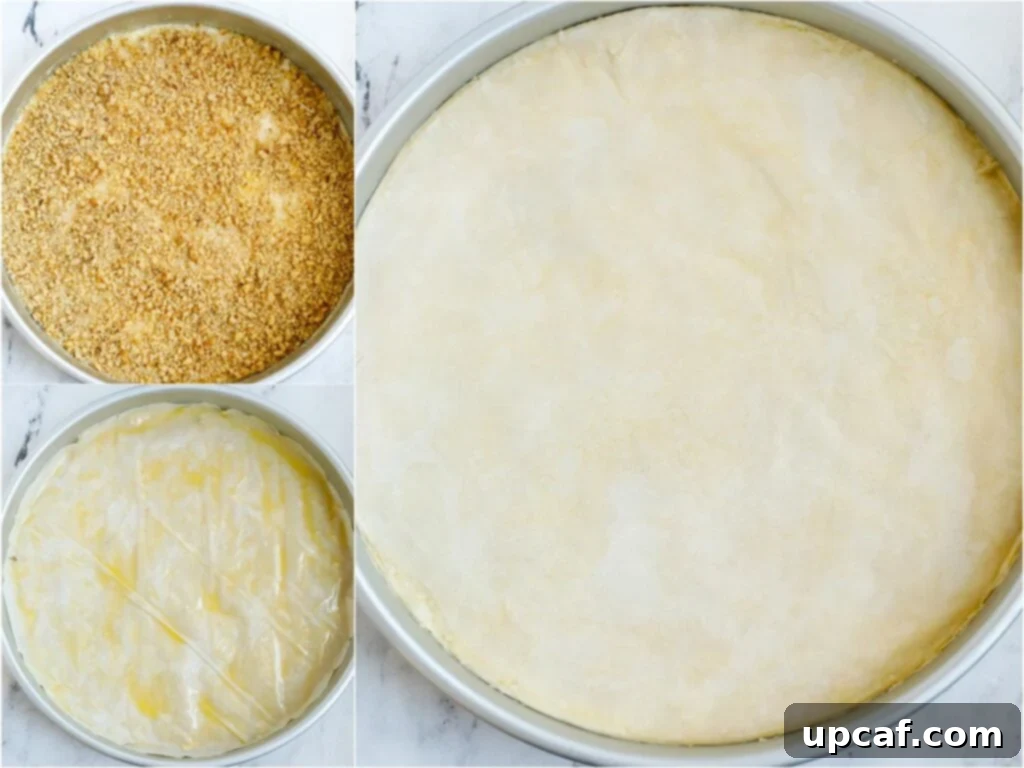
- Evenly spread 1½ cups of the prepared ground walnut filling over the phyllo base.
- Carefully place five more phyllo sheets on top of the walnuts, brushing each layer with ghee as you go.
- Again, press down well to ensure the layers are flat and compressed, removing any trapped air.
- Add another 1½ cups of the ground walnut filling, spreading it out evenly.
- Top this layer with five more ghee-brushed phyllo sheets.
- Press down firmly once more.
- Add the final 1½ cups of ground walnuts, creating the last rich layer of filling.
- Complete your baklava masterpiece by topping it with the remaining ten ghee-brushed phyllo sheets, mirroring your base layer.
- Finally, press down firmly on the top layer and generously brush the entire surface with ghee, preparing it for a beautiful golden bake.
Precision Cutting: Shaping Your Baklava
Cutting baklava before baking is crucial for achieving clean, beautiful portions after it’s cooked. Here’s how to create the traditional diamond pattern:
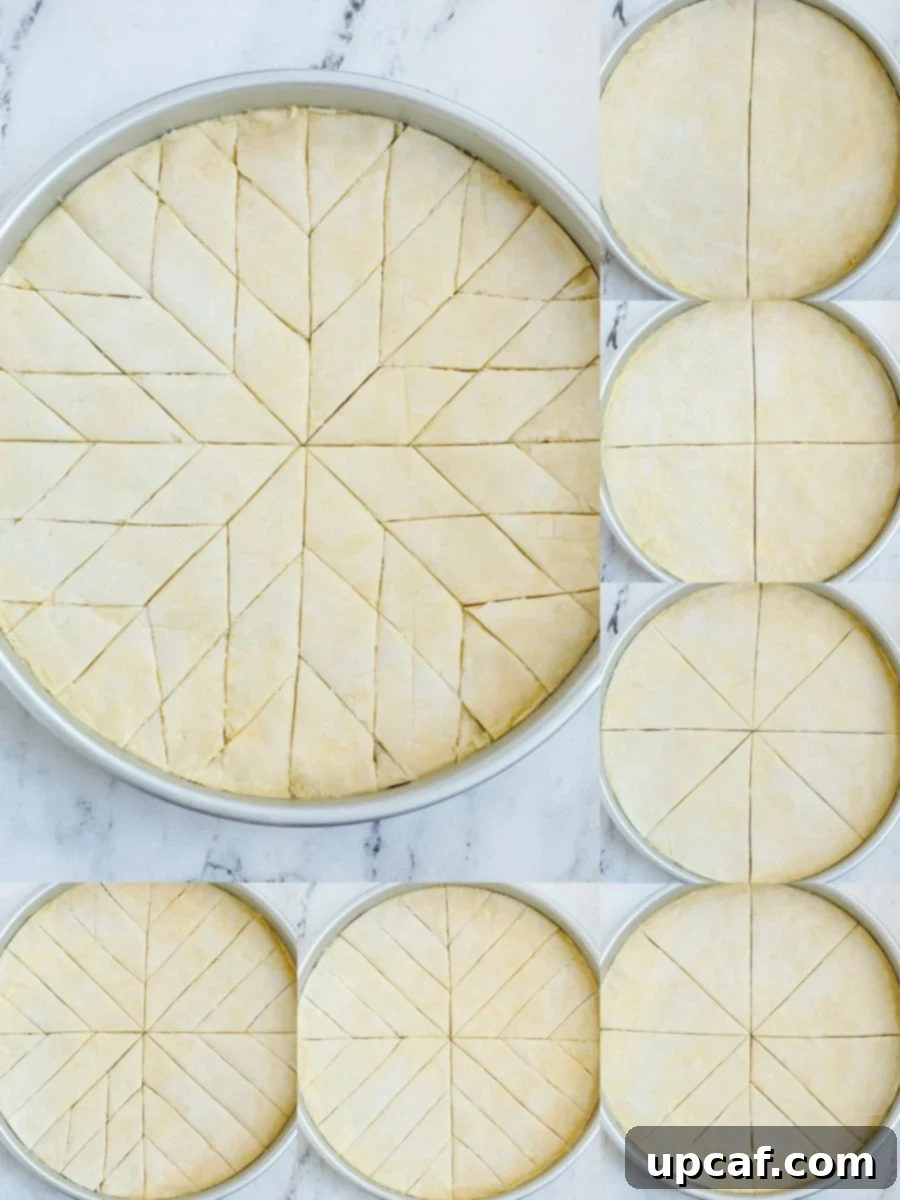
- Using a sharp, pointed knife, first divide the baklava into four equal triangles.
- Next, cut each of these large triangles in half, yielding a total of eight wedges.
- Working with one wedge at a time, make two straight cuts, approximately 1 inch apart, parallel to one of the triangle’s sides.
- Then, make two more cuts, also 1 inch apart, parallel to the opposite side of the same triangle. This will create a classic diamond pattern within that wedge.
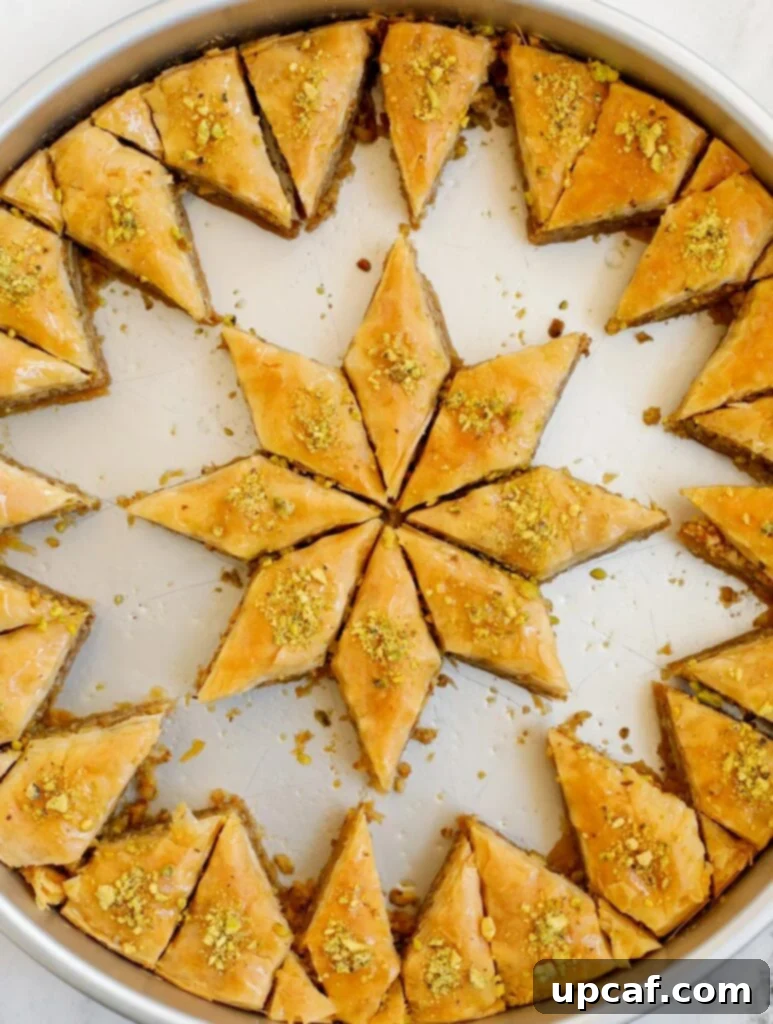
- Repeat this precise cutting process for the remaining seven wedges. This method ensures uniform pieces and helps the syrup penetrate evenly during baking.
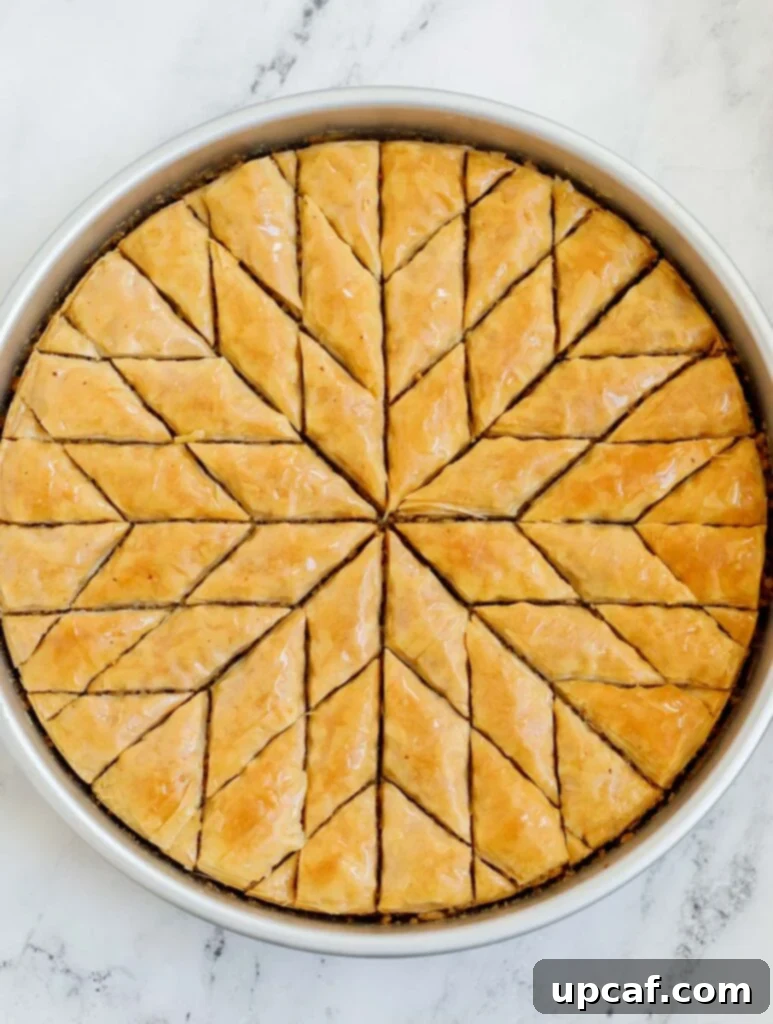
- Bake to Golden Perfection: Place the tray on the middle rack of your preheated oven and bake for approximately 45 minutes. During this time, the baklava edges should turn a light golden brown. For an extra crisp and beautifully caramelized top, you can briefly switch on the broiler for just 1-2 minutes. This step requires extreme vigilance – watch it “very closely” as baklava can burn incredibly fast under the broiler. Remove it the instant it reaches your desired golden hue.
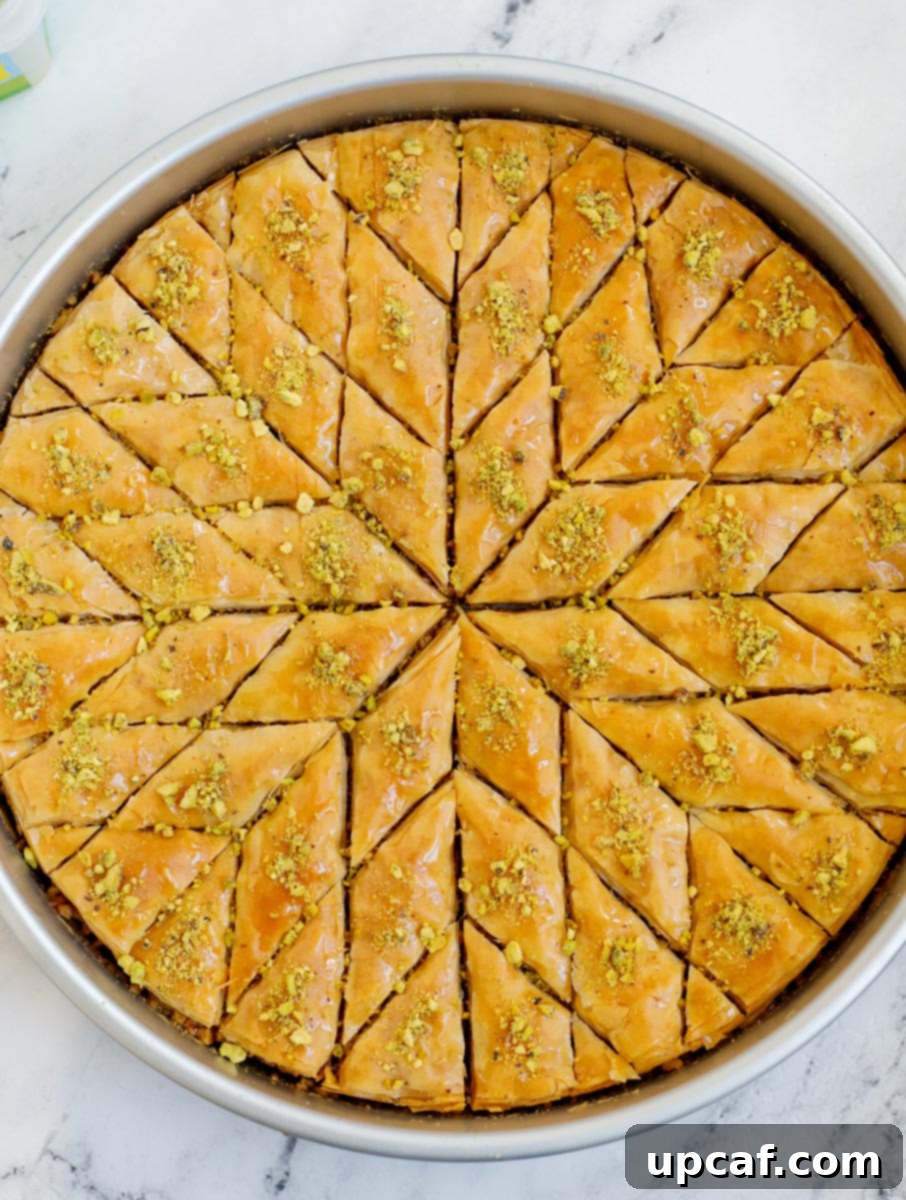
- The Syrup Drizzle: Immediately upon removing the baklava from the oven, while it’s still piping hot, generously drizzle 1¼ cups of the cooled simple syrup evenly over the entire surface. The contrast in temperatures is key: the hot baklava will eagerly absorb the cool syrup, resulting in a moist interior and a delightfully crispy exterior. Adjust the amount of syrup to your preference; this quantity provides a perfectly balanced sweetness. A squeezable bottle is ideal for ensuring an even distribution of syrup across every piece.
Expert Tips for Crafting the Ultimate Baklava
Achieving baklava perfection is within your reach! Follow these tried-and-true tips to ensure your homemade creation is nothing short of magnificent:
- Thaw Phyllo Properly: Phyllo dough is sold frozen for a reason – it’s delicate! Always thaw your phyllo sheets thoroughly overnight in the refrigerator. If you’re in a hurry, you can carefully thaw them at room temperature for a few hours. Attempting to work with partially frozen or damp phyllo will make it prone to tearing and incredibly difficult to separate.
- Handle Phyllo with Care: Phyllo is notoriously fragile. As you work with each sheet, keep the remaining stack covered with a slightly damp, clean kitchen towel. This prevents the exposed sheets from drying out and becoming brittle, making them much easier to handle without tearing.
- Embrace Imperfections: Don’t fret if a phyllo sheet tears! It happens to even experienced bakers. Simply patch it up with another piece, brush with ghee, and continue layering. Once baked, the many layers will conceal any minor imperfections, and no one will ever notice.
- Pan Size Matters (and Adaptability): If your phyllo sheets are a smaller size and don’t fit your round pan for a perfect cut, you have options. You can layer and brush the sheets, then trim the edges with a knife each time before adding a walnut layer and for the final top layer. Alternatively, use a smaller rectangular or square baking tray that fits your phyllo sheets more naturally, then adjust the quantities of walnuts, ghee, and syrup accordingly. If the round diamond cut proves too challenging, square or rectangular cuts are perfectly traditional and much simpler to execute.
- Cool Syrup is Non-Negotiable: Start making your simple syrup well in advance so it has plenty of time to cool to room temperature or even be slightly chilled. Pouring hot syrup over hot baklava will make the pastry soggy and prevent it from achieving that desired crispness. The temperature difference allows the baklava to properly absorb the syrup while maintaining its flaky texture.
- Pre-Bake Cutting is Key: This is a critical step often overlooked by beginners! Always cut your baklava into portions *before* it goes into the oven. After baking, the phyllo layers become incredibly flaky and brittle, making it nearly impossible to slice clean, even pieces without crushing the delicate pastry. Cutting beforehand ensures beautiful, defined portions.
- Don’t Skimp on the Ghee: Ghee is what gives baklava its signature richness, golden color, and incredibly flaky texture. Be generous when brushing each phyllo layer. It might seem like a lot, but it’s essential for the authentic taste and mouthfeel.
- Evenly Spread Nut Filling: Ensure your walnut filling is spread in a consistent, even layer. This creates uniform texture in every bite and prevents some pieces from being overly dense while others are sparse.
Frequently Asked Questions About Baklava
While both puff pastry and phyllo dough create flaky layers, they are not interchangeable for baklava. Puff pastry relies on steam to “puff up” significantly during baking, creating large, airy pockets. Phyllo, on the other hand, bakes into many thin, crisp layers when brushed with fat, which is essential for baklava’s dense, delicate flakiness. Using puff pastry would result in a very different, and likely less desirable, texture for baklava.
Baklava is undoubtedly an indulgent dessert, and its calorie count reflects that. The richness comes from several key ingredients: the generous use of ghee (clarified butter), the substantial amount of walnuts, and, most notably, the significant amount of sugar in both the nut filling (powdered sugar) and the generous simple syrup poured over the baked pastry. However, like all rich desserts, baklava is meant to be enjoyed in moderation as a special treat, savored for its exquisite flavor rather than consumed as a diet staple.
While simple syrup is traditional, especially the aromatic Lebanese Ater, you can certainly use honey as an alternative. Many regional variations of baklava indeed use honey for sweetening. However, the floral notes from rose and orange blossom water in simple syrup impart a distinctive and highly aromatic flavor that is characteristic of Middle Eastern baklava. Using this infused syrup makes a significant difference in the overall taste experience.
Absolutely! Baklava is incredibly versatile when it comes to nut fillings. Walnuts and pistachios are the most common choices, but feel free to experiment with your favorite nuts or a combination. Almonds, pecans, or even a mix of walnuts and pistachios, can create equally delicious variations. Just ensure the nuts are finely chopped or ground to achieve the right texture for the filling.
You can create ghee from regular butter by simmering it to remove milk solids and water, resulting in pure butterfat. However, simply substituting melted butter for ghee directly in the recipe is not ideal. Regular butter contains water, which can make the phyllo less crisp and more prone to steaming rather than frying. Ghee, being pure fat, provides a much richer flavor and ensures the baklava achieves its signature crisp, flaky, and golden-brown finish that butter alone cannot replicate.
Baklava is an excellent dessert to prepare ahead of time! In fact, many believe its flavors deepen and meld beautifully after a day or two. Once completely cooled, store your baklava in an airtight container at room temperature. This helps maintain its crispness. It can also be stored in the refrigerator, though some find it slightly less crispy when chilled. When stored correctly, baklava can last for at least a week, but it’s usually devoured long before then!
Yes, baklava freezes exceptionally well! Once it has completely cooled, wrap individual portions or smaller batches tightly in plastic wrap, then place them in an airtight freezer-safe container. It can be frozen for up to three months. Freezing in smaller portions is convenient, allowing you to thaw only what you need without repeatedly freezing and thawing the entire batch. To enjoy, simply transfer the desired amount to the refrigerator overnight to thaw.
More Irresistible Lebanese Recipes to Explore
If you’ve fallen in love with the flavors of Lebanese cuisine through this baklava, I invite you to explore more authentic recipes that are cherished in Lebanese homes:
- Lebanese Spinach Pies (Fatayer Bi Sabanekh)
- Lebanese Chicken Lentil Soup (Shorbet Adas ma Dajaj)
- Easy Kafta and Potato Stew (Batata wa Kafta)
- Authentic Baba Ghanouj
- Homemade Zaatar Manakeesh
- Lebanese Meat Pies (Fatayer Blahmeh)
I genuinely hope you find joy and deliciousness in all the recipes I share, especially this exquisite Walnut Baklava. It’s a labor of love that is incredibly rewarding. I encourage you to try it, savor every bite, and share its goodness with your loved ones. Your feedback means the world, so please consider rating and commenting below if you enjoy this recipe!
For more culinary inspiration, the latest posts, and delightful recipes, be sure to follow Cookin’ With Mima on FACEBOOK | INSTAGRAM | PINTEREST.
Homemade Baklava With Walnuts
Equipment
- 1-13 x 2 inch round aluminum pan.
- Cooking brush
Ingredients
- 2 16 oz. 14 x 18 phyllo sheet packs, or 2-9 x14 16 oz. sheet packs
- 1 cup ghee, melted, preferably grass fed
- 1¼ cup Simple Syrup, More or less to preference
- 2-3 tbsps. ground pistachios, for garnishing
The Filling
- 4 cups whole walnuts, just the normal ones at the store
- ½ cup powdered sugar, or less to preference
Instructions
- Prepare the simple syrup first and let it cool completely.
- Preheat oven to 350°F (175°C).
- Process the walnuts and powdered sugar in a food processor until finely ground. Transfer to a bowl and set aside.
- Unfold the phyllo sheets onto a large cutting board. Smooth them out and align evenly. Note: If using smaller phyllo sheets, you might need to trim the edges on the pan. Refer to the Notes section for guidance.
- Place your baking pan on top of the phyllo stack as a guide and cut the phyllo to fit the pan perfectly. Repeat for the second pack of phyllo sheets.
- Once your sheets are prepared, brush the base of the pan generously with melted ghee. Place one sheet of phyllo and brush again. Repeat this 9 more times to create a total of 10 base layers, brushing ghee between each sheet. Add 1.5 cups of the ground walnuts and spread evenly.
- Carefully place one phyllo sheet over the nuts and gently dab with ghee, as brushing might move the nuts. Add 4 more sheets, brushing ghee between each. Before brushing the top of the 5th sheet, press down the surface firmly with your palm to compress the nuts. Then, brush generously with ghee.
- Add another 1.5 cups of crushed walnuts and top with 5 more phyllo sheets, layered and brushed with ghee in the same manner. For the final nut layer, add the remaining 1.5 cups ground walnuts. Top with 10 phyllo sheets for the very top layer, just like the bottom base. Before the final ghee brush, press down the entire surface very well with your palm to compress all the layers.
- Using a sharp knife with a pointed tip, cut the baklava into 4 equal large triangles. Then, cut each of these triangles in half, forming 8 triangles total. Working one wedge at a time, make two straight cuts, about 1 inch apart, parallel to one side of the triangle. Make two more cuts, parallel to the opposite side of the same triangle, creating a beautiful diamond pattern. Repeat this process for the remaining 7 wedges. Refer to the blog photos for visual guidance on this step.
- Place the prepared tray on the middle rack of your oven and bake for 45 minutes. At this point, the edges and top should be a light golden brown. For an intensified golden finish, you may turn on the top broiler for just 1-2 minutes, watching it “very closely” as it can burn rapidly. Remove immediately once desired color is achieved.
- Remove the baklava from the oven right away. While it’s still hot, drizzle 1¼ cups of the cooled simple syrup evenly all over the baklava. Use more or less according to your sweetness preference; this amount typically yields a perfectly balanced dessert. A squeezable bottle is helpful for spreading the syrup uniformly.
Notes
- Be sure to thaw your phyllo sheets ahead of time. As they’re sold in the freezer section, you’ll have to thaw them overnight in the fridge or quickly on the counter at room temperature. If there’s still kind of frozen and damp, the moisture will make the phyllo hard to work with.
- If you are using a smaller phyllo sheet as mentioned and can’t get the round cut, you can layer and brush the phyllo layers as mentioned and cut the edges before adding in the walnuts layer each time and the last layer on top. Another thing you can do is just use a smaller tray if you like to fit that sheet, but you will end up using less of the amounts of walnuts, ghee and simple syrup. If this is too challenging to cut, you can always just do it in a rectangular or square tray and cut them into squares.
- If your phyllo pastry rips, it’s ok, don’t fret. After it’s been baked, no one will notice!
- Cover the phyllo sheets with a damp towel as you work your way through them to prevent them from drying out.
- Be sure to start your syrup early so it has time to cool. If the syrup is hot, you’ll find that it’s difficult for the baklava to absorb it.
- Be sure not to forget to cut the baklava before you bake it! It’ll be much harder to slice clean pieces after it’s been baked as the phyllo sheets are so flaky and won’t cut evenly.
