Mastering Crème Brûlée: An Easy Recipe for a Decadent Homemade Dessert
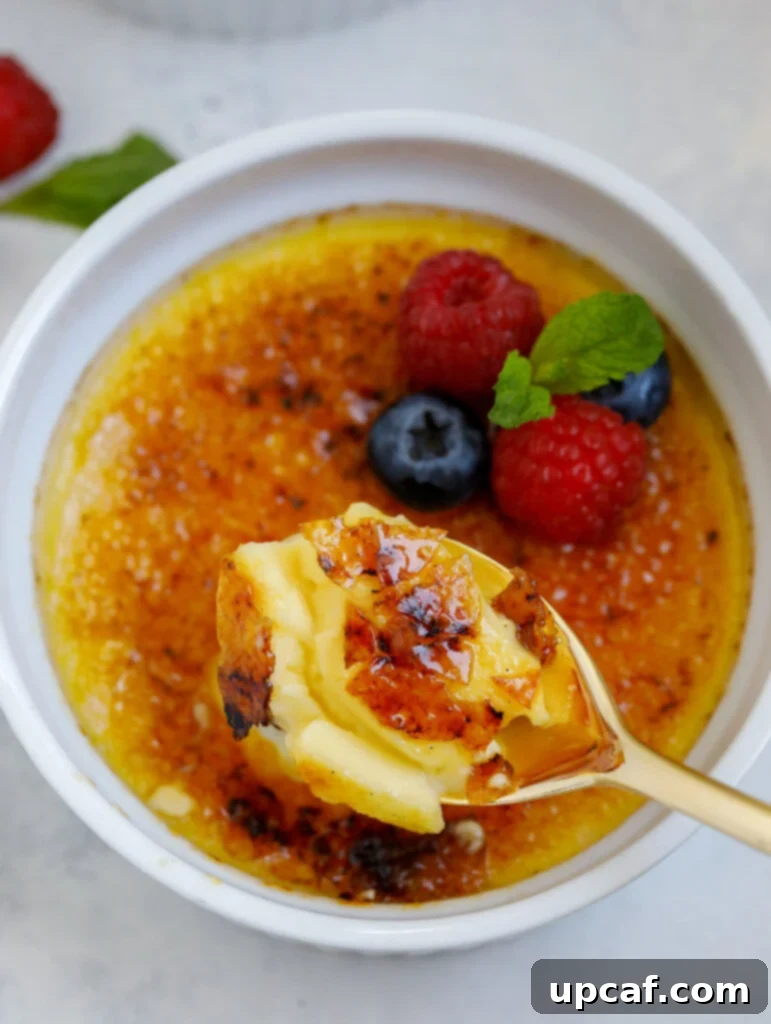
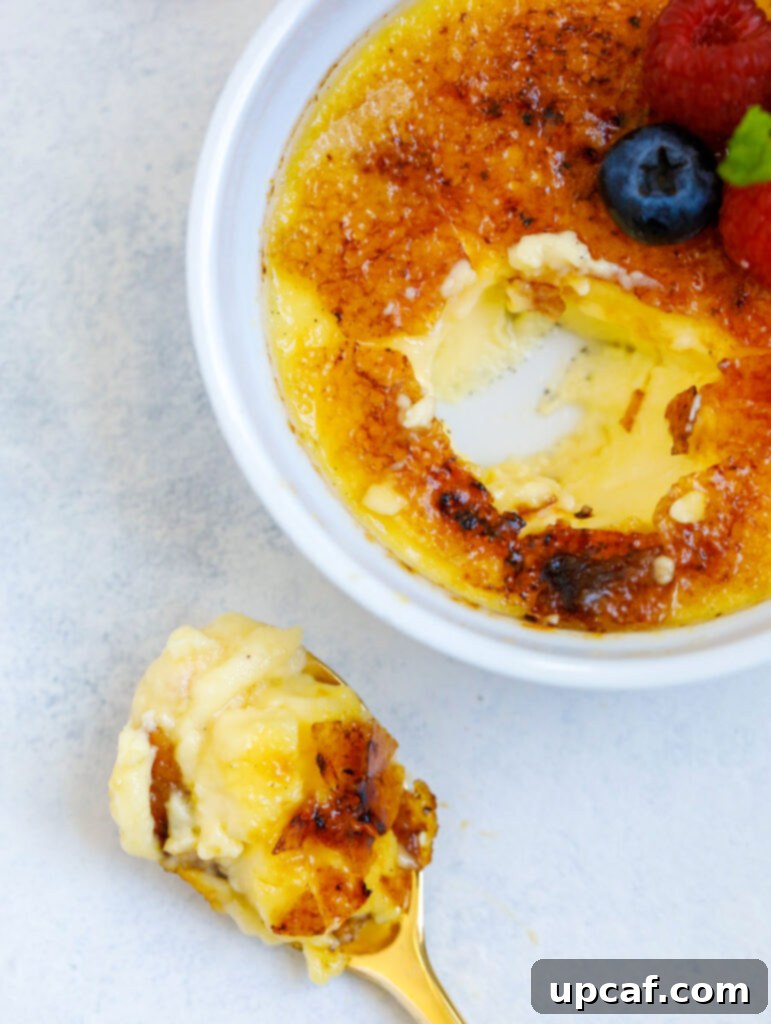
Crème brûlée, a dessert often synonymous with fine dining and culinary expertise, possesses an air of sophisticated complexity. Yet, beneath its elegant surface lies a surprisingly simple confection that even novice bakers can master with ease. This Easy Crème Brûlée recipe unveils the secrets to achieving that perfect balance: a lusciously creamy custard base crowned with an irresistibly crunchy, caramelized sugar topping that shatters with every spoon.
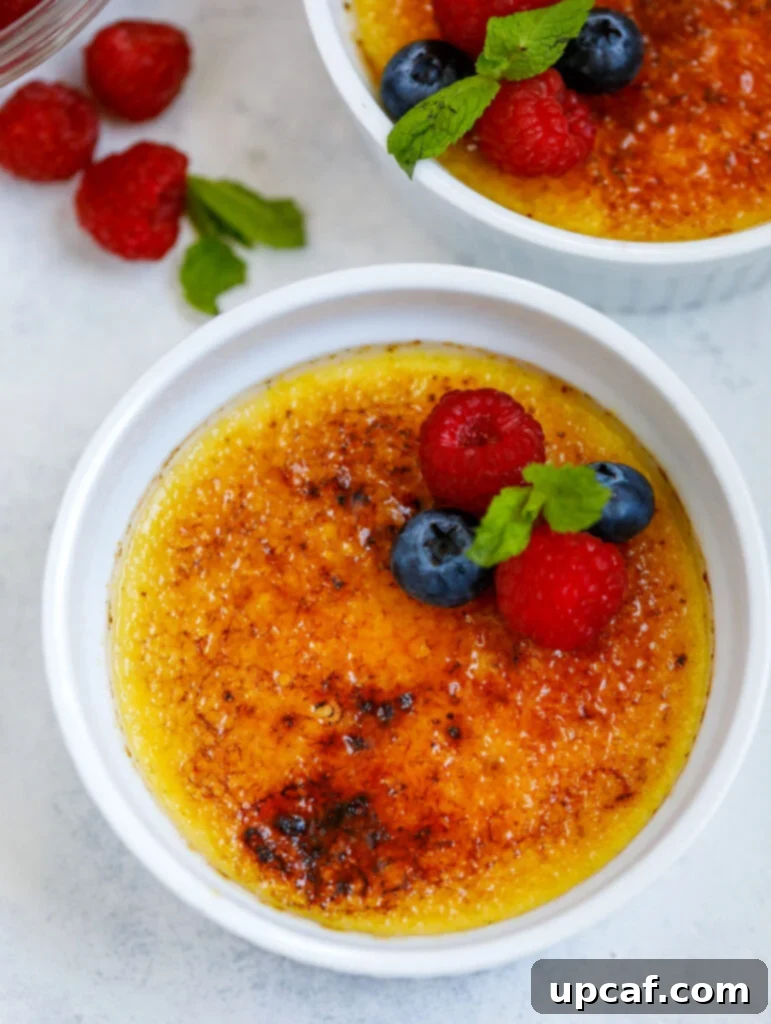
Imagine the delightful crack as your spoon breaches the golden caramel, diving into a rich, velvety vanilla custard. This recipe promises to bring that restaurant-quality indulgence directly to your kitchen, transforming an ordinary meal into an extraordinary culinary experience. Adorn each individual serving with a handful of fresh berries – raspberries, blueberries, or sliced strawberries – for an added burst of freshness and a touch of vibrant color that makes this dessert as visually stunning as it is delicious.
Should your sweet tooth crave more delightful adventures, explore other tempting creations such as my Chocolate Chip Cheesecake and my Raspberry Puff Pastry Tart.
Why This Easy Crème Brûlée Recipe Will Become Your Favorite
There are countless reasons to fall in love with this straightforward take on the classic French dessert. Its simple preparation belies its luxurious outcome, making it an ideal choice for impressive entertaining or a special treat at home.
- A Decadent, Velvety Custard Filling: Our recipe yields a custard that is not just creamy, but truly rich and deeply flavorful. Infused with the warm, aromatic notes of vanilla, it creates a dreamy foundation that melts in your mouth, leaving a lingering, satisfying taste. The texture is exquisitely smooth, a testament to careful preparation and quality ingredients.
- The Signature Crisp Caramel Topping: The hallmark of a perfect crème brûlée is its glass-like, caramelized sugar crust. This recipe ensures that coveted topping, created by a quick torching of a sugar layer over the chilled custard. The satisfying sound and sensation when your spoon breaks through this brittle layer is pure dessert bliss, offering a delightful textural contrast to the soft custard below.
- Elegance Made Effortless: Despite its gourmet appearance, crème brûlée doesn’t have to be intimidating. This recipe simplifies the process, making it accessible for home cooks of all skill levels. With just a handful of fundamental ingredients and clear, concise steps, you can create a dessert that looks incredibly fancy but is surprisingly simple to whip up. It’s the perfect showstopper for any occasion without the stress!
The Essential Ingredients for Your Homemade Crème Brûlée
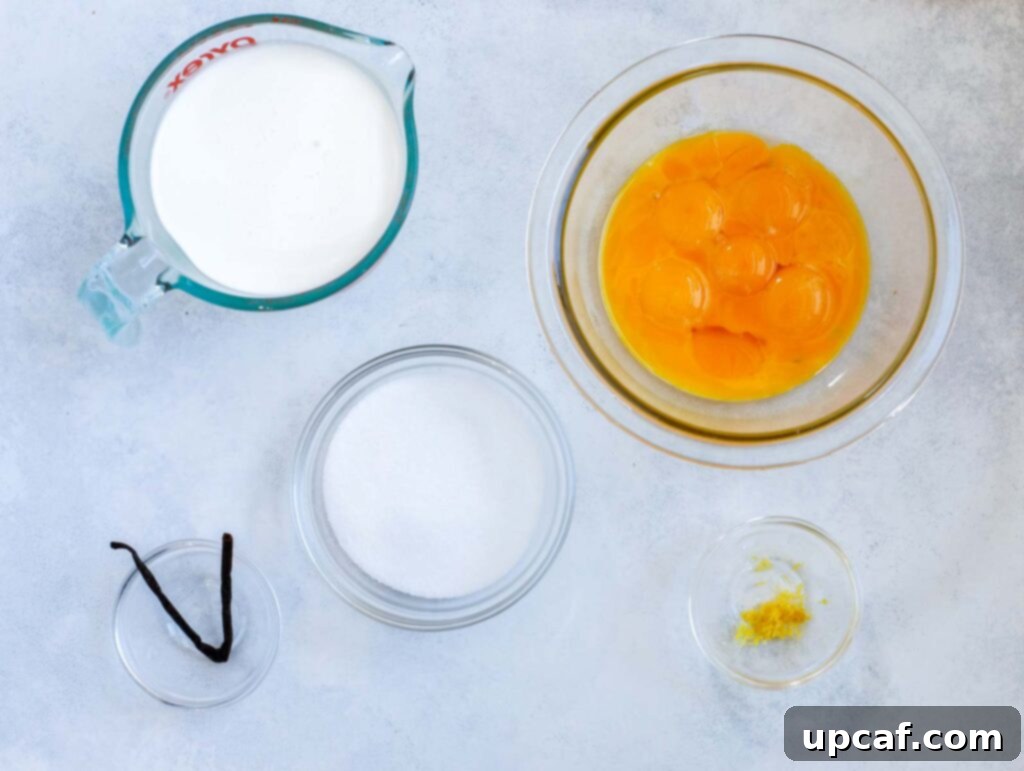
Creating this sublime dessert requires only a few key ingredients, each playing a crucial role in achieving the perfect flavor and texture. Quality matters here, so opt for fresh ingredients when possible.
- Egg Yolks: These are the backbone of our custard, providing richness, structure, and that beautiful golden hue. Using only yolks results in a silkier, more luxurious texture compared to using whole eggs.
- Heavy Cream: The secret to an incredibly rich and decadent custard. Its high fat content contributes to the signature creamy mouthfeel of crème brûlée. Do not substitute with lighter creams or milk, as this will compromise the texture.
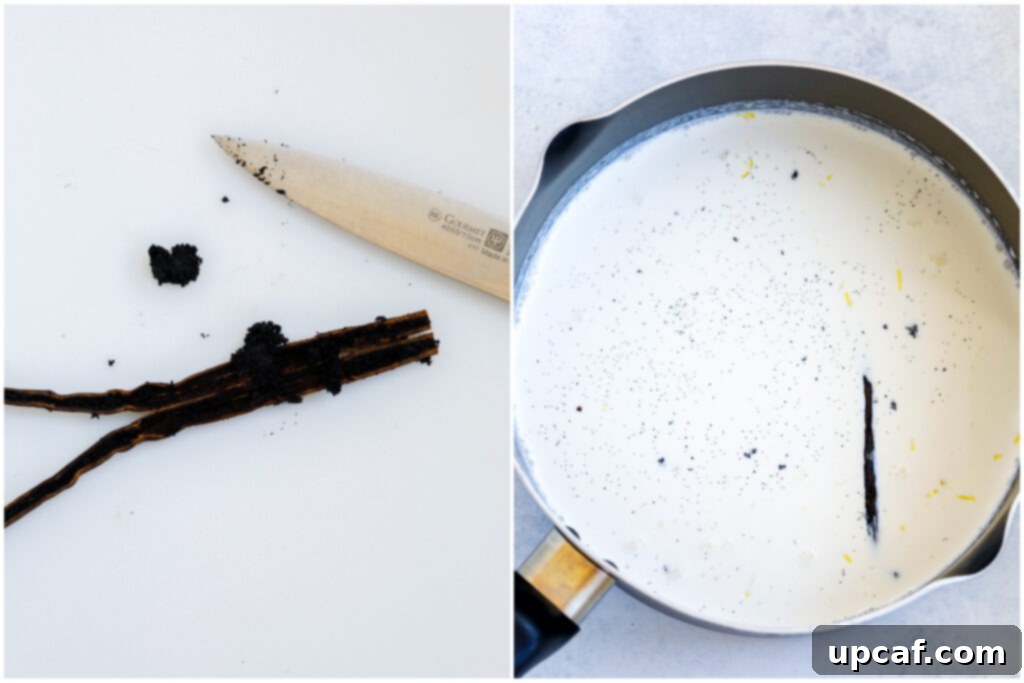
- Vanilla Bean or Vanilla Extract: Vanilla is indispensable for classic crème brûlée. A whole vanilla bean, with its tiny fragrant seeds, offers the most profound and authentic flavor. Split the bean, scrape out the seeds, and infuse both the seeds and the pod into the cream for maximum aroma. If a vanilla bean is unavailable, high-quality pure vanilla extract (ensure it’s not imitation) is a perfectly acceptable alternative.
- Granulated Sugar: Used for both sweetening the custard and forming the iconic crunchy topping. Fine granulated sugar works best for an even melt and caramelization.
- Lemon Zest (Optional, but Recommended): A touch of finely grated lemon zest (or orange zest) adds a bright, subtle citrus note that beautifully complements the richness of the cream and vanilla, preventing the dessert from being overly heavy. It’s a small addition that makes a big difference.
- Fresh Berries (for Topping): While optional, fresh raspberries, blueberries, or sliced strawberries provide a refreshing tartness and vibrant color, cutting through the richness of the custard and caramelized sugar. They also elevate the visual appeal of the dessert.
Step-by-Step: How to Make This Easy Crème Brûlée Recipe
Follow these detailed instructions to create a flawless crème brûlée that will impress everyone. Remember, patience and attention to detail are your best allies.
- Prepare the Vanilla-Infused Cream: In a medium saucepan, combine the heavy cream, vanilla (split bean with scraped seeds, or vanilla extract), and lemon zest. Heat this mixture over low to medium heat, stirring occasionally, just until it reaches a gentle simmer or small bubbles appear around the edges. Do not let it come to a rapid boil. Remove from heat immediately to prevent scorching.
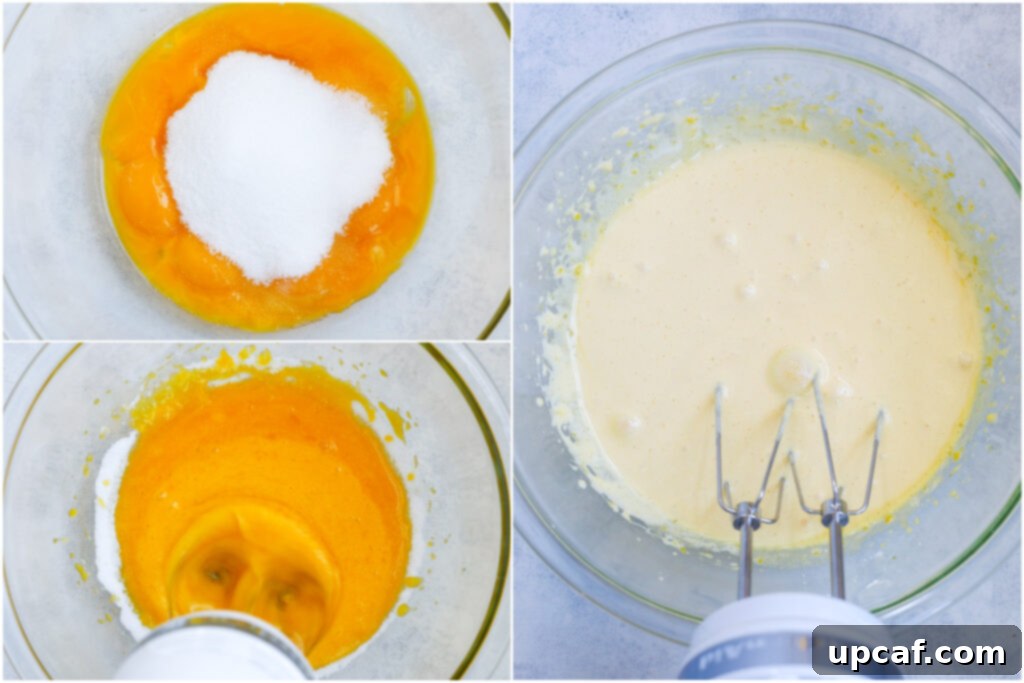
- Whisk Egg Yolks and Sugar: In a separate large bowl, whisk the egg yolks with the granulated sugar (the portion designated for the custard, usually 2/3 of the total) until the mixture is pale yellow, thick, and fluffy. This process incorporates air and dissolves the sugar, creating a smooth base.
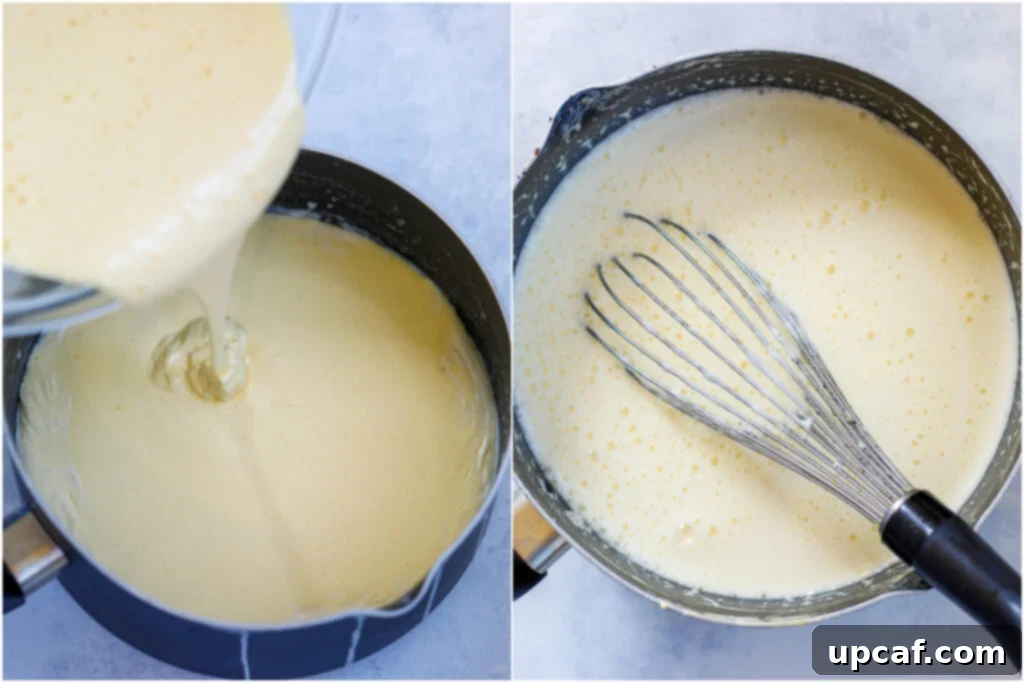
- Temper the Eggs: This is a crucial step to prevent the eggs from scrambling. Slowly pour about a quarter of the hot cream mixture into the egg yolk mixture while continuously whisking vigorously. This gradually raises the temperature of the eggs without cooking them. Once combined, pour the tempered egg mixture back into the saucepan with the remaining cream, whisking constantly until well combined.
- Cook the Custard (Briefly): Return the saucepan to low heat. Continue to stir the custard gently with a spoon or spatula, making sure to scrape the bottom and sides of the pan. Cook for about 2-3 minutes, or until the custard slightly thickens and coats the back of a spoon. It should not boil.
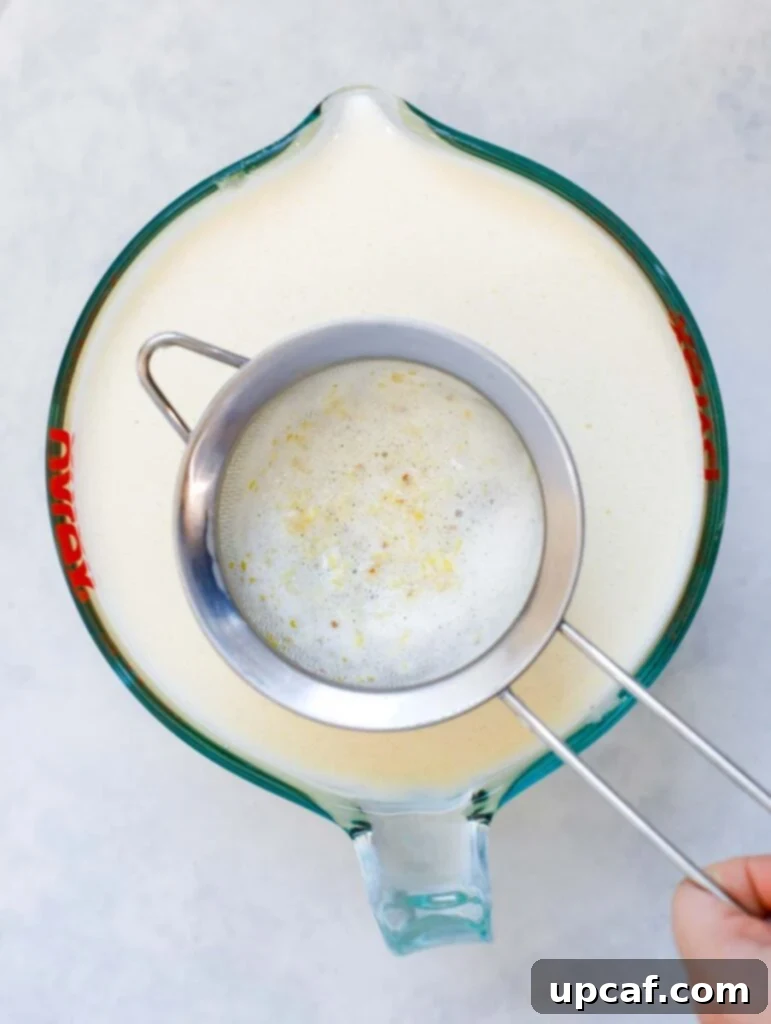
- Strain the Custard: For the silkiest texture, immediately strain the custard mixture through a fine-mesh sieve into a clean pitcher or bowl. This step removes any potential cooked egg bits, vanilla bean pod (if used), or lemon zest, ensuring a perfectly smooth custard. Gently skim off any foam that forms on the surface – this prevents an uneven custard top.
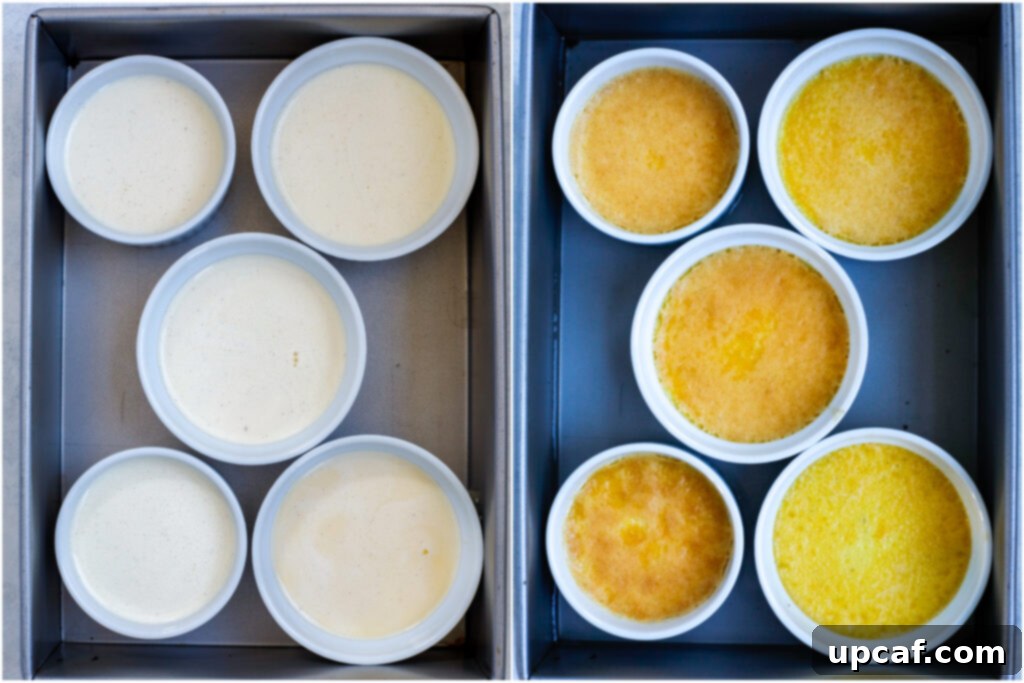
- Pour into Ramekins and Prepare for Baking: Preheat your oven to 300°F (150°C). Arrange your individual ramekins (typically 4-6 oz capacity) in a deep baking dish or roasting pan. Carefully pour the strained custard into each ramekin, filling them about 90% full, just shy of the rim.
- Create a Water Bath (Bain-Marie): Place the baking dish with the filled ramekins into the preheated oven. Then, carefully pour boiling water into the baking dish around the ramekins, ensuring the water level comes about halfway up the sides of the ramekins. A water bath (bain-marie) ensures even, gentle cooking, preventing the custard from cracking or curdling.
- Bake to Perfection: Bake for approximately 50-60 minutes. The baking time can vary slightly depending on your oven and ramekin size. The custards are done when the edges are set, but the center still has a slight jiggle when gently shaken. Do not overbake, or the custard will become rubbery.
- Chill Thoroughly: Carefully remove the baking dish from the oven. Using tongs or oven mitts, carefully transfer the ramekins from the hot water bath to a wire rack to cool completely at room temperature. Once cooled, cover each ramekin tightly with plastic wrap and refrigerate for at least 4 hours, or preferably overnight, until thoroughly chilled and firm.
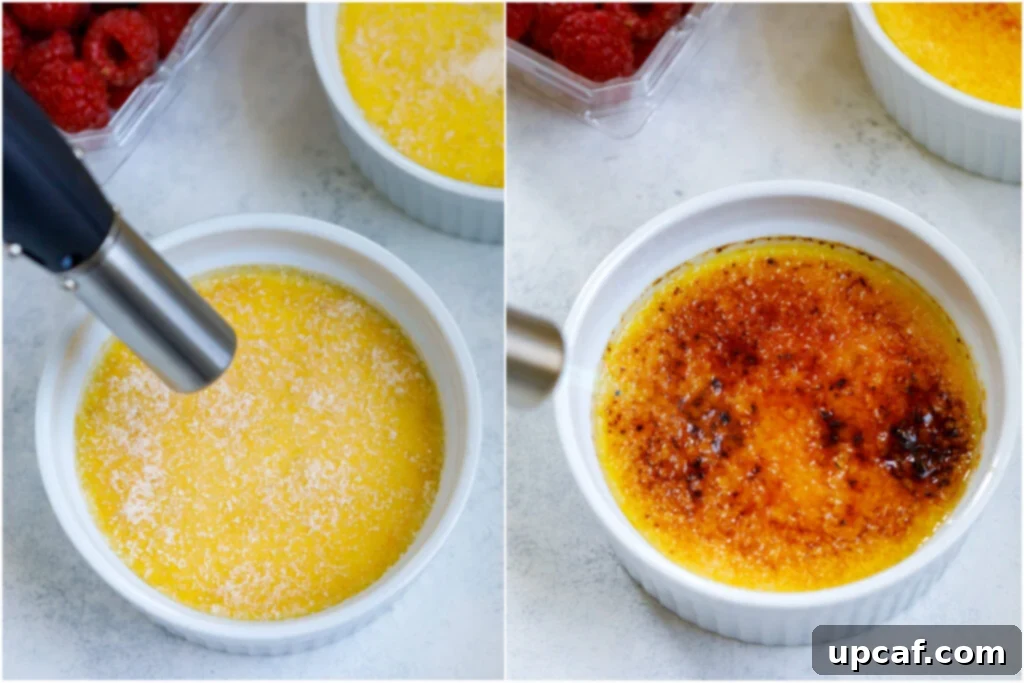
- Create the Caramel Topping: Just before serving, uncover the chilled custards. Evenly sprinkle a thin layer of granulated sugar (the remaining 1/3 portion) over the surface of each crème brûlée. Use a kitchen torch to caramelize the sugar. Move the flame slowly and evenly over the sugar until it melts, bubbles, and turns a rich amber-brown, forming a hard, glossy crust. Work quickly to avoid overheating the custard below. If you don’t have a torch, see the FAQ section for an oven method.
- Garnish and Serve: Immediately after caramelizing, serve your magnificent crème brûlée, ideally garnished with fresh berries or a sprig of mint. The contrast between the warm, crisp topping and the cold, creamy custard is heavenly. Enjoy!
Expert Tips and Troubleshooting for Crème Brûlée Success
Achieving crème brûlée perfection is easy with a few key insights and common troubleshooting solutions:
Essential Recipe Notes & Tips:
- Ramekin Size Matters: The yield of this recipe can vary based on the size of your ramekins. While it typically makes about 6 servings, using smaller or larger dishes will adjust the total number. Adjust baking time accordingly if using different sizes.
- Boiling Water for the Bain-Marie: Always use boiling hot water for the water bath (bain-marie). If you don’t have an electric kettle, start heating water on the stovetop well in advance so it’s ready when your custard is poured into the ramekins. This ensures immediate gentle cooking and better temperature control.
- Timing the Caramelization: Only caramelize the sugar topping just before serving. Storing crème brûlée in the fridge after torching will cause the caramel to absorb moisture, softening it and making it lose its desirable crunch.
- Skim the Foam: After whisking the egg mixture and hot cream together, a layer of foam may form on top. It’s best to gently skim this foam off the surface before pouring the custard into the ramekins. This ensures a perfectly smooth and uniform custard surface, which is ideal for caramelizing.
- Preheat Your Oven: Always ensure your oven is fully preheated to the specified temperature before placing the water bath inside. Consistent oven temperature is crucial for even baking.
- Don’t Rush the Chill: Resist the urge to serve your crème brûlée prematurely. The custard needs ample time in the refrigerator (at least 4 hours, or overnight) to set properly and achieve its ideal firm, yet creamy, consistency.
- Tempering is Key: When combining the hot cream with the egg yolks, pour slowly and whisk continuously. This prevents the yolks from scrambling and ensures a smooth, lump-free custard.
Common Troubleshooting:
- Custard is Too Runny: This usually means it was underbaked. Next time, bake a bit longer until the edges are set and the center has a gentle jiggle. Ensure your oven temperature is accurate.
- Custard is Curdled or Rubbery: This is a sign of overbaking or cooking at too high a temperature. The water bath helps prevent this, but check for doneness at the earlier end of the baking time.
- Sugar Topping Burns Easily: Ensure you’re using fine granulated sugar and move the kitchen torch flame continuously. If using the broiler method, watch it like a hawk as it can burn in seconds.
- Sugar Topping Doesn’t Crisp: Ensure the custard is thoroughly chilled. Any warmth can prevent the sugar from hardening properly. Apply an even, thin layer of sugar for best results.
Crème Brûlée Flavor Variations
While classic vanilla is always a hit, crème brûlée is wonderfully versatile. Feel free to experiment with these flavor additions:
- Chocolate Crème Brûlée: Melt 2-3 oz of good quality dark chocolate into the hot cream mixture before tempering.
- Coffee/Espresso Crème Brûlée: Add 1-2 tablespoons of instant espresso powder or strong brewed coffee to the heavy cream.
- Lavender Crème Brûlée: Infuse 1-2 teaspoons of culinary lavender buds into the cream during heating, then strain out before tempering.
- Citrus Infusion: For a more intense citrus flavor, infuse additional strips of orange or lemon peel into the cream, then strain before tempering.
- Spice Infusion: Add a pinch of cinnamon, cardamom, or star anise to the cream for a warm, exotic twist. Remember to strain out whole spices.
Frequently Asked Questions (FAQ’s)
How to store Crème Brûlée?
Crème brûlée can be stored in the refrigerator for up to 3-4 days. It’s best to cover each ramekin tightly with plastic wrap before caramelizing the sugar. If you’ve already torched the sugar, storing it in the fridge will eventually cause the topping to soften due to moisture absorption. If keeping chilled for a couple of days before caramelizing, you might notice a small amount of condensation on the custard surface. Gently pat it dry with a paper towel or Kleenex before adding sugar to torch.
What can I use for crème brûlée if I don’t have a torch?
While a kitchen torch provides the best and most consistent results for a perfectly crisp topping, you can still achieve a caramelized crust without one. The most common alternative is using your oven’s broiler setting. Sprinkle the sugar evenly, then place the ramekins under a preheated broiler (watch them closely!) for 1-3 minutes until the sugar melts and browns. Be extremely vigilant, as sugar burns quickly, and you want to avoid warming the custard too much. Another, more laborious method involves carefully heating the back of a metal spoon with a flame and pressing it onto the sugar surface, though this requires considerable care and patience.
Do I need ramekins to make crème brûlée?
Serving crème brûlée in individual ramekins is highly recommended for optimal results. The small, shallow dishes ensure the custard cooks evenly and sets beautifully, creating that ideal individual portion with a perfect crust-to-custard ratio. While it’s technically possible to use a larger wide ceramic dish, the results may vary significantly. A large dish could lead to uneven cooking (edges overcooked, center undercooked) and a less satisfying presentation.
Can I use milk instead of heavy cream?
Using milk instead of heavy cream will drastically alter the texture and richness of your crème brûlée. Heavy cream’s high-fat content is crucial for the velvety, luxurious mouthfeel. Milk will result in a much thinner, less satisfying custard that might also be more prone to curdling. For the best crème brûlée, heavy cream is non-negotiable.
What kind of sugar should I use for the topping?
Fine granulated sugar is ideal for the topping as it melts and caramelizes evenly. While regular granulated sugar can work, very coarse sugar might melt less uniformly, and powdered sugar can burn too quickly. Some chefs even use superfine or caster sugar for a very delicate crust.
Other Delicious Desserts to Explore
If you’re eager to expand your dessert repertoire, check out these other irresistible recipes:
- Best Lemon Bars Recipe
- Strawberry French Tart
- Strawberry Cheesecake Ice Cream
- Mixed Berry Galette
I genuinely hope you cherish every recipe I share with you, especially this Easy Crème Brûlée. Give it a try, savor every bite, and share your experience and ratings with friends and family!
If you create this recipe and love it, please share your culinary masterpiece with me on INSTAGRAM using my hashtag for a chance to be featured in my story! Don’t forget to follow Cookin’ With Mima on FACEBOOK | INSTAGRAM | PINTEREST to stay updated with all my latest social posts and delicious recipes.
Crème Brûlée Recipe Card

Crème Brûlée
By: Mariam Ezzeddine
This Easy Crème Brûlée recipe delivers a creamy, rich custard with a delightful crunchy caramel topping. It’s surprisingly simple to make and always a showstopper!
Prep Time: 15 minutes
Cook Time: 1 hour
Total Time: 1 hour 15 minutes (plus chilling time)
Servings: 6 servings
Print Recipe
Equipment
- Ramekins (4-6 oz capacity)
- Kitchen Torch (recommended, see FAQ for alternative)
- Medium Saucepan
- Large Mixing Bowl
- Whisk
- Fine-Mesh Sieve
- Pitcher or Large Measuring Cup
- Deep Baking Dish or Roasting Pan (for water bath)
Ingredients
- 7 whole egg yolks
- 3 cups heavy cream
- 1 pod vanilla bean (preferably), or 2 tsp pure vanilla extract
- 1 cup fine granulated sugar, divided (2/3 cup for custard, 1/3 cup for topping)
- 1 tsp lemon zest (or orange zest)
- Fresh berries for topping (optional)
Instructions
- Preheat the oven to 300°F (150°C).
- Begin boiling 1 liter (or more, depending on your baking pan size) of water, either in a water kettle or on the stovetop.
- If using a vanilla bean, slice it in half lengthwise and scrape out all the fragrant beans.
- In a medium saucepan, combine the heavy cream, vanilla beans (and the scraped pod, if using), and lemon zest. Heat over low heat until it just begins to simmer, stirring occasionally. Do not allow it to boil vigorously. Remove from heat.
- In a separate large bowl, whisk the egg yolks with the 2/3 cup of granulated sugar until the mixture is light in color and fluffy.
- Slowly temper the egg mixture: Gradually pour about a quarter of the hot cream into the egg yolk mixture while continuously whisking to prevent scrambling. Once combined, pour the tempered egg mixture back into the saucepan with the remaining cream, whisking constantly for about 30 seconds until smooth and slightly thickened.
- Strain the custard mixture through a fine-mesh sieve into a pitcher or clean bowl to remove the vanilla bean pod, lemon zest, and any potential clumps. Gently skim off any foam from the surface.
- Pour the strained custard mixture evenly into individual ramekins, filling each approximately 90% full.
- Arrange the filled ramekins in a deep baking dish or roasting pan. Carefully place the pan on the oven rack. Pour the prepared boiling water into the baking dish around the ramekins until the water is about 2 inches deep.
- Bake for 50-60 minutes, or until the edges of the custard are set but the center still has a slight jiggle. Baking time may vary depending on your oven and ramekin size.
- Remove the baking dish from the oven. Carefully transfer the ramekins from the hot water bath using tongs to a wire rack. Allow them to cool completely at room temperature, then cover with plastic wrap and refrigerate for at least 2 hours, or until thoroughly chilled and firm.
- Just before serving, uncover the chilled custards. Evenly spread a thin layer of the remaining 1/3 cup of granulated sugar onto the top of each crème brûlée. Use a kitchen torch to caramelize the sugar until it forms a hard, amber-brown crust.
- Garnish with fresh berries, serve immediately, and enjoy the perfect crack!
Notes
- If you can’t find a vanilla bean (which is highly recommended for flavor), use 2 teaspoons of pure vanilla extract instead.
- The recipe yield may vary depending on the specific size of your ramekins.
- Ensure your water for the bain-marie is boiling hot before adding it to the baking pan.
- Remember, storing torched crème brûlée in the fridge will cause the caramelized topping to soften. Caramelize just before serving for the best crunch.
- Always remove any foamy layer from the custard surface before pouring into ramekins for a perfectly smooth finish.
- Preheating your oven correctly is crucial for even baking.
Nutrition Information (Approximate per serving)
Calories: 544kcal | Carbohydrates: 37g | Protein: 3g | Fat: 44g | Saturated Fat: 28g | Cholesterol: 176mg | Sodium: 46mg | Potassium: 89mg | Fiber: 1g | Sugar: 33g | Vitamin A: 1766IU | Vitamin C: 2mg | Calcium: 77mg | Iron: 1mg
Love this easy recipe? Please take a moment to rate it and leave a comment below!
