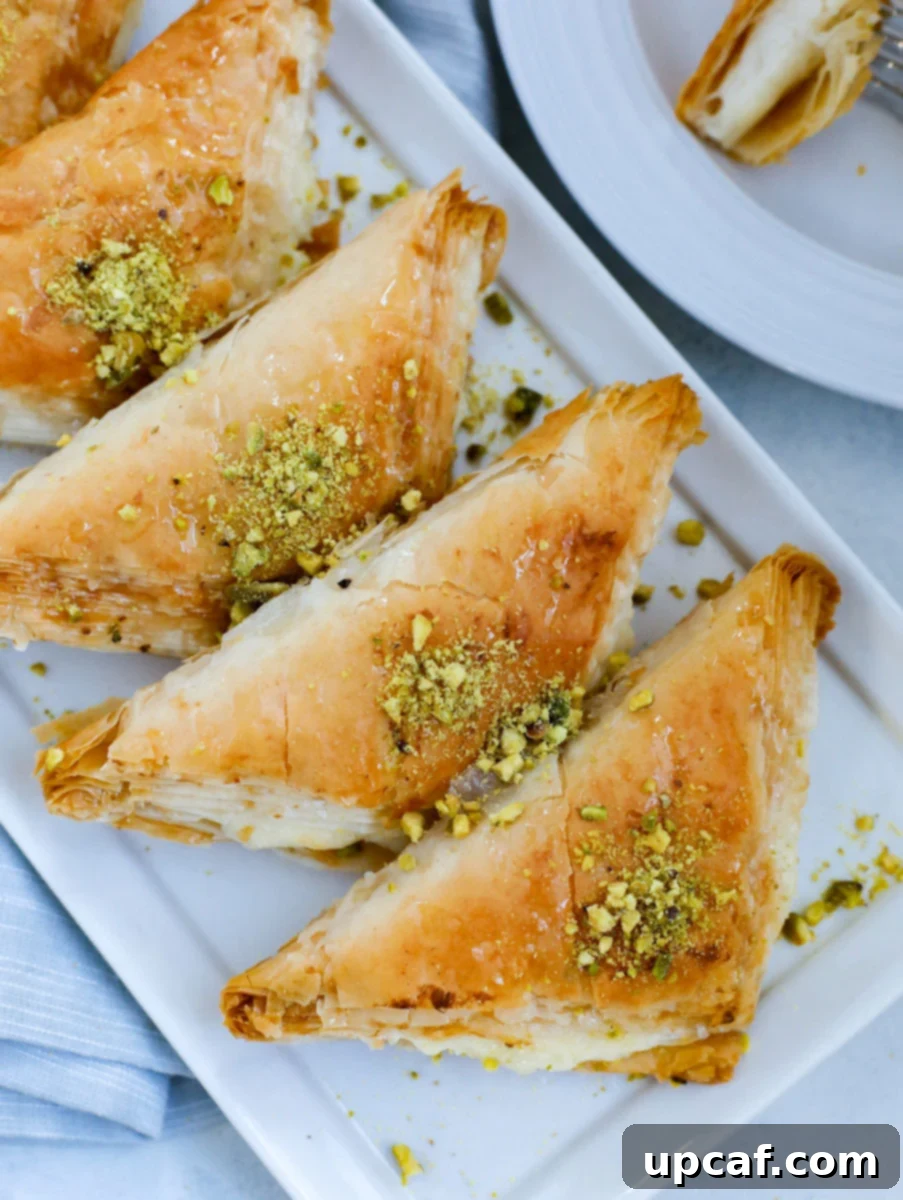
Indulge in the exquisite delight of Lebanese Shaabiyat, a truly enchanting Middle Eastern pastry that promises a symphony of crunchy, sweet, and utterly delicious textures in every bite. These traditional treats are meticulously crafted from delicate layers of flaky phyllo dough, generously filled with a luscious, homemade Lebanese Ashta cream, creating a dessert experience that is both sophisticated and deeply satisfying. Perfect for special occasions, festive gatherings, or simply a luxurious treat, Shaabiyat is a beloved staple in Lebanese cuisine and beyond, captivating hearts with its rich flavor and elegant presentation.
What are Shaabiyat? An Authentic Middle Eastern Delicacy
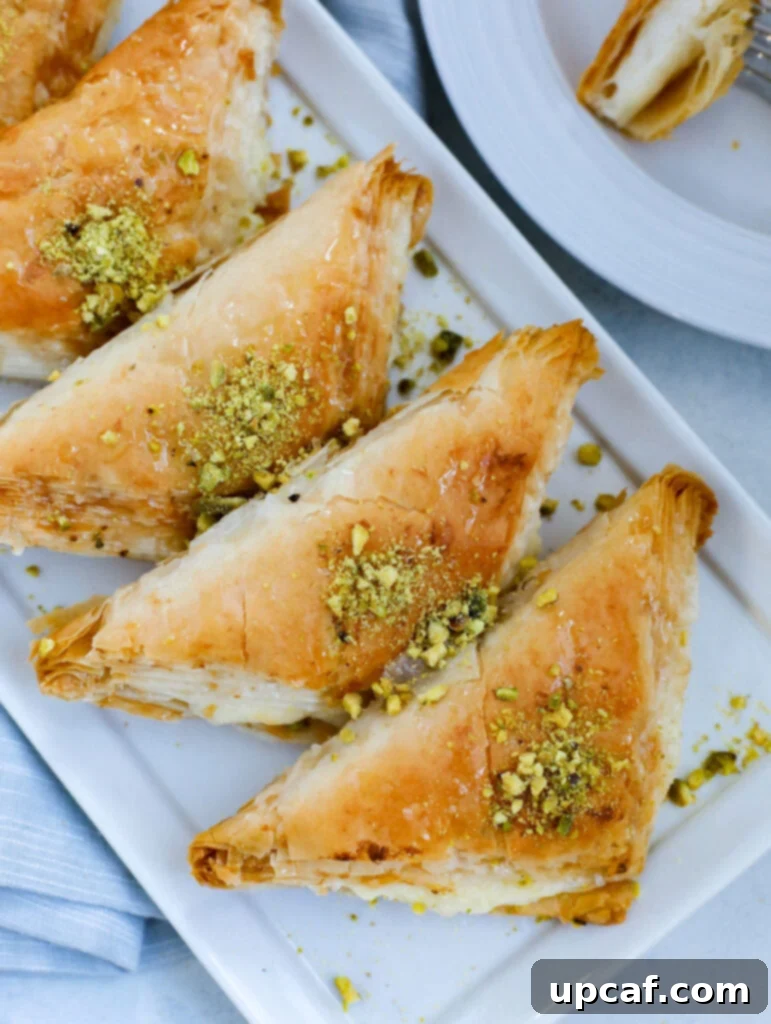
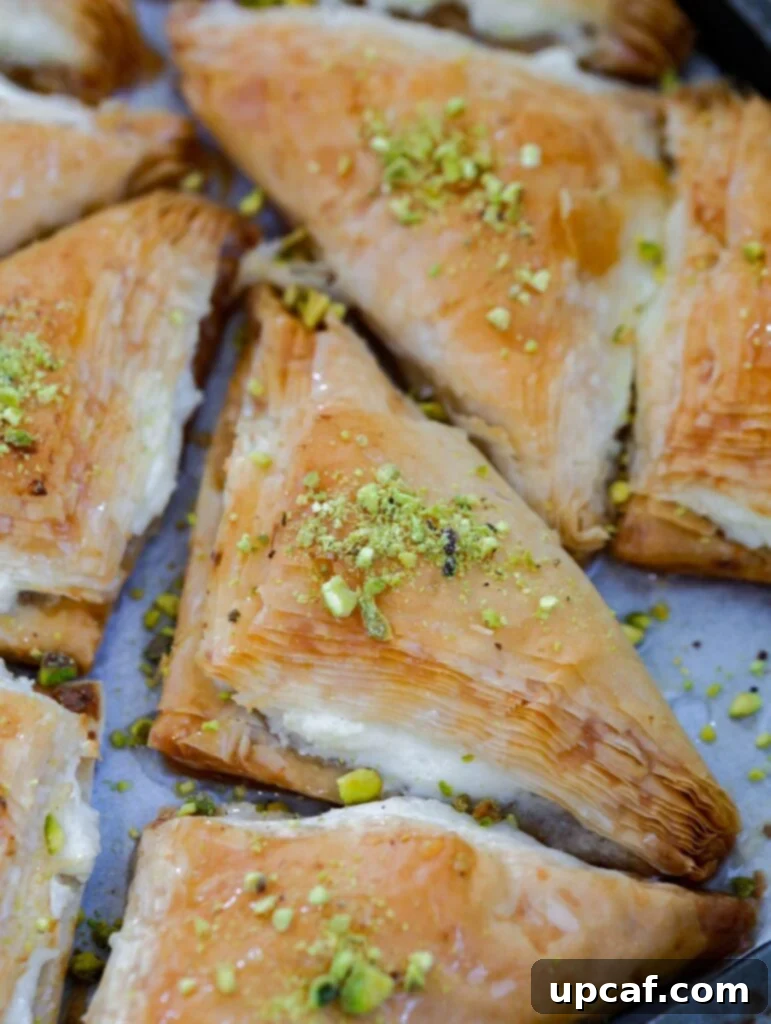
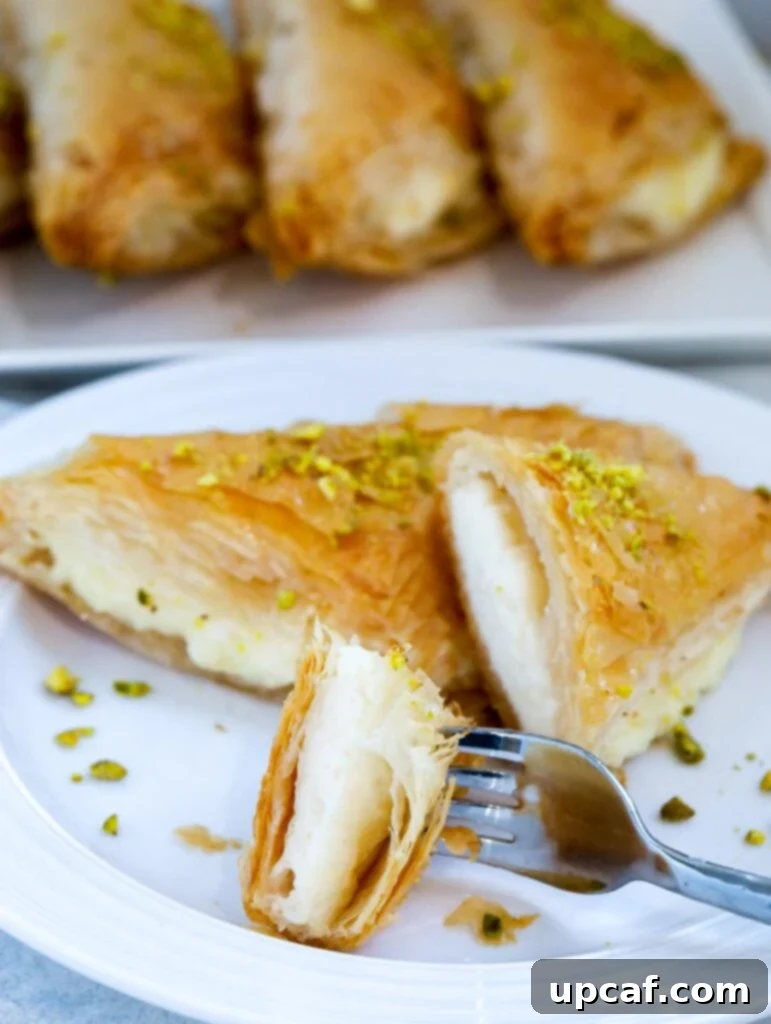
Shaabiyat, often known as Warbat Bil-Ashta in other regions, stands as a highly cherished dessert not just within Lebanon but across the entire Middle East. This exquisite pastry is a testament to the region’s rich culinary heritage, particularly celebrated during the holy month of Ramadan and other significant festivities. At its core, Shaabiyat consists of numerous paper-thin layers of phyllo dough, each delicately brushed with a precise blend of shortening and butter or ghee, which is the secret to its signature crispiness. These buttery layers encase a generous filling of homemade Ashta, a rich and creamy clotted cream that is a hallmark of Middle Eastern sweets. Once filled and expertly folded into elegant triangular shapes, the pastries are baked to a beautiful golden perfection, then drenched in an aromatic sugar syrup infused with rose and orange blossom water. The result is a harmonious blend of textures—a shatteringly crisp exterior yielding to a velvety smooth, fragrant cream filling, all sweetened to perfection. Shaabiyat is more than just a dessert; it’s a culinary experience, reflecting centuries of tradition and a deep appreciation for refined flavors and textures.
Beyond Shaabiyat, the Middle Eastern dessert repertoire is vast and inviting. For those who appreciate the sweet traditions of the region, other popular recipes frequently enjoyed during Ramadan and throughout the year include the delightful Namoura, a semolina cake drenched in syrup, and the vibrant, turmeric-spiced Sfouf. Be sure to explore these and many more of my authentic Lebanese Recipes to expand your culinary horizons!
Why This Shaabiyat Recipe Is a Culinary Gem
Having meticulously developed and refined this Shaabiyat recipe over many years, I can confidently present it as a foolproof guide for home bakers of all skill levels, from seasoned chefs to those taking their first steps in Middle Eastern pastry-making. Its success lies in its simplicity and reliability: the ingredients are readily available in most grocery stores, and the step-by-step process is incredibly straightforward, eliminating any complexities often associated with traditional desserts. What truly sets this recipe apart is its consistent ability to deliver outstanding results—crispy, tender, and perfectly sweetened pastries every single time. When you serve these delightful Shaabiyat, you’re not just offering a dessert; you’re presenting a homemade masterpiece that will undoubtedly impress and “WOW” your guests, making any gathering memorable.
Mastering the Art of Shaabiyat: A Step-by-Step Guide
Creating Lebanese Shaabiyat is an enjoyable culinary journey that, while requiring a few distinct stages, is surprisingly manageable. The key to success and a smooth preparation process lies in proper planning, especially regarding the creamy Ashta filling. It is crucial to prepare the Ashta first and allow it ample time to cool completely to room temperature. This cooling period is vital because it enables the cream to set and firm up, ensuring it holds its shape beautifully once you fill the delicate phyllo pastries. A well-chilled Ashta prevents the filling from becoming too runny and seeping out during the baking process. If you find yourself with a busy schedule, a fantastic time-saving tip is to prepare the homemade Ashta filling 1-2 days in advance, storing it in the refrigerator until you are ready to assemble your Shaabiyat. This approach allows you to break down the preparation into manageable steps, making the entire experience more relaxed and enjoyable.
Crafting the Silky Homemade Ashta Cream
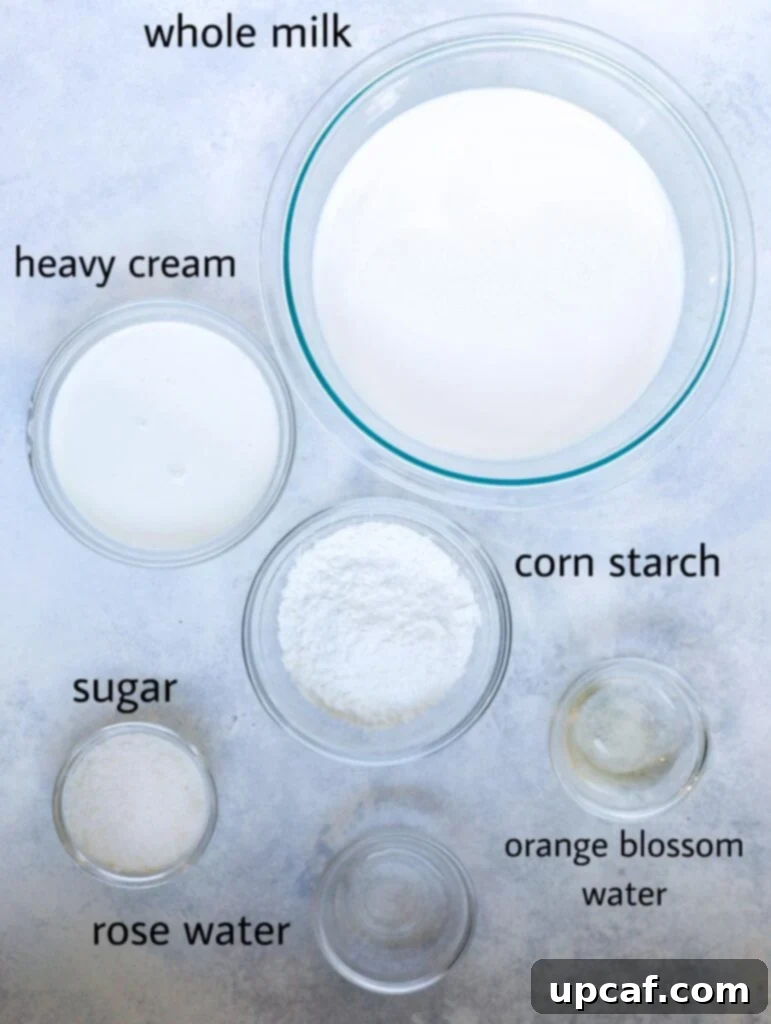
The soul of Shaabiyat lies in its creamy, aromatic Ashta filling. While store-bought options exist, nothing compares to the fresh, rich flavor and perfect consistency of homemade Ashta. This recipe ensures a smooth, luscious cream that beautifully complements the crispy phyllo.
Ingredients you’ll need for the Ashta filling:
To prepare the Ashta filling:
- In a medium-sized, heavy-bottomed pot, combine all the Ashta ingredients: whole milk, heavy cream, cornstarch, sugar, rose water, and orange blossom water. Whisk these ingredients thoroughly until they are well integrated and the cornstarch has completely dissolved, ensuring there are no lumps.
- Place the pot over medium heat, bringing the mixture to a gentle boil. It is absolutely essential to whisk almost continuously throughout this process. Consistent whisking prevents the cream from sticking to the bottom of the pot and, more importantly, ensures a perfectly smooth, velvety texture free of any clumps. You are aiming for a luxurious, creamy consistency.
- Once the cream begins to thicken considerably and coats the back of a spoon, reduce the heat to low. Continue whisking for another minute or so to cook out any residual starchy flavor and achieve the desired thickness. The cream should be quite thick but still pourable, resembling a rich custard.
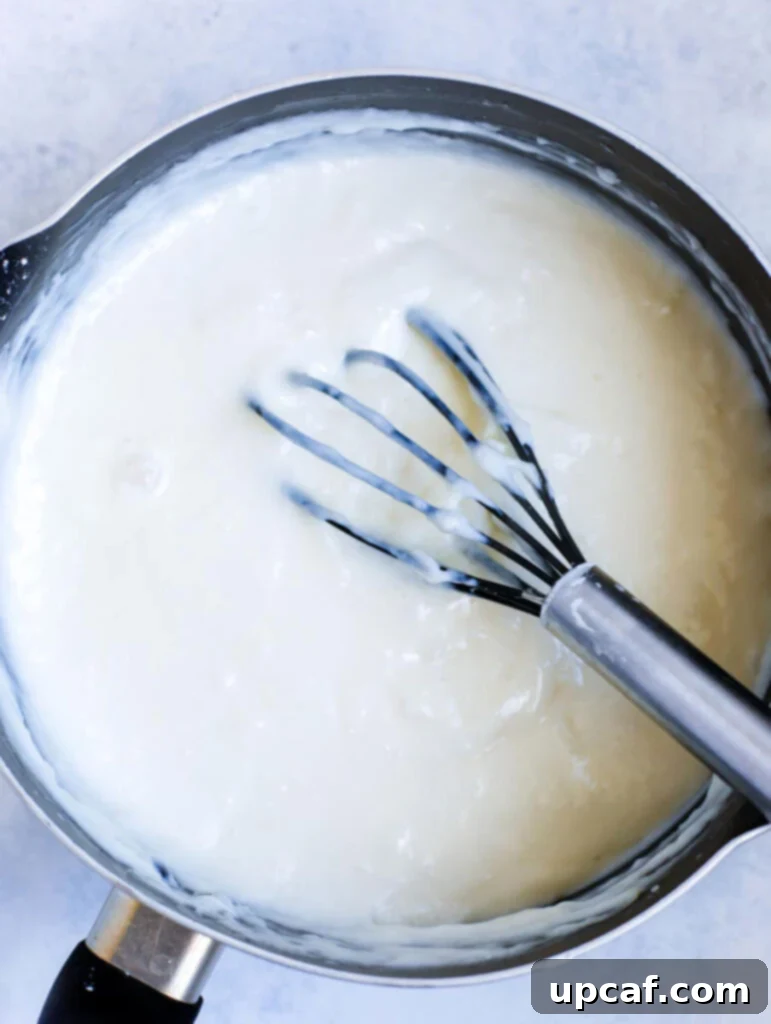
- Immediately remove the thickened Ashta mixture from the heat. Transfer it promptly into a clean Pyrex dish or a shallow container. To prevent a skin from forming on the surface, cover the Ashta directly with plastic wrap, pressing it gently against the cream. Allow it to cool at room temperature for at least 30 minutes. For an even firmer consistency, especially if you plan to fill the pastries later, you can then transfer it to the refrigerator for an additional 15 minutes or even leave it overnight.
Crafting the Aromatic Sugar Syrup (Ater)
While your homemade Ashta cools to perfection, it’s the ideal time to prepare the fragrant sugar syrup, known as “Ater” in Arabic, which will generously drench your baked Shaabiyat. This syrup is not just a sweetener; it’s an integral component that infuses the pastries with moisture and its signature floral aroma. The specific ingredients and their quantities are detailed in the comprehensive recipe card below, but here’s a breakdown of the process to ensure a crystal-clear, perfectly balanced syrup:
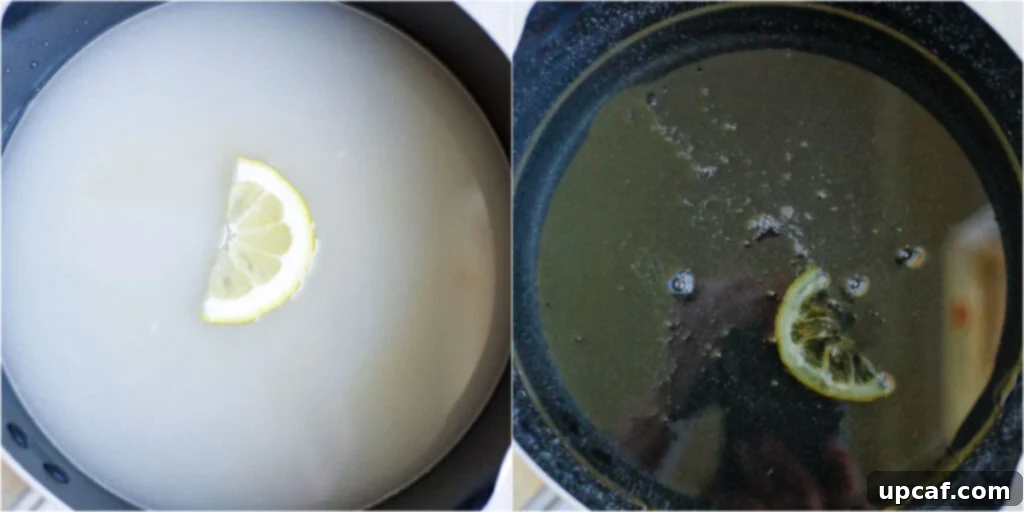
- In a small saucepan, combine the sugar and water. Place the pot over medium-high heat and bring the mixture to a rolling boil. Stir occasionally to help the sugar dissolve, but avoid excessive stirring once it boils to prevent crystallization.
- Once the syrup reaches a vigorous boil, begin timing it for exactly 5 minutes. This duration is crucial for achieving the right consistency—not too thick, not too thin. After 5 minutes, carefully add the fresh lemon juice, orange blossom water, and rose water. The lemon juice acts as an anti-crystallization agent, ensuring your syrup remains smooth. The floral waters, meanwhile, impart the characteristic fragrant notes that are essential to Middle Eastern desserts.
- Reduce the heat to low and allow the syrup to gently simmer for another 2 minutes. This brief simmering period allows the flavors to meld beautifully.
- Turn off the heat and remove the pot. It is imperative to let the sugar syrup cool completely to room temperature before using it. Pouring hot syrup over hot pastries will result in a soggy texture; cool syrup ensures the Shaabiyat remains wonderfully crisp.
Assembling the Flaky Phyllo Pastries
Next, you will prepare the delicate phyllo sheets, transforming them into the crisp layers that define Shaabiyat. It is crucial to only begin this step once your homemade Ashta filling has fully cooled and set, as working with phyllo requires efficiency.
Ingredients you’ll need for the phyllo:
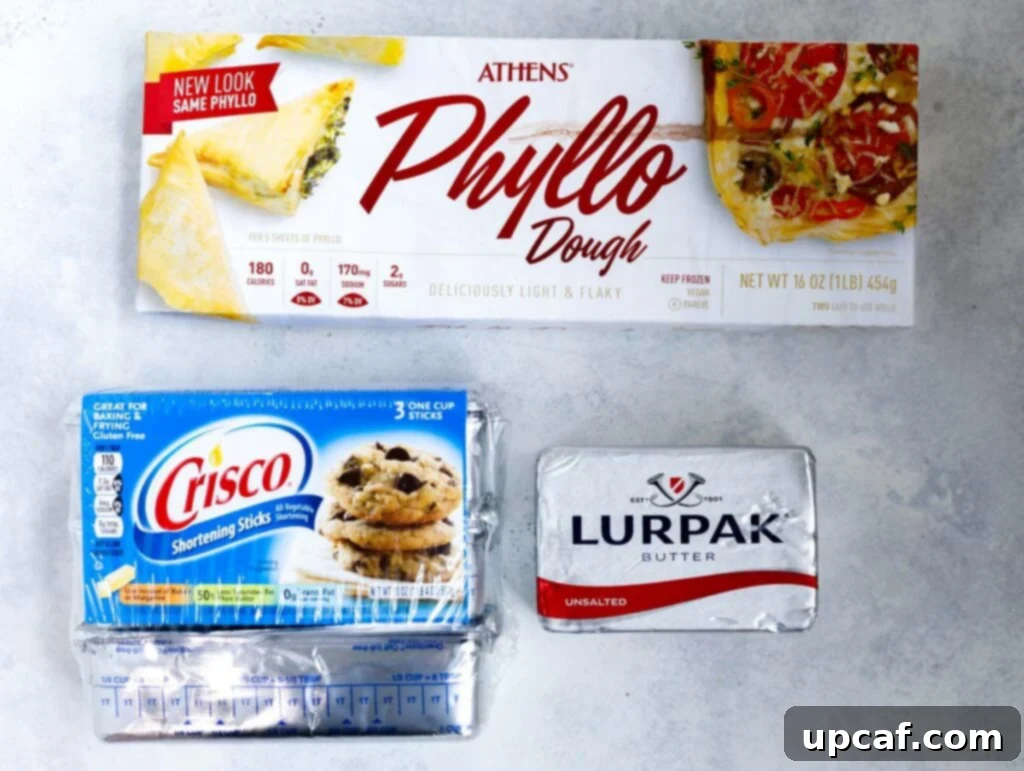
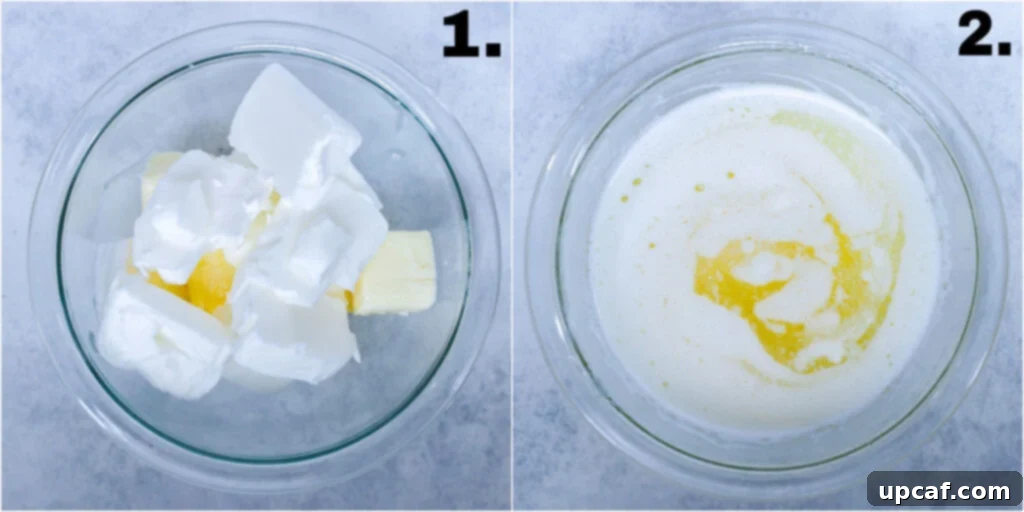
- In a microwave-safe bowl, combine the butter and shortening. Heat in the microwave for approximately 1 minute, or just long enough until they are completely melted and well combined. Be careful not to overheat the mixture; it should be warm enough to be easily brushed, but not sizzling hot. Alternatively, you can melt them gently in a small saucepan on the stovetop over low heat.
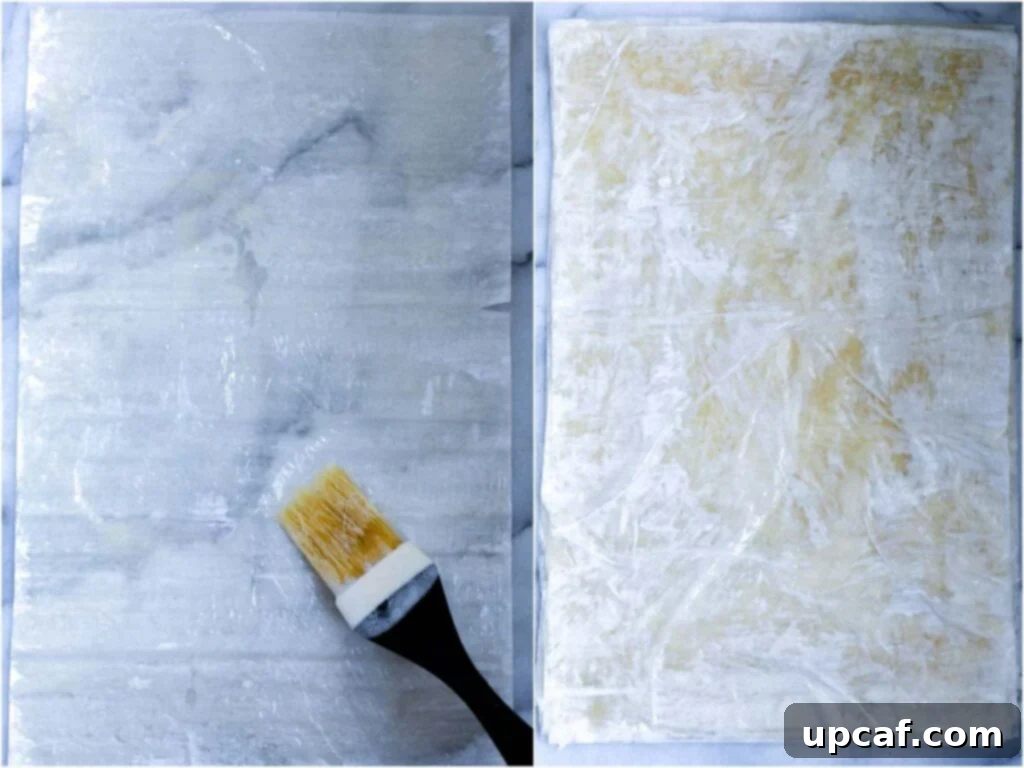
- Carefully remove the phyllo sheets from their packaging. It’s advisable to keep them covered with a damp cloth while you work to prevent them from drying out, as phyllo dries very quickly. Lay a single sheet of phyllo dough flat on a clean cutting board or a spacious kitchen counter surface. Using a pastry brush, lightly brush the entire surface of this sheet with the melted butter and shortening mixture. This step is essential for creating the distinct layers and achieving that irresistible crispiness.
- Repeat this process, carefully stacking 15 individual sheets of phyllo dough on top of each other, brushing each layer thoroughly with the butter mixture before adding the next. This specific quantity of 15 layers is ideal for achieving the perfect thickness and structural integrity for your Shaabiyat, ensuring they are robust enough to hold the filling yet wonderfully flaky when baked.
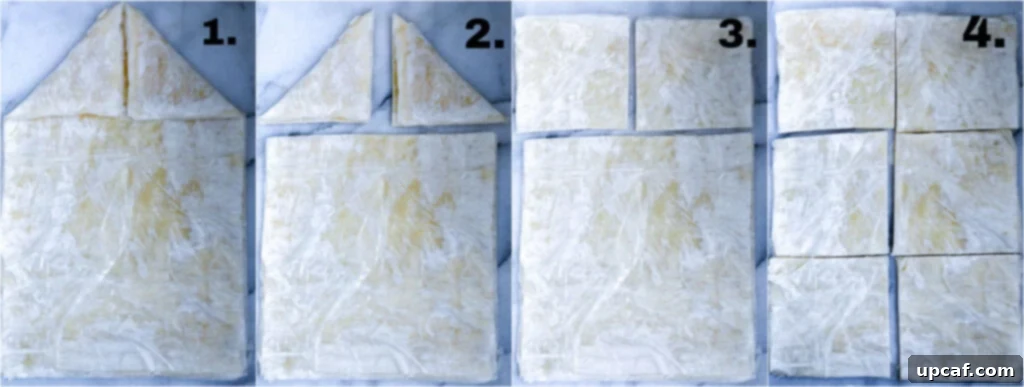
- Once you have a stack of 15 brushed phyllo sheets, you will need to cut them into even squares. The exact size of your squares will depend on the dimensions of your phyllo sheets. For example, if you’re using 9×14 inch sheets (a common size from brands like Target), you can often wrap a corner of the stack inwards to create a guide for cutting without needing a ruler. However you choose to measure, ensure the squares are as even as possible for consistent pastry size and baking.
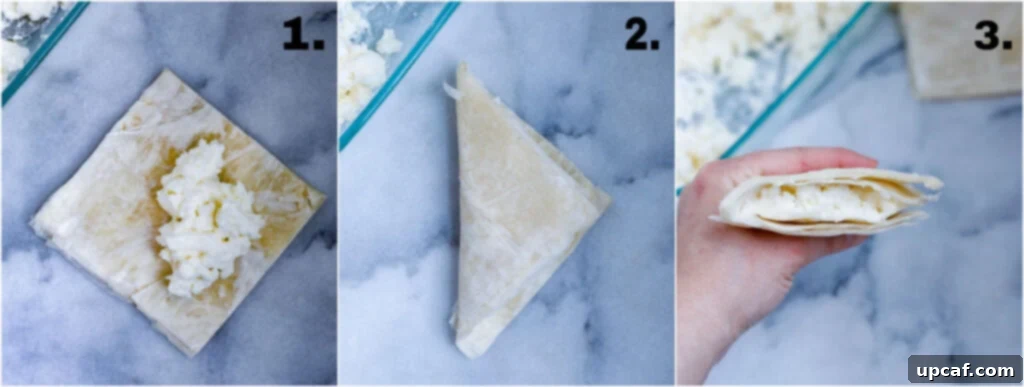
- Take one of your phyllo squares and place a heaping teaspoon (a normal teaspoon, not a measuring spoon) of the cooled Ashta filling right in its center. Be mindful of the quantity: you want enough filling to create a plump pastry that showcases the creamy interior once baked, but not so much that it overflows or bursts during baking. Carefully fold the square into a triangle or another desired shape, sealing the edges well to encapsulate the Ashta. Repeat this precise process for all the remaining phyllo squares until all your pastries are assembled.
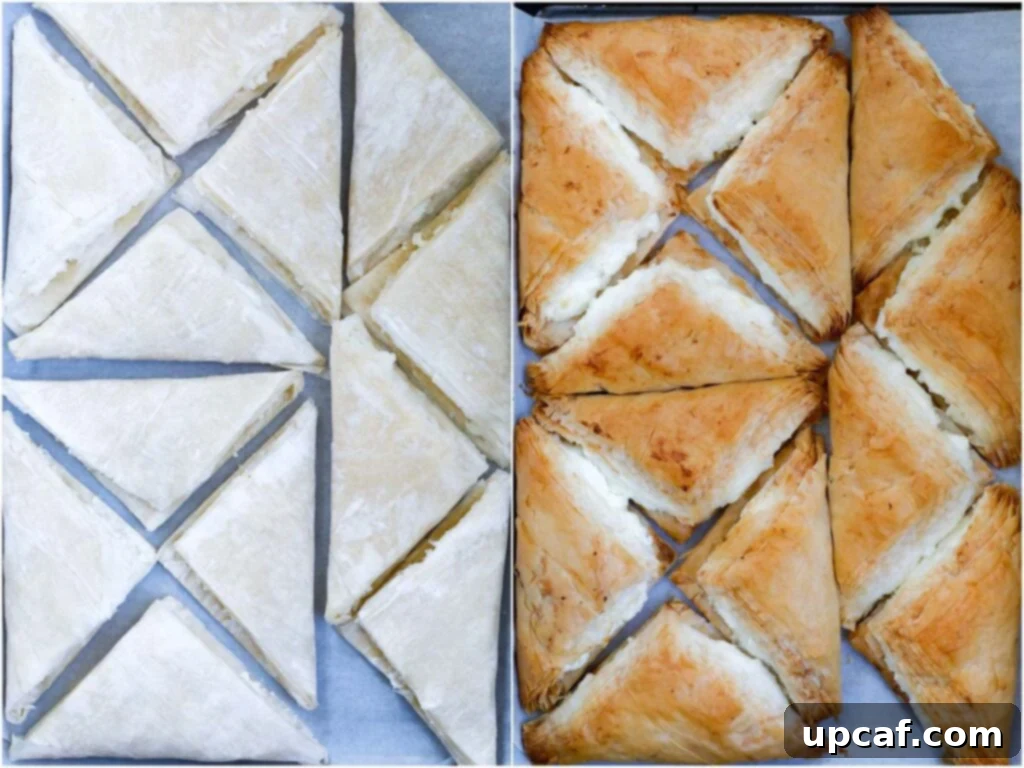
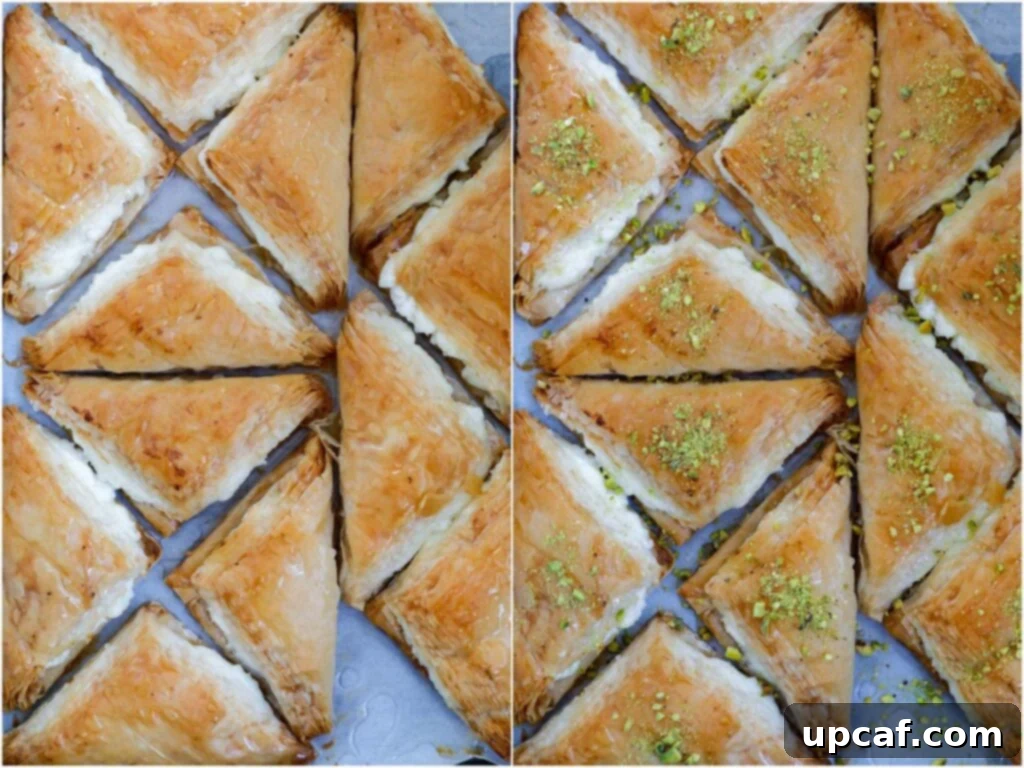
- Arrange the filled phyllo pastry pieces neatly on a non-stick baking sheet lined with parchment paper. There’s no need to butter the parchment paper itself, as the phyllo layers are already rich with butter and shortening. Bake in a preheated oven set to 375 degrees Fahrenheit (190 degrees Celsius) for approximately 30 minutes. The baking time can vary slightly depending on your oven, so keep a close eye on them. The goal is a beautiful, evenly golden-brown color, signifying a perfectly crisp pastry. Crucially, resist the temptation to use the broiler, as phyllo can burn incredibly fast and unevenly, ruining your delicate creations.
- Immediately after removing the freshly baked Shaabiyat from the oven, while they are still warm, generously drizzle them with the cooled sugar syrup. Aim for about 1 to 1 1/4 cups of syrup, or adjust according to your preferred level of sweetness. You can always add more syrup when serving if desired, preventing over-sweetening upfront.
- For a touch of elegance and flavor, garnish the pastries with a sprinkle of finely ground pistachios. These not only add a beautiful contrasting color but also a subtle nutty crunch.
- Allow the Shaabiyat to cool completely at room temperature for at least 2 hours. This step is crucial for the syrup to fully absorb and for the pastries to achieve their ultimate crispness.
- For the best texture and taste, transfer the cooled Shaabiyat to the refrigerator, leaving them uncovered. This is key to maintaining their delightful crunch. When you’re ready to enjoy these delectable treats, simply transfer them to a serving platter and present them to your eagerly awaiting guests.
Expert Tips & Frequently Asked Questions for Perfect Shaabiyat
- **Plan Ahead with Ashta:** To streamline your baking day, prepare the Ashta filling at least a day in advance. This allows it ample time to chill and firm up properly, making the filling and folding process much easier and cleaner, and significantly reducing active preparation time on the day of baking.
- **Prevent Sugar Syrup Crystallization:** When preparing the sugar syrup, be careful not to overcook it. Boiling for too long or stirring excessively once it’s boiling can cause the sugar to crystallize. The lemon juice added to the syrup acts as a natural inhibitor against crystallization, but careful timing is still important for a smooth, clear syrup.
- **The Power of the Butter-Shortening Blend:** While butter offers rich flavor, using only butter for brushing the phyllo can result in a less crisp pastry. The blend of butter and shortening (or ghee) is essential for achieving that characteristic crisp, golden-brown exterior and delicate layers. Shortening contributes to crispiness and helps prevent burning. If you prefer, you can substitute the butter-shortening mixture entirely with a high-quality vegetarian ghee for a similar effect and flavor profile, avoiding any unpleasant flavors from low-quality substitutes.
- **Embrace the Crunch: Keep Shaabiyat Uncovered:** After baking and drizzling with syrup, resist the urge to cover your Shaabiyat. Covering them, especially while they are still warm, will trap moisture and cause the phyllo to soften, losing its desirable crunch. The crunchier they are, the longer they will maintain their freshness and delightful texture.
- **The Magic of Cold:** For an optimal taste and texture experience, refrigerate the Shaabiyat for at least 2 hours before serving. While some individuals enjoy them warm, the chilling process allows the flavors to meld beautifully and significantly enhances the crispness of the phyllo and the set of the Ashta cream, creating a truly superior dessert.
How long do Shaabiyat last and how should they be stored?
- These delightful pastries are best enjoyed within 3-4 days when stored properly in the refrigerator, uncovered. However, it’s important to note that their signature crispiness will gradually diminish after 2-3 days. For the ultimate crunchy experience, consume them within the first couple of days. We typically discard any leftovers after 3 days because we find that the texture is best when freshly crisp.
Can I add the sugar syrup later, just before serving, instead of after baking?
- While you certainly could, doing so would likely result in a drier dessert overall. The best and most authentic results come from drenching the warm pastries in the cooled sugar syrup immediately after baking. This allows the syrup to penetrate the warm phyllo layers, moistening and flavoring them from within, creating a harmonious balance between the crisp pastry and sweet, aromatic syrup.
Is it acceptable to omit the orange blossom and rose water from the syrup?
- Absolutely not! I strongly recommend including both orange blossom water and rose water in your sugar syrup. These distinctive floral essences are what impart the unique, authentic, and incredibly fragrant flavor profile characteristic of traditional Middle Eastern desserts like Shaabiyat. Omitting them would significantly alter the taste and diminish the overall experience of this classic sweet.
I have a nut allergy; can I still enjoy Shaabiyat without pistachios?
- Yes, absolutely! The ground pistachios are primarily used for garnishing, adding a touch of color and a subtle nutty flavor. If you have a nut allergy or simply prefer not to use them, you can easily omit the pistachios without affecting the core taste or texture of the Shaabiyat. They will be just as delicious!
More Lebanese Dessert Recipes to try:
- Lebanese Nights Dessert
- Chocolate Lazy Cake
- Lebanese Rice Pudding
- Maamoul Date Cookies
I sincerely hope you find immense joy in all the culinary creations I share, including this truly delicious and surprisingly simple recipe for Lebanese Shaabiyat Dessert. I encourage you to try preparing it, savor every bite, and share this delightful experience with your cherished family and friends. If this recipe brings a touch of Middle Eastern magic to your kitchen, please consider giving it a star rating on the recipe card below. Your feedback and support mean the world!
To stay updated with all my latest recipes and culinary adventures, be sure to sign up for my blog newsletter. New delicious creations will be delivered straight to your inbox! And when you whip up your own batch of Shaabiyat or any other recipe, don’t forget to tag me on INSTAGRAM so I can admire your wonderful recreations. Until our next recipe, happy cooking! XoXo…
Lebanese Shaabiyat Dessert
Ingredients
- 1 pack phyllo dough, 16 oz, 9×14 inch sheets (e.g., from Target)
- ¾ cup crisco vegetable shortening, melted
- ¾ cup unsalted butter, melted
- ¼ cup ground pistachios , for garnishing (optional)
Ashta Filling
- 3 cups whole milk
- 1 cup heavy cream
- ⅔ cup cornstarch, plus 1 tbsp extra
- ⅓ cup sugar
- 1 tbsp rose water
- 1 ½ tbsp orange blossom water
Sugar Syrup (Ater)
- 2 cups sugar
- 1 cup water
- 1 tbsp orange blossom water
- ½ tbsp rose water
- 1 tsp lemon juice
Instructions
- PREPARE THE ASHTA FILLING: In a medium-sized pot, combine all Ashta ingredients (milk, heavy cream, cornstarch, sugar, rose water, orange blossom water) and mix very well until smooth.
- Bring the mixture to a boil over medium heat, whisking almost continuously to prevent lumps and ensure a perfectly smooth, creamy texture. Once the cream thickens significantly, reduce the heat to low and continue whisking for another minute or so.
- Remove the Ashta from heat and transfer it into a Pyrex dish. Cover the surface directly with plastic wrap to prevent a skin from forming, and let it cool completely at room temperature for at least 30 minutes. For an even firmer consistency, you can chill it in the fridge for an additional 15 minutes or longer.
- PREPARE THE SUGAR SYRUP (ATER): While the Ashta is cooling, begin preparing the sugar syrup.
- In a small pot, combine sugar and water. Bring to a boil over medium-high heat. Once it starts boiling, time it for 5 minutes. Then, add the orange blossom water, rose water, and lemon juice. Reduce the heat to low and simmer for 2 more minutes. Turn off the heat and let the syrup cool completely to room temperature.
- PREPARE THE PHYLLO DOUGH: Once the Ashta is fully cooled and set, prepare the phyllo dough. In a small glass bowl, melt the butter and shortening in the microwave for about 1 minute, or just until melted and combined. Do not overheat.
- Lay a single sheet of phyllo dough flat on a clean surface. Lightly brush the entire surface with the melted butter mixture. Repeat this process, stacking a total of 15 sheets of phyllo dough, brushing each layer with the butter mixture. Keep unused phyllo covered with a damp cloth to prevent drying.
- Carefully cut the stacked phyllo sheets into even squares (e.g., if using 9×14 inch sheets, aim for approximately 3×3 inch squares). Place a full teaspoon (a normal kitchen spoon, not a measuring spoon) of the cooled Ashta mixture in the center of each square and fold the square into a triangle, sealing the edges gently to enclose the filling. Repeat for all squares.
- BAKE THE SHAABIYAT: Place the assembled pastries on a non-stick baking pan lined with parchment paper. Bake in a preheated 375°F (190°C) oven for approximately 30 minutes, or until they turn a beautiful golden brown color. Avoid using the broiler.
- Remove the Shaabiyat from the oven. Immediately and generously drizzle them with 1 to 1 1/4 cups of the cooled sugar syrup. You can always add more syrup when serving if you prefer a sweeter pastry, rather than oversweetening upfront.
- Garnish with ground pistachios (if using). Let the pastries cool completely at room temperature for at least 2 hours. For the best crispness and flavor, refrigerate them uncovered for another 2 hours before serving.
Notes
- Prepare the Ashta filling ahead to reduce waiting time on the day of assembly.
- Do not overcook the sugar syrup, as this can lead to crystallization.
- For optimal crispiness and flavor, do not use only butter for brushing the phyllo; the blend with shortening (or ghee) is essential.
- Crucially, do not cover the Shaabiyat after baking. This will make them soft and soggy. Allowing them to cool uncovered helps maintain their desirable crisp texture. The crunchier they are, the longer they will maintain their quality.
- Refrigerating Shaabiyat for at least 2 hours before serving significantly enhances their flavor and texture, though some prefer them warm.
Nutrition
Carbohydrates: 27g |
Protein: 4g |
Fat: 28g |
Saturated Fat: 13g |
Cholesterol: 48mg |
Sodium: 164mg |
Potassium: 114mg |
Fiber: 1g |
Sugar: 17g |
Vitamin A: 564IU |
Vitamin C: 1mg |
Calcium: 69mg |
Iron: 1mg
