Achieve Crispy Perfection at Home: The Ultimate Buttermilk Fried Chicken Recipe
There’s simply nothing quite like the irresistible allure of perfectly cooked fried chicken. That golden, crunchy exterior giving way to incredibly tender and juicy meat – it’s a culinary masterpiece that evokes comfort and nostalgia. While many might believe achieving such restaurant-quality results is reserved for professional chefs, this easy-to-follow homemade buttermilk fried chicken recipe is here to prove otherwise. Get ready to master the art of crispy fried chicken and delight your taste buds with every glorious, finger-licking bite.
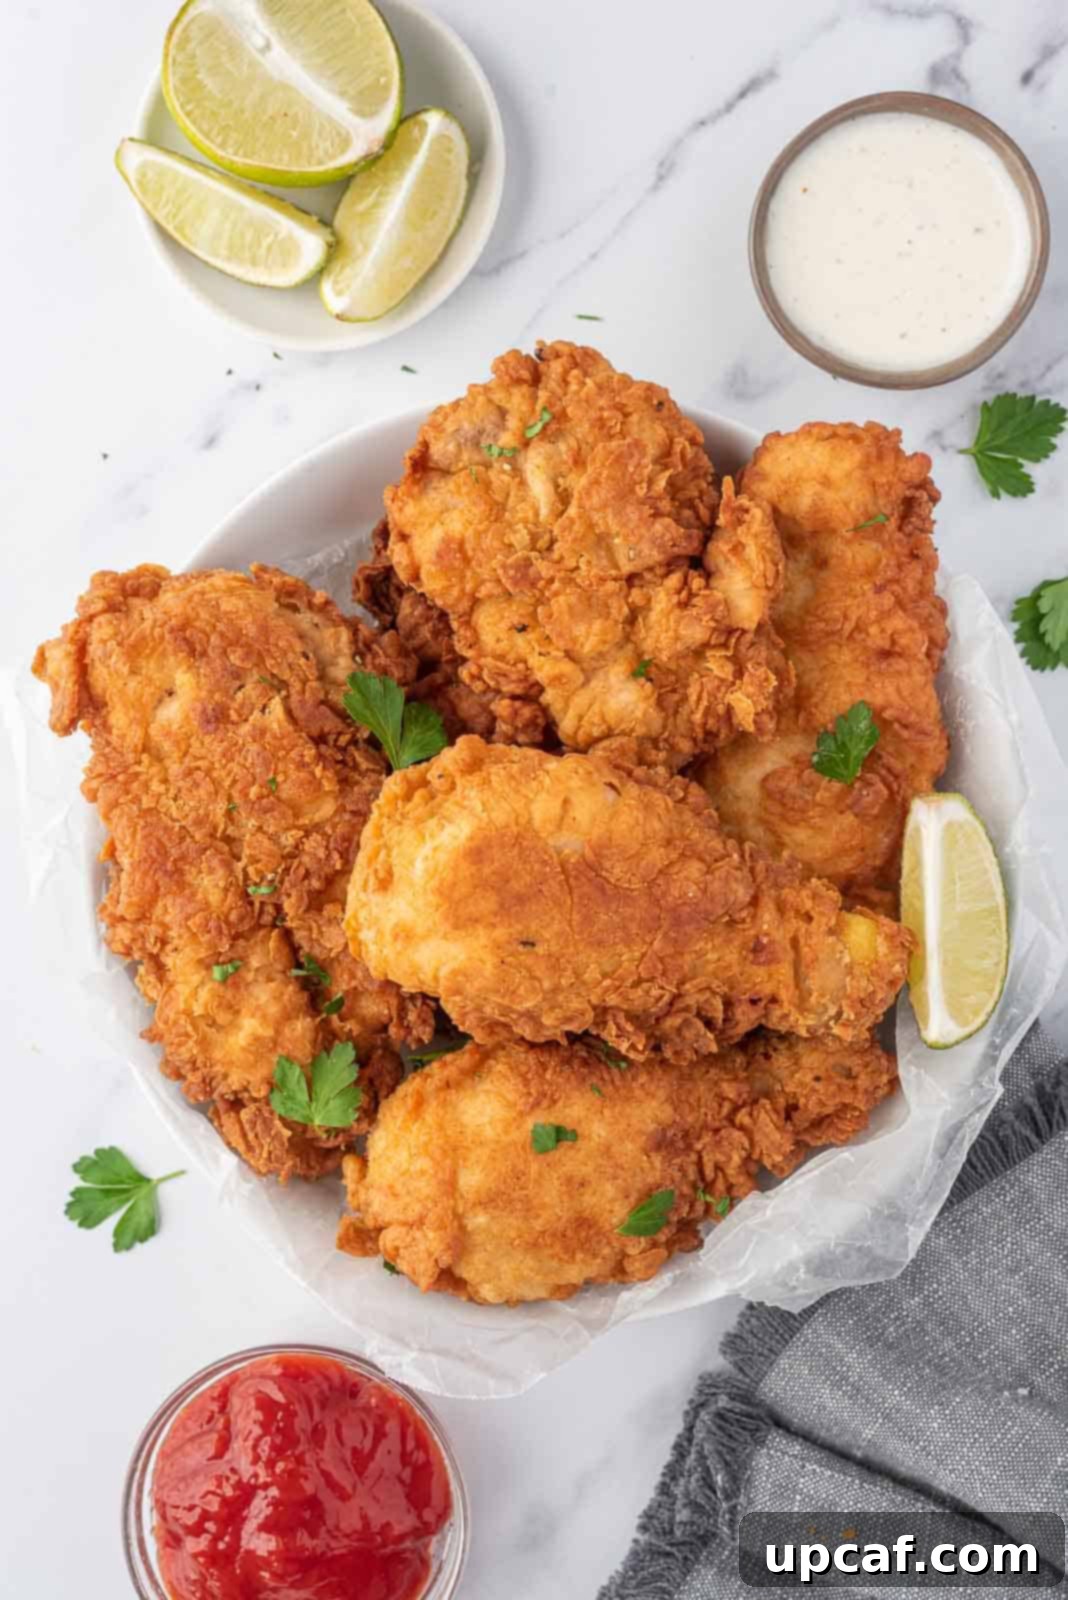
This isn’t just any fried chicken; it’s a testament to how simple ingredients, combined with the right technique, can create extraordinary flavor. Our recipe focuses on bone-in chicken pieces, double-dredged in a rich, seasoned buttermilk bath and a perfectly spiced flour mixture, then deep-fried to achieve that coveted, outrageously crispy crust. The result is a truly remarkable dish that’s equally perfect for a comforting weeknight meal or a show-stopping Sunday dinner. Prepare to impress your family and friends with this instant classic that tastes like it came straight from your favorite Southern kitchen.
Got extra buttermilk? Don’t let it go to waste! Use it to whip up some delightful Buttermilk Pancakes or decadent Double Chocolate Chip Muffins for an equally delicious breakfast or brunch treat.
Why This Recipe is a Game-Changer for Homemade Fried Chicken
If you’ve been on the hunt for the ultimate crispy fried chicken recipe, look no further. This method consistently delivers results that will make you wonder why you ever bought it out. Here’s what sets this recipe apart:
- Unrivaled Restaurant Quality, Right at Home: Forget expensive takeout or mediocre fast-food fried chicken. This recipe empowers you to create mouth-watering, professional-grade fried chicken in your own kitchen. You’ll enjoy superior taste and texture, often at a fraction of the cost, making it an incredible value for gourmet flavor.
- Outrageously Crispy Texture: The Double-Dredge Secret: The hallmark of truly exceptional fried chicken is its crispy exterior. Our unique double-dredging method – first in seasoned flour, then in buttermilk, and back into flour – creates multiple layers of seasoned coating. This intricate layering is key to developing those delightful craggy bits and an extra crunchy crust that shatters with every bite, a crispiness you simply won’t believe is homemade.
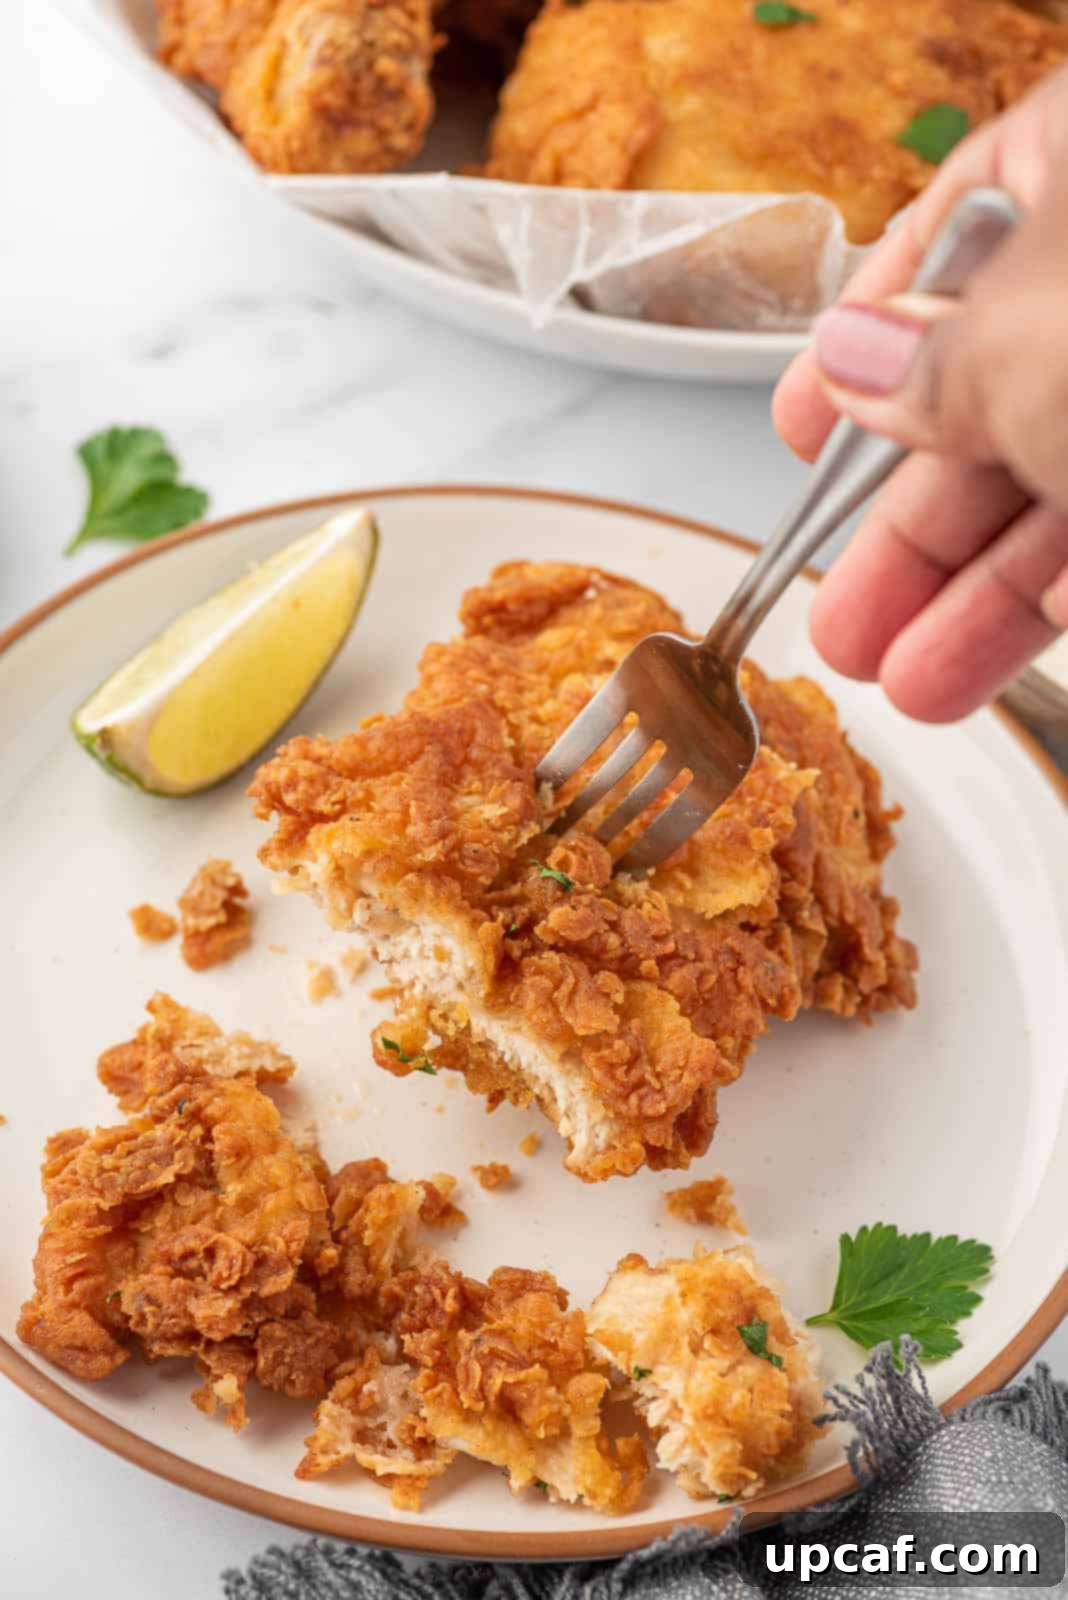
- Incredibly Tender and Juicy Inside: Beyond the crunch, what truly elevates this chicken is its interior. Soaking the chicken in buttermilk before frying tenderizes the meat, ensuring it remains incredibly moist and flavorful. The buttermilk’s slight acidity breaks down tough muscle fibers, resulting in chicken that’s juicy and tender all the way to the bone, perfectly contrasting the crisp exterior.
- The Ultimate Comfort Food Experience: There’s a universal appeal to crispy buttermilk fried chicken. It’s warm, golden, and packed with savory flavor. This dish isn’t just food; it’s an experience that brings people together, evoking happy memories and creating new ones. It’s the quintessential comfort food, perfect for any occasion that calls for something truly special and deeply satisfying.
Essential Ingredients for Flavorful Crispy Buttermilk Fried Chicken
Crafting the perfect fried chicken starts with selecting quality ingredients and understanding their role in achieving that incredible taste and texture. Our recipe uses a thoughtful combination of components to build layers of flavor and ensure maximum crispiness and juiciness.
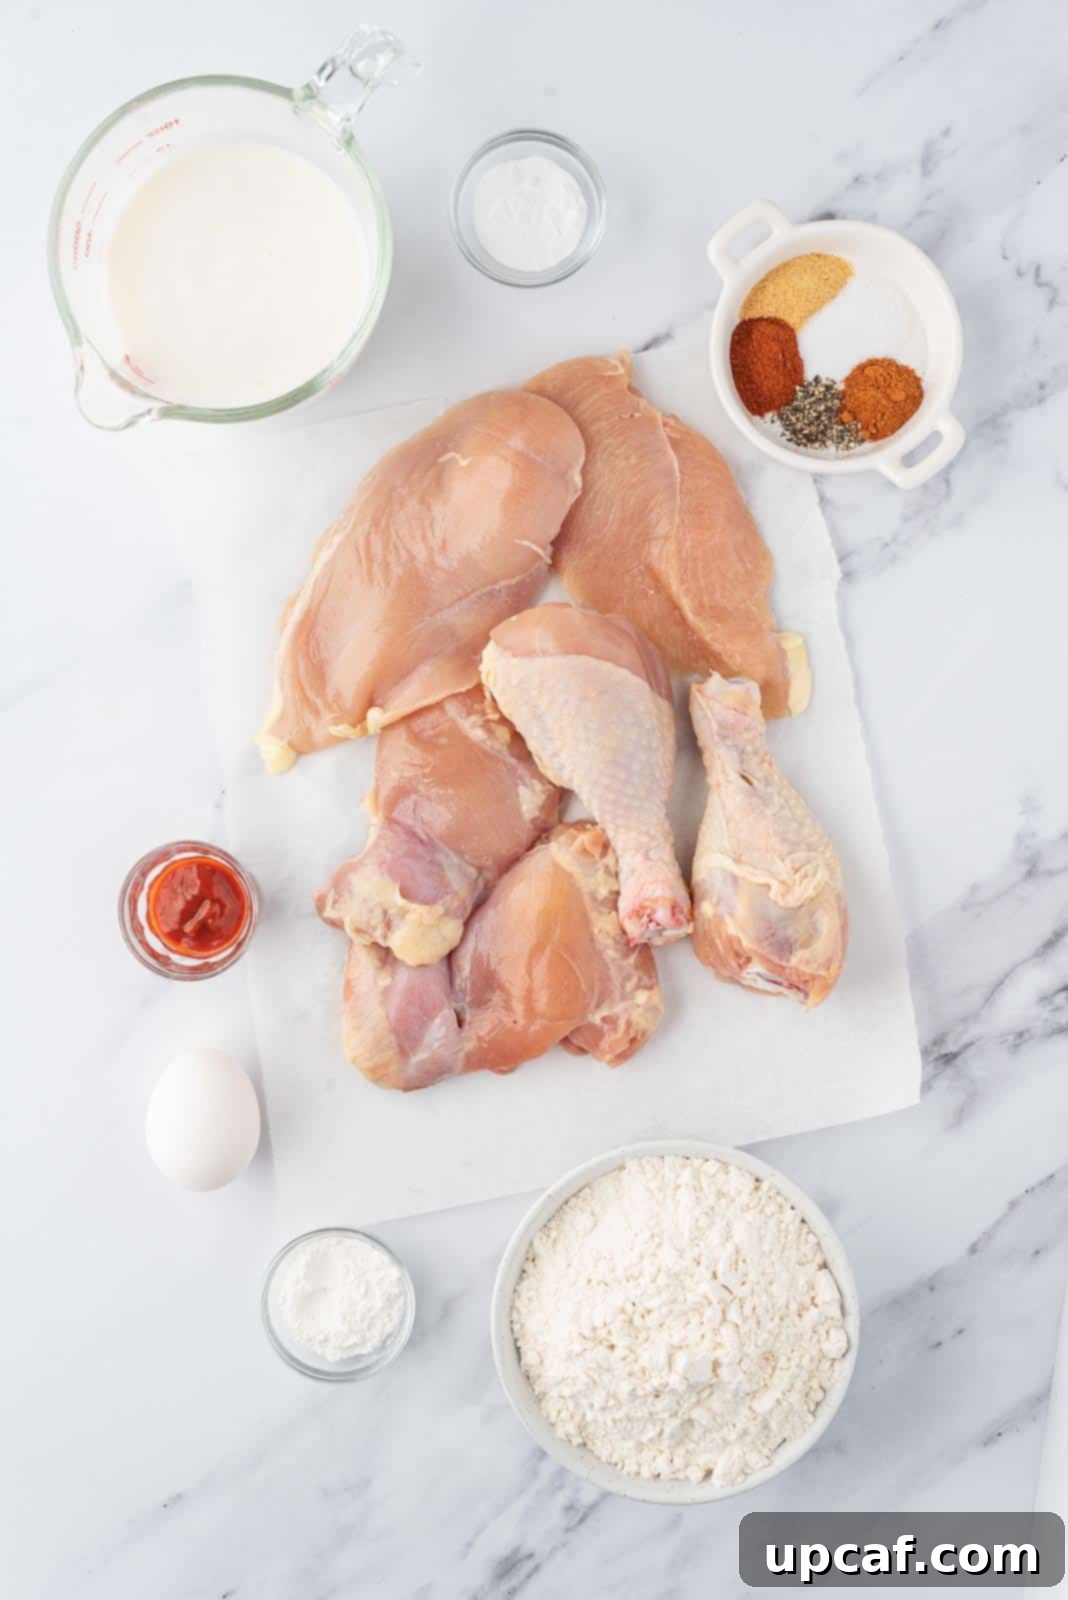
- Chicken: For the best flavor and juiciness, this recipe calls for bone-in chicken pieces. We recommend a mix of 2 chicken drumsticks, 2 chicken thighs, and 2 chicken breasts. Bone-in cuts tend to stay moister during frying and impart a richer flavor. You can opt for skin-on for an even crispier experience, or skinless if you prefer.
- Seasoned Flour Blend: This isn’t just plain flour! Our blend is seasoned to perfection with:
- All-Purpose Flour: The base for our crispy coating.
- Baking Powder & Baking Soda: These are the secret ingredients for extra crunch! They react with the buttermilk to create tiny air pockets, resulting in a lighter, more airy, and truly extra-crispy crust.
- Smoked Paprika: Adds a wonderful depth of flavor and a beautiful reddish hue to the coating.
- Cayenne Pepper: Provides a subtle (or not-so-subtle, depending on your preference!) kick of heat. Adjust to your spice tolerance.
- Garlic Powder: Essential for that savory, aromatic base.
- Ground Black Pepper & Salt: Fundamental seasonings to enhance all the other flavors.
- Buttermilk Mixture: The crucial tenderizing and flavor-enhancing marinade.
- Buttermilk: Its natural acidity works wonders, breaking down the chicken’s fibers to make it incredibly tender and moist from the inside out. It also helps the seasoned flour adhere better.
- Egg: Acts as a binder, helping the flour stick evenly to the chicken and contributing to the overall crispiness.
- Hot Sauce: Adds another layer of flavor and a touch of tang and spice, complementing the savory notes.
- Salt & Pepper: Further seasons the chicken from the inside.
- Oil: For deep frying. Choose an oil with a high smoke point, such as canola, peanut, or vegetable oil, to ensure your chicken fries beautifully without burning. The right oil is key to achieving that golden, crispy finish.
How To Make Crunchy Buttermilk Fried Chicken: A Detailed Guide
Making truly exceptional fried chicken at home is a rewarding process, and with this detailed step-by-step guide, you’ll achieve perfect results every time. Follow these instructions carefully to create your own batch of incredibly crispy, juicy, and flavorful buttermilk fried chicken.
1. Prepare Your Chicken Pieces for Success
Begin by ensuring your chicken is ready for its transformation. Thoroughly pat dry each piece of bone-in chicken with paper towels. Removing excess moisture is a critical step, as it allows the seasoned coating to adhere better and promotes a crisper crust during frying. Set the dried chicken pieces aside on a clean plate or cutting board.
2. Set Up Your Dredging Stations
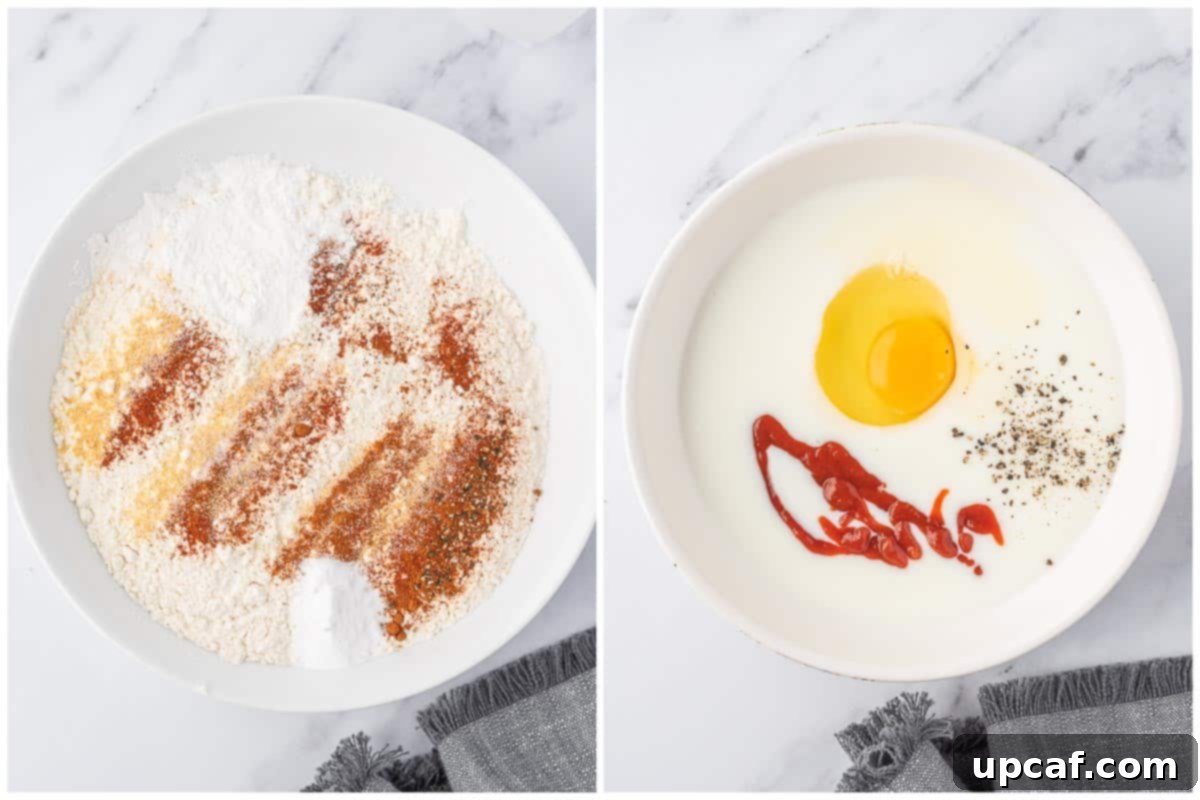
To streamline the coating process, prepare two separate shallow bowls or dishes for your dredging mixtures. This creates an efficient assembly line for coating your chicken.
- For the Seasoned Flour: In your first shallow bowl, combine the all-purpose flour, baking powder, baking soda, smoked paprika, cayenne pepper, garlic powder, ground black pepper, and salt. Whisk these ingredients together thoroughly until they are uniformly mixed. This ensures every bite of chicken is seasoned perfectly.
- For the Buttermilk Mixture: In your second shallow bowl, whisk together the buttermilk, egg, hot sauce, and additional salt and pepper until well combined. This mixture will act as both a tenderizer and a binder for the flour coating.
3. Master the Double-Dredge Technique
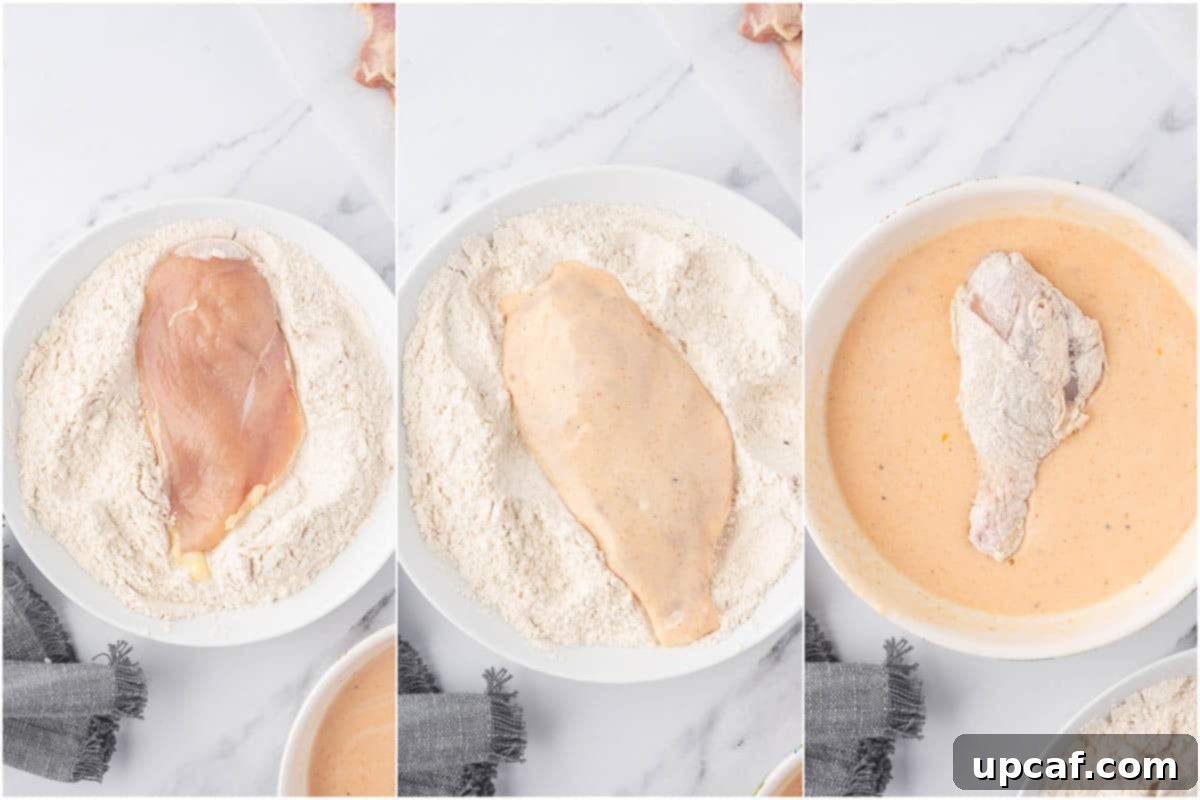
This “double-dredge” is the secret to maximum crispiness. Work with one piece of chicken at a time to ensure even coating:
- First, dredge the chicken piece thoroughly in the seasoned flour mixture, ensuring it’s fully coated. Gently shake off any excess flour.
- Next, dip the flour-coated chicken into the buttermilk mixture, allowing any excess buttermilk to drip off.
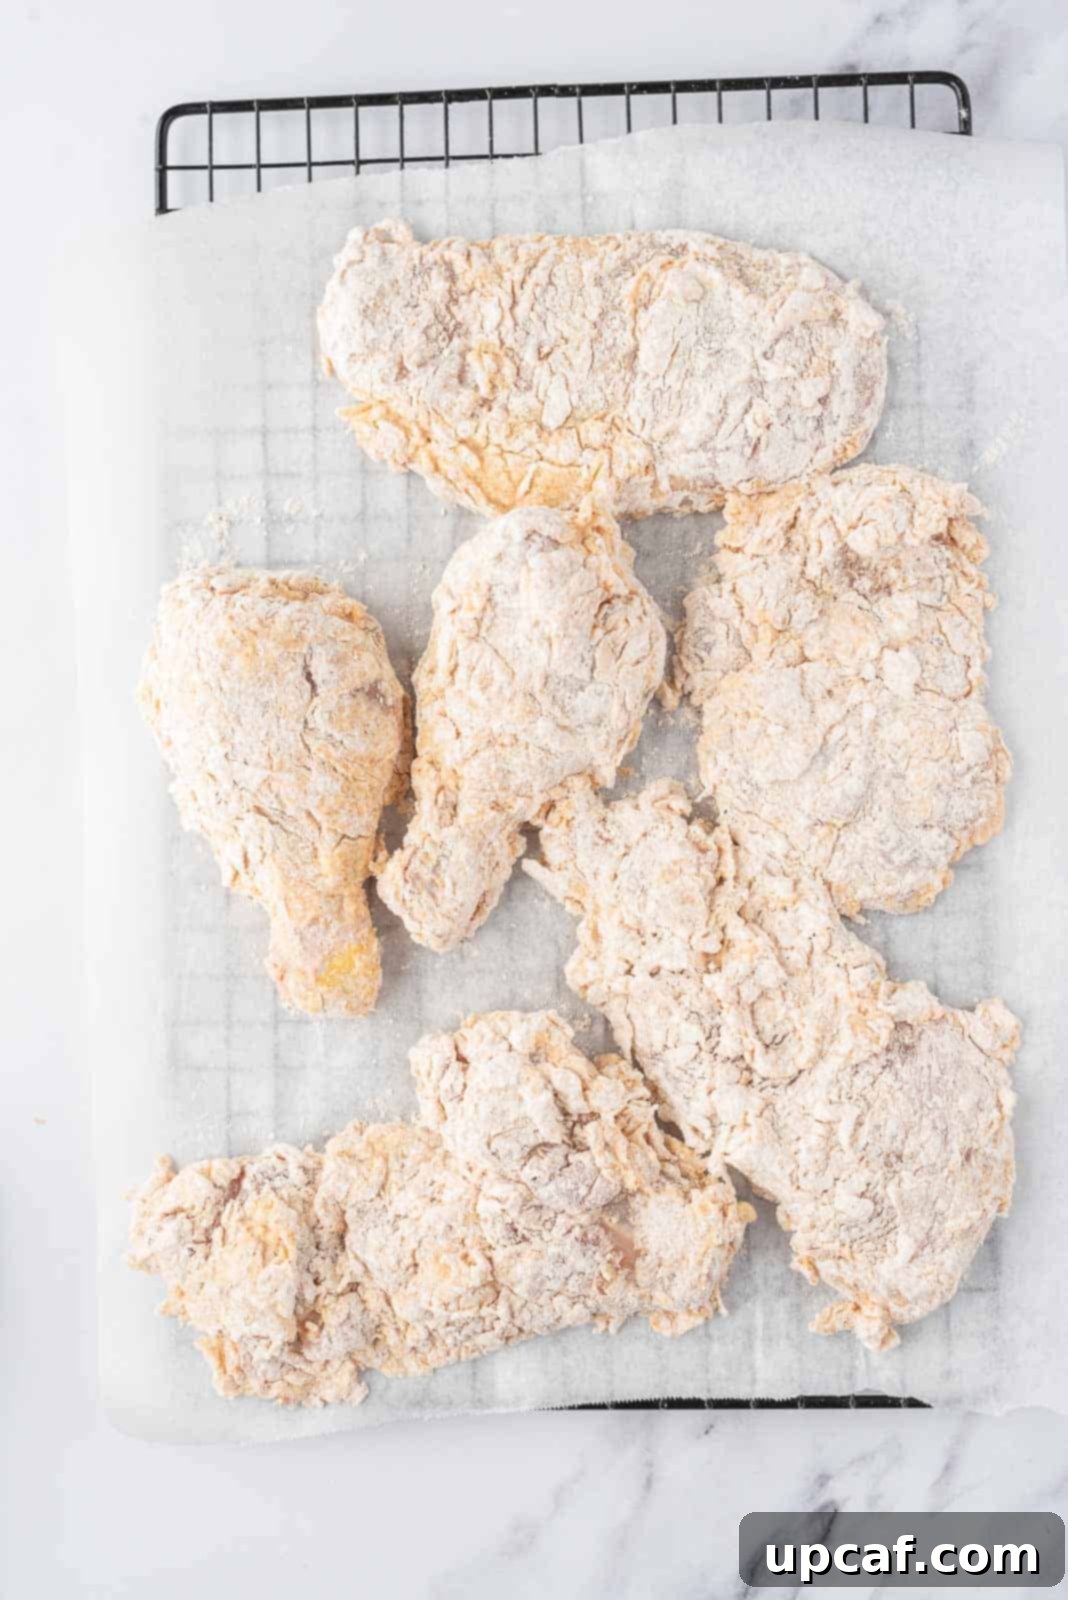
- Finally, return the chicken to the seasoned flour mixture for a second coating. Press the flour onto the chicken firmly to ensure a thick, even layer. This second coat is what gives the fried chicken its signature craggy, extra-crispy texture.
Once coated, gently shake off any loose flour and place the dredged chicken piece on a sheet of parchment paper or a wire rack while you repeat the process with the remaining chicken. Allowing the coated chicken to rest for 10-15 minutes at room temperature can also help the coating adhere better, preventing it from falling off during frying.
4. Fry to Golden, Crispy Perfection
Heat your chosen deep-frying oil in a large, heavy-bottomed pot or Dutch oven over medium-high heat. Aim for an oil temperature of 350-375°F (175-190°C) for optimal results. A cooking thermometer is highly recommended for accuracy. Once the oil reaches the correct temperature, carefully and gently add the dredged chicken pieces to the hot oil, ensuring not to overcrowd the pan. Cook in batches if necessary to maintain consistent oil temperature.
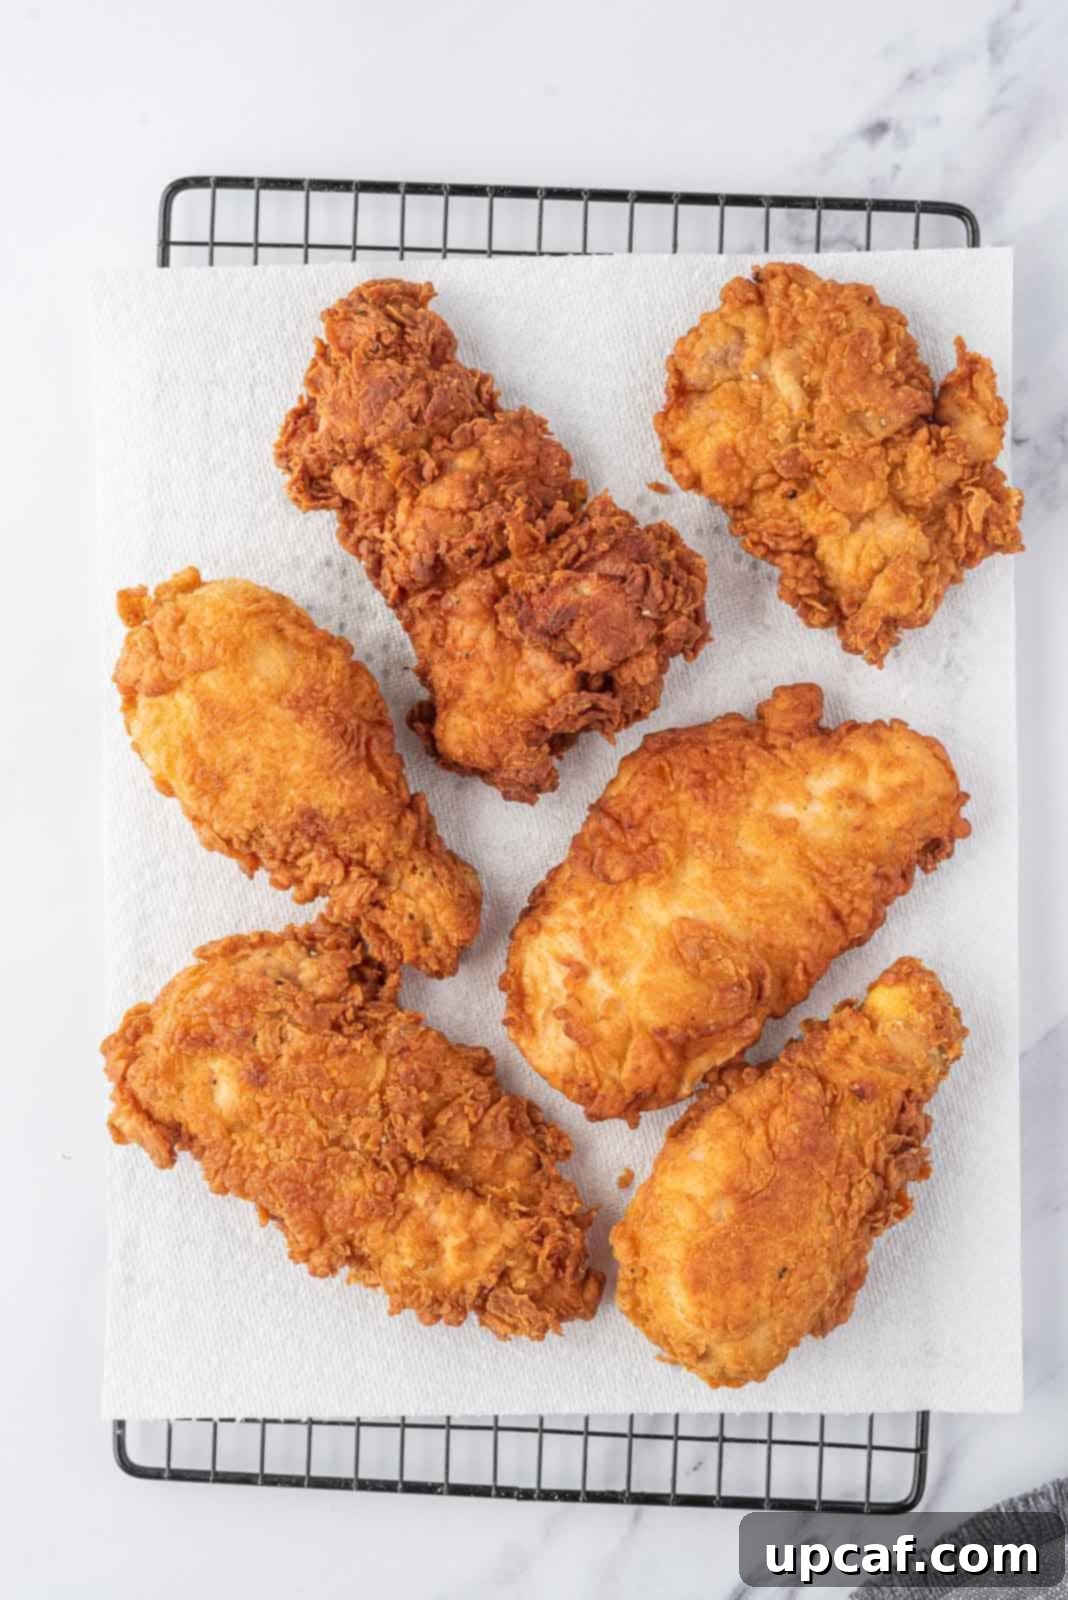
Fry the chicken for approximately 5-6 minutes per side, or until it’s beautifully golden brown and incredibly crispy. Flip the chicken once halfway through the cooking time to ensure even browning. The total frying time will vary slightly depending on the size and thickness of the chicken pieces. Keep an eye on the oil temperature, adjusting the heat as needed to prevent it from dropping too low (leading to greasy chicken) or getting too high (causing the coating to burn before the chicken is cooked through).
5. Drain and Serve with Flair
Once the chicken has reached a deep golden hue and is cooked through (internal temperature of 165°F or 74°C in the thickest part), carefully remove it from the oil using tongs or a slotted spoon. Transfer the cooked chicken pieces to a wire rack set over a baking sheet lined with paper towels. This setup allows excess oil to drain away, helping to maintain maximum crispiness while preventing the bottom from getting soggy.
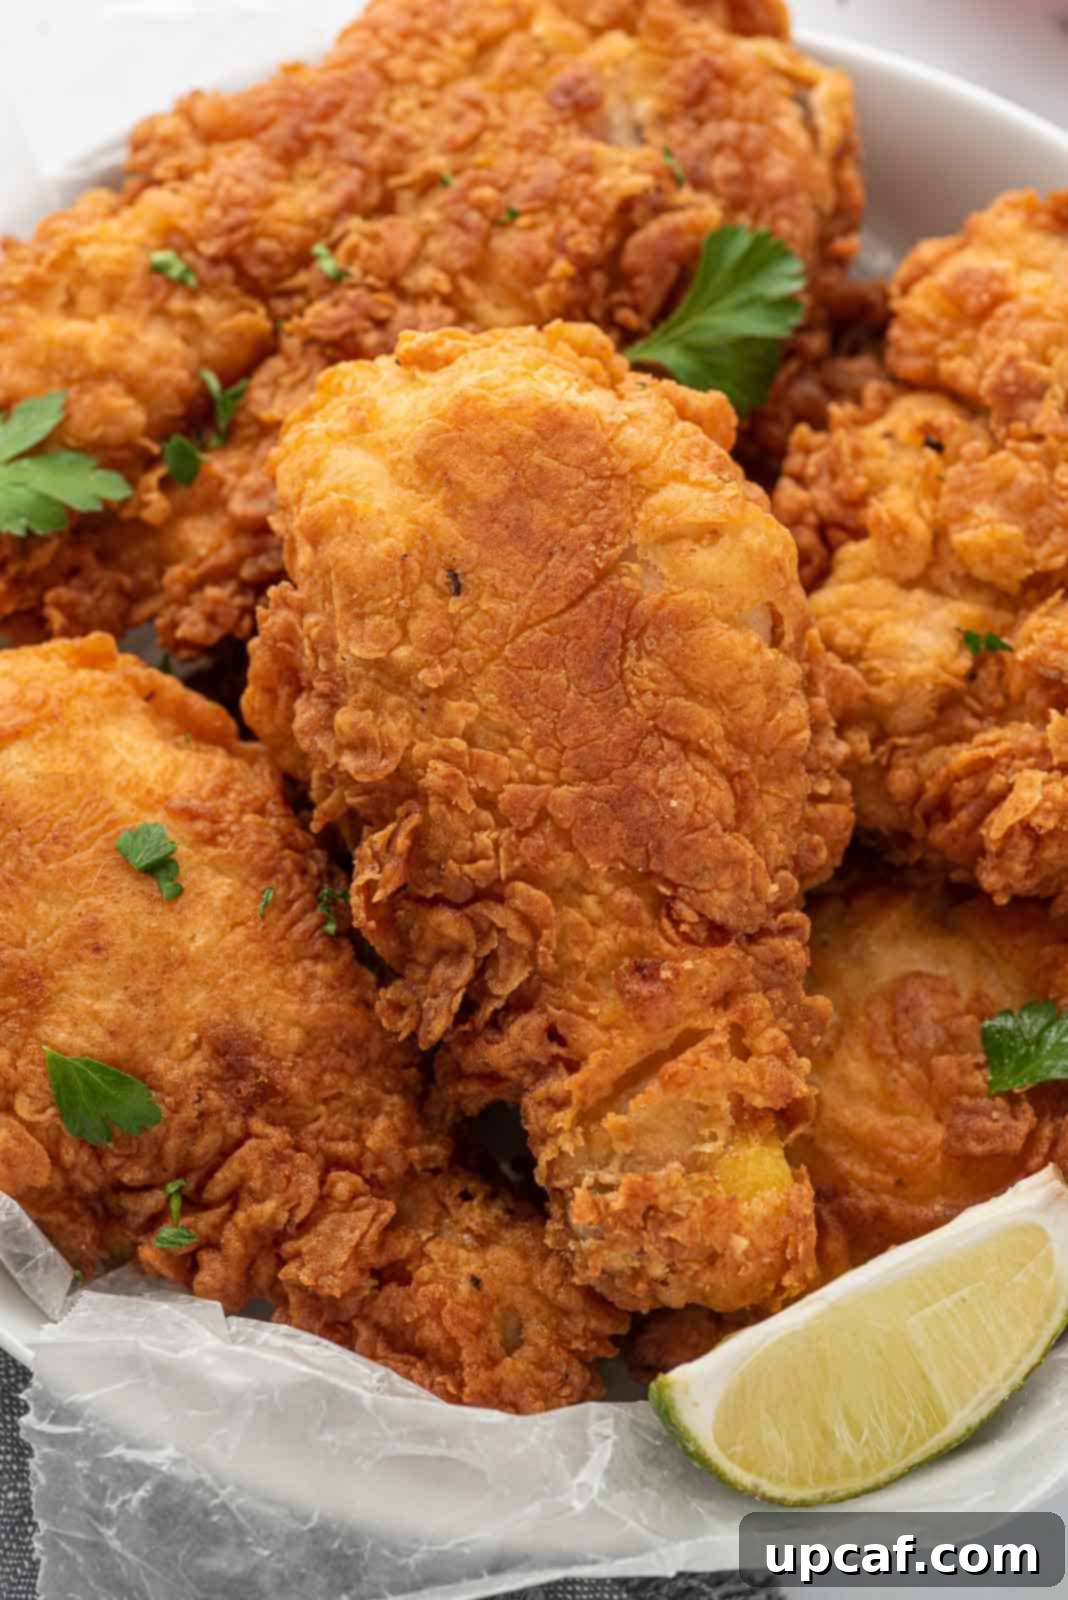
For a vibrant finish, sprinkle some fresh chopped parsley over the hot fried chicken. Serve your extra crispy fried chicken immediately with classic accompaniments like ketchup and ranch dressing on the side. Other popular pairings include creamy mashed potatoes, tangy coleslaw, or a fresh green salad.
Expert Tips for Making The Crispiest Fried Chicken Every Time
Achieving truly exceptional fried chicken is an art, but with a few expert tips, you can elevate your results from good to legendary. These pointers will help ensure your buttermilk fried chicken is always perfectly crispy, juicy, and full of flavor.
- Choose the Right Chicken Cuts: While our recipe calls for a mix, feel free to customize. You can buy a whole chicken and cut it into desired pieces, or use all drumsticks, all thighs, or even wings for this recipe. Bone-in, skin-on pieces are generally recommended for the best flavor and juiciness, as the bone helps insulate the meat and the skin crisps up beautifully.
- Don’t Skip the Buttermilk Soak: The buttermilk soak is absolutely crucial. It tenderizes the chicken and infuses it with flavor, leading to incredibly juicy results. For maximum benefit, consider soaking your chicken in the buttermilk mixture for at least 4 hours, or even overnight in the refrigerator. This longer marination time allows the acidity to work its magic more effectively.
- The Art of Dredging: When coating the chicken in flour and buttermilk, ensure a generous but even layer. After each step, gently shake off any excess liquid or flour. Too much liquid will thin the flour, and too much loose flour can fall off in the oil, making it cloudy. Pressing the flour onto the chicken firmly during the second dredge creates those wonderful craggy, crispy bits.
- Customize Your Spice Level: Adjust the heat to your preference! For more kick, increase the amount of cayenne pepper in the seasoned flour blend or add extra hot sauce to the buttermilk mixture. For a milder flavor, you can reduce or omit the cayenne pepper.
- Temperature Control is Key: Invest in a reliable deep-fry thermometer. Maintaining a consistent oil temperature of 350-375°F (175-190°C) is vital. If the oil is too cold, the chicken will absorb too much oil and become greasy. If it’s too hot, the coating will burn before the chicken cooks through. Monitor and adjust the heat throughout the frying process.
- Avoid Overcrowding the Pan: Frying too many pieces of chicken at once will drastically drop the oil temperature, leading to greasy and less crispy chicken. Cook in batches, leaving enough space between pieces for the oil to circulate freely. This helps maintain a consistent temperature and ensures even cooking and browning.
- Patience is a Virtue – Leave it Alone: Resist the urge to constantly flip the chicken. Once you place it in the oil, let it cook undisturbed for about half of the suggested cooking time on one side to develop a golden crust, then flip it once and cook the other side. Excessive turning can disturb the coating and prevent it from becoming truly crispy.
- Keep Cooked Chicken Warm: If you’re frying in batches, keep the already cooked chicken warm and crispy by placing it on a wire rack set over a baking sheet in a low oven (around 180°F or 82°C). This allows air to circulate, preventing sogginess, while keeping the chicken perfectly warm until all batches are ready to serve.
- Ensure Proper Doneness: Always cook chicken to a safe internal temperature. Using a meat thermometer, insert it into the thickest part of the chicken piece, avoiding the bone. The chicken is safely cooked when it reaches an internal temperature of 165°F (74°C). This ensures not only safety but also the best texture and flavor.
Frequently Asked Questions About Crispy Fried Chicken
Here are answers to some common questions about making and enjoying the best homemade fried chicken:
For deep frying chicken, it’s crucial to use an oil with a high smoke point. Canola oil is a popular choice and widely recommended due to its neutral flavor and high smoke point, which means it can get hot enough to crisp the chicken without burning. Other excellent options include peanut oil, vegetable oil, or even shortening/lard for a more traditional Southern flavor. Avoid olive oil or butter, as they have low smoke points and will burn quickly.
The best way to maintain that coveted crispiness is to serve the fried chicken as soon as possible after cooking. If you need to hold it or are cooking in batches, place the cooked pieces on a wire rack set over a baking sheet. This allows air to circulate around the chicken, preventing steam from accumulating and making the crust soggy. You can then place the rack in a warm oven (around 180°F / 82°C) until you are ready to serve. Avoid covering it with foil, as this traps steam.
Buttermilk plays two critical roles in making delicious fried chicken. First, its mild acidity acts as a natural tenderizer, breaking down the tough muscle fibers in the chicken, which results in incredibly moist and tender meat. Second, buttermilk helps the flour coating adhere better to the chicken, creating a thicker, more even crust that becomes beautifully crispy when fried. It also imparts a subtle tangy flavor that complements the seasonings.
Greasy fried chicken is almost always a result of incorrect oil temperature. If the oil is too cool (below 350°F / 175°C), the chicken’s coating will absorb excessive oil, making it heavy and unappetizingly greasy. Conversely, if the oil is too hot (above 375°F / 190°C), the exterior will brown and burn too quickly, while the inside remains undercooked, and the coating can taste harsh. Using a thermometer to maintain a consistent oil temperature is key to preventing greasiness and ensuring perfectly cooked chicken.
For the best crispiness, fried chicken is truly best enjoyed fresh and hot. However, leftovers can be stored in an airtight container in the refrigerator for up to 3-4 days. To reheat, avoid the microwave, as it will make the chicken soggy. Instead, preheat your oven to 350°F (175°C) and place the chicken pieces on a wire rack over a baking sheet. Reheat for 15-20 minutes, or until warmed through and the crust begins to crisp up again. While it won’t be as intensely crunchy as freshly fried chicken, this method will yield the best results for reheating.
Yes, you can freeze fried chicken! Allow the cooked chicken pieces to cool completely. Wrap each piece individually in plastic wrap, then place them in a freezer-safe bag or airtight container. Freeze for up to 3 months. To reheat from frozen, place the chicken on a wire rack on a baking sheet and bake in a preheated oven at 350°F (175°C) for 30-45 minutes, or until thoroughly heated. As with refrigerated leftovers, the reheated texture may not be as crisp as fresh.
Extra crispy fried chicken pairs wonderfully with a variety of classic Southern and comfort food sides. Time-honored favorites include Crispy Air Fryer French Fries and Easy Homemade Mashed Potatoes. You could also try refreshing Easy Macaroni Salad, creamy Easy Baked Mac and Cheese, a hearty Potato Cobb Salad, or a flavorful Brussels Sprouts Salad for a balanced meal.
Explore More Delicious Fried Chicken Recipes
If you’ve enjoyed mastering this classic, be sure to check out these other fantastic fried chicken-inspired recipes:
- Air Fryer Chicken Cutlets
- Fried Chicken Sandwich
- Air Fryer Chicken Nuggets
- Nashville Hot Chicken Tenders
- Crispy Chicken Bites
We hope you thoroughly enjoy this delicious Easy Fried Chicken recipe. It’s a true classic perfected for your home kitchen. If you try it, love it, and share it with your loved ones, we would be thrilled to hear your thoughts!
If you make this recipe and find yourself delighted by the results, please consider leaving a star rating and a comment below. Your feedback helps us and other home cooks. Don’t forget to share your culinary creations with us on Instagram using our hashtag – we love seeing your delicious takes on our recipes!

Crunchy Fried Chicken
By: Mariam Ezzeddine
It’s hard to beat the finger-licking goodness of crunchy fried chicken. Making it at home may seem out of reach, but this easy fried chicken recipe will have you changing your mind. Pieces of bone-in chicken are dredged in seasoned buttermilk and seasoned flour, then deep-fried to crispy perfection.
Prep Time: 10 minutes
Cook Time: 20 minutes
Total Time: 30 minutes
Servings: 4 Servings
Ingredients
- 6 pieces chicken (2 drumsticks, 2 thighs, 2 breasts)
- 2 cups all-purpose flour
- 1 tablespoon baking powder
- 1 teaspoon baking soda
- 2 teaspoons smoked paprika
- 1 teaspoon cayenne pepper
- 1 teaspoon garlic powder
- ½ teaspoon ground black pepper
- ½ teaspoon salt, to taste
- 1 cup buttermilk
- 1 whole egg
- 1 tablespoon hot sauce
- Salt & pepper, to taste
- Oil, for deep frying
Instructions
- Pat dry the chicken pieces with a paper towel and keep aside.
- In a shallow bowl, combine flour, baking powder, baking soda, paprika, cayenne pepper, garlic powder, black pepper, and salt. Whisk well.
- In another bowl, whisk together buttermilk, egg, hot sauce, salt, and pepper.
- Dredge the chicken in the flour mixture first, then dip into the buttermilk mixture, and then back into the flour mixture until evenly coated. Gently shake off excess flour and place on parchment paper. Repeat with remaining chicken.
- Heat oil to deep fry the chicken to 350-375°F (175-190°C). Gently add chicken to the oil (do not overcrowd). Fry for 5-6 minutes per side, flipping once, until golden and crispy.
- Once done, transfer the chicken to a cooling rack lined with a paper towel to remove excess oil.
- Sprinkle with fresh parsley and serve the crispy fried chicken with ketchup and ranch.
Notes
- You can use a whole chicken cut into pieces, or all thighs, drumsticks, etc.
- Chicken can be used with or without skin.
- When coating, always shake off excess buttermilk and flour.
- Increase spiciness by adding more cayenne pepper to the flour or more hot sauce to the buttermilk.
- Use a thermometer to ensure consistent oil temperature.
- Cook in batches to avoid overcrowding the pan.
- Flip the chicken only once, halfway through cooking.
- Keep cooked chicken warm on a wire rack in a 180°F (82°C) oven.
- Always cook chicken to an internal temperature of 165°F (74°C) when a meat thermometer is inserted into the thickest part.
Nutrition
Calories: 663kcal | Carbohydrates: 53g | Protein: 42g | Fat: 30g | Saturated Fat: 9g | Polyunsaturated Fat: 6g | Monounsaturated Fat: 12g | Trans Fat: 1g | Cholesterol: 178mg | Sodium: 880mg | Potassium: 541mg | Fiber: 2g | Sugar: 3g | Vitamin A: 1108IU | Vitamin C: 6mg | Calcium: 285mg | Iron: 5mg
