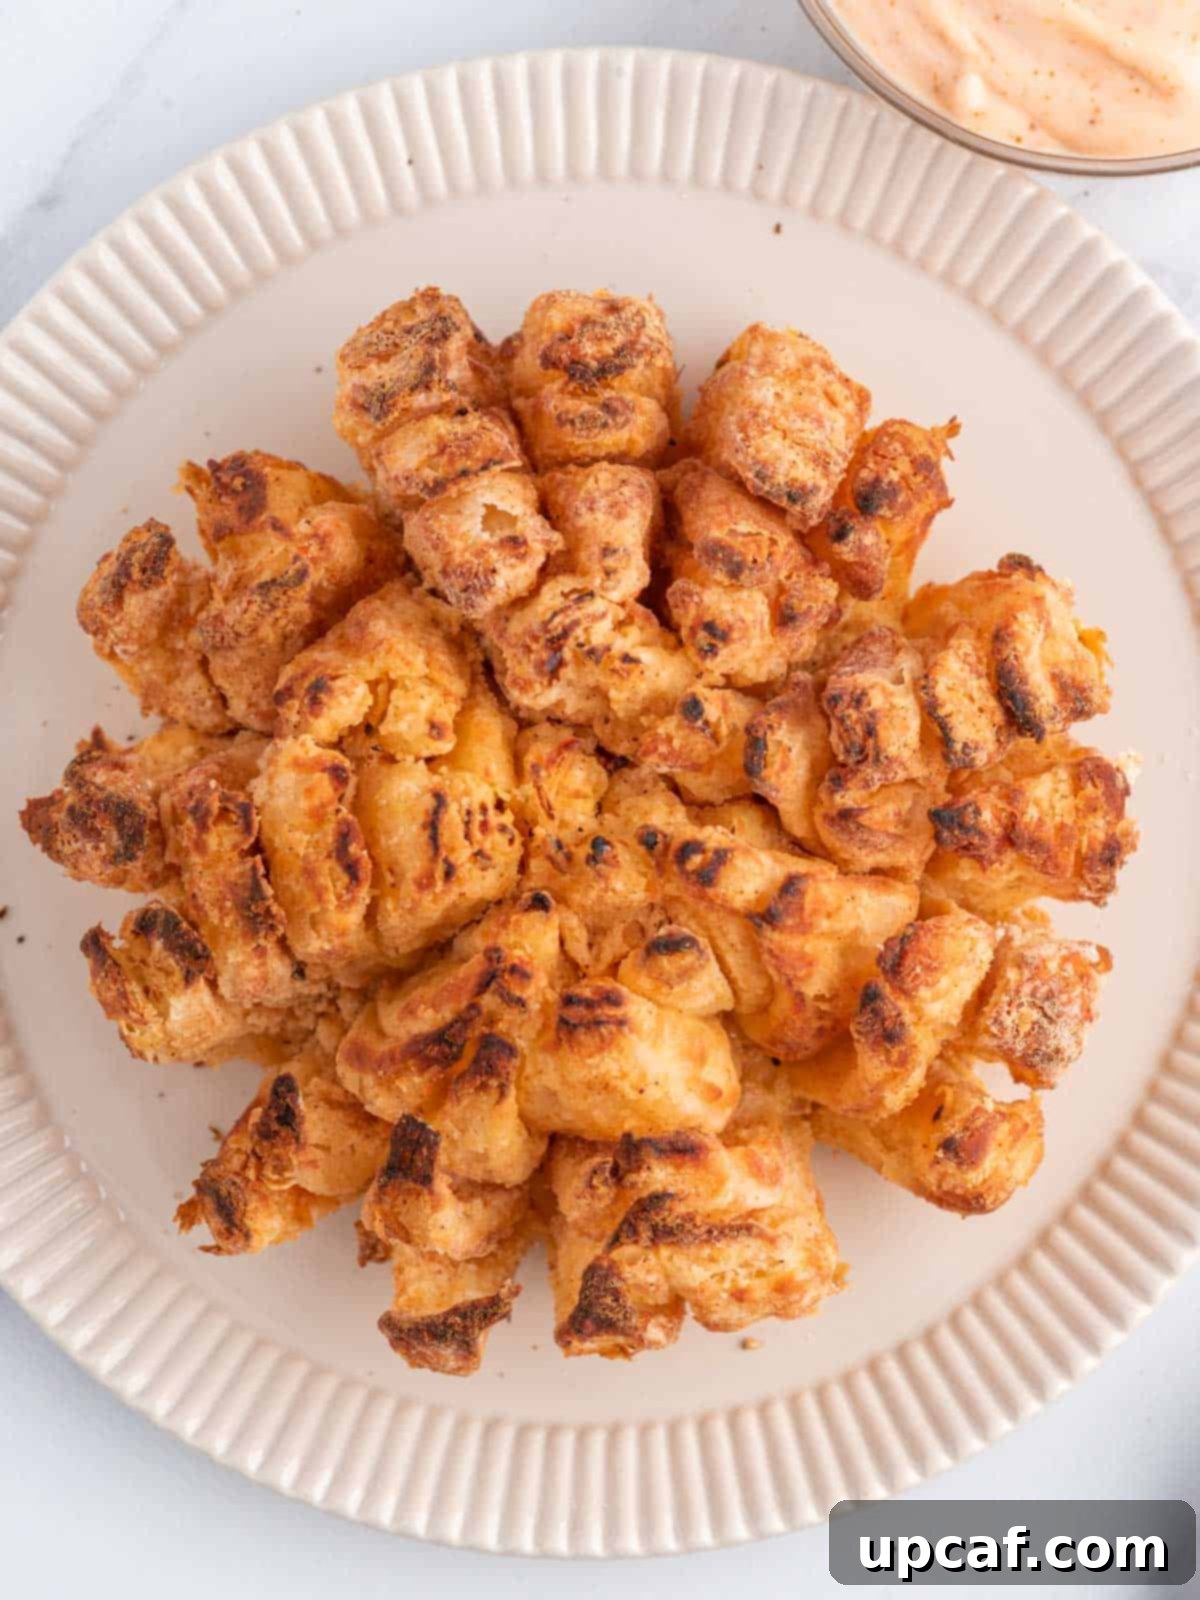
Welcome to your new favorite appetizer: the incredible Air Fryer Blooming Onion! Forget the deep-fried indulgence and embrace a healthier, yet equally delicious, version of this classic restaurant treat. This recipe promises a perfectly crispy, beautifully golden, and incredibly flavorful blooming onion right from your air fryer. It’s a spectacular centerpiece for any gathering, whether you’re hosting a game night, a casual weekend get-together, or simply craving an impressive snack.
Transforming a simple onion into a stunning, edible flower is easier than you think. With just a few basic ingredients and the magic of your air fryer, you can create a masterpiece that’s tender on the inside, crunchy on the outside, and seasoned to perfection. Say goodbye to excessive grease and messy deep-frying, and hello to an appetizer that will have everyone reaching for another petal. Get ready to impress your friends and family with this homemade bloomin’ onion that’s every bit as tasty as what you’d find at your favorite steakhouse, but without the guilt.

Creating this homemade sensation is not only a delight for your taste buds but also a healthier alternative to its deep-fried counterparts from popular chain restaurants like Outback Steakhouse, Chili’s, or Applebee’s. The air fryer significantly reduces the oil content, making it a guilt-free pleasure you can enjoy more often. Each bite offers a harmonious blend of tender onion, savory seasoning, and an irresistible crispy coating. It’s the ultimate party appetizer or a fun snack for any occasion that calls for something special.
If you’re a fan of recreating your restaurant favorites at home with a healthy twist, be sure to explore more of our copycat recipes. You might love our Panda Express Honey Walnut Shrimp or the indulgent yet simplified Cheesecake Factory Chicken Madeira. These recipes bring the gourmet experience right to your kitchen, just like this spectacular air fryer bloomin’ onion.
Why You’ll Love Making Blooming Onion in an Air Fryer
The air fryer is a game-changer for so many recipes, and the blooming onion is no exception. Here’s why this method will quickly become your preferred way to make this iconic appetizer:
- Healthier Indulgence: One of the biggest advantages of using an air fryer is the significant reduction in oil. By air frying instead of deep frying, you cut down on calories and fat, allowing you to enjoy your favorite appetizer without the guilt often associated with fried foods. It’s a smarter way to satisfy those cravings!
- Less Mess & Easier Cleanup: Deep frying can be notoriously messy, often leaving your kitchen covered in splattered oil. The air fryer contains the cooking process, minimizing mess and making cleanup a breeze. No more dealing with large quantities of hot oil or scrubbing greasy countertops!
- Perfect for Sharing: A blooming onion is inherently designed for sharing. Its unique ‘petal’ structure makes it easy for everyone to pull off a piece, dipping it into their favorite sauce. It’s an interactive and fun appetizer that fosters connection and enjoyment around the table.
- Incredibly Crispy Texture: The air fryer excels at creating a wonderfully crispy exterior without the need for excessive oil. The circulating hot air ensures that every part of the onion blossom achieves that coveted golden-brown crunch, making it irresistible from the first bite to the last.
- Quick & Convenient: Air fryers preheat faster and cook more efficiently than traditional ovens or deep fryers. This means you can have a show-stopping appetizer ready in a fraction of the time, perfect for spontaneous cravings or last-minute guests.
Essential Ingredients for Your Air Fryer Blooming Onion
Crafting the perfect air fryer blooming onion starts with selecting the right ingredients. Each component plays a vital role in achieving that signature crispy texture and savory flavor. Here’s a detailed look at what you’ll need:
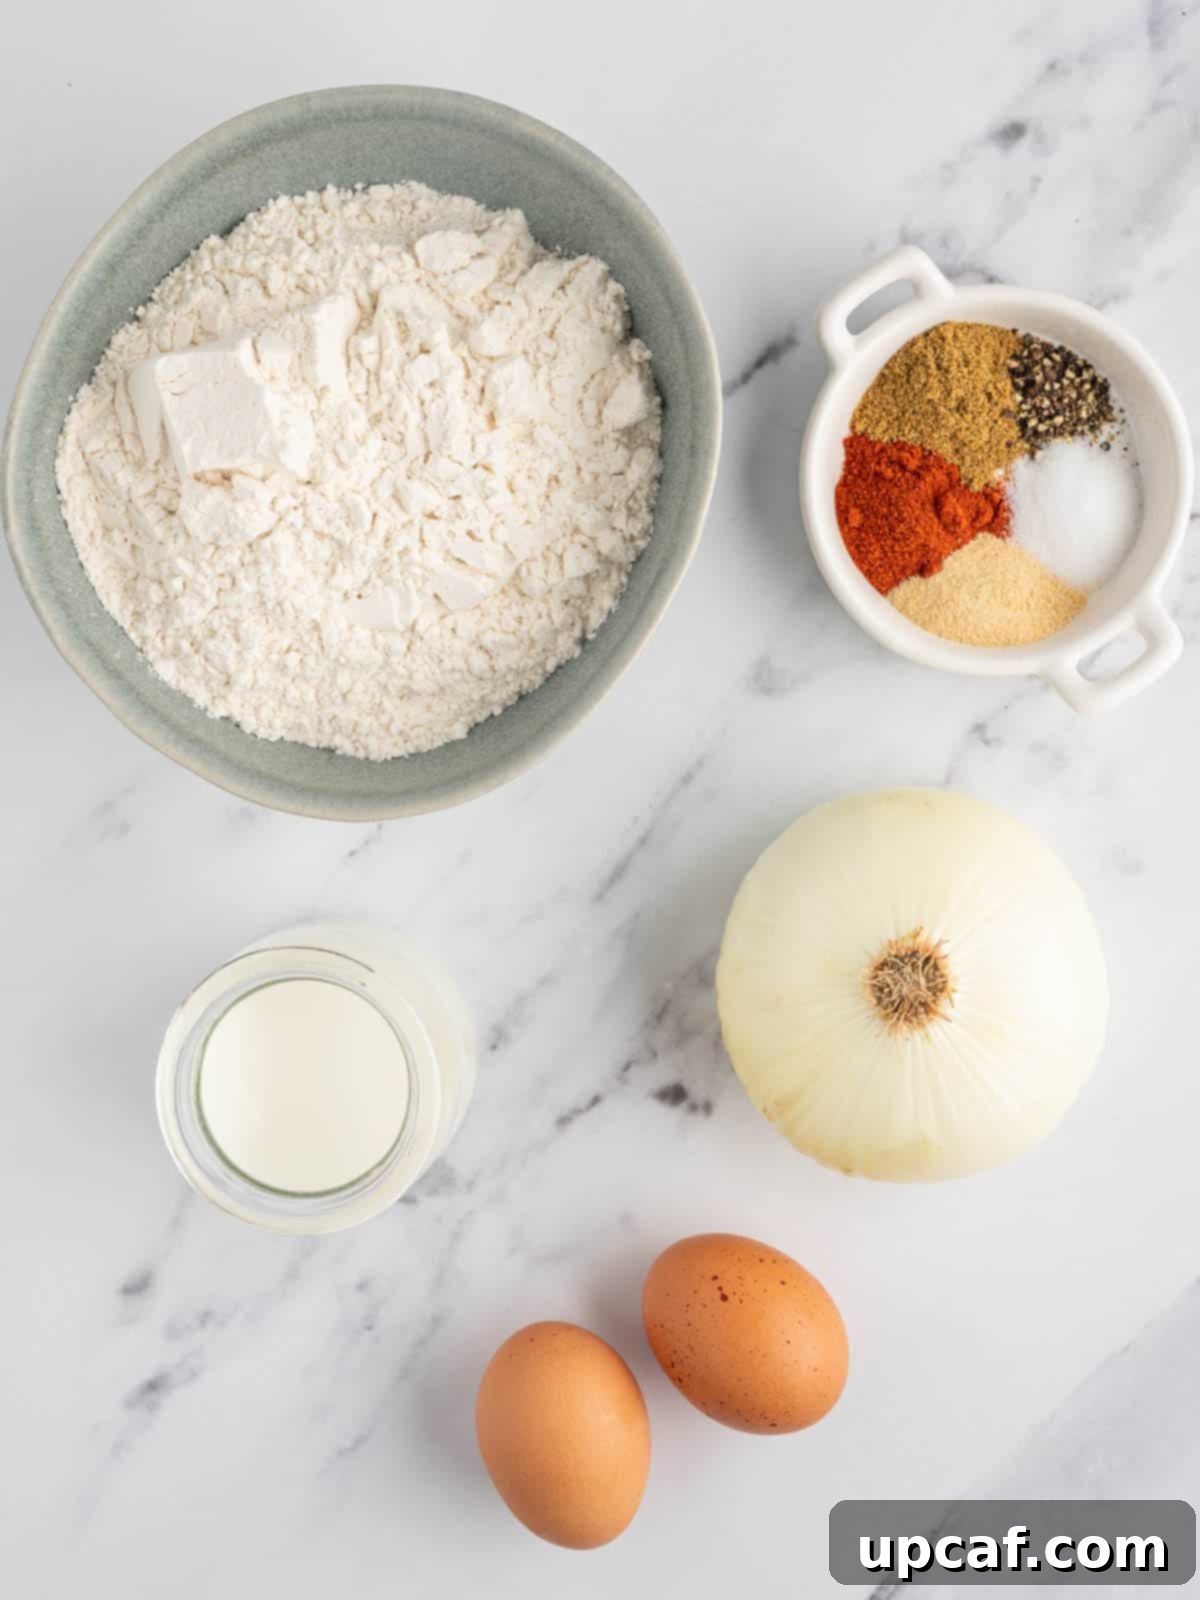
- Onion: The star of the show! Opt for a single, large sweet onion, such as a Vidalia or Walla Walla. These onions have a milder, sweeter flavor profile that mellows beautifully during cooking, preventing any harsh bitterness. Their large size is also crucial for achieving the impressive “blooming” effect.
- All-Purpose Flour: This forms the base of our crispy coating. Regular all-purpose flour provides the perfect adherence for the seasonings and creates a satisfying crunch when air-fried. While this recipe hasn’t been tested with gluten-free flour, you are welcome to experiment with a cup-for-cup gluten-free blend if you prefer.
- Aromatic Spices: The blend of spices is what truly elevates the flavor. You’ll combine paprika (smoked paprika adds a wonderful depth), ground cumin, garlic powder, salt, and ground black pepper. This savory mix penetrates every petal, ensuring a burst of flavor in every bite. Feel free to adjust the spice levels or add a pinch of cayenne for a subtle kick.
- Eggs: Two room-temperature eggs are essential for creating the “egg wash” that helps the flour coating stick to the onion. Using room-temperature eggs helps them whisk more evenly and combine better with the milk.
- Milk: Any kind of milk you prefer will work perfectly here. It helps to create a thinner, more consistent egg wash, ensuring an even coating on the onion petals. Dairy milk, almond milk, or soy milk are all suitable options.
- Cooking Spray: A light, even coating of cooking spray is key to achieving that desirable golden-brown color and maximum crispiness in the air fryer. It mimics the effect of oil in deep frying without the excess. Olive oil spray, avocado oil spray, or any neutral cooking spray will work well.
How To Master the Air Fryer Blooming Onion
Creating this stunning appetizer is simpler than it looks, especially with an air fryer. Follow these detailed steps to achieve a perfectly crispy and flavorful blooming onion:
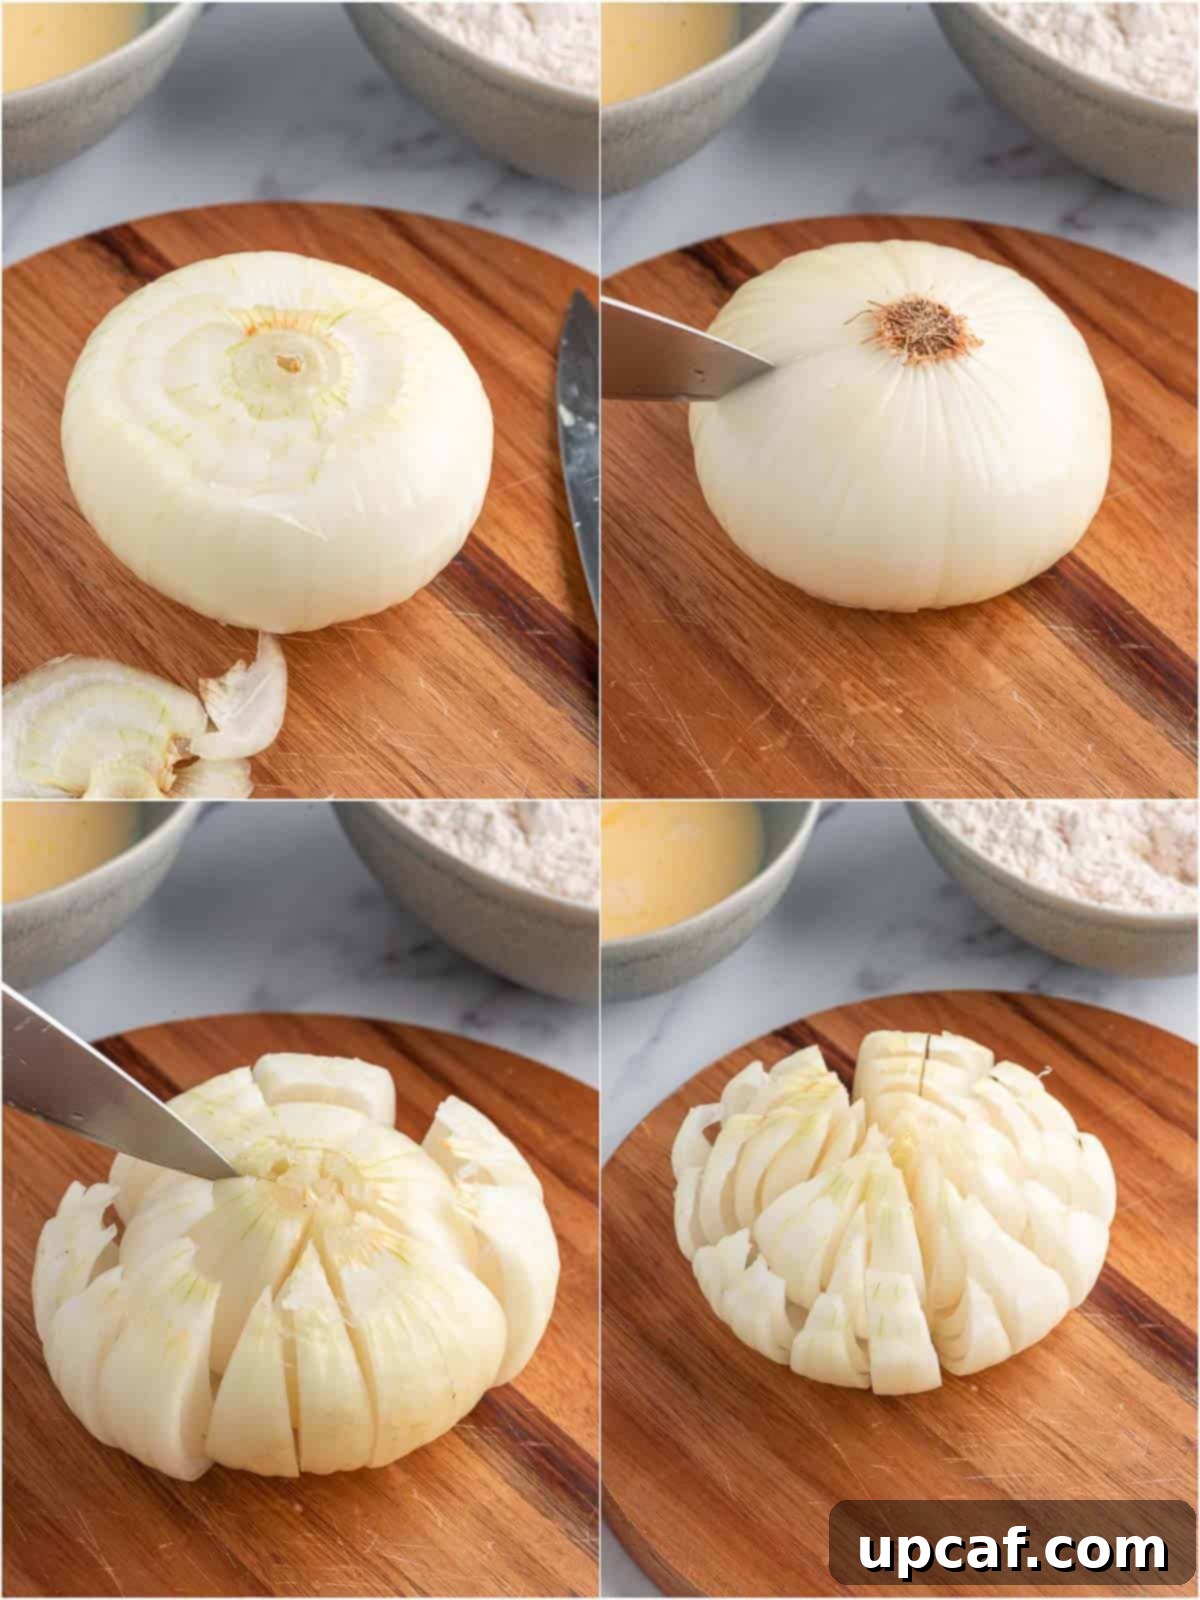
- Prepare the Onion for Blooming: Begin by carefully peeling the outer skin of your large sweet onion. Then, trim about ½ inch off the top (stem end) of the onion. This creates a stable base. Place the trimmed, cut side down on a clean, flat surface. Now, using a sharp knife, make your initial cuts. Start about ½ inch from the root of the onion (the uncut end) and make 4 equally spaced, deep cuts around the onion, cutting almost all the way through but leaving the root end intact. This root end is crucial as it holds the entire blossom together. Next, cut between these initial sections, aiming for a total of 16 equal cuts or “petals.” Once all cuts are made, gently turn the onion over and use your hands to carefully separate the sections, allowing the onion petals to relax and open up for a couple of minutes. This step is vital for an even coating and proper “bloom.”
- Prepare the Flavorful Coatings: While the onion is relaxing, prepare your two coating mixtures. In one wide, shallow bowl, whisk together the all-purpose flour, smoked paprika, ground cumin, garlic powder, salt, and ground black pepper until thoroughly combined. In a separate wide, shallow bowl, whisk the two room-temperature eggs with the milk until well blended. Set both bowls aside, ready for dredging.
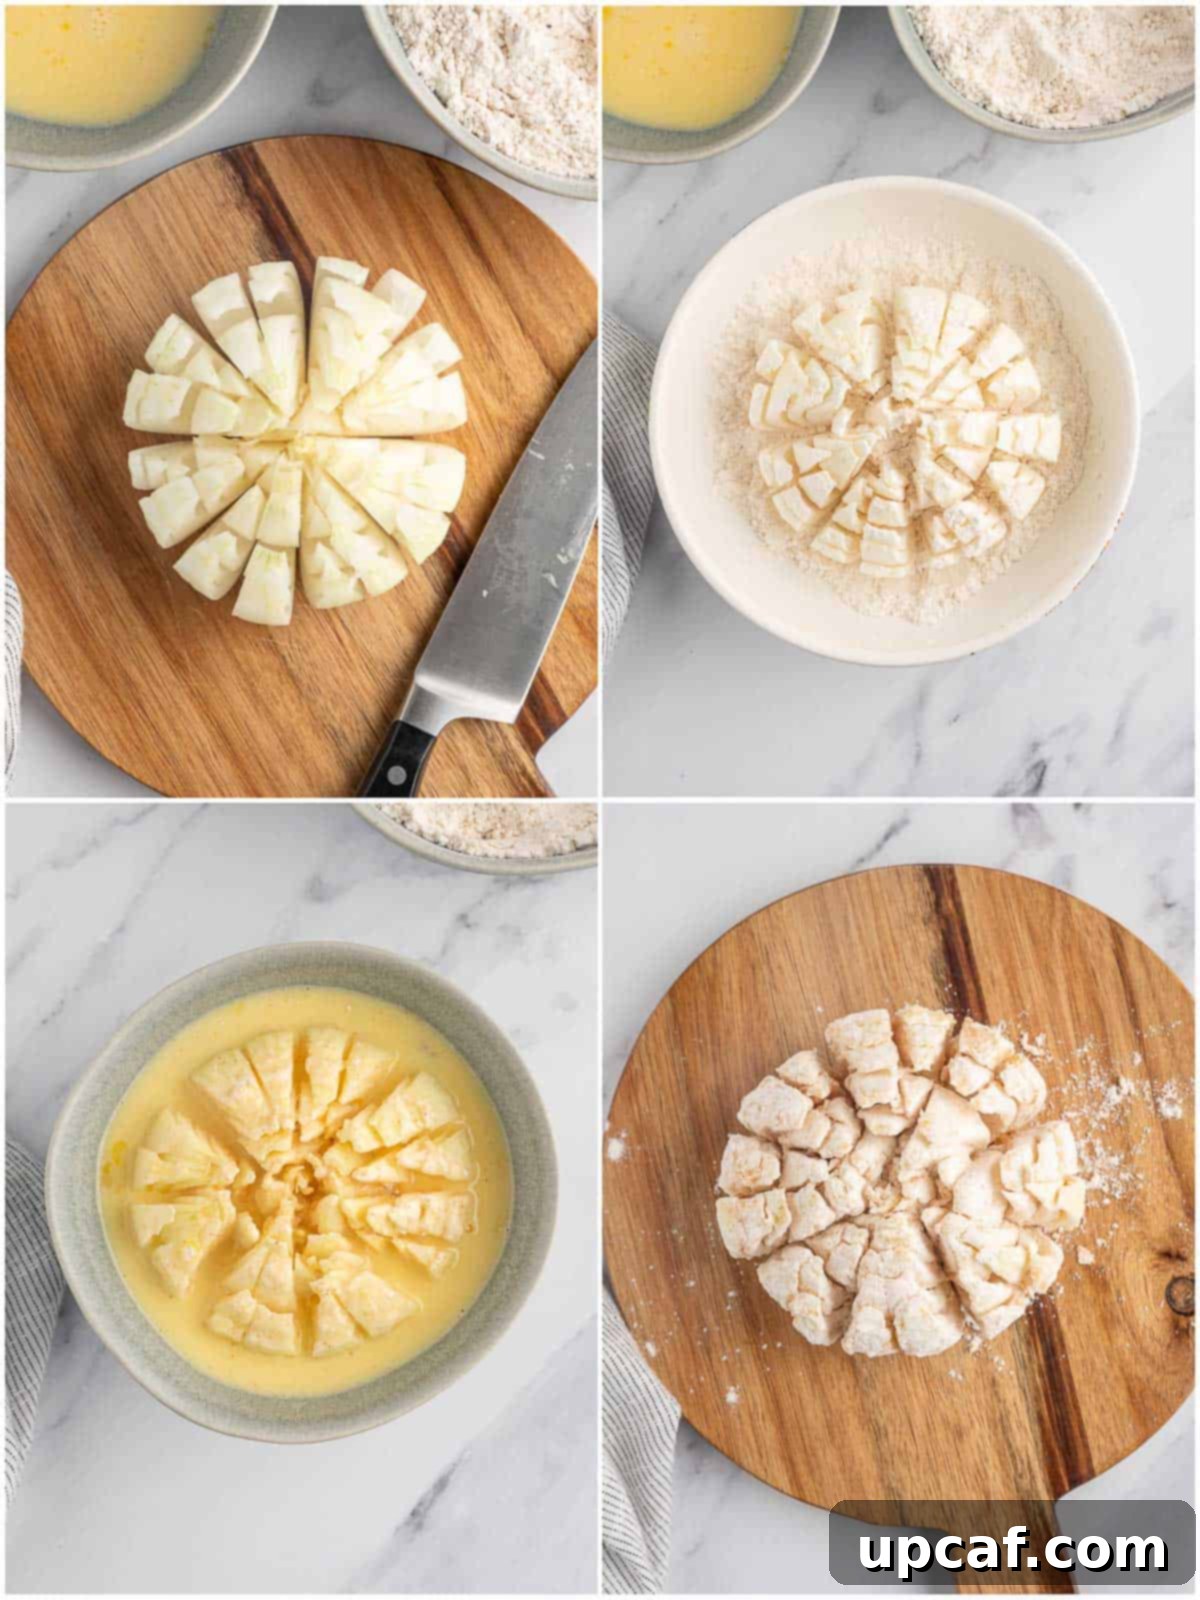
- First Flour Coating: Place the cut onion (with the stem end still intact and facing down) into the bowl with the flour and spice mixture. Gently sprinkle the flour mixture over the entire onion, ensuring that all the sections, especially between the petals, are thoroughly coated. Use your hands to carefully separate the petals and work the flour into every crevice. This initial dry layer is essential for creating a crispy crust.
- Egg Wash and Second Flour Coating: Carefully transfer the flour-coated onion into the egg mixture bowl, making sure it gets fully immersed and coated evenly. Lift the onion, allowing any excess egg wash to drip off. Then, transfer the onion back into the bowl with the remaining flour mixture. Pour any remaining flour on top and again, work gently to ensure every part of the onion, inside and out, is generously coated with the flour mixture. This double-dredging technique creates an extra crispy layer.
- Preheat Your Air Fryer: While you’re coating the onion, preheat your air fryer to 360°F (180°C). For easier cleanup and to prevent sticking, line the bottom of your air fryer basket with aluminum foil. Make sure the foil doesn’t block air circulation vents.
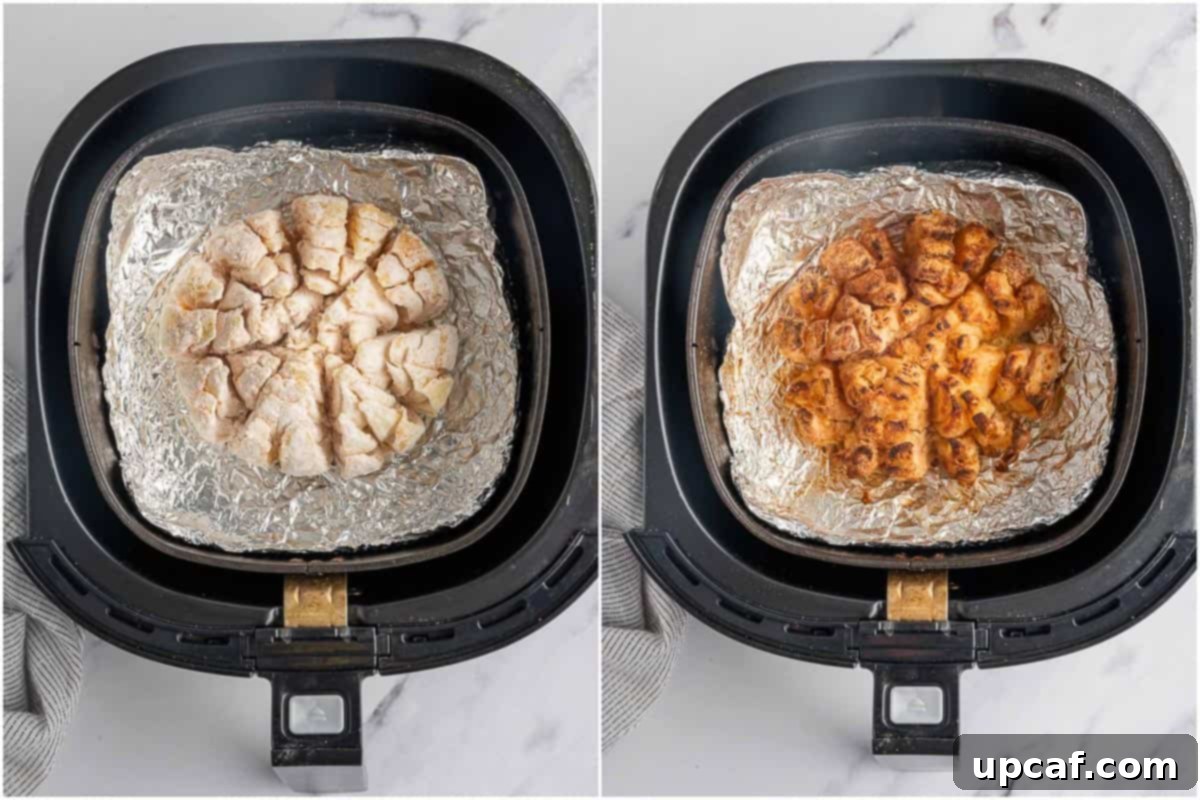
- Air Fry to Golden Perfection: Gently place the prepared blooming onion into the preheated air fryer basket. Generously coat the entire onion with cooking spray. This is crucial for achieving that beautiful golden-brown color and crispy texture. Air fry the blooming onion for a total of 20 minutes. Halfway through the cooking time, at about the 10-minute mark, open the air fryer and spray the onion generously with cooking spray once more. This helps to ensure even crispiness and a vibrant golden hue.
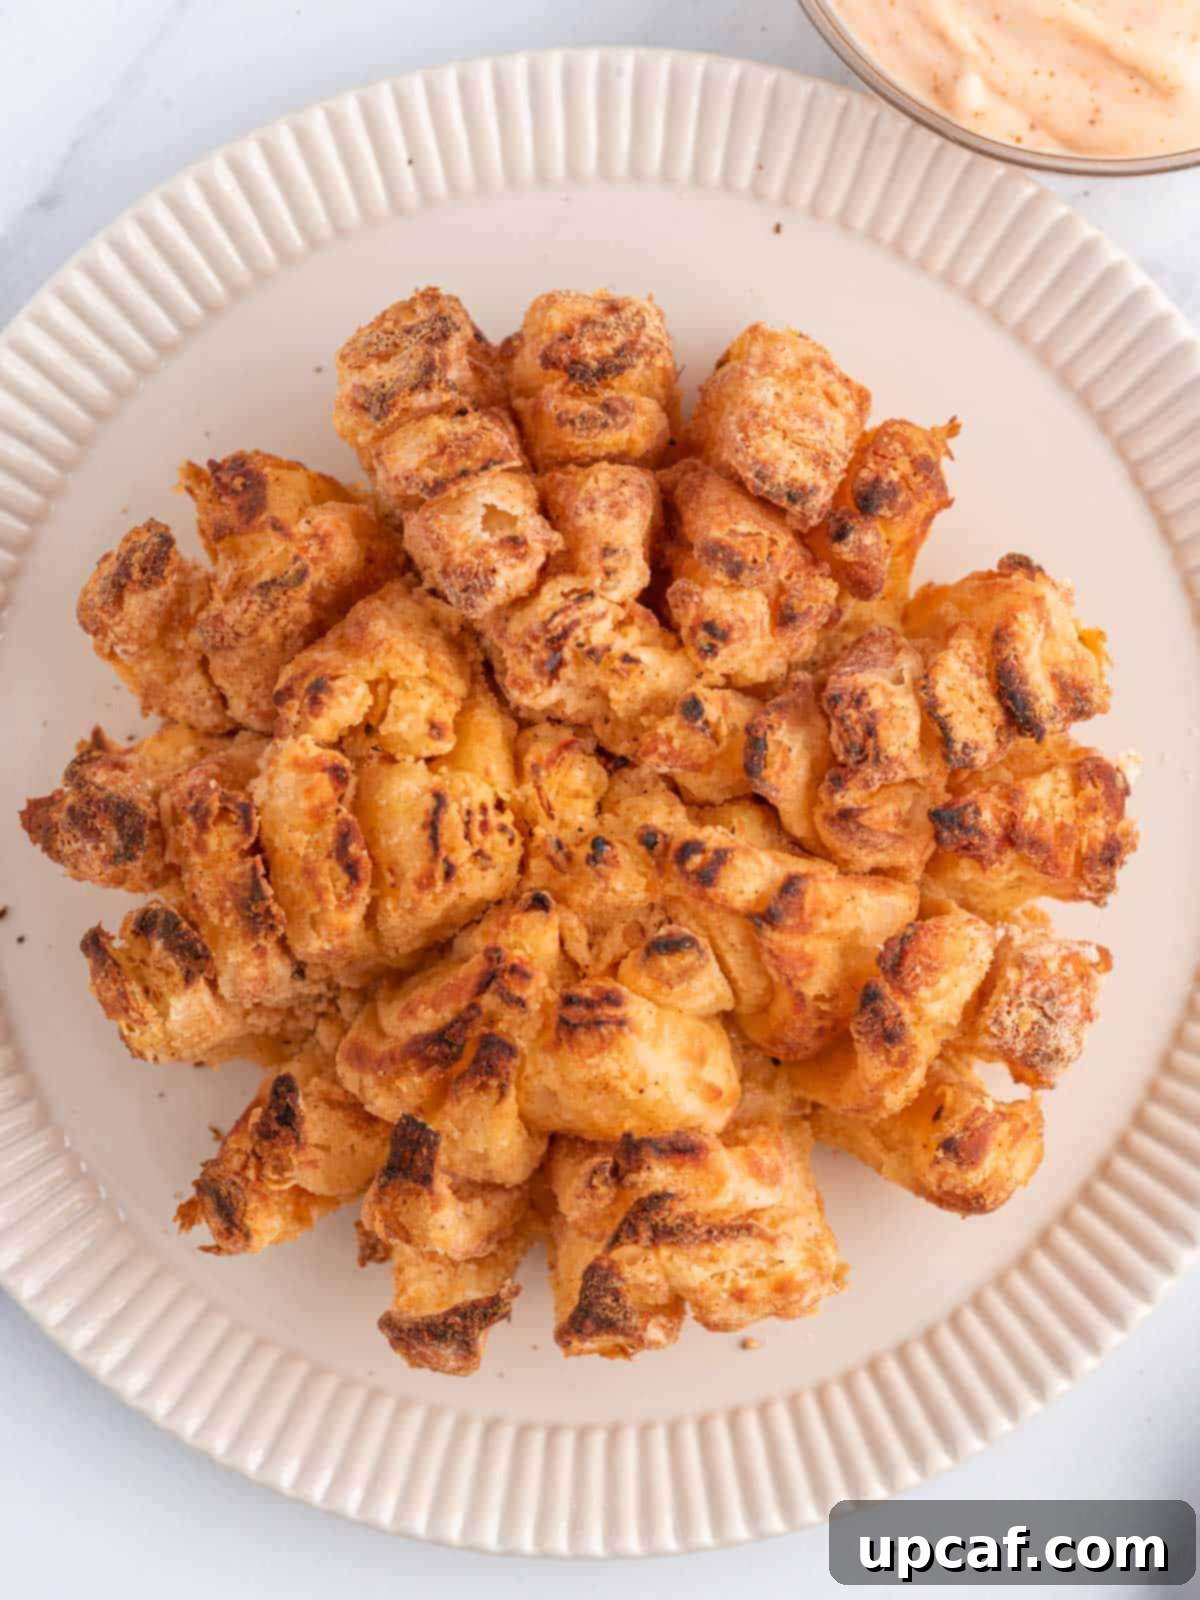
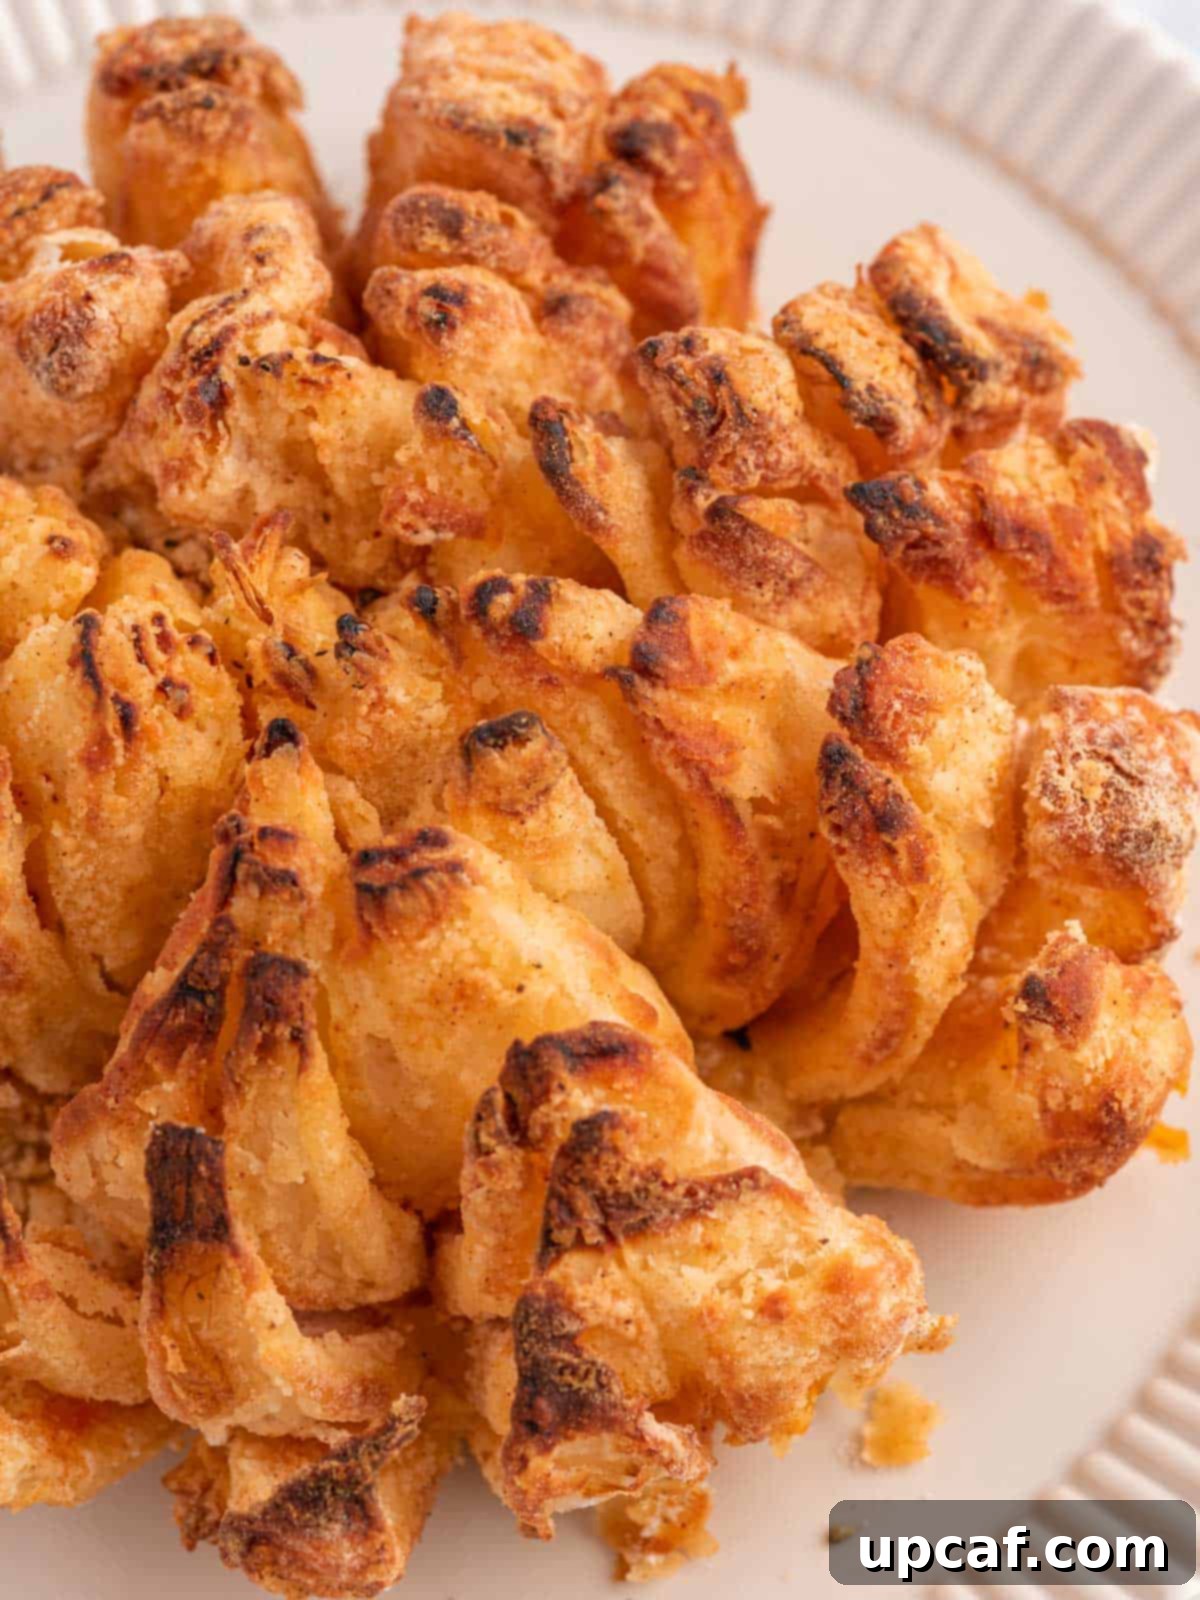
- Serve & Enjoy: Once the blooming onion is tender on the inside, golden-brown, and delightfully crispy on the outside, it’s ready! Carefully remove it from the air fryer. Serve immediately with your favorite dipping sauce on the side. A classic tangy sauce is highly recommended to complement the savory onion.
Expert Tips for the Best Air Fryer Blooming Onion
Achieving a perfectly crispy and flavorful blooming onion in your air fryer is simple with a few expert tips. These suggestions will help you navigate the process, from cutting to cooking, ensuring a show-stopping appetizer every time:
- Mastering the Onion Cut: Cutting the onion correctly is the most crucial step. Always use a very sharp knife to make clean, precise cuts. Work on a stable, flat cutting surface. Remember to leave about ½ inch of the root end intact; this is the anchor that holds your “blossom” together.
- Adjust Petal Count for Onion Size: While 16 petals are ideal for a very large onion, if you’re using a slightly smaller sweet onion, you might find that 8-10 petals are more manageable and yield better results. Too many cuts on a smaller onion can make it flimsy.
- Gentle Petal Separation: After cutting, gently work the onion petals open with your hands. Don’t force them too much, as they might break. A few minutes of resting after cutting also helps the natural separation.
- Thorough Coating is Key: Ensure every surface of the onion, both inside and out, is generously coated with the flour mixture. Gently pry apart the petals to get the flour and egg wash into all the nooks and crannies. This ensures maximum crispiness and flavor distribution.
- Don’t Skimp on Cooking Spray: For that ultimate golden-brown and extra-crispy finish, be liberal with your cooking spray. Spray several times during the cooking process, especially at the 10-minute mark, to ensure even browning and to help the coating crisp up beautifully.
- Foil for Easy Cleanup: Lining your air fryer basket with aluminum foil is a fantastic trick. It not only prevents the onion blossom from sticking but also makes cleanup incredibly easy, catching any drips or loose crumbs.
- Revive Closing Petals: If you notice some petals starting to close up during cooking, gently use a fork or tongs to pry them open. This ensures even air circulation and crisping.
- One Onion at a Time: For optimal results, cook only one blooming onion at a time. Overcrowding the air fryer basket can impede hot air circulation, leading to a less crispy, unevenly cooked onion. If cooking for a crowd, cook in batches.
- Monitor Cooking Times: Air fryer models vary, so treat the cooking times as approximate guidelines. Keep an eye on your blooming onion, especially towards the end, and adjust the cooking time as needed until it reaches your desired level of golden crispiness and tenderness.
- Dipping Sauce is Essential: A blooming onion isn’t complete without a delicious dipping sauce. Consider a classic tangy mayonnaise-based sauce, a zesty ranch, or a spicy aioli to complement the savory onion.
Frequently Asked Questions About Air Fryer Blooming Onions
Here are some common questions to help you perfect your homemade air fryer blooming onion:
For the best blooming onion, it’s crucial to select a large sweet onion, such as a Vidalia or Walla Walla onion. These varieties have a naturally mild and sweet flavor that becomes even more delightful when cooked. Avoid using strong, pungent onions like red or white onions, as their intense flavor might not mellow enough and could overpower the dish. The large size is also important to ensure you can create enough “petals” for the classic bloom effect.
Cutting a blooming onion can seem intimidating, but it’s quite straightforward once you get the hang of it. The key is to leave the root end completely intact, as this acts as the anchor that holds all the “petals” together during cooking. Start by trimming about ½ inch off the stem end of a peeled onion. Place it cut-side down. Using a sharp knife, make 4 equally spaced cuts from the top down, stopping about ½ inch from the root. Then, make cuts between these initial ones, aiming for 12-16 total petals depending on the onion’s size. Gently pry the petals open with your hands and a fork. Refer to the step-by-step photos in the recipe for a visual guide.
Leftover blooming onion can be stored in an airtight container in the refrigerator for up to 2-3 days. To reheat and restore its crispiness, place the leftovers back into a preheated air fryer at 350°F (175°C) for 5-7 minutes, or until thoroughly warmed through and crispy again. Avoid the microwave, as it will make the onion soggy.
Freezing a homemade blooming onion is generally not recommended. The unique texture of the cooked onion and its crispy coating can become soft and waterlogged after thawing and reheating, compromising the overall quality and enjoyment of the dish.
Blooming onions are incredibly versatile! They are perfect as a standalone appetizer for parties or game nights. For dipping, a classic tangy mayonnaise-based “blooming sauce” is traditional, but ranch dressing, spicy aioli, or even a zesty BBQ sauce work wonderfully. For a complete meal, serve it alongside your favorite steakhouse main courses. It pairs beautifully with Simple Skillet Ribeye Steak, Air Fryer Coconut Shrimp, or Best Baked Chimichurri Chicken, and even a simple grilled steak and potatoes. It truly elevates any meal into a special occasion.

More Delightful Air Fryer Appetizer Recipes to Explore
If you loved making this Air Fryer Blooming Onion, you’re in for a treat! The air fryer is a fantastic tool for creating crispy, flavorful appetizers with less oil and less fuss. Here are some more delicious recipes that are perfect for parties, game nights, or just a fun snack:
- Shrimp Sushi Stack (While not air-fried, a fantastic appetizer!)
- Crispy Air Fryer Pasta Chips
- Easy Spanakopita Triangles
- Flavorful Air Fryer Garlic Chicken Wings
- Zesty Buffalo Cauliflower Wings
- Crispy Air Fryer Eggplants
We hope you thoroughly enjoy experimenting with all the delicious recipes we share, especially this show-stopping Air Fryer Blooming Onion! It’s a testament to how simple ingredients and smart cooking techniques can bring restaurant-quality taste right into your home. Don’t hesitate to give it a try, savor every crispy petal, and consider rating it and sharing your experience with friends and family!
If you prepare this incredible recipe and find yourself loving it as much as we do, please take a moment to leave a star rating and a comment below. Your feedback helps us and other home cooks discover wonderful dishes. Also, stay connected and follow us at Cookin’ With Mima on FACEBOOK | INSTAGRAM | PINTEREST for all our latest culinary creations, helpful tips, and fresh recipes delivered straight to your feed.

Print Recipe
Air Fryer Blooming Onion
Ingredients
- 1 large sweet onion
- 2 cups all-purpose flour
- 1 tablespoon smoked paprika
- 1 teaspoon ground cumin
- 1 teaspoon garlic powder
- 1 teaspoon salt
- ½ teaspoon ground pepper
- 2 whole eggs
- ½ cup milk
- Cooking spray
Instructions
- Peel the outer skin of the onion, and trim the top of the onion for ½ an inch.
- Place the cut side down and start cutting downwards ½ inch from the root of the onion. Cut 4 equally spaced cuts around the onion.
- Now cut between the sections until it reaches 16 equal cuts. Turn the onion over and use your hands to make some separation between the sections and allow the onion petals to relax for a couple of minutes.
- Meanwhile, in a bowl whisk flour, paprika, cumin, garlic powder, salt, and pepper. In another bowl whisk egg and milk. Keep the bowls aside.
- Place the onion in a wide bowl facing the cut side up and sprinkle the flour over and coat the onion with the flour mixture making sure the onion sections are well coated with the flour.
- Transfer the flour-coated onion into the egg mixture bowl and coat it evenly. Once done transfer the onion back to the bowl and pour the remaining flour mixture on top and coat evenly.
- Meanwhile, preheat the air fryer to 360 degrees F. Cover the air fryer basket with aluminum foil.
- Place the onion carefully into the air fryer basket and coat the cooking spray generously on the onion.
- Air fry the blooming onion for 20 minutes and spray the oil after 10 minutes once again all over the onion.
- Once done, serve the blooming onion with a dip on the side to enjoy.
Notes
- Cutting the onion can be tricky. Be sure to use a sharp knife and work on a flat surface.
- For smaller onions, you may prefer to cut 8-10 petals rather than 16.
- Gently work the onion to open the petals.
- Carefully coat the entire onion and between each petal with flour.
- Spray with cooking spray several times during cooking for maximum crispiness.
- Using tin foil will keep the onion blossom from sticking and make cleanup a breeze.
- If a petal begins to close while cooking, gently pry it open with a fork.
- If cooking more than one onion, cook separately so the hot air can circulate.
- Cooking times are approximate. You will need to adjust based on how your individual air fryer cooks.
Nutrition
Like this recipe? Rate and comment below!
