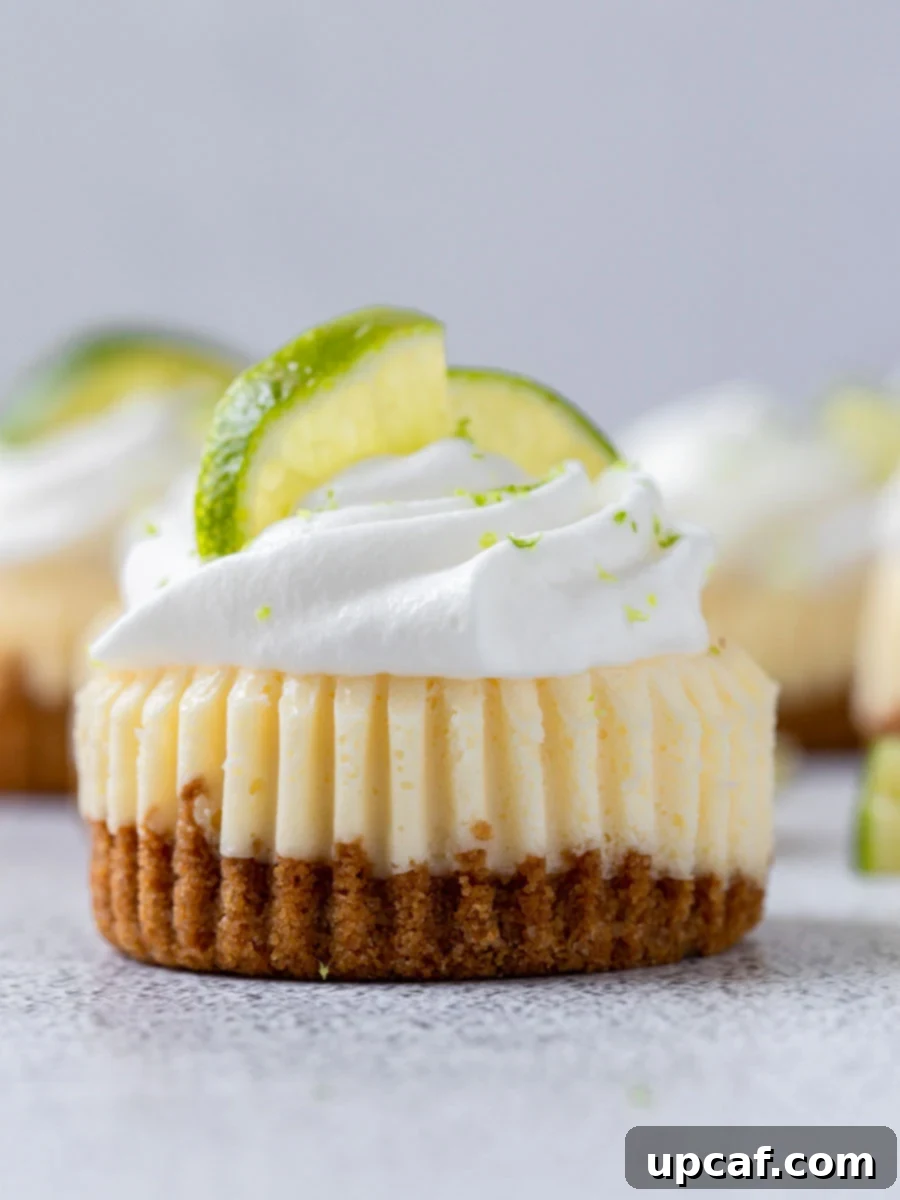
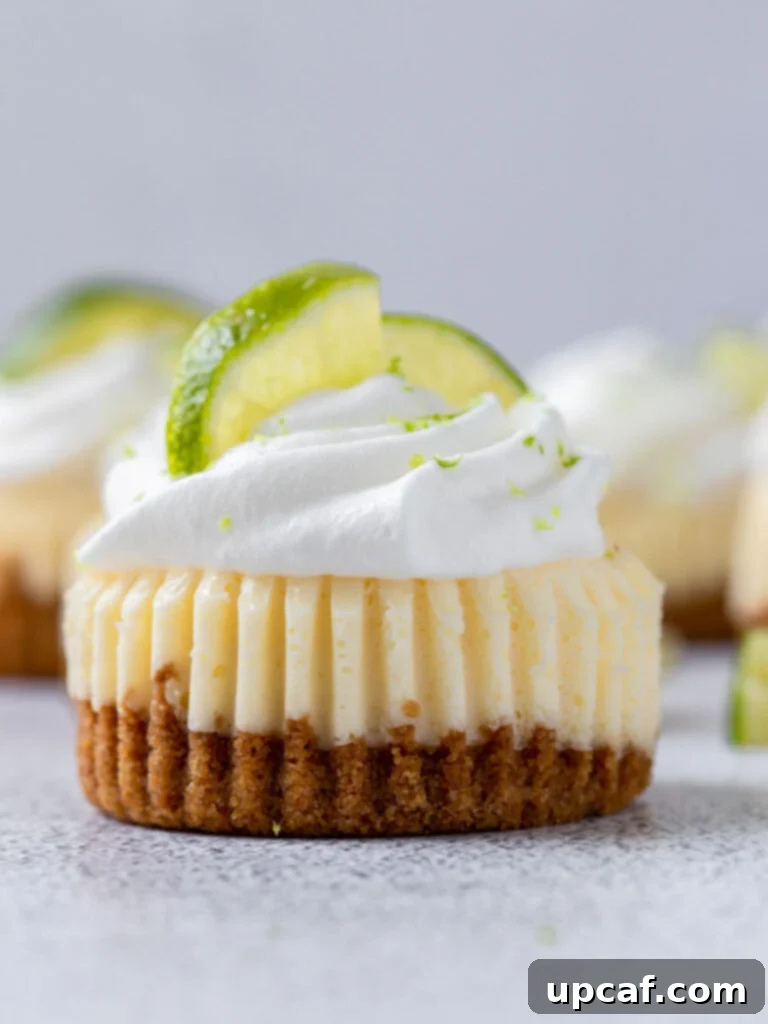
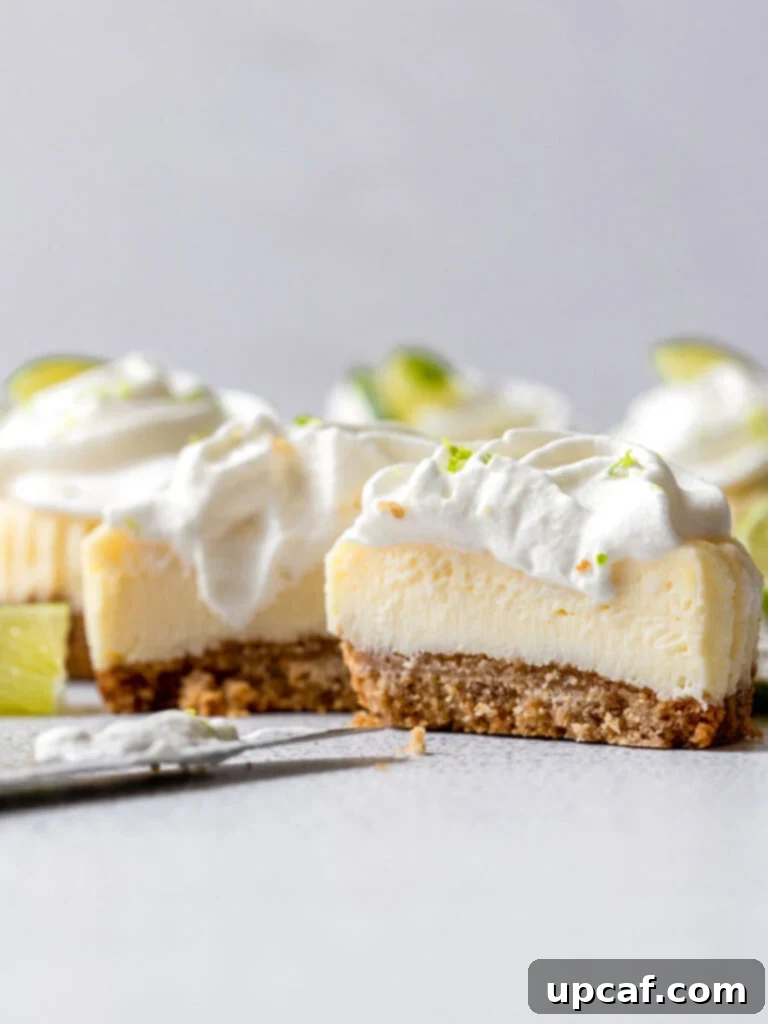
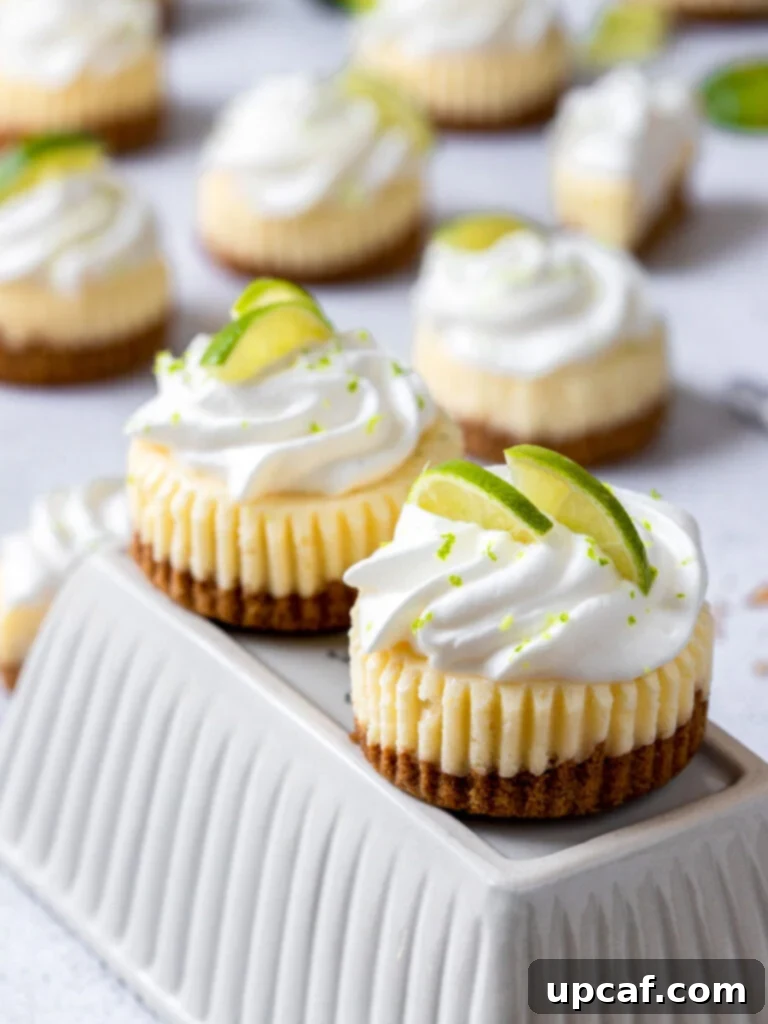
Sweet but tangy, these Mini Key Lime Cheesecakes are the perfect little desserts to end your meal with. A smooth and creamy key lime flavored filling overtop of a graham cracker crust, you’ll love this twist on a classic cheesecake.
Craving a dessert that’s both wonderfully sweet and delightfully tart? Look no further than these irresistible Mini Key Lime Cheesecakes. They capture all the vibrant, zesty essence of a traditional Key Lime Pie, expertly blended into the rich, creamy texture of a classic cheesecake. These individual treats are not only incredibly delicious but also surprisingly simple to prepare, making them an ideal choice for any occasion, from casual family dinners to elegant gatherings. Prepare to impress your taste buds and your guests with this fantastic, perfectly portioned dessert that delivers a burst of tropical flavor in every bite.
Looking for more amazing dessert ideas? Discover other delightful recipes like my Chocolate Covered Strawberries or my Mixed Berry Galette.
Why You’ll Fall in Love with These Mini Key Lime Cheesecakes
These mini cheesecakes are more than just a dessert; they’re a delightful experience waiting to happen. Here’s why this recipe will become a treasured favorite in your baking repertoire:
- Exquisite Flavor Balance: Imagine the creamy, decadent richness of cheesecake perfectly complemented by the bright, zesty tang of fresh key limes. Each bite offers a harmonious balance that is neither too sweet nor too tart, creating an incredibly satisfying and refreshing dessert experience.
- Effortless Elegance – No Water Bath Needed! One of the most common anxieties when baking cheesecakes is the dreaded water bath. This recipe cleverly bypasses that step entirely! By utilizing a standard cupcake tin, you can achieve beautifully baked, crack-free mini cheesecakes without the fuss and potential mess of a water bath, making it accessible even for novice bakers.
- Perfectly Portioned & Convenient: Serving individual desserts eliminates the need for slicing and ensures everyone gets their own adorable, perfectly sized treat. These mini cheesecakes are ideal for parties, potlucks, or simply enjoying a single serving without temptation. Their individual size also makes storage a breeze.
- Freezer-Friendly for Future Cravings: Don’t you love having a delicious dessert ready whenever a craving strikes? These mini key lime cheesecakes are wonderfully freezer-friendly. Prepare a batch, freeze them without the topping, and you’ll have a gourmet dessert on hand for weeks. Just thaw, top, and serve!
- A Fun Twist on a Classic: While classic cheesecake and key lime pie are beloved desserts, combining their best attributes into a mini format offers a novel and exciting culinary adventure. It’s a creative take that delights both traditionalists and those seeking something new.
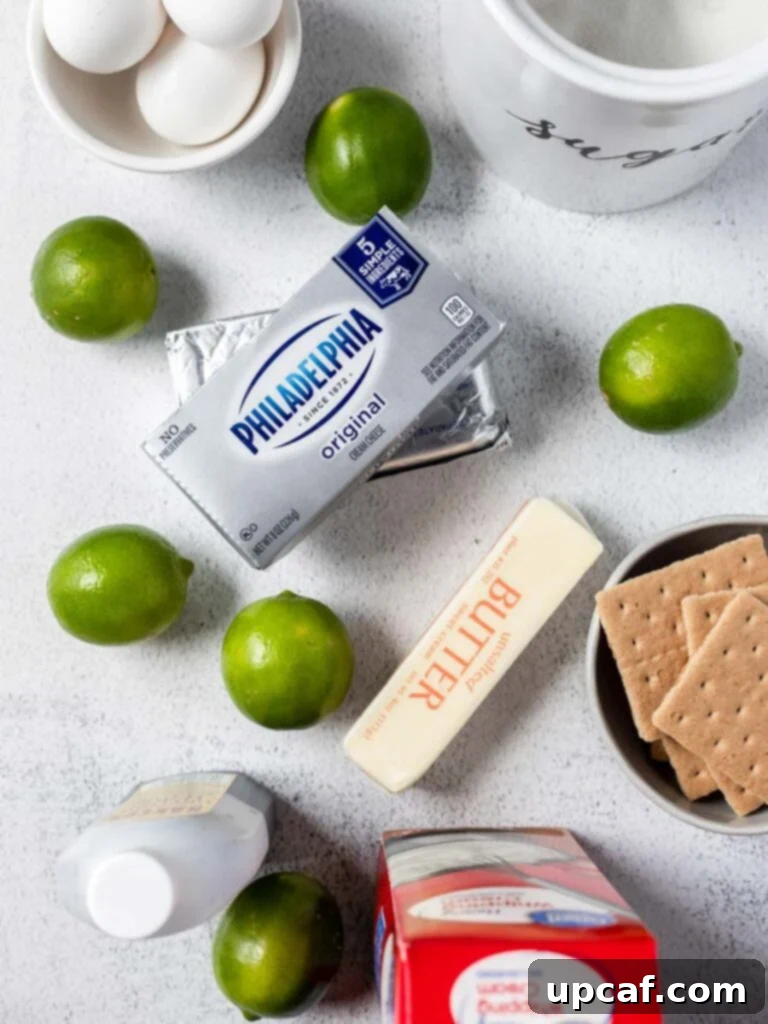
Essential Ingredients for Your Mini Key Lime Cheesecakes
Gathering the right ingredients is the first step to creating these delectable mini cheesecakes. Here’s what you’ll need, along with a few important notes:
For the Golden Graham Cracker Crust:
- Graham crackers: Finely crushed. You can buy pre-crushed graham cracker crumbs for convenience, or easily crush your own using a food processor or by placing crackers in a zip-top bag and crushing them with a rolling pin.
- Salt: Just a pinch to enhance the flavor of the crust and balance the sweetness.
- Granulated sugar: Adds a touch of sweetness to the buttery crust.
- Unsalted butter: Melted. This acts as the binding agent for the crumbs, creating a firm and flavorful crust. Using unsalted butter allows you to control the overall saltiness of the dessert.
For the Velvety Key Lime Filling:
- Cream cheese: Two 8-ounce blocks, brought to room temperature. This is crucial! Room temperature cream cheese mixes smoothly, preventing lumps and ensuring a silky, uniform filling. Always opt for full-fat, block cream cheese, as low-fat or spreadable varieties won’t yield the same rich texture and will affect the cheesecake’s structure.
- Granulated sugar: Provides the perfect level of sweetness to complement the tartness of the key lime.
- Eggs: Two whole eggs, also brought to room temperature. Like the cream cheese, room temperature eggs incorporate more evenly into the batter, preventing overmixing and potential cracks in the finished cheesecake.
- Key lime juice: Approximately ⅓ cup, freshly squeezed. This is the star ingredient! While bottled key lime juice exists, fresh key lime juice delivers an unparalleled vibrant, tart, and aromatic flavor that is essential for authentic Key Lime Cheesecakes. Don’t compromise on this for the best results.
- Vanilla extract: Two teaspoons. A touch of vanilla enhances the overall flavor profile and adds depth, beautifully complementing the citrus.
For the Dreamy Whipped Topping:
- Heavy cream: 1 cup, kept very cold. Cold heavy cream is key to achieving stiff, fluffy peaks when whipping.
- Powdered sugar: 1 tablespoon. Sweetens the whipped cream and helps stabilize it.
- Lime zest: As needed, for garnish. Fresh lime zest adds a burst of concentrated lime aroma and a beautiful visual appeal to the finished cheesecakes.
Step-by-Step Guide: How to Craft Your Mini Key Lime Cheesecakes
Follow these detailed instructions to create perfectly baked and delicious mini key lime cheesecakes:
- Prepare Your Oven and Muffin Tin: Begin by preheating your oven to 325°F (160°C). Line a standard 12-cavity cupcake or muffin tin with paper cupcake liners. These liners are essential for easy removal of your mini cheesecakes later. Set the prepared tin aside.
- Create the Graham Cracker Crust: In a medium-sized bowl, combine your finely crushed graham cracker crumbs, salt, granulated sugar, and melted unsalted butter. Mix these ingredients thoroughly until they are fully combined. The mixture should resemble wet sand – moist enough to hold its shape when pressed.
- Form and Bake the Crusts: Take approximately 1 to 1½ tablespoons of the graham cracker mixture and firmly press it into the bottom of each lined cupcake cavity. Use the back of a spoon or your fingertips to ensure a compact, even crust. Bake these crusts in the preheated oven for 8-10 minutes, or until they turn a beautiful golden brown. Once baked, remove the pan from the oven and allow the crusts to cool completely on a wire rack before proceeding. This step is crucial for preventing a soggy crust.
- Adjust Oven Temperature: After the crusts have cooled, reduce your oven temperature to 300°F (150°C). This lower temperature is ideal for baking the cheesecake filling gently.
- Prepare the Creamy Key Lime Filling: In the bowl of a stand mixer fitted with the paddle attachment, or using a large bowl with a hand mixer, beat the room temperature cream cheese and granulated sugar together on low speed. Continue mixing until the mixture is completely smooth and creamy, with no lumps. Next, add the eggs, one at a time, mixing well after each addition and scraping down the sides of the bowl to ensure everything is fully incorporated. Finally, add the fresh key lime juice and vanilla extract, mixing just until combined. Be careful not to overmix the batter at this stage, as too much air can cause the cheesecakes to crack.
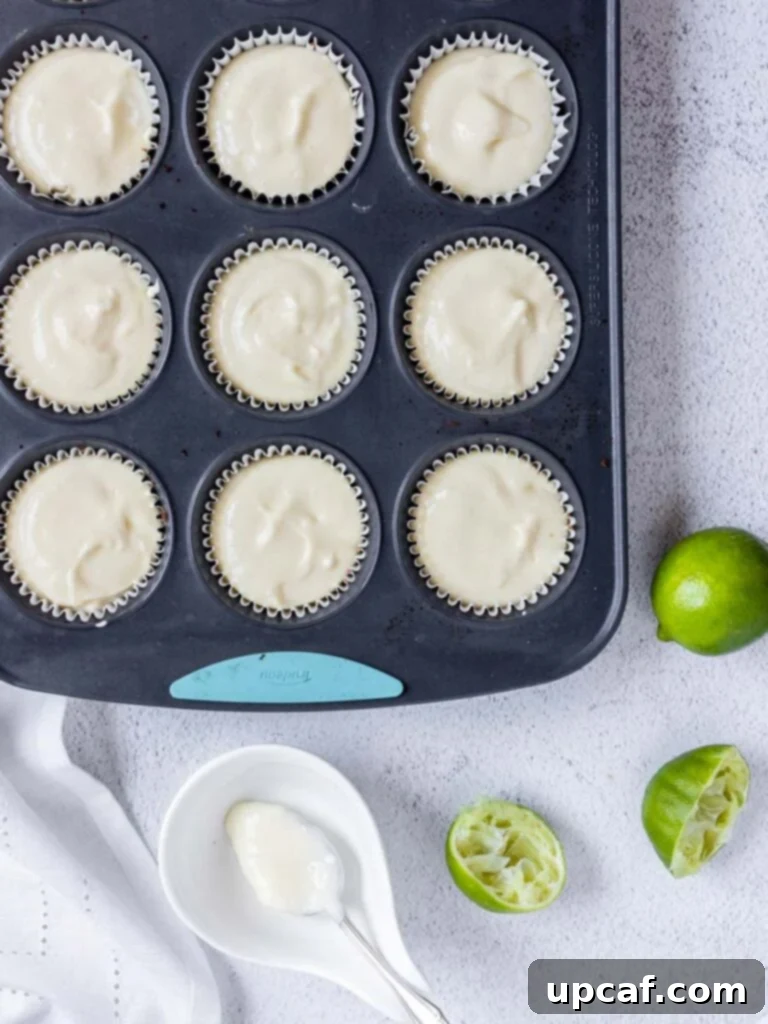
- Bake the Mini Cheesecakes: Carefully spoon or pour the key lime cheesecake filling into each prepared liner, filling them almost to the top. Transfer the muffin tin back into the oven and bake for 15 minutes at 300°F (150°C). After 15 minutes, turn the oven off completely, but do not open the oven door. Allow the cheesecakes to sit in the residual heat of the oven for an additional 30 minutes. This gentle cooling process helps prevent cracking. After 30 minutes, crack the oven door open slightly (about 1-2 inches) and let the cheesecakes cool completely to room temperature inside the oven.
- Chill Thoroughly: Once cooled to room temperature, transfer the mini cheesecakes to the refrigerator. Allow them to chill for at least 2 hours, or preferably overnight, before serving. Chilling is essential for the cheesecakes to set properly and develop their full flavor and firm texture.
- Prepare the Whipped Topping: Just before serving, prepare your topping. In a medium bowl, using a hand mixer, beat the very cold heavy cream and powdered sugar together until stiff peaks form. Be careful not to overbeat, as this can turn the cream grainy.
- Garnish and Serve: Pipe or spoon a generous dollop of the freshly whipped cream on top of each chilled mini cheesecake. Finish by sprinkling a little fresh lime zest over the whipped cream for an extra burst of citrus aroma and a beautiful presentation. Serve immediately and enjoy!
Expert Tips for Mini Key Lime Cheesecake Success
Achieving bakery-quality mini cheesecakes is easy with these helpful tips:
- Crushed Graham Crackers: To save time, you can purchase pre-crushed graham cracker crumbs. However, crushing whole graham crackers in a food processor or a sealed bag with a rolling pin often yields a fresher flavor and a more consistent texture.
- Cream Cheese Selection is Crucial: Always use full-fat cream cheese in block form, not the low-fat or spreadable varieties found in tubs. Block cream cheese has the necessary fat content and density to create the rich, firm, and creamy cheesecake texture you desire. Other types can lead to a runny or gritty filling.
- Room Temperature Ingredients are Non-Negotiable: This is perhaps the most important tip for any cheesecake! Ensure your cream cheese and eggs are at room temperature. Cold ingredients don’t emulsify well, leading to a lumpy batter that requires excessive mixing. Overmixing incorporates too much air, which can cause your cheesecakes to puff up excessively in the oven and then collapse or crack as they cool.
- Zest Before You Juice: It’s much easier to zest a whole lime before you cut it and squeeze out its juice. The firm surface provides better grip and leverage for your zester or grater.
- Don’t Overmix the Filling: Mix the cream cheese and sugar until just smooth, then add eggs one by one and mix until just combined. Overmixing after adding the eggs can introduce too much air, leading to a cracked top once the cheesecakes cool.
- Gradual Cooling Prevents Cracks: The method of turning off the oven and allowing the cheesecakes to cool gradually inside, followed by cracking the door open, is vital. Sudden temperature changes are a primary cause of cheesecake cracks.
- For Easy Liner Removal: Ensure your cheesecakes are thoroughly chilled before attempting to remove the cupcake liners. The cold helps the cheesecake firm up and shrink slightly, making the liners peel away cleanly without sticking. If you still encounter difficulty, a brief stint in the freezer can help them release even more easily.
Frequently Asked Questions About Mini Key Lime Cheesecakes
Key limes, also known as Mexican limes or West Indian limes, are smaller, rounder, and have a thinner, more yellowish-green rind compared to common Persian limes. They are significantly more aromatic, with a distinct floral fragrance and a more intensely tart and complex flavor profile. Key limes also tend to have more seeds, so using a fine-mesh strainer or a juicer designed to catch seeds is recommended when extracting their juice.
While bottled key lime juice is available, I strongly recommend using fresh key lime juice for these mini cheesecakes. Bottled versions often lack the vibrant, fresh, and complex tart-tangy flavor that makes key lime desserts truly exceptional. The subtle floral notes and bright acidity from freshly squeezed key limes are irreplaceable for achieving the best possible taste.
If you don’t have a microplane zester, you can carefully use a vegetable peeler to remove only the outermost green layer of the lime rind, avoiding the bitter white pith underneath. Then, finely mince these peelings with a sharp knife. Alternatively, a fine-grater (like those used for cheese) can also work, though it may be a bit more challenging to avoid the pith.
To perform the “jiggle test” for your mini cheesecakes, gently shake the muffin tin. When the cheesecakes are done, the edges should appear set and firm, but the very center of each cheesecake should still have a slight, gentle jiggle. This indicates they are cooked through but not overbaked, which would result in a dry texture.
Cheesecake filling often sinks or cracks due to too much air in the batter, which causes it to puff up too quickly during baking and then deflate. This is usually a result of overmixing the batter, especially after adding the eggs. Additionally, using cold ingredients can necessitate more mixing, further contributing to this issue. Ensuring all ingredients are at room temperature and mixing just until combined are key preventative measures.
These mini cheesecakes will last for up to 5 days when stored in an airtight container in the refrigerator. For the best presentation and texture, it’s recommended to add the whipped cream topping and lime zest just before serving. You can store the un-topped cheesecakes and the lime zest separately until ready to assemble.
To freeze key lime cheesecakes, skip adding the whipped topping and allow them to cool completely to room temperature, then chill thoroughly in the refrigerator. Once cold and firm, transfer the individual cheesecakes (still in their liners if you prefer) to a baking sheet and place in the freezer, uncovered, until solid. Once frozen solid, transfer them to a freezer-safe bag or airtight container. They can be stored in the freezer for up to 3 months.
The best way to thaw frozen cheesecakes is slowly, in the refrigerator overnight. This gentle thawing helps maintain their creamy texture. If you’re in a rush, you can place them at room temperature for a shorter period, but keep an eye on them to prevent them from becoming too warm.
The key to cleanly removing cupcake liners from your mini cheesecakes is ensuring they are thoroughly chilled. Once the cheesecakes are very cold and firm from refrigeration, the liners should peel away with ease. If you find them sticking, try placing the cheesecakes in the freezer for about 15-20 minutes before attempting to peel, as the extra cold can help them shrink slightly and release.
More Irresistible Dessert Recipes You’ll Love
- Chocolate Lazy Cake
- Strawberry French Tart
- Lemon French Madeleines Cakes
- Key Lime Pie Bars
- Coconut Basbousa
- Easy Chocolate Cupcake
I sincerely hope you enjoy discovering and creating all the recipes I share with you, especially this delightful Mini Key Lime Cheesecakes recipe. It brings together the best of both worlds in one irresistible dessert. I encourage you to try it, savor every bite, and share this wonderful creation with your friends and family!
If you give this recipe a try and love it, please share your experience and creations on INSTAGRAM! Don’t forget to follow Cookin’ With Mima on FACEBOOK | INSTAGRAM | PINTEREST for all the latest social posts and delicious recipes.
Mini Key Lime Cheesecake
By: Mariam Ezzeddine
Sweet but tangy, these Mini Key Lime Cheesecakes are the perfect little desserts to end your meal with. A smooth and creamy key lime flavored filling overtop of a graham cracker crust, you’ll love this twist on a classic cheesecake.
Prep Time: 20 minutes
Cook Time: 25 minutes
Resting Time: 2 hours
Total Time: 2 hours 45 minutes
Servings: 12 servings
Ingredients
For the Crust:
- 8 sheets graham crackers, finely crushed
- ¼ tsp. salt
- 2 tbsps. granulated sugar
- ¼ cup unsalted butter, melted
For the Filling:
- 2 (8 oz) blocks cream cheese, room temperature
- ¾ cup granulated sugar
- 2 whole eggs, room temperature
- ⅓ cup key lime juice, fresh squeezed
- 2 tsps. vanilla extract
For the Topping:
- 1 cup heavy cream, cold
- 1 tbsp. powdered sugar
- Lime zest, as needed
Instructions
For the Crust:
- Preheat the oven to 325°F (160°C). Line a 12-cavity cupcake tin with cupcake liners and set aside.
- In a small bowl, combine the graham cracker crumbs, salt, sugar, and melted butter. Mix until fully combined. The mixture should have the texture of wet sand.
- Firmly press 1 to 1½ tablespoons of the crumb mixture into each liner.
- Bake the crusts for 8-10 minutes or until golden brown. Remove the pan from the oven and allow to cool completely.
For the Filling:
- Turn the oven down to 300°F (150°C).
- In the bowl of a stand mixer or in a large bowl with a hand mixer, beat the cream cheese and sugar together on low speed until fully combined and smooth.
- Add the eggs one at a time, mixing well after each addition and scraping down the sides of the bowl.
- Add the key lime juice and vanilla extract. Mix until fully combined. Avoid overmixing.
- Fill each liner almost to the top with the cheesecake filling.
- Bake the cheesecakes for 15 minutes. Then, turn the oven off and allow the cheesecakes to sit in the oven for 30 minutes with the door closed.
- Crack the oven door open and allow the cheesecakes to sit until cooled to room temperature.
- Transfer cheesecakes to the fridge and chill for at least 2 hours, or until ready to serve.
For the Topping:
- In a medium bowl with a hand mixer, beat the cold heavy cream and powdered sugar to stiff peaks. Be sure not to overbeat.
- Pipe or scoop the whipped cream on top of the chilled cheesecakes.
- Sprinkle fresh lime zest on top before serving.
Notes
- Crushed graham crackers can be purchased for convenience.
- Always use full-fat blocks of cream cheese for the best results; low-fat or spreadable cream cheese will alter the texture.
- Ensure all cold ingredients (cream cheese and eggs) are at room temperature to prevent a lumpy filling and avoid overmixing, which can cause cracks.
- Zest the limes before juicing them for easier handling.
Nutrition
Calories: 207kcal | Carbohydrates: 24g | Protein: 1g | Fat: 12g | Saturated Fat: 7g | Trans Fat: 1g | Cholesterol: 38mg | Sodium: 111mg | Potassium: 35mg | Fiber: 1g | Sugar: 18g | Vitamin A: 411IU | Vitamin C: 1mg | Calcium: 22mg | Iron: 1mg
