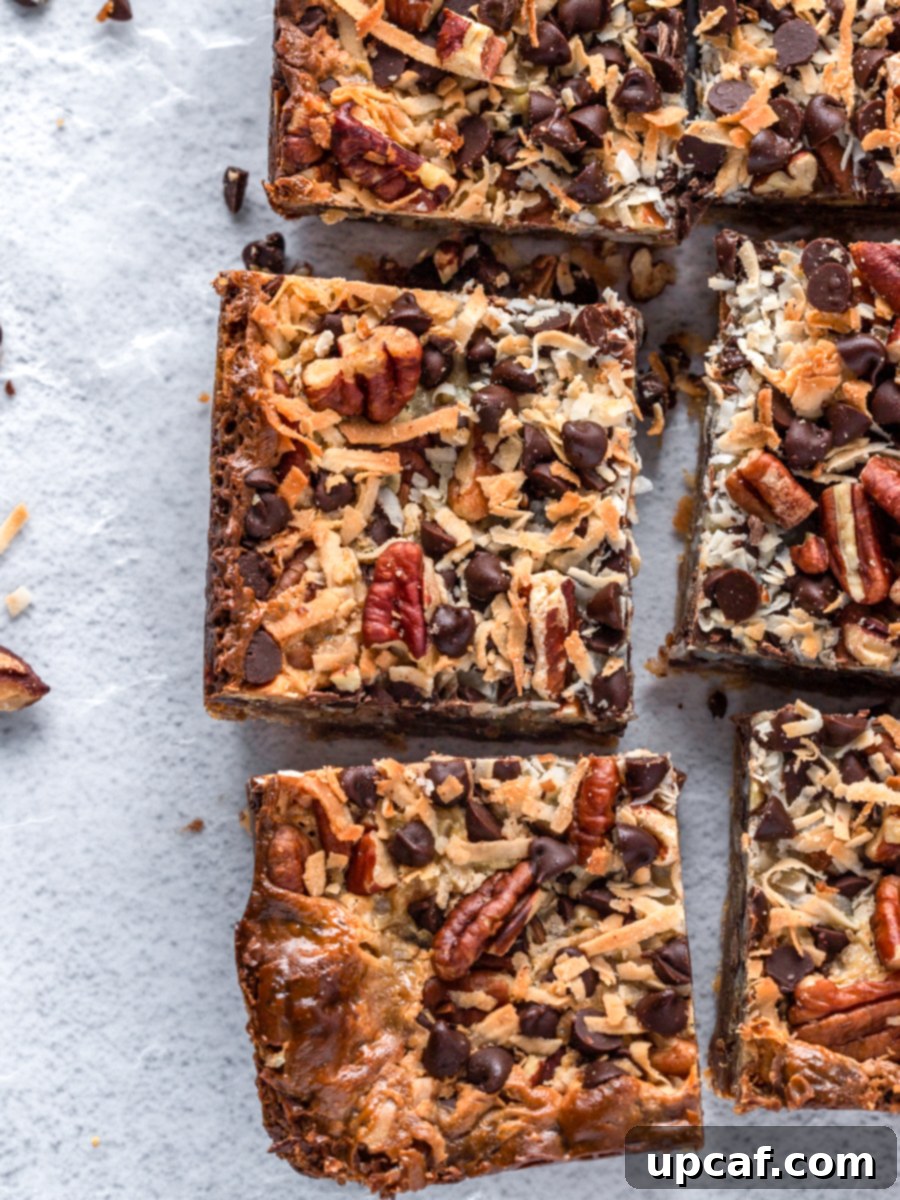
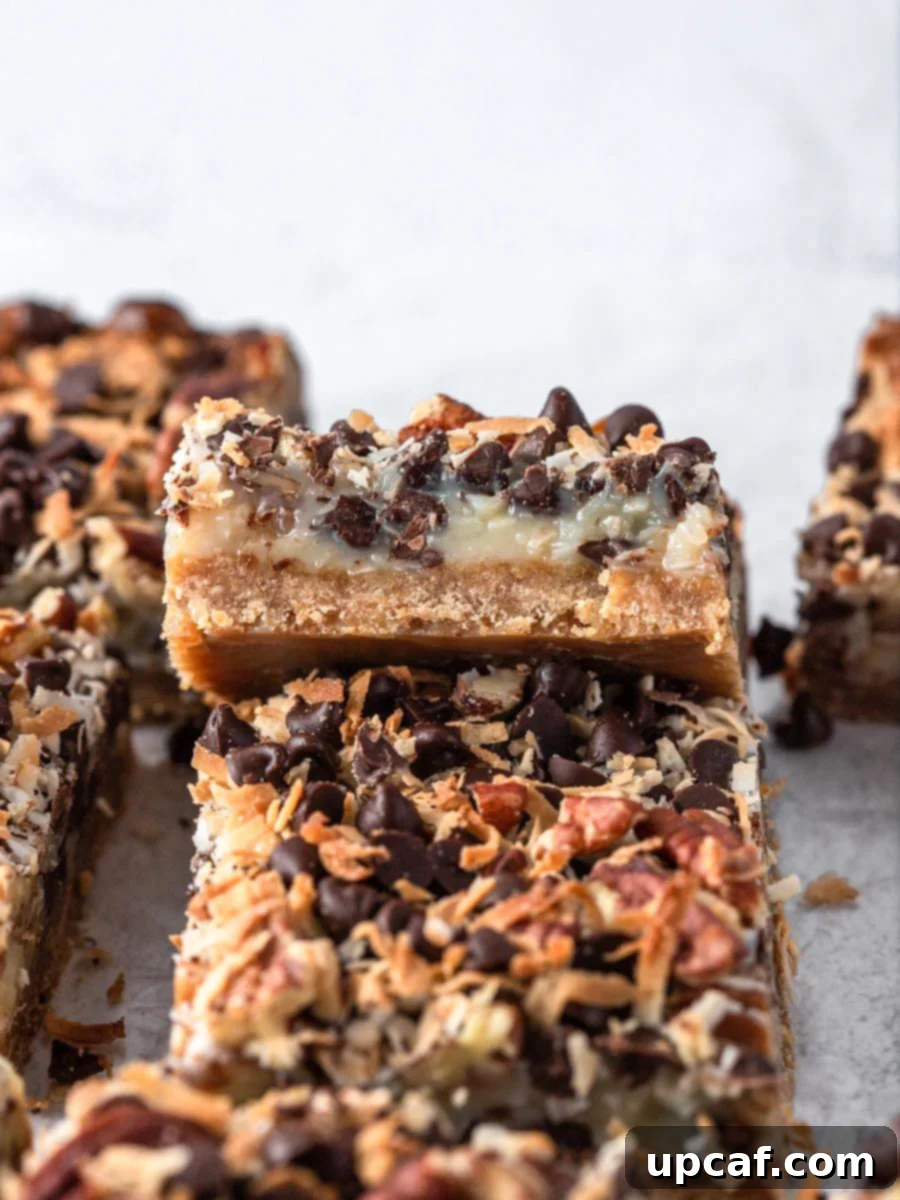
Get ready to discover the magic with these incredibly easy-to-make, seven-ingredient dessert bars! Often known by delightful names like Hello Dolly Bars or 7 Layer Bars, these irresistible treats offer a symphony of textures and flavors. Imagine a rich, buttery graham cracker crust topped with a gooey, caramel-like layer, studded generously with sweet shredded coconut, decadent chocolate chips, and crunchy pecans. Each bite of these bars delivers an extraordinary experience that lives up to their enchanting name. Whether you’re a seasoned baker or just starting your culinary journey, this recipe promises a straightforward process and a truly unforgettable outcome.
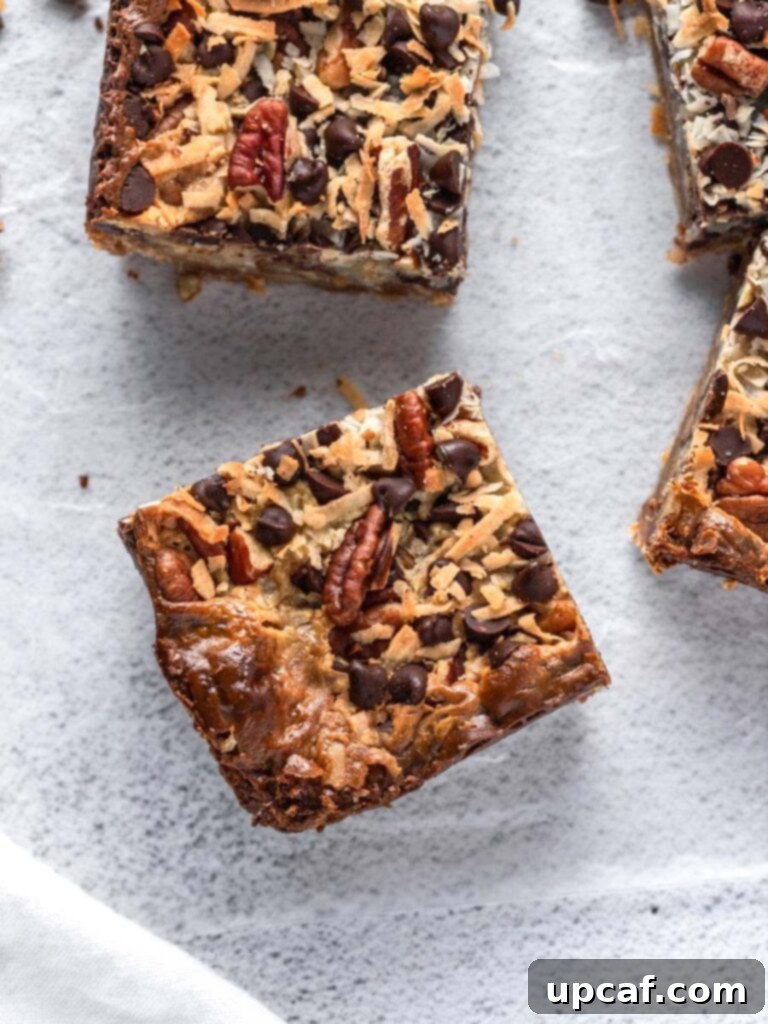
You might initially be curious about how something so magical can come together with such simplicity. The secret lies in one hero ingredient: sweetened condensed milk. While it starts as a liquid, during the baking process, it transforms into a rich, luscious caramel binder, perfectly holding together the crisp graham cracker base and the delightful array of toppings. This transformation is truly what gives these bars their “magic” reputation. Forget complicated baking techniques or fancy equipment; all you need is a baking pan, a mixing bowl, and a spatula to create these utterly amazing coconut magic bars. They’re ideal for satisfying sudden sweet cravings, potlucks, or simply as a comforting treat for your family.
If you’re a devoted fan of coconut-infused desserts, you’ll also adore recipes like my Basbousa Cake with Coconut, which shares a similar love for this tropical ingredient. But first, let’s delve into what makes these Magic Bars an absolute must-try!
Why You’ll Love These Irresistible Coconut Magic Bars
These Magic Bars aren’t just a dessert; they’re an experience waiting to happen, offering several compelling reasons to become your new go-to sweet treat.
- Effortless Simplicity with Minimal Ingredients: This magic bar recipe truly lives up to its name by requiring only seven basic ingredients. The beauty of this is that most of these staples are likely already residing in your pantry. Even if you need to pick them up, they are readily available and affordable at any local grocery store. This makes it a fantastic last-minute dessert option or a stress-free baking project. You won’t need to hunt for obscure components, allowing you to focus on the joy of creating something delicious.
- Incredibly Easy to Prepare: Beyond the simple ingredient list, the preparation process for these magic bars is remarkably straightforward. There are no complex techniques, intricate steps, or specialized kitchen gadgets required. You don’t even need a stand mixer or food processor; just a mixing bowl, a spatula, and a baking pan will suffice. This makes them an ideal recipe for beginner bakers, busy parents looking for an activity with their children, or anyone who desires a quick yet impressive dessert. The layering method is intuitive, ensuring a perfect result every time.
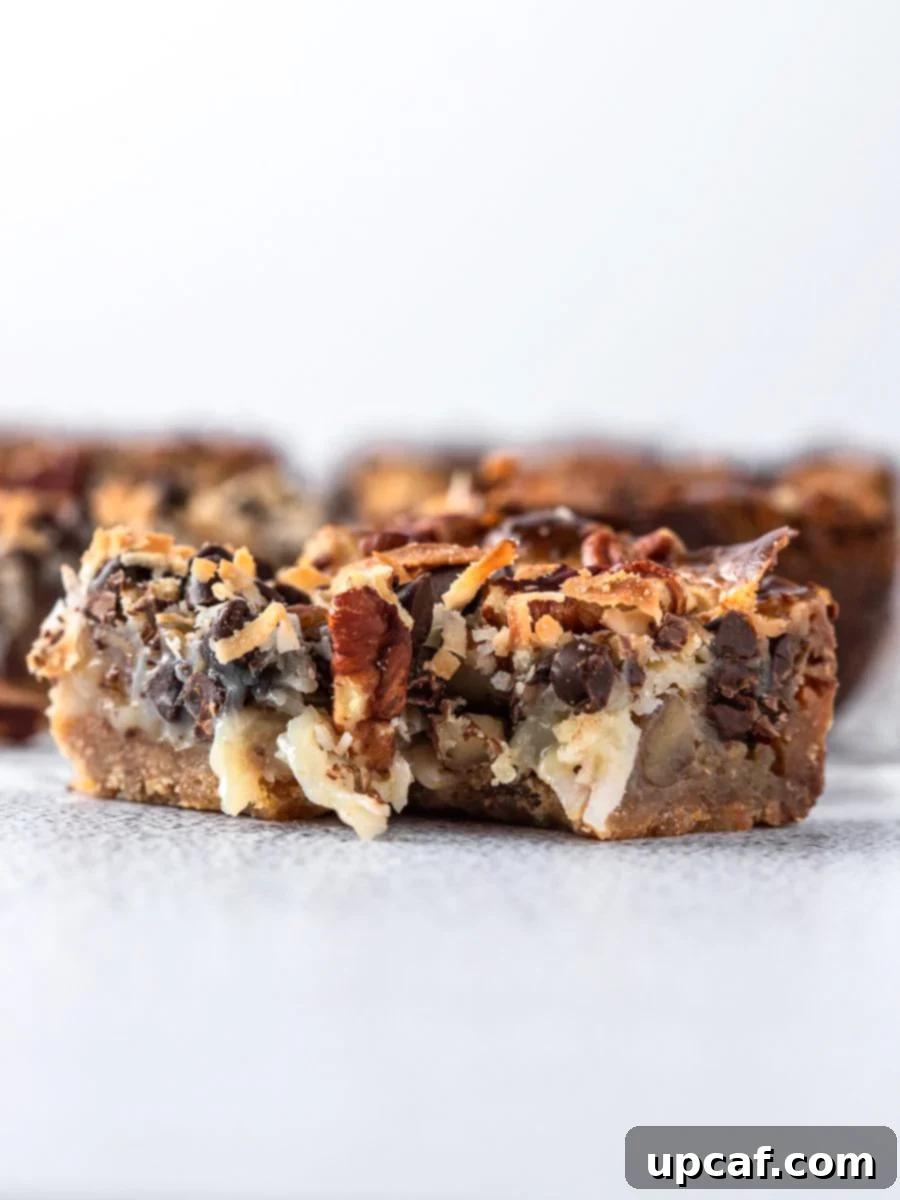
- A Symphony of Unforgettable Flavors and Textures: Prepare your taste buds for an explosion of delight! These coconut magic bars hit every possible sweet spot. They are wonderfully sweet, with just the right amount of richness. The chewiness from the coconut and the caramel-like condensed milk creates an incredibly satisfying mouthfeel. You’ll also encounter delightful crunch from the pecans and a melt-in-your-mouth chocolatey goodness from the chips. The crisp graham cracker crust provides a perfect textural contrast, making each bite a harmonious blend of chewy, nutty, chocolatey, caramel-y, and crunchy sensations. It’s a dessert that truly satisfies on multiple levels, leaving you craving just one more piece.
Essential Ingredients for Your Perfect Coconut Magic Bars
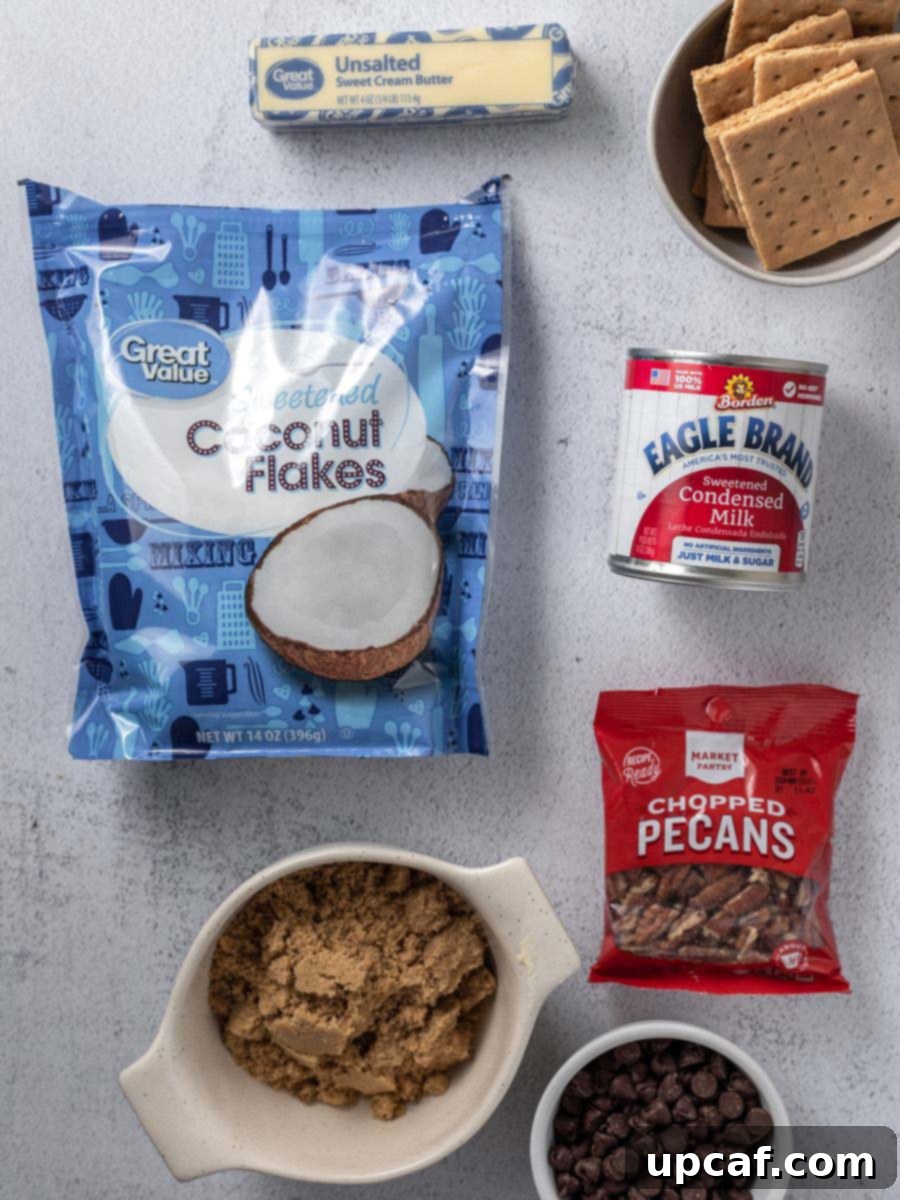
Crafting these heavenly bars requires just a handful of readily available ingredients. Here’s a closer look at what you’ll need and why each component is key:
- Unsalted Butter: You’ll need one stick of unsalted butter, melted. Using unsalted butter allows you to control the overall saltiness of your dessert. If you only have salted butter, you can use it, but consider slightly reducing any added salt in other components, though typically, no additional salt is required for this recipe. The butter is crucial for binding the graham cracker crust.
- Brown Sugar: A quarter cup of brown sugar adds depth and a subtle molasses note to the graham cracker crust, enhancing its overall flavor profile and helping it achieve a perfectly chewy texture. It also helps to create that desired golden-brown finish.
- Graham Crackers: Twelve finely crushed graham crackers form the delicious, buttery base of these magic bars. You can crush them easily in a food processor, or by placing them in a resealable bag and using a rolling pin. The fine crumbs ensure a uniform and sturdy crust.
- Sweetened Condensed Milk: This is the “magic” ingredient! Make absolutely sure you’re using sweetened condensed milk, not evaporated milk, as they are not interchangeable. Sweetened condensed milk is thick, sweet, and will transform into a glorious caramel-like binder during baking, holding all the layers together and providing that signature ooey-gooey texture.
- Chocolate Chips: One cup of your favorite chocolate chips will melt into luscious pockets of chocolate throughout the bars. Semi-sweet chocolate chips are a classic choice, but milk chocolate or dark chocolate chips also work wonderfully, depending on your preference.
- Pecans: A cup of chopped pecans adds a fantastic nutty flavor and delightful crunch, balancing the sweetness of the other ingredients. Ensure they are roughly chopped to distribute evenly and provide a noticeable texture.
- Sweetened Shredded Coconut: One cup of sweetened shredded coconut is essential for that tropical flavor and chewy texture. It toasts beautifully in the oven, intensifying its flavor and adding a lovely golden hue to the top of your bars.
How to Make The Best Coconut Magic Bars: A Step-by-Step Guide
Follow these simple steps to create perfectly gooey, chewy, and irresistible magic bars every time:
- Prepare Your Oven and Baking Pan: Begin by preheating your oven to 350°F (175°C). This ensures your oven is at the correct temperature for even baking. Next, prepare a 9×9 inch square baking pan. Spray the pan generously with nonstick cooking spray. For effortless removal and clean slices, line the bottom of the pan with two strips of parchment paper, crossing them to create an overhang on all four sides. This “sling” will allow you to easily lift the entire baked slab of bars from the pan once cooled.
- Craft the Golden Graham Cracker Crust: In a medium-sized mixing bowl, combine the melted unsalted butter, brown sugar, and finely crushed graham crackers. Mix these ingredients thoroughly until the crumbs are uniformly moistened, resembling wet sand. This ensures a cohesive crust. Once combined, transfer the mixture to your prepared baking pan and press it down firmly and evenly across the bottom. You can use the back of a spoon, a flat-bottomed glass, or your fingers to achieve a compact and level crust.
- Add the “Magic” Condensed Milk Layer: Carefully and evenly pour the entire can of sweetened condensed milk over the pressed graham cracker crust. The thick, viscous milk will create the gooey, caramel-like layer that binds all the delicious toppings together during baking. Ensure it spreads from edge to edge for consistent magic throughout the bars.
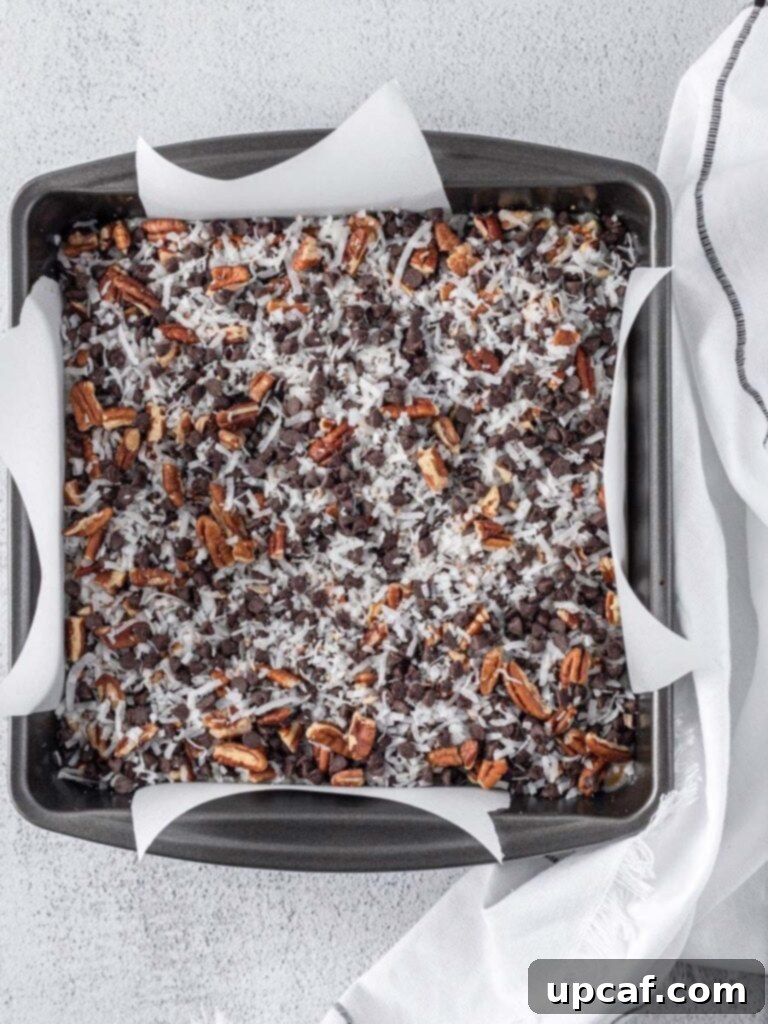
- Layer on the Delectable Toppings: In a separate small bowl, gently combine the chocolate chips, chopped pecans, and sweetened shredded coconut. Give them a quick toss to mix them well. Then, sprinkle this tempting mixture evenly over the sweetened condensed milk layer. Try to distribute the toppings so that each bar will have a delightful assortment of all three.
- Bake to Golden Perfection: Place your prepared baking pan on the center rack of your preheated oven. Bake for approximately 20-25 minutes. Keep an eye on the bars; they are ready when the edges are lightly golden, the coconut topping is beautifully browned and toasted, and the center appears set and bubbly. The caramel-like condensed milk should be visibly golden and slightly firm.
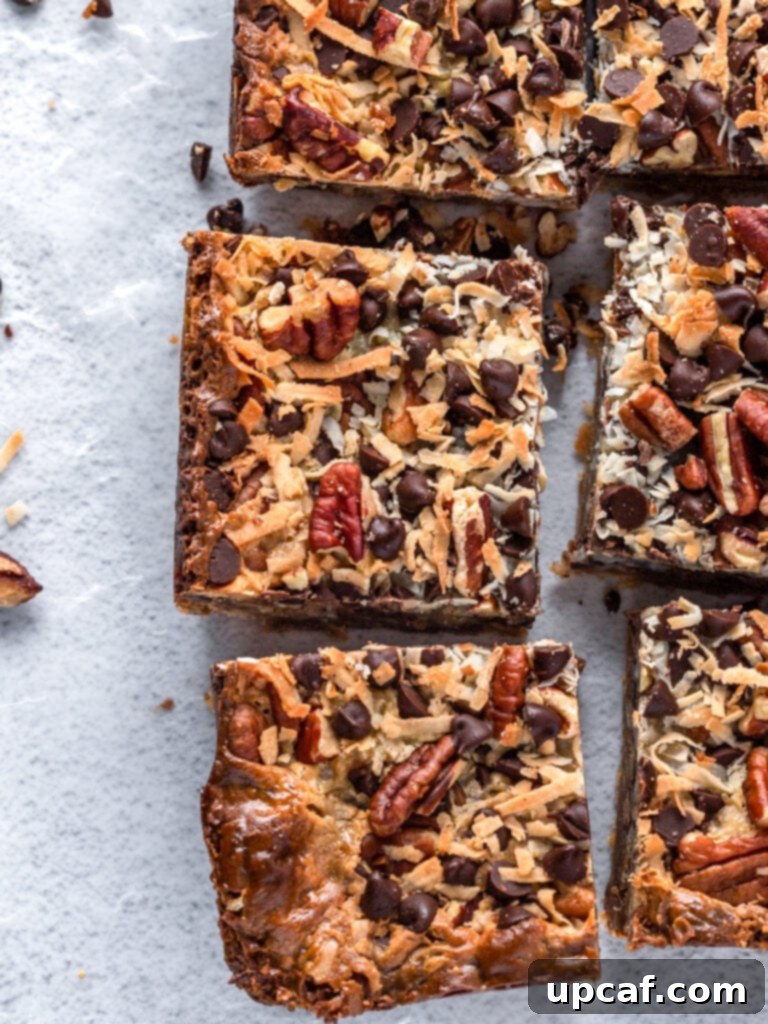
- Cool Completely Before Slicing: Once baked, carefully remove the magic bars from the oven. This step is crucial for achieving clean, neat slices. Allow them to cool completely in the pan on a wire rack. This cooling process allows the condensed milk to set properly, transforming from a molten liquid to a firm, chewy caramel. Rushing this step will result in messy, crumbly bars. For even cleaner slices, you can place the cooled bars in the refrigerator for an hour or two before cutting. Once thoroughly chilled, use the parchment paper overhang to lift the entire slab out of the pan, place it on a cutting board, and slice into your desired bar size.
Delicious Recipe Variations for Your Magic Bars
While the classic Coconut Magic Bar recipe is undeniably perfect, its versatility makes it an excellent canvas for customization. Feel free to experiment with these exciting variations to create your own signature treat:
- Switch Up Your Chips: Don’t limit yourself to just semi-sweet chocolate chips! Explore a variety of flavors by swapping them out. White chocolate chips add a creamy sweetness, caramel chips bring an extra layer of buttery richness, butterscotch chips offer a unique, nostalgic flavor, and dark chocolate chips provide a more intense, less sweet contrast. You could even use a mix of different chips for a multi-faceted chocolate experience.
- Explore Different Nuts: If pecans aren’t your favorite or you simply want to try something new, feel free to substitute them. Chopped walnuts offer a slightly more bitter, earthy flavor, while almonds provide a milder crunch. For a richer taste, try macadamia nuts, or for a festive touch, use chopped pistachios. Just ensure they are roughly chopped for even distribution.
- Add Dried Fruit for a Chewy Zing: Introduce a delightful chewy element and a burst of fruity flavor by incorporating dried fruits. Chopped dried cranberries or cherries add a tart counterpoint to the sweetness. Golden raisins or finely diced apricots can provide a lovely chewiness and a different kind of sweetness. Ensure they are small pieces so they blend well within the bar.
- Elevate Your Crust with Alternative Cookies: The graham cracker crust is classic, but you can create a truly unique base by using other types of crumbled cookies. Imagine a crust made from crushed Biscoff cookies for a warm, spiced flavor, or rich Oreo cookies (without the cream filling) for a chocolatey foundation. Chocolate wafers or shortbread cookies can also create a luxurious and distinct crust. The key is to ensure they can be finely crushed and mixed with butter to form a firm base.
- Spice It Up: For a subtle warmth, a pinch of cinnamon or a dash of nutmeg can be added to the graham cracker crust mixture. Or, for a more complex flavor, a small amount of cardamom pairs wonderfully with coconut.
- A Touch of Extract: A teaspoon of vanilla extract is often included, but consider adding almond extract for a marzipan-like nuance, or even a hint of rum extract for a tropical twist that complements the coconut beautifully.
- Candy Bar Mashup: For the ultimate indulgence, chop up your favorite candy bars (like Snickers, Mars, or Twix) and sprinkle them over the condensed milk layer along with the other toppings. This creates an even more decadent and varied texture.
How to Store Coconut Magic Bars for Maximum Freshness
Proper storage ensures your delicious Magic Bars stay fresh and enjoyable for as long as possible. Here are the best methods:
- At Room Temperature: For short-term storage, these magic bars can be kept in an airtight container at room temperature. They will remain wonderfully fresh and chewy for 3 to 5 days. Ensure they are completely cooled before storing to prevent condensation, which can make them soggy. Keep them away from direct sunlight or heat sources.
- In the Refrigerator: If you want to extend their freshness, or if you prefer a firmer, chilled bar, store your coconut magic bars in an airtight container in the refrigerator. They will stay fresh for up to a week. Chilling them also makes them easier to slice cleanly. Layer them between sheets of parchment paper if stacking to prevent sticking.
- In the Freezer: Magic bars freeze exceptionally well, making them perfect for meal prep or saving for a future treat. You can freeze them for up to 3 months. To freeze, ensure the bars are completely cooled. Wrap individual bars or small batches tightly in plastic wrap, then place them in an airtight freezer-safe container or a heavy-duty freezer bag. This double-layer protection helps prevent freezer burn and keeps out odors. When you’re ready to enjoy them, thaw the bars overnight in the refrigerator, or for a quicker thaw, let them sit at room temperature for an hour or two.
Frequently Asked Questions About Coconut Magic Bars
Can I use pre-crushed graham crackers for the crust?
Absolutely! Using pre-crushed graham cracker crumbs is a fantastic time-saver. Many grocery stores sell them in a box or bag specifically for pie crusts. If you opt for these, you’ll save yourself the effort of crushing whole graham crackers, making the recipe even quicker to assemble. Just measure out the equivalent amount needed for the crust.
Do I have to line my pan with parchment paper?
While not strictly mandatory, lining your pan with parchment paper, especially creating an overhang as described in the instructions, is highly recommended. It acts as a “sling” that allows you to easily lift the entire slab of baked bars out of the pan once they’ve cooled. This makes cutting into neat, individual bars significantly easier and prevents them from sticking to the bottom of your pan. Without it, you might find it challenging to remove the bars intact.
How do I get clean slices?
Achieving perfectly clean slices for these gooey and chewy bars requires patience and a little trick. The key is to allow the bars to cool completely at room temperature, and then—for best results—place them in the refrigerator for at least an hour (or even longer) before slicing. Chilling solidifies the condensed milk layer and firms up the other ingredients, making them much easier to cut without tearing or smearing. Use a sharp, warm knife, wiping it clean between each cut for the cleanest possible edges.
Can I use a different size pan?
You can, but it might alter the thickness of your bars and the baking time. A 9×13 inch pan will result in thinner bars and may require a slightly shorter baking time (around 18-22 minutes). A smaller pan, like an 8×8 inch, will make thicker bars and might need a few extra minutes in the oven (25-30 minutes). Always keep an eye on the visual cues for doneness: golden-brown edges, toasted coconut, and a set center.
Why are they called Magic Bars?
The “magic” in Magic Bars primarily comes from the sweetened condensed milk. When baked, this liquid transforms into a rich, caramel-like layer that incredibly binds all the other ingredients together – the crust, coconut, chocolate, and nuts – without any extra effort from the baker. It seems to happen magically in the oven, creating a cohesive, delicious dessert from simple layers. The alternative name “7 Layer Bars” also refers to the distinct layers that magically meld into a single, irresistible treat.
If you’re craving more delightful desserts, be sure to explore my recipes for Almond Joy Ice Cream and Strawberry Cheesecake Ice Cream. Each offers a unique and satisfying sweet escape.
I genuinely hope you cherish every recipe I share with you, and this delicious Coconut Magic Bar recipe is no exception. Give it a try, savor every gooey bite, and don’t forget to share your experience with friends and family! Your feedback and enjoyment mean the world.
If you bake this recipe and love it, please consider sharing your creation on social media using my hashtag for a chance to be featured! Stay connected with Cookin’ With Mima on your favorite platforms for all my latest culinary inspirations and recipes.
Magic Bars with Coconut
By: Mariam Ezzeddine
Crafted from just seven ingredients, these magic bars are the simplest desserts to make! It features an irresistible mix of shredded coconut, chocolate chips, and pecans, all bound together by a crispy graham cracker crust.
Prep Time: 10 minutes
Cook Time: 25 minutes
Cooling Time: 1 hour+
Total Time: 35 minutes (plus cooling)
Servings: 9 bars
Ingredients
- 1 stick unsalted butter, melted
- ¼ cup brown sugar
- 12 graham crackers, finely crushed
- 1 can (14 oz) sweetened condensed milk
- 1 cup chocolate chips
- 1 cup pecans, chopped
- 1 cup sweetened shredded coconut
Instructions
- Prepare Oven and Pan: Preheat your oven to 350°F (175°C). Spray a 9×9 inch baking pan with nonstick spray. Lay two strips of parchment paper across the bottom of the pan in a cross shape, leaving an overhang to easily remove the bars later.
- Make the Graham Cracker Crust: In a medium bowl, combine the melted unsalted butter, brown sugar, and finely crushed graham crackers. Mix until thoroughly combined. Press this mixture firmly and evenly into the bottom of the prepared pan to form the crust.
- Pour Condensed Milk: Carefully pour the entire can of sweetened condensed milk over the pressed graham cracker crust, ensuring it covers the crust evenly from edge to edge.
- Add Toppings: In a separate small bowl, combine the chocolate chips, chopped pecans, and sweetened shredded coconut. Sprinkle this mixture evenly over the sweetened condensed milk layer, making sure the toppings are well distributed.
- Bake: Place the pan on the center rack of your preheated oven. Bake for 20-25 minutes, or until the edges are golden, the coconut is nicely browned and toasted, and the center is set and bubbly.
- Cool and Slice: Remove the pan from the oven and allow the bars to cool completely at room temperature on a wire rack. For the cleanest slices, refrigerate the cooled bars for at least 1-2 hours before lifting them out of the pan using the parchment paper overhang. Slice into 9 even bars.
Notes
- Chocolate Chip Alternatives: Feel free to swap chocolate chips for white chocolate, caramel, butterscotch, or dark chocolate chips to vary the flavor.
- Nut Substitutions: If pecans aren’t available, walnuts or any other chopped nuts of your choice work beautifully.
- Dried Fruit Addition: For an added chewy and fruity element, sprinkle in some chopped dried cranberries, cherries, or apricots along with the other toppings.
- Crust Variations: For a unique twist on the crust, try using crushed Biscoff cookies, Oreo cookies (without filling), or chocolate wafers instead of graham crackers.
Nutrition
Serving: 1 bar (out of 9) |
Calories: Approximately 560 kcal |
Carbohydrates: 63 g |
Protein: 6 g |
Fat: 33 g |
Saturated Fat: 17 g |
Polyunsaturated Fat: 3 g |
Monounsaturated Fat: 9 g |
Trans Fat: 0.4 g |
Cholesterol: 42 mg |
Sodium: 208 mg |
Potassium: 343 mg |
Fiber: 2 g |
Sugar: 50 g |
Vitamin A: 437 IU |
Vitamin C: 1 mg |
Calcium: 171 mg |
Iron: 1 mg
*Nutrition facts are an estimate and may vary based on specific brands and exact measurements used.
