Elevate your culinary skills and master the art of making perfect hard-boiled eggs with intensely creamy yolks and shells that peel away effortlessly! This comprehensive guide provides foolproof methods and essential tips to transform your egg-boiling experience.
Many of us have encountered the dreaded “bad” hard-boiled egg – a chalky, dry yolk, rubbery whites, or that unappetizing greenish-gray ring around the yolk. These common mishaps can deter anyone from enjoying this versatile and nutritious food. But what if you could consistently achieve eggs with tender whites and a lusciously creamy, vibrant yellow yolk every single time? This guide is your secret weapon to making truly perfect hard-boiled eggs in various ways, ensuring a delightful experience with every bite.
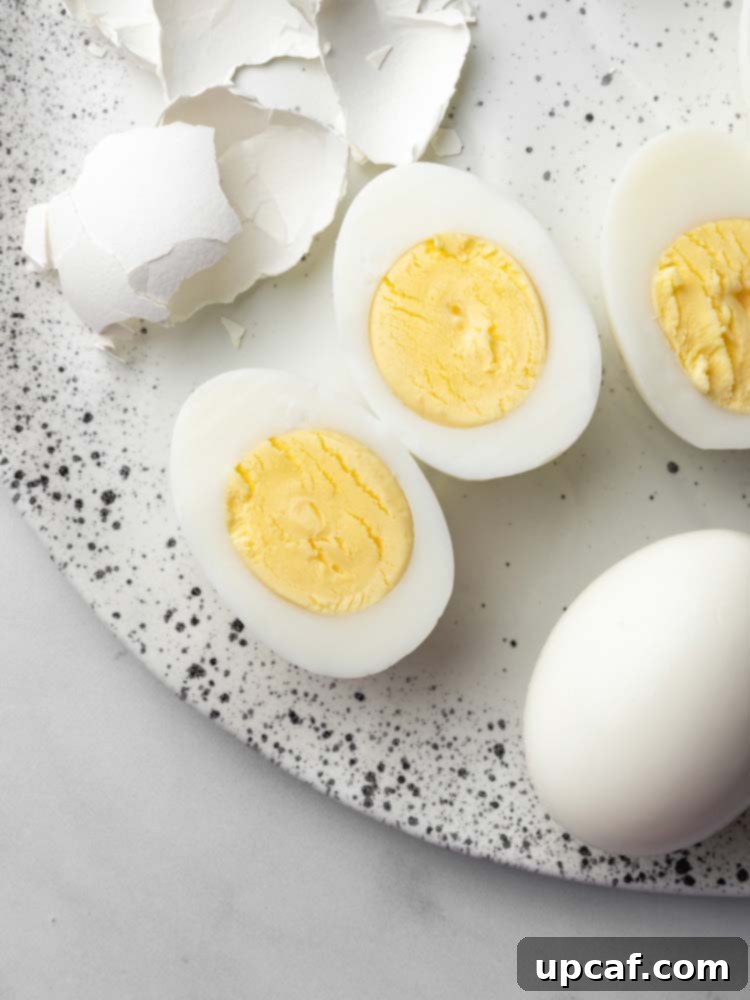
How to Make Perfect Hard-Boiled Eggs Every Time
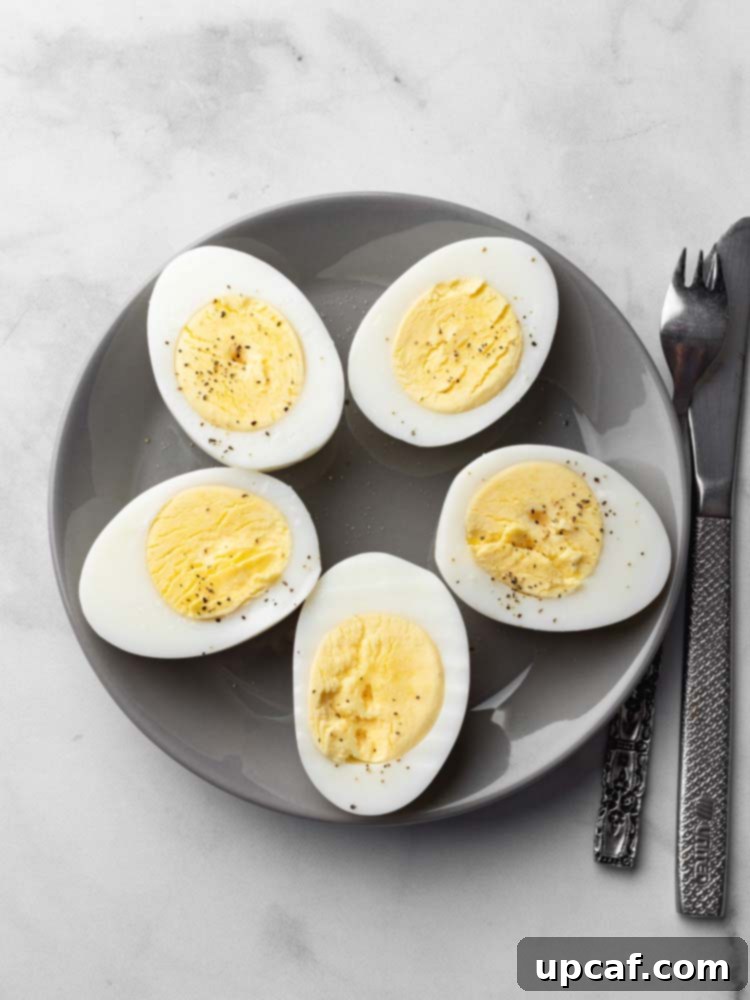
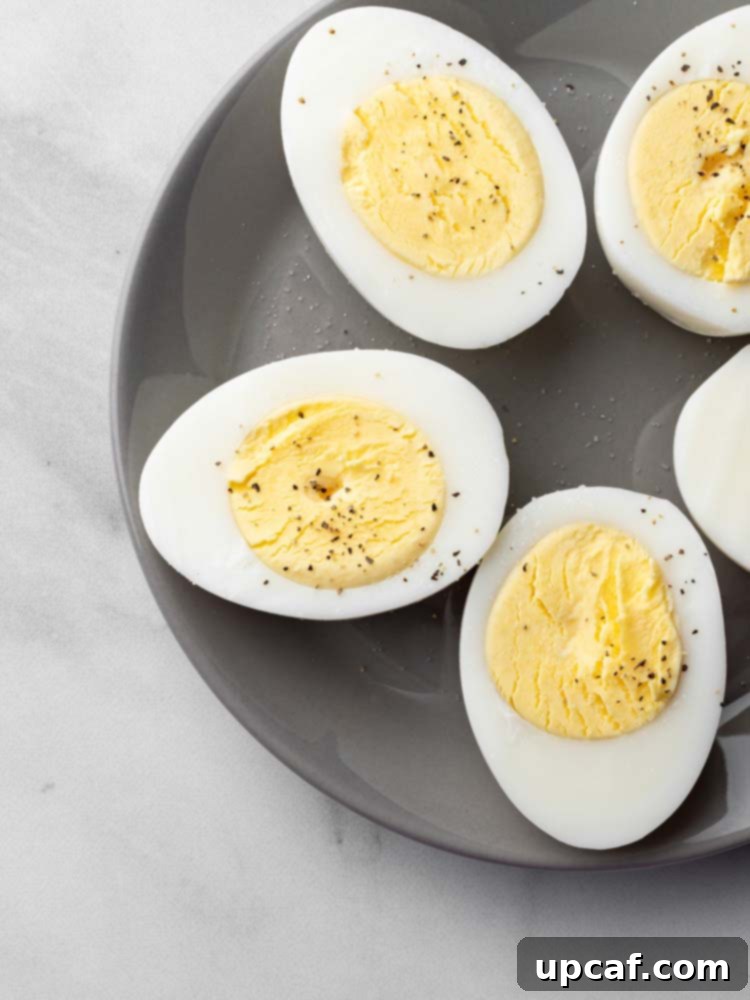
A truly perfect hard-boiled egg is a thing of beauty: its yolk is a rich, creamy yellow without any hint of a green discoloration, and the whites are firm yet tender, never rubbery. Achieving this ideal texture can sometimes feel like a culinary challenge, as it’s surprisingly easy to overcook or undercook. Fortunately, with the right techniques and a few simple tips, you can consistently produce restaurant-quality hard-boiled eggs right in your own kitchen. This guide will walk you through four distinct, foolproof methods, helping you select the best approach for your kitchen setup and time constraints, alongside crucial advice to ensure impeccable results.
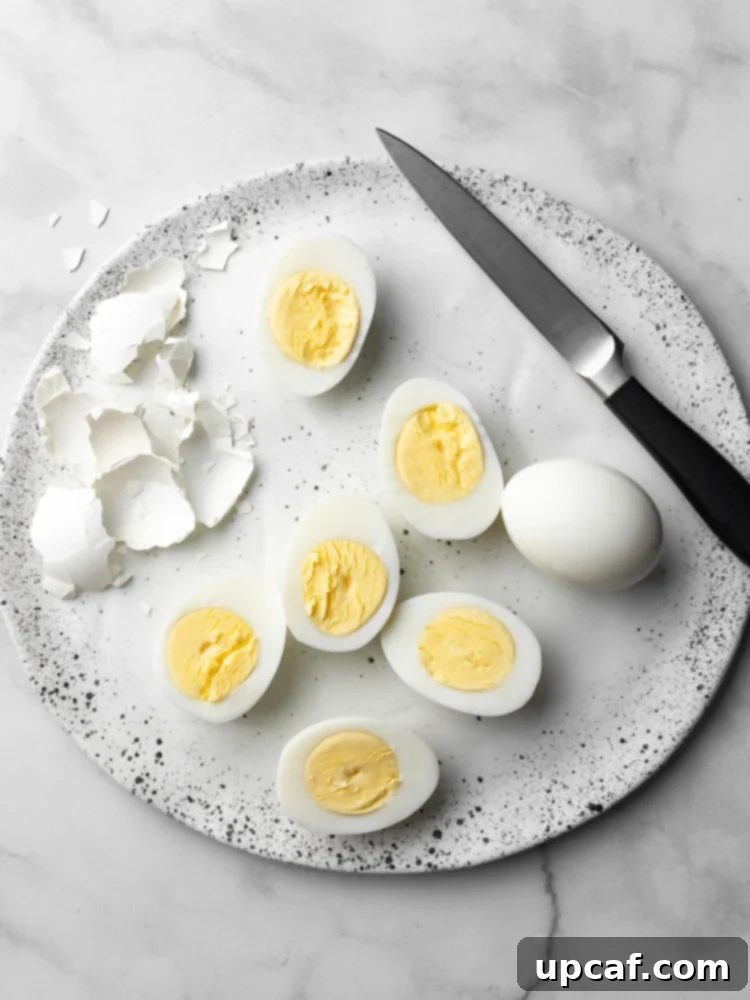
The Incredible Versatility of Hard-Boiled Eggs
Hard-boiled eggs are a powerhouse of nutrition and a remarkably versatile ingredient, fitting seamlessly into countless dishes and meal preparations. Beyond being a simple snack, they can elevate a variety of culinary creations. Here are some popular ways to enjoy your perfectly cooked eggs:
- In Sandwiches: Slice or mash them for a protein-packed addition to your favorite sandwich, offering a satisfying texture and flavor.
- In Salads: Quartered or chopped, hard-boiled eggs add substantial protein, richness, and visual appeal to green salads, potato salads, or pasta salads.
- For Deviled Eggs: The classic party appetizer! Halve them, scoop out the creamy yolks, mix with mayonnaise and seasonings, then pipe back into the whites for an irresistible treat.
- Egg Salad: A timeless favorite. Chop the eggs, mix with mayonnaise, mustard, celery, and herbs for a delicious spread or sandwich filling.
- Toast Topper: Slice them thinly and arrange over avocado toast or any other savory toast for an elegant and wholesome breakfast or brunch.
- As a Quick Snack: Grab a peeled hard-boiled egg for an on-the-go snack that’s rich in protein and keeps you feeling full.
- On Their Own!: Simply sprinkle with a pinch of salt and pepper, or a dash of hot sauce, and enjoy their natural goodness.
Essential Ingredients and Equipment for Hard-Boiled Eggs
Before diving into the cooking methods, let’s ensure you have all the necessary ingredients and equipment at hand. Success often lies in preparation!
The Ingredients
- Eggs: You can use medium or large-sized eggs, whether white or brown. While fresh eggs are delicious, slightly older eggs (about a week or two old) are often easier to peel due to changes in their pH balance and the air pocket inside. Aim for eggs that are at room temperature, or at least not straight from the fridge, as this helps prevent cracking during cooking.
- Water: Essential for all boiling methods, and for creating the crucial ice bath.
- Ice: Plenty of ice is needed for the ice bath, which is a non-negotiable step for perfect hard-boiled eggs.
The Equipment
The method you choose will dictate your primary cooking vessel, but some tools are universally helpful:
Equipment of Choice:
- Saucepan with a Lid: Necessary for the traditional stovetop methods (cold water start and simmering water start). Choose a pan large enough to hold your eggs in a single layer without overcrowding.
- Instant Pot (Pressure Cooker): Ideal for the Instant Pot method, offering a quick and reliable way to steam eggs under pressure.
- Muffin Tin: Required for the oven-baked method, providing individual compartments to hold the eggs steady during baking.
Large Slotted Spoon or Tongs:
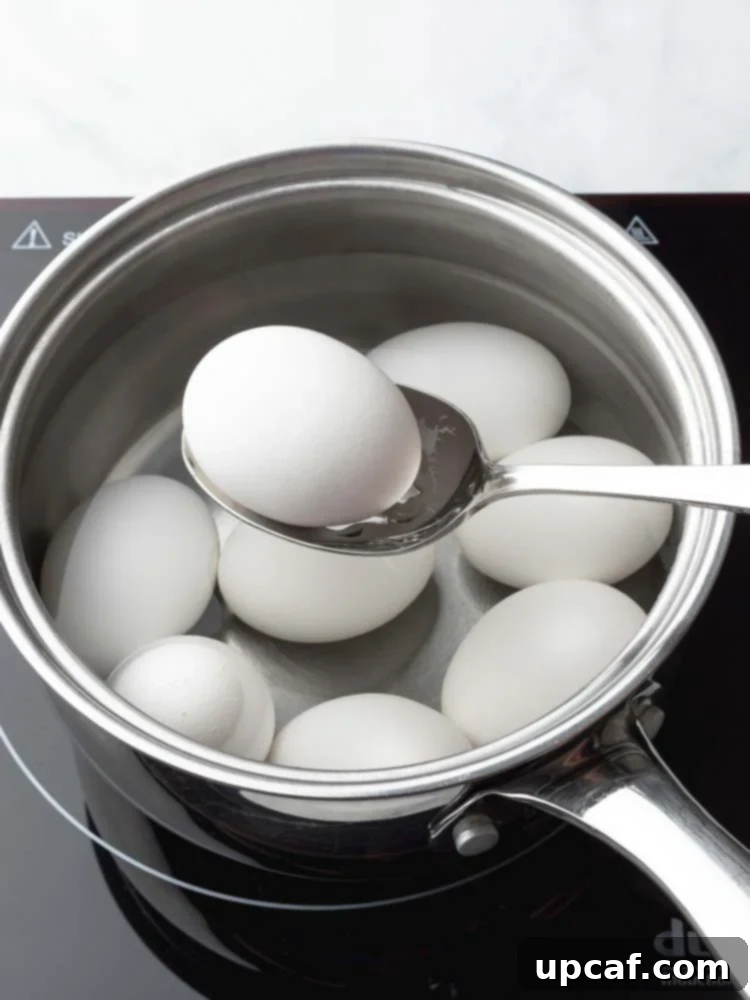
A large slotted spoon or a pair of tongs is invaluable for gently placing eggs into hot water and carefully removing them without cracking. This prevents unnecessary splashing and protects your hands from heat.
Bowl of Ice Water (Ice Bath):
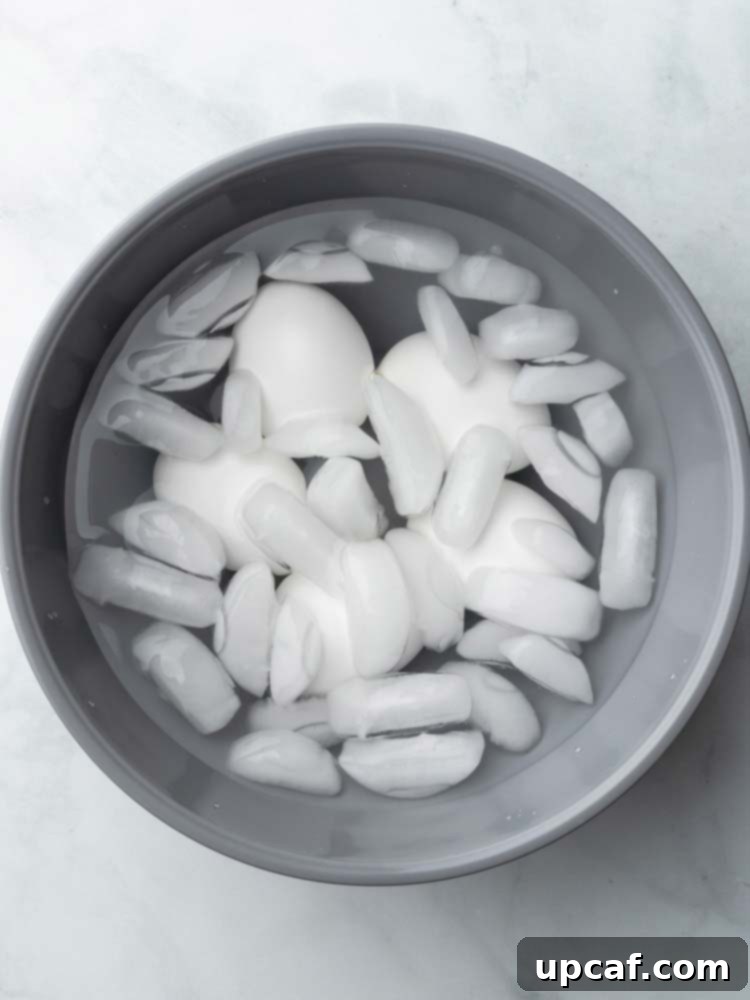
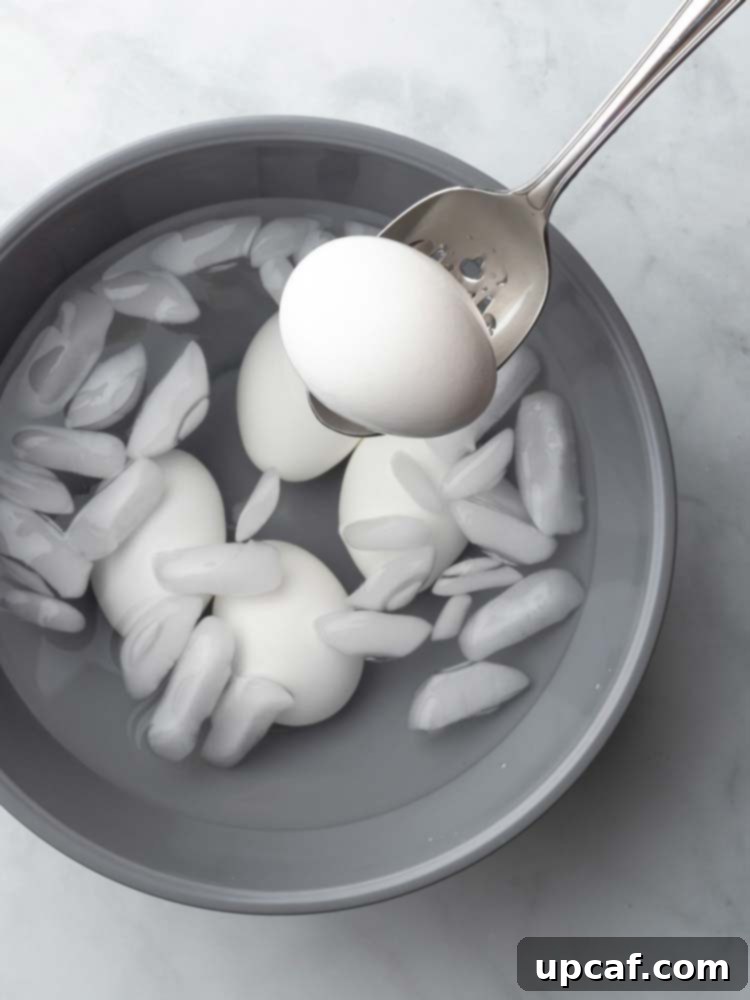
This is arguably the most critical piece of “equipment” after your cooking vessel. Immediately plunging cooked eggs into a bowl filled with ice water serves two vital purposes: it rapidly halts the cooking process, preventing overcooking (which leads to rubbery whites and green yolks), and it causes the egg white to contract, separating it from the shell membrane, which makes peeling significantly easier.
Four Foolproof Methods for Perfect Hard-Boiled Eggs
No matter your cooking preference or kitchen tools, there’s a reliable method for you to achieve flawlessly cooked hard-boiled eggs. Here are four techniques, each with its unique advantages:
Method 1: The Cold Water Start (Classic Stovetop Method)
This is a widely popular method known for its simplicity and consistent results, especially for achieving easy-to-peel eggs. Starting with cold water allows the eggs to gradually come up to temperature, minimizing cracking and ensuring even cooking.
- Step 1: Place Eggs in Saucepan. Gently place your eggs in a single layer at the bottom of a saucepan.
- Step 2: Cover with Cold Water. Fill the saucepan with cold tap water, ensuring the water level is at least 1 inch above the top of the eggs.
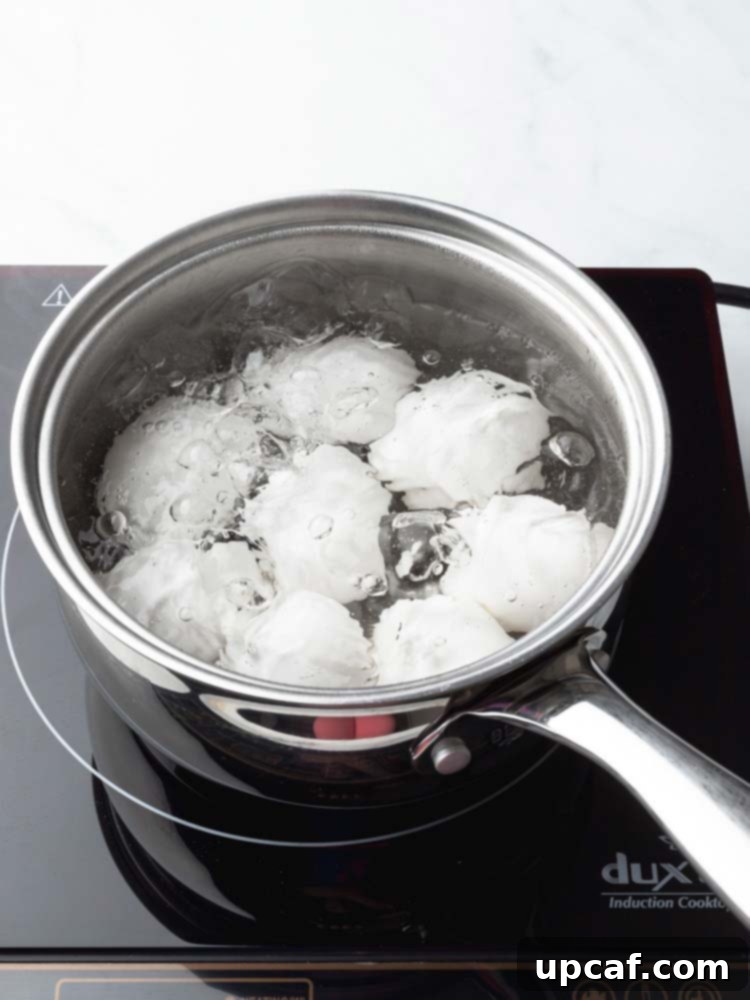
- Step 3: Bring to a Rolling Boil. Place the saucepan over high heat and bring the water to a rapid, rolling boil.
- Step 4: Remove from Heat and Cover. As soon as the water reaches a full boil, immediately remove the pan from the heat. Do NOT lift the lid; allow the residual heat to continue cooking the eggs.
- Step 5: Let Eggs Sit. Let the eggs sit covered in the hot water for 10 to 12 minutes for perfectly hard-boiled eggs with creamy yolks. For slightly softer yolks, reduce the time to 8-9 minutes.
- Step 6: Ice Bath. Once the sitting time is complete, use a large slotted spoon to transfer the eggs directly into a prepared bowl of ice water.
- Step 7: Cool and Peel. Allow the eggs to cool in the ice bath for at least 5 minutes (or until completely cool to the touch) before peeling. This rapid cooling is essential for both stopping the cooking process and facilitating easy peeling.
Method 2: The Simmering Water Start (Gentle Stovetop Method)
This method involves adding eggs to already hot water, which can sometimes lead to minor cracking if not done carefully. However, it offers precise control over cooking time once the eggs are in the water.
- Step 1: Bring Water to a Boil. Fill a saucepan about ¾ full with cold water and bring it to a vigorous boil over high heat.
- Step 2: Reduce to a Gentle Simmer. Once boiling, reduce the heat to maintain a gentle, rolling simmer. The water should be bubbling lightly, not aggressively.
- Step 3: Gently Add Eggs. Using a large slotted spoon, carefully lower each egg one by one into the simmering water. Avoid dropping them, which can cause cracking.
- Step 4: Simmer for Specified Time. Simmer the eggs for 12 to 14 minutes for a fully hard-boiled egg with a creamy yolk. Adjust time for desired firmness.
- Step 5: Ice Bath. Immediately remove the eggs from the hot water with your slotted spoon and plunge them into a bowl of ice water.
- Step 6: Cool and Peel. Allow them to cool for at least 5 minutes before peeling.
Method 3: The Instant Pot Method (Pressure Cooking)
The Instant Pot (or any electric pressure cooker) is revered for producing incredibly easy-to-peel hard-boiled eggs, thanks to the steaming process under pressure. This method often results in a slightly different texture, with whites that are firm but very tender.
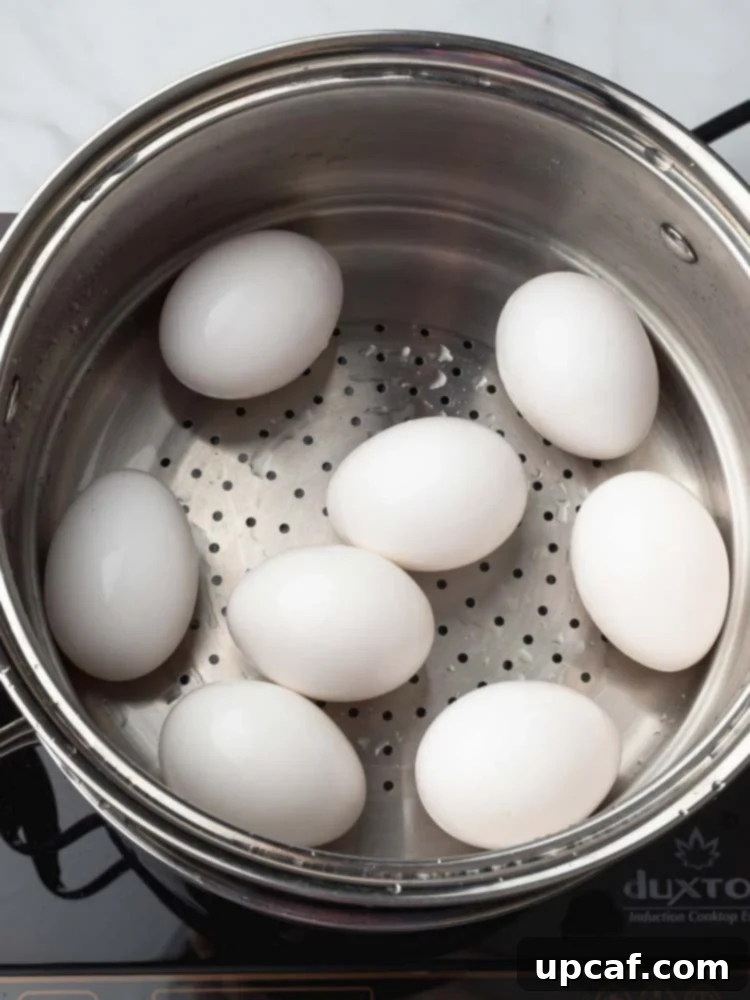
- Step 1: Set Up. Place the trivet (rack) at the bottom of your Instant Pot liner.
- Step 2: Add Eggs and Water. Carefully arrange the eggs on the rack in a single layer. Add 1 cup of water to the Instant Pot liner.
- Step 3: Cook Under Pressure. Close the lid and set the steam release valve to the “Sealing” position. Cook on high pressure for 7 minutes.
- Step 4: Quick Release and Ice Bath. Once cooking is complete, perform a quick release by turning the steam release valve to “Venting.” As soon as the pressure is fully released and the float valve drops, carefully open the lid. Immediately transfer the eggs to an ice bath.
- Step 5: Cool and Peel. Let the eggs cool in the ice water for at least 5 minutes before peeling.
Method 4: The Oven-Baked Method (Hands-Off Approach)
While less common, baking eggs in the oven is a hands-off approach that can be convenient, especially when cooking a large batch. The texture may be slightly different from boiled eggs, but they still make excellent hard-boiled eggs.
- Step 1: Preheat Oven. Preheat your oven to 325°F (160°C).
- Step 2: Place Eggs in Muffin Tin. Carefully place each egg into a cavity of a muffin tin. This prevents them from rolling around and cracking.
- Step 3: Bake. Bake for 30 minutes. The exterior of the shells may brown slightly, which is normal.
- Step 4: Ice Bath. Once baked, quickly remove the hot eggs from the muffin tin (using tongs or oven mitts) and immediately dunk them into a bowl of ice water.
- Step 5: Cool and Peel. Allow the eggs to cool for at least 5 minutes in the ice bath before peeling.
Expert Tips for Effortless Peeling
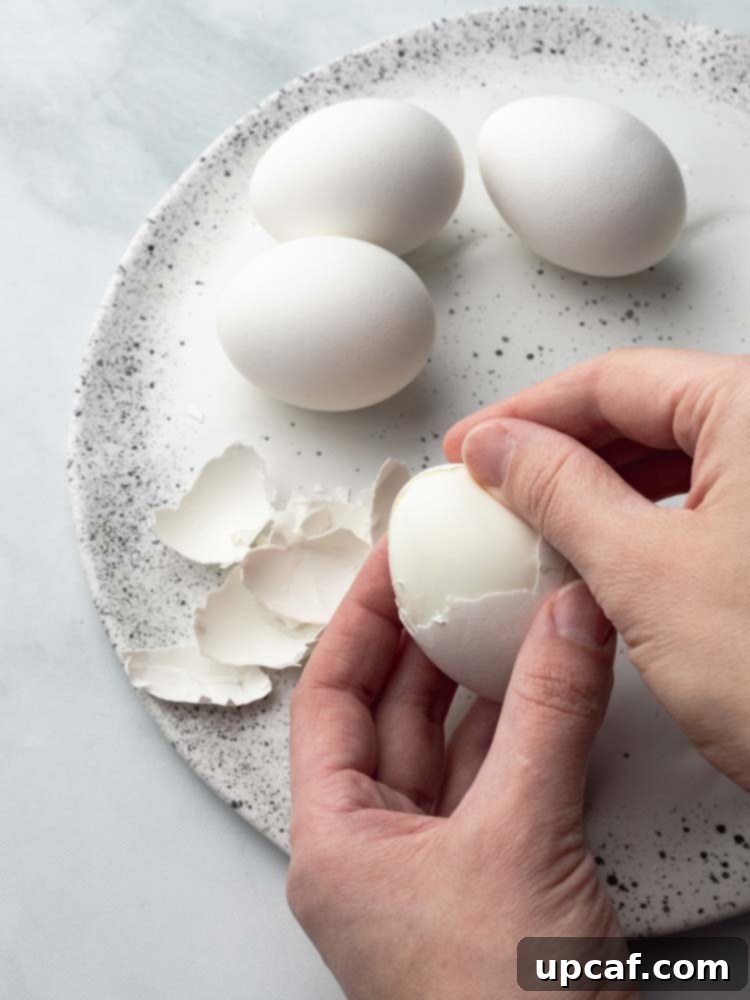
Perhaps the most frustrating part of making hard-boiled eggs is the peeling process. A perfectly cooked egg can still be a nightmare to peel if not handled correctly. But with a few techniques and tricks, you can achieve smooth, intact whites every time.
Peeling Method 1: The Classic Roll and Peel
This method works well for most eggs and is a simple, effective way to get started.
- Step 1: Gentle Crack. Once the egg is fully cooled in the ice bath, gently tap the egg on a hard surface (like your countertop). Start at the wider bottom end of the egg, as this is usually where the air bubble is located, making it easier to initiate the peel.
- Step 2: Roll and Crack. Once you have a small crack, gently roll the egg between your palm and the countertop, applying light, even pressure. This will create a network of fine cracks all over the shell.
- Step 3: Peel. Start peeling from the wider end, using your fingers to get under the shell and the thin membrane beneath it. The shell should come off in larger pieces. If it’s sticking, move on to Method 2.
Peeling Method 2: The Running Water Technique
When you encounter stubborn shells, running water can be your best friend. The water helps to get under the membrane, lubricating the process and making it easier to slide the shell off.
- Step 1: Crack as Before. Follow Step 1 and 2 from Method 1, creating a network of cracks across the eggshell.
- Step 2: Peel Under Water. Hold the cracked egg under a slow stream of cool running water. As you peel, the water will flow between the egg white and the inner membrane, helping to loosen the shell. This method is particularly effective for very fresh eggs that tend to stick more.
Common Questions & Advanced Tips for Perfect Eggs
Why an Ice Bath is Crucial
The ice bath isn’t just a suggestion; it’s a critical step. Immediately plunging hot eggs into ice water serves two primary functions: it instantly stops the cooking process, preventing the whites from becoming rubbery and the yolks from developing that unappealing grayish-green ring (caused by a reaction between sulfur in the egg white and iron in the yolk). Secondly, the rapid temperature change causes the egg white to contract, separating it from the shell’s inner membrane, which dramatically improves peelability. Never skip the ice bath for best results!
The Role of Egg Freshness
Counter-intuitively, older eggs (around one to two weeks old) are generally easier to peel than very fresh eggs. This is because, over time, the pH level of the egg white increases, making it less acidic. This slight change weakens the bond between the egg white and the inner membrane, allowing the shell to come off more cleanly. If you’re planning to make hard-boiled eggs, consider buying them a week in advance or using eggs that have been in your fridge for a little while.
Avoiding the Green Ring (Sulfur Reaction)
That unattractive green or grayish ring around the yolk is a clear sign of an overcooked egg. It forms when hydrogen sulfide (from the egg white) reacts with iron (from the yolk) at high temperatures. To prevent this, ensure you don’t overcook your eggs. Stick to the recommended cooking times for each method, and always use an immediate ice bath to halt the cooking process effectively.
Achieving that Creamy Yolk
The secret to a creamy, vibrant yellow yolk lies in precise cooking. Overcooking dries out the yolk, making it chalky. The methods described above, especially with their specific timing, are designed to cook the egg thoroughly while maintaining a moist, tender, and creamy texture in the yolk. Paying close attention to the cooking duration and the instant cooling process is key.
Storing Hard-Boiled Eggs Safely
Once you’ve mastered making perfect hard-boiled eggs, proper storage is essential to maintain their freshness and safety. Hard-boiled eggs are highly perishable and should be handled with care.
- Refrigeration is Key: Whether peeled or unpeeled, hard-boiled eggs must be stored in an airtight container in the refrigerator as soon as they have completely cooled.
- Shelf Life: Stored properly, hard-boiled eggs can last for up to one week in the refrigerator.
- Room Temperature Warning: Never leave hard-boiled eggs at room temperature for more than 2 hours. Bacteria can multiply rapidly at unsafe temperatures, making them unsafe to eat. Discard any eggs left out for too long.
- Peeled vs. Unpeeled: Unpeeled eggs tend to stay fresh slightly longer as the shell provides an extra layer of protection. If you peel them, store them in a container covered with a damp paper towel to prevent them from drying out.
How To Reheat Hard-Boiled Eggs (With Caution)
Hard-boiled eggs are typically enjoyed cold directly from the refrigerator, making them a convenient grab-and-go snack. While it’s generally recommended to eat them cold after storage to preserve their texture and safety, you can reheat them with some precautions if desired. Be aware that reheating can sometimes alter the texture of the whites, potentially making them tougher.
- Boiling Water Method: If reheating eggs with the shell on, you can place them in a pot of boiling water for up to 2-3 minutes. This gently warms them through without further cooking.
- Microwave Method (Use Extreme Caution): You can attempt to microwave hard-boiled eggs in very short increments (e.g., 5-10 seconds). However, be extremely cautious. Microwaving whole eggs for too long can cause them to explode due to steam buildup inside the shell, posing a burn risk and creating a mess. It’s generally not the preferred method due to this risk and the potential for rubbery texture.
- Risk of Overcooking: Regardless of the method, reheating always carries the risk of overcooking the egg, which can lead to rubbery whites and a dry or green-tinged yolk.
How Do You Know If Hard-Boiled Eggs Have Gone Bad?
Food safety is paramount, and it’s crucial to know how to identify if your hard-boiled eggs have spoiled. When in doubt, always err on the side of caution and discard them.
- The Sniff Test: This is the most reliable indicator. If your hard-boiled egg emits any sour, sulfurous, or otherwise foul odor (often described as rotten eggs), it has spoiled and should be immediately discarded.
- Appearance: While less common, mold growth or a slimy texture on the egg’s surface are clear signs of spoilage.
- Texture: If the egg white becomes unusually soft, mushy, or chalky, it might be a sign it’s past its prime.
- When in Doubt, Toss It Out: If you have any reservations about an egg’s freshness, it’s always safest to throw it away rather than risk foodborne illness.
Pin
How to Make The Hard Boiled Eggs
By: Mariam Ezzeddine
Here are some foolproof methods as well as tips on how to make the perfect hard boiled eggs four different ways with the creamiest yolk!
Cook Time: 14 minutes
Total Time: 14 minutes
Servings: 6 servings
Ingredients
- 6 whole eggs
Instructions
Method 1: Cold Water Start
- Place the eggs into the saucepan, fill the saucepan so that there’s 1 inch of cold water covering it, and bring it to a boil.
- Once it has boiled, remove the pan from the heat with the lid on. Do not lift the lid.
- Let the eggs sit for 10 to 12 minutes.
- Once done, remove the eggs from the hot water with the slotted spoon and dunk them into the ice water.
- Let the eggs cool for at least 2 minutes before peeling.
Method 2: Simmering Water Start
- Fill the saucepan ¾ full of cold water and bring it to a boil. Once it has boiled, lower the heat and bring it down to a gentle rolling simmer.
- Using a large slotted spoon, gently add your eggs into the saucepan one by one.
- Simmer the eggs for 12 to 14 minutes.
- Once done, quickly remove the eggs from the water and dunk them into the ice water.
- Let the eggs cool for at least 2 minutes before peeling.
Method 3: Instant Pot
- Add the Instant Pot rack to the bottom of the Instant Pot liner.
- Add eggs onto the rack and add 1 cup water.
- Close the lid, set the valve to sealing, and cook on high pressure for 7 minutes.
- Quick release and remove the eggs from the water and dunk them into the ice water.
- Let the eggs cool for at least 2 minutes before peeling.
Method 4: Oven Baked
- Preheat the oven to 325F.
- Place eggs in a muffin tin and bake for 30 minutes.
- Once done, quickly remove the eggs from the oven and dunk them into the ice water.
- Let the eggs cool for at least 2 minutes before peeling.
Notes
Nutritional facts does not include any other ingredients but the egg.
Nutrition
Serving: 1g | Calories: 70kcal | Carbohydrates: 1g | Protein: 1g | Fat: 1g | Saturated Fat: 1g | Cholesterol: 4mg | Sodium: 1mg | Potassium: 1mg | Sugar: 1g | Vitamin A: 5IU | Calcium: 1mg | Iron: 1mg
Explore More Cooking Tutorials You May Like
If you enjoyed mastering hard-boiled eggs, you might also find these other cooking tutorials helpful for expanding your kitchen expertise:
- How to make perfect soft boiled eggs
- How to poach an egg
- How to make cauliflower rice
- How to bake the perfect potato
I genuinely hope this detailed guide empowers you to consistently create the most delicious and perfectly cooked hard-boiled eggs. Enjoy experimenting with these methods and integrating these versatile gems into your meals. Don’t forget to rate this tutorial if you found it useful and share it with your friends and family!
If you try any of these methods and love the results, please share your creations with me on INSTAGRAM using my hashtag for a chance to be featured! For more delicious recipes and cooking tips, follow Cookin’ With Mima on FACEBOOK, INSTAGRAM, and PINTEREST.