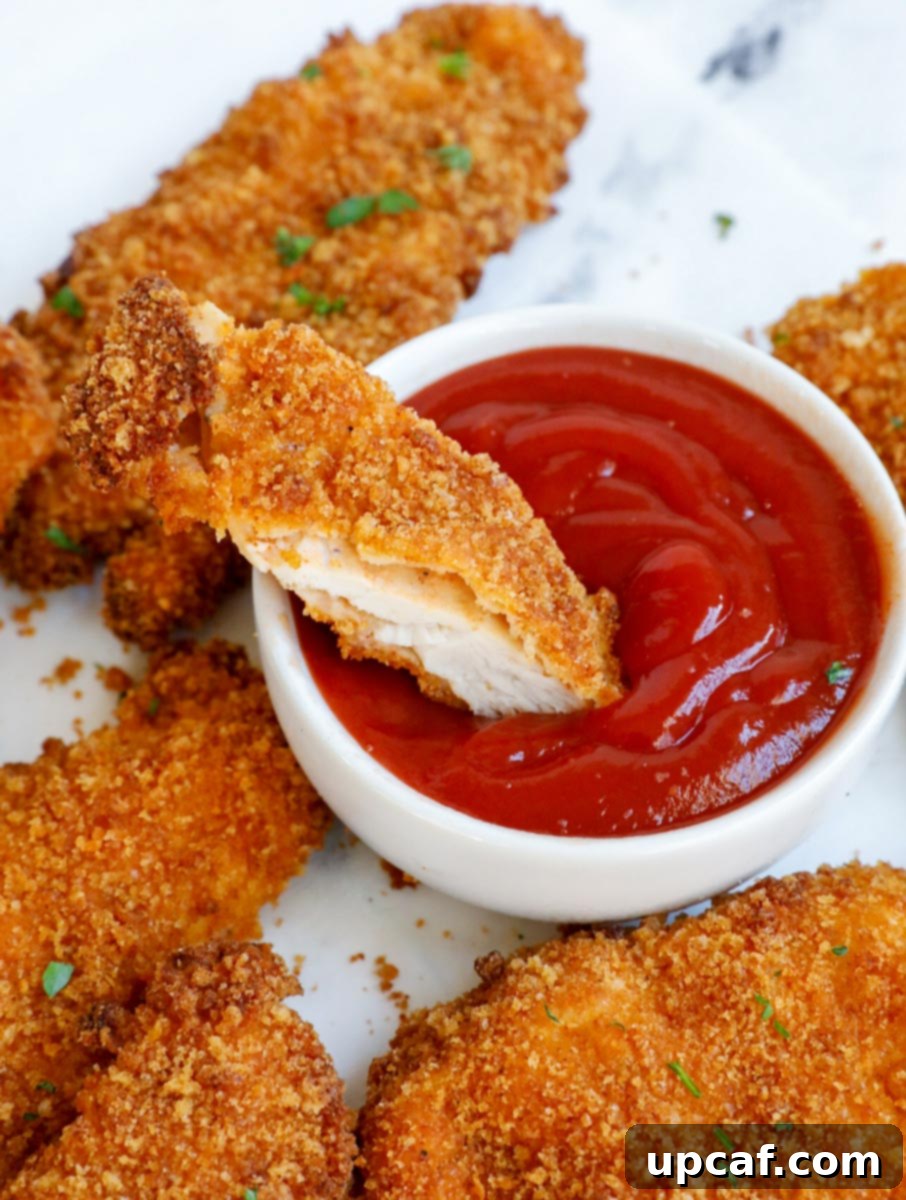
Unlock the secret to perfectly cooked, irresistibly crispy chicken at home with these incredible Baked Crispy Chicken Tenders. Forget the deep-fryer mess and unhealthy oils; our oven-baked method delivers tenders that are gloriously moist and tender on the inside, with a golden, crunchy exterior that rivals your favorite restaurant-style chicken. These utterly addictive, healthy, and flavor-packed chicken tenders are poised to become a staple in your culinary repertoire.
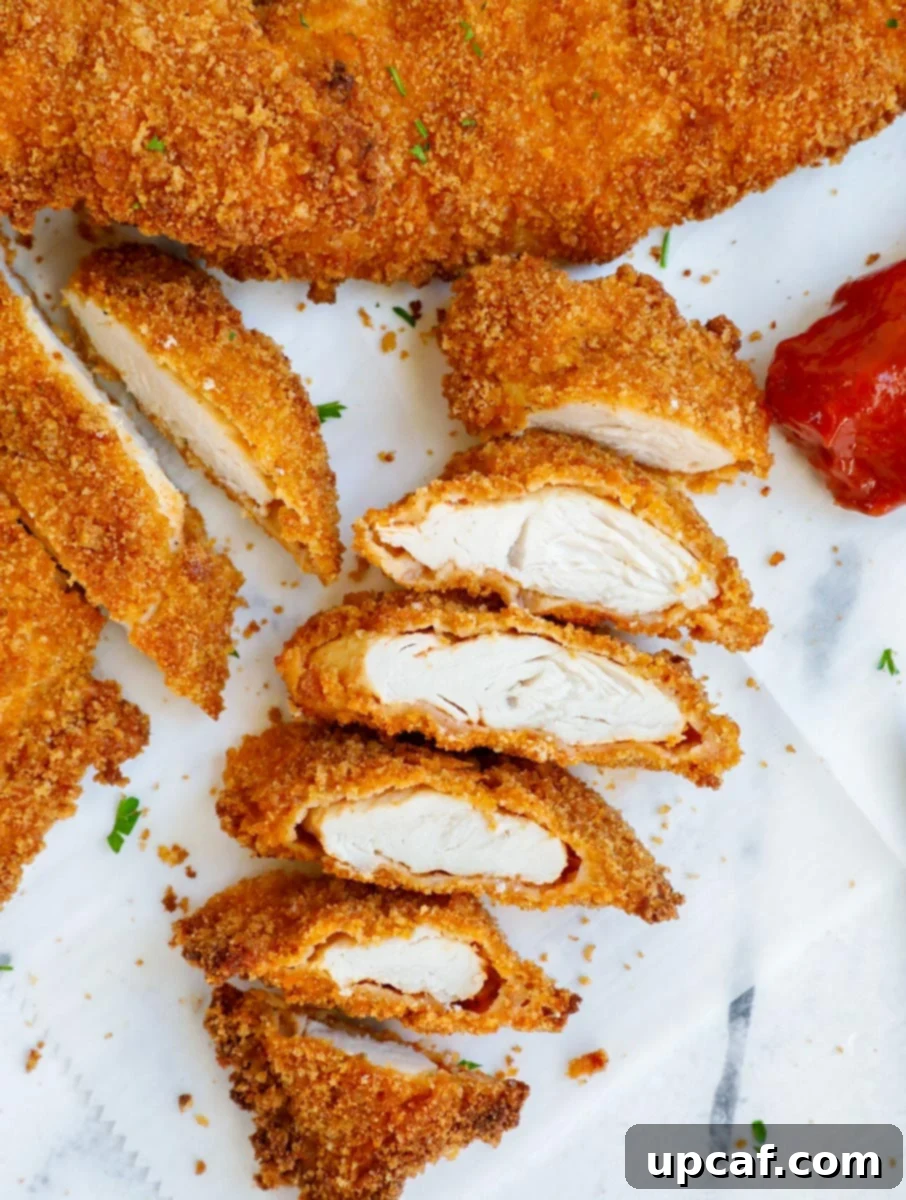
These Oven Baked Chicken Tenders are a true triumph of flavor and texture. Each tender is super tender, enveloped in a beautifully seasoned crust that crisps up wonderfully in the oven. They are incredibly versatile and perfect for any occasion. Serve them as a crowd-pleasing snack during game night, a satisfying main course for family dinner, or get creative by slicing them up to top a fresh salad, wrap in a soft tortilla, or pair with your favorite dipping sauces. The possibilities are endless! Our oven-baked approach makes them a much healthier alternative to their fried counterparts, yet they lose none of their delicious crispiness. Moreover, the carefully crafted coating expertly locks in all the natural juices of the chicken, ensuring every bite is a tender, flavorful delight – truly a win-win situation for health and taste!
Craving more delicious and healthy chicken recipes? Explore our collection of guilt-free options. You might also love my Air Fryer Chicken Thighs, Air Fryer Chicken Nuggets, Air Fryer Butterfly Drumsticks, Grilled Chicken Nuggets, and Air Fryer Lemon Chicken. These recipes are designed to be both wholesome and incredibly tasty, allowing you to enjoy your favorite chicken dishes without compromise.
Why These Homemade Crispy Chicken Tenders Are a Must-Try
If you’re looking for an easy, flavorful, and healthier alternative to fast-food favorites, these homemade chicken tenders tick all the boxes. Here’s why they stand out as an exceptional dish:
- Healthier Indulgence: Unlike traditional fried chicken, these tenders are oven baked, not submerged in excessive oil. This method significantly reduces fat and calorie content without sacrificing any of the satisfying crunch. You get all the crispy goodness you crave, but in a much more wholesome package, making them a perfect choice for health-conscious eaters and families.
- A Symphony of Flavors in Every Bite: The secret to their incredible taste lies in the ingenious coating. Each juicy chicken tender is first bathed in a buttermilk marinade, which not only tenderizes the meat but also acts as a fantastic adhesive for the breading. It’s then generously coated with a delightful blend of seasonings, offering a complex and spicy zing that elevates the flavor profile far beyond ordinary chicken strips. This robust coating ensures a burst of flavor with every single crispy bite.
- Effortless Preparation: Don’t let the impressive results fool you; these crunchy, crispy oven tenders are incredibly simple to whip up using common kitchen staples. The straightforward steps and accessible ingredients make this a perfect recipe for busy weeknights, beginner cooks, or anyone seeking a delicious meal without a complicated process. Minimal fuss, maximum flavor!
- Customizable for Every Palate: Whether you prefer a milder taste or an extra kick, this recipe is easily adaptable. Adjust the amount of sriracha or other hot sauce to suit your spice preference. You can also experiment with different seasoning blends to create your signature flavor.
- Family-Friendly and Versatile: Kids and adults alike will devour these tenders! Their appealing crunch and familiar shape make them an instant hit at any dinner table. Plus, their versatility allows them to be the star of various meals, from simple snack to a full dinner, or even as a protein boost in salads and wraps.
Essential Ingredients for Crispy Oven Baked Chicken Tenders
Crafting the perfect crispy chicken tenders begins with selecting the right ingredients. Here’s a detailed look at what you’ll need and why each component is crucial for achieving that mouthwatering result:
- Chicken Tenders: We specifically recommend using chicken tenders rather than cutting up regular chicken breast. Tenderloins are naturally more tender and moist, making them ideal for this recipe. They cook quickly and evenly, ensuring a consistently juicy interior.
- Buttermilk: This key ingredient is a game-changer! Buttermilk’s mild acidity works wonders in tenderizing the chicken, breaking down tough fibers to create an incredibly succulent texture. It also helps the breading adhere beautifully, ensuring a uniform and crispy coating. If you don’t have buttermilk, you can easily make your own by adding one tablespoon of lemon juice or white vinegar to a cup of regular milk and letting it sit for 5-10 minutes until it slightly curdles.
- Sriracha: For that irresistible spicy kick, sriracha is our preferred choice. Its vibrant flavor and moderate heat perfectly complement the chicken. If sriracha isn’t on hand or you prefer a different kind of heat, feel free to substitute with any other hot sauce you enjoy, such as Frank’s RedHot, tabasco, or even a dash of cayenne pepper for powdered heat.
- Salt and Pepper: These fundamental seasonings are crucial for enhancing the chicken’s natural flavor. Always season to taste, adjusting the quantities as you like to achieve your desired balance. Freshly ground black pepper offers the best aroma and flavor.
- Paprika: Beyond just flavor, paprika is added for its beautiful color. It imparts a warm, reddish-orange hue to the breading, making your tenders look as appealing as they taste. You can use sweet, smoked, or hot paprika depending on your preference for subtle smoky notes or added warmth.
- Eggs: Acting as a vital binding agent, whisked eggs create a sticky surface that allows the flour and breading mixture to firmly cling to the chicken. This ensures a consistent, crispy crust that stays put during baking.
- Seasoning Mix or Panko Breadcrumbs: For the ultimate crispy texture, panko breadcrumbs are highly recommended due to their light, airy, and flaky structure, which creates a superior crunch. However, a good quality seasoned crumb mix (like “Shake ‘n Bake” or similar) also works wonderfully and can add extra layers of flavor. Use what you have available, but for maximum crispiness, reach for the panko.
- Flour Mix: This specially blended flour mixture forms the initial layer of the crispy coating, providing a base for the egg and breading. It consists of:
- All-purpose flour: The foundation of the coating.
- Paprika: Adds color and a subtle sweet or smoky note.
- Onion powder: Provides a savory depth of flavor that enhances the overall taste.
- Garlic powder: Aromatic and savory, garlic powder is a must-have for robust chicken flavor.
- Salt and pepper: Essential for seasoning the coating itself, ensuring flavor throughout.
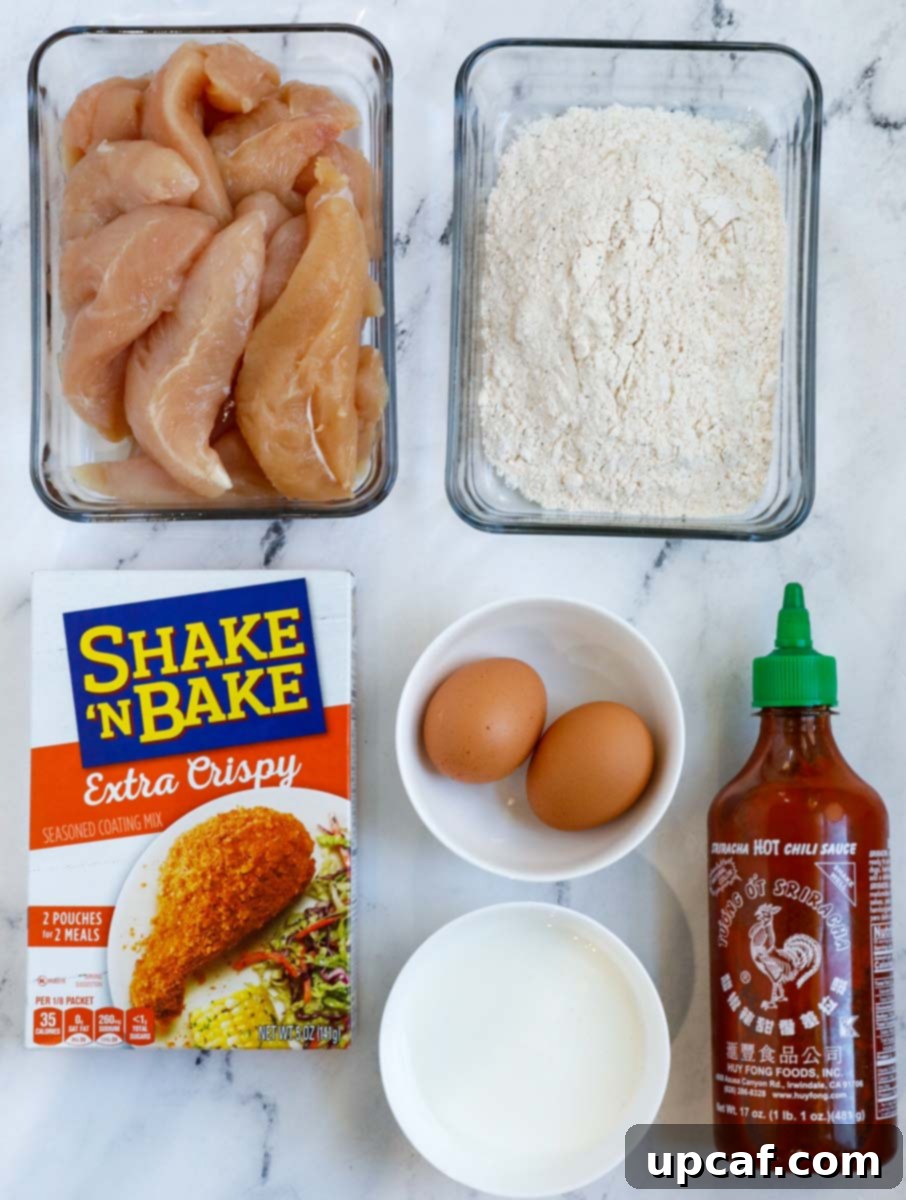
Step-by-Step Guide: How to Make Crispy Baked Chicken Tenders
Achieving perfectly crispy, flavorful chicken tenders at home is simpler than you think. Follow these easy steps to create a dish that everyone will adore:
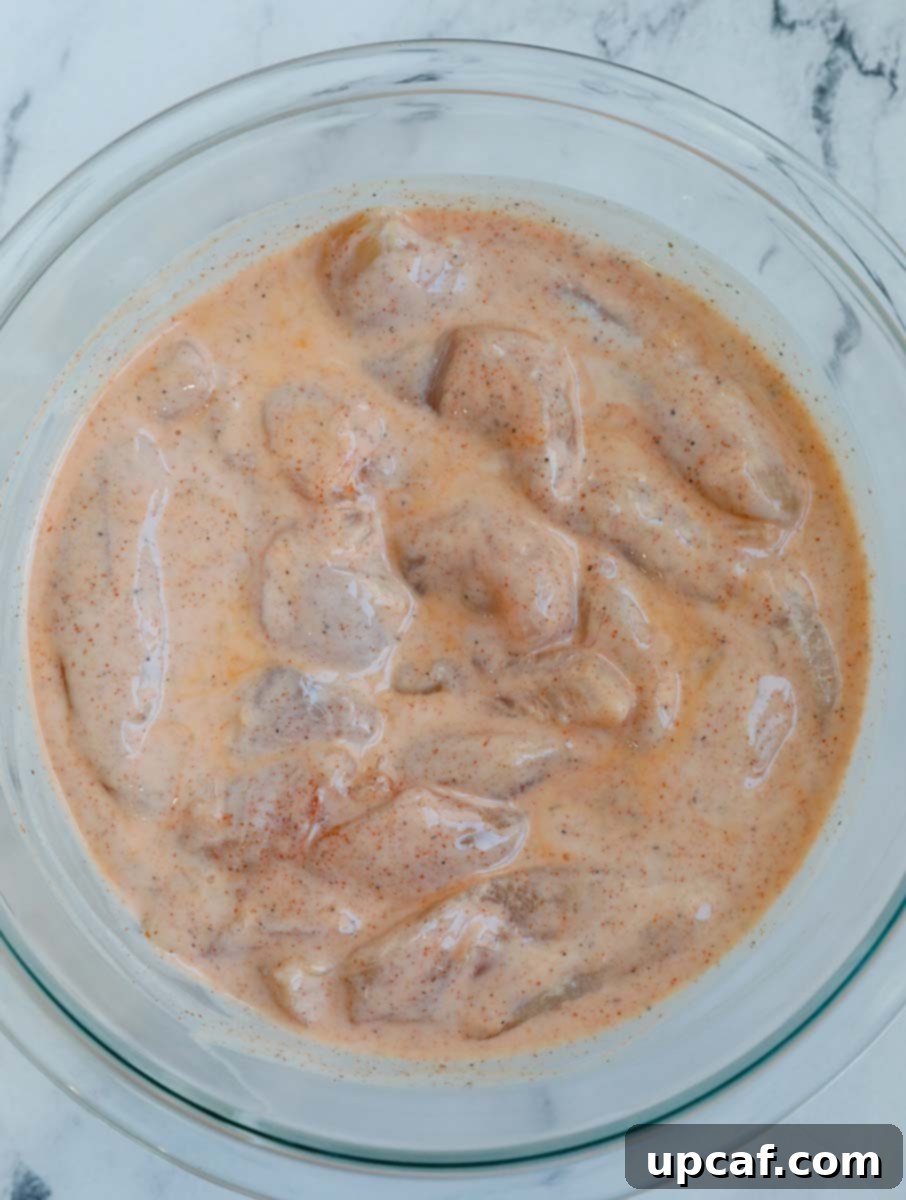
- Prepare the Chicken and Marinate: Begin by trimming your chicken tenders. This involves removing any visible film, sinew, or muscle strings to ensure the most tender bite. Once trimmed, place the chicken in a medium-sized bowl. Pour in the buttermilk and sriracha, then season generously with black pepper, salt, and paprika. Mix everything thoroughly to ensure each tender is fully coated in the marinade. Cover the bowl and refrigerate for at least 1 hour. This marinating step is crucial for tenderizing the chicken and infusing it with flavor, leading to incredibly juicy results.
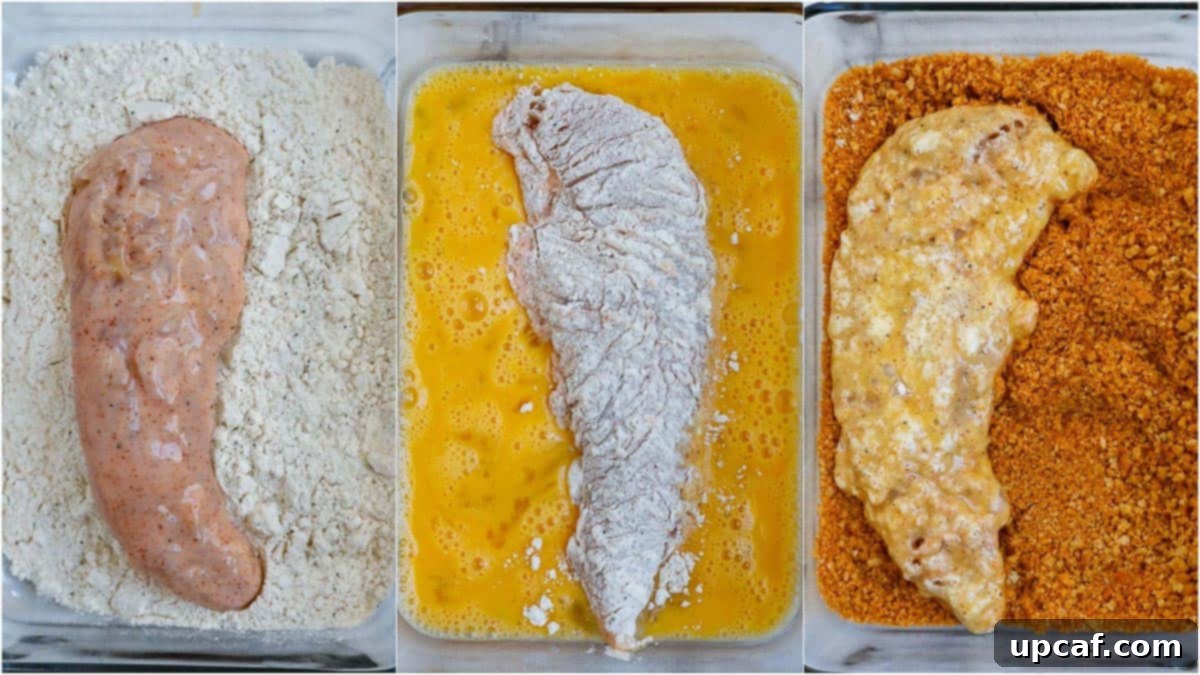
- Set Up Your Breading Stations: While the chicken marinates, prepare your breading assembly line. In one shallow bowl, combine all the ingredients for your flour mix (all-purpose flour, paprika, onion powder, garlic powder, salt, and pepper), whisking until well combined. In a second shallow bowl, crack and whisk the eggs until the yolks and whites are fully incorporated. In a third shallow bowl, add your seasoned crumb mix or panko breadcrumbs. This three-bowl setup ensures an efficient and complete coating process.
- Bread the Chicken: After the chicken has marinated for at least an hour, it’s time to bread. Working one tender at a time, first dredge the chicken in the flour mixture, ensuring it’s completely covered. Shake off any excess flour. Next, dip the floured tender into the whisked egg mixture, allowing any extra egg to drip off. Finally, transfer the chicken to the bowl with the seasoned breadcrumbs or panko, pressing gently to ensure a thorough and even coating on all sides. Repeat this process for all chicken tenders, placing the breaded pieces on a clean plate or parchment-lined baking sheet as you go.
- Bake to Golden Perfection: Arrange the breaded chicken tenders in a single layer on a baking sheet lined with parchment paper or, for extra crispiness, on a baking rack set over a baking sheet. This allows for better air circulation around the tenders. Ensure your oven is preheated to 400°F (200°C). Bake for approximately 20 minutes, or until the chicken is golden brown, crispy, and cooked through. To verify doneness, insert a meat thermometer into the thickest part of a tender; it should read 160°F (71°C).

- Rest and Serve: Once baked, remove the crispy chicken tenders from the oven and allow them to rest on the baking sheet for a couple of minutes before serving. This brief resting period helps redistribute the juices, ensuring maximum tenderness. Garnish with some freshly chopped parsley for a pop of color and serve immediately with your favorite dipping sauces. Enjoy your perfectly crispy, homemade chicken tenders!
Expert Tips for Unbelievably Crispy Oven Baked Chicken Tenders
Achieving restaurant-quality crispy chicken tenders in your own oven is entirely possible with a few smart techniques. Follow these expert tips to ensure your tenders are always golden, crunchy, and perfectly cooked:
- Preheat Your Oven Thoroughly: Always start with a fully preheated oven. A hot oven creates an immediate crisp on the exterior of the tenders, preventing them from drying out and promoting a truly golden crust. Don’t rush this step!
- Pat the Chicken Dry: Before drenching the chicken in the buttermilk mixture, ensure each tender is thoroughly patted dry with paper towels. Excess moisture on the chicken surface can hinder the breading from sticking properly and can lead to a soggy, rather than crispy, coating.
- Proper Trimming is Key: Take a moment to trim the tenders carefully. Remove any silverskin (the thin, silvery film) and tough muscle strings. This not only improves the texture but also ensures a more pleasant eating experience.
- Lightly Spritz with Oil: For an extra layer of crispness and a beautiful golden-brown finish, lightly spritz the breaded tenders with cooking spray or a fine mist of olive oil just before baking. This helps simulate the effect of frying without the added oil.
- Utilize a Baking Rack: If you desire maximum crispiness all around, bake the tenders on a wire rack placed over a baking sheet. This elevates the chicken, allowing hot air to circulate underneath and preventing the bottoms from becoming soggy. If you don’t have a rack, parchment paper on a baking sheet works well too, just be aware the bottom might be slightly less crispy.
- Monitor Internal Temperature for Doneness: The best way to ensure your chicken is perfectly cooked and safe to eat is to use a meat thermometer. Insert it into the thickest part of the largest chicken tender. When it reads 160°F (71°C), the chicken is done. Remove it from the oven immediately; it will continue to cook slightly as it rests, reaching the safe internal temperature of 165°F (74°C).
- Choose Your Breading Wisely: While a good seasoned mix works, panko breadcrumbs are highly recommended for their superior crispiness. Panko flakes are larger and airier than regular breadcrumbs, resulting in a lighter, crunchier texture.
- Don’t Overcrowd the Baking Sheet: Arrange the tenders in a single layer on the baking sheet, ensuring there’s space between each piece. Overcrowding can lead to steaming, which prevents the chicken from getting properly crispy. If necessary, bake in batches.
- Garnish for Visual Appeal: A sprinkle of freshly chopped parsley after baking not only adds a lovely pop of vibrant green color but also a fresh herbaceous note that complements the savory chicken.
- Rest Before Serving: Just like larger cuts of meat, allowing the chicken tenders to rest for a few minutes after baking helps the juices redistribute throughout the meat, ensuring a more tender and flavorful result.
Frequently Asked Questions About Crispy Baked Chicken Tenders
The chicken tenderloin, often simply called a “tender,” is a specific cut of white meat located just underneath the breast bone. It’s a small, lean, and very tender strip of muscle that is naturally separated from the main breast. While it’s possible to carefully remove tenderloins from a bone-in chicken breast, it’s typically much more convenient and common to purchase them pre-cut and packaged at your local grocery store. Their inherent tenderness makes them ideal for quick-cooking methods like baking or air frying.
Air frying these crispy chicken tenders is a fantastic alternative for an even quicker cook time and superb crispiness. To air fry, simply arrange the breaded tenders in a single layer in your air fryer basket. Ensure not to overcrowd the basket, as this can lead to uneven cooking and less crispiness. Air fry at 350°F (175°C) for 10-12 minutes, flipping halfway through, or until they are golden brown and cooked through. For best results, work in batches if necessary. The subsequent batches may require a minute or two less cooking time since the air fryer will already be preheated and operating at optimal temperature.
Leftover baked chicken tenders can be stored in an airtight container in the refrigerator for 3 to 4 days, making them excellent for meal prep. If you wish to freeze them for longer storage, place the cooked and cooled tenders in a freezer-safe bag or container for up to 2 months. To reheat, thaw frozen tenders overnight in the fridge if possible. Then, arrange them on a baking sheet and bake in a preheated oven at 400°F (200°C) for about 10-15 minutes, or until heated through and crispy again. Alternatively, an air fryer can reheat them quickly at 350°F (175°C) for 5-8 minutes.
These golden beauties are incredibly versatile and pair well with a wide variety of sides and dips, allowing you to create a complete and satisfying meal. While they are fantastic on their own with just a dip, consider these delicious ideas for a fuller experience: Crispy Air Fryer Sweet Potato Fries, Oven Roasted Baby Potatoes, Mexican Street Corn Salad, Spicy Pico De Gallo and Avocado Corn Salad. For dipping, classic ketchup, ranch, honey mustard, BBQ sauce, or a spicy mayo are always popular choices!
Yes, you absolutely can use regular boneless, skinless chicken breast. If using chicken breast, we recommend slicing it into uniform strips (about 1-inch thick) to mimic the size and shape of tenders. Pounding the chicken breast lightly before slicing can also help tenderize it and ensure even cooking. Keep in mind that chicken breast might be slightly less moist than actual tenders, so ensure you don’t overcook them.
Certainly! To make this recipe gluten-free, simply substitute the all-purpose flour in the flour mix with a gluten-free all-purpose flour blend (ensure it contains xanthan gum for best results). For the seasoned crumb mix or panko breadcrumbs, use gluten-free panko breadcrumbs, which are widely available in most grocery stores. The rest of the ingredients, like chicken, buttermilk, sriracha, and seasonings, are naturally gluten-free.

Explore More Delicious Chicken Recipes
If you loved these crispy baked chicken tenders, you’re in for a treat! Our kitchen is always buzzing with creative and flavorful ways to enjoy chicken. Here are a few more chicken recipes that we think you’ll truly enjoy:
- Baked Salsa Chicken
- Spinach Stuffed Chicken Breast
- Oven Baked Chicken Cutlets
- Honey Mustard Chicken Drumsticks
- Crunchy Fried Chicken
We sincerely hope you enjoy discovering and trying all the recipes we passionately share with you, especially this fantastic Crispy Baked Chicken Tenders recipe. We encourage you to give it a try, savor every bite, leave a star rating and comment below with your feedback, and share this delightful dish with your cherished friends and family!
If you prepare this recipe and find yourself loving it, please don’t hesitate to leave a star rating and a comment below. Your feedback helps us grow and inspires others! Also, be sure to follow us at Cookin’ With Mima on FACEBOOK | INSTAGRAM | PINTEREST for all of our latest social posts, delicious recipes, and culinary inspiration. Happy cooking!
Pin
Baked Crispy Chicken Tenders
Ingredients
- 2 lbs. chicken tenders, trimmed
- 3/4 cup buttermilk
- 1/4 cup sriracha
- 1/2 tsp. salt
- 1/2 tsp. paprika
- 1/2 tsp. black pepper
- 2 whole eggs
- 2 cups shake n’ bake extra crispy seasoned mix, or panko crumbs if preferred
Flour mix
- 3/4 cup all purpose flour
- 1 tbsp. paprika
- 1/2 tsp. onion powder
- 1/2 tsp. garlic powder
- 1/2 tsp. black pepper
- 1/2 tsp. salt
Instructions
- Preheat your oven to a steady 400°F (200°C). This ensures the chicken starts crisping immediately upon entering.
- Carefully trim the chicken tenders, removing any film or tough muscle strings. Transfer the trimmed chicken to a bowl and add the buttermilk, sriracha, black pepper, paprika, and salt. Mix thoroughly to coat all the chicken pieces evenly. Cover the bowl and let the chicken marinate in the refrigerator for a minimum of 1 hour to tenderize and absorb flavors.
- Set up your breading stations: In one shallow bowl, combine all the flour mix ingredients (all-purpose flour, paprika, onion powder, garlic powder, salt, and pepper). In a second shallow bowl, whisk the eggs until smooth. In a third shallow bowl, add your seasoned crumb mix or panko breadcrumbs.
- Once the chicken strips have completed their marinating time, it’s time to prepare them for baking.
- Take one marinated chicken tender, place it in the flour mix to coat completely, shaking off any excess. Next, transfer it to the whisked egg mixture, ensuring full coverage. Finally, dredge it in the seasoned breadcrumb mix, pressing gently to make sure the strip is entirely and firmly coated. Repeat for all tenders.
- Arrange the breaded strips in a single layer on a baking tray lined with parchment paper or, for optimal crispiness, on a baking rack set over a tray. Bake in the preheated oven for approximately 20 minutes, or until the tenders are golden brown and wonderfully crispy. The internal temperature of the thickest part of the chicken should reach 160°F (71°C).
- Remove the tenders from the oven and allow them to rest for a couple of minutes before serving. This helps redistribute the juices for maximum tenderness. Garnish with some freshly chopped parsley (optional) for a fresh touch and serve immediately with your favorite dipping sauce. Enjoy!
Notes
- Always use a fully preheated oven to achieve the best crispiness.
- Ensure your chicken is thoroughly patted dry before coating to help the breading adhere better.
- Don’t forget to trim the tenders, removing any unwanted film and muscle strings for a better texture.
- For an even crispier result, lightly spritz the breaded tenders with cooking spray or olive oil before baking.
- To confirm your chicken is perfectly cooked, insert a meat thermometer into the thickest part; it should read 160°F (71°C).
- You can opt for either a seasoned mix or panko crumbs for the breading, with panko generally offering a superior crunch.
- Garnish with some chopped fresh parsley to add a beautiful pop of color and freshness.
Nutrition
Like this recipe? Rate and comment below!
