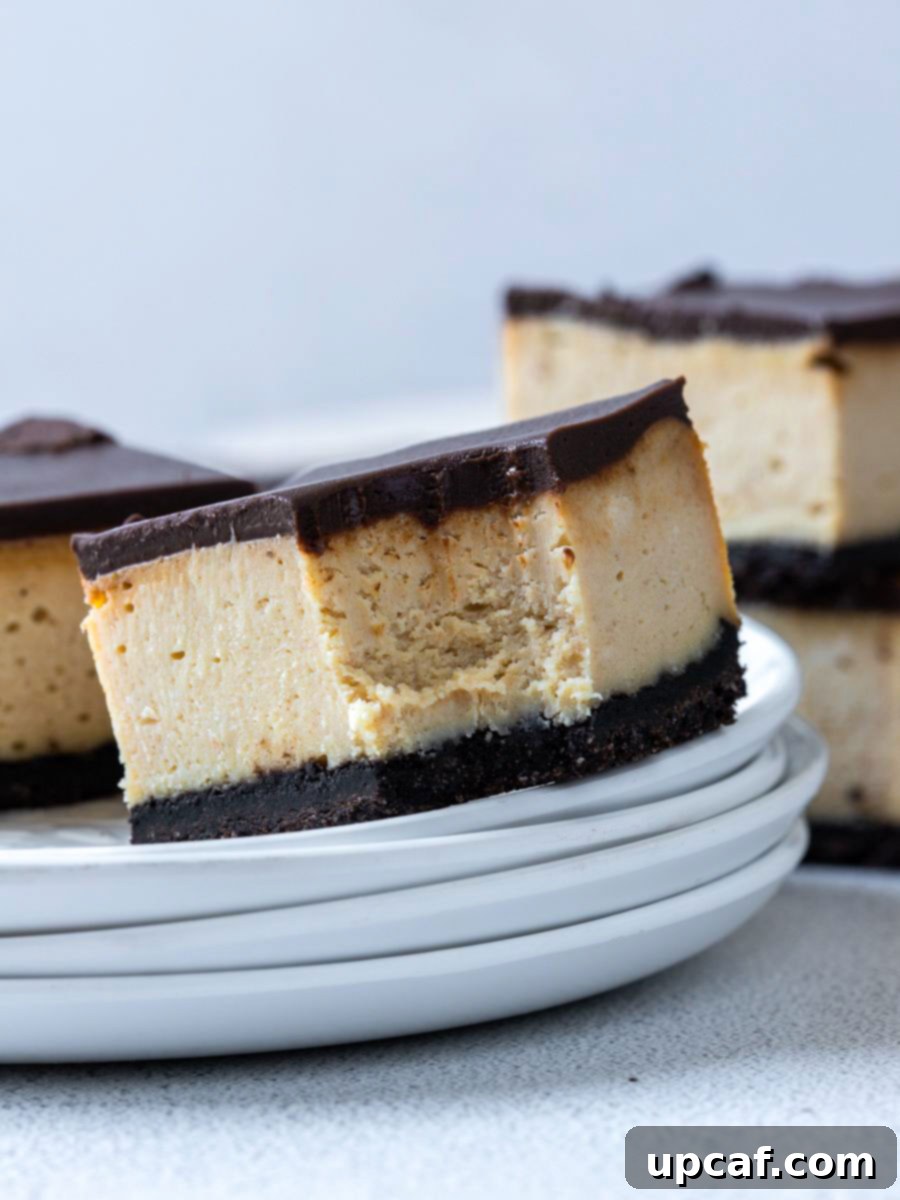
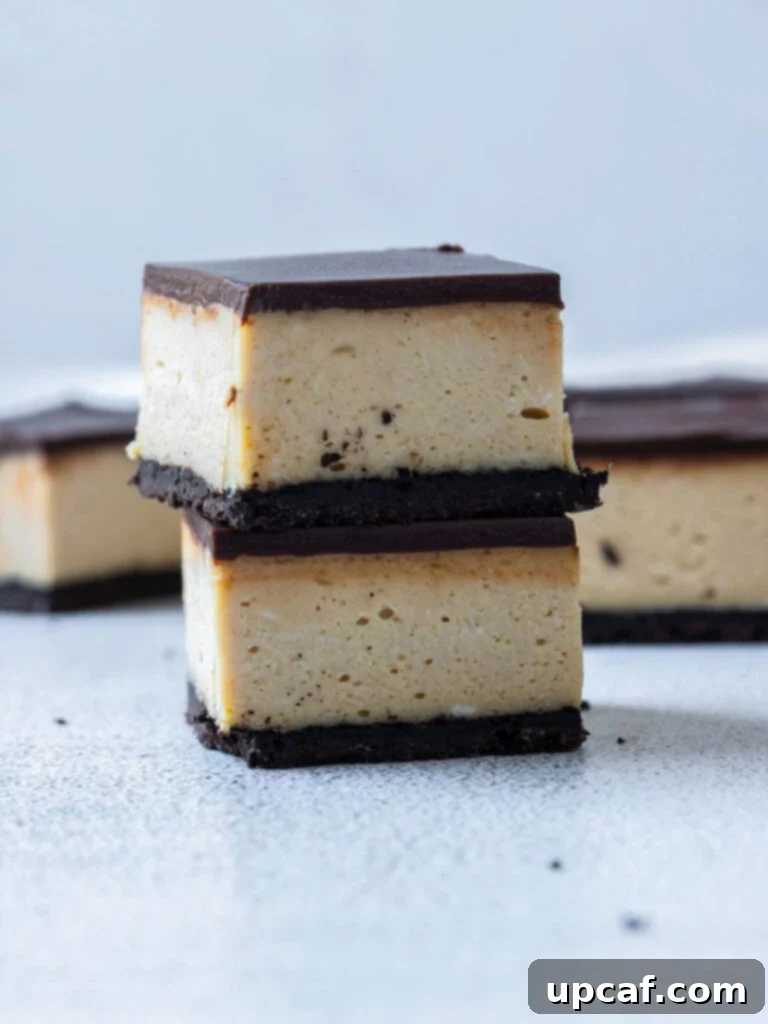
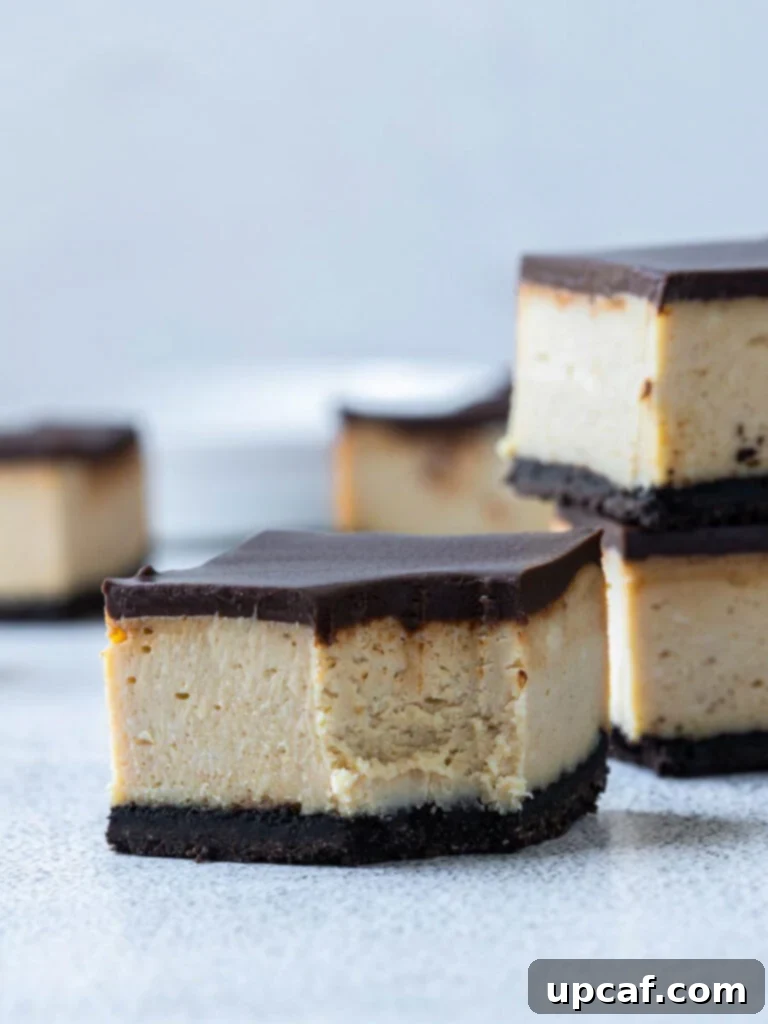
Prepare to indulge in a dessert that marries two of the world’s most beloved flavors: rich chocolate and creamy peanut butter. These Chocolate Peanut Butter Cheesecake Bars are not just a dessert; they’re an experience. Imagine the delightful taste of a peanut butter cup transformed into a sophisticated, yet incredibly easy-to-make, cheesecake. Each bar features a perfectly crumbly cookie crust, a luscious peanut butter cheesecake filling so smooth it melts in your mouth, and a decadent chocolate ganache topping that brings it all together in a symphony of flavors. This recipe is destined to become a staple for your family gatherings and a showstopper for any occasion.
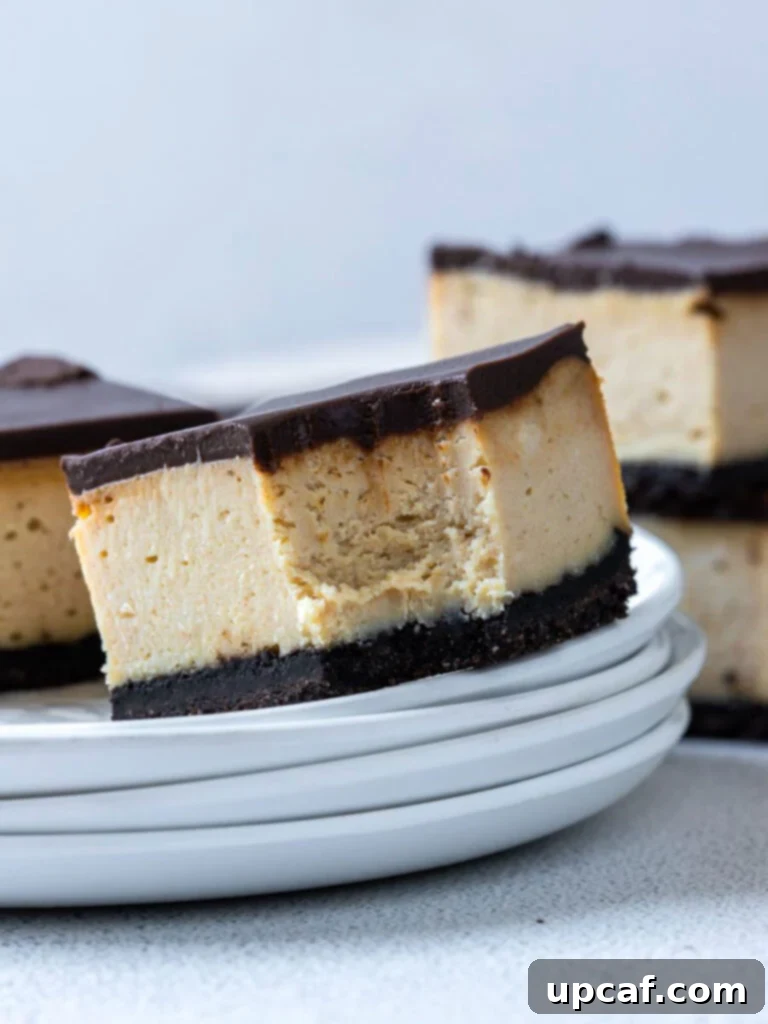
The combination of chocolate and peanut butter is an undeniable classic, and today, we’re elevating it to new heights by infusing it into a creamy cheesecake. What makes these Chocolate Peanut Butter Cheesecake Bars truly special is how effortlessly they come together. Despite their impressive appearance and irresistible taste, they are surprisingly simple to prepare, making them an ideal make-ahead dessert for busy hosts or anyone craving a luxurious treat without all the fuss.
If you’re on the hunt for more delightful and straightforward dessert recipes that impress with minimal effort, be sure to explore my other popular creations. You might love my Nutella Ice Cream, a creamy dream for hazelnut lovers, my Chocolate Peanut Butter Protein Balls for a healthier, yet equally satisfying bite, or my fun and nostalgic Oreo Ice Cream Sandwich.
Why You’ll Love These Decadent Peanut Butter Cheesecake Bars
These Chocolate Peanut Butter Cheesecake Bars aren’t just another dessert recipe; they offer a multitude of reasons to fall in love with them. Here’s why they’ll quickly become a favorite in your kitchen:
- Effortless Make-Ahead Dessert: Planning a party or need a sweet treat ready for a busy week? These cheesecake bars are your answer. They not only hold up beautifully in the refrigerator for 2-3 days but also travel incredibly well, making them perfect for potlucks, picnics, or gifting. Prepare them in advance and enjoy stress-free entertaining!
- A Dream for Peanut Butter Cup Fans: Every bite of these bars is reminiscent of your favorite chocolate peanut butter candy. The rich, nutty flavor of the peanut butter cheesecake, perfectly balanced with the sweet chocolate ganache, will transport you straight to candy heaven. Kids and adults alike will adore this nostalgic flavor profile.
- Remarkably Simple to Create: Don’t let the elegant presentation fool you. This recipe is designed to be accessible for bakers of all skill levels. With clear, step-by-step instructions, you’ll be able to create a professional-looking dessert with ease, even if you’re new to cheesecake making.
- Versatile Serving Options: While designed as convenient bars, you have the flexibility to serve this dessert in different ways. Cut them into traditional squares for individual servings, or if you prefer a classic cheesecake experience, slice them wider and serve them as wedges. The choice is yours!
- Irresistible Crowd-Pleaser: The combination of chocolate and peanut butter is a universally loved duo. These bars are guaranteed to be a hit at any gathering, eliciting smiles and compliments from everyone who tries them. They’re the ultimate dessert for impressing guests without hours of effort.
Essential Ingredients for Your Cheesecake Masterpiece
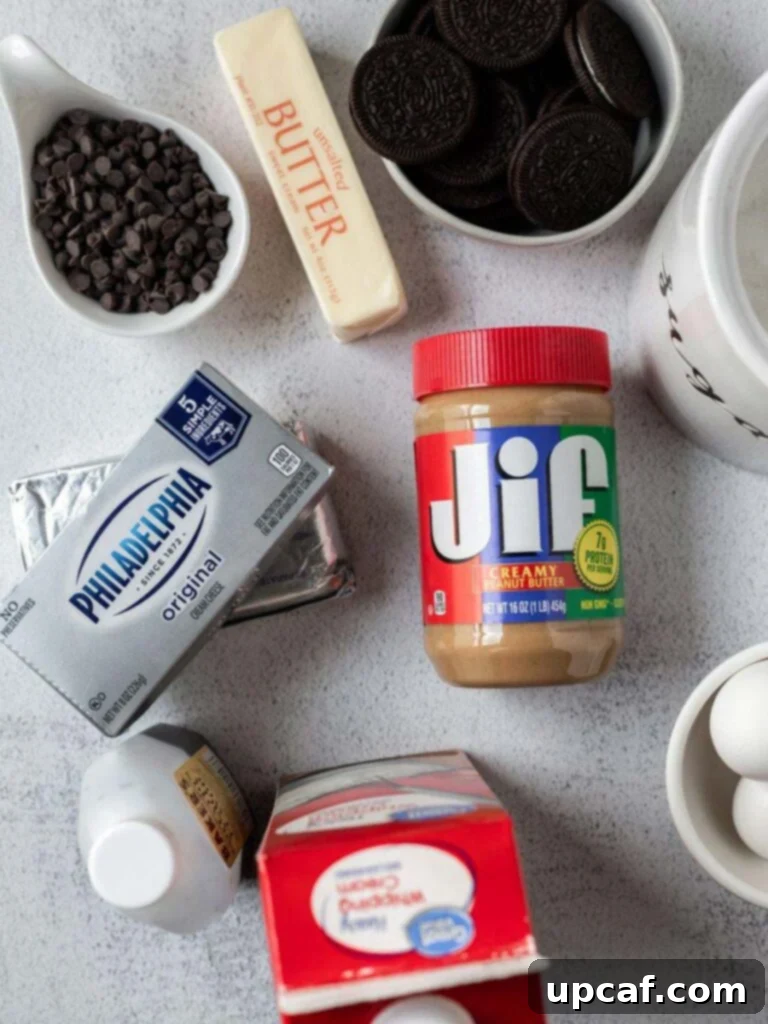
Crafting these extraordinary Chocolate Peanut Butter Cheesecake Bars requires a selection of high-quality ingredients, each playing a crucial role in achieving the perfect texture and flavor. Here’s a detailed look at what you’ll need:
For the Irresistible Cookie Crust
- Oreos: You’ll need about 25 Oreo cookies, finely crushed. The classic chocolate sandwich cookie provides a rich, dark base that perfectly complements the peanut butter filling. For best results, crush them to a fine crumb consistency using a food processor or by placing them in a zip-top bag and crushing with a rolling pin.
- Butter: Six tablespoons of unsalted butter, melted. Unsalted butter allows you to control the overall saltiness of the crust. Melting it helps bind the cookie crumbs together, creating a firm and flavorful base.
For the Creamy Peanut Butter Cheesecake Filling
- Cream Cheese: Three 8-ounce blocks of full-fat cream cheese, brought to room temperature. This is a critical step! Room temperature cream cheese will blend smoothly without lumps, ensuring a silky-smooth cheesecake texture.
- Granulated Sugar: One cup of granulated sugar adds the perfect amount of sweetness to balance the tang of the cream cheese and the richness of the peanut butter.
- Creamy Peanut Butter: One cup of creamy peanut butter. Opt for a classic, shelf-stable creamy peanut butter (like Jif or Skippy) for the best texture and consistency in your cheesecake. Natural peanut butter can sometimes separate and affect the cheesecake’s structure.
- Eggs: Three whole eggs, also brought to room temperature. Like the cream cheese, room temperature eggs emulsify better with the other ingredients, leading to a smoother, more uniform batter and preventing cracks during baking.
- Heavy Cream: One-third cup of heavy cream, at room temperature. Heavy cream adds richness and contributes to the cheesecake’s luscious, creamy texture.
- Vanilla Extract: One teaspoon of pure vanilla extract. Always use real vanilla extract, not artificial, for the most authentic and vibrant flavor that enhances all the other ingredients.
For the Decadent Chocolate Ganache Topping
- Heavy Cream: One-third cup of heavy cream. This will be heated to create the base for your rich ganache.
- Chocolate Chips: Two-thirds cup of your favorite chocolate chips. Semi-sweet or milk chocolate chips work wonderfully here, providing a smooth, glossy finish and a deep chocolate flavor that perfectly complements the peanut butter.
How to Make Peanut Butter Chocolate Cheesecake Bars: Step-by-Step Guide
Creating these delightful Chocolate Peanut Butter Cheesecake Bars is a rewarding process. Follow these detailed steps to ensure a flawless and delicious outcome every time:
Step 1: Prepare Your Oven and Baking Pan
Begin by preheating your oven to 350°F (175°C). Line a 9×9 inch baking pan with aluminum foil or parchment paper. Make sure to leave a generous overhang on the sides; this will act as “handles” later, allowing for incredibly easy removal of the chilled cheesecake from the pan.
Step 2: Craft the Perfect Cookie Crust
In a medium-sized bowl, combine your finely crushed Oreo cookies with the melted unsalted butter. Mix these ingredients thoroughly until the cookie crumbs are fully moistened and resemble wet sand. This ensures an even and flavorful crust. Once combined, firmly press this mixture into the bottom of your prepared 9×9 inch pan. Use the back of a spoon or a flat-bottomed glass to create a compact and even layer.
Step 3: Pre-Bake the Crust
Bake the prepared crust in the preheated oven for 10 minutes. This short bake time helps to set the crust, preventing it from becoming soggy once the filling is added. After baking, remove the pan from the oven and set it aside to cool completely while you prepare the filling. It’s crucial for the crust to be cool before adding the cheesecake mixture.
Step 4: Prepare the Creamy Peanut Butter Cheesecake Filling
Reduce your oven temperature to 325°F (160°C). In the bowl of a stand mixer fitted with the paddle attachment (or using a large bowl and a hand mixer), combine the room temperature cream cheese and granulated sugar. Beat on low speed until the mixture is completely smooth and free of any lumps, scraping down the sides of the bowl as needed. Next, add the creamy peanut butter and mix again until it’s fully incorporated and the mixture is uniform. Now, add the eggs one at a time, mixing just until each egg is combined. Overmixing at this stage can incorporate too much air, leading to cracks in your cheesecake. Finally, add the room temperature heavy cream and vanilla extract, mixing on low speed until just combined. The filling should be smooth and luscious.
Step 5: Bake the Cheesecake to Perfection
Gently pour the peanut butter cheesecake filling over the cooled, pre-baked crust in your prepared pan. Carefully transfer the pan to the oven. Bake for 30-40 minutes, or until the edges are set and appear slightly puffed, but the very center still has a slight jiggle when the pan is gently shaken. This “slight jiggle” indicates it’s perfectly cooked. Once baked, turn off the oven, but leave the cheesecake inside with the oven door propped open a few inches for another 30 minutes. This gradual cooling prevents drastic temperature changes that can cause cracks. After 30 minutes, remove the cheesecake from the oven and let it cool completely to room temperature on a wire rack.
Step 6: Chill for Optimal Texture
Once cooled to room temperature, carefully transfer the cheesecake (still in its pan) to the refrigerator. Chill for at least 4 hours, or ideally overnight. This chilling period is essential for the cheesecake to fully set, firm up, and develop its optimal creamy texture.
Step 7: Prepare the Silky Chocolate Ganache
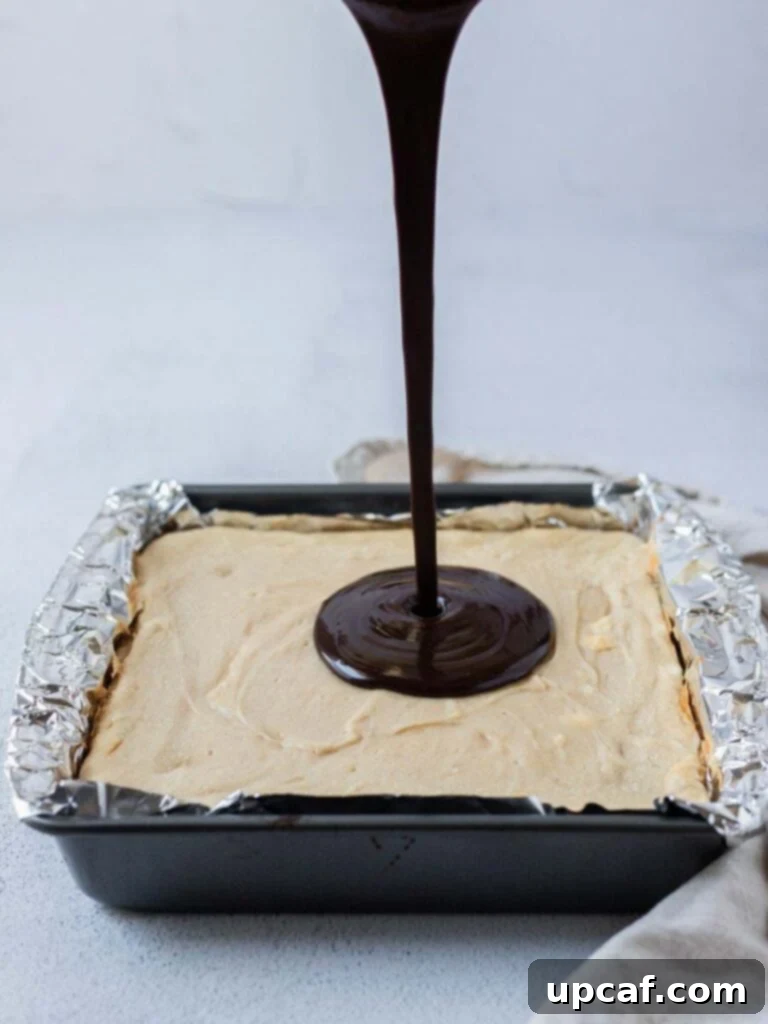
In a small saucepan, heat the heavy cream over medium heat until it just begins to boil and small bubbles appear around the edges. Immediately remove the saucepan from the heat and add the chocolate chips. Let the mixture sit undisturbed for five minutes; this allows the hot cream to melt the chocolate chips thoroughly. After five minutes, slowly and gently stir the chocolate and cream together using a whisk or spatula until the chocolate is fully melted and the ganache is smooth, glossy, and uniform. Allow the chocolate ganache to cool slightly, making it thicker and easier to spread. Then, pour it evenly over the chilled peanut butter cheesecake. Use an offset spatula or the back of a spoon to spread it edge to edge.
Step 8: Final Chill and Serve
Carefully place the cheesecake back into the refrigerator for approximately one hour, or until the chocolate ganache is completely set and firm. Once fully chilled and set, use the foil or parchment overhang to lift the entire cheesecake out of the pan. Place it on a cutting board and use a sharp knife (wiped clean between each cut) to slice it into 16 equal-sized bars. Serve immediately and watch them disappear!
Expert Tips for a Flawless Cheesecake Every Time
Achieving a picture-perfect cheesecake, especially one as rich as these Peanut Butter Chocolate Cheesecake Bars, can be simple with a few insider tips. Pay attention to these details to ensure your dessert turns out beautifully, free from common cheesecake woes:
- Ensure Room Temperature Ingredients: This is arguably the most crucial tip! Cream cheese, eggs, and heavy cream should all be at room temperature. Cold ingredients don’t emulsify properly, leading to a lumpy batter and a less smooth cheesecake texture. Plan ahead and take them out of the fridge at least 1-2 hours before you start baking.
- Avoid Overmixing the Filling: Once you add the eggs, mix only until just combined. Overmixing incorporates too much air into the batter, which can cause the cheesecake to puff up excessively during baking and then collapse, leading to unsightly cracks.
- Gradual Cooling is Key: The most common cause of cheesecake cracks is a sudden change in temperature. After baking, resist the urge to pull the cheesecake out of the hot oven immediately. The “oven off, door propped” method allows the cheesecake to cool slowly and evenly, preventing the edges from cooling and setting faster than the center, which causes tension and cracks.
- A Gentle Tap for Air Bubbles: After pouring the cheesecake filling into the crust, gently tap the pan on your countertop a few times. This simple action helps to release any trapped air bubbles, contributing to a smoother, denser texture and reducing the likelihood of surface cracks.
- Use a Water Bath (Optional, but Recommended for Traditional Cheesecakes): While not strictly necessary for cheesecake bars, for a truly creamy, crack-free whole cheesecake, a water bath provides a moist, even baking environment. Place your cheesecake pan inside a larger roasting pan, then fill the larger pan with hot water halfway up the sides of the cheesecake pan before baking. (Ensure your springform pan is well-wrapped in foil to prevent water seepage if making a whole cheesecake.)
- Chill Thoroughly: Patience is a virtue when it comes to cheesecake. The extended chilling time (at least 4 hours, preferably overnight) allows the cheesecake to fully set and firm up, resulting in clean slices and a superior texture. Don’t rush this step!
Troubleshooting Cheesecake Cracks: Don’t Despair!
Even with the best intentions and careful execution, cheesecakes can sometimes develop cracks. While following the tips above greatly reduces the risk, if you find yourself with a cracked surface, don’t worry for a second! This particular peanut butter cheesecake recipe is incredibly forgiving thanks to its luscious topping. The rich, chocolate ganache you pour over the top will beautifully conceal any imperfections, leaving you with a perfectly presentable and utterly delicious dessert. No one will ever know!
Storage and Freezing Tips for Lasting Freshness
These Chocolate Peanut Butter Cheesecake Bars are so delicious, you might not have any leftovers! But if you do, here’s how to properly store them to maintain their freshness and flavor:
- Storing Leftovers in the Refrigerator: Place any leftover peanut butter cheesecake bars in an airtight container. This prevents them from absorbing odors from other foods in your fridge and keeps them fresh. They will remain delicious for up to one week in the refrigerator.
- Freezing Individual Bars: For longer storage, these bars freeze beautifully. Wrap individual bars tightly in plastic wrap, then place them in an airtight freezer-safe container or a heavy-duty freezer bag. Frozen bars can be enjoyed for up to one month. Thaw them in the refrigerator for a few hours before serving.
- Freezing a Whole Cheesecake: If you’re planning to freeze an entire cheesecake, ensure it’s completely cooled and then remove it from the pan. Wrap the entire cheesecake tightly first in plastic wrap, then again in aluminum foil. Store it in an airtight freezer-safe container. A whole frozen cheesecake can last for up to three months. To thaw, transfer the wrapped cheesecake to the refrigerator overnight. Once thawed, you can add the ganache topping if you prefer to do so fresh.
Exciting Recipe Variations and Customizations
While these Chocolate Peanut Butter Cheesecake Bars are phenomenal as is, don’t hesitate to get creative! Here are some exciting variations and customization ideas to put your own spin on this classic:
- Crust Alternatives: While Oreos provide a fantastic chocolatey base, feel free to experiment. Graham cracker crumbs are a timeless choice for cheesecake, or consider vanilla wafers for a lighter flavor. For a crunchier texture, try shortbread cookies or even pretzels for a sweet and salty twist!
- Ganache Makeovers: The classic chocolate ganache is divine, but you can easily change it up. Substitute the chocolate chips with white chocolate chips for a luxurious white chocolate ganache, or use dark chocolate for a more intense chocolate experience. A sprinkle of sea salt on top of the ganache before it sets can also create a delightful salted chocolate peanut butter combination.
- Add-Ins for Extra Flavor and Texture: Elevate your cheesecake by incorporating additional ingredients into the filling or as a topping. Fold mini chocolate chips, chopped roasted peanuts, or even small peanut butter cups into the cheesecake batter before baking. After the ganache is set, sprinkle with chopped peanuts, mini chocolate chips, or crushed toffee bits for added crunch and visual appeal.
- Make it Extra Fancy: For an impressive presentation, garnish each bar with something special. You could make my Easy Chocolate Covered Strawberry recipe and place one elegant strawberry on top of each bar just before the ganache sets. A drizzle of extra melted peanut butter or a dollop of whipped cream also works wonders.
- Nut Butter Alternatives: If peanut allergies are a concern, or if you simply want to try something different, almond butter or cashew butter can be substituted for peanut butter in the filling, offering a subtly different nutty flavor.
More Delicious Desserts to Explore
If you’ve enjoyed making these cheesecake bars, you’ll love my other dessert recipes that are perfect for any occasion. Each offers unique flavors and textures to satisfy your sweet cravings:
- Mini Strawberry Cheesecakes: Bite-sized delights bursting with fresh strawberry flavor.
- Almond Joy Ice Cream: A homemade ice cream recipe inspired by the classic candy bar.
- Pistachio Bird Nest Baklava: A beautifully crafted, rich, and nutty Middle Eastern pastry.
- Lotus Biscoff Cheesecake: A creamy cheesecake featuring the irresistible caramel flavor of Biscoff cookies.
I sincerely hope you enjoy discovering and creating all the recipes I share with you, and especially this incredible Peanut Butter Chocolate Cheesecake Bar recipe. It’s a true labor of love to bring these delightful treats to your kitchen. I encourage you to try it, savor every bite, and share your experiences with friends and family!
If you try this recipe and love it, please consider sharing your creation on INSTAGRAM using my hashtag! You might even get featured in my story! Also, don’t forget to follow Cookin’ With Mima on FACEBOOK, INSTAGRAM, and PINTEREST for all my latest social updates, recipes, and culinary inspiration. Happy baking!
Chocolate Peanut Butter Cheesecake Bars
These Chocolate Peanut Butter Cheesecake Bars are so delightfully decadent and are like eating a peanut butter cup in cheesecake form! Layered with a delicious cookie crust, a creamy peanut butter cheesecake filling, and topped with a chocolate ganache, this is going to be a hit with your friends and family.
By: Mariam Ezzeddine
Prep Time: 30 minutes
Cook Time: 50 minutes
Additional Time (Chilling): 3 hours
Total Time: 4 hours 20 minutes
Servings: 16 bars
Ingredients
For the Crust:
- 25 pieces Oreos, finely crushed
- 6 tablespoons butter, melted
For the Filling:
- 3 (8 oz) blocks cream cheese, room temperature
- 1 cup granulated sugar
- 1 cup creamy peanut butter
- 3 whole eggs, room temperature
- 1/3 cup heavy cream, room temperature
- 1 teaspoon vanilla extract
For the Topping:
- 1/3 cup heavy cream
- 2/3 cup chocolate chips
Instructions
For the Crust:
- Preheat oven to 350°F (175°C). Line a 9×9 inch pan with foil or parchment paper, leaving an overhang on the sides for easy removal once cooled.
- In a small bowl, combine the crushed Oreos and melted butter. Mix until fully combined and the mixture has the texture of wet sand.
- Firmly press the crumbs into the bottom of the prepared pan, creating an even layer.
- Bake the crust for 10 minutes. Remove the pan from the oven and allow it to cool completely.
For the Filling:
- Turn the oven temperature down to 325°F (160°C).
- In the bowl of a stand mixer or a large bowl with a hand mixer, beat the room temperature cream cheese and sugar together on low speed until fully combined and smooth.
- Add the creamy peanut butter and mix until fully incorporated.
- Add the eggs one at a time, mixing well after each addition and scraping down the sides of the bowl as needed.
- Finally, add the room temperature heavy cream and vanilla extract, mixing just until fully combined. Do not overmix.
- Gently pour the cheesecake filling over the cooled crust in the pan.
- Bake the cheesecake bars for 30-40 minutes, or until only the center is slightly jiggly. Then, turn the oven off and allow the cheesecake to sit in the oven for an additional 30 minutes with the door propped open slightly. Allow to cool completely to room temperature before chilling.
- Transfer the cheesecake to the fridge and chill for at least 4 hours, or until thoroughly set.
For the Topping:
- Heat the heavy cream in a small saucepan over medium heat until it just begins to boil around the edges.
- Remove from heat and add the chocolate chips. Let it sit undisturbed for five minutes to allow the chocolate to melt.
- Slowly stir the chocolate until it is fully melted and the ganache is smooth and glossy.
- Let the chocolate ganache cool slightly to thicken, then pour it evenly over the chilled cheesecake. Spread evenly to cover the top.
- Place the cheesecake back into the fridge for about an hour, or until the ganache is completely set.
- Once the cheesecake is fully chilled and the ganache is firm, remove it from the fridge (using the foil overhang to lift it from the pan). Cut it into 16 equal-sized bars and serve.
Notes
- To help prevent cracks, gently tap your cheesecake pan on the countertop after pouring the filling to release any air bubbles.
- Avoid overmixing your cheesecake filling, especially after adding eggs, as this can incorporate too much air and cause cracks during baking.
- Resist the temptation to open the oven door while the cheesecake is baking, as sudden temperature changes can also lead to cracks.
- Storing Leftovers: Place leftover peanut butter cheesecake bars in an airtight container and store in the fridge. Enjoy within one week.
- Freezing Leftovers: Wrap individual bars tightly in plastic wrap, then place in an airtight container before freezing for up to one month.
- Freezing a Whole Cheesecake: Wrap the entire cheesecake tightly in plastic wrap and then foil, and store in an airtight container before freezing for up to three months. Thaw overnight in the refrigerator.
Nutrition
Serving: 16 bars | Calories: 339kcal | Carbohydrates: 31g | Protein: 9g | Fat: 21g | Saturated Fat: 8g | Cholesterol: 58mg | Sodium: 329mg | Potassium: 195mg | Fiber: 1g | Sugar: 22g | Vitamin A: 332IU | Calcium: 93mg | Iron: 1mg
