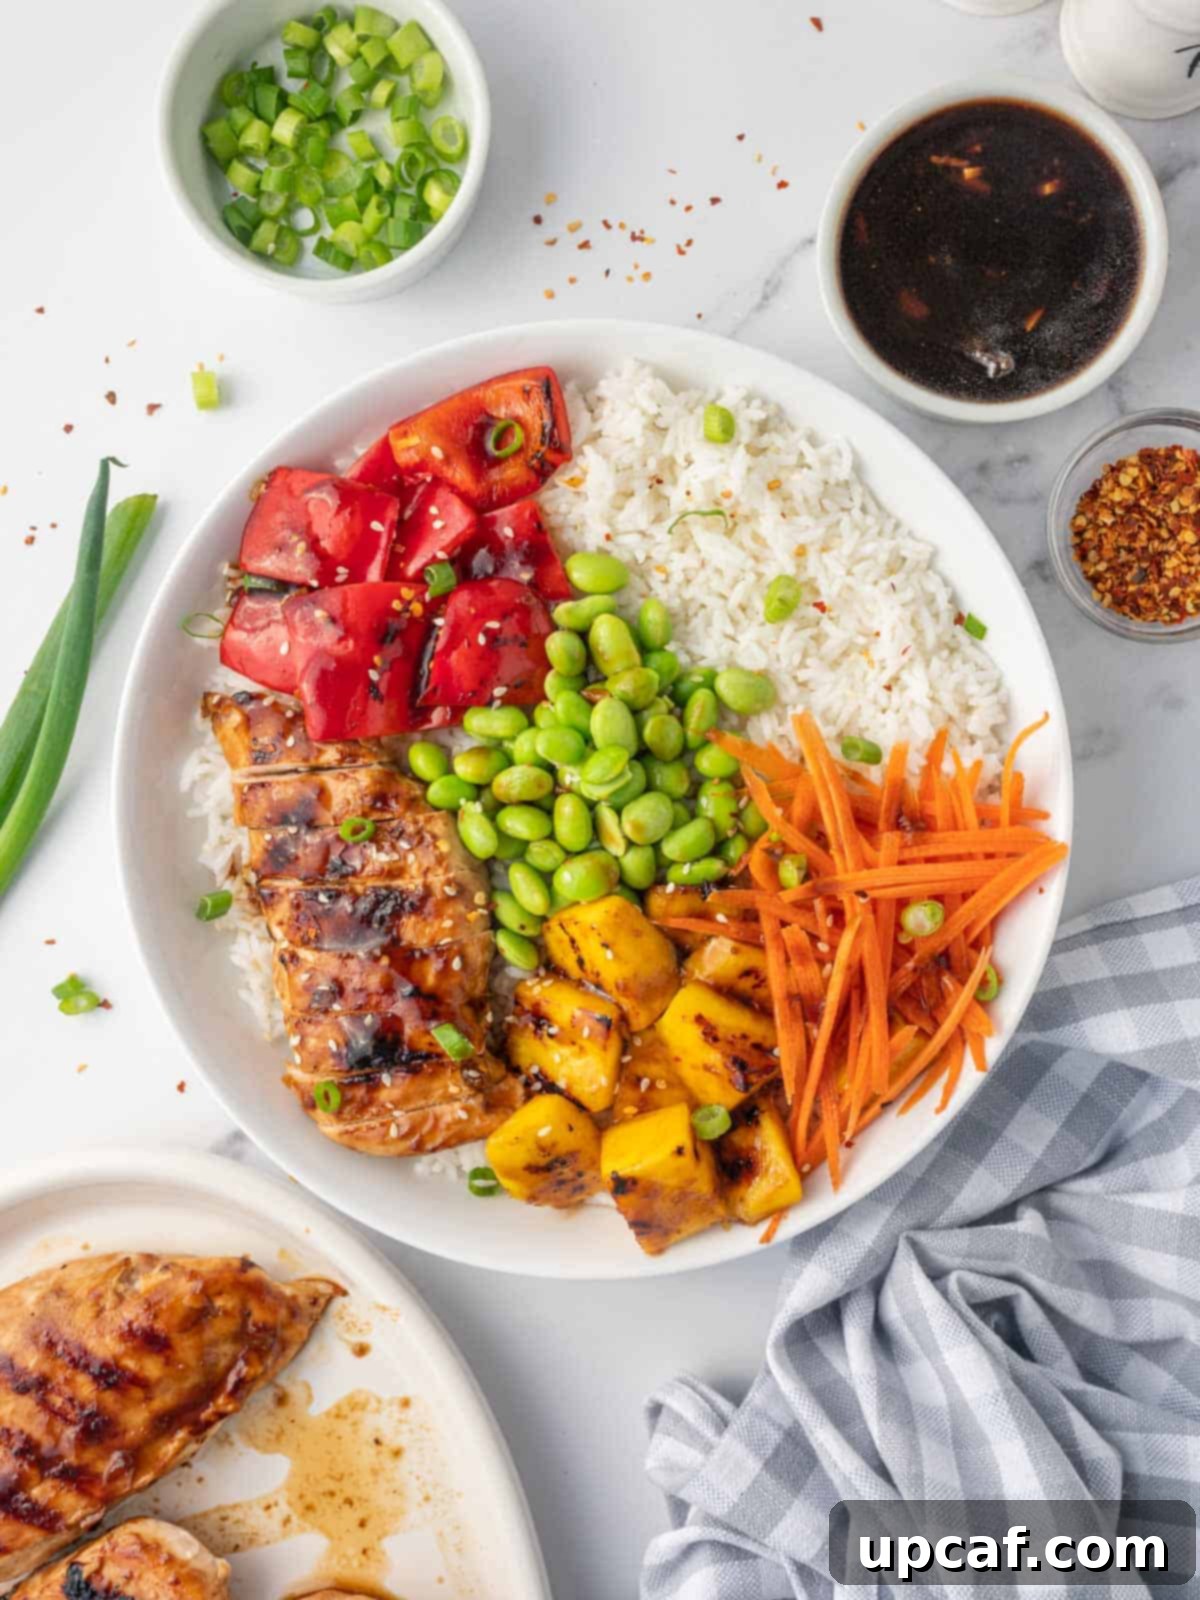
Transform your weeknight dinner routine with this irresistible Homemade Teriyaki Chicken Bowl. Bursting with authentic Asian flavors, this dish features succulent, marinated chicken, fluffy rice, vibrant vegetables, and a luscious, homemade teriyaki sauce that’s simply unmatched. Forget takeout; this recipe brings the delightful experience of a restaurant-quality meal right to your kitchen, offering a healthier and more satisfying alternative that’s surprisingly easy to prepare. Once the chicken is marinated to perfection, this flavorful bowl comes together in just about 20 minutes, making it an ideal choice for busy weeknights when you crave something wholesome and delicious without spending hours in the kitchen.
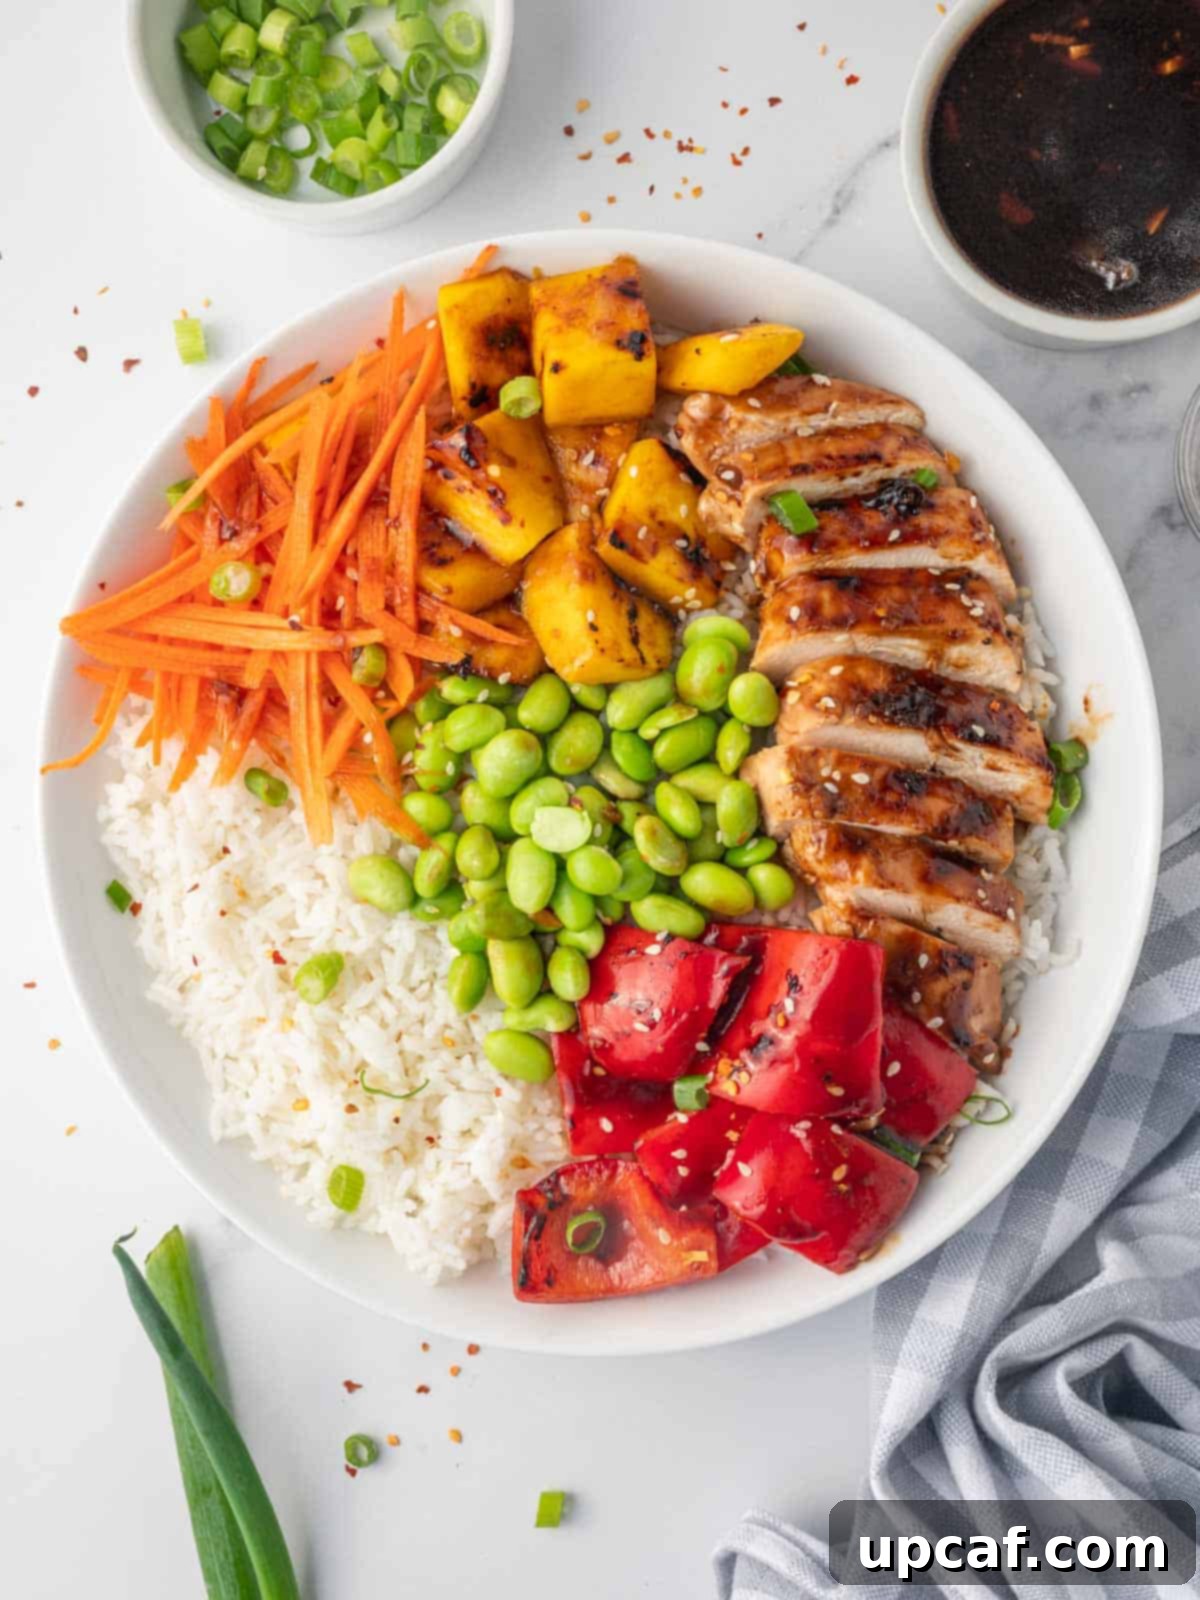
The true star of this Teriyaki Chicken Rice Bowl is undoubtedly the rich, glossy, and perfectly balanced homemade teriyaki sauce. Crafted from simple pantry staples, this sauce is incredibly easy to whip up and delivers a depth of umami and a hint of sweetness that elevates every component of the dish. I often make a double batch, keeping extra on hand to drizzle over grilled chicken, pan-seared salmon, or stir-fried vegetables throughout the week, instantly adding a gourmet touch to any meal. The boneless, skinless chicken is marinated, then expertly sautéed until it achieves a tender, juicy texture and a beautiful caramelized finish. Served alongside your favorite fluffy rice and a medley of fresh, crisp vegetables like sweet mango and crunchy bell peppers, each spoonful offers a harmonious blend of textures and tastes. For an explosion of flavor, be generous with that extra homemade teriyaki sauce – it’s what truly binds the bowl together, creating an unforgettable dining experience.
If you’re a fan of rice-based dishes and Asian cuisine, you might also enjoy these other delightful recipes: Chinese Vegetable Fried Rice, a quick and satisfying meal; Spicy Salmon Crispy Rice, a textural delight with a kick; or Spicy Salmon and Rice Egg Rolls, a creative take on classic flavors. Each offers a unique way to enjoy fresh ingredients and vibrant seasonings.
Why This Homemade Teriyaki Chicken Bowl Will Become Your New Favorite
There are countless reasons why this Teriyaki Chicken Bowl is poised to become a staple in your culinary repertoire. It’s not just a meal; it’s a convenient, flavorful, and adaptable solution for modern kitchens.
- Quick & Effortless Preparation: In today’s fast-paced world, finding time for elaborate cooking can be a challenge. This teriyaki chicken recipe shines with its efficiency. By simply preparing the marinade in advance – perhaps the night before or even in the morning – you significantly cut down on active cooking time. Once the chicken has had a chance to soak up all those incredible flavors, the rest of the meal comes together in a remarkable 20 minutes, making it perfect for those hectic weeknights when you need a satisfying and speedy dinner.
- An Explosion of Flavor: Prepare your taste buds for a symphony of flavors! The star, our homemade teriyaki sauce, is a masterpiece of umami, offering a complex blend of savory, sweet, and tangy notes that coat every piece of chicken. When combined with the natural sweetness of fresh mango, the crispness of bell peppers, and the comforting foundation of rice, you create a dish that is not only balanced but also deeply satisfying and universally loved. It’s a flavor profile that appeals to nearly everyone, even the pickiest eaters.
- Endless Customization Options: This recipe is a canvas for your culinary creativity. Whether you prefer a mild flavor or a fiery kick, adjusting the spice level is incredibly simple. Don’t eat chicken? Easily swap it out for shrimp, beef, tofu, or even hearty portobello mushrooms. Want to add more greens? Broccoli, snap peas, asparagus, or carrots can be incorporated with ease, allowing you to tailor each bowl to your personal preferences, dietary needs, or whatever fresh produce you have on hand. It’s a versatile dish that never gets boring.
- A Healthier Alternative to Takeout: Enjoying your favorite Asian-inspired flavors doesn’t have to mean compromising on health. By making your teriyaki chicken bowl at home, you gain complete control over the ingredients. You can opt for low-sodium soy sauce, reduce the sugar content, and load up on fresh, wholesome vegetables, transforming a typically high-calorie, high-sodium takeout option into a nutritious and balanced meal.
- Perfect for Meal Prep: This dish is a dream come true for meal preppers. The individual components – cooked chicken, rice, and even the sauce – can be prepared ahead of time and stored separately. When lunchtime or dinner rolls around, simply assemble your bowl for a fresh, delicious, and convenient meal. It’s an excellent way to ensure you have healthy, homemade options readily available throughout your busy week.
Essential Ingredients for Your Ultimate Teriyaki Chicken Rice Bowl
Crafting the perfect Teriyaki Chicken Rice Bowl begins with selecting quality ingredients. Here’s a breakdown of what you’ll need, along with tips for optimal flavor and potential substitutions:
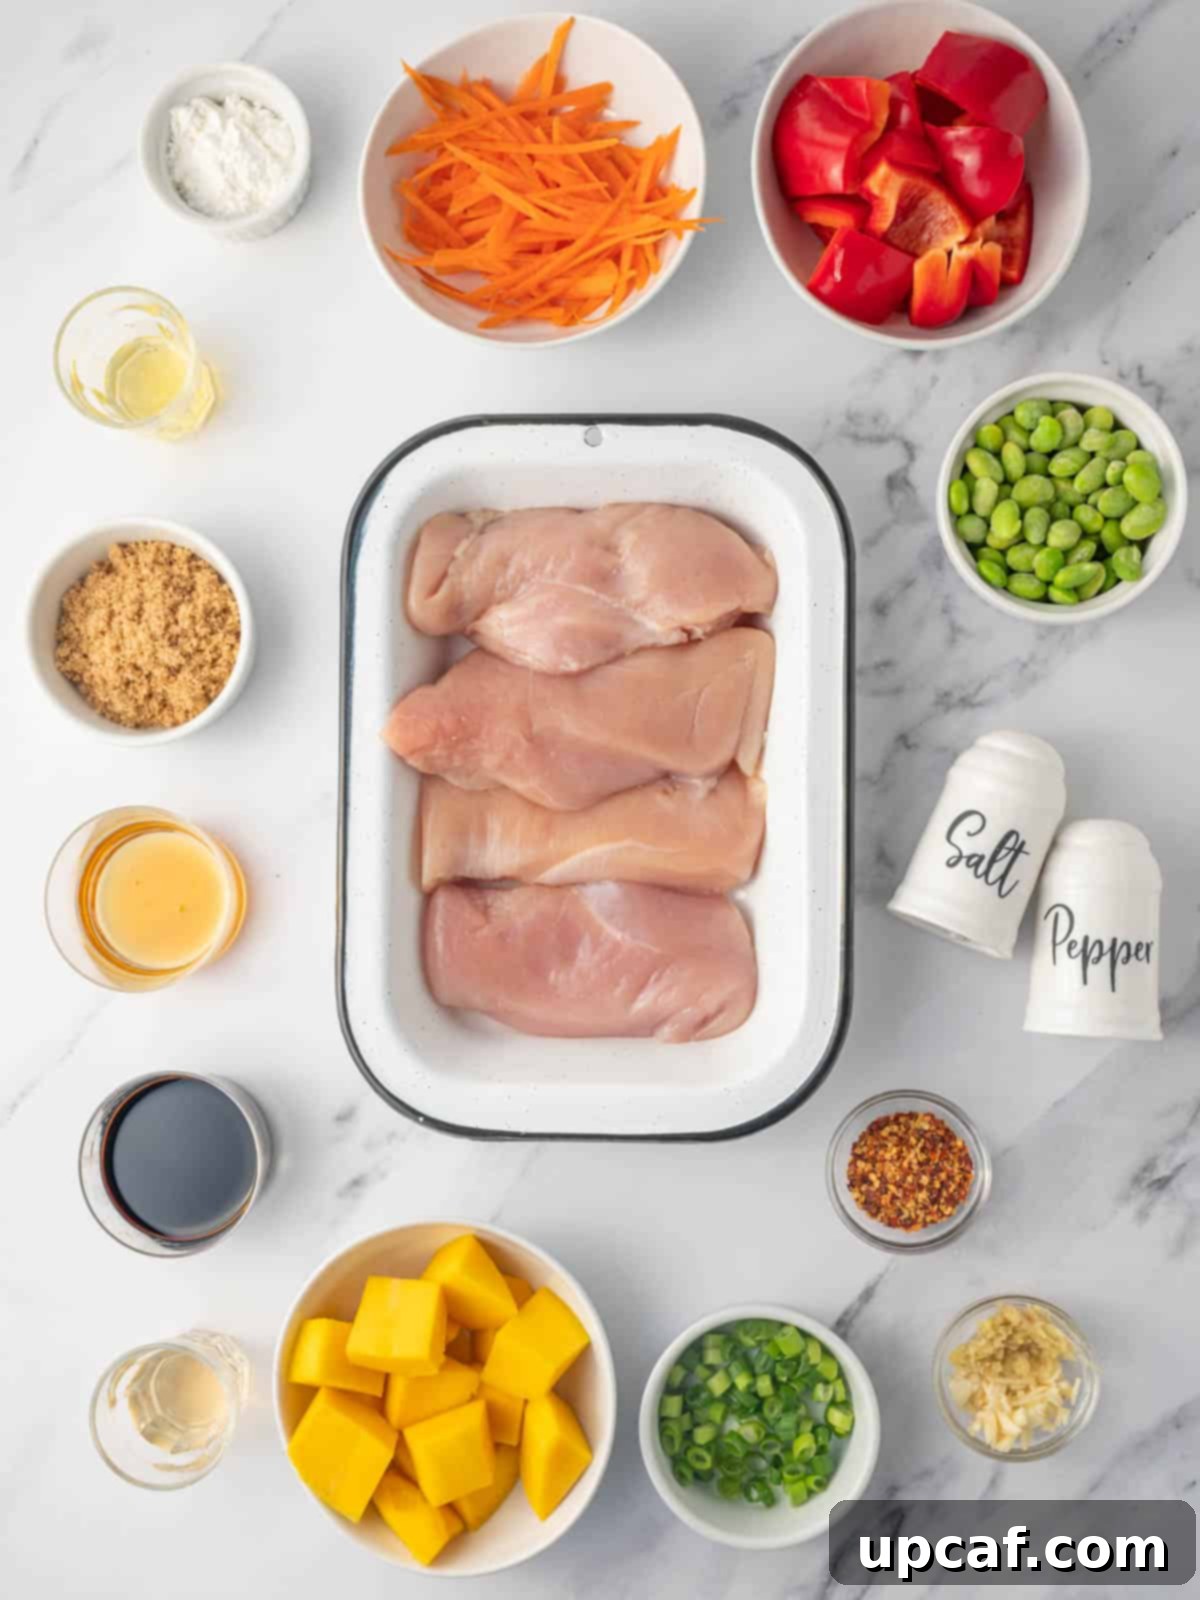
For the Homemade Teriyaki Sauce:
- Soy Sauce: The backbone of any good teriyaki. For a healthier option and better control over sodium levels, always choose a low-sodium soy sauce. Alternatively, you can use tamari for a gluten-free version, or coconut aminos/liquid aminos for a soy-free alternative, though the flavor profile may vary slightly.
- Water: Used to thin the sauce to the desired consistency without diluting the flavor.
- Brown Sugar: Adds a crucial depth of sweetness and helps achieve that signature glossy finish. Both light or dark brown sugar work well, with dark brown sugar offering a slightly richer molasses flavor. Honey can be used as a natural sweetener alternative.
- Rice Vinegar: Provides a subtle tang and balances the sweetness of the sugar. Its mild, slightly sweet acidity is key to authentic teriyaki flavor. If unavailable, apple cider vinegar can be substituted, but use slightly less as it’s more pungent.
- Sesame Oil: Essential for its distinctive nutty aroma and flavor. This ingredient is difficult to substitute without significantly altering the taste of the sauce, so it’s highly recommended not to skip it.
- Fresh Ginger: Use freshly grated ginger for the most vibrant and aromatic flavor. It adds a warm, spicy note that’s integral to Asian cooking. Keep leftover ginger in the freezer for extended freshness; simply grate from frozen when needed.
- Fresh Garlic: Like ginger, freshly minced garlic offers the best flavor depth. Avoid garlic powder if possible for this recipe.
- Cornstarch Slurry: A simple mixture of water and cornstarch (often 2 tablespoons water + 2 teaspoons cornstarch) is crucial for thickening the sauce to that perfect, spoon-coating consistency. Without it, your sauce will be watery.
- Seasoning: A pinch of salt and freshly ground black pepper to taste will enhance all the flavors in your sauce.
For Assembling the Bowl:
- Chicken: Boneless, skinless chicken breasts are lean and cook quickly. For a richer flavor and juicier texture, boneless, skinless chicken thighs are an excellent substitute. Cut them into bite-sized pieces for even cooking and easy eating.
- Rice: The foundation of your bowl. Use 2 cups of your favorite cooked rice, such as fragrant jasmine rice, nutty brown rice, or even quinoa for a gluten-free, higher-protein option.
- Mango: Adds a wonderful tropical sweetness and soft texture. Cut fresh mango into cubes. Fresh pineapple chunks can be used as a delicious alternative.
- Bell Peppers: Provide a crisp texture and vibrant color. Red bell peppers are sweet and visually appealing, but any color (yellow, orange, green) will work equally well. Cut them into cubes to match the mango.
- Toppings for Garnish and Extra Flavor:
- Edamame: Adds a pop of green, a slightly firm texture, and a boost of plant-based protein.
- Shredded Carrot: For crunch, color, and a hint of earthy sweetness.
- Green Onions: Finely sliced green onions (scallions) provide a fresh, pungent bite and visual appeal.
- Sesame Seeds: Toasted sesame seeds offer a delicate nutty flavor and a satisfying textural contrast.
- Red Chili Flakes: For those who enjoy a little heat, a sprinkle of crushed red pepper flakes will add a pleasant warmth. Adjust to your personal spice preference.
Step-by-Step Guide: Crafting Your Perfect Teriyaki Chicken Bowl
Creating this delicious Teriyaki Chicken Bowl is a straightforward process, broken down into a few key steps. Follow along to achieve a perfectly balanced and flavorful meal.
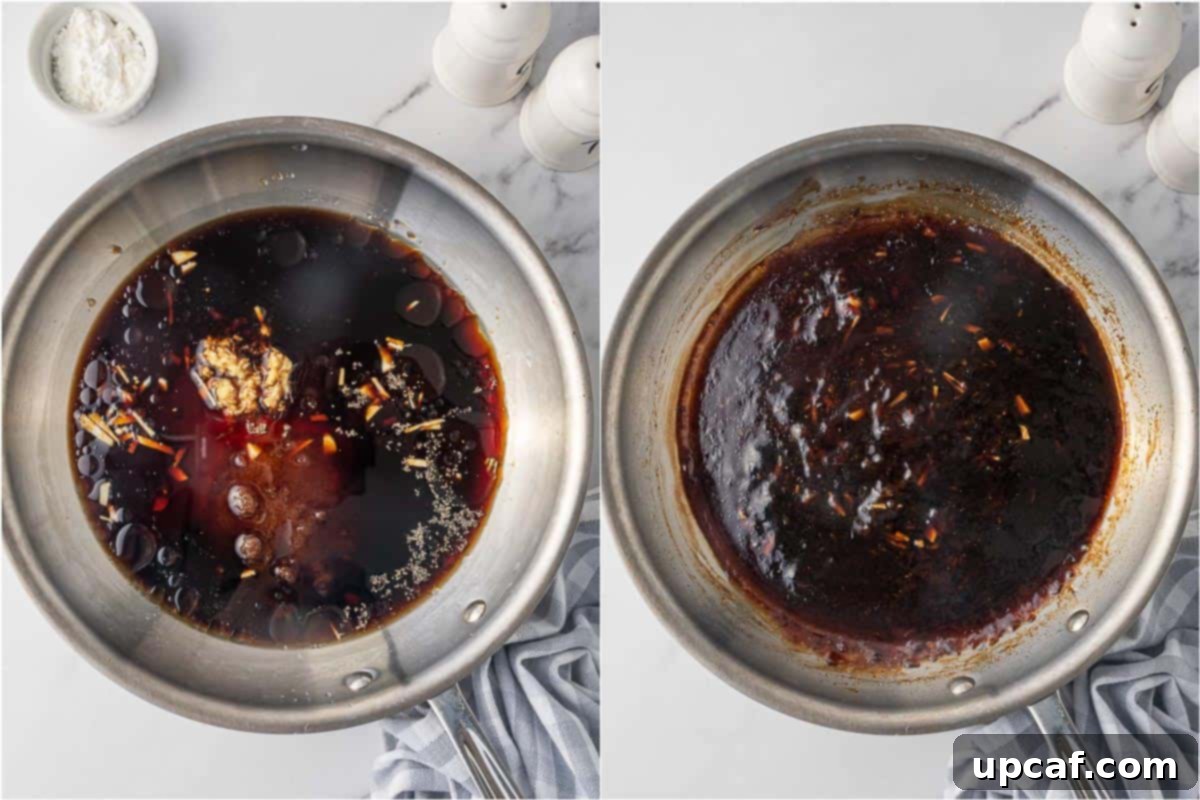
- Prepare the Homemade Teriyaki Sauce: Begin by heating a medium-sized skillet over a medium flame. Add the soy sauce, water, brown sugar, rice vinegar, sesame oil, freshly grated ginger, and minced garlic to the skillet. Whisk gently to combine the ingredients. Bring the mixture to a rolling boil, then immediately whisk in the cornstarch slurry (a pre-mixed combination of cornstarch and water). Stir continuously as the sauce begins to thicken. Season the sauce to taste with salt and freshly ground pepper. Allow it to simmer for 3-4 minutes, until it reaches a beautiful, glossy, and spoon-coating consistency. Remove from heat and let the teriyaki sauce cool down completely. This cooling step is important before using it to marinate the chicken.
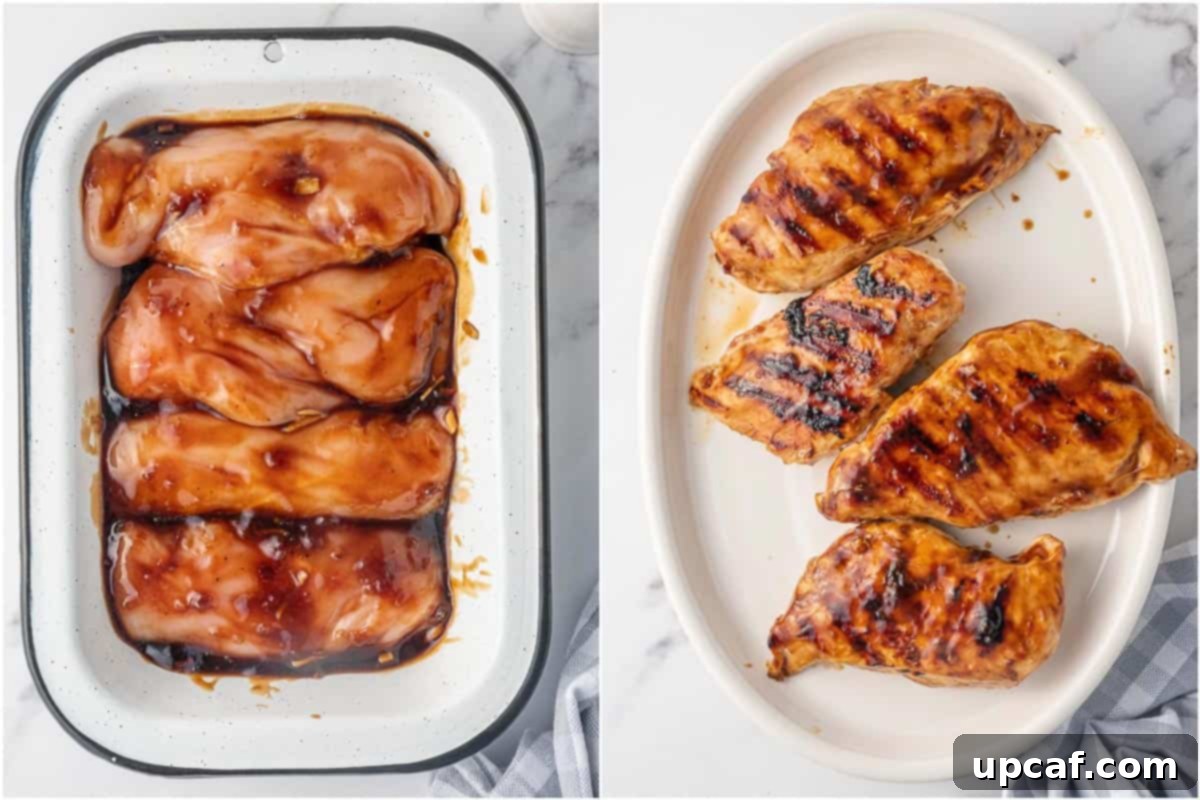
- Marinate the Chicken: Slice the boneless, skinless chicken breasts into bite-sized pieces or thin cutlets, whichever you prefer for your bowl. In a clean bowl, combine the chicken with half of the freshly prepared teriyaki sauce. Ensure all chicken pieces are well coated. For the best flavor infusion, allow the chicken to marinate for a minimum of 1 hour in the refrigerator. For an even deeper flavor, you can marinate it overnight.
- Cook the Chicken: Preheat your griddle or grill pan over medium-high heat. Once hot, carefully place the marinated chicken pieces onto the cooking surface. Cook for approximately 8-10 minutes, flipping the chicken halfway through, until it is cooked through, golden brown, and slightly caramelized. Avoid overcrowding the pan, as this can steam the chicken instead of searing it. Work in batches if necessary.
- Rest the Chicken: Once the chicken is cooked, transfer it to a plate. Tent it loosely with foil and allow it to rest for at least 5-10 minutes. This crucial step helps the juices redistribute, resulting in more tender and succulent chicken.
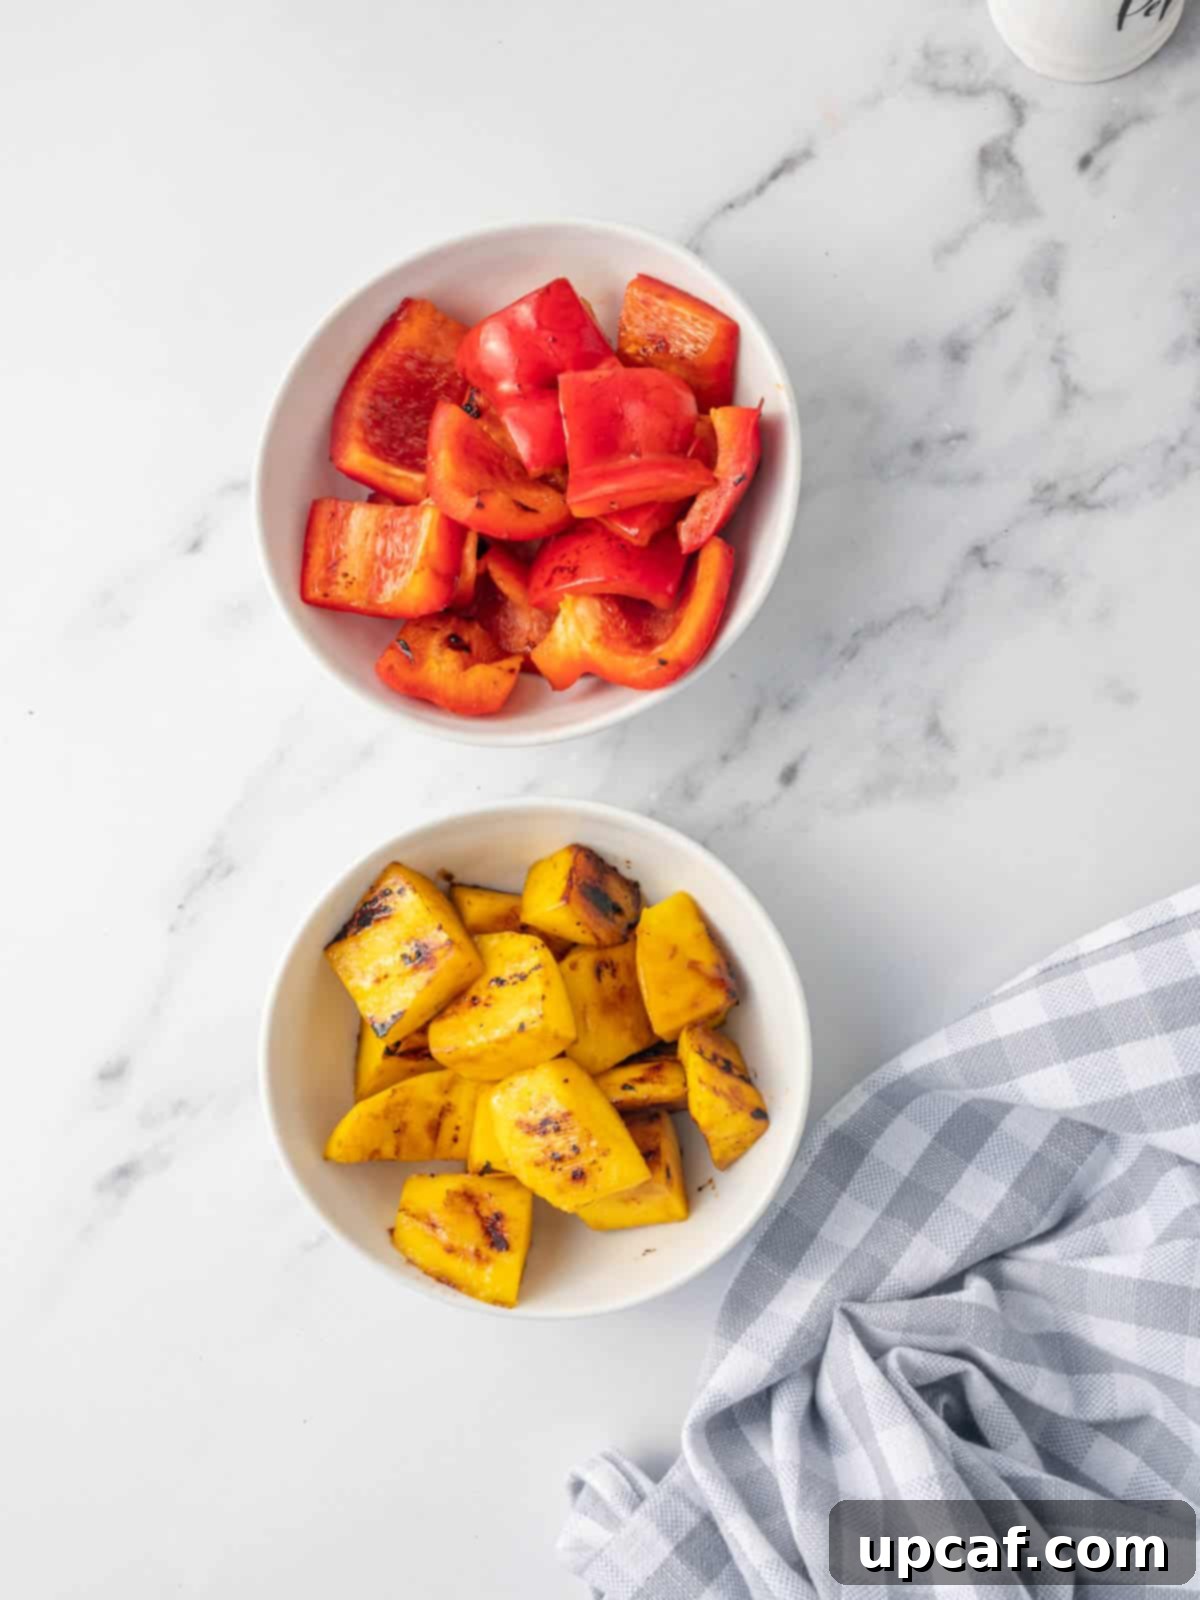
- Sauté the Mango and Peppers: While the chicken is resting, use the same griddle or a separate pan. Add the cubed mango chunks and bell peppers. Sauté them for about 2 minutes, just until they are slightly softened but still retain a bit of their crispness. This quick sauté enhances their natural sweetness and gives them a lovely charred flavor. Once done, set them aside.
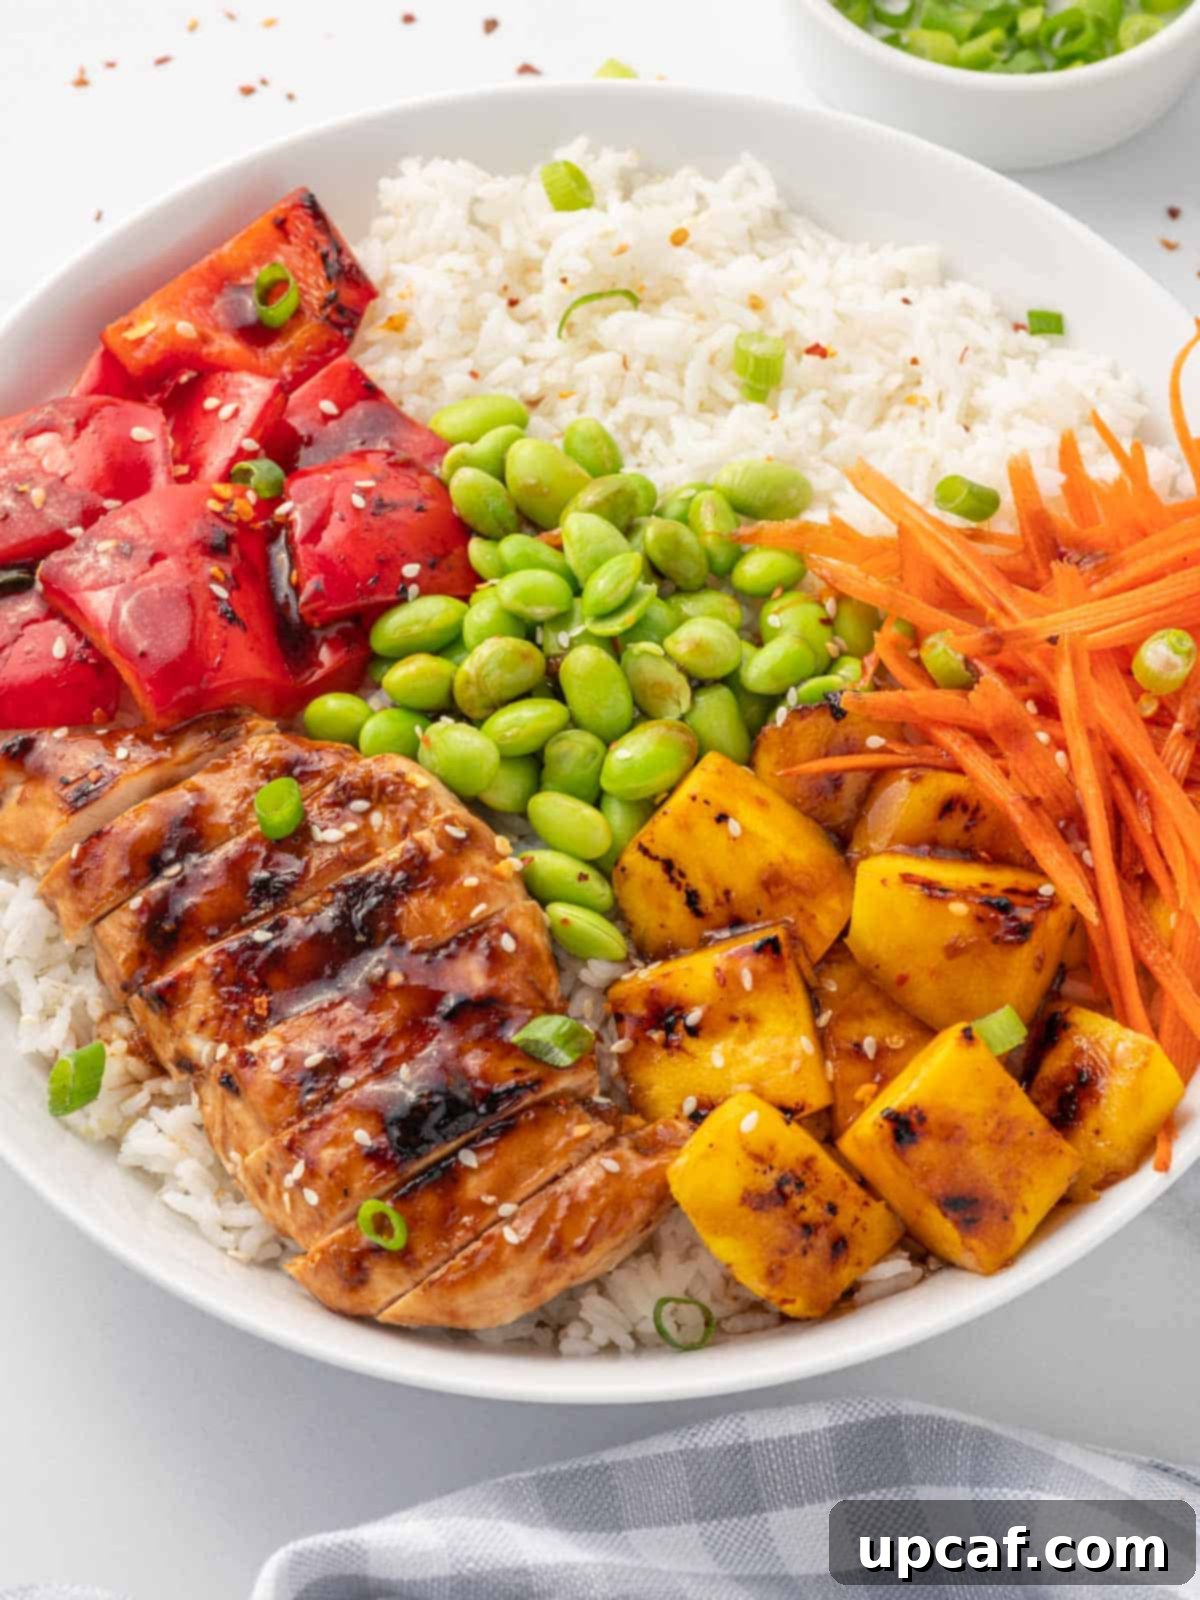
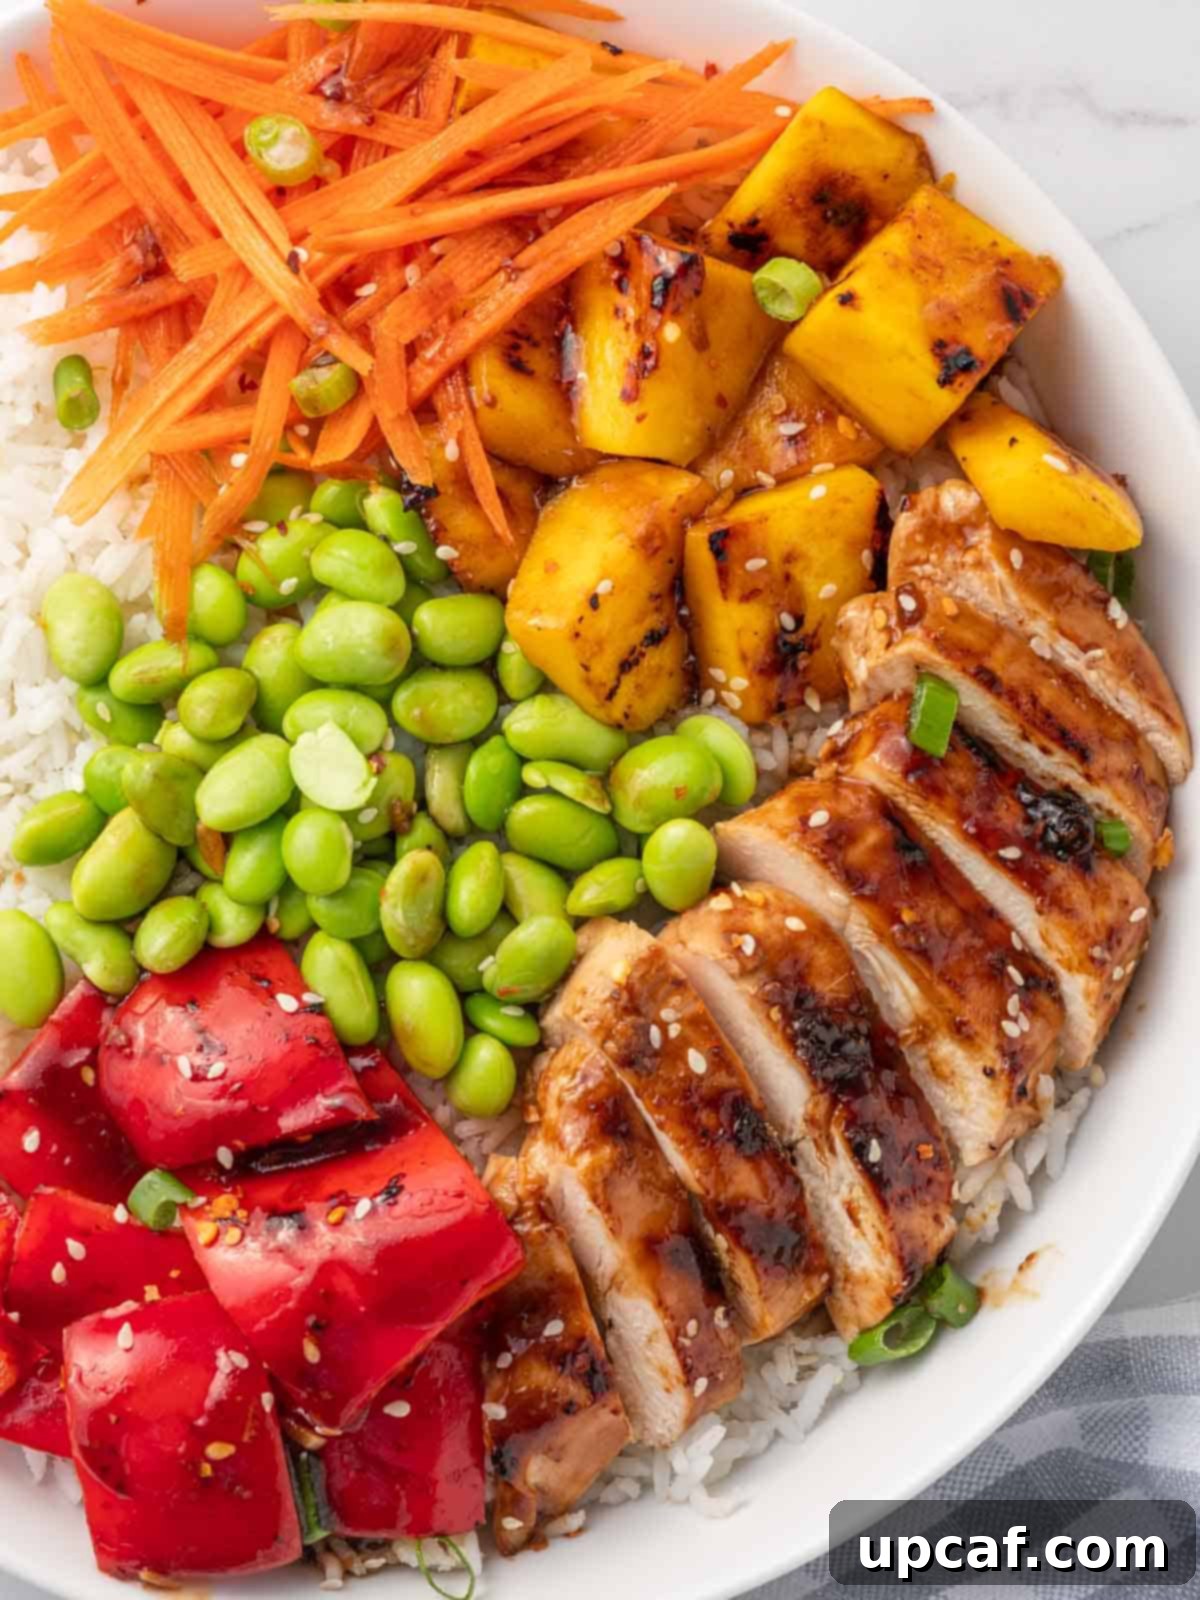
- Assemble Your Teriyaki Chicken Bowl: It’s time to build your masterpiece! Start by placing a generous layer of your favorite cooked rice (jasmine or brown rice work wonderfully) in the bottom of a serving bowl. Neatly arrange the sliced teriyaki chicken over the rice. Next, add the sautéed mango, bell peppers, a handful of edamame, and shredded carrots.
- Garnish and Serve: Drizzle the remaining reserved teriyaki sauce generously over all the components of the bowl. Finish with a sprinkle of fresh green onions, toasted sesame seeds, and a dash of crushed red chili flakes if you enjoy a touch of heat. Serve immediately and savor the incredible homemade flavors!
Expert Tips for the Most Flavorful Teriyaki Chicken Bowl
Achieving a truly outstanding Teriyaki Chicken Bowl is simple with these expert tips and tricks:
- Maximize Marinade Time: For chicken that’s incredibly tender and bursting with flavor, allow it to marinate in the homemade teriyaki sauce for at least 1 hour. For an even more profound depth of taste, consider marinating it overnight (up to 12 hours) in the refrigerator. This longer soak time truly allows the chicken to absorb all the delicious notes of the sauce.
- Don’t Overcrowd the Pan: When cooking your chicken, resist the urge to pack too many pieces into the pan or skillet. Overcrowding lowers the pan’s temperature, causing the chicken to steam rather than sear and caramelize. Cook in batches if necessary, ensuring each piece gets a beautiful, golden-brown crust. This is crucial for texture and flavor.
- Utilize a Non-Stick Pan: The rich, sugary teriyaki sauce can easily stick to traditional pans. Using a good quality non-stick pan or a well-seasoned cast-iron skillet will prevent sticking, ensure even cooking, and make cleanup significantly easier.
- Sweetness Adjustment: Homemade sauce means full control! The sweetness of your teriyaki sauce can be easily adjusted to your preference. If you like it less sweet, reduce the amount of brown sugar slightly. If you prefer a sweeter profile, add a touch more. Taste and adjust as you go!
- Embrace Customization: This bowl is designed for personalization. Get creative with your toppings and vegetables! Beyond what’s listed, consider adding steamed broccoli florets, snap peas, sliced cucumbers, or even sautéed mushrooms. For fresh herbaceous notes, chopped cilantro can be a wonderful addition alongside green onions and sesame seeds.
- Double the Sauce for Future Meals: Teriyaki sauce is incredibly versatile. Make a double batch of the homemade sauce and store the extra in an airtight container in the refrigerator for up to a week. It’s fantastic for quick drizzles over grilled meats, seafood, or roasted vegetables, making future meal prep a breeze.
- Garnish Just Before Serving: For optimal freshness, texture, and visual appeal, add your garnishes (such as green onions, sesame seeds, and chili flakes) just before serving. This ensures they remain crisp and vibrant.
- Explore Protein Alternatives: While chicken is classic, don’t hesitate to swap it out for other proteins. Sliced beef (like flank or sirloin), tender shrimp, firm tofu cubes, or even flaky salmon fillets all pair wonderfully with teriyaki sauce. Remember to adjust cooking times accordingly based on the protein you choose to ensure it’s cooked perfectly.
- Mindful Rice Choice: While jasmine rice is fragrant and fluffy, brown rice offers more fiber and a nuttier flavor. You can also use cauliflower rice for a low-carb alternative.
Frequently Asked Questions About Teriyaki Chicken Bowls
Absolutely! While I am a firm believer in the superior flavor and quality of homemade teriyaki sauce, especially for controlling ingredients like sodium and sugar, using a premade bottled teriyaki sauce is a perfectly acceptable time-saver. Just be sure to choose a high-quality brand you enjoy, and keep an eye on the ingredient list for hidden sugars or excessive sodium. You might also want to enhance it with a bit of fresh ginger or garlic if it tastes a little bland.
Yes, definitely! This recipe is incredibly adaptable. Instead of boneless, skinless chicken breast, you could easily use chicken tenders for a quicker cooking time, or boneless, skinless chicken thighs for a richer, juicier result. Thighs are often more forgiving and less prone to drying out. Beyond chicken, feel free to substitute with beef (like flank steak or sirloin), tofu (pressed and cubed), shrimp, or even salmon fillets for a delicious seafood variation. Adjust cooking times accordingly for different proteins.
Rice bowls can be an incredibly healthy and balanced meal, offering a great combination of protein, complex carbohydrates, and essential vitamins from vegetables. However, their healthfulness largely depends on the ingredients and preparation. Many store-bought or restaurant versions can be high in sodium, sugar, and unhealthy fats. Making your teriyaki chicken bowl at home allows you to take control: use low-sodium soy sauce, reduce the amount of brown sugar in your homemade teriyaki sauce, and pack it full of fresh vegetables. This way, you can enjoy a delicious meal that supports your health goals.
While these rice bowls are truly best enjoyed fresh, leftovers can be a fantastic meal prep option. Allow the components to cool completely before storing. Covered tightly in an airtight container, the prepared bowl will stay fresh in the refrigerator for 3-4 days. To reheat, simply microwave until warm through. For best results, you might want to add a splash of water or a little extra teriyaki sauce to prevent the rice from drying out during reheating.
I generally recommend freezing only the cooked teriyaki chicken, and then preparing fresh rice and vegetables when you’re ready to assemble a new bowl. Rice tends to become dry and less appealing in texture after being frozen and reheated, and many vegetables can turn mushy. The cooked chicken, however, freezes beautifully in an airtight container or freezer bag for up to 3-6 months. Thaw it in the refrigerator overnight before reheating and assembling your fresh bowl.
The beauty of this meal is its all-in-one nature! Each bowl provides a balanced combination of protein, complex carbohydrates, and a generous portion of vegetables and fruit. Therefore, it truly stands alone as a complete meal. If you’re looking to expand the spread, a light side salad with a ginger-sesame dressing, a warm bowl of miso soup, or some simple pickled ginger can complement the flavors beautifully.
Explore More Delicious Teriyaki Creations
If you’ve fallen in love with the rich, savory-sweet flavors of teriyaki, you’re in luck! There’s a whole world of teriyaki-inspired dishes to explore. Expand your culinary horizons with these other fantastic recipes:
- Teriyaki Chicken Meatballs: Perfect as an appetizer or served with rice for a hearty meal.
- Grilled Teriyaki Chicken Skewers: Ideal for summer grilling or a festive gathering.
- Chicken Teriyaki Stir Fry: A quick and versatile dish packed with vegetables.
- Baked Teriyaki Salmon: A healthier option that’s both elegant and flavorful.
- Teriyaki Salmon Stir Fry: Another great way to enjoy salmon with the delightful teriyaki sauce.
- Spicy Teriyaki Chicken with Broccoli: For those who love a little heat with their savory meal.
- Teriyaki Shrimp: A fantastic quick-cooking seafood option.
I genuinely hope you enjoy discovering and creating all the recipes I share with you, and this delicious Teriyaki Chicken Bowl recipe is no exception. It’s a dish that brings comfort, flavor, and convenience to your table. Please give it a try, savor every bite, and if you love it, consider leaving a star rating and sharing your thoughts below. Your feedback truly helps! Don’t forget to use my hashtag if you share your delicious recreations on Instagram – I’d love to see them! For all my latest social posts, kitchen tips, and new recipes, be sure to follow Cookin’ With Mima on FACEBOOK, INSTAGRAM, and PINTEREST.

Teriyaki Chicken Bowl
Mariam Ezzeddine
20 minutes
20 minutes
40 minutes
4
Ingredients
For making teriyaki sauce
- ⅓ cup low-sodium soy sauce
- ⅓ cup water
- 3 tablespoons brown sugar
- 1 tablespoon rice vinegar
- 1 teaspoon sesame oil
- 1 teaspoon grated ginger
- 1 teaspoon minced garlic
- 2 tablespoon water + 2 teaspoons cornstarch (for slurry)
- ½ teaspoon salt
- ½ teaspoon ground pepper
For the bowl
- 1.5 lb boneless skinless chicken breasts
- 2 cups cooked rice
- 1 cup mango, cut into cubes
- 1 cup red bell peppers, cut into cubes
- 1 cup edamame
- 1 cup carrot, shredded
- 2 tablespoons green onions, sliced
- 2 teaspoons sesame seeds
- 1 teaspoon crushed red chili flakes (optional)
Instructions
- Heat a skillet over medium flame. Add soy sauce, water, brown sugar, rice vinegar, sesame oil, ginger, and garlic. Bring it to a rolling boil, then whisk in the cornstarch slurry (cornstarch + water). Season with salt and pepper. The mixture will begin to thicken; simmer for 3-4 minutes until glossy. Allow the teriyaki sauce to cool down completely.
- In a bowl with the chicken breasts (cut into preferred size), pour half of the prepared teriyaki sauce. Marinate the chicken for at least 1 hour in the refrigerator, or overnight for enhanced flavor.
- Place the marinated chicken breasts on a preheated griddle or grill pan. Cook for 8-10 minutes, turning halfway through, until the chicken is cooked through and lightly charred.
- Once cooked, transfer the chicken to a plate and allow it to rest for 10 minutes. This helps keep the chicken juicy.
- Meanwhile, add the mango chunks and bell peppers to the same griddle or a clean pan. Cook for 2 minutes until slightly softened but still vibrant. Once done, set them aside.
- Assemble the Teriyaki chicken bowl: place a layer of cooked rice in a serving bowl. Top the rice with sliced teriyaki chicken, grilled mango, grilled bell peppers, edamame, and shredded carrots.
- Drizzle the reserved teriyaki sauce generously over the bowl. Garnish with sliced green onions, sesame seeds, and crushed red chili flakes before serving.
Notes
- Allow the chicken to marinate in the homemade teriyaki sauce for at least 1 hour or overnight to enhance the flavors significantly.
- Avoid overcrowding the pan or skillet when cooking the chicken; this ensures proper browning and caramelization rather than steaming.
- Use a non-stick pan to prevent the teriyaki sauce from sticking and to simplify cleanup.
- Adjust the sweetness of your homemade teriyaki sauce by varying the amount of brown sugar according to your preference.
- Customize your bowl with additional toppings and vegetables. Consider steamed broccoli, snap peas, sliced cucumbers, or chopped cilantro for extra freshness and nutrients.
- Consider doubling the teriyaki sauce recipe. The extra sauce can be stored in the refrigerator and used for drizzling or as a marinade for other grilled meats and seafood later in the week.
- For the best presentation and texture, garnish your Teriyaki Chicken Bowl just before serving.
- Experiment with different proteins such as beef, shrimp, tofu, or salmon. Remember to adjust the cooking time to match your chosen protein.
Nutrition
Calories:
455
kcal
|
Carbohydrates:
50
g
|
Protein:
45
g
|
Fat:
8
g
|
Saturated Fat:
1
g
|
Polyunsaturated Fat:
2
g
|
Monounsaturated Fat:
2
g
|
Trans Fat:
0.02
g
|
Cholesterol:
109
mg
|
Sodium:
1290
mg
|
Potassium:
1192
mg
|
Fiber:
5
g
|
Sugar:
19
g
|
Vitamin A:
7189
IU
|
Vitamin C:
67
mg
|
Calcium:
96
mg
|
Iron:
3
mg
