Transform your dinner routine with this irresistible Creamy Caesar Chicken recipe, a phenomenal reimagining of the classic Caesar salad, but without the greens! Forget everything you thought you knew about Caesar, because this dish delivers an explosion of flavor in every bite. Each piece of chicken is incredibly crispy on the outside, yet unbelievably tender and juicy within, promising a melt-in-your-mouth experience that will leave you craving more. What makes this recipe even better is its simplicity, relying on common pantry staples that you likely already have on hand. Get ready to whip up this creamy, comforting chicken masterpiece tonight and impress your family with a meal that’s both quick and gourmet-tasting.
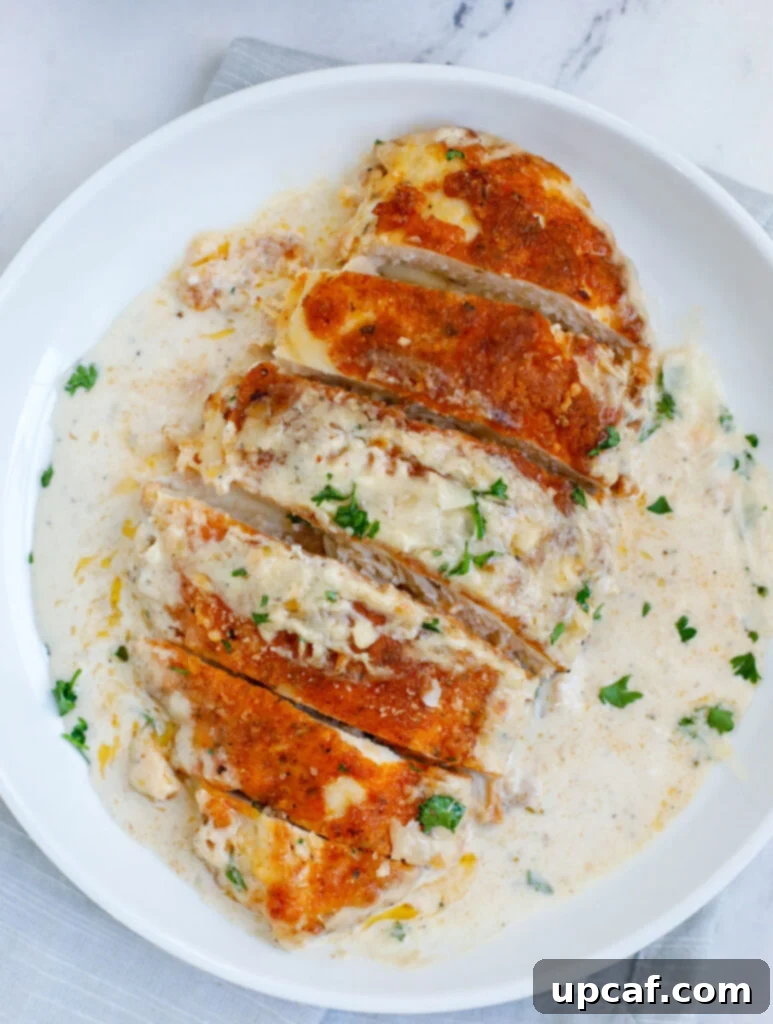
My kitchen is a place of constant experimentation, especially when it comes to easy and creamy chicken recipes – a true family favorite! This particular creation, born from a desire to capture all the incredible flavors of a Chicken Caesar salad while skipping the leafy greens, turned out to be an absolute winner. We’ve managed to infuse the chicken with an abundance of rich, creamy goodness that elevates it beyond a simple weeknight meal. It’s a dish that embodies comfort, flavor, and convenience, making it a perfect addition to your culinary repertoire. If you’re like us and always on the lookout for more delightful chicken dishes, don’t miss out on exploring other beloved recipes such as my Easy Orange Chicken Recipe, the comforting Easy Creamy Mushroom Chicken, or the bright and zesty Lemon & Garlic Chicken. Each offers a unique flavor profile but shares the same commitment to ease and deliciousness.
Why You’ll Adore This Creamy Caesar Chicken
This isn’t just another chicken recipe; it’s a culinary experience designed for maximum enjoyment with minimal fuss. Here’s why this Creamy Caesar Chicken is destined to become a regular in your meal rotation:
- Unforgettable Flavor Profile: Who can resist the alluring tang and savory depth of a classic Caesar dressing? This recipe takes that beloved flavor and transforms it into a luscious, velvety sauce that generously coats every piece of crispy chicken. Each bite is a symphony of garlic, Parmesan, and a signature Caesar zest that is so incredibly good, you’ll be tempted to lick your plate clean! It’s robust, creamy, and wonderfully satisfying.
- Remarkably Quick Dinner Solution: In today’s fast-paced world, finding meals that are both delicious and quick is a game-changer. This Caesar chicken clocks in at under 30 minutes from start to finish, making it an ideal choice for busy weeknights. Whether you’re juggling after-school activities, late work meetings, or just craving a speedy yet satisfying dinner, this recipe ensures a fantastic meal without the long wait.
- Smart Use of Pantry Staples: There’s nothing more frustrating than starting a recipe only to realize you’re missing several key ingredients. This dish is a lifesaver for those last-minute meal decisions because it relies heavily on ingredients you likely already stock in your kitchen. Chicken, flour, eggs, common spices, and a good bottle of Caesar dressing are typically all you need, proving that extraordinary meals don’t require extraordinary shopping lists.
- Family-Friendly Appeal: This dish is a guaranteed crowd-pleaser for all ages. The rich, creamy sauce and tender chicken are a hit with both adults and children, making mealtime smoother and more enjoyable for everyone. It’s a sophisticated twist on a familiar flavor that even picky eaters will love.
- Versatile and Adaptable: While incredible on its own, this Creamy Caesar Chicken serves as a fantastic foundation for various culinary creations. Serve it with your favorite sides, incorporate it into wraps, or enjoy it over pasta – the possibilities are endless, ensuring you can easily adapt it to suit different tastes and preferences.
Essential Ingredients for Creamy Caesar Chicken
Gathering your ingredients is the first step towards creating this culinary delight. Here’s a detailed look at what you’ll need to make this flavorful dish:
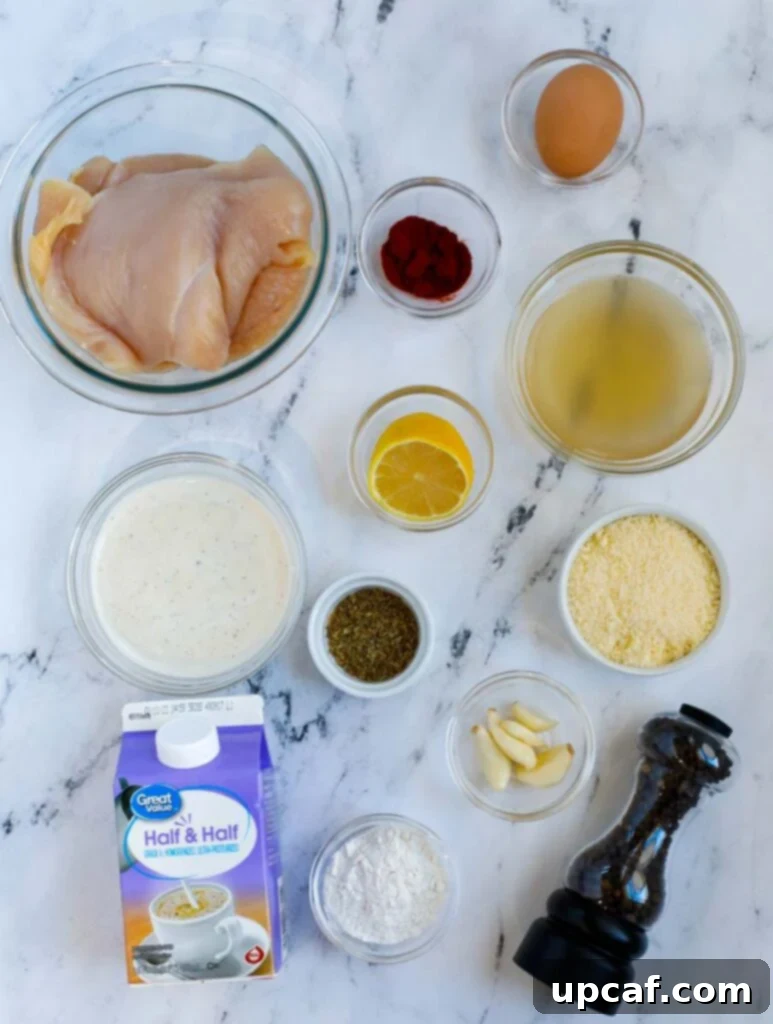
For the Crispy Chicken
- Chicken Breasts: Two large chicken breasts, horizontally sliced into four thinner cutlets. Thinner chicken cooks faster and crisps up beautifully, ensuring tenderness with every bite.
- Parmesan Cheese: Finely grated for the breading, contributing a savory, cheesy crust that enhances flavor and texture.
- All-Purpose Flour: The base for our crispy coating, helping the seasonings adhere to the chicken and creating a golden crust.
- Seasoning Blend: A harmonious mix of dry oregano (for earthy notes), Spanish paprika (for a hint of smokiness and color), salt, and freshly ground black pepper (to season the chicken perfectly).
- Egg: One whole egg, whisked, acts as a binding agent for the breading, ensuring a uniform and crispy coating.
- Olive Oil: Light-tasting olive oil is ideal for pan-searing the chicken to a perfect golden brown, without overpowering its flavor.
For the Luscious Caesar Sauce
- Garlic: Three cloves, minced, forming the aromatic heart of the sauce. Fresh garlic is key for the best flavor.
- Dry Oregano: ½ teaspoon, adding a subtle herbaceous layer that complements the rich Caesar notes.
- Black Pepper: ½ teaspoon, freshly ground, for a touch of warmth and spice that balances the creaminess.
- Half and Half: One cup, providing the rich, creamy base for our decadent sauce.
- Chicken Broth: One cup, preferably low sodium, to control the overall saltiness of the dish and add depth.
- Salt: ½ teaspoon, adjust to taste, ensuring the sauce is perfectly seasoned.
- Caesar Dressing: ¾ cup of your favorite creamy Caesar dressing. For optimal results, choose a high-quality, creamy (not chunky) refrigerated brand like Litehouse, known for its superior taste and texture.
- Parmesan Cheese: ¼ cup, grated, to be incorporated into the sauce for extra richness and an authentic Caesar flavor boost.
For the Perfect Garnish
- Fresh Parsley: Chopped, for a vibrant pop of color and fresh herbal aroma that brightens the dish.
- Grated Parmesan Cheese: A final sprinkle for a beautiful presentation and an extra layer of savory goodness.
How to Craft Creamy Caesar Chicken: Step-by-Step
Follow these straightforward steps to create a truly memorable Creamy Caesar Chicken dinner:
- Prepare Your Workspace and Oven: Begin by preheating your oven to 400°F (200°C). This ensures it’s ready for the final baking step, allowing the cheese to brown beautifully.
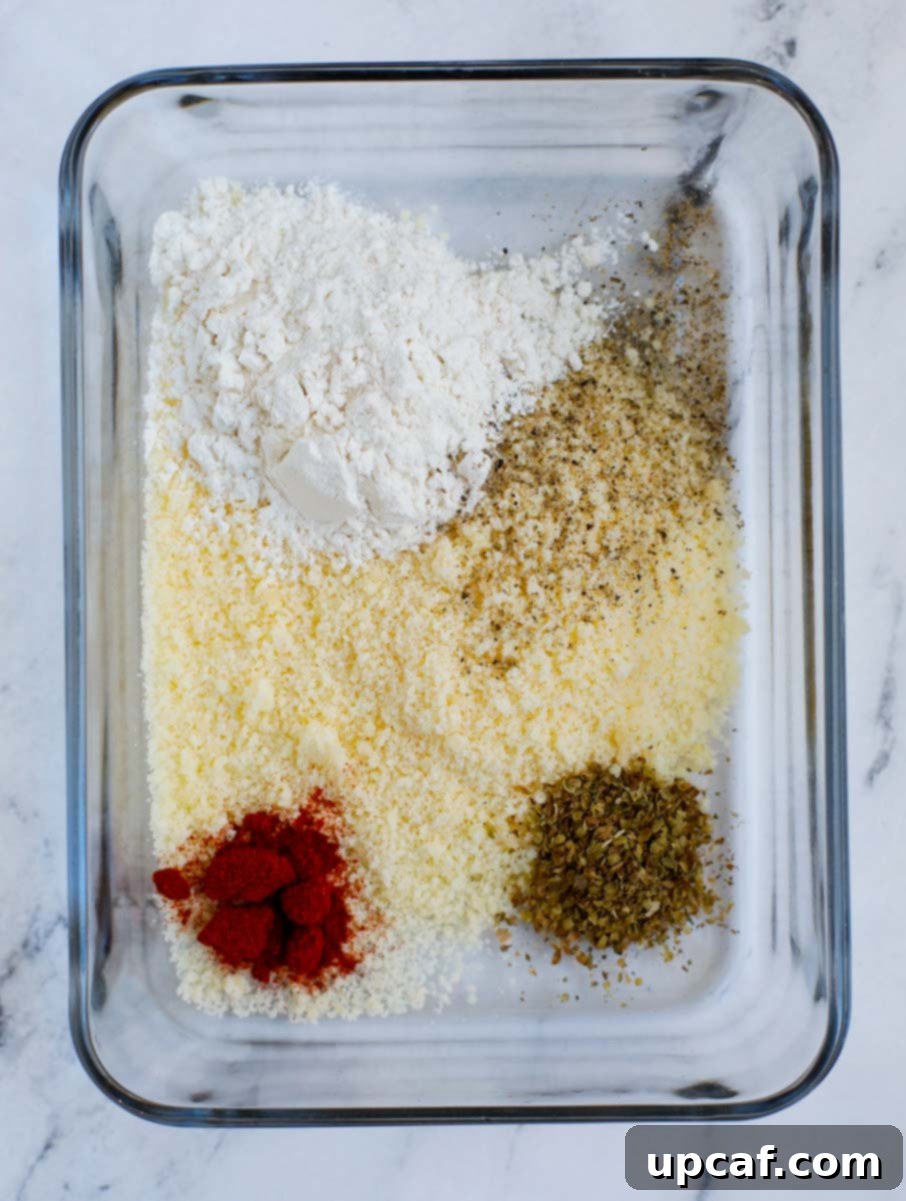
- Set Up the Dredging Station: In a shallow bowl, combine the grated Parmesan cheese, all-purpose flour, dry oregano, Spanish paprika, salt, and black pepper for your dry breading mixture. In a separate bowl, whisk the whole egg until well combined to create your egg wash.
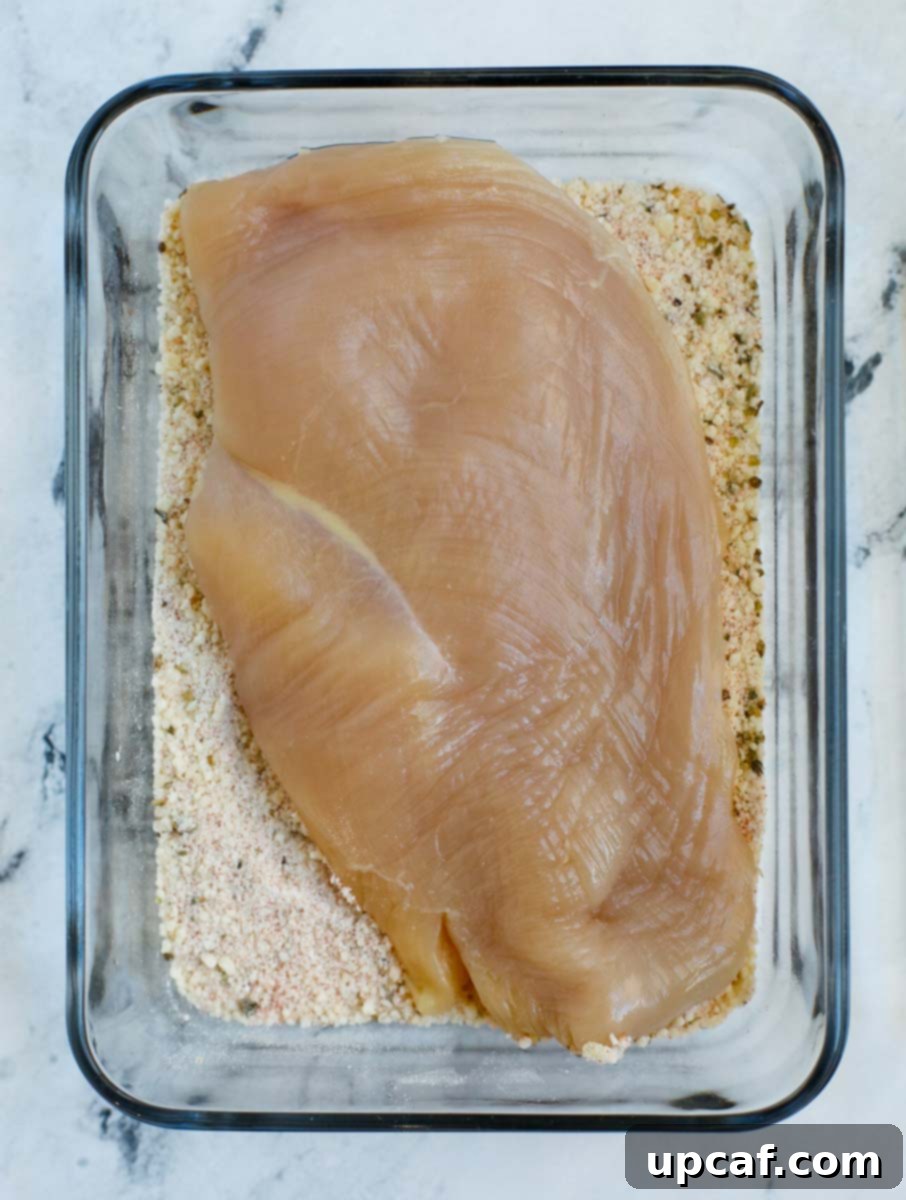
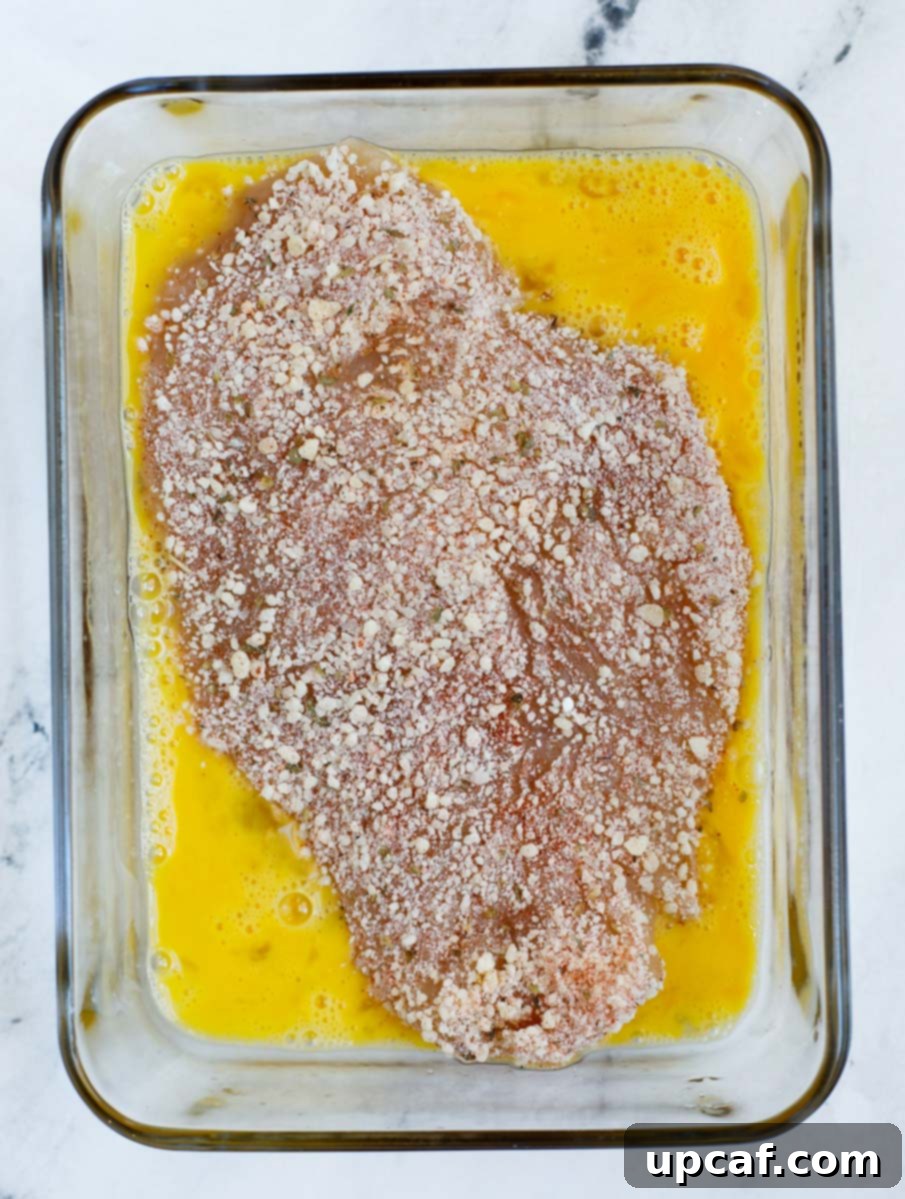
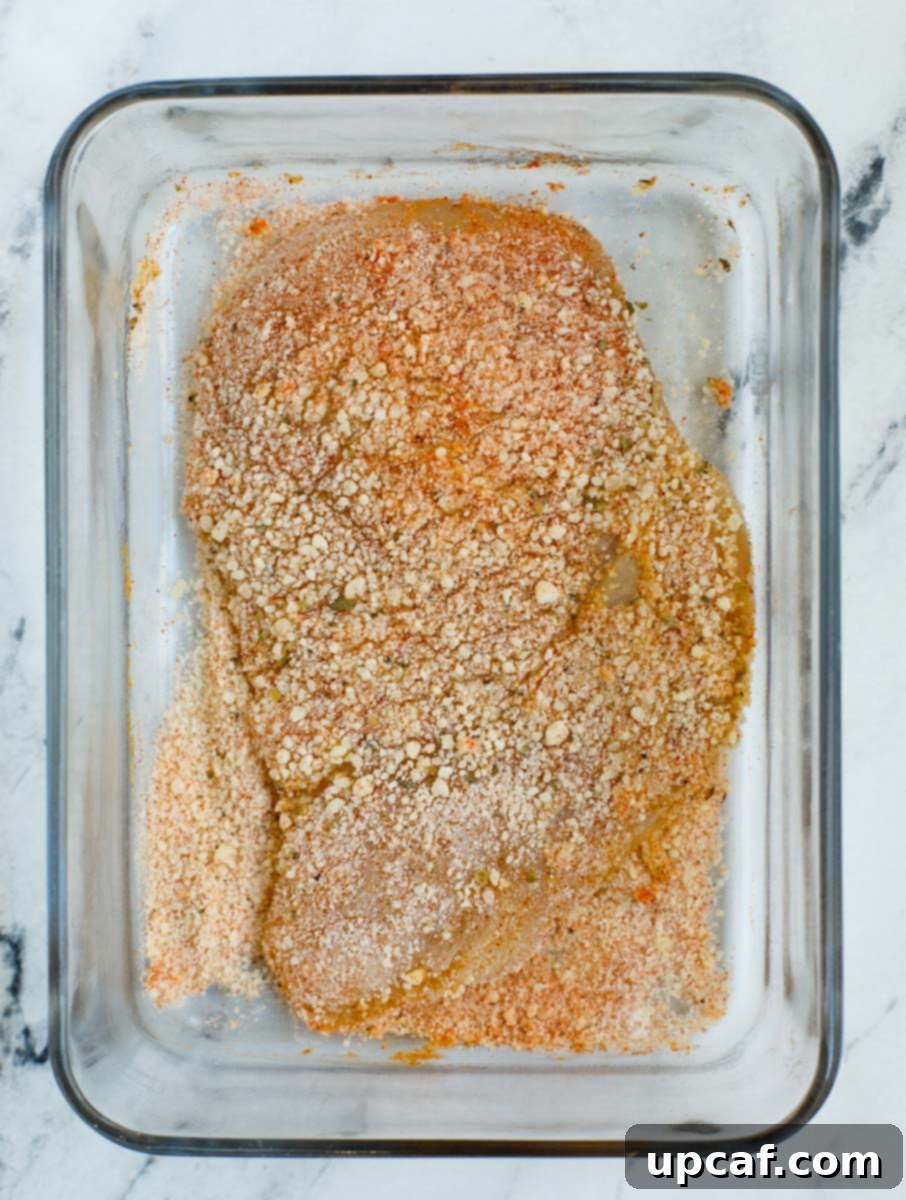
- Dredge the Chicken: Pat your chicken cutlets thoroughly dry with paper towels; this step is crucial for achieving a crispy crust. Dip each piece of chicken first into the egg wash, ensuring it’s fully coated. Then, transfer it to the dry breading mixture, pressing firmly to adhere the coating evenly on all sides. Set the dredged chicken aside on a clean plate or cutting board and repeat for the remaining pieces.
- Pan-Sear for Golden Perfection: Heat a large, oven-safe, non-stick skillet over medium heat. Add 2 tablespoons of light-tasting olive oil. Once the oil shimmers, carefully place the dredged chicken cutlets into the hot skillet. Pan-sear each side for approximately 4 minutes, or until they achieve a beautiful golden-brown and crispy crust. Remove the seared chicken from the skillet and set aside. It won’t be fully cooked through at this stage, but the initial sear develops incredible flavor and texture.

- Prepare the Irresistible Caesar Sauce: Using the same skillet (don’t clean it, those browned bits add flavor!), add the minced garlic and sauté for about 30 seconds until it becomes wonderfully fragrant. Pour in the half and half, black pepper, dry oregano, salt, and chicken broth. Bring the mixture to a gentle simmer over medium heat and cook for about 1 minute, allowing the flavors to meld.
- Thicken and Infuse the Sauce: Stir in the grated Parmesan cheese until it’s fully melted and incorporated. Reduce the heat to low and continue to simmer for another 2 minutes, stirring occasionally, until the sauce visibly thickens to a luscious consistency. Finally, add the creamy Caesar dressing to the thickened sauce. Mix thoroughly and let it cook on low heat for an additional 2 minutes, allowing the Caesar flavor to fully develop and integrate into the rich sauce.
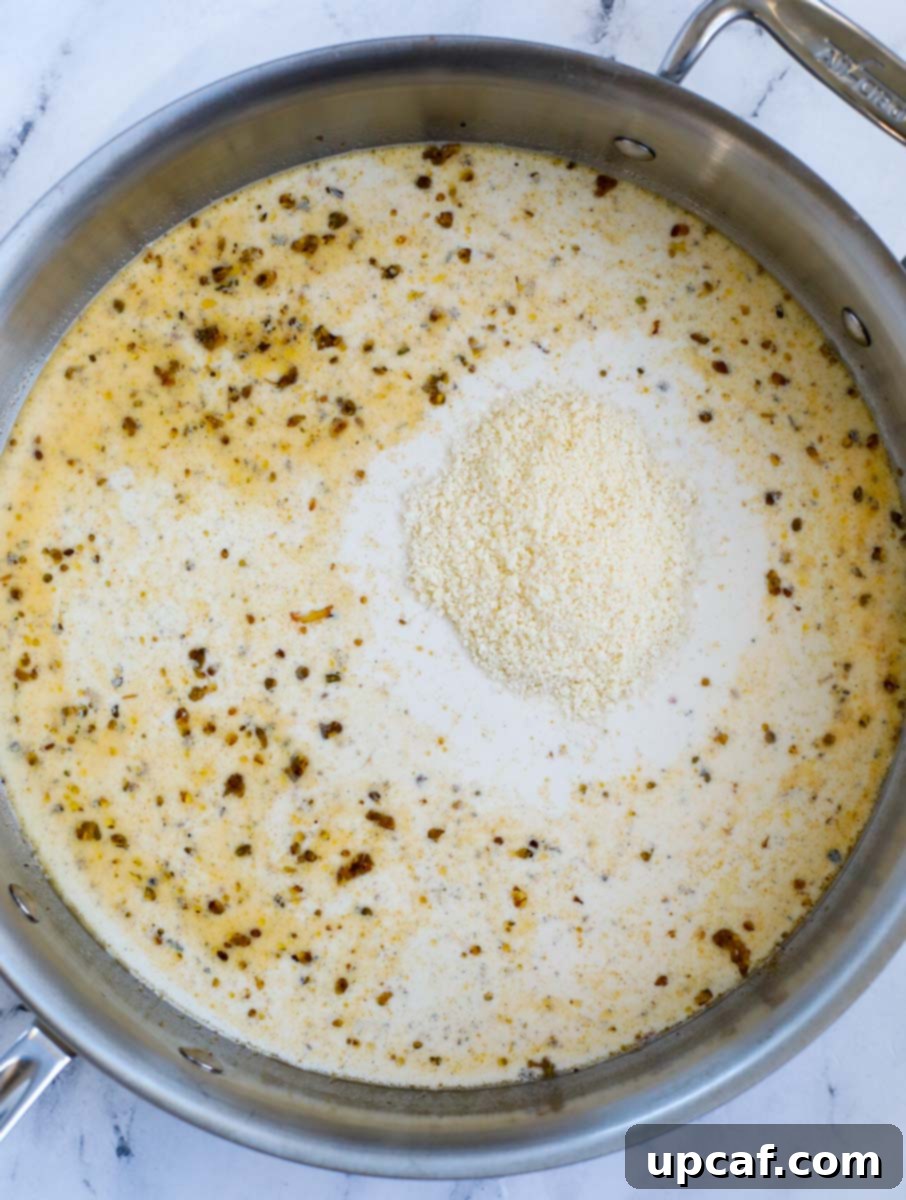
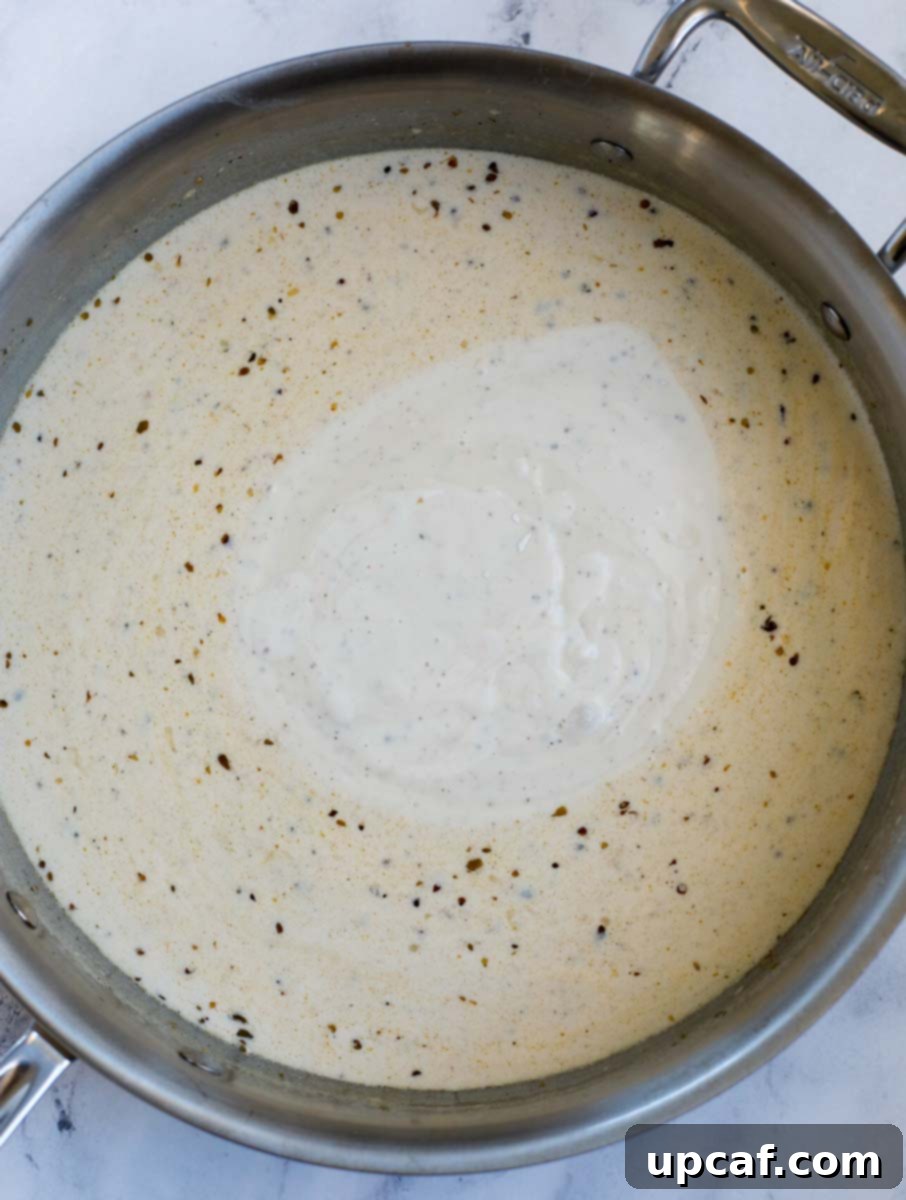
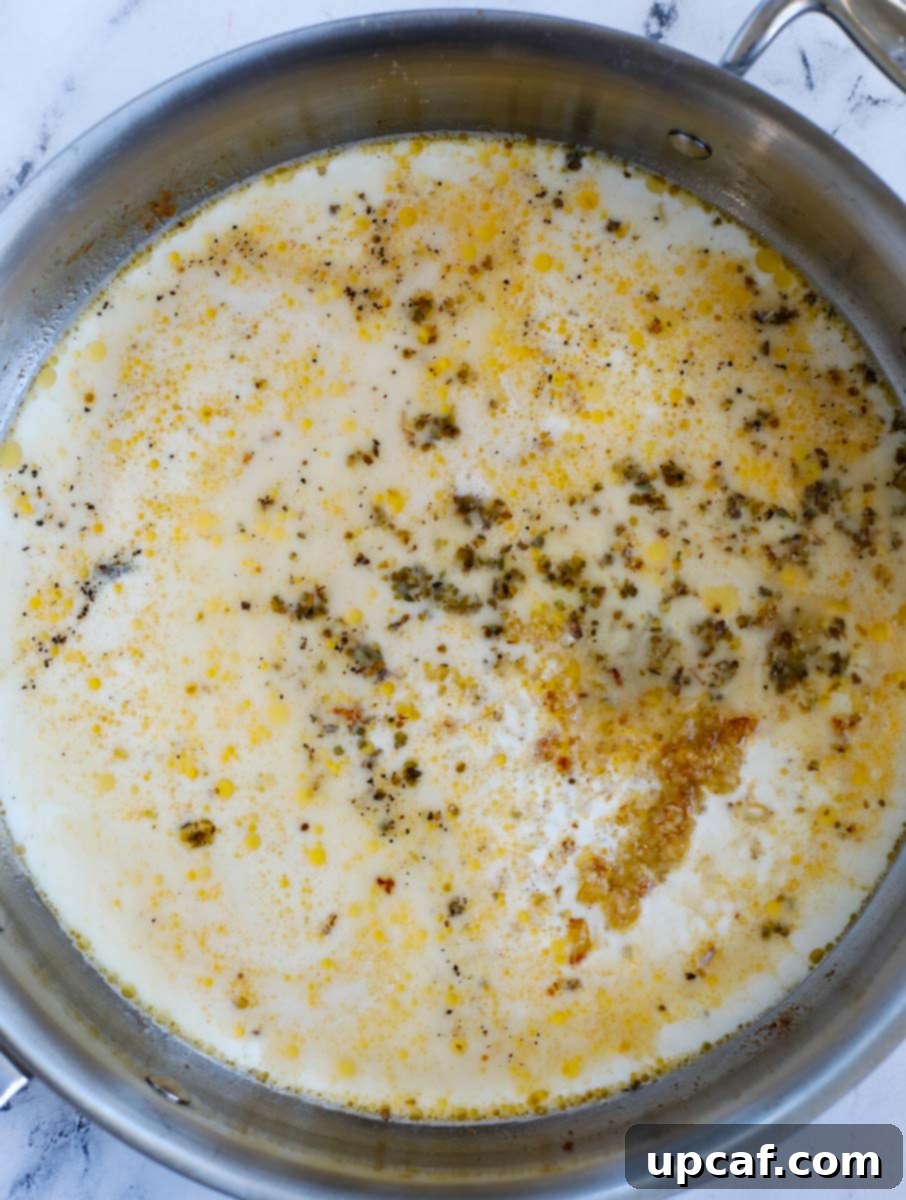
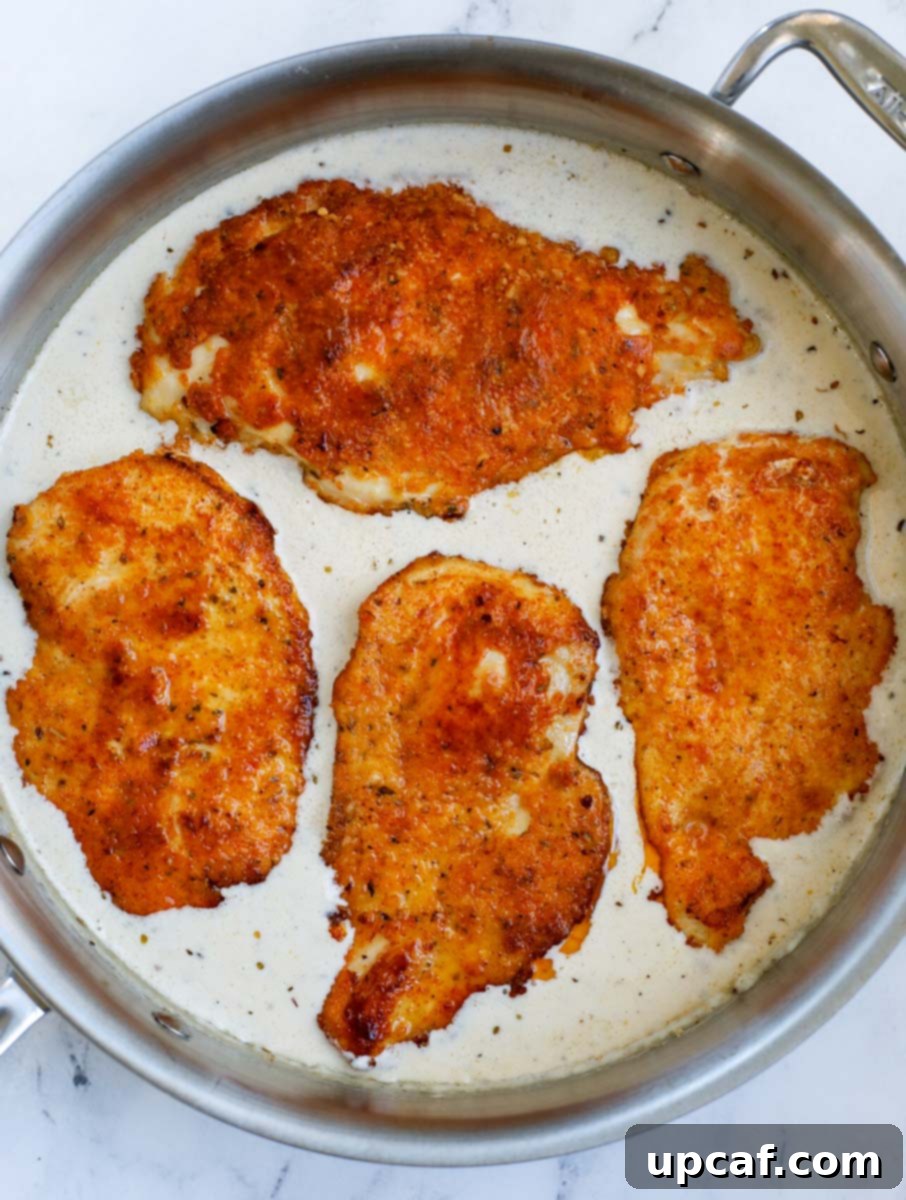
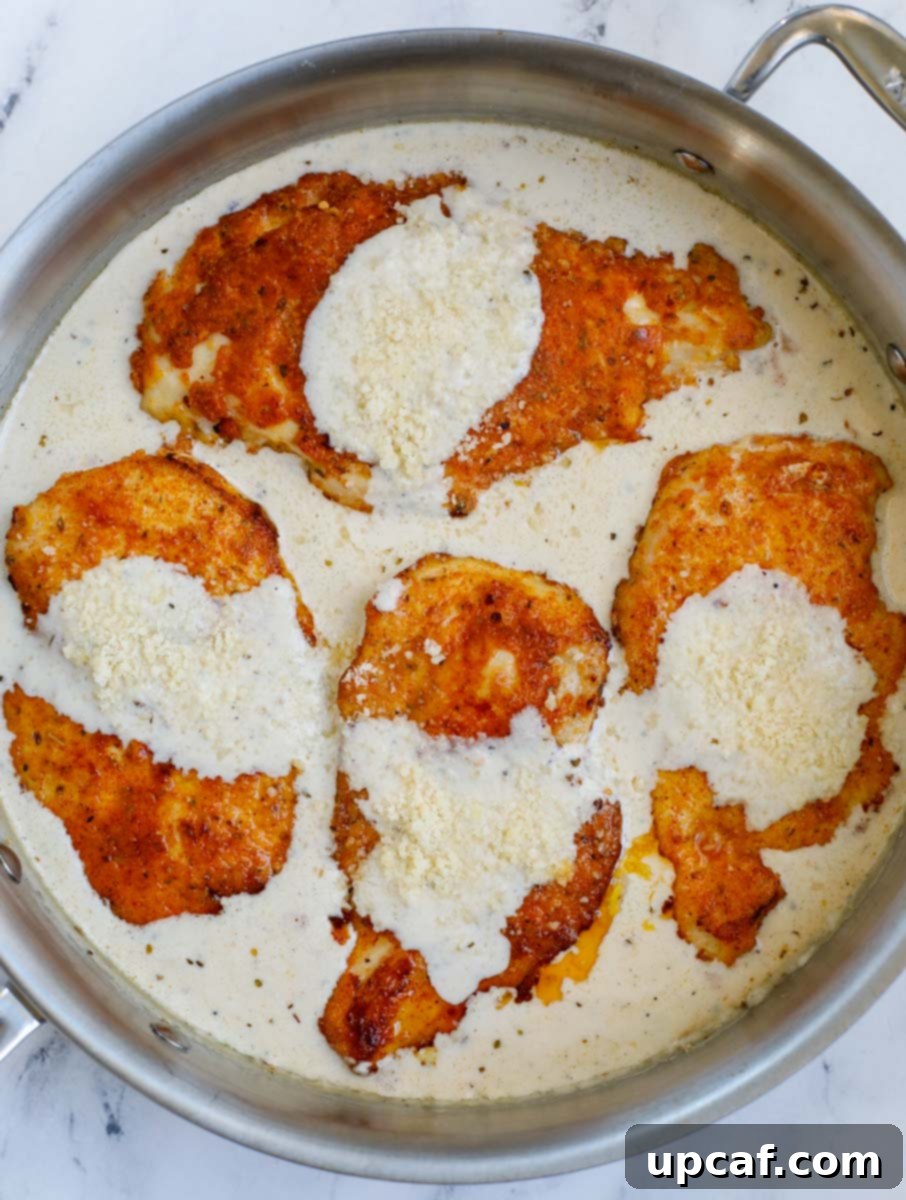
- Combine and Bake to Perfection: Gently return the pan-seared chicken cutlets into the skillet, nestling them into the creamy Caesar sauce. Spoon additional sauce over the chicken to ensure it’s well coated. Sprinkle a generous layer of grated Parmesan cheese over each piece of chicken. Transfer the skillet to your preheated oven and bake for 10 minutes. This final baking step ensures the chicken is cooked through, and the cheese on top turns a beautiful golden brown and becomes wonderfully bubbly.
- Optional Stove-Top Finish: If you prefer not to bake, or don’t have an oven-safe skillet, you can simply continue cooking the chicken on the stovetop over low heat for a few more minutes. Ensure the chicken is cooked through and the Parmesan cheese melts into the sauce. Keep in mind that the cheese won’t achieve the same browned, bubbly crust as it would in the oven, but the flavor will still be outstanding.
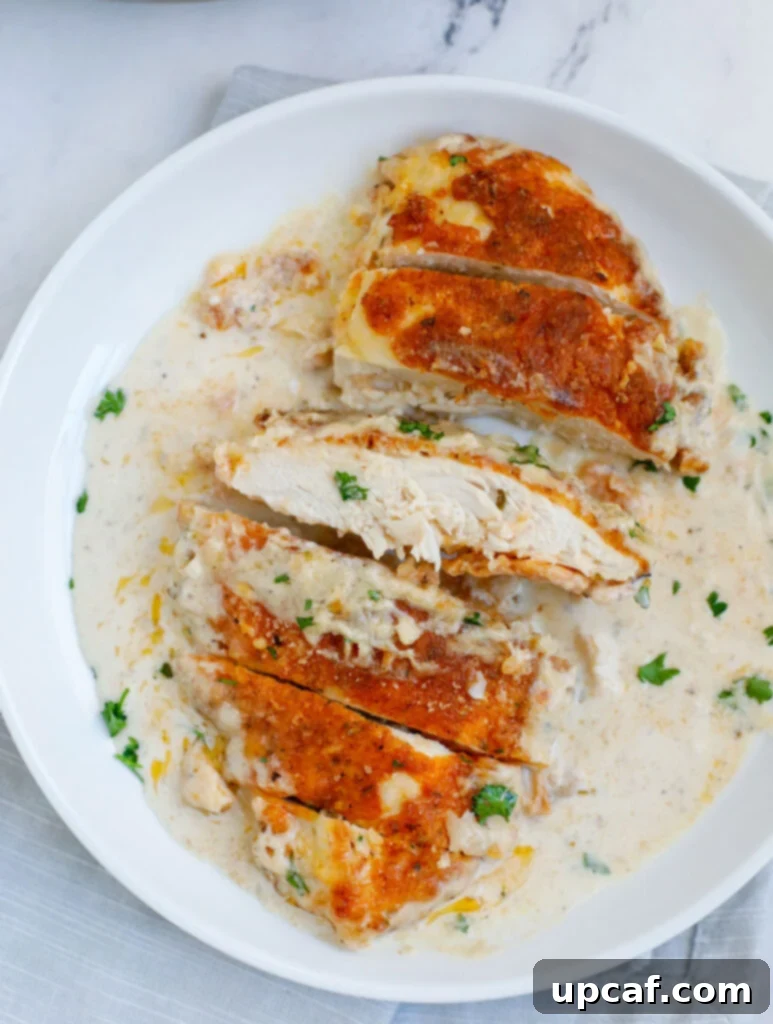
- Garnish and Serve: Carefully remove the hot skillet from the oven (or stovetop). Garnish generously with freshly chopped parsley and an extra sprinkle of grated Parmesan cheese. Serve immediately and enjoy!

Delicious Recipe Variations to Try
While the classic Creamy Caesar Chicken is divine, feel free to get creative with these delicious variations:
- Chicken Cut Versatility: For a richer flavor and even juicier results, consider swapping chicken breasts for boneless, skinless chicken thighs. They tend to hold up well to cooking and absorb the creamy sauce beautifully. If using thighs, ensure they are pounded to an even thickness for consistent cooking.
- Extra Cheesy Indulgence: If you’re a cheese lover, elevate the cheesiness by adding a layer of shredded mozzarella cheese on top of the chicken alongside the Parmesan, just before baking. This will create a wonderfully gooey, stretchy cheese pull that’s incredibly satisfying.
- Spice It Up: For those who enjoy a little kick, a pinch of red chili flakes or a dash of cayenne pepper added to the sauce will introduce a pleasant warmth without overwhelming the Caesar flavors. Adjust the amount to your preferred level of spice.
- Add Veggies: Boost the nutritional value and texture by incorporating sautéed mushrooms, spinach, or sun-dried tomatoes into the sauce. Add them after sautéing the garlic and before adding the liquids.
- Herbaceous Twist: Experiment with different fresh herbs for garnish. Instead of just parsley, try a mix of fresh chives, dill, or even a touch of basil for a slightly different aromatic profile.
Expert Tips and Notes for the Best Caesar Chicken
Achieving the perfect Creamy Caesar Chicken is easy with these helpful tips and insights:
- Uniform Chicken Thickness: For optimal cooking and a consistently tender result, ensure your chicken breasts are pounded to an even, thin thickness (about ½-inch). This helps them cook through quickly and evenly without drying out.
- Oven-Safe Skillet Alternative: If you don’t own an oven-safe skillet, simply transfer the seared chicken and sauce to a baking dish or casserole before the baking step. This ensures you can still achieve that delicious browned cheese topping.
- Monitor Browning: While I usually bake the chicken uncovered to achieve a golden-brown crust, keep an eye on your cheese. If you notice it’s browning too quickly, you can loosely cover the skillet with aluminum foil or move it to a lower rack in the oven to prevent over-browning.
- Check for Doneness: The safest way to ensure your chicken is perfectly cooked and safe to eat is to use an instant-read meat thermometer. The internal temperature of the thickest part of the chicken should reach 165°F (74°C). This guarantees juicy chicken every time.
- Choose the Right Caesar Dressing: The quality of your Caesar dressing significantly impacts the final taste of your sauce. Opt for a creamy, high-quality dressing found in the refrigerated section of your grocery store, rather than shelf-stable varieties. Brands like Litehouse are often recommended for their superior flavor and smooth consistency. Avoid chunky dressings, as they can alter the sauce’s texture.
- Don’t Overcrowd the Skillet: When pan-searing the chicken, work in batches if necessary. Overcrowding the skillet can lower the temperature, leading to steamed rather than crispy chicken. Give each piece enough space to brown properly.
- Deglaze for Flavor: After searing the chicken, those browned bits at the bottom of the skillet (the “fond”) are packed with flavor. When you add the garlic and liquids for the sauce, make sure to scrape up these bits with a wooden spoon or spatula. This process, called deglazing, adds incredible depth to your sauce.
Frequently Asked Questions About Creamy Caesar Chicken
Here are answers to some common questions about this delightful dish:
Can I use a light Caesar dressing?
For the richest and creamiest sauce, I highly recommend using a regular, full-fat Caesar dressing. The fat content contributes significantly to the sauce’s luxurious texture and flavor. If you opt for a light version, the sauce might be thinner and less robust, but you can certainly experiment! Let me know in the comments how it turns out if you try it!
Can I make this Creamy Caesar Chicken ahead of time?
Absolutely! This creamy chicken recipe can be prepared in advance. Once cooked and cooled, simply transfer it to an airtight container and refrigerate for up to 3-4 days. For reheating, you can use a microwave for a quick warm-up or gently reheat it in the oven. When reheating in the oven, cover it loosely with foil to prevent the chicken from drying out and to maintain the sauce’s creamy consistency. Add a splash of broth or half & half if the sauce seems too thick.
Is it possible to freeze this recipe?
Yes, you can freeze Creamy Caesar Chicken. After it has fully cooled, transfer the chicken and sauce to a freezer-safe container. It can be frozen for up to 2-3 months. When you’re ready to enjoy it, thaw the dish overnight in the refrigerator. Reheat it gently in the microwave or oven, taking care to avoid overcooking, which can dry out the chicken. Again, a little extra liquid can help revive the sauce.
How can I repurpose leftover Creamy Caesar Chicken?
Leftover Creamy Caesar Chicken is incredibly versatile! You can slice or shred it and:
- Make a Wrap: Tuck it into a tortilla with some fresh lettuce and maybe a sprinkle of extra Parmesan for a quick and satisfying Caesar chicken wrap.
- Boost a Salad: Add it as a delicious protein topping to a fresh green salad for a complete and flavorful meal.
- Create a Quesadilla: Chop the chicken, mix it with some cheese, and grill it between two tortillas for a cheesy, savory quesadilla.
- Stuff a Baked Potato: Spoon the chicken and sauce over a fluffy baked potato for a hearty and comforting meal.
What to Serve With Creamy Caesar Chicken?
This incredibly versatile creamy chicken recipe pairs wonderfully with a wide array of side dishes. Whether you prefer a classic accompaniment or something a little more adventurous, here are some fantastic ideas to complete your meal:
- Rice: Serve it over fluffy white rice or nutritious brown rice to soak up every last drop of the decadent Caesar sauce.
- Pasta: Toss the chicken and sauce with your favorite pasta shape – fettuccine, linguine, or penne all work beautifully – for a comforting and hearty pasta dish.
- Garlic Butter Mushrooms: Earthy and savory, these mushrooms complement the chicken perfectly.
- Oven Roasted Baby Potatoes: Crispy on the outside, fluffy on the inside, these are a simple yet satisfying side.
- Parmesan Herbed Potatoes: An extra cheesy and herbaceous potato option that echoes the flavors of the main dish.
- Cheesy Broccoli Bites: A fun and flavorful way to get your greens in, especially appealing to kids.
- Roasted Garlic Mashed Potatoes: Creamy, rich, and infused with roasted garlic, these are a truly indulgent pairing.
- Roasted Garlic Bread: Perfect for scooping up all that delicious creamy sauce.
- Brown Sugar Glazed Carrots: A touch of sweetness provides a lovely contrast to the savory chicken.
- Simple Green Salad: If you miss the “salad” part of Caesar chicken, a light green salad with a vinaigrette dressing offers a refreshing balance to the rich main course.
- Steamed Asparagus or Green Beans: Lightly steamed vegetables offer a fresh and healthy accompaniment.
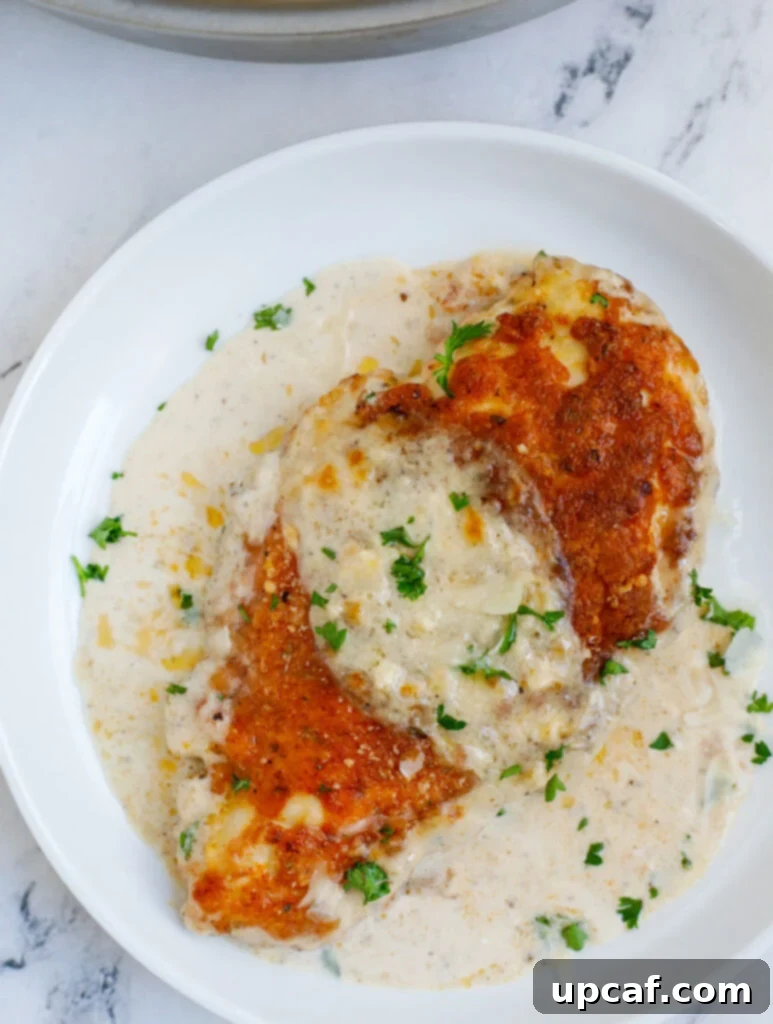
I genuinely hope you find as much joy in preparing and savoring this delightful Creamy Caesar Chicken recipe as my family and I do. It’s a dish crafted with simplicity and flavor in mind, perfect for any occasion. Give it a try, enjoy every creamy, crispy bite, and please consider leaving a rating and sharing your experience with friends and family!
If you try this recipe and love it, don’t forget to share your culinary creation with me on INSTAGRAM using my hashtag for a chance to be featured in my story! You can also follow Cookin’ With Mima on FACEBOOK, INSTAGRAM, and PINTEREST for all the latest social posts and mouthwatering recipes.

Creamy Caesar Chicken
By: Mariam Ezzeddine
Creamy Caesar Chicken offers a delightful spin on traditional Caesar salad, without the greens. Bursting with flavor, its crispy texture is utterly mouthwatering. Crafted from simple pantry ingredients, this chicken dish can be your dinner delight.
Prep Time: 10 minutes
Cook Time: 20 minutes
Servings: 4 servings
Equipment
- Oven-safe skillet
- Mixing bowls
- Whisk
- Instant-read meat thermometer (optional, but recommended)
Ingredients
The Crusted Chicken
- 2 large chicken breasts, sliced horizontally (to make 4 thinner pieces)
- ½ cup grated Parmesan cheese
- ¼ cup all-purpose flour
- ½ tsp. dry oregano
- ½ tsp. Spanish paprika (or regular paprika)
- ½ tsp. black pepper
- ½ tsp. salt
- 1 whole egg, whisked (for dredging)
- 2 tbsps. light-tasting olive oil (for searing the chicken)
The Sauce
- 3 cloves garlic, minced
- ½ tsp. dry oregano
- ½ tsp. black pepper
- 1 cup half and half
- 1 cup chicken broth, low sodium (to control saltiness)
- ½ tsp. salt
- ¾ cup creamy Caesar dressing (Litehouse brand from the fridge section recommended)
- ¼ cup grated Parmesan cheese
Garnish
- Freshly chopped parsley
- Extra grated Parmesan cheese (for topping)
Instructions
- Preheat your oven to 400°F (200°C).
- In one shallow bowl, mix together the ½ cup grated Parmesan cheese, ¼ cup all-purpose flour, ½ tsp. dry oregano, ½ tsp. Spanish paprika, ½ tsp. black pepper, and ½ tsp. salt to create your dry breading mixture. In a second shallow bowl, whisk the whole egg for the egg wash.
- Pat the chicken cutlets thoroughly dry with paper towels. Dip each chicken piece into the egg wash, then coat it generously with the dry breading mixture, pressing to ensure it adheres well. Set aside.
- Heat a large, oven-safe, non-stick skillet over medium heat and add 2 tablespoons of light-tasting olive oil. Once hot, pan-sear the chicken on each side for about 4 minutes until beautifully golden brown and crispy. Remove the chicken from the skillet and set aside.
- Using the same skillet, reduce the heat to medium-low. Add the 3 minced garlic cloves and sauté for about 30 seconds until fragrant.
- Pour in the 1 cup half and half, ½ tsp. black pepper, ½ tsp. dry oregano, ½ tsp. salt, and 1 cup low sodium chicken broth. Bring to a gentle simmer for 1 minute.
- Stir in ¼ cup grated Parmesan cheese until melted. Continue to simmer on low heat for 2 minutes, stirring occasionally, until the sauce thickens. Then, add the ¾ cup creamy Caesar dressing, mix well, and cook on low for another 2 minutes to fully integrate the flavors.
- Return the seared chicken into the pan, nestling it into the creamy Caesar sauce. Spoon some sauce over the chicken and sprinkle with extra grated Parmesan cheese.
- Transfer the skillet to the preheated oven and bake for 10 minutes, or until the chicken is cooked through and the cheese on top is golden brown and bubbly.
- Note: If you prefer not to bake, you can finish cooking the chicken on the stovetop. Continue simmering the chicken in the sauce over low heat for a few more minutes until it’s cooked through and the Parmesan cheese has melted. The cheese won’t brown as much as in the oven, but the dish will still be delicious.
- Remove the skillet from the oven (or stovetop) and garnish with freshly chopped parsley and an additional sprinkle of grated Parmesan cheese. Serve immediately.
Notes
- Ensure chicken breasts are thin (about ½-inch thick) for quick and even cooking.
- If you don’t have an oven-safe skillet, transfer the seared chicken and sauce to a casserole dish before baking.
- Monitor the cheese while baking; if it browns too quickly, cover loosely with foil or move to a lower oven rack.
- Confirm chicken doneness with an instant-read thermometer; it should reach 165°F (74°C).
- Always choose a creamy, high-quality Caesar dressing from the refrigerated section for the best sauce texture and flavor.
- Avoid overcrowding the skillet when searing to achieve a truly crispy crust.
Nutrition Information
(Per serving, approximate)
- Calories: 606 kcal
- Carbohydrates: 13g
- Protein: 33g
- Fat: 47g
- Saturated Fat: 13g
- Trans Fat: 1g
- Cholesterol: 129mg
- Sodium: 1472mg
- Potassium: 618mg
- Fiber: 1g
- Sugar: 1g
- Vitamin A: 385 IU
- Vitamin C: 3mg
- Calcium: 312mg
- Iron: 2mg